AWS SQS
- 13 Jul 2022
- 1 Minute to read
- Print
- DarkLight
AWS SQS
- Updated on 13 Jul 2022
- 1 Minute to read
- Print
- DarkLight
Article Summary
Share feedback
Thanks for sharing your feedback!
Overview
The Amazon Web Services (AWS) module allows users to integrate with AWS's Simple Queue Service (SQS) Message Queue.
Prerequisites
- Installation of the AWS module.
- Active AWS account and application.
- If using temporary credentials, an Amazon IAM role with access to the queue will need to be created.
- If the temporary credentials have conditions for assuming the role, the sts:externalid value will be needed.
AWS Message Queue Settings
This example will demonstrate how to integrate SQS in Decisions using the AWS module.
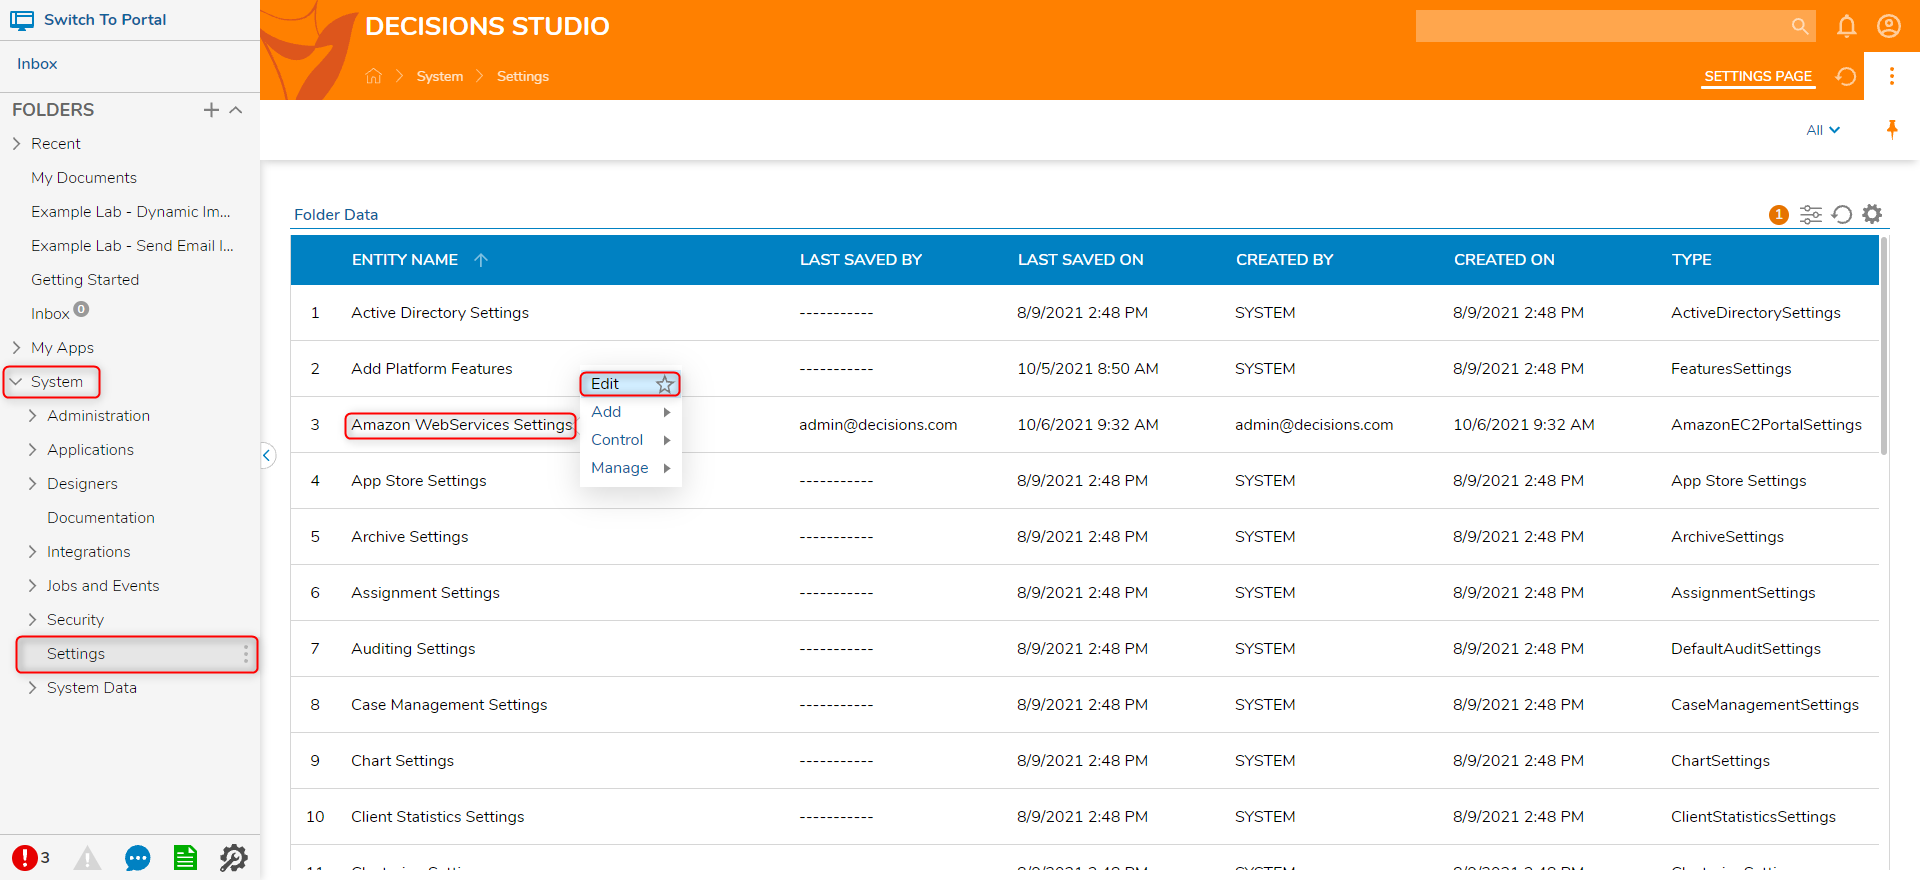
- In the Decision Studio, navigate to System > Settings. Right-click Amazon WebServices Settings and select Edit.
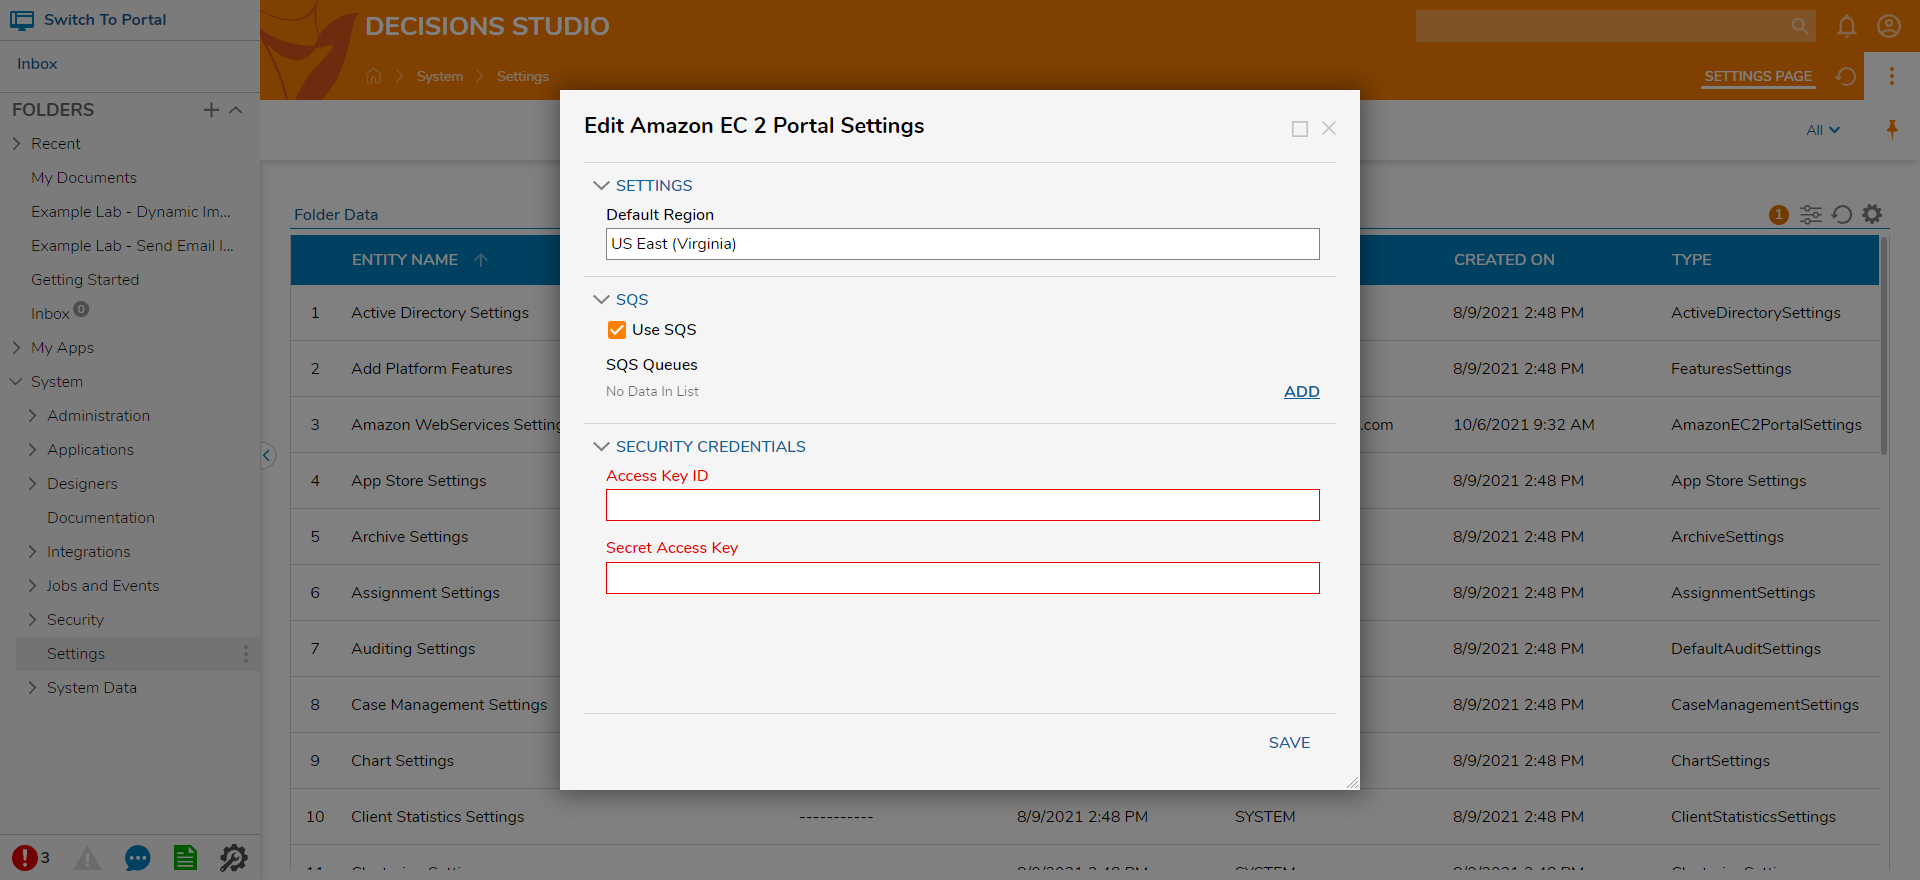
- On the Edit Amazon EC 2 Portal Settings, select the Use SQS option. Click ADD under SQS Queues.
- On the Add SQS Queues window, enter the SQS Display Name, select the Queue Region, and enter the Queue Access Key Id, Queue Secret Key, and the Queue URL from the AWS SQS service page. Click OK when done.
By default, messages sent to an SQS queue will be encoded in Base64 format. To allow messages to be interpreted as a plain String, uncheck both Send/Read String Messages as Base64. 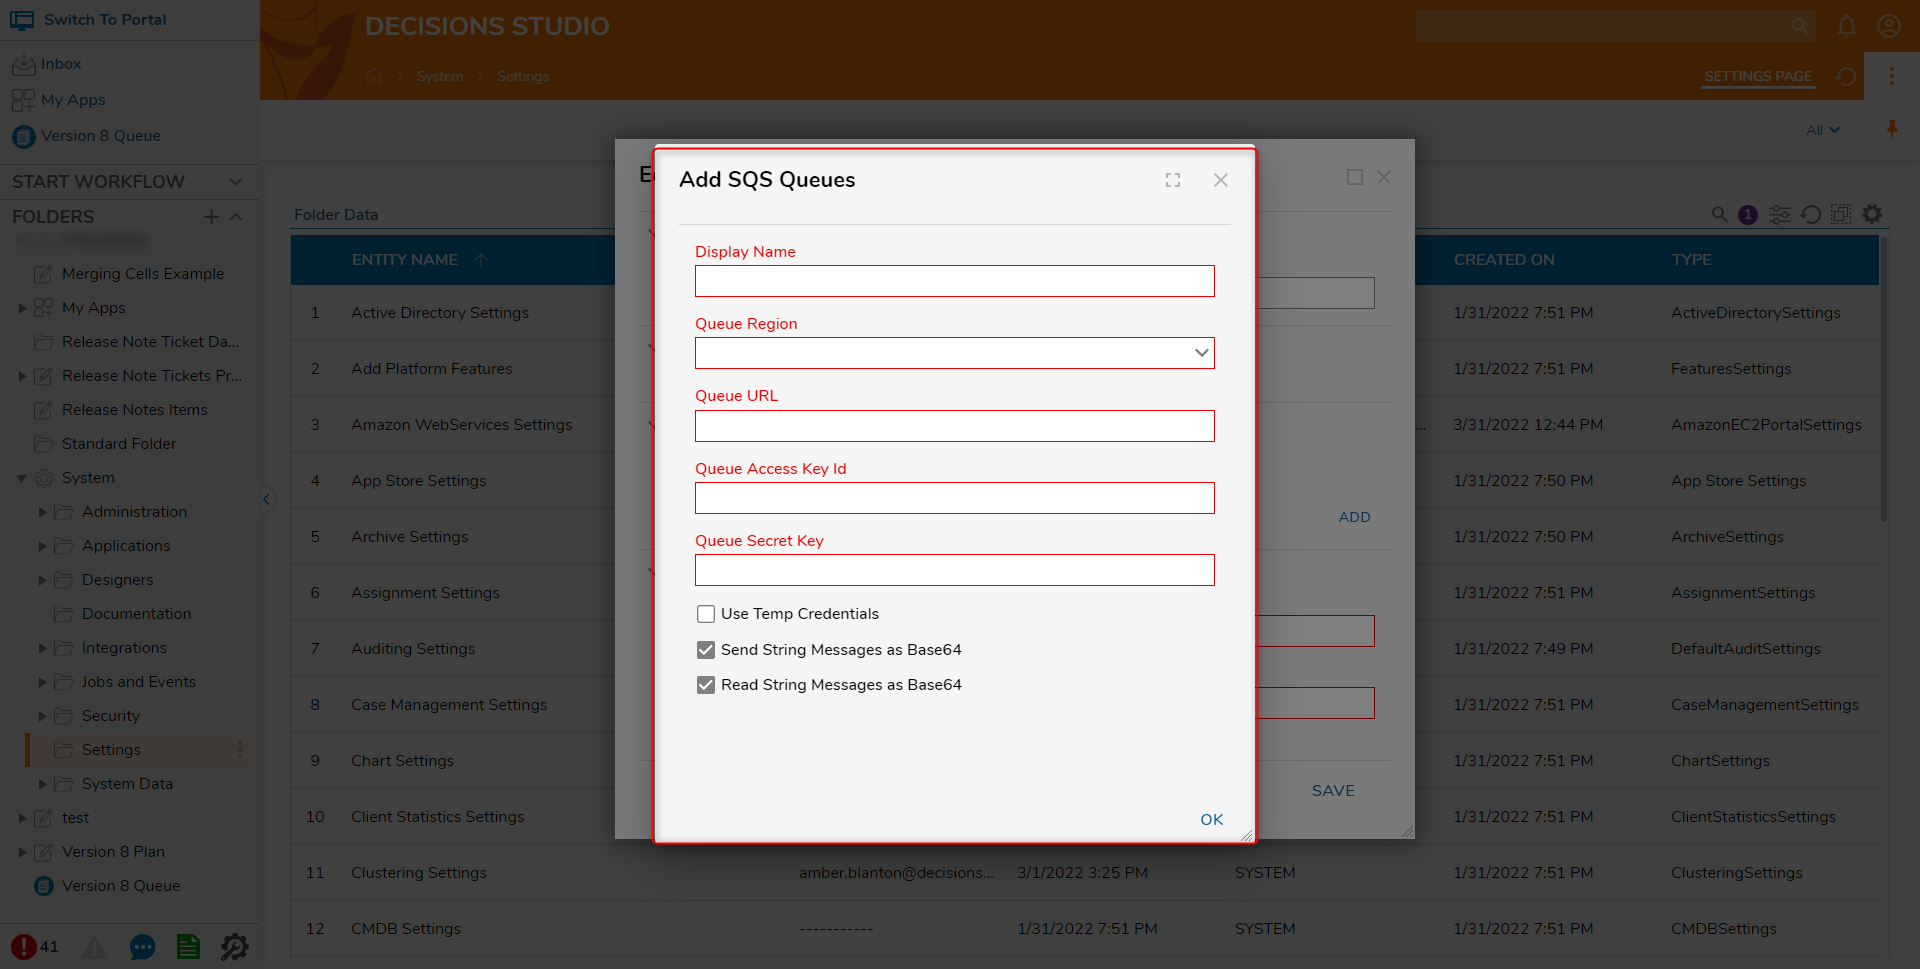
- Click SAVE.


Using Temporary Credentials
Users can specify temporary credentials to be used by an SQS queue in Decisions. These credentials are an Amazon AWS IAM role that has access to the queue.
- On the System page, navigate to Settings > Amazon WebServices Settings.
- Select or create a new SQS Queue
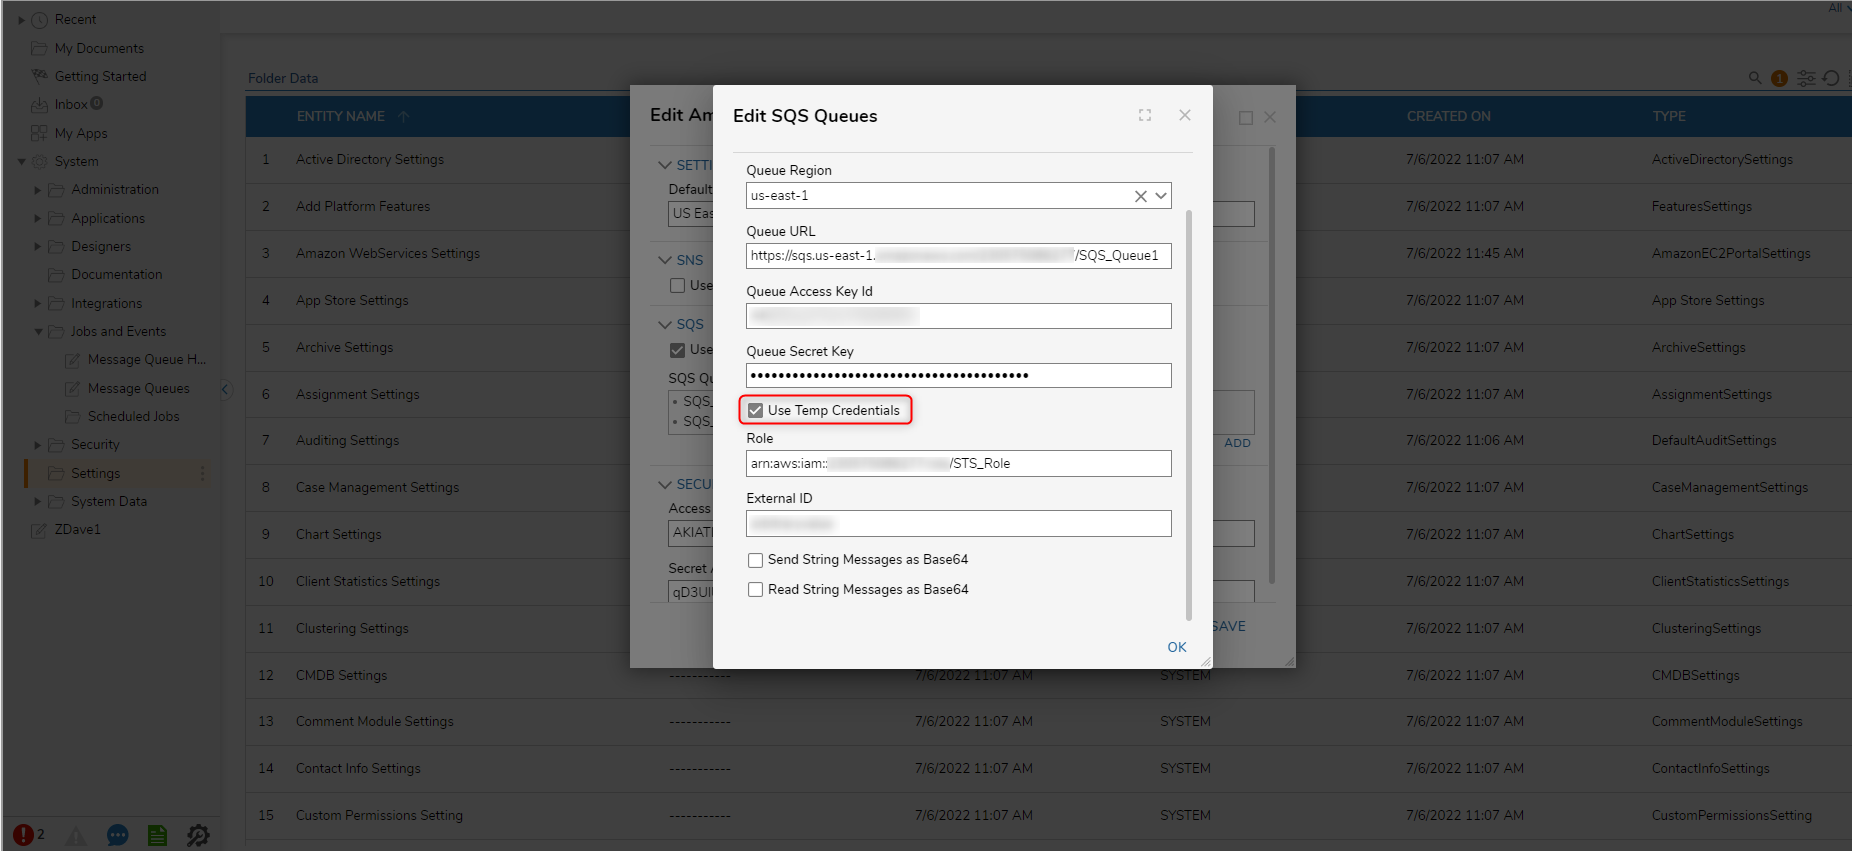
- In the following dialog, check Use Temp Credentials. Two textboxes will appear allowing the user to specify the role and an external id.
- Under External ID, set a value. This must match an sts:externalid value defined for the AWS role.

SQS Message Queue steps
SQS Message queue steps can be found under Integration -> Amazon AWS -> SQS in the step toolbox.
Post SQS Message step
The Post SQS Message step accepts a String input as message and returns an ID when the step completes. This ID will match the ID that the SQS queue generates.
The queue can also be specified for the step, which is done by expanding the Settings header in the Properties panel and selecting the queue from the drop down menu, or by checking Get Queue from Flow.
| Input | Output |
|---|---|
| Message Text | Message ID |

For further information on Integrations, visit the Decisions Forum.
Was this article helpful?