Editing Data Grid Items with the Property Grid
- 06 May 2021
- 1 Minute to read
- Print
- DarkLight
Editing Data Grid Items with the Property Grid
- Updated on 06 May 2021
- 1 Minute to read
- Print
- DarkLight
Article Summary
Share feedback
Thanks for sharing your feedback!
Overview
The Data Grid Form component displays a list of data objects in a grid, where each row in the grid represents an object and each column represents an object property. Objects within a data grid can be edited by the Property Grid or inline.
Example
In this example, a Form will pull a list of accounts from the Decisions Portal and display them within a data grid. The user will be able to edit the data for a selected item and add/remove data items.
- In the Designer Project, click CREATE FLOW from the Global Action Bar and select Flow from the dialog window. Name the Flow (Edit Data Grid Flow) and click CREATE.
.png)
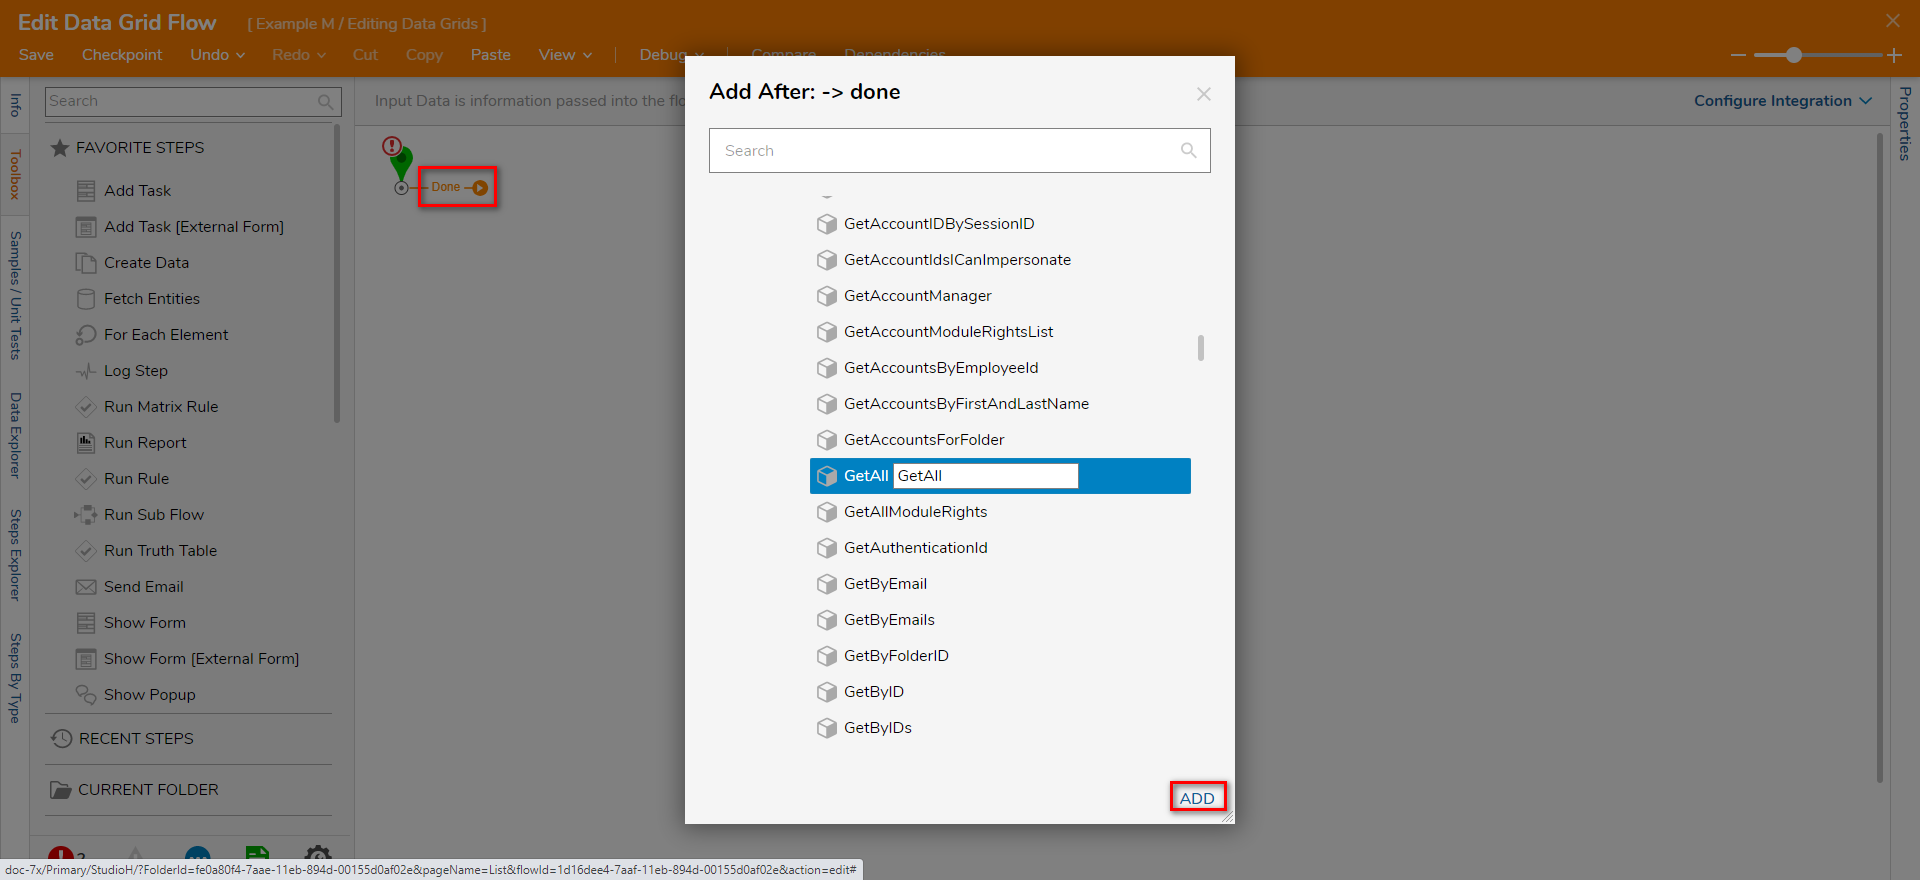
- Click the Done path on the Start step. Navigate to All Steps [Catalog] > Integration > Internal Services > AccountService. Select the GetAll step and click ADD.
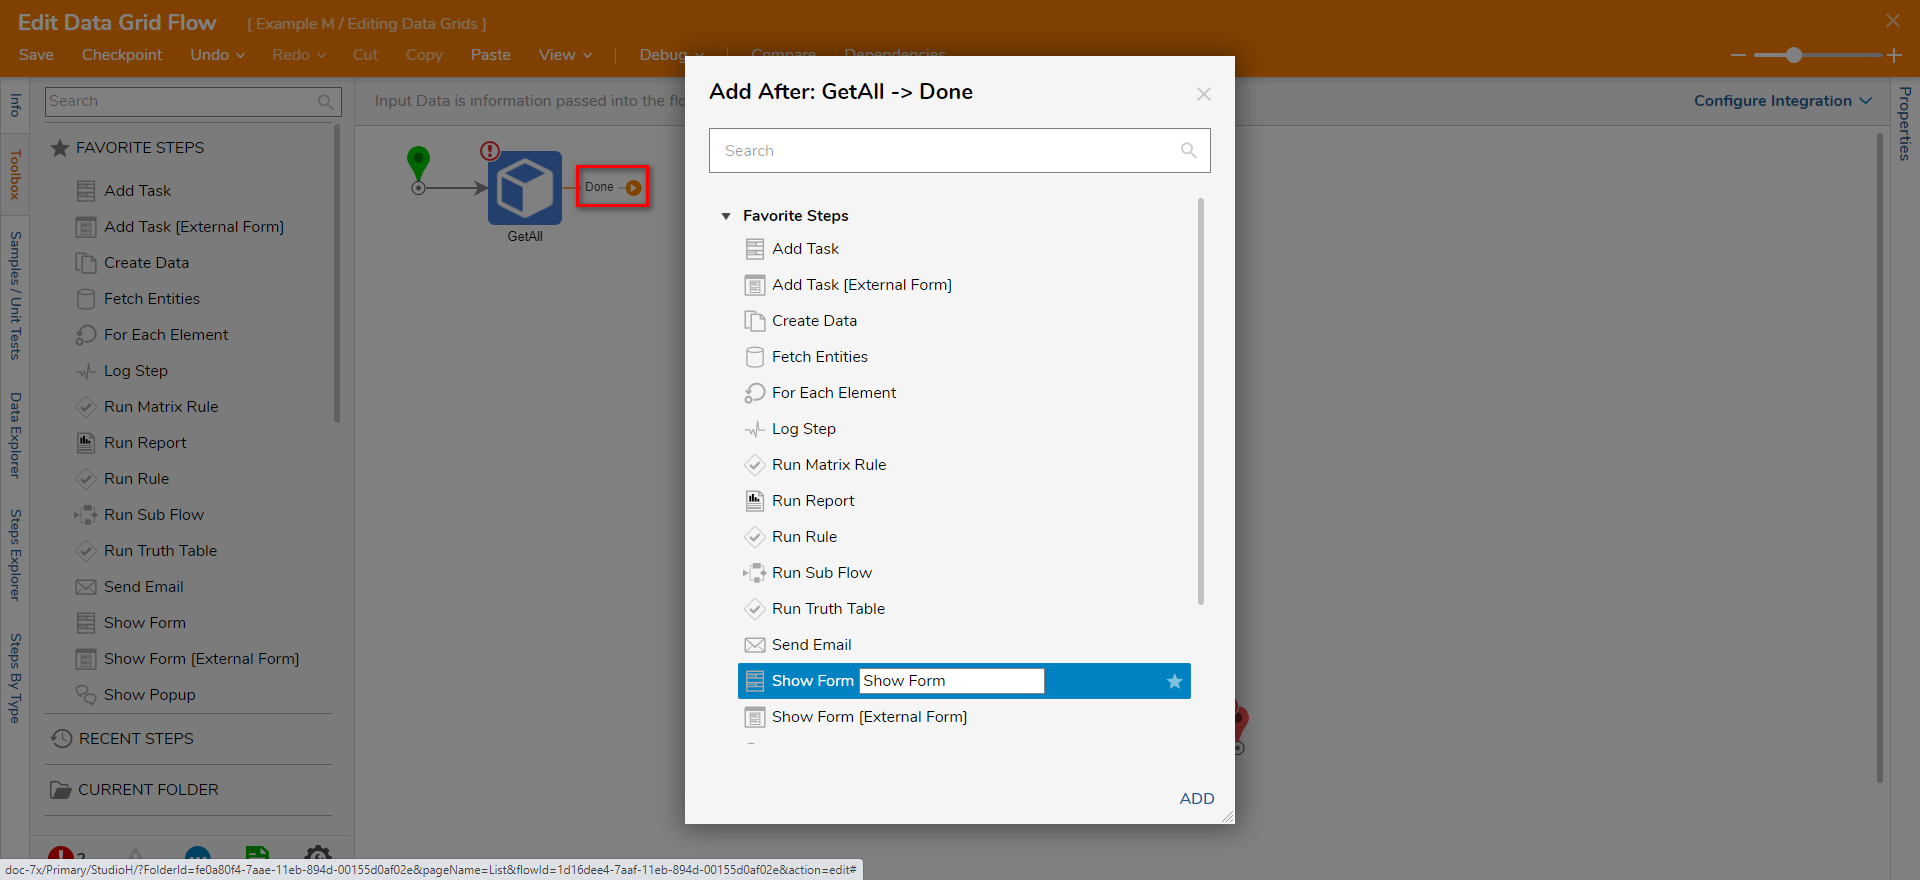
- Click the Done step on the GetAll step. Select the Show Form step and click ADD.
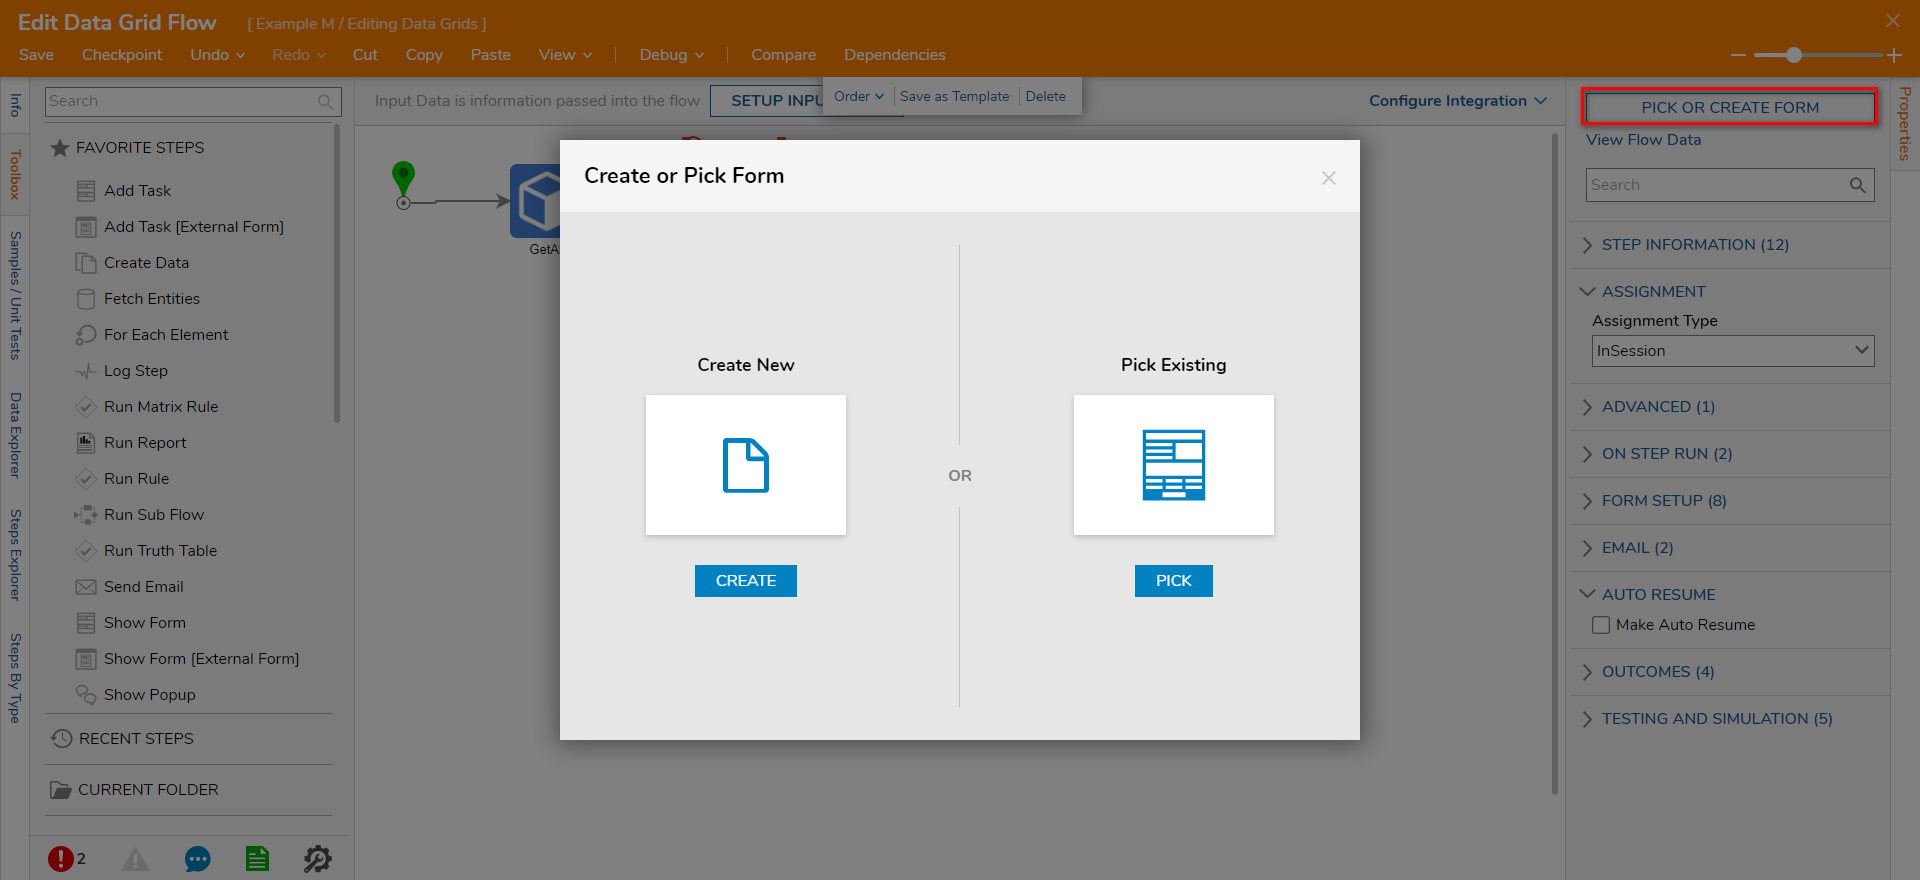
- With the Form step selected, click PICK OR CREATE FORM on the Properties panel. On the dialog window, click CREATE.
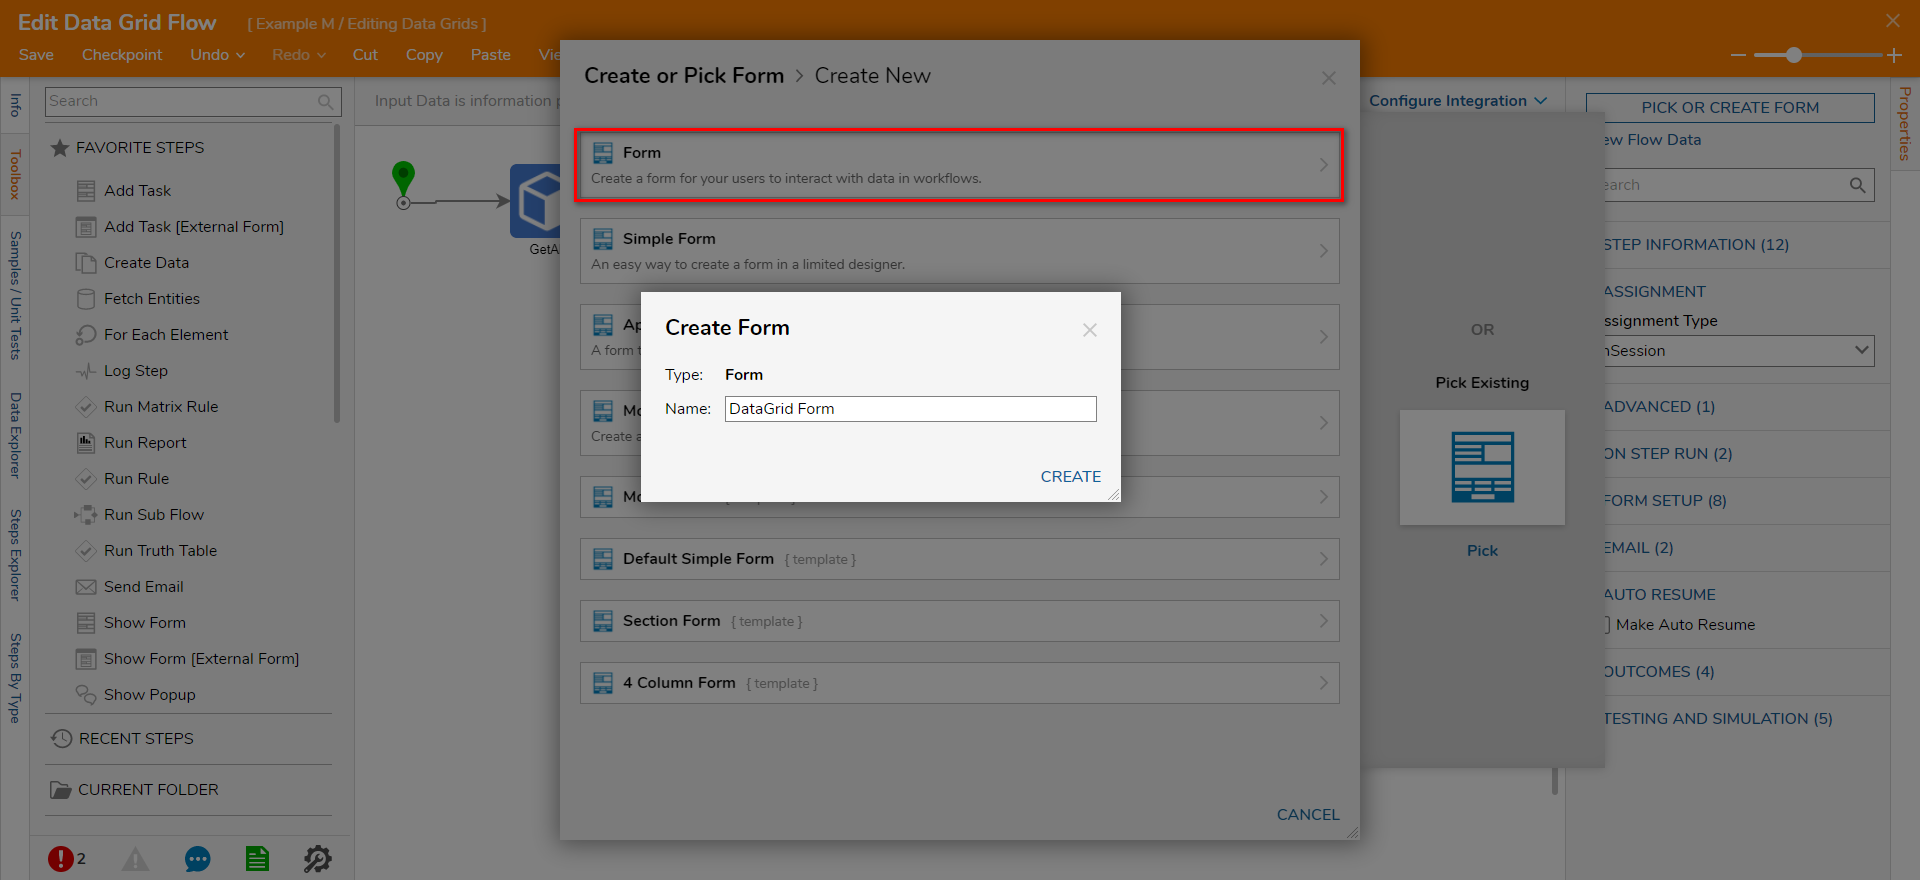
- Select Form from the Create New dialog window, name the Flow (DataGrid Form), and click CREATE.
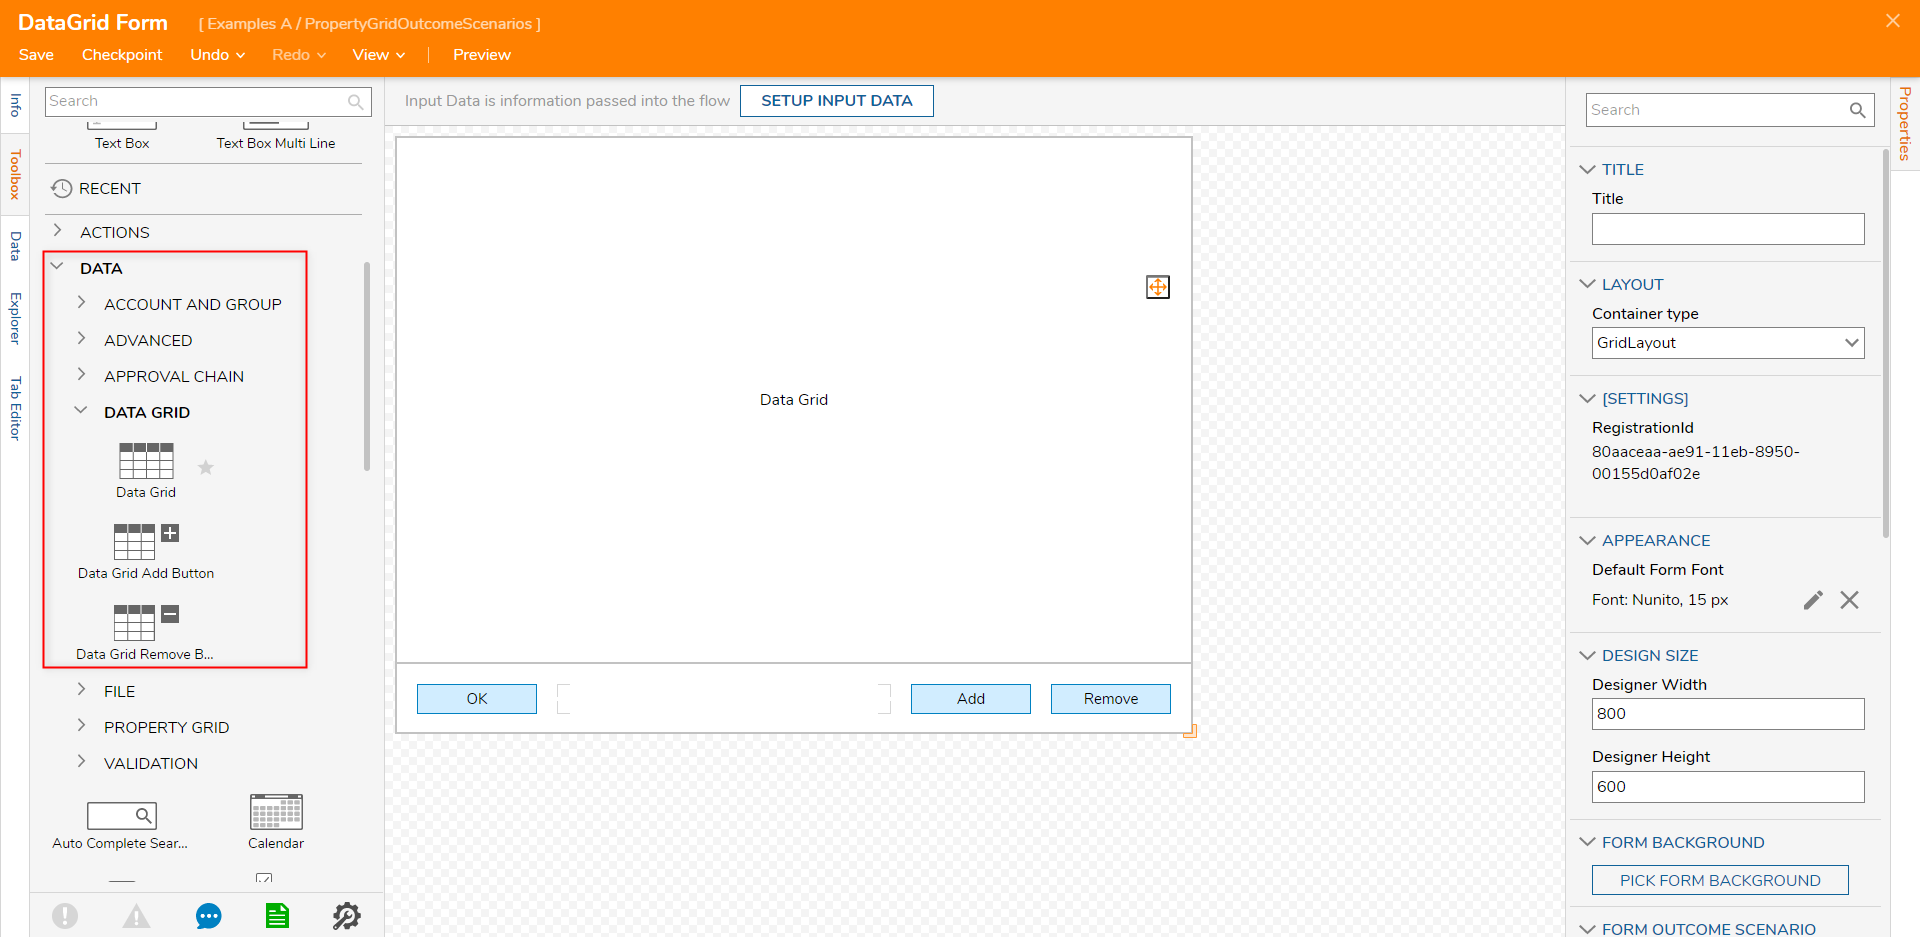
- Configure the Form with a Data Grid component (DisplayProducts), a Button component (OK). Then, add a Data Grid Add Button and a Data Grid Remove Button from DATA > DATA GRID in the Toolbox panel.
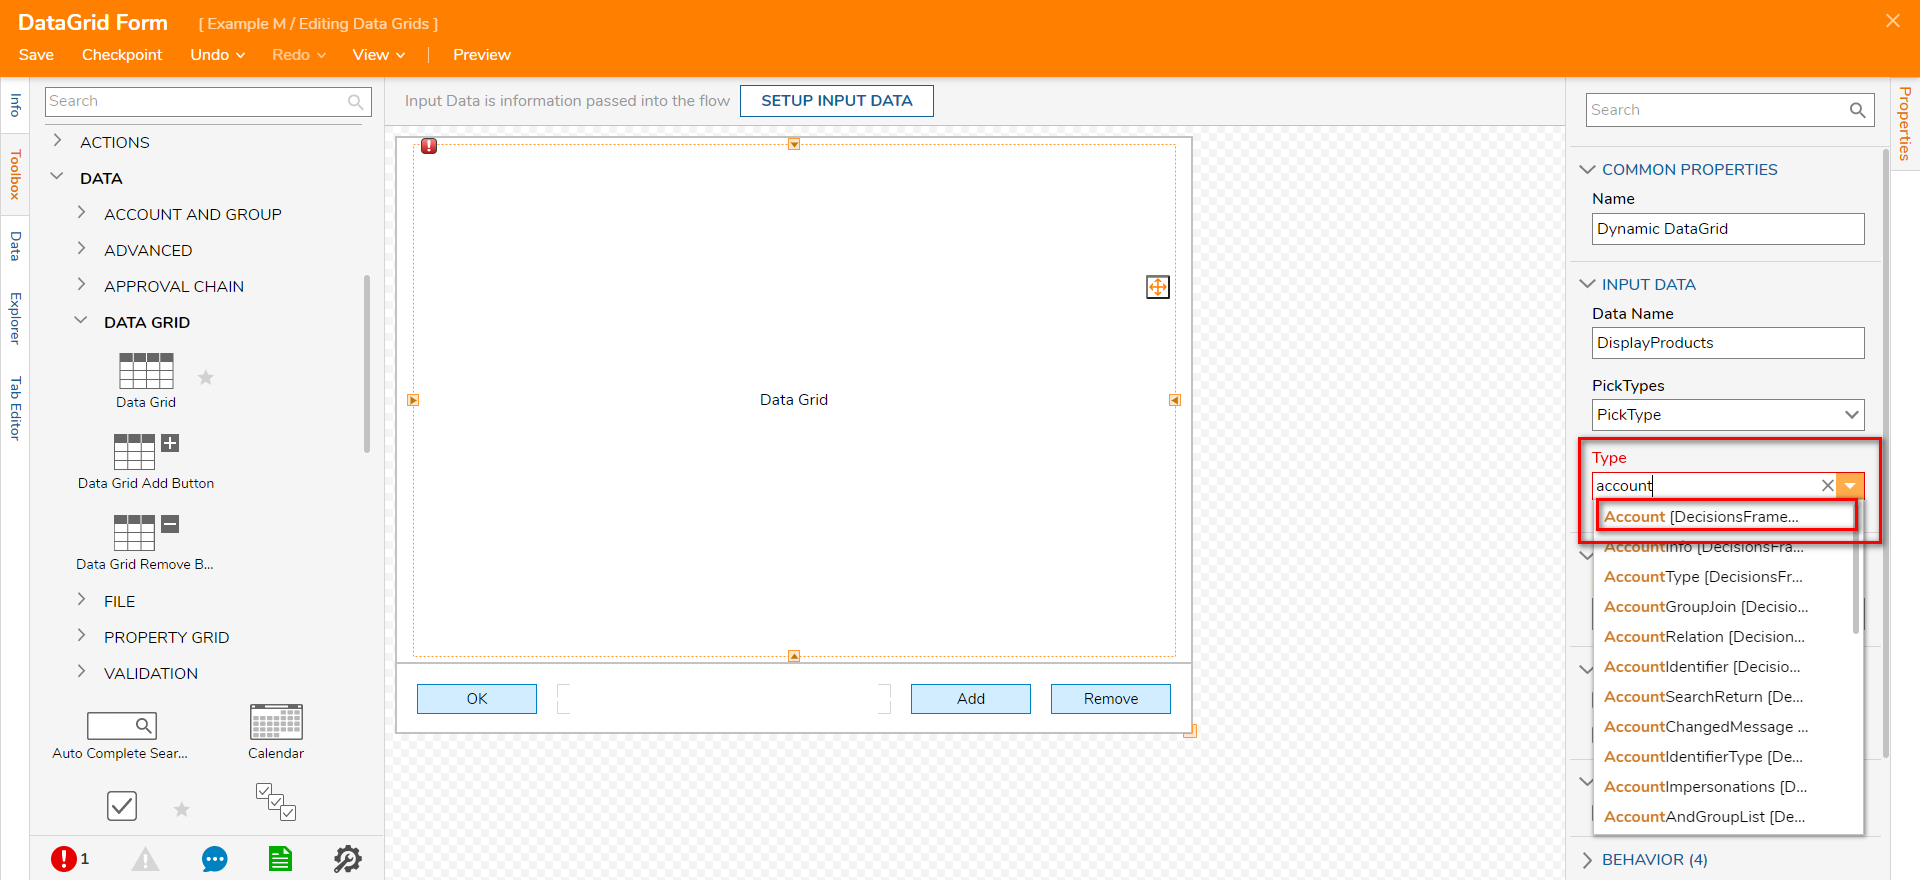
- Select the Data Grid. In the Properties panel, under INPUT DATA, click the Type dropdown list. Enter "account" in the text box and select Account [DecisionsFramework.].
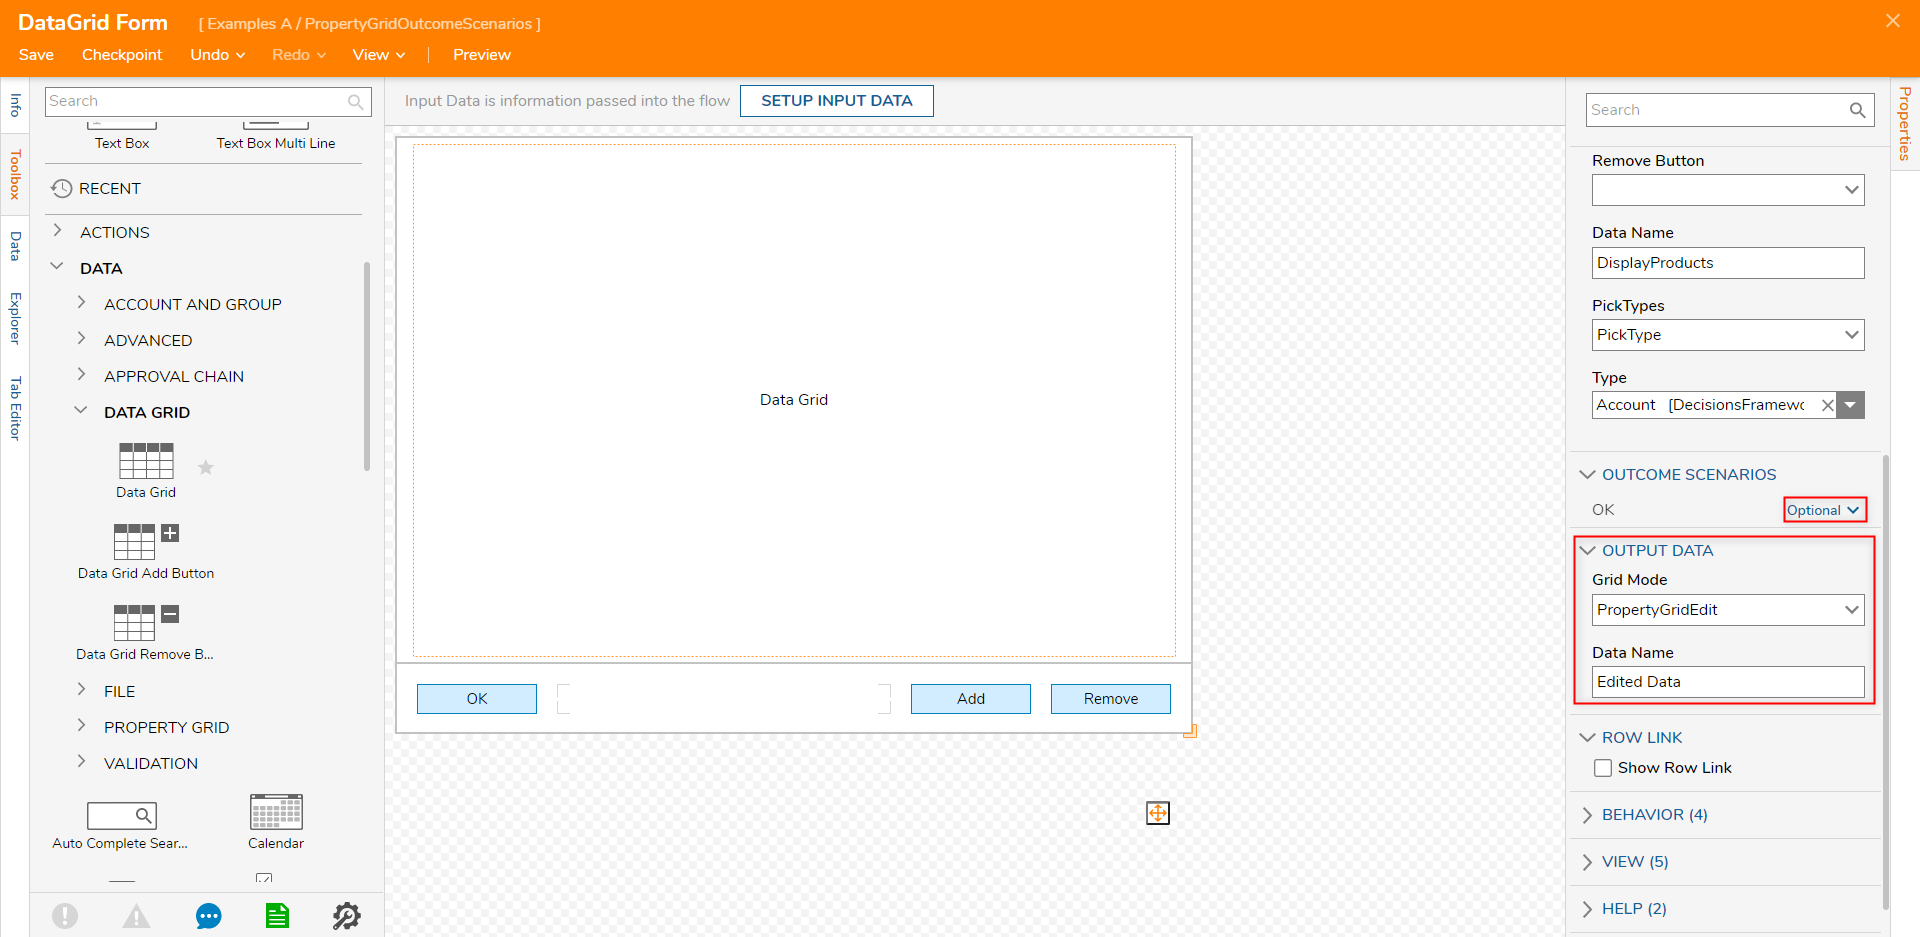
- Under the OUTPUT DATA category, select the Grid Mode dropdown box and select PropertyGridEdit and enter "Edited Data" in the Data Name field. Then, uncheck the OK checkbox under OUTCOME SCENARIOS, set OK to Optional.
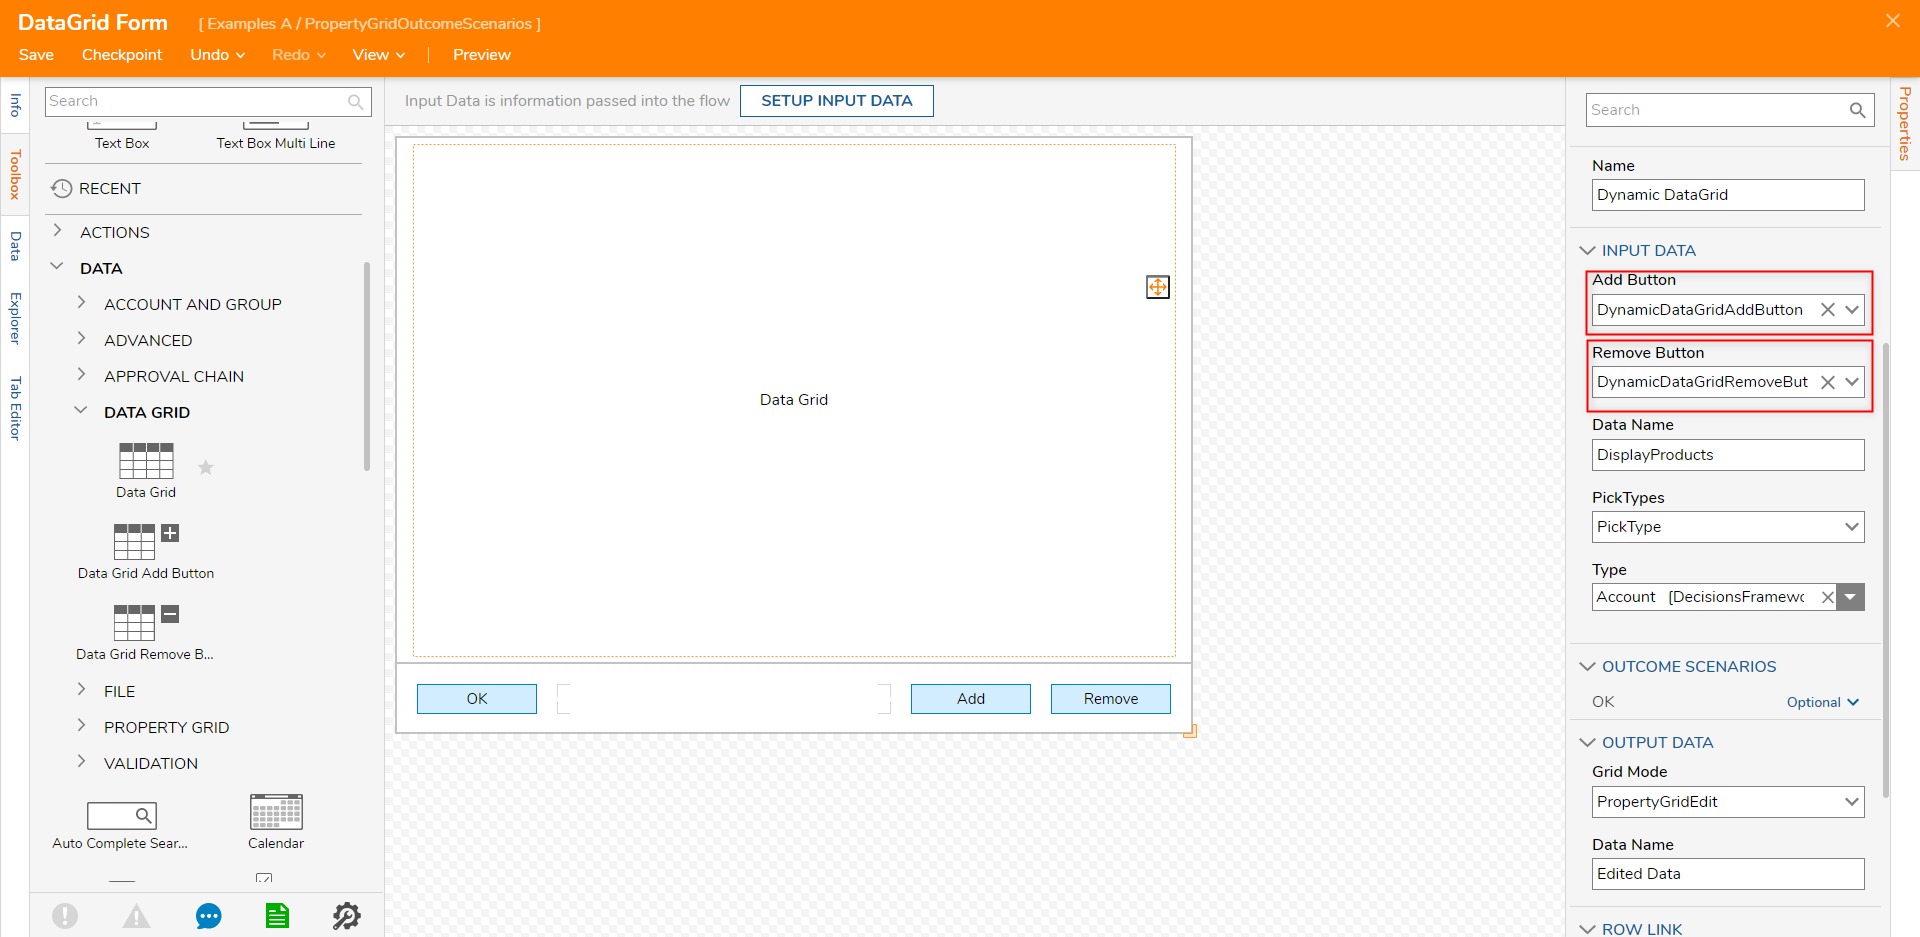
- Under the INPUT DATA category, select the dropdown list under Add Button and select DynamicDataGridAddButton. Then, select the Remove Button dropdown list under Remove Button and select DynamicDataGridRemoveButton.
- Click Save and close the Form Designer.
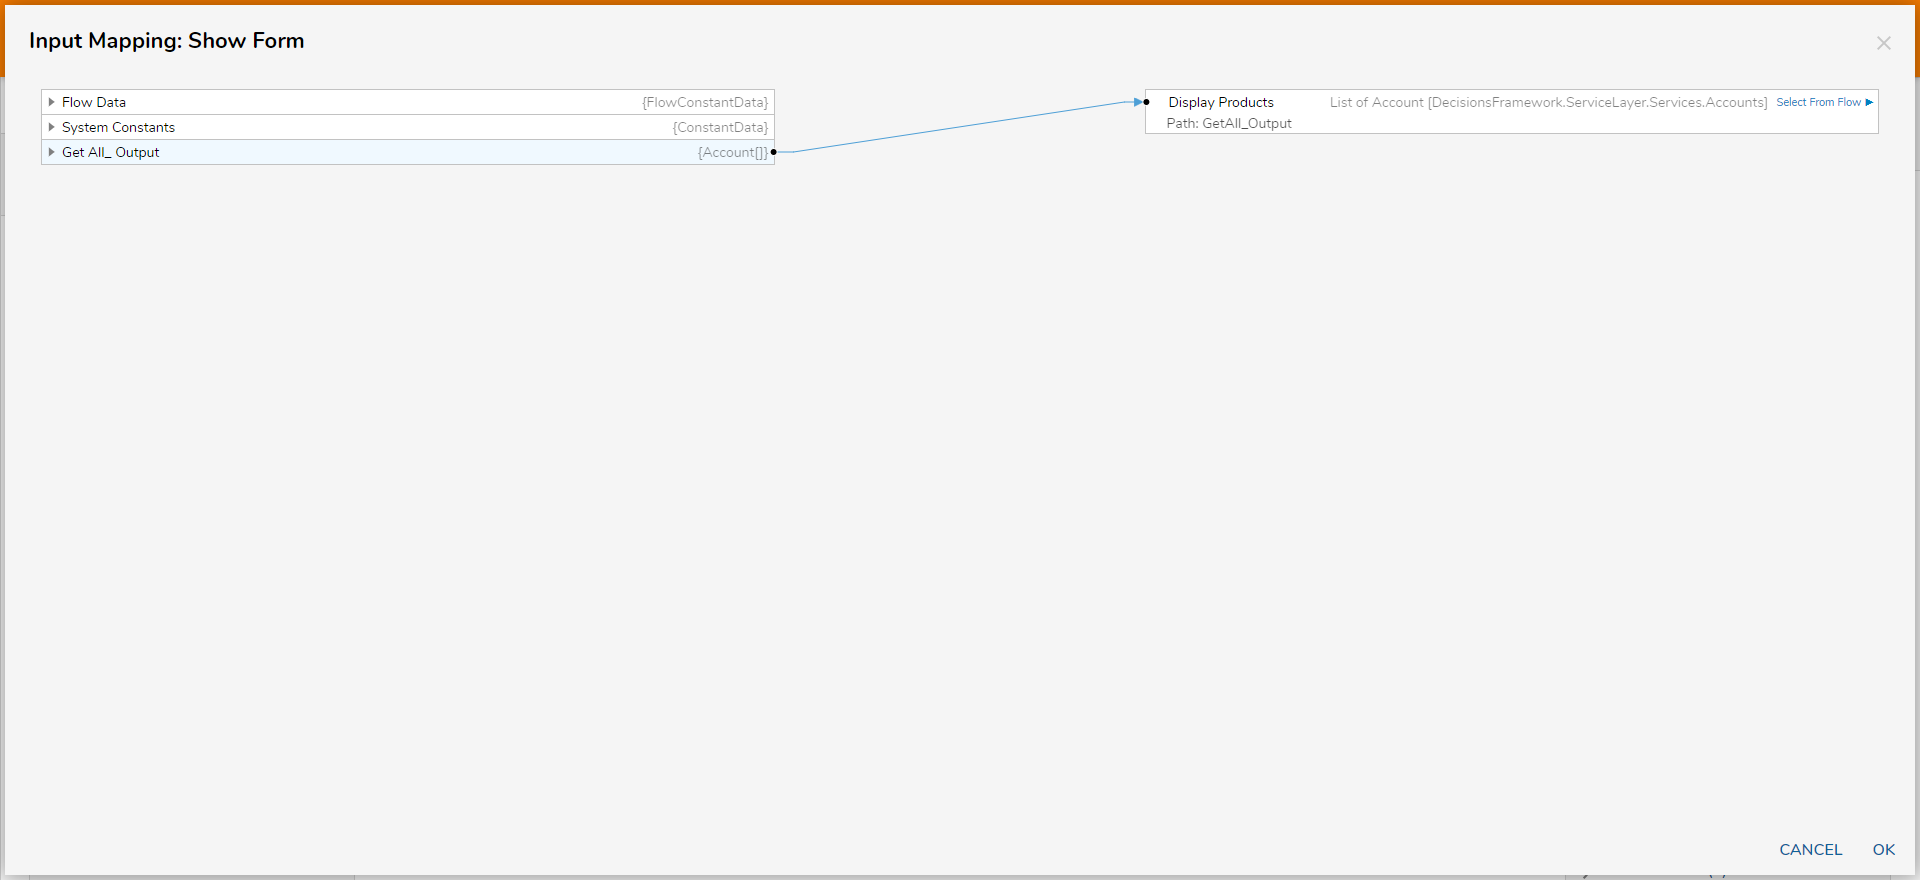
- With the Form selected, click Edit Input Mapping.
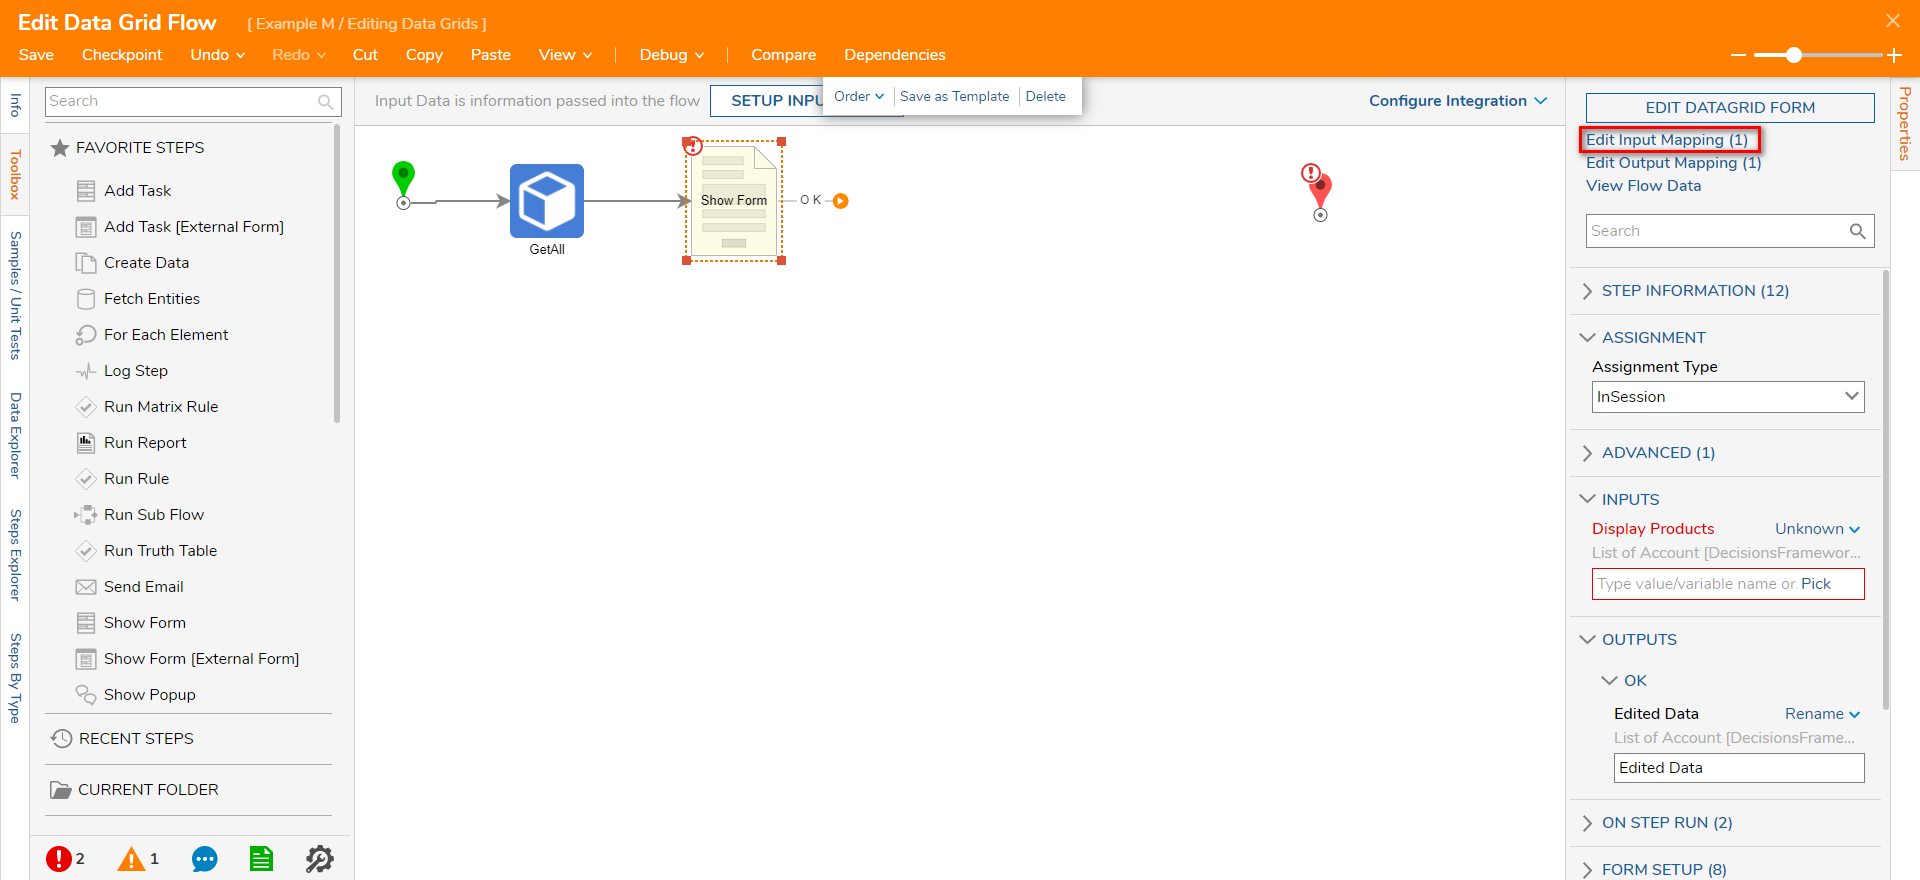
- Click the Get All_ Output {Account[]} and drag the line to Display Products. Then, click OK.
- Connect the OK path to the End step.
- Click Save to save changes.
.png)


Debug
- Click Debug on the top action panel. Then, click START DEBUGGING.
- Click on a desired data grid item and click Edit from the action menu to edit it.A user can also add or remove an object by clicking the Add or Remove button.

Was this article helpful?