Displaying Flow Data on Forms
- 26 Sep 2022
- 2 Minutes to read
- Print
- DarkLight
Displaying Flow Data on Forms
- Updated on 26 Sep 2022
- 2 Minutes to read
- Print
- DarkLight
Article Summary
Share feedback
Thanks for sharing your feedback!
Overview
Flow Data contains default variables made available to users at design time, such as the 'InitiatingAccount' of an instance, the 'CurrentAccount' logged in, etc. Flow Data is system-generated data and does not contain user-created data.
Assuming there exist no custom SDK changes in the Decisions configuration, then the same Flow Data variables will be available in every Designer, but the data values may differ.
For example, the variable 'CurrentUserEmail' changes depending on which user is logged into the system. This type of data can be leveraged in many use cases, including user context-relevant Forms and Flow Run time calculations.
Flow Data Breakdown
Each FlowData entry is formatted in the following way:

Bolded Text: The name and type of FlowData.
Blue Text: The current value of the FlowData Type. This changes depending on which account is logged in, in what browser, from what IP Address, etc.
[Bracketed Text]: The Decisions Data Type of the FlowData. Examples may include Account, String, Int32, etc.
Icon: A visual representation of FlowData's Data type. If a FlowData contains nested FlowData, it will look like the tree hierarchy symbol shown in the image above.
Mapping Flow Data with Select From Flow
In this example, a Form containing Labels, Textboxes, and an outcome Button Form controls will demonstrate mapping Flow Data into the Textboxes as inputs.
- In a Designer Project, create a Flow. It will automatically open in the Flow Designer.
- In the Flow Designer, drag a Show Form step into the workspace. Create a Form. It will automatically open in the Form Designer.
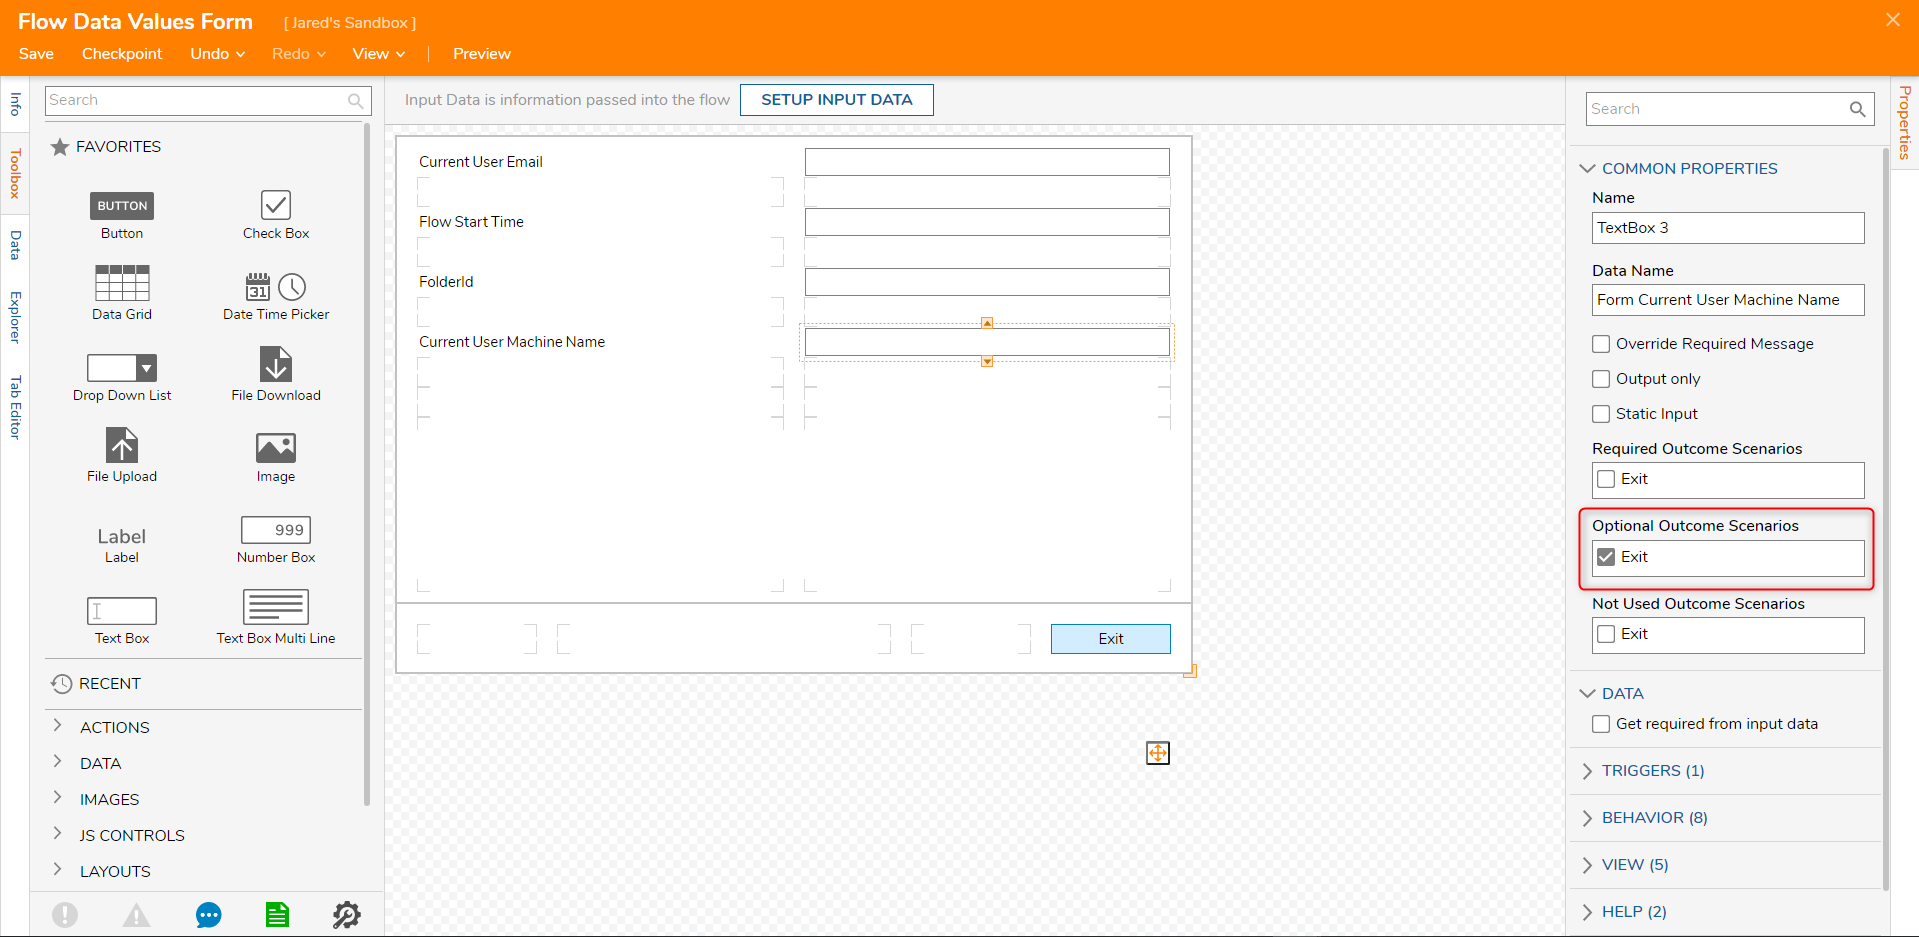
- In the Form Designer, drag four Labels, four Textboxes, and one outcome Button on the Form. Place a Label to the left of each Textbox.
- Set the Labels to display the following values from top to bottom: 'Current User Email,' 'Flow Start Time,' 'FolderId,' and 'Current User Machine Name.'
- Match the data names of the Textboxes correspond to their Labels. Set their outcome scenarios to Optional.
- Save and close the Form to return it to the Flow Designer.
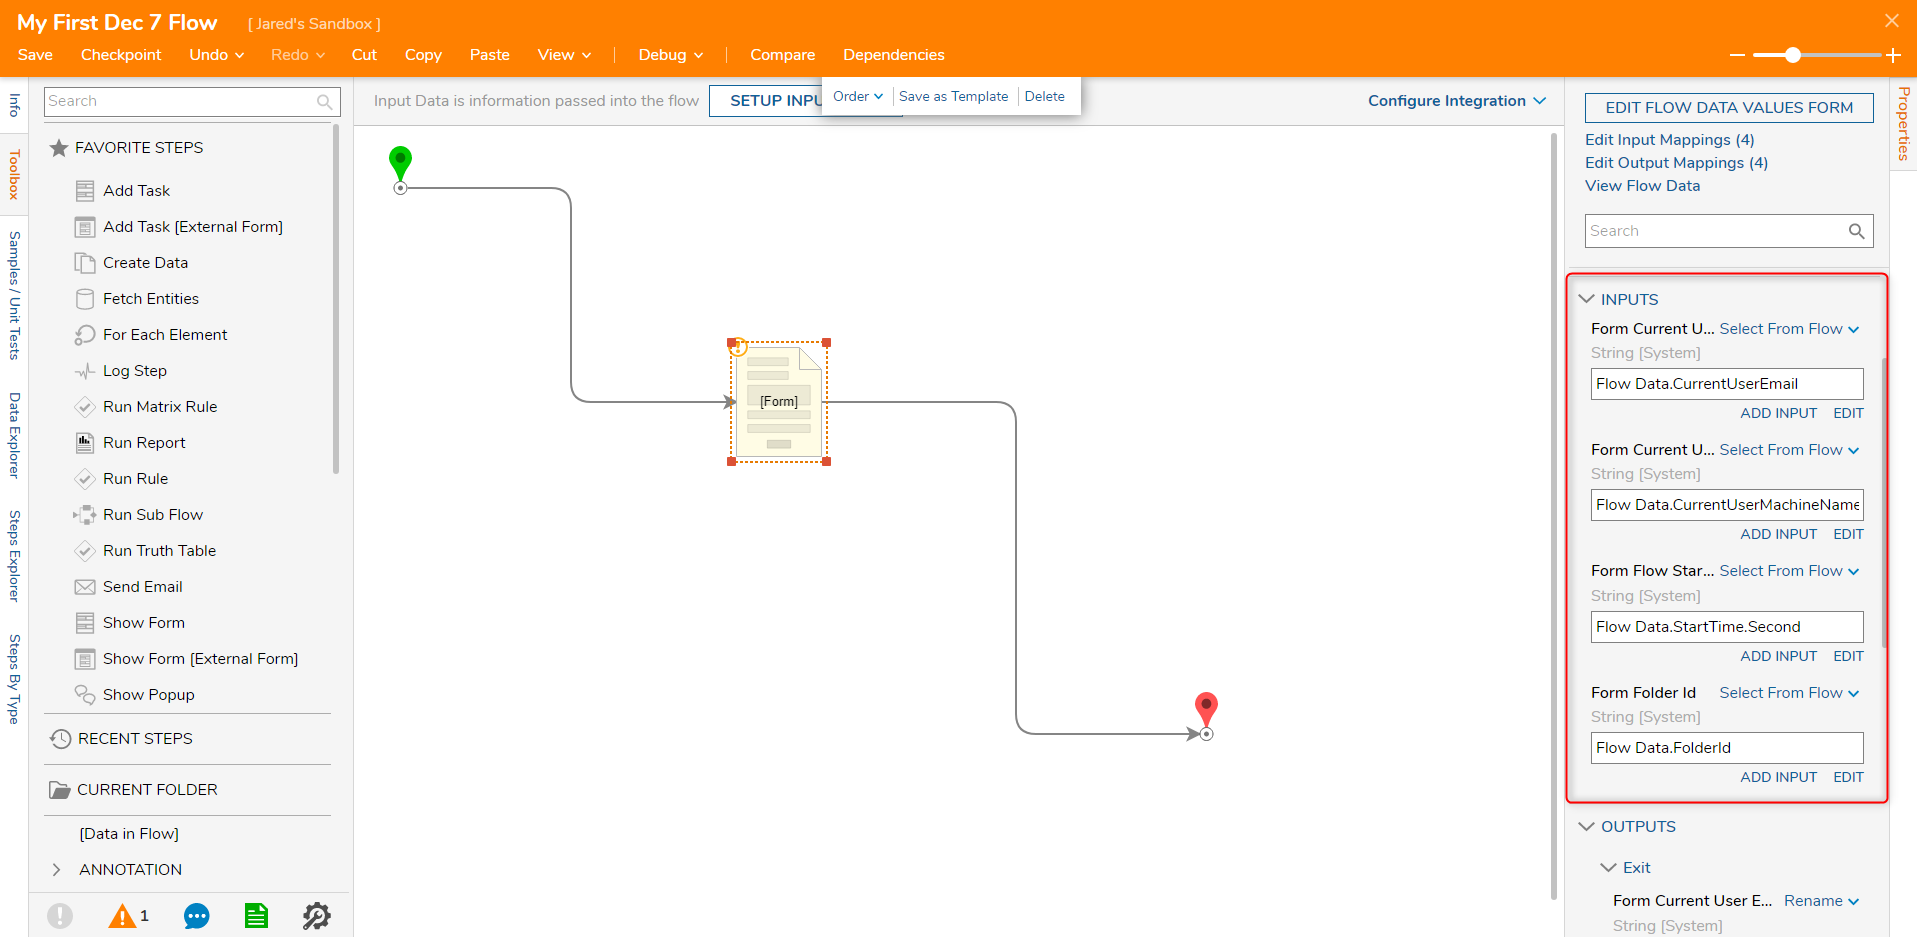
- In the Flow Designer, connect the outcome path to the end step.
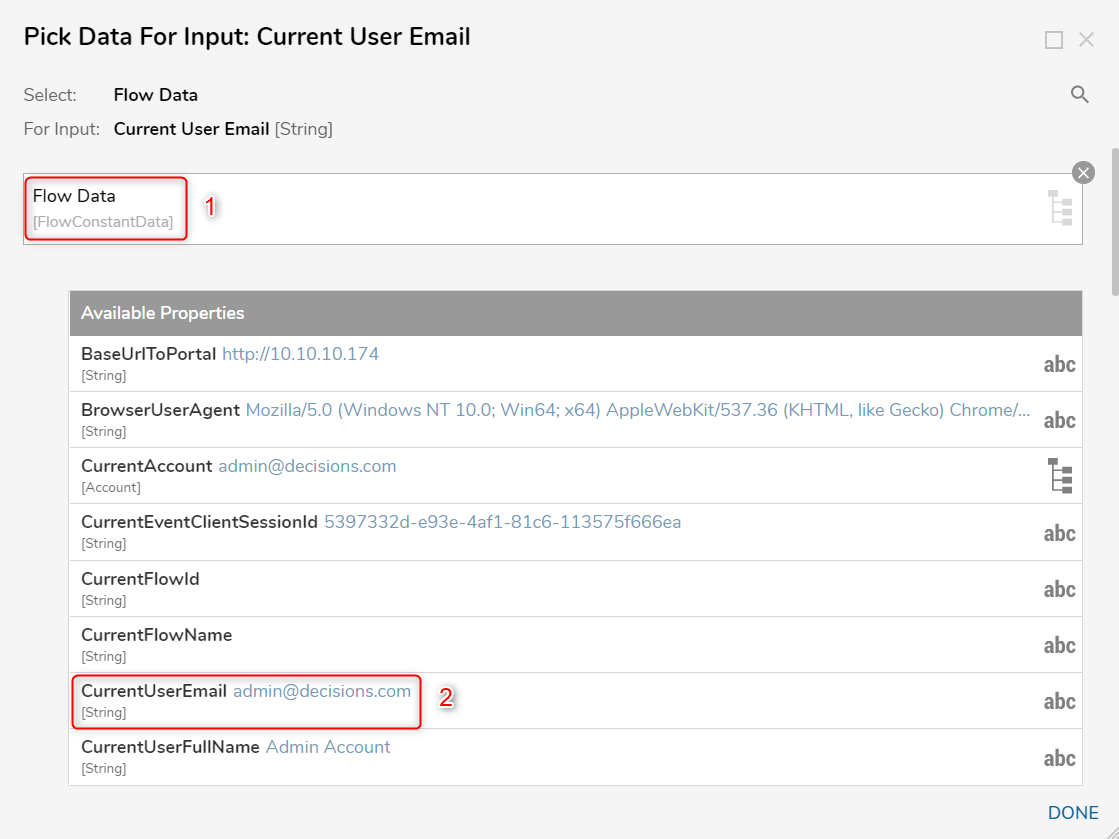
- Select the Form to view its Inputs, and select the 'Select From Flow' input mapping for the 'CurrentUserEmail' input.
- Click the FlowData category to expand it and select the 'CurrentUserEmail' Flow Data.
- Repeat steps 8-9 to map each input to its corresponding Flow Data.


Debug
Click Debug, located at the top of the Designer to see the Flow Data values passed into the Form.
Mapping Flow Data with the Data Tab
Flow Data may also be accessed via the Data tab in the Form Designer.
This method automatically selects, creates, and names the Form control to house the Flow Data. The Flow Data input must still be manually selected.
- In the Form Designer, expand the Data tab on the right side of the screen underneath the Toolbox tab.
- Notice the tab populate with Flow Data, System Constants, and any other User Defined lookup data. Expand Flow Data.
- Drag the CurrentUserEmail Flow Data from the Data tab onto an empty space in the Form.
- Once placed, a radio button list of controls to contain the Flow Data appear. This list changes upon the Flow Data's Data Type. Select Label Of Data Value and press Enter to confirm.
- Save and exit the Form to return to the Flow Designer.
- In the Form's Properties under Inputs, map the new 'Current User Email' input to Flow Data.CurrentUserEmail via Select From Flow.

Debug
- Select the Debug action in the orange Action Bar.
- Select START DEBUGGING.
Once the Form appears, the Label will automatically populate with the email of the currently logged-in user.
Was this article helpful?