CSV To Object Mapping Step
- 25 Jan 2022
- 2 Minutes to read
- Print
- DarkLight
CSV To Object Mapping Step
- Updated on 25 Jan 2022
- 2 Minutes to read
- Print
- DarkLight
Article Summary
Share feedback
Thanks for sharing your feedback!
Overview
Through the use of CSV To Object steps in the Flow Designer, users are afforded the ability to map defined CSV data to a Data Structure in Decisions.
Prerequisite:
Before proceeding with the example, download the following CSV file; this file will be imported into the example Flow. The imported file contains three rows with three fields; First Name, Last Name, and Email Address.
Example
In this example, a Flow will be created that will create an Array of Account Objects from a CSV file using the CSV To Object Mapping step. Then, for each account in the array, the Flow will create an account in the Portal.
- From a Designer Project, click the CREATE FLOW button on the Global Action Bar. Then, select Flow, provide a Name and click CREATE.
- From the Flow Designer, navigate to the Toolbox tab and attach a Create Data step to the Start step.
- Select the Create Data step to navigate to its Properties and click SHOW EDITOR.
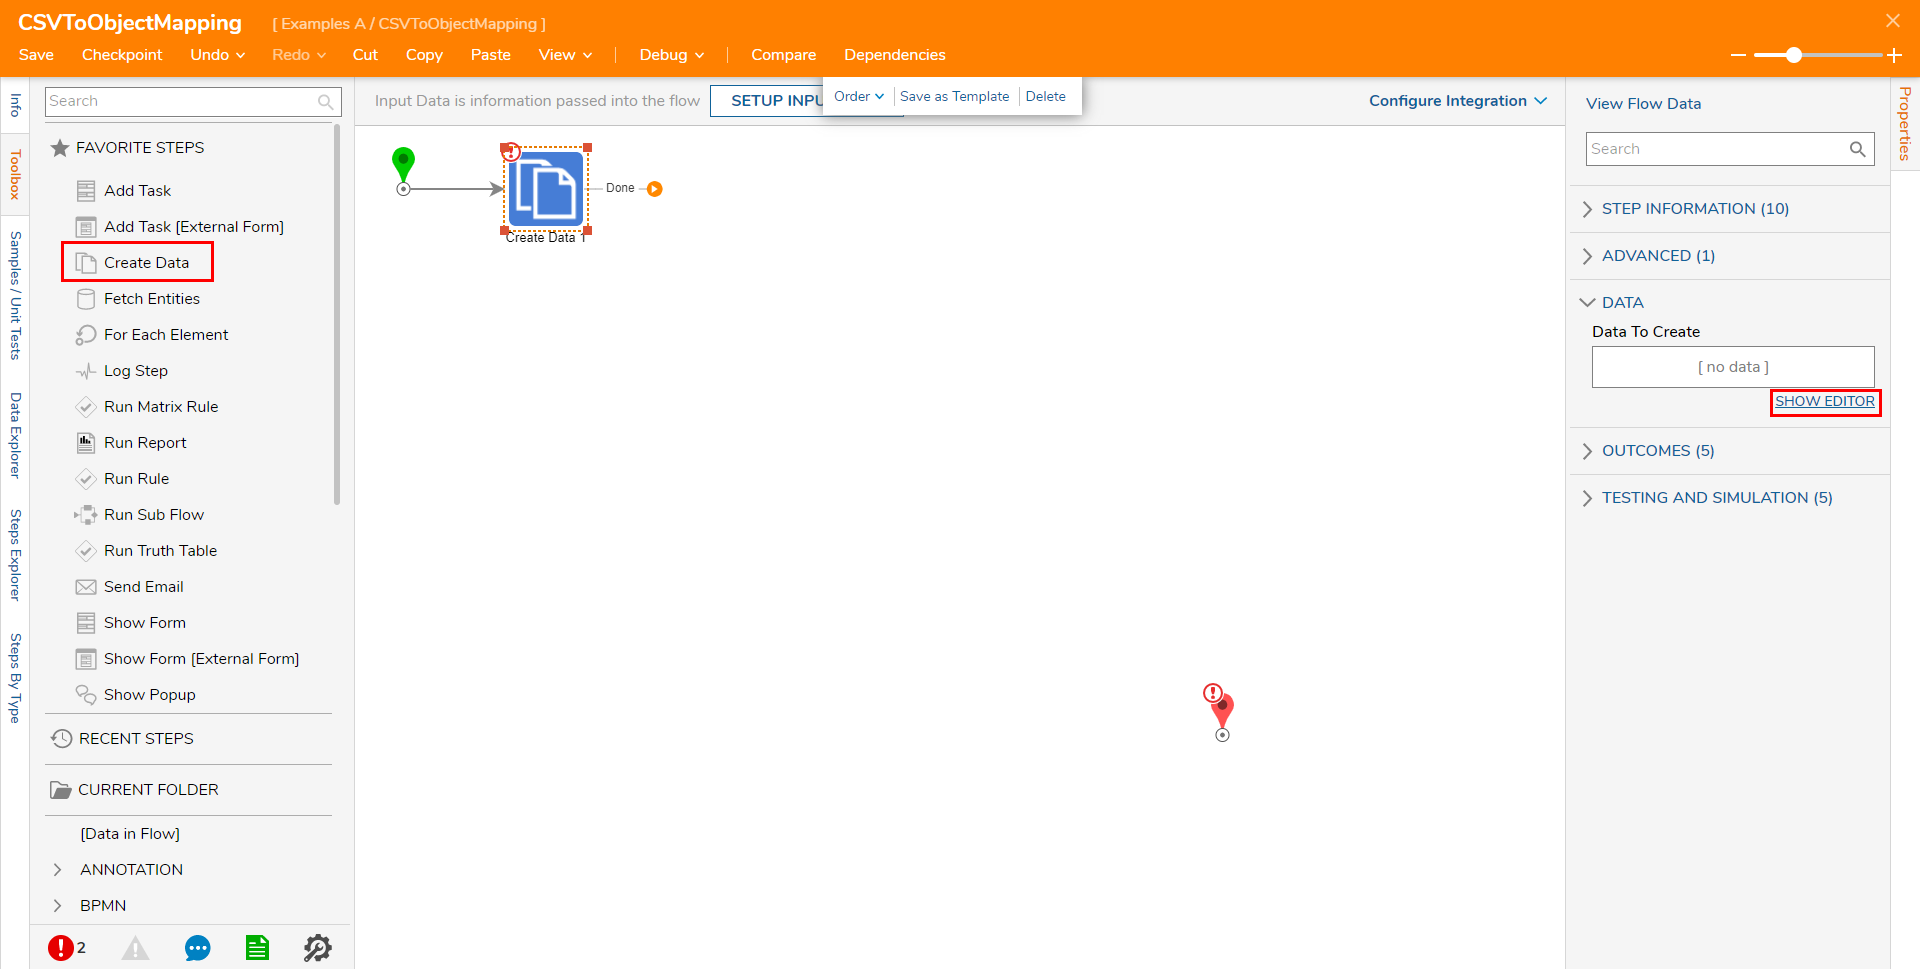
- From the Data Definitions window, Name the Data "File", select FileData from the Type dropdown, then click CLOSE. This Data Definition is used to import CSV data into the Flow.
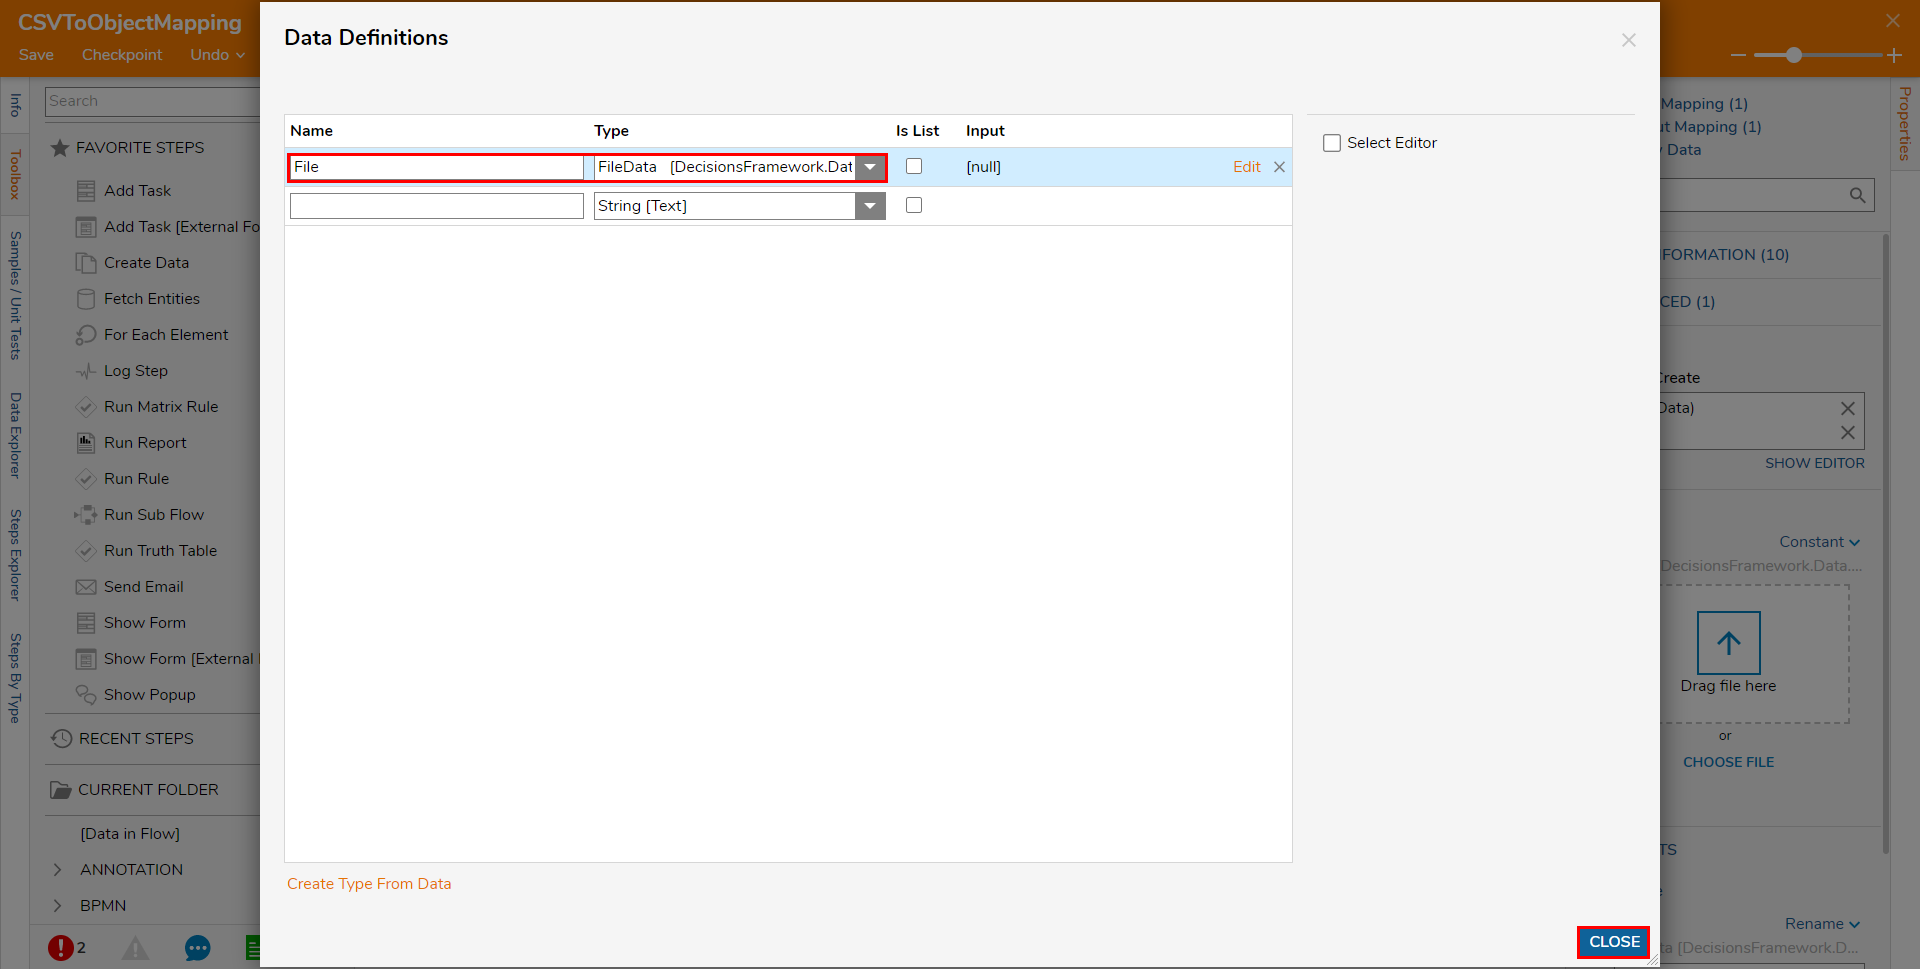
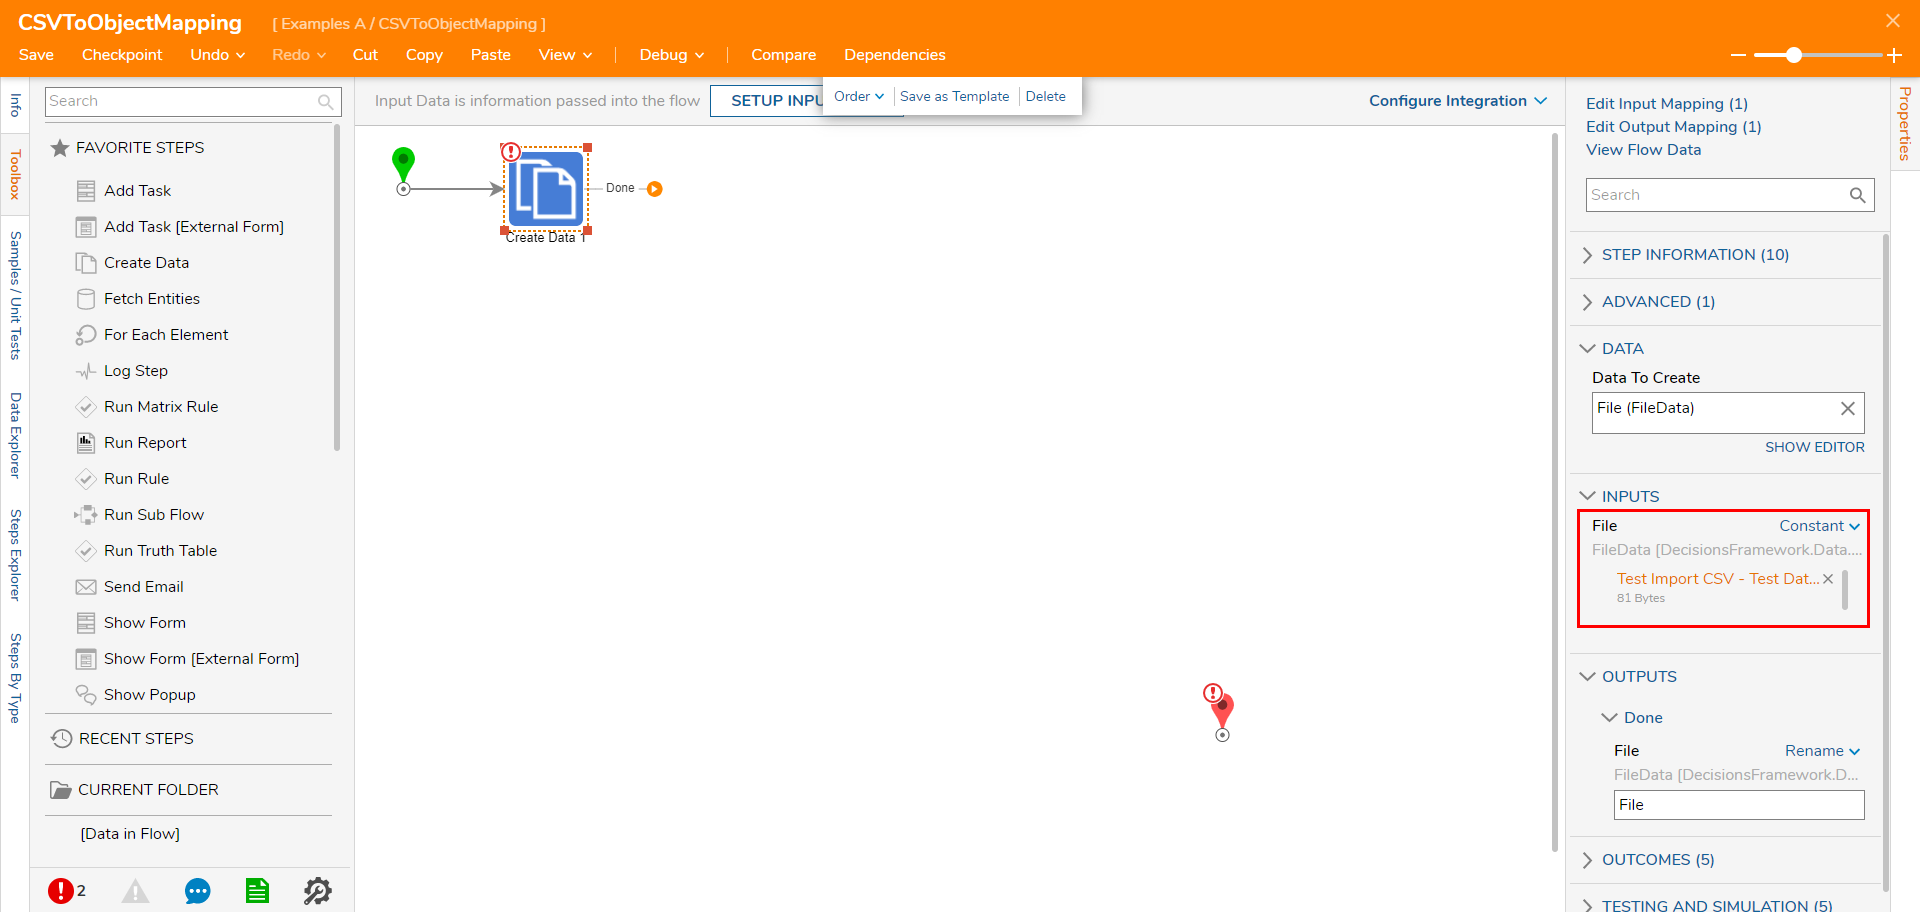
- From the Create Data Properties, upload the desired CSV file via the Drag file here field or CHOOSE FILE button, under INPUTS > File.
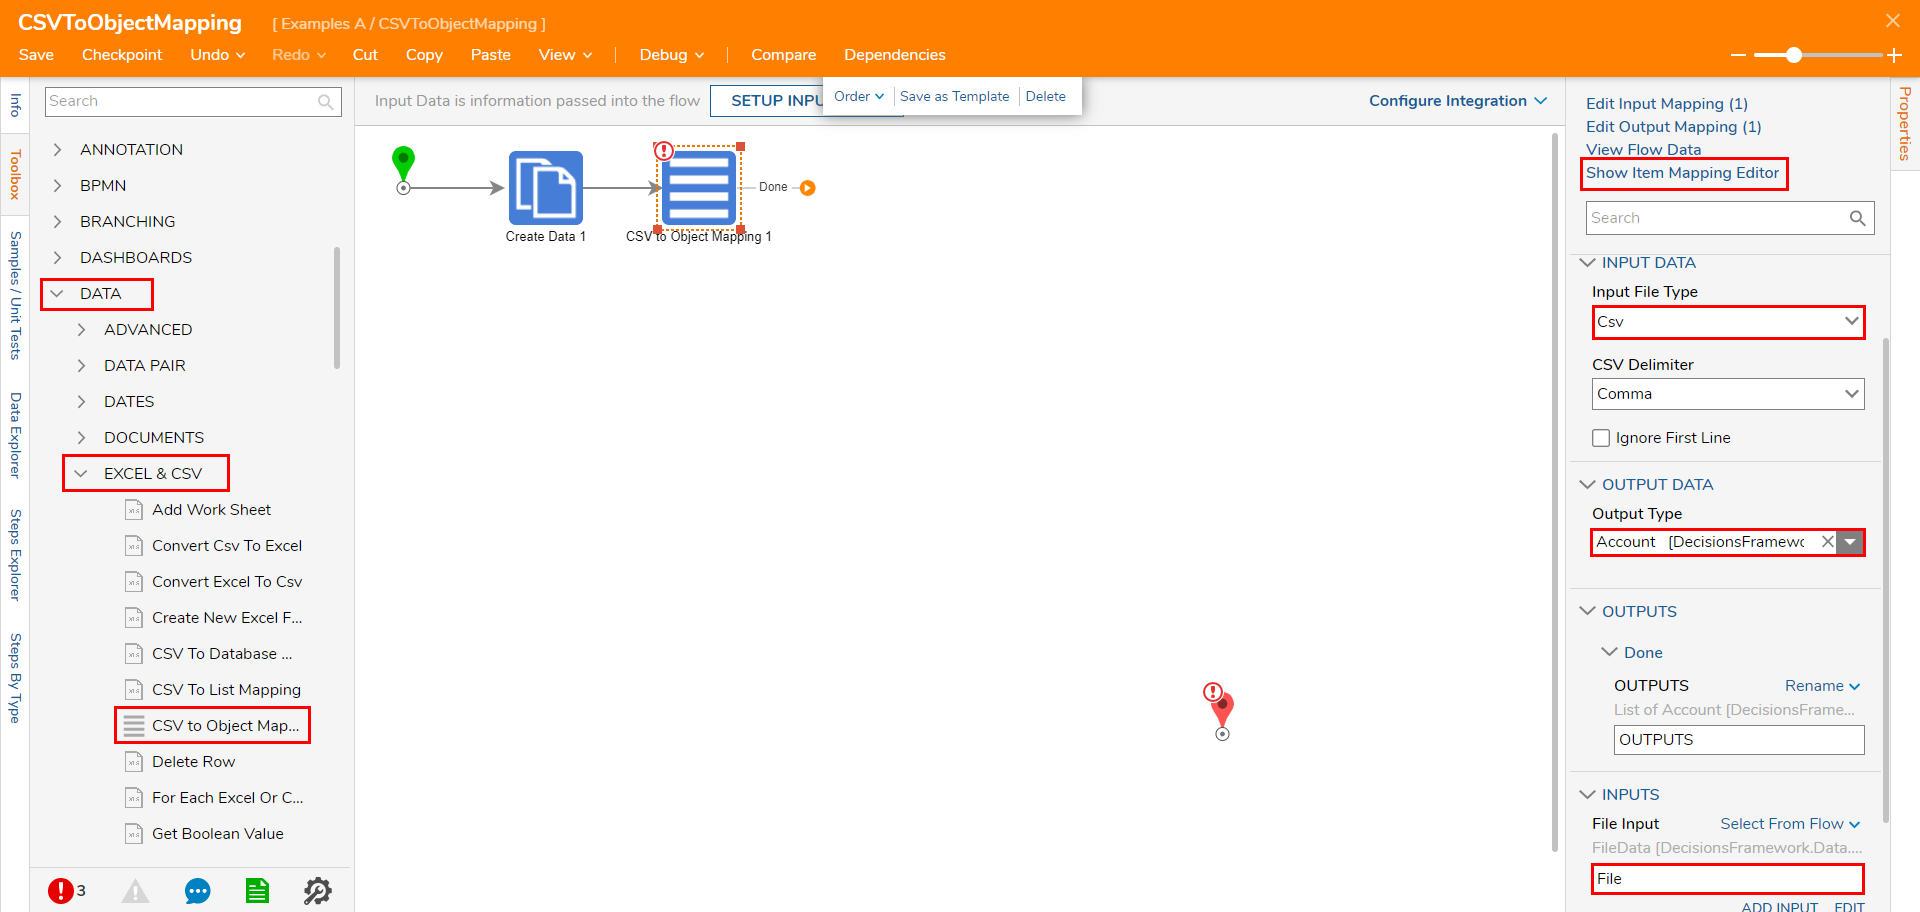
From Toolbox > DATA > EXCEL & CSV, attach a CSV to Object Mapping step to the Create Data step. From the newly added step's Properties, select Csv from the Input File Type menu, then map File to INPUTS > File Input.
Under OUTPUT DATA > Output Type, select Account [DecisionsFrameworkServiceLayer.Services.Accounts] from the dropdown menu. Then click Show Item Mapping Editor.
From the Mapping Editor, under Inputs, change the mapping for ITEM to Build Data.
Under Properties, click the ellipses button. Then, in the Edit window, under SelectedProperties, check EmailAddress, First Name, and Last Name. Click OK.
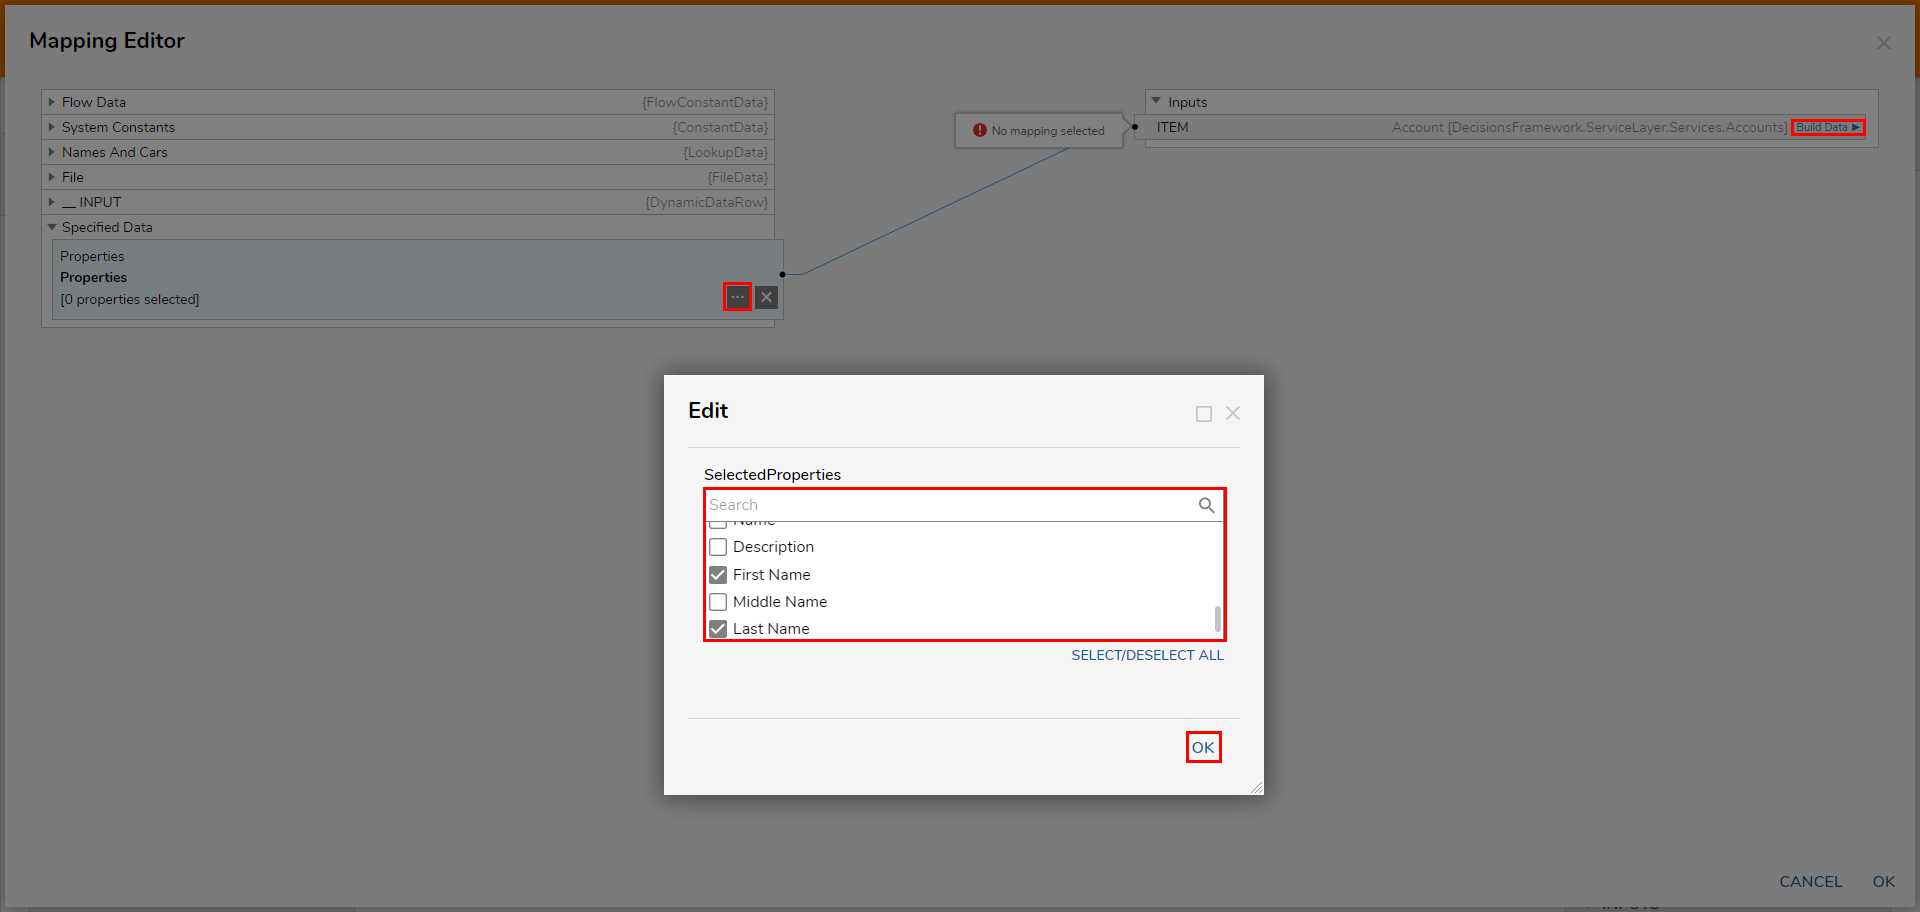
Expand the _INPUT category on the left then map Field01 > TextValue to First Name, Field02 > TextValue to Last Name, and Field03 > TextValue to EmailAddress. Click OK to save the Mapping and close the window.
Each Field number corresponds to each corresponding column in the spreadsheet.
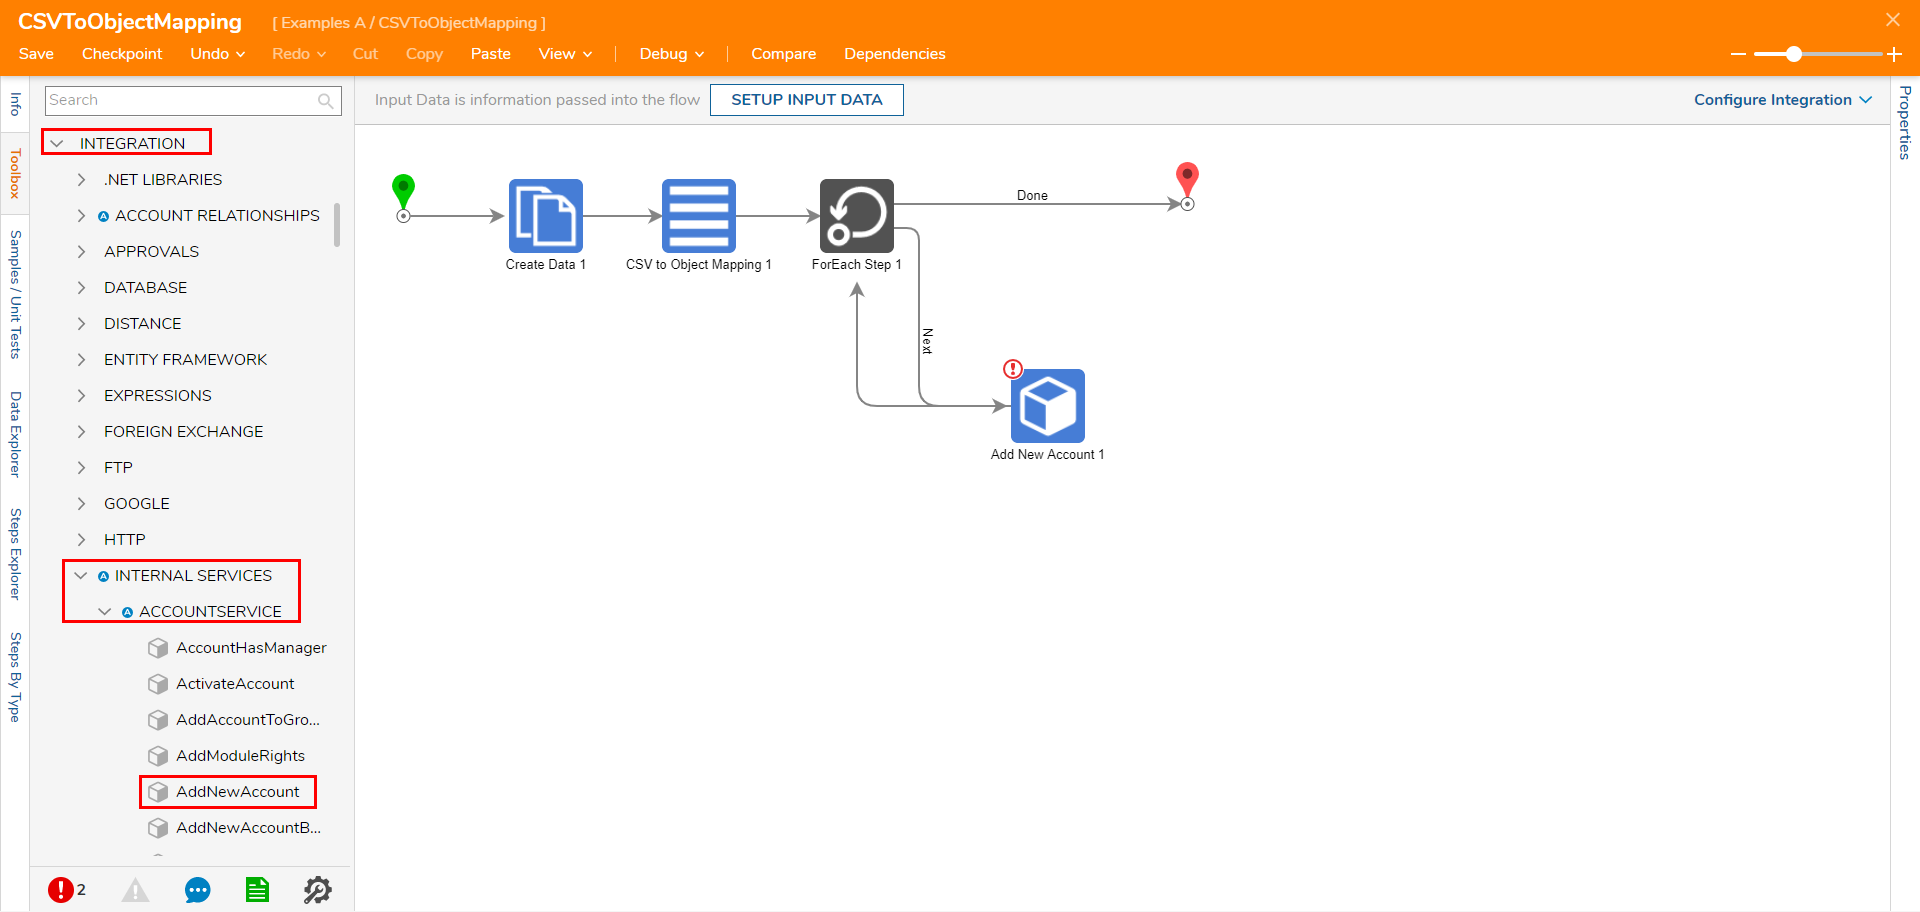
Navigate to Toolbox > ITERATION, and attach a ForEach Step to the CSV to Object Mapping step. From the ForEach Step's Properties, map OUTPUTS to INPUTS > Collection.
On the Next path of the ForEach Step, attach an AddNewAccount step from Toolbox > INTEGEATION > INTERNAL SERVICES > ACCOUNTSERVICE. Attach the Done path for the Add Account step to the ForEach Step, then attach the Done path for the ForEach step to the End step.
From the Properties tab of the Add New Account step, change the account INPUT's mapping to Build Data.
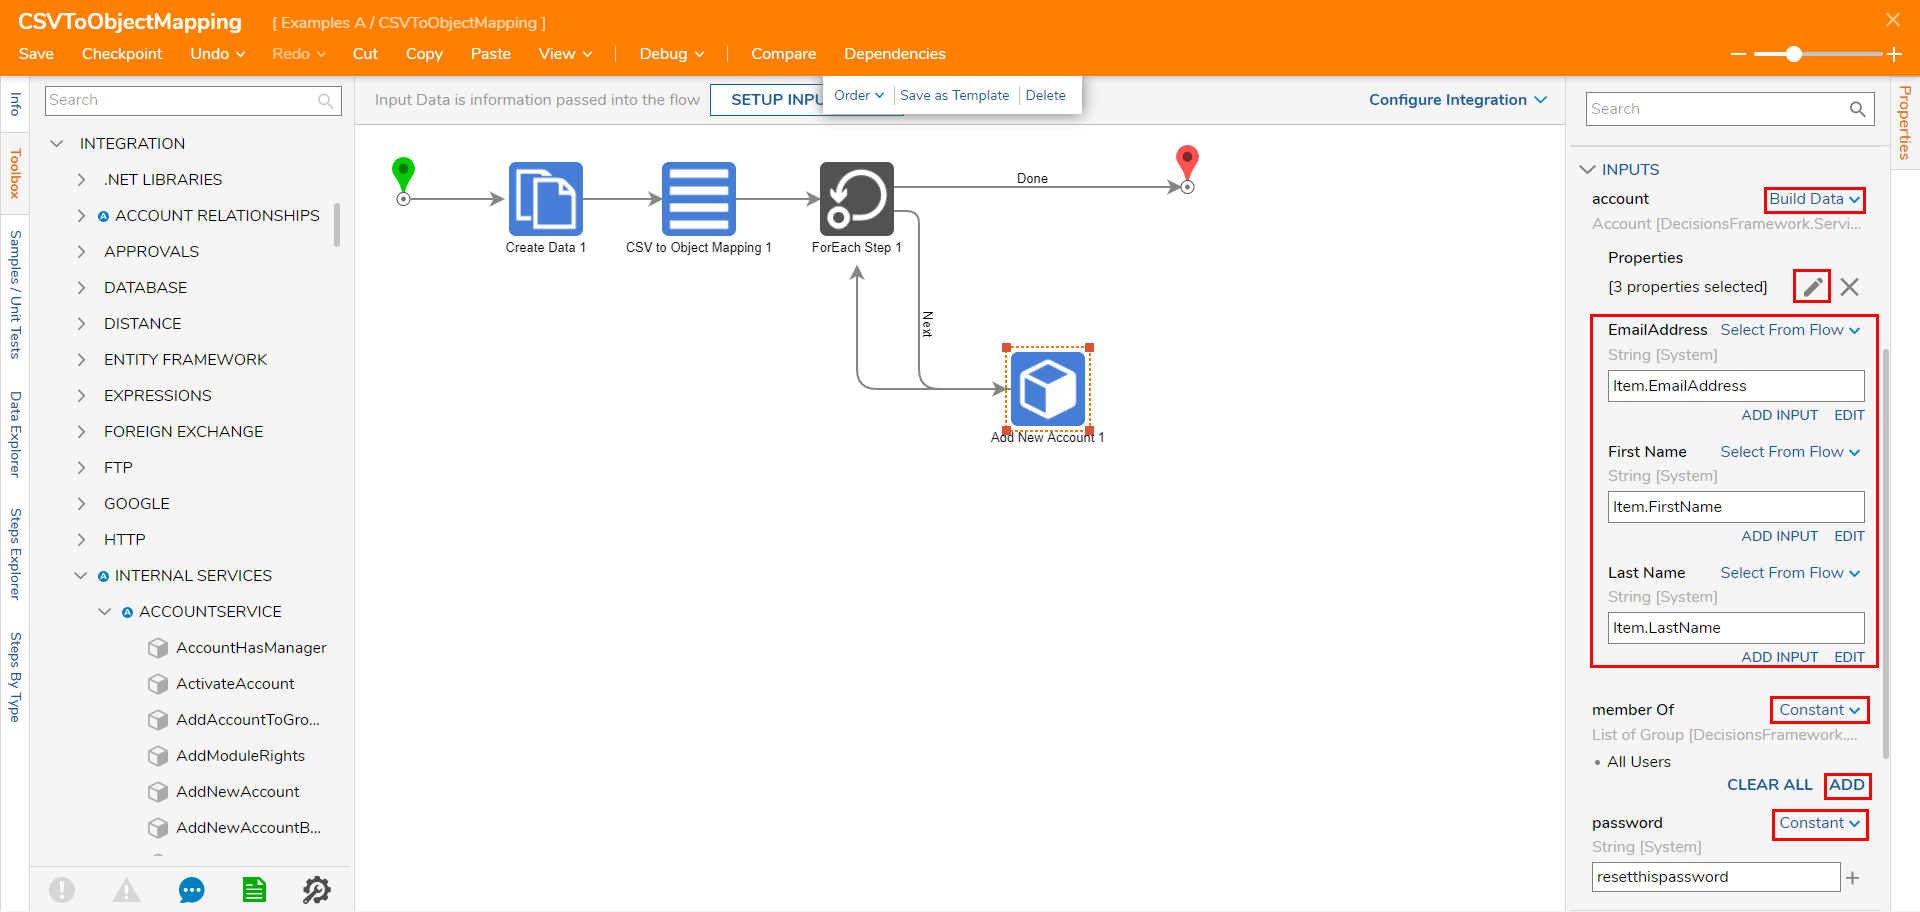
Select the desired Properties. After selecting the Properties, map the respective Output from the Item to each value.
Under member Of, Constant map the desired Group by changing the mapping then clicking ADD. Then, Constant map a placeholder value under the password.
Click Save to save changes to the Flow.


Debug
- From the Flow Designer, select Debug from the top action bar.
- Click START DEBUGGING. The Flow will run and in turn create three Accounts that correspond to the data within the spreadsheet.
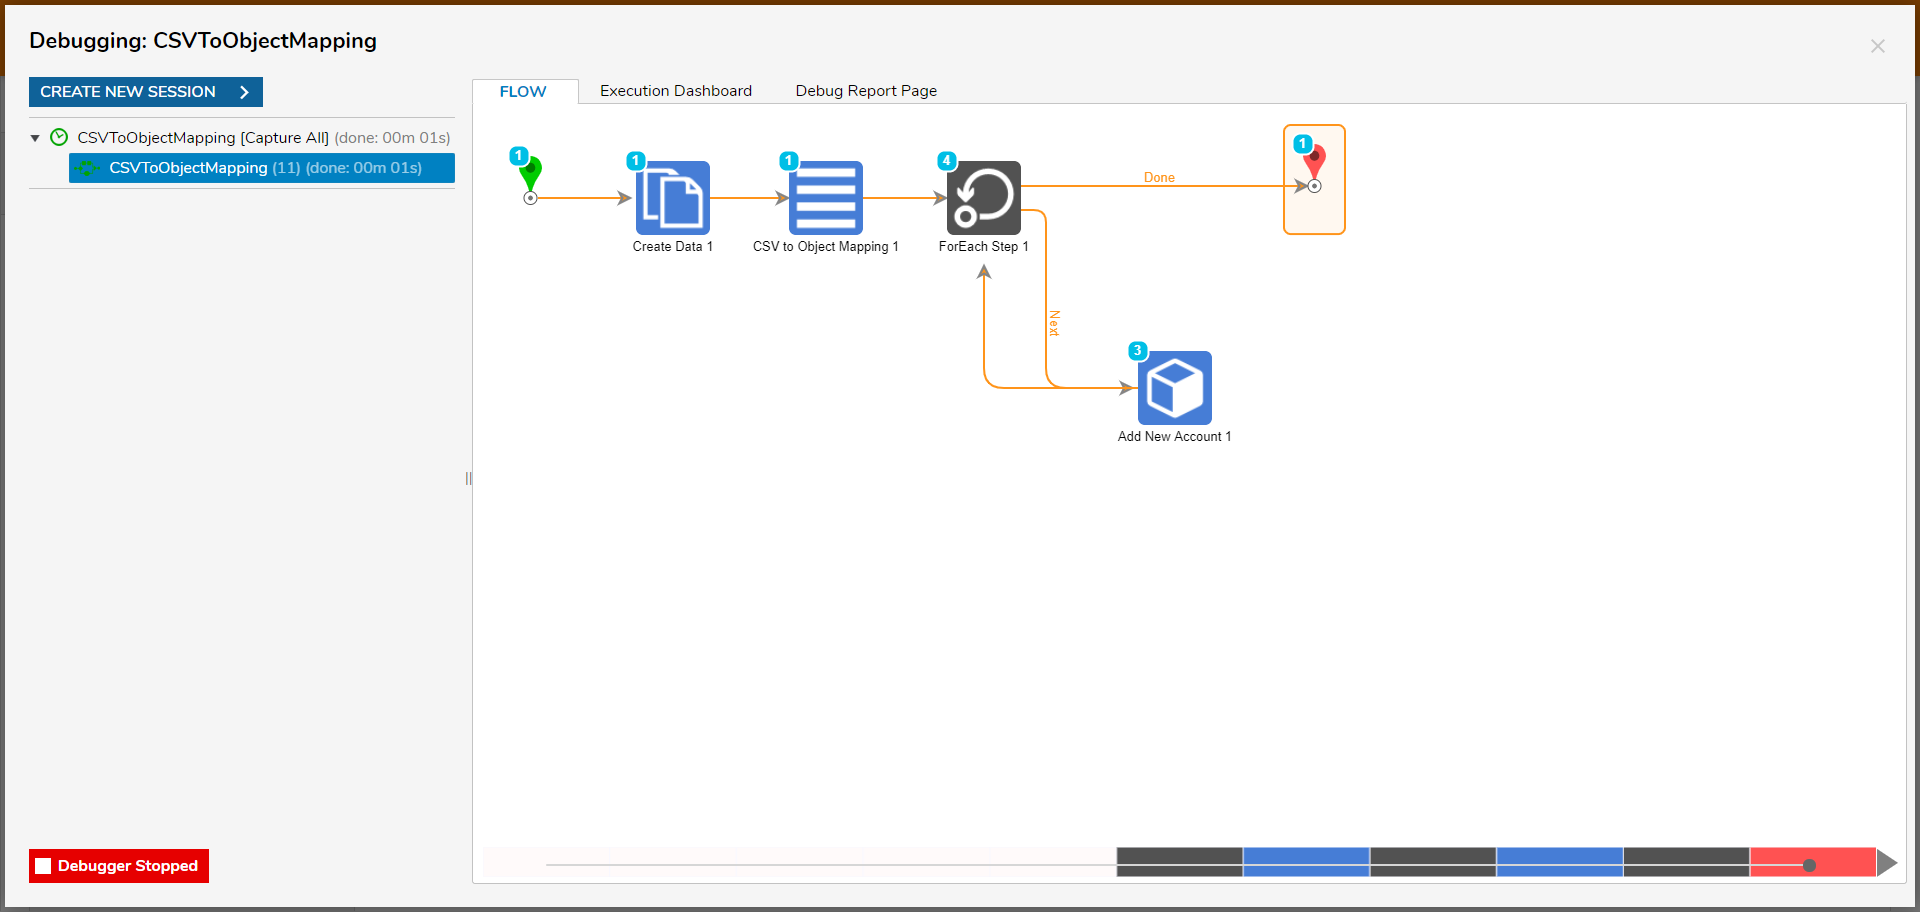
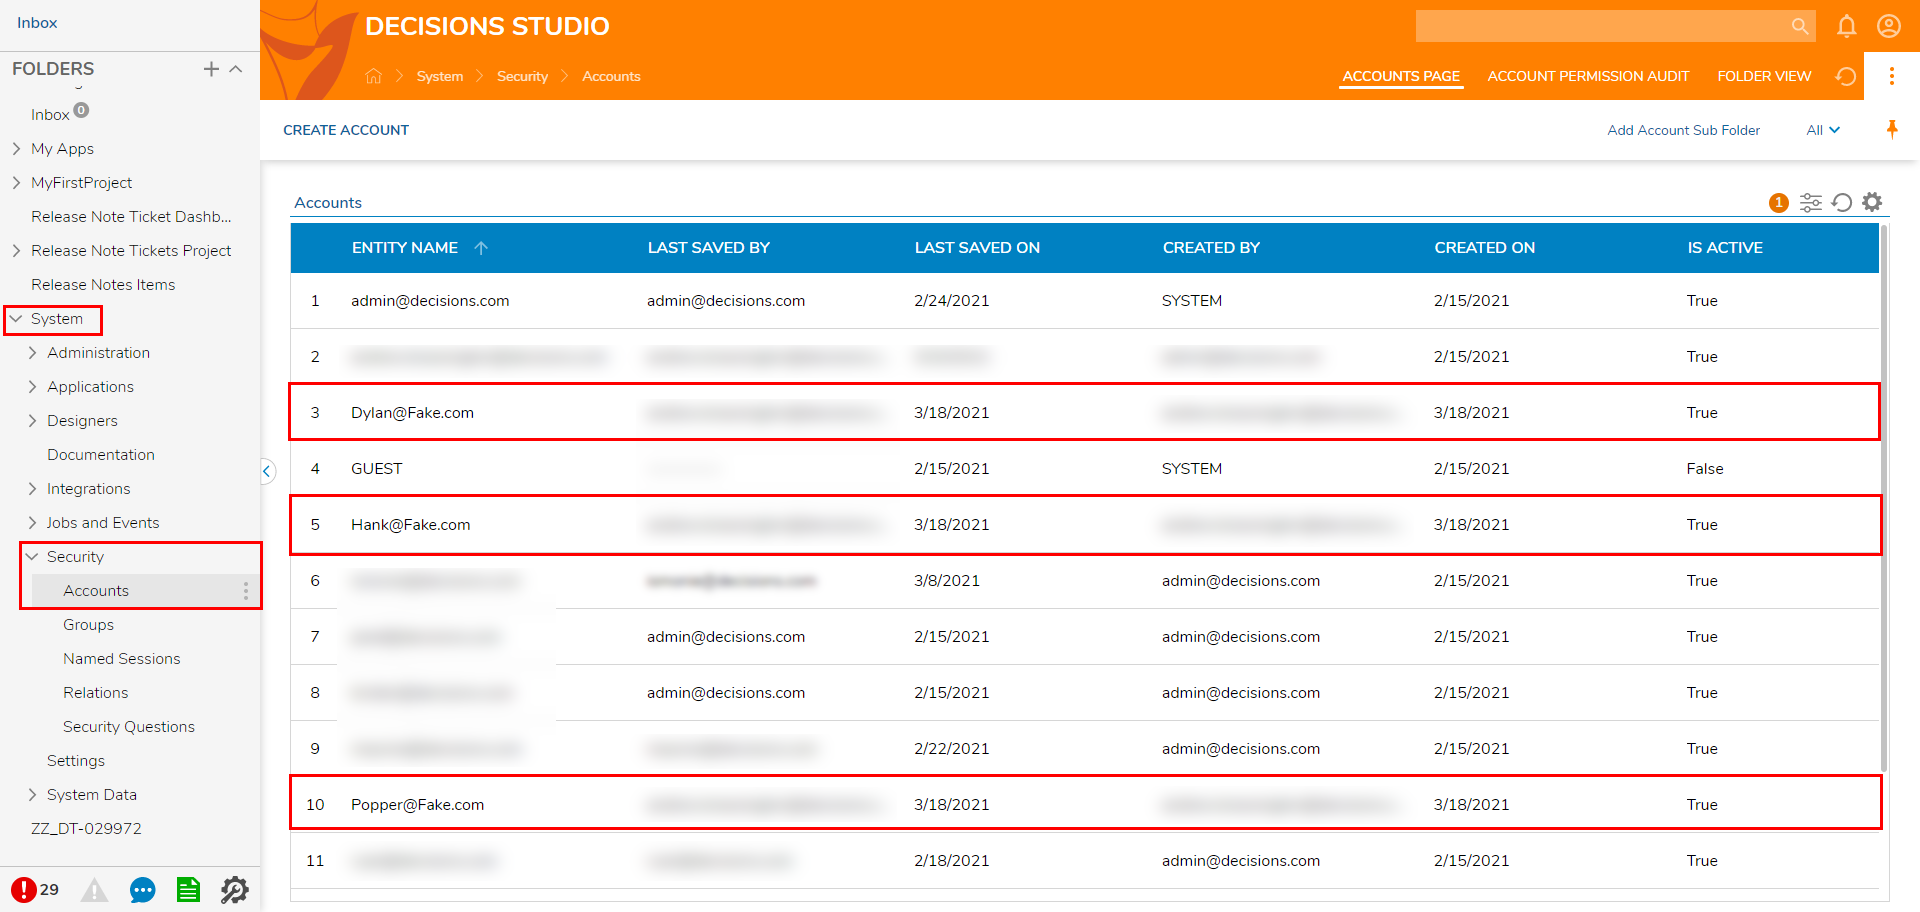
From the Decisions Studio, navigate to System > Security > Accounts in the Folder Tree and verify that the Accounts were created.


Was this article helpful?