Creating and Styling Excel Document
- 25 Mar 2021
- 3 Minutes to read
- Print
- DarkLight
Creating and Styling Excel Document
- Updated on 25 Mar 2021
- 3 Minutes to read
- Print
- DarkLight
Article Summary
Share feedback
Thanks for sharing your feedback!
Overview
This tutorial demonstrates how to create and style an Excel Document in the Flow Designer.
Before proceeding, download and import the following into Decisions:
Example
- From a Designer Project, select CREATE FLOW in the Global Action Bar; Name the Flow and select CREATE.
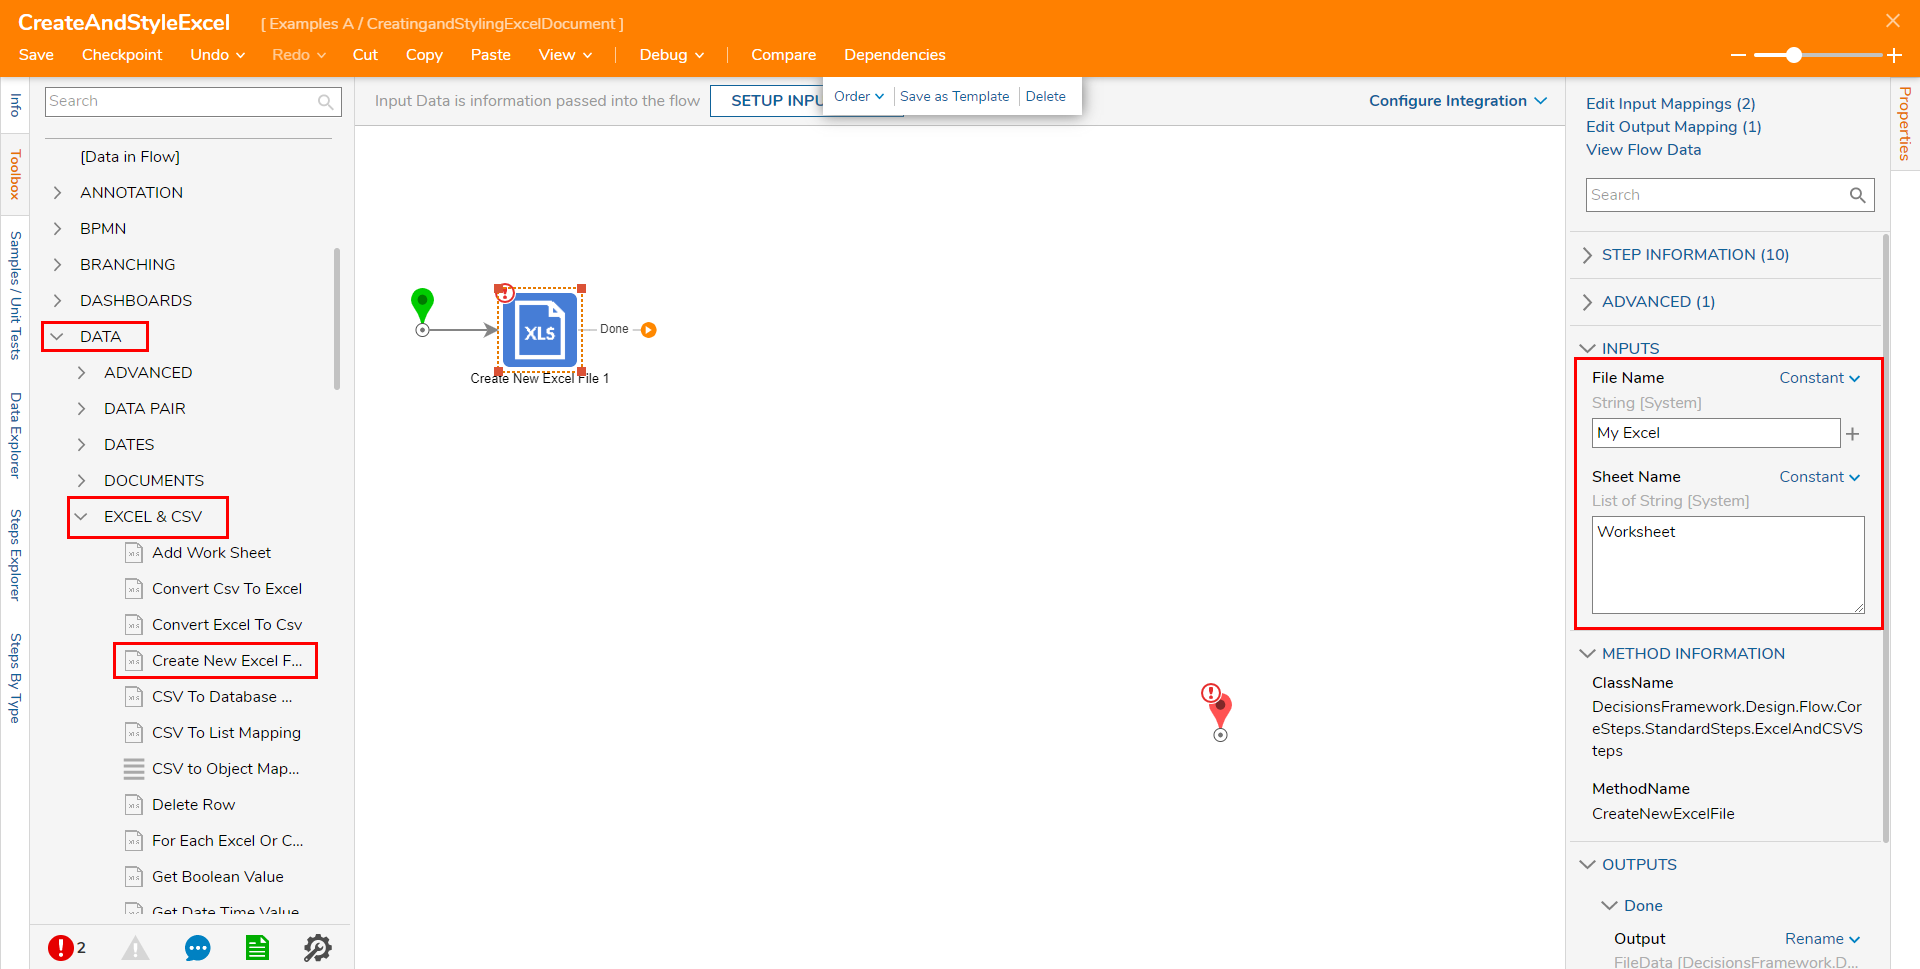
- From Toolbox > DATA > EXCEL & CSV, attach a Create New Excel File step to the Start step. From the Create New Excel File step's Properties, Constant map "My Excel" to File Name, and "Worksheet" to Sheet Name.
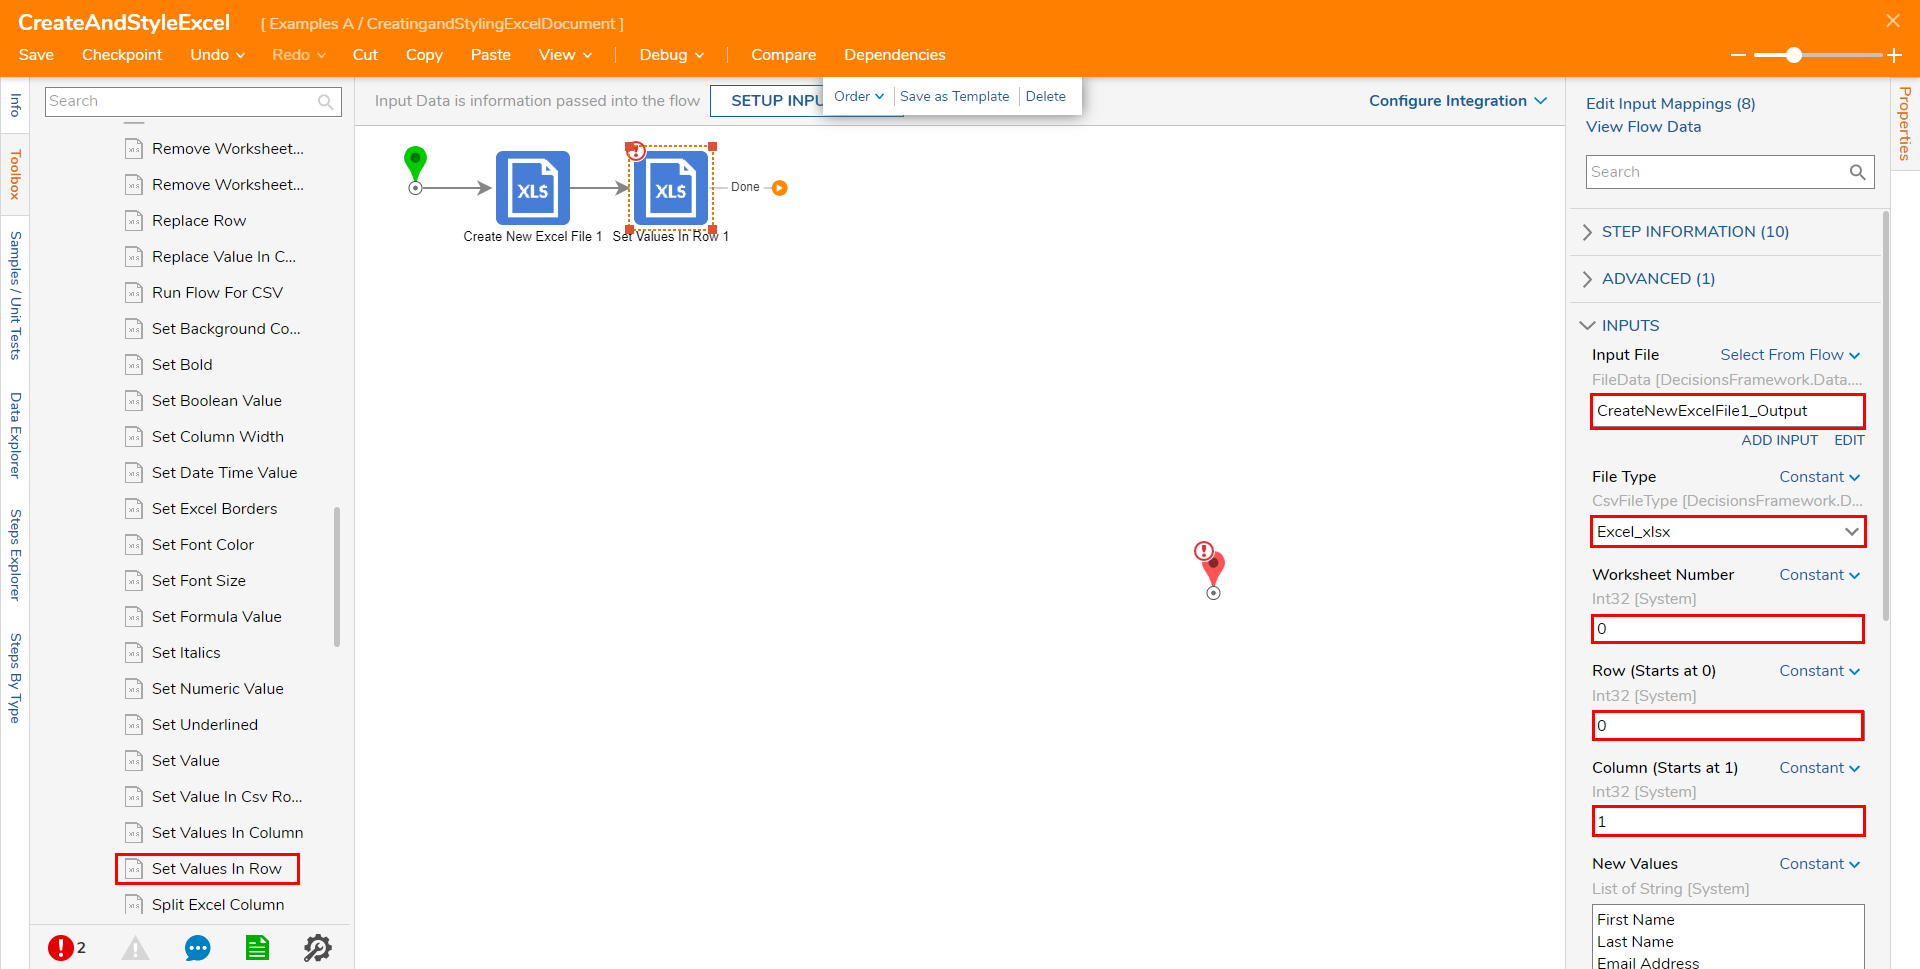
- From the same Toolbox category, attach a Set Values In Row step to the Create New Excel File step. From the newly added step's Properties, map CreateNewExcelFile1_Output to Input File, Constant map Excel_xlsx to File Type, set Worksheet Number to "0". Constant map "0" to Row (Starts at 0), and "1" to Column (Starts at 1).
- Note: As is indicated by their names, the Row Input starts its Index from the number 0 and the Column Input starts at 1. This means that for Rows, 0 is treated as the first row, and for Columns, 1 is treated as the first Column.
Worksheet Number behaves similarly to Rows, where 0 is equivalent to the first Worksheet in the Excel file. - Still in Properties tab, Constant map "First Name, Last Name, and Email Address" to New Values, being sure to keep each value on a separate line. Set Try To Parse Numbers? to False by leaving the checkbox unchecked, and set Fields Starting With Equals Are Formulae to True.
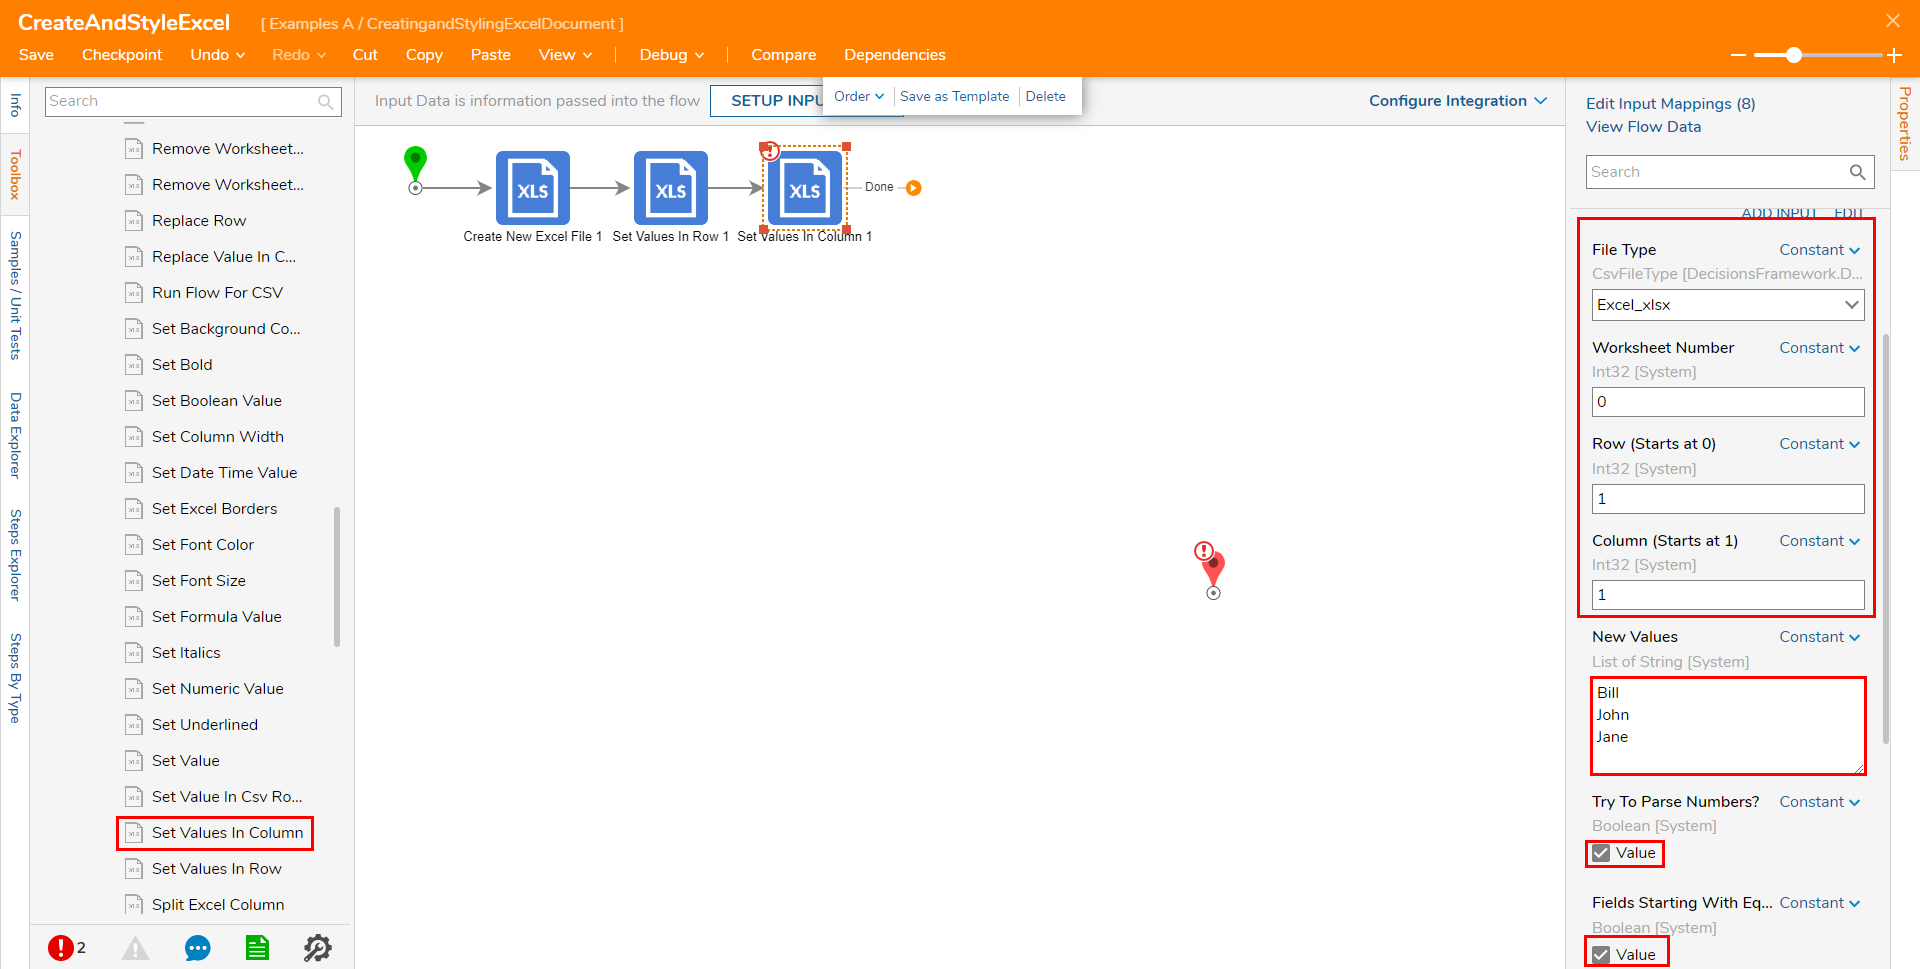
- Attach a Set Values in Column step to the Set Values in Row step. From this step's Properties tab, map Input File, File Type, Worksheet Number, Fields Starting With Equals Are Formulae and Column (Starts at 1) the exact same way as the Set Values in Row step.
- From the Set Values In Column step's Properties still, Constant map "1" to Row (Starts at 0), set Try To Parse Numbers? to True. Then, Constant map 3 names under New Values, leaving each on a separate line.
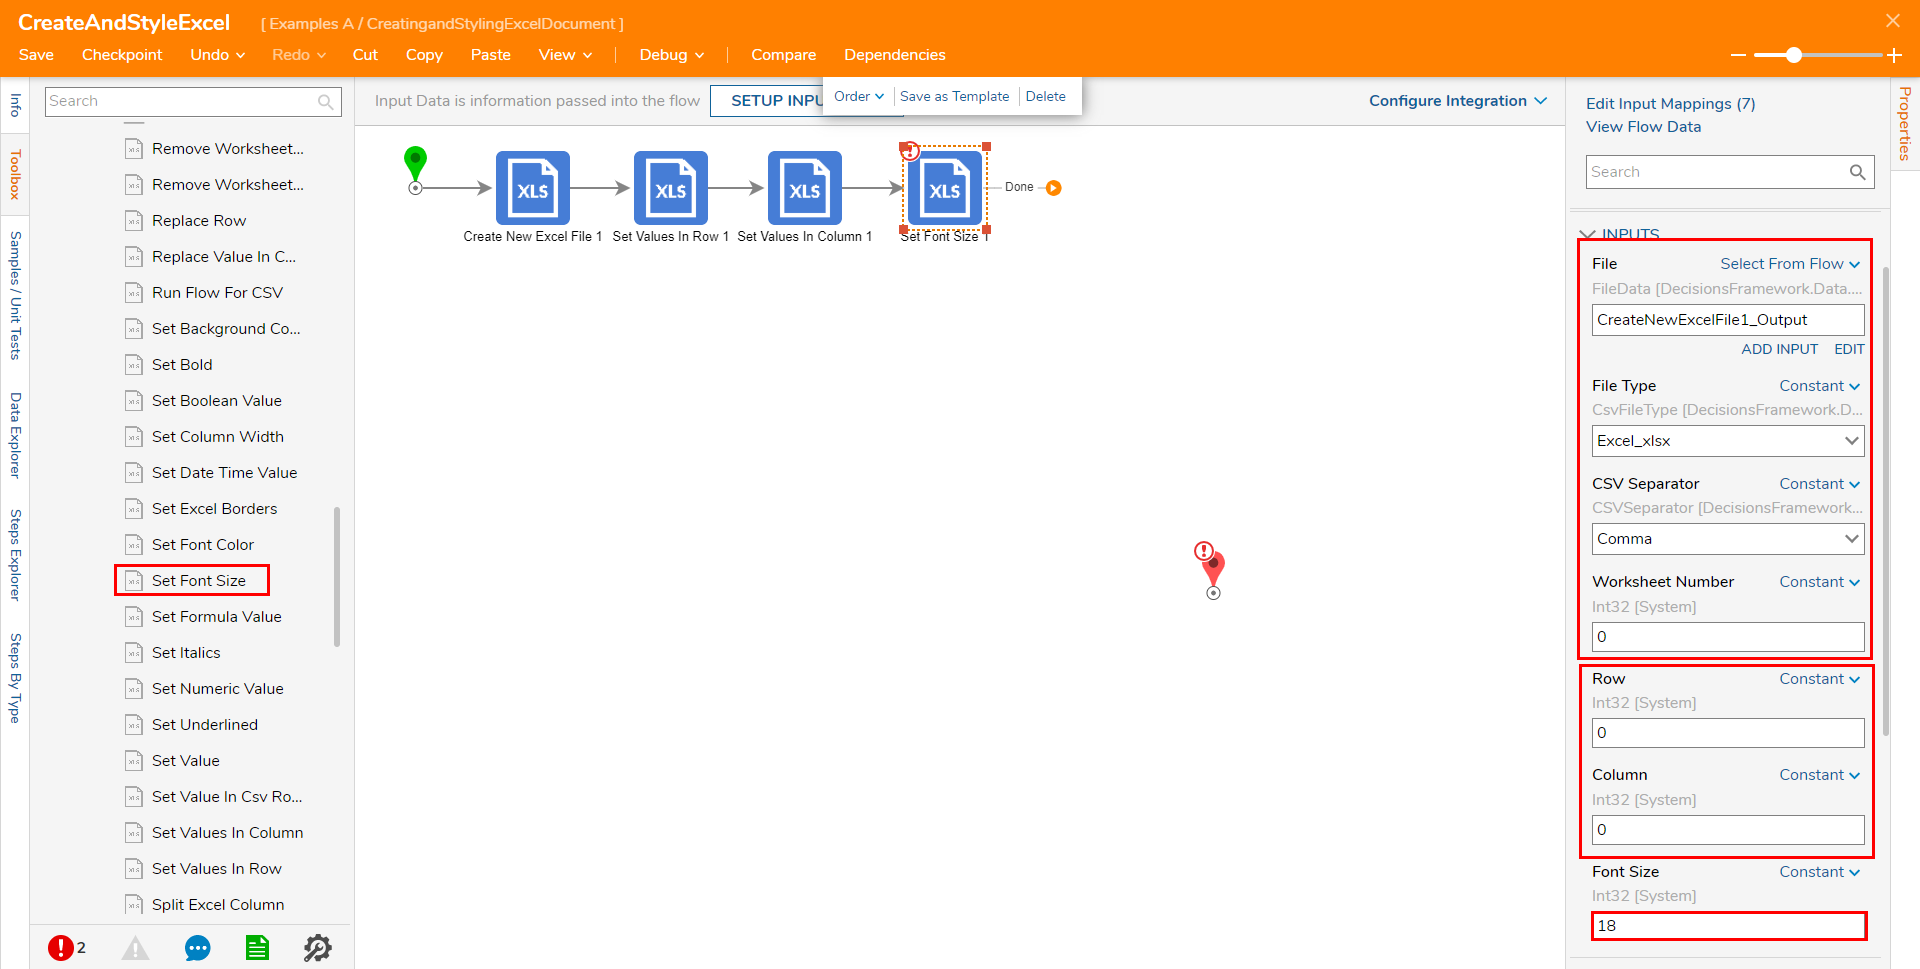
- From Toolbox > DATA > EXCEL & CSV, attach a Set Font Size step to the Set Values in Column step. Map CreateNewExcelFile1_Output to File, set File Type to Excel_xlsx from the dropdown menu, and set Worksheet Number to "0". Constant map "0" to both the Row and Column values, and set Font Size to "18".
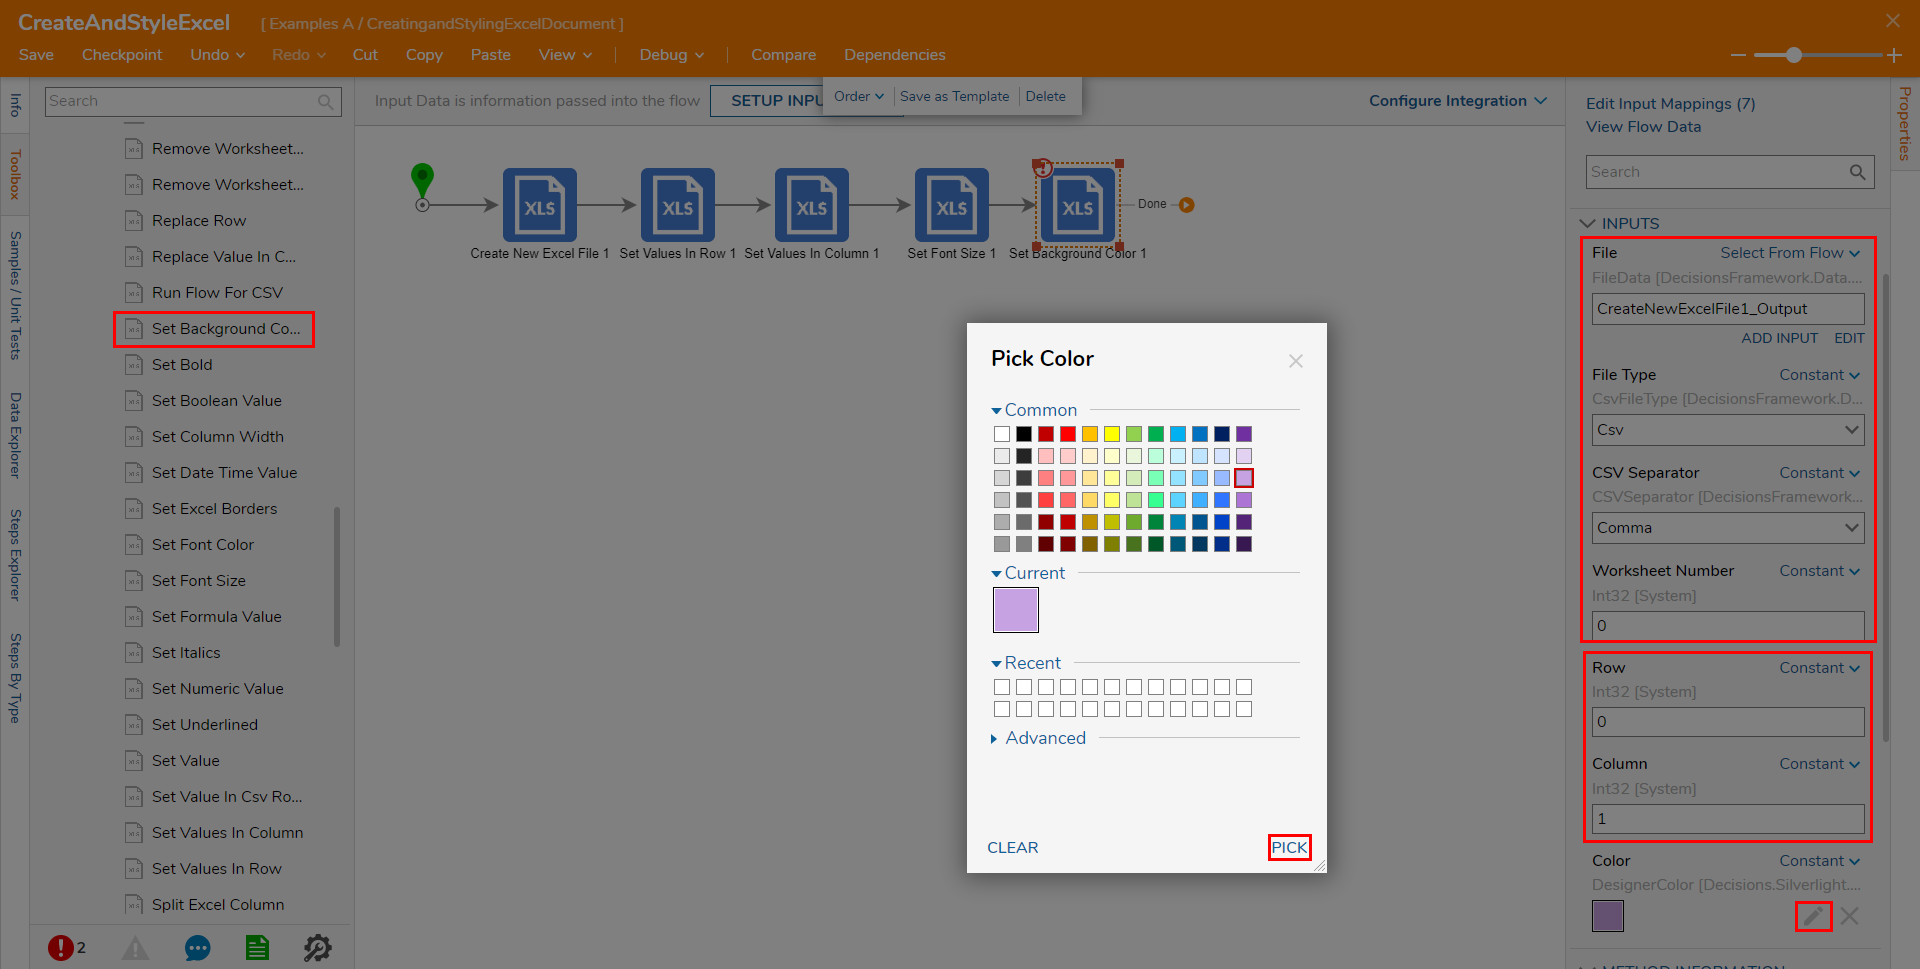
- Attach a Set Background Color step to the Set Font Size step. Set File, File Type, CSV Separator, and Worksheet Number to same values as the previous step. Constant map the value for Row as "0" and Column as "1". Then Constant map the Color using the Pick Color tool to PICK the desired Color.
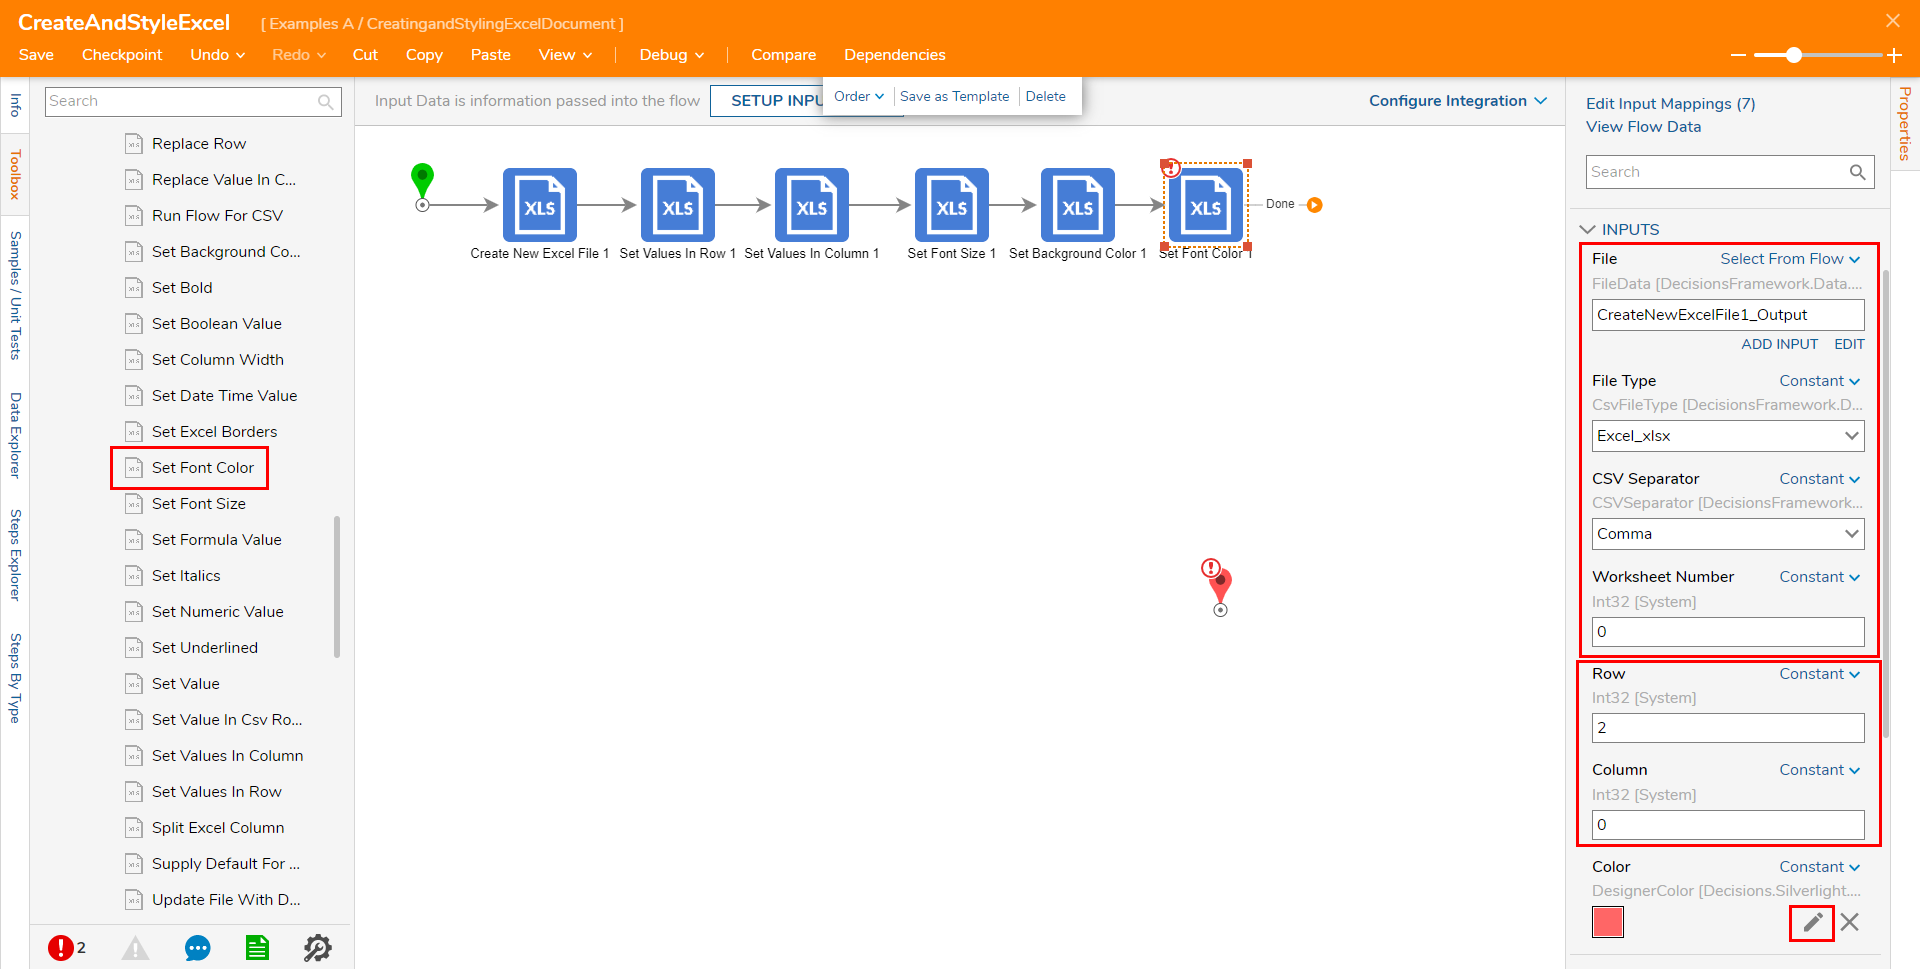
- Attach a Set Font Color step to the Set Background Color step. From its Properties tab, map File, File Type, CSV Separator, and Worksheet Number accordingly. Set Row to "2" and Column to "0". Then PICK the desired Color.
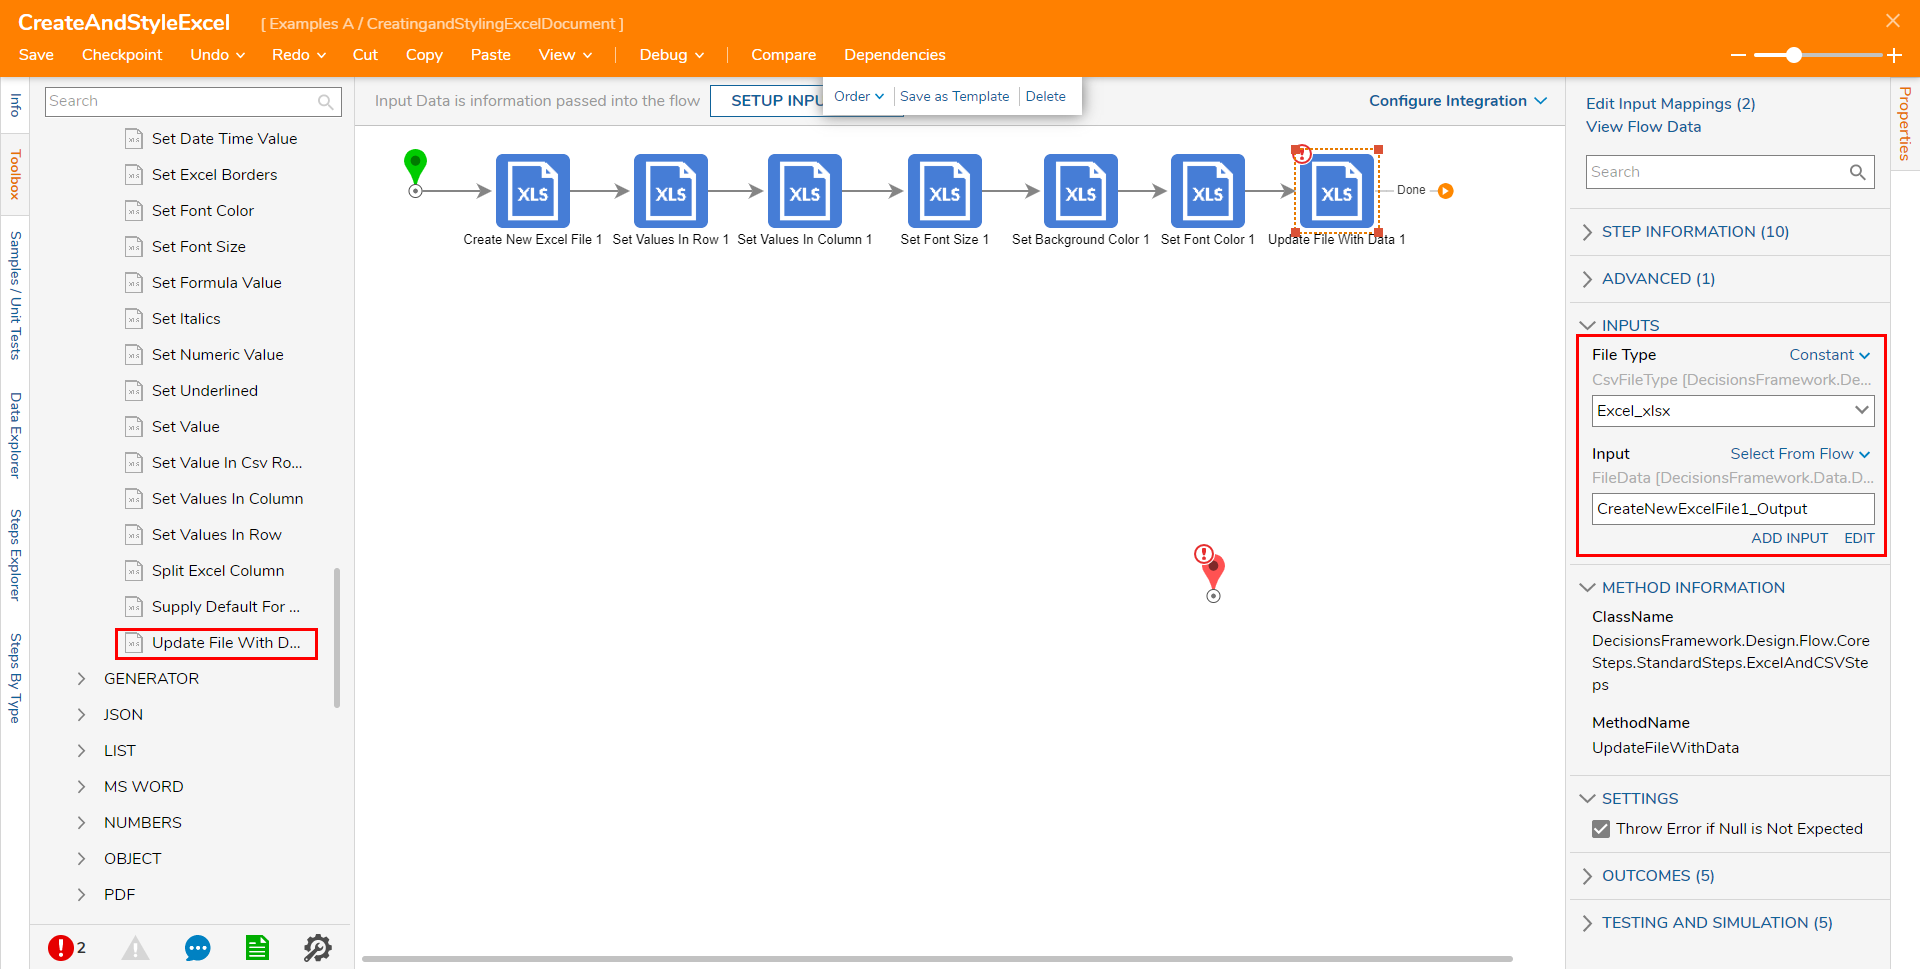
- Attach an Update File With Data step to the Set Font Color step; set File Type to Excel_xlsx, and map CreateNewExcelFile1_Output to Input.The Update File With Data step updates the chosen Excel file with Data from previous Excel steps.
From Toolbox > FAVORITE STEPS, attach a Show Form step to the Update File With Data step. From its Properties tab, select PICK OR CREATE FORM then CREATE a new Form.
This Form will be used as a method to download the created/styled Excel file.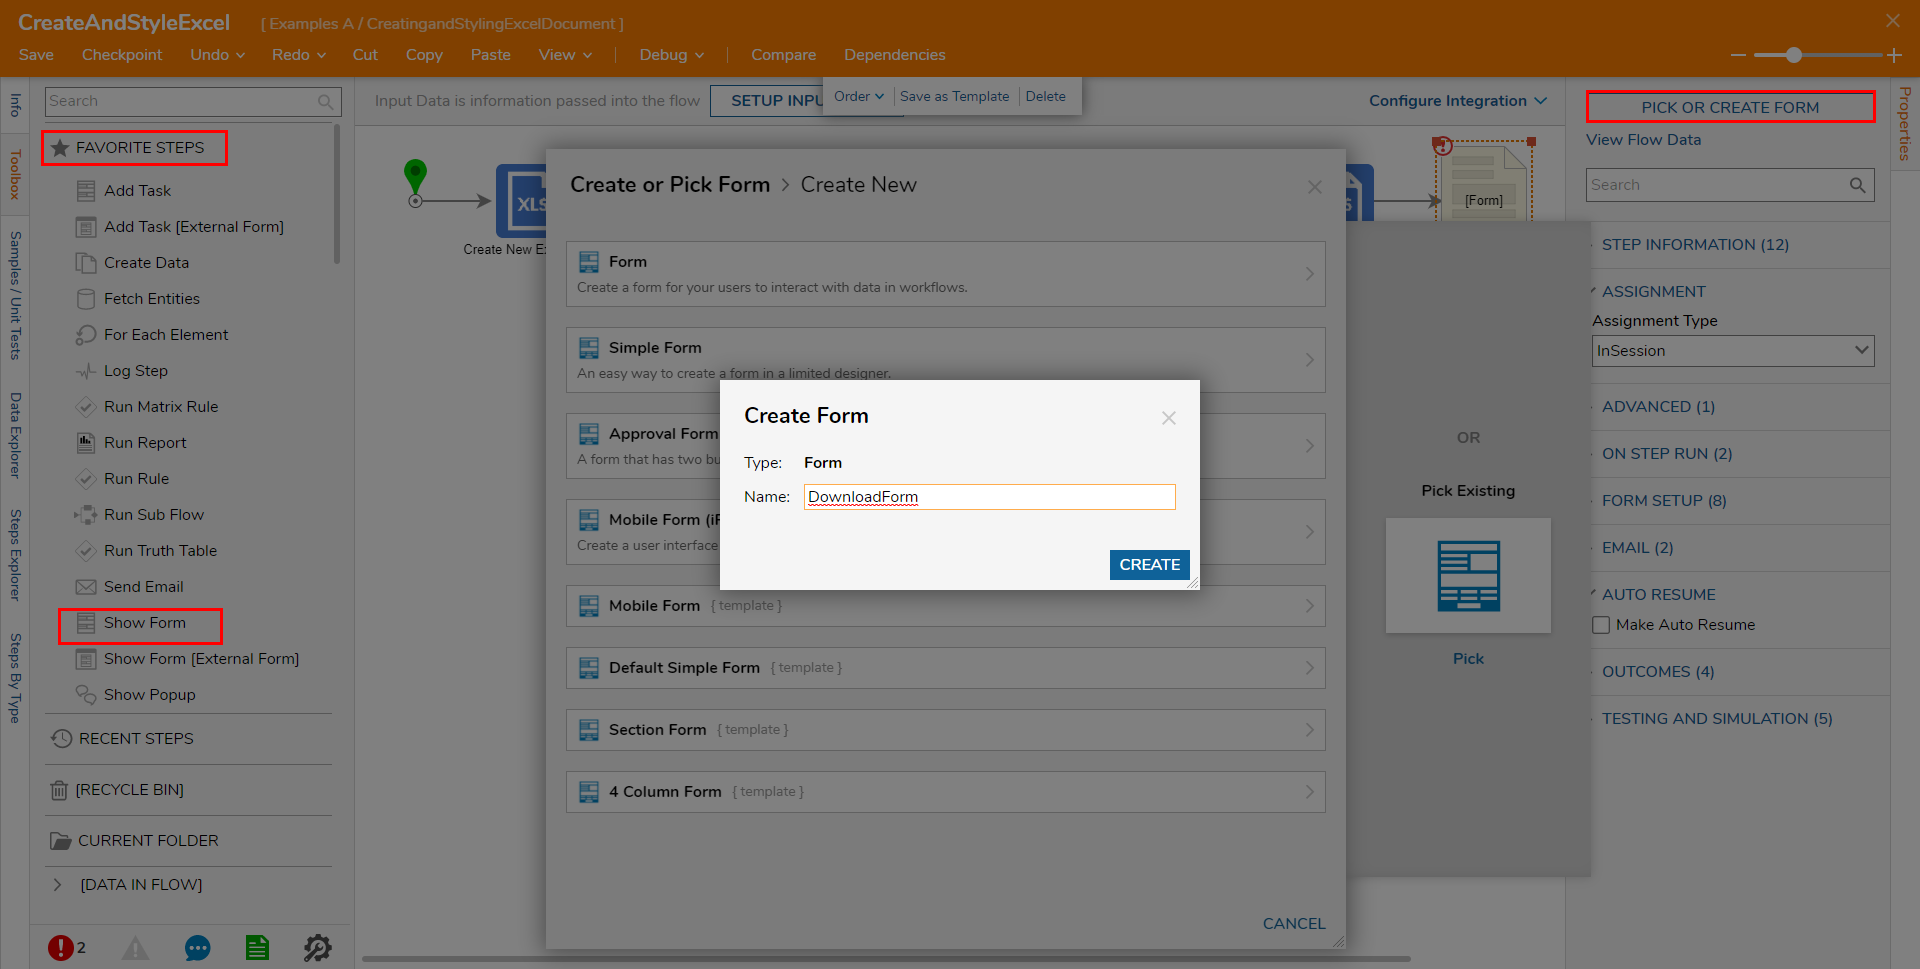
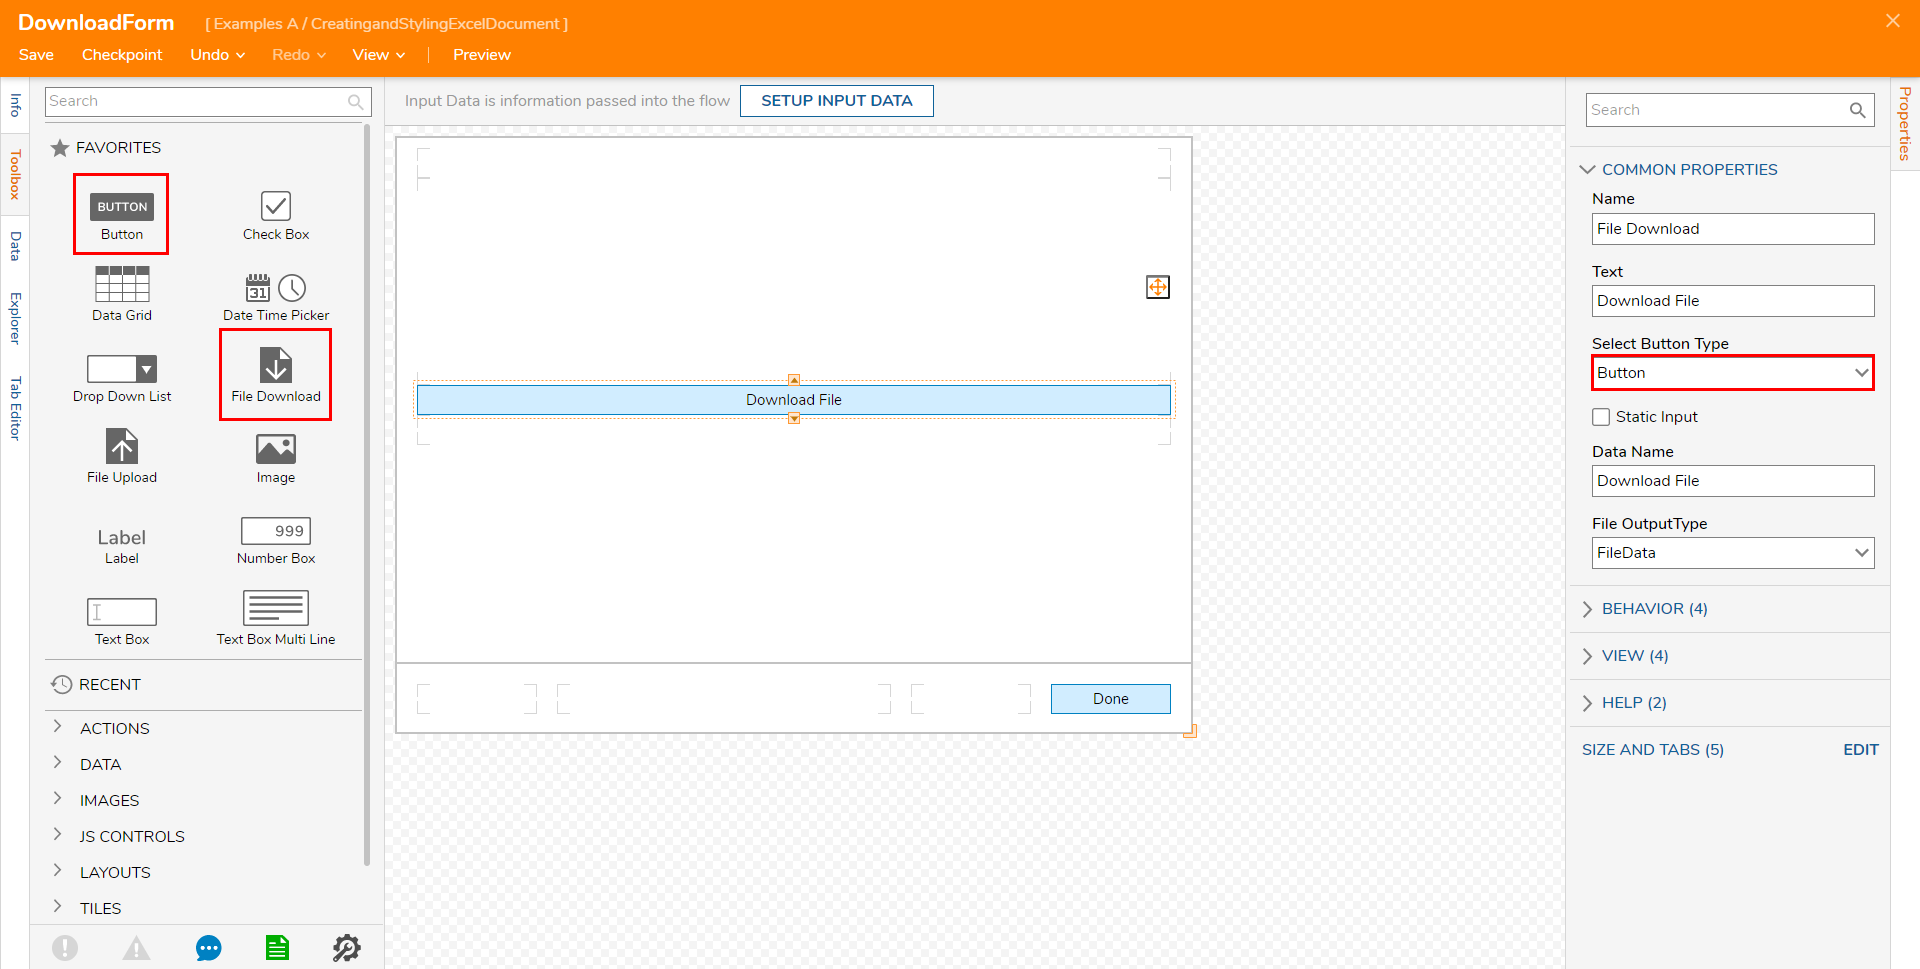
From the Form Designer, design a Form that utilizes a File Download component and a "Done" Button from Toolbox > FAVORITES. Under the Properties for the File Download component, under COMMON PROPERTIES > Select Button Type, select Button from the dropdown menu. Save and close the Form.
Back in the Flow Designer, map CreateNewExcelFile1_Output to INPUTS > Download File, then connect the Form step to the End step.
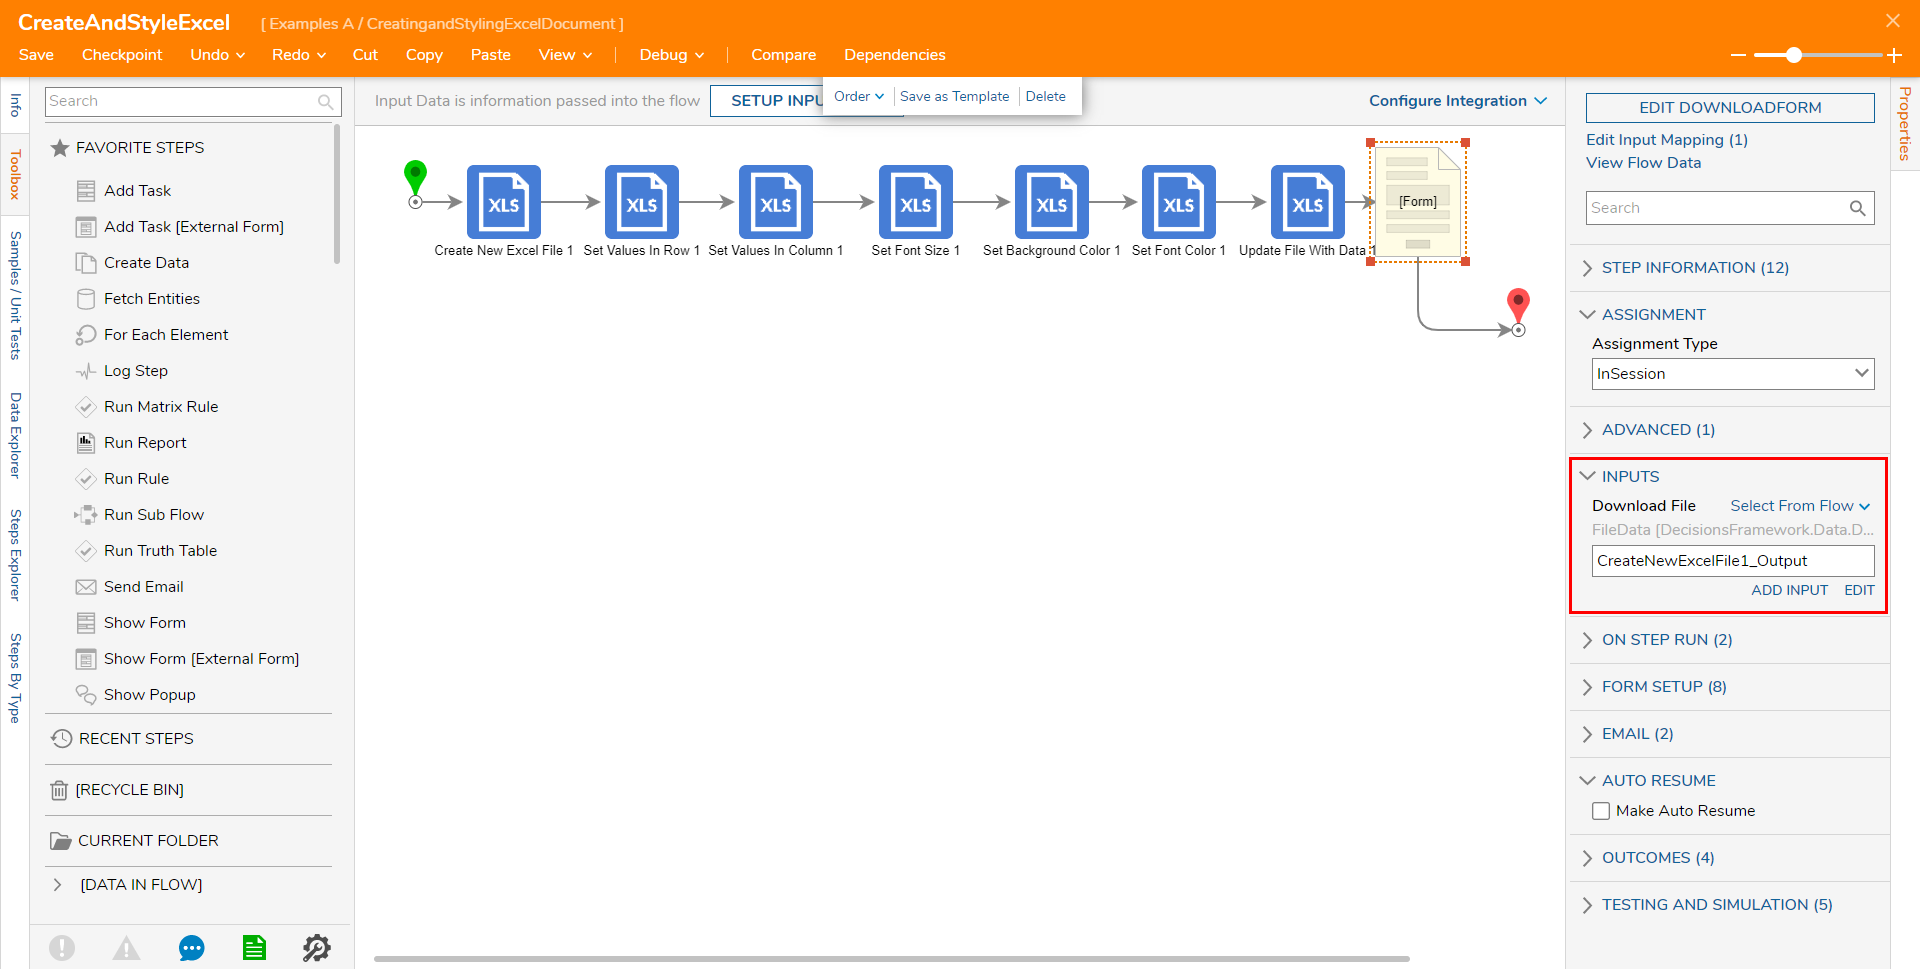
Save the Flow, then if desired, close via X.


Debug
- From the Flow Designer, select Debug on the top action bar.
- Click START DEBUGGING.
- When the Flow reaches the Form step, click File Download.

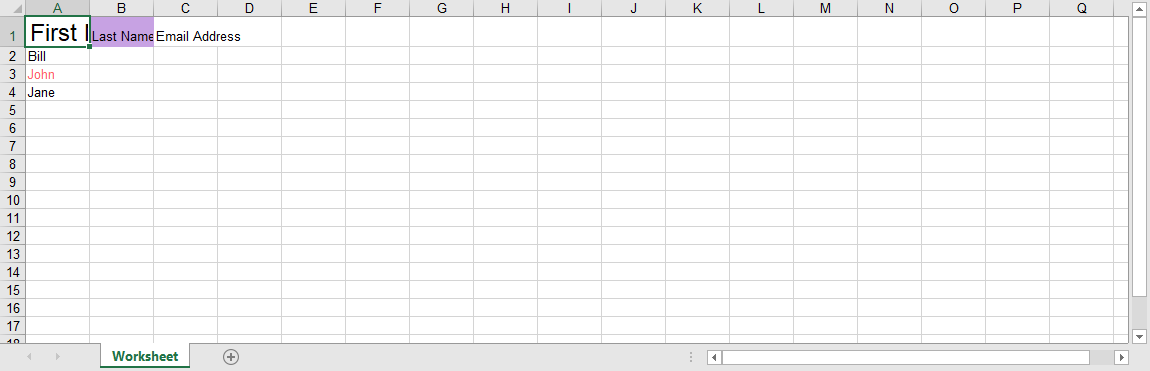
- Open the downloaded Excel file to verify that all configured styles were applied to the Excel file.


Was this article helpful?