Controlling Form Fields with Visibility Rules
- 26 Sep 2022
- 3 Minutes to read
- Print
- DarkLight
Controlling Form Fields with Visibility Rules
- Updated on 26 Sep 2022
- 3 Minutes to read
- Print
- DarkLight
Article Summary
Share feedback
Thanks for sharing your feedback!
Overview
The following features are considered legacy content.
It is not recommended to introduce these features to new projects. Support for these features have been maintained just to grant time for projects to shift away from legacy content towards the new preferred method: Active Form Flows.
Failure to do so may result in losing work involving legacy content in the future.
On a Form, Decisions has Visibility Rules to control if a form component is shown/hidden and enabled/disabled depending on what is input by the end-user.
Hide/Show Visibility Rule
- In a Designer Folder, select the CREATE FLOW button. When the Create Flow dialog appears, select Flow, name the Flow, then select CREATE.
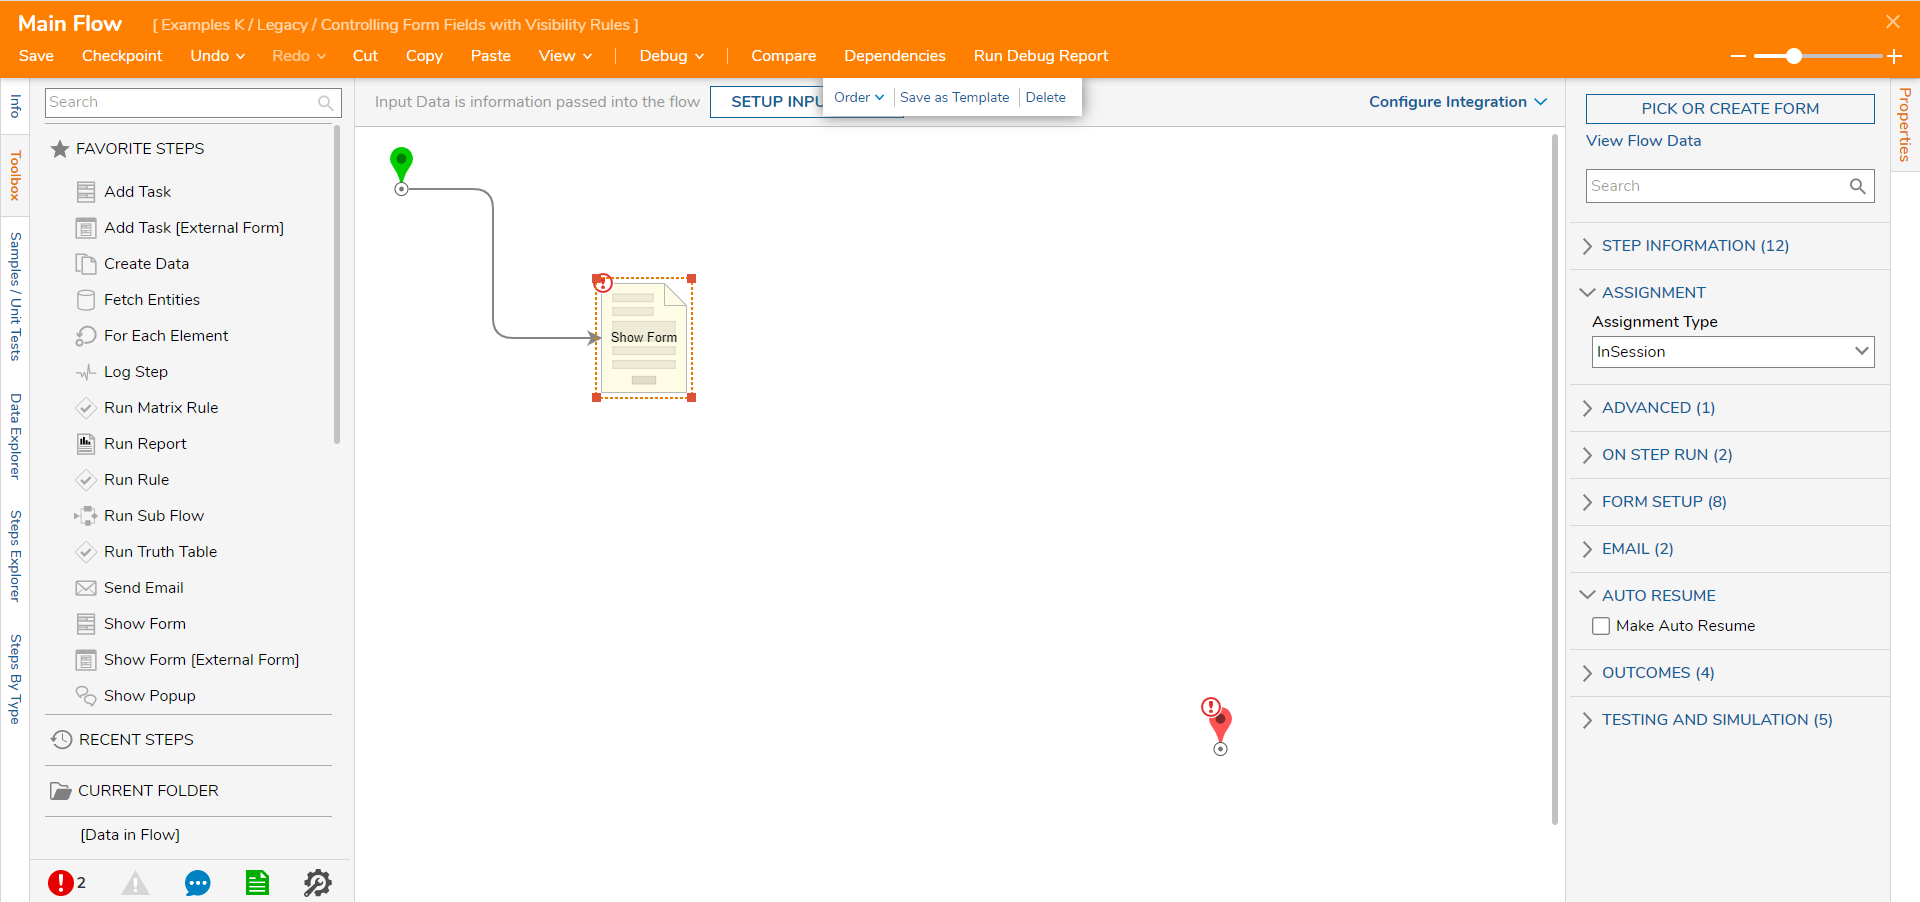
- Select the Done outcome path of the Start step.
- In the Add After dialog, select the Show Form step in the Favorite Steps category. Select ADD.
- With the Show Form step selected, in the Properties panel, select PICK OR CREATE FORM. Select CREATE under Create New. Choose Form. Name the Form. Select CREATE.
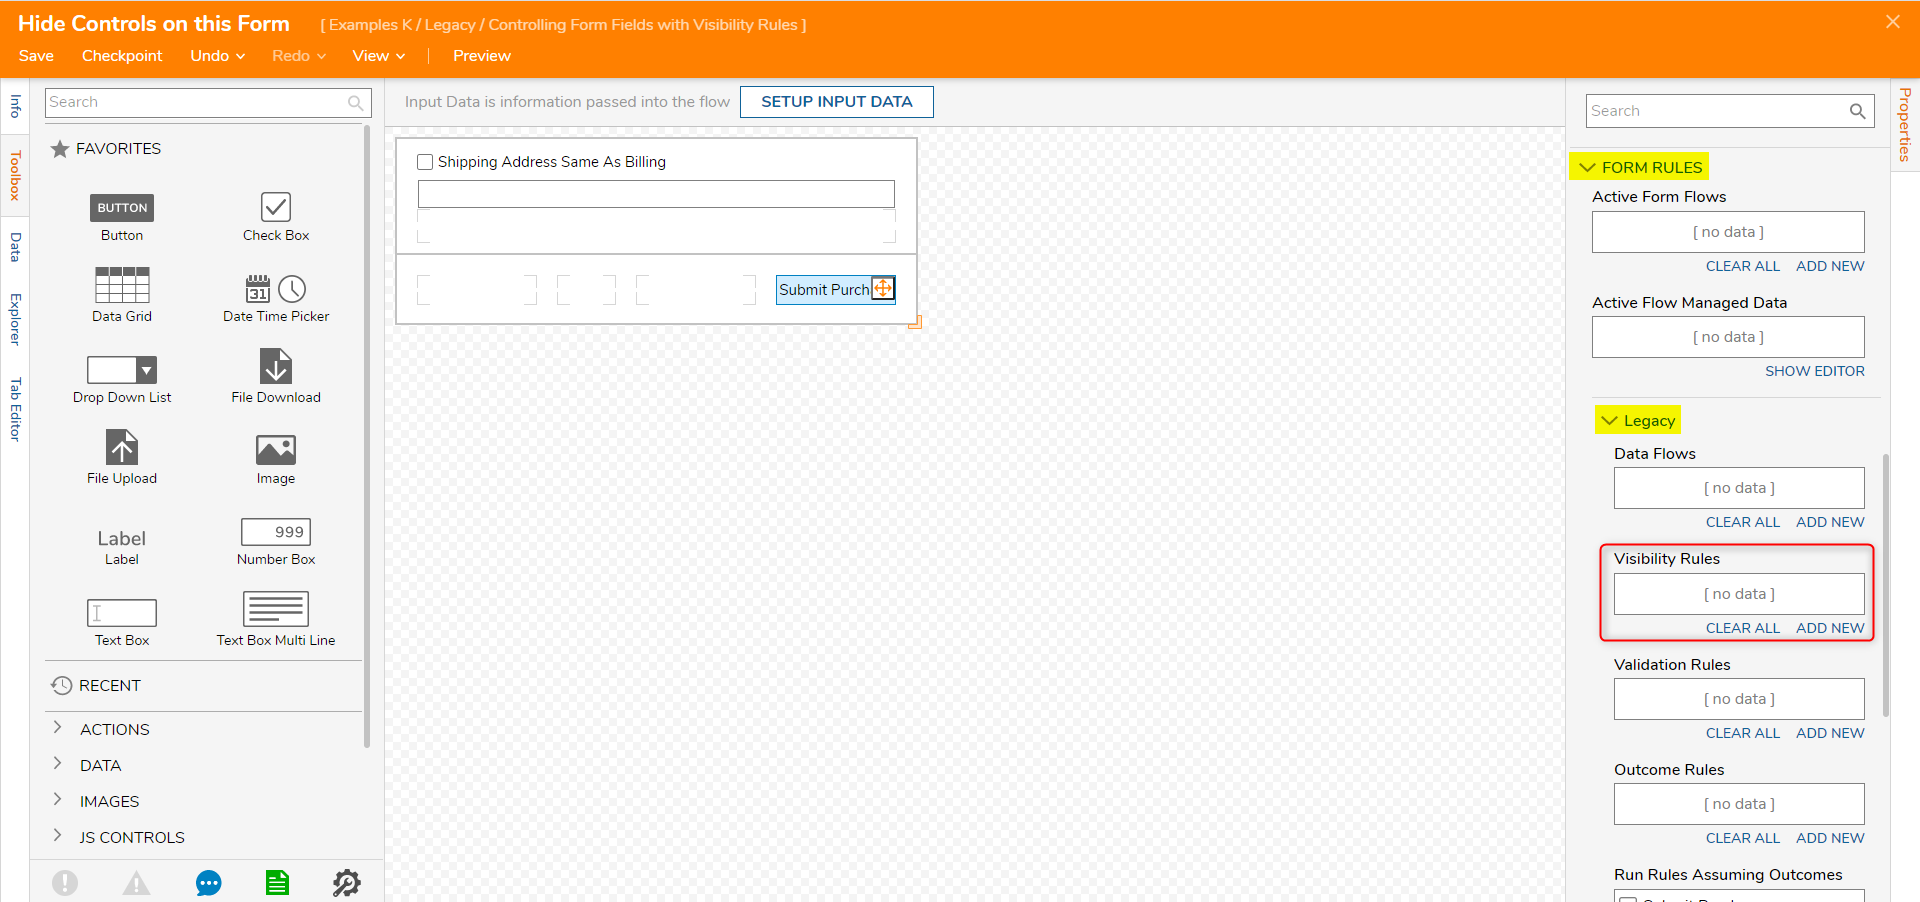
- In the Form Designer, add a Check Box (Shipping Address Same As Billing), a Text Box (Address), and a Button (Submit Purchase).
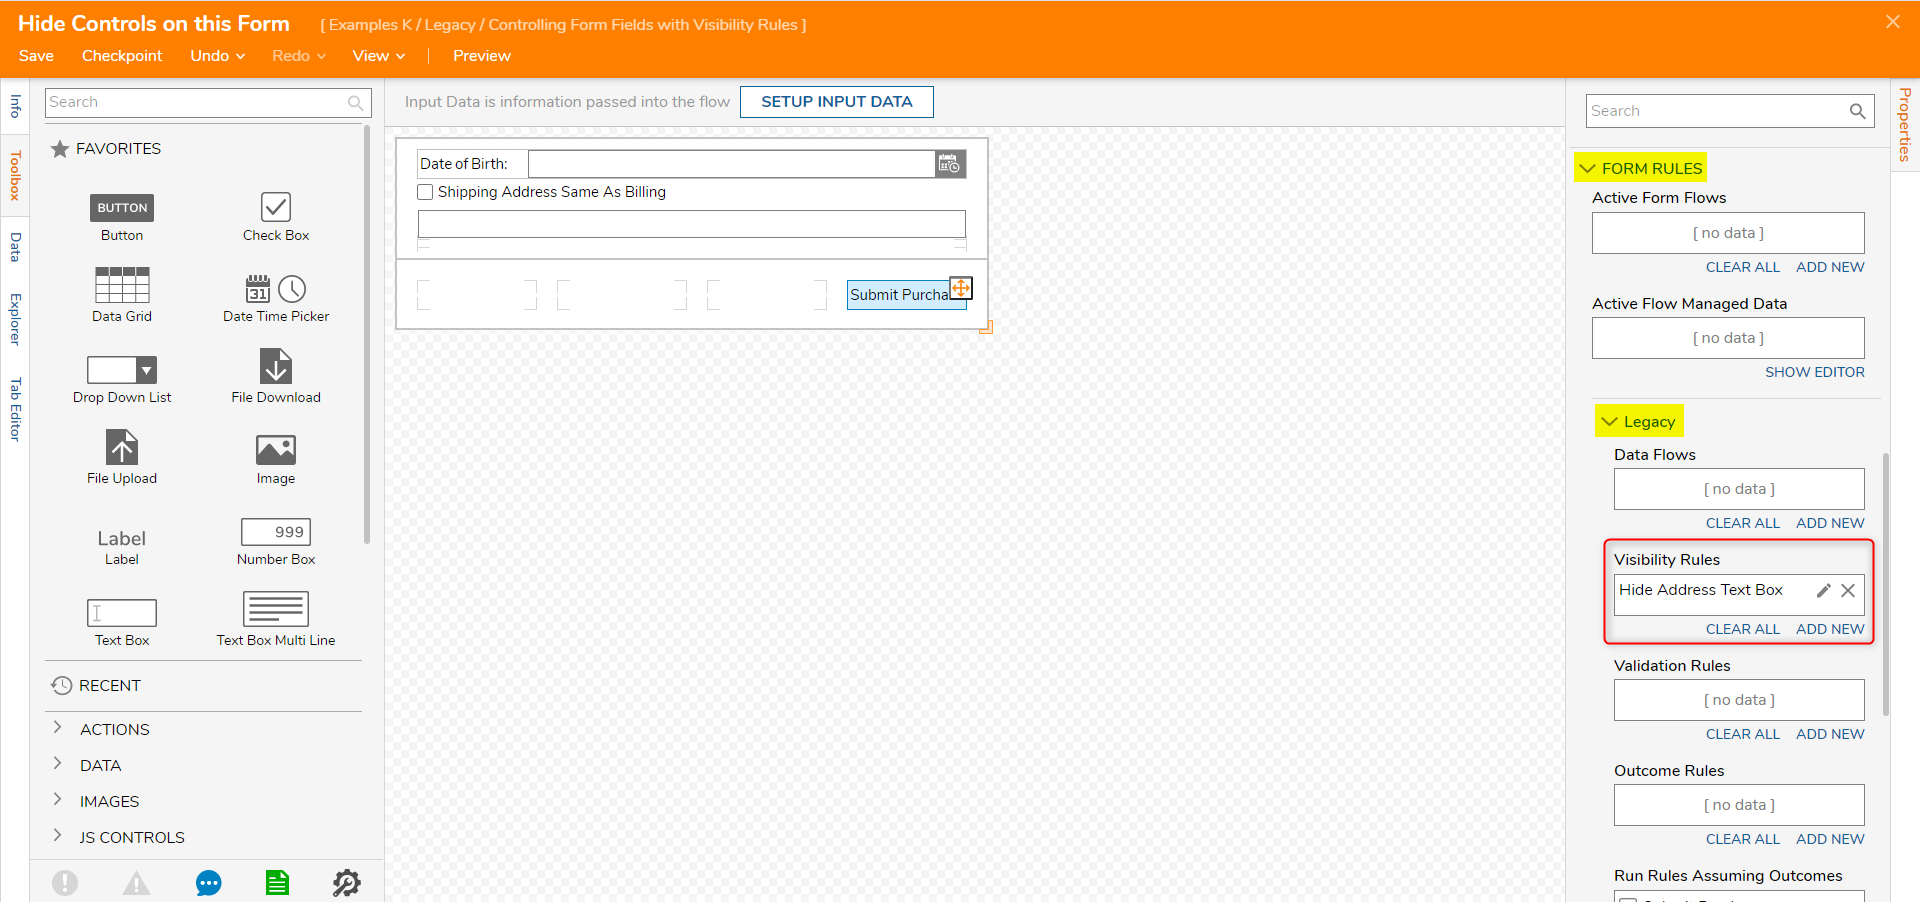
- Select the workspace, then navigate to the Properties panel. Under Form Rules > Legacy > Visibility Rules, select ADD NEW.
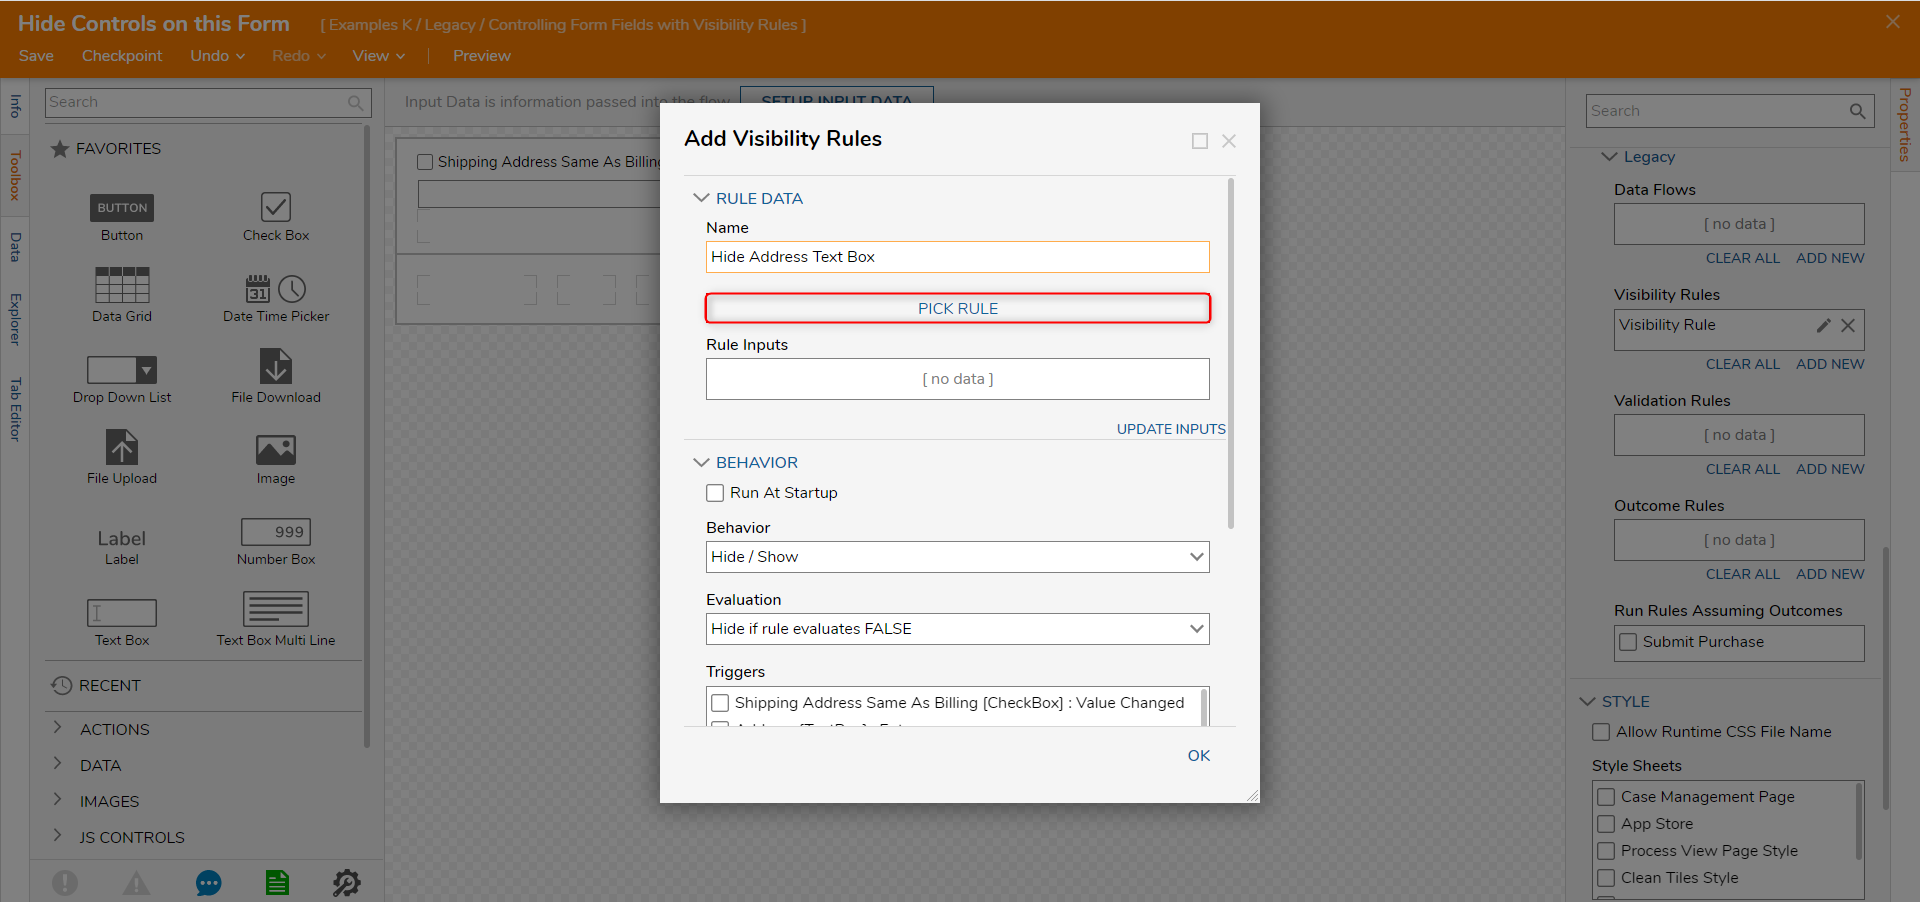
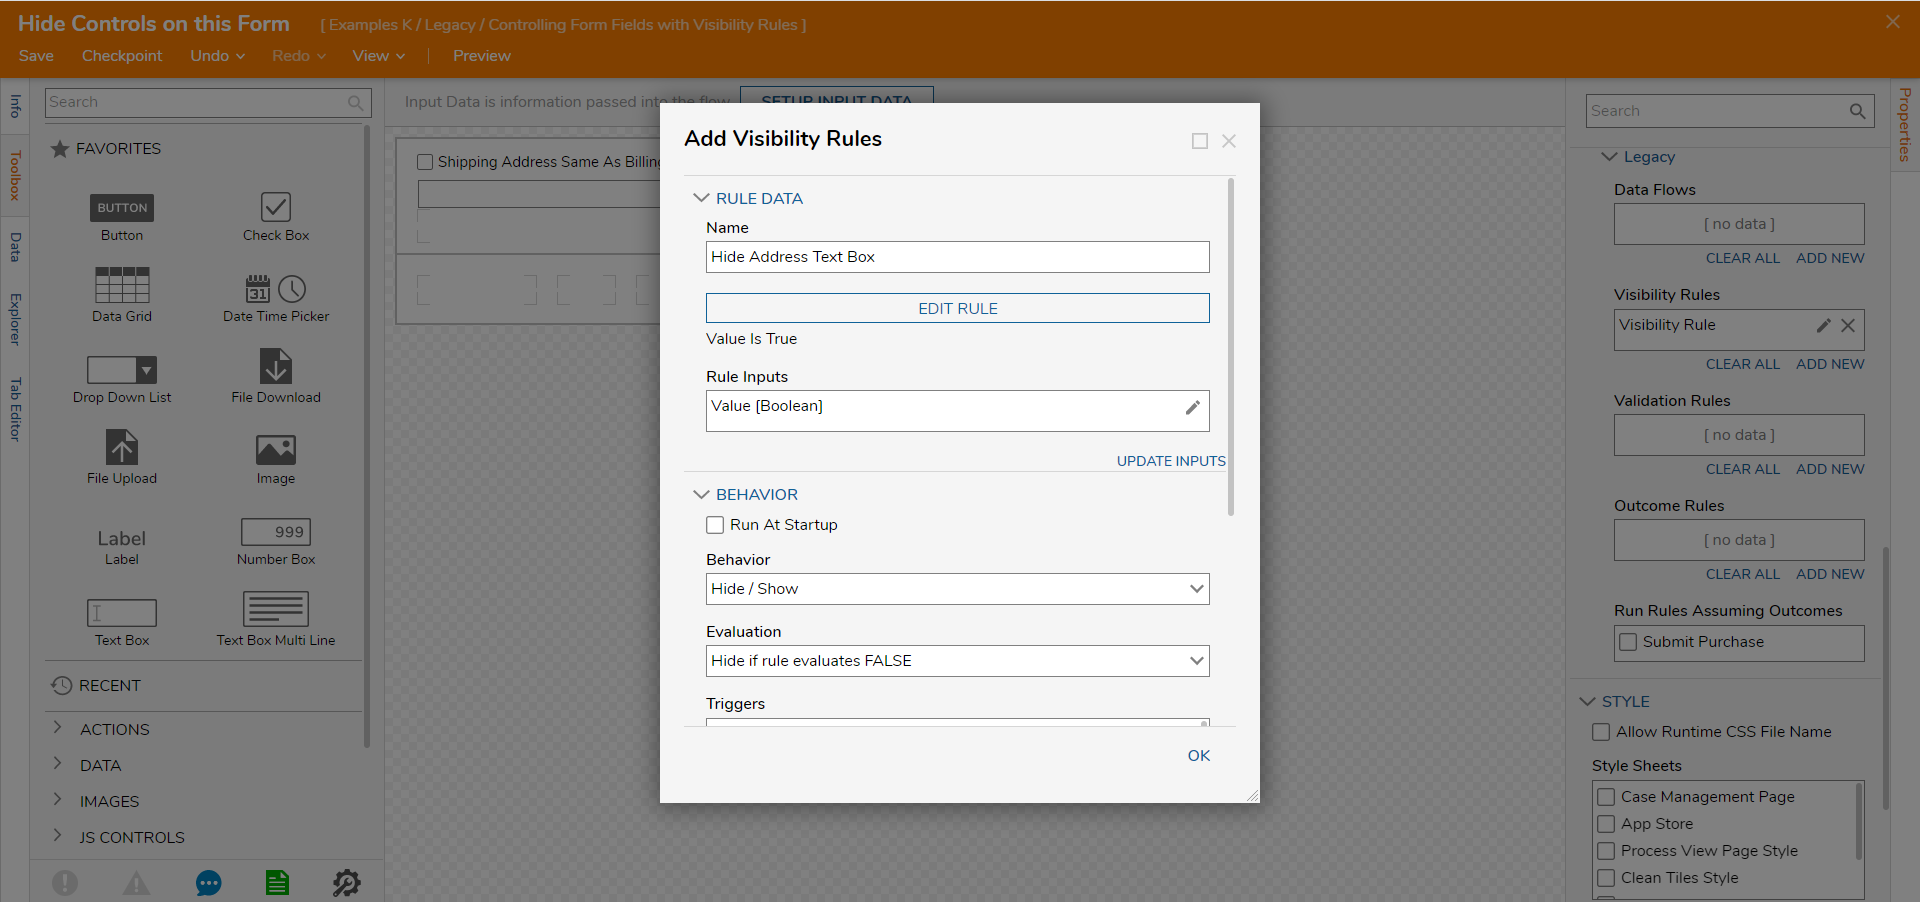
- In the Add Visibility Rules dialog, name the Rule and select PICK RULE.
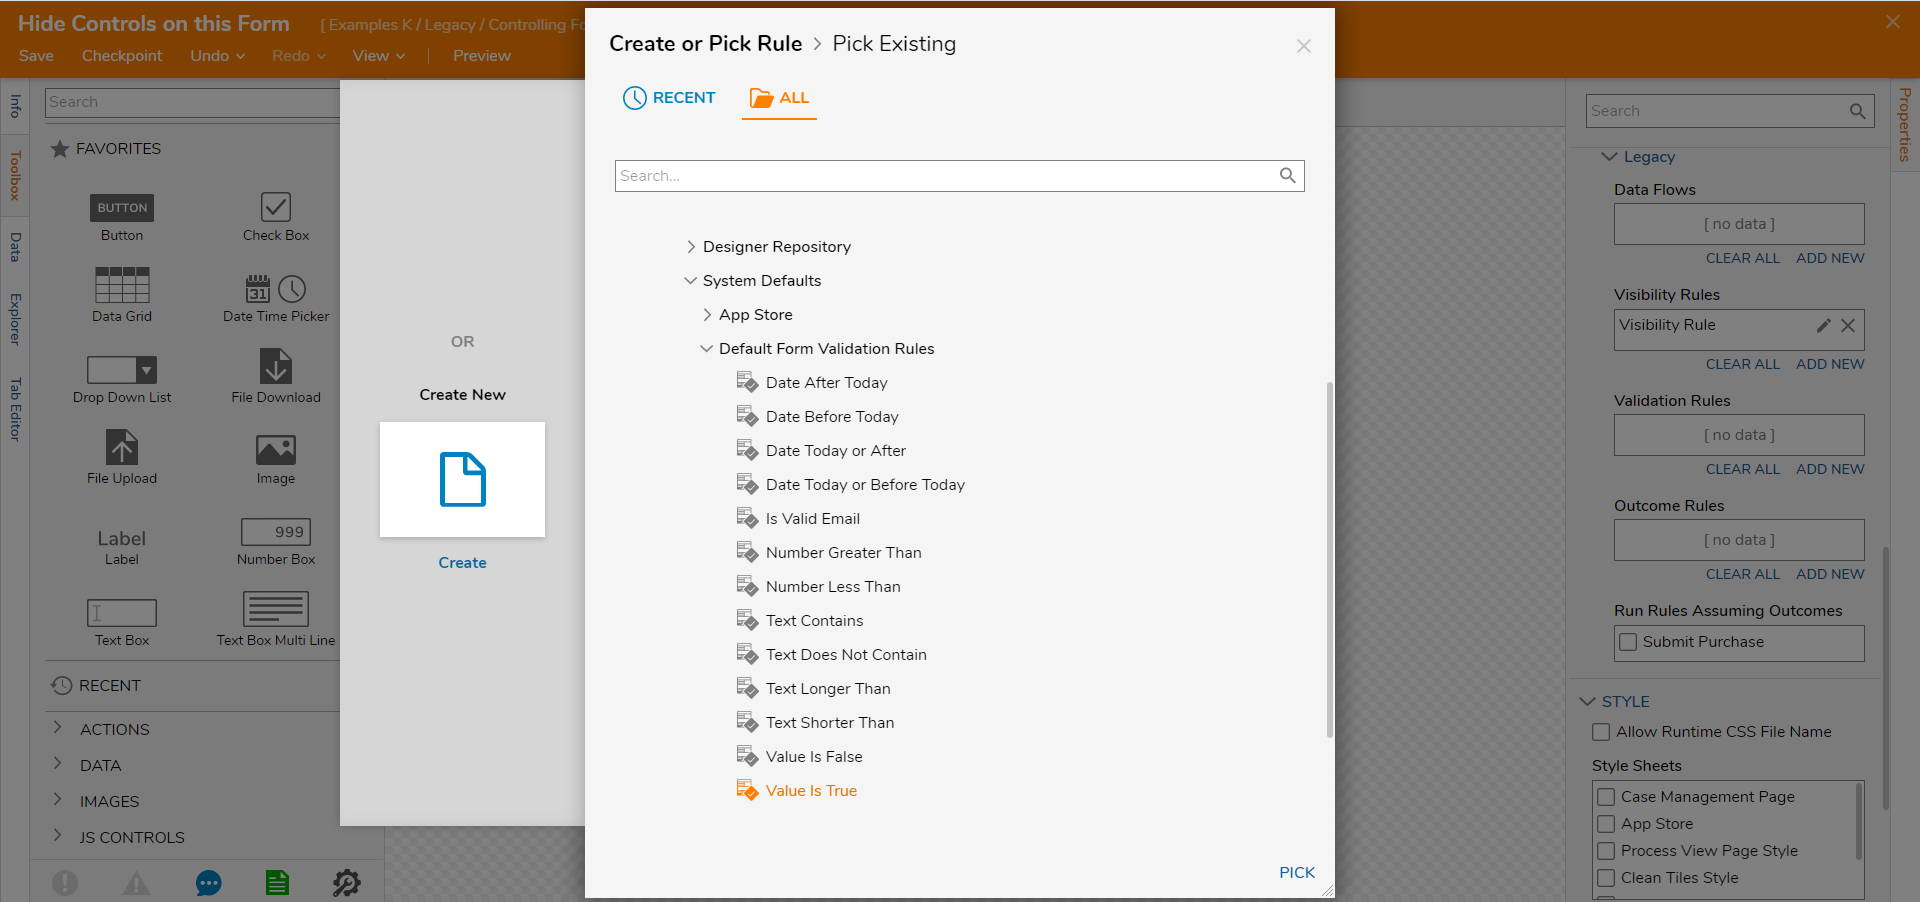
- In the Pick or Create Rule dialog, select Pick Existing. Navigate to All > System > Designers > Catalog > System Defaults > Default Form Validation Rules choose Value is True, select PICK.
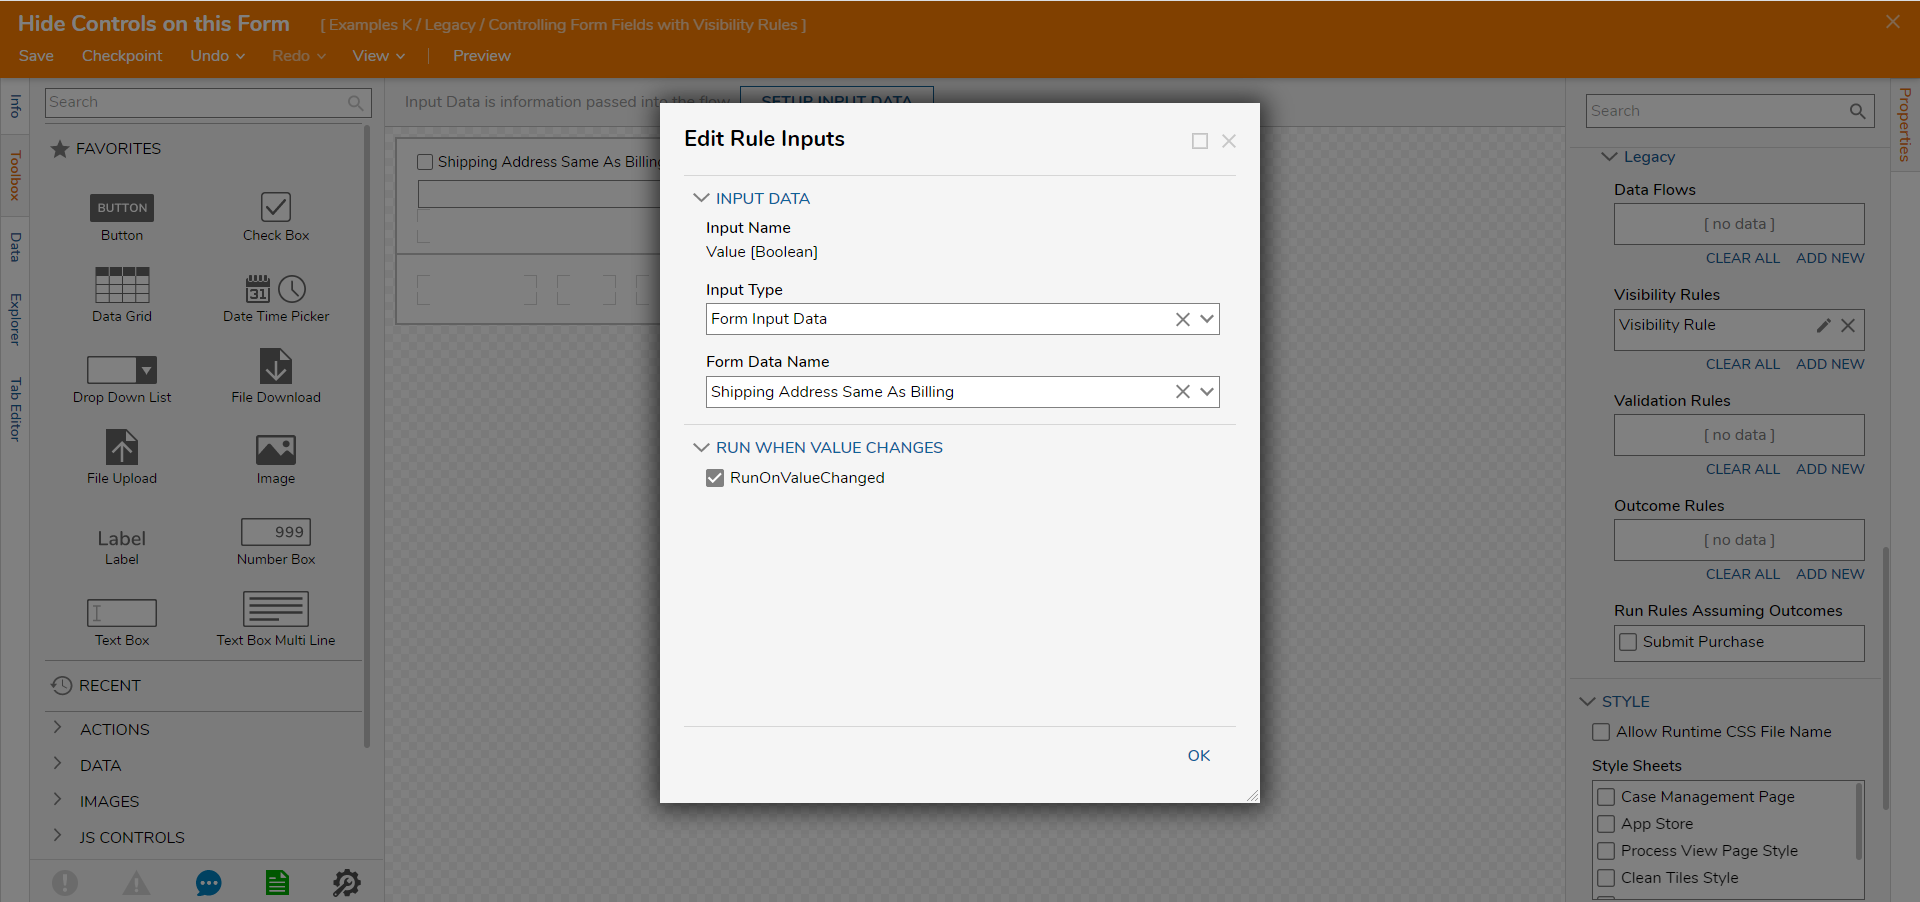
- Back in the Add Visibility Rules dialog, select Update Inputs. Within the Rule Inputs box, choose the input and select Edit [pencil shaped icon].
- In the Edit Rule Inputs dialog, from the Input Type drop-down list, select Form Component. To indicate which field on the Form that the visibility rule will be Triggered By, select "Shiping Address Same As Billing" from the Form Data Name drop-down list.
- Select Ok.
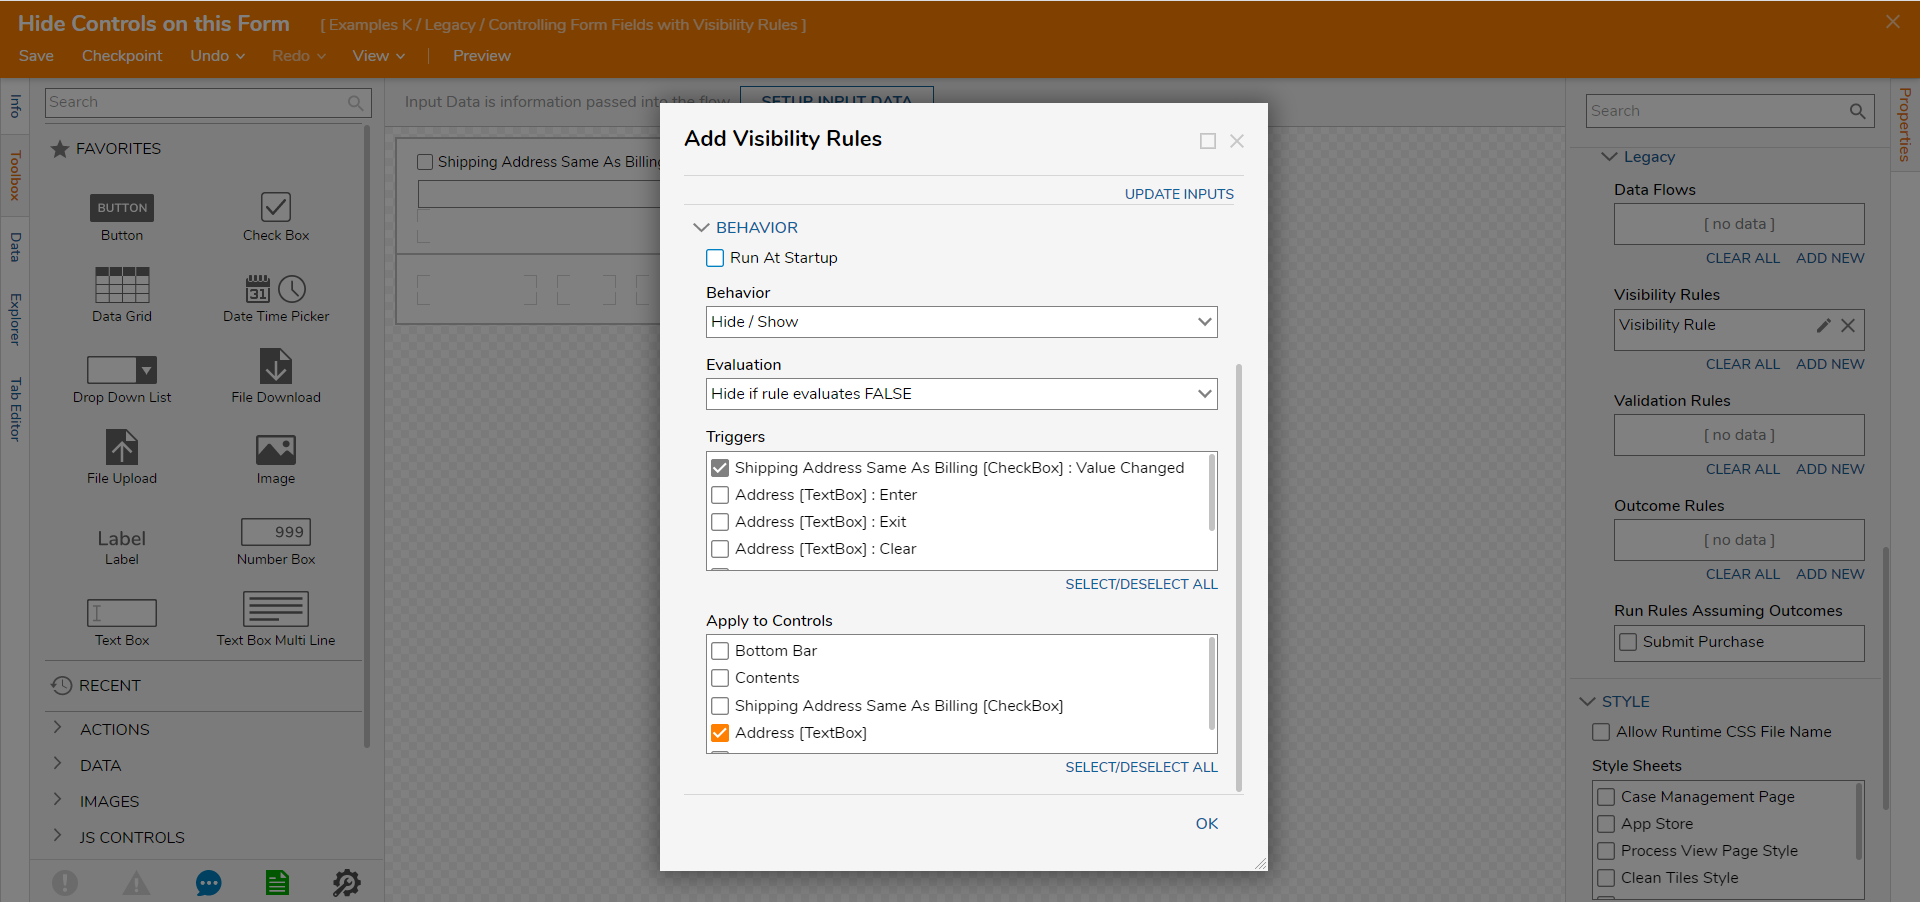
- Back in the Edit Visibility Rules dialog, in the Behavior drop-down list, select Hide/Show.
- Change the Evaluation to Hide if rule Evaluates as TRUE.
- Under Triggers, select the "Shipping Address Same as Billing" CheckBox.
- Finally, under Apply to Controls, select the control to hide, "Address" [TextBox].
- Select Ok.
- Save and close the Form Designer.


Debug: Hide/Show
- In the Flow Designer, select Debug in the top action panel.
- Select START DEBUGGING.
- Set the Check Box to True and False to Show/Hide the Address Text Box.

Disable/Enable Visibility Rule
- Edit the Form created in the first example. Add a Date Time control (DoB) and a Label (Date of Birth).
- In the Properties panel, under Form Rules > Legacy > Visibility Rules, select Add New.
- In the Add Visibility Rules dialog, name the Rule and select PICK RULE.

- In the Rule Designer, select Setup Input Data.

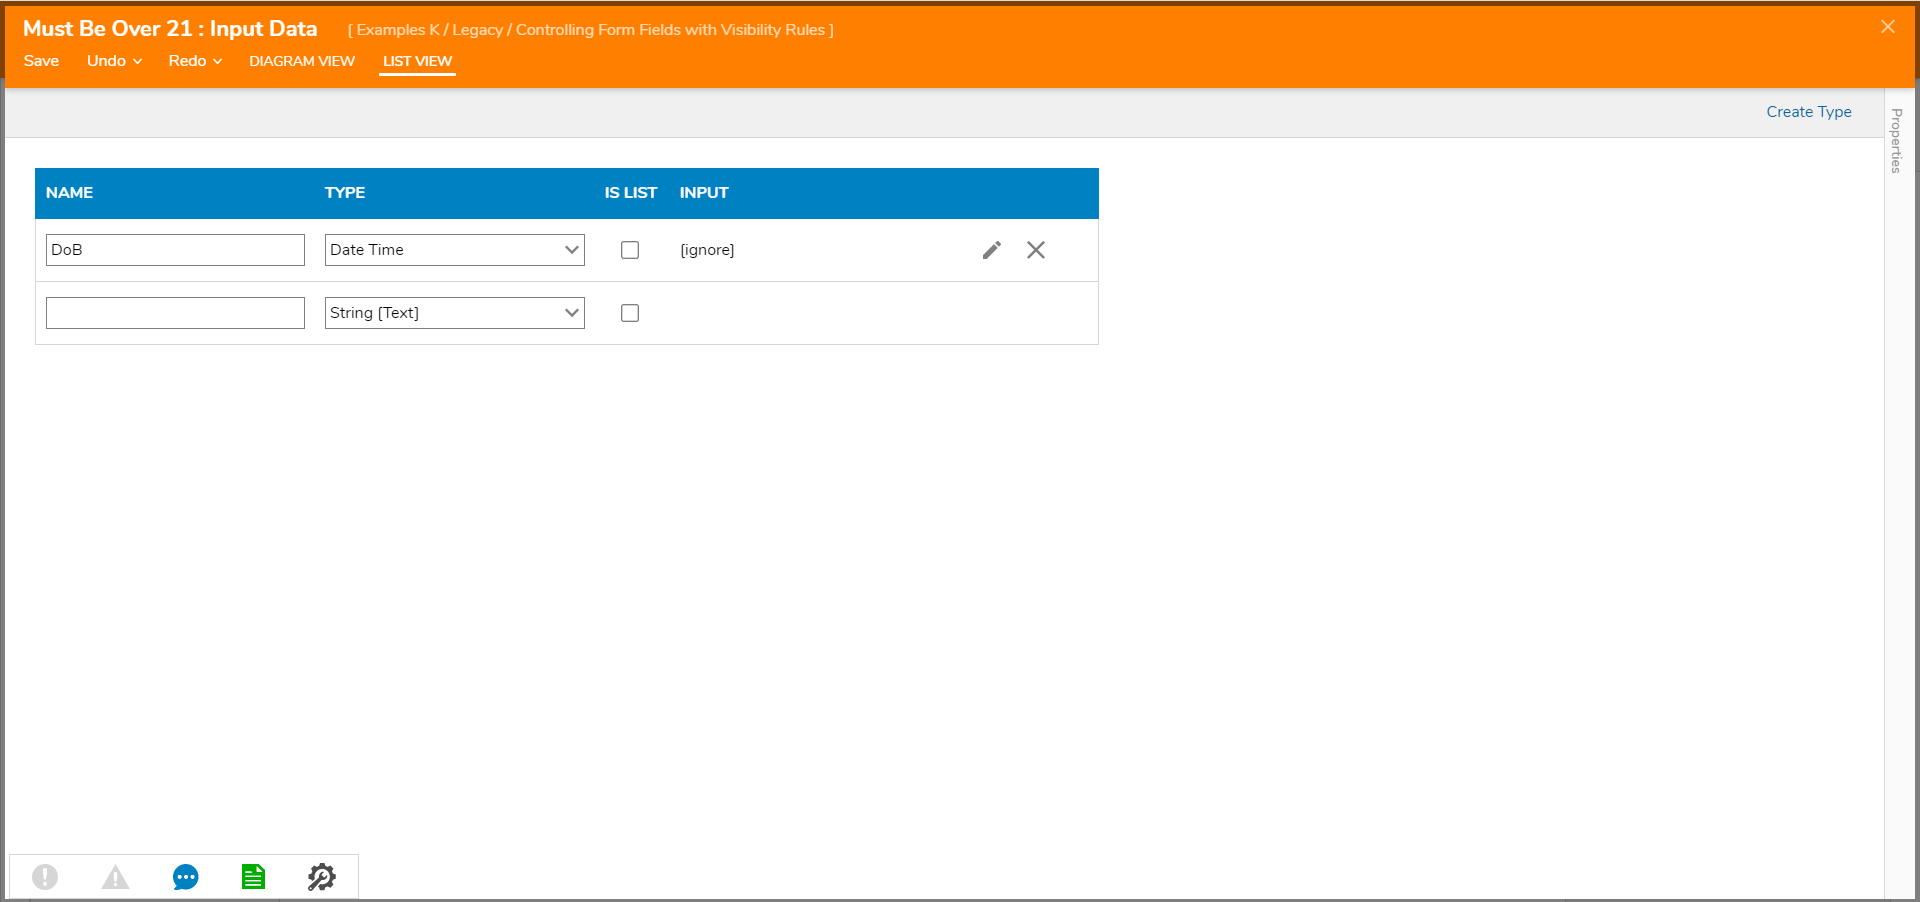
- In the Data Definitions dialog, name the input "DoB" and set the Type to DateTime. Select Save, click 'X' to close.
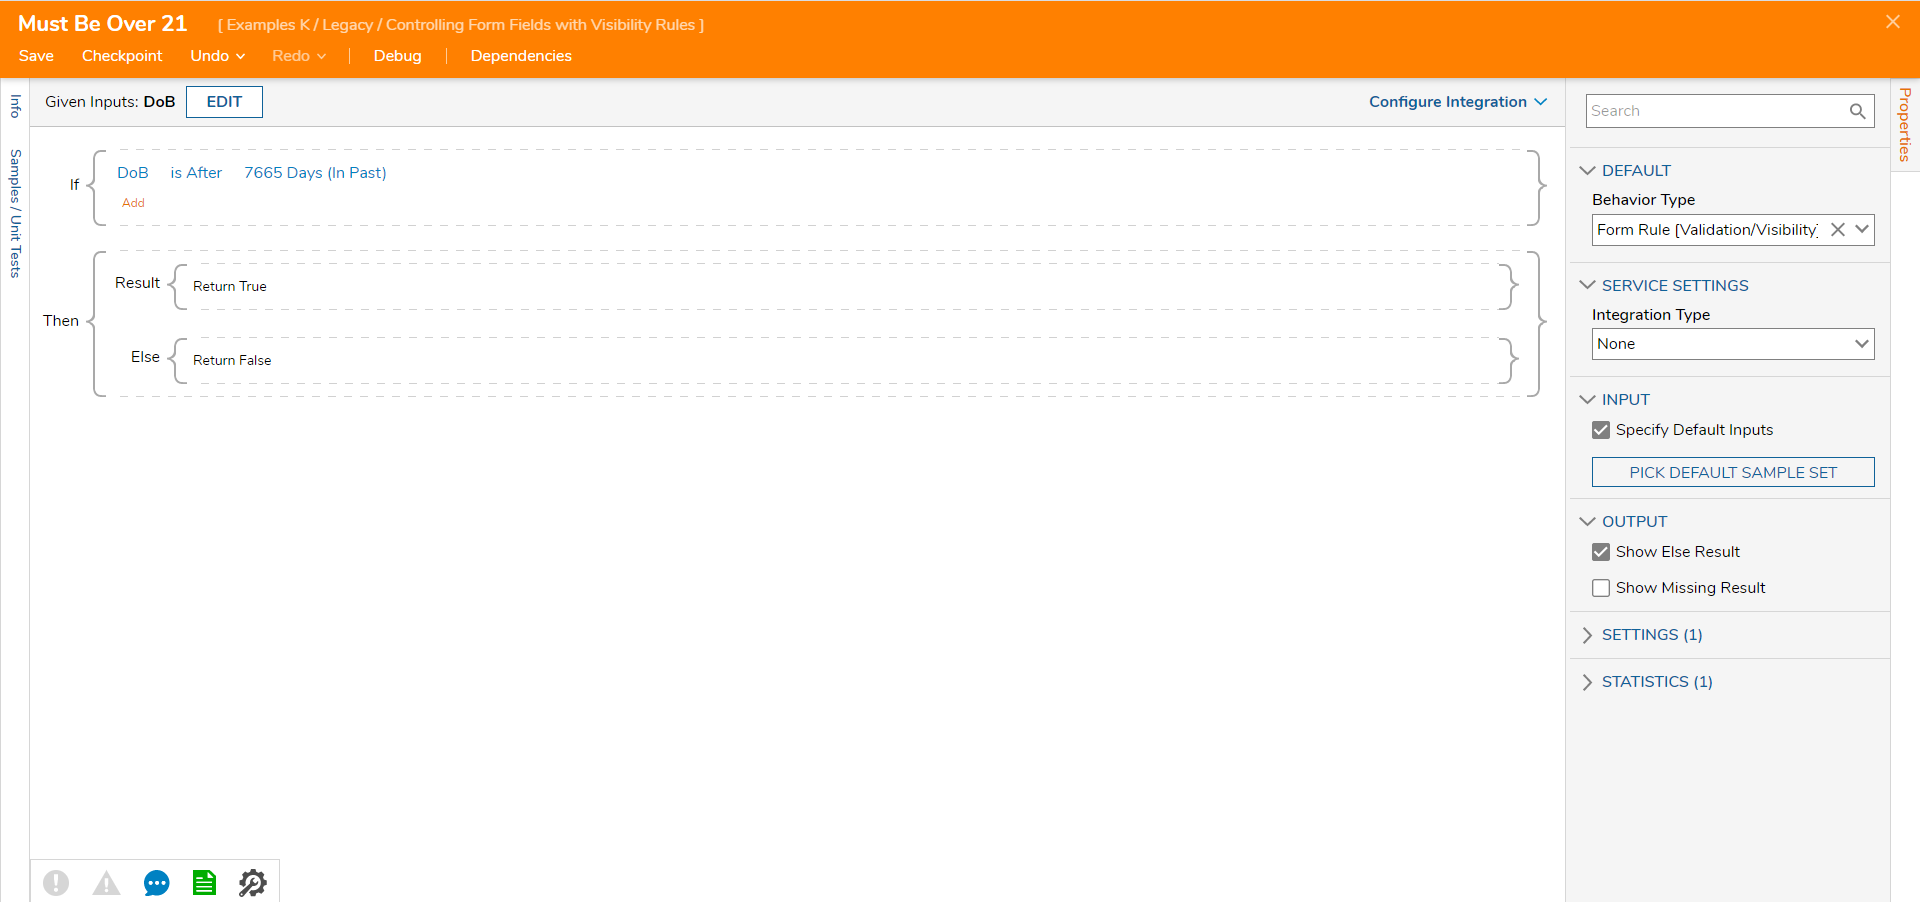
- Set the rule to read: If the DoB is After 7665 Days (in Past), then Return True. For this example, it is assumed that 21 years = 7,665 days. Save and close the Rule Designer.To learn more about building rules, navigate to the Create a Rule article.
- Back in the Add Visibility Rules dialog, select Update Inputs. Within the Rule Inputs box, choose the input and select Edit [pencil shaped icon].
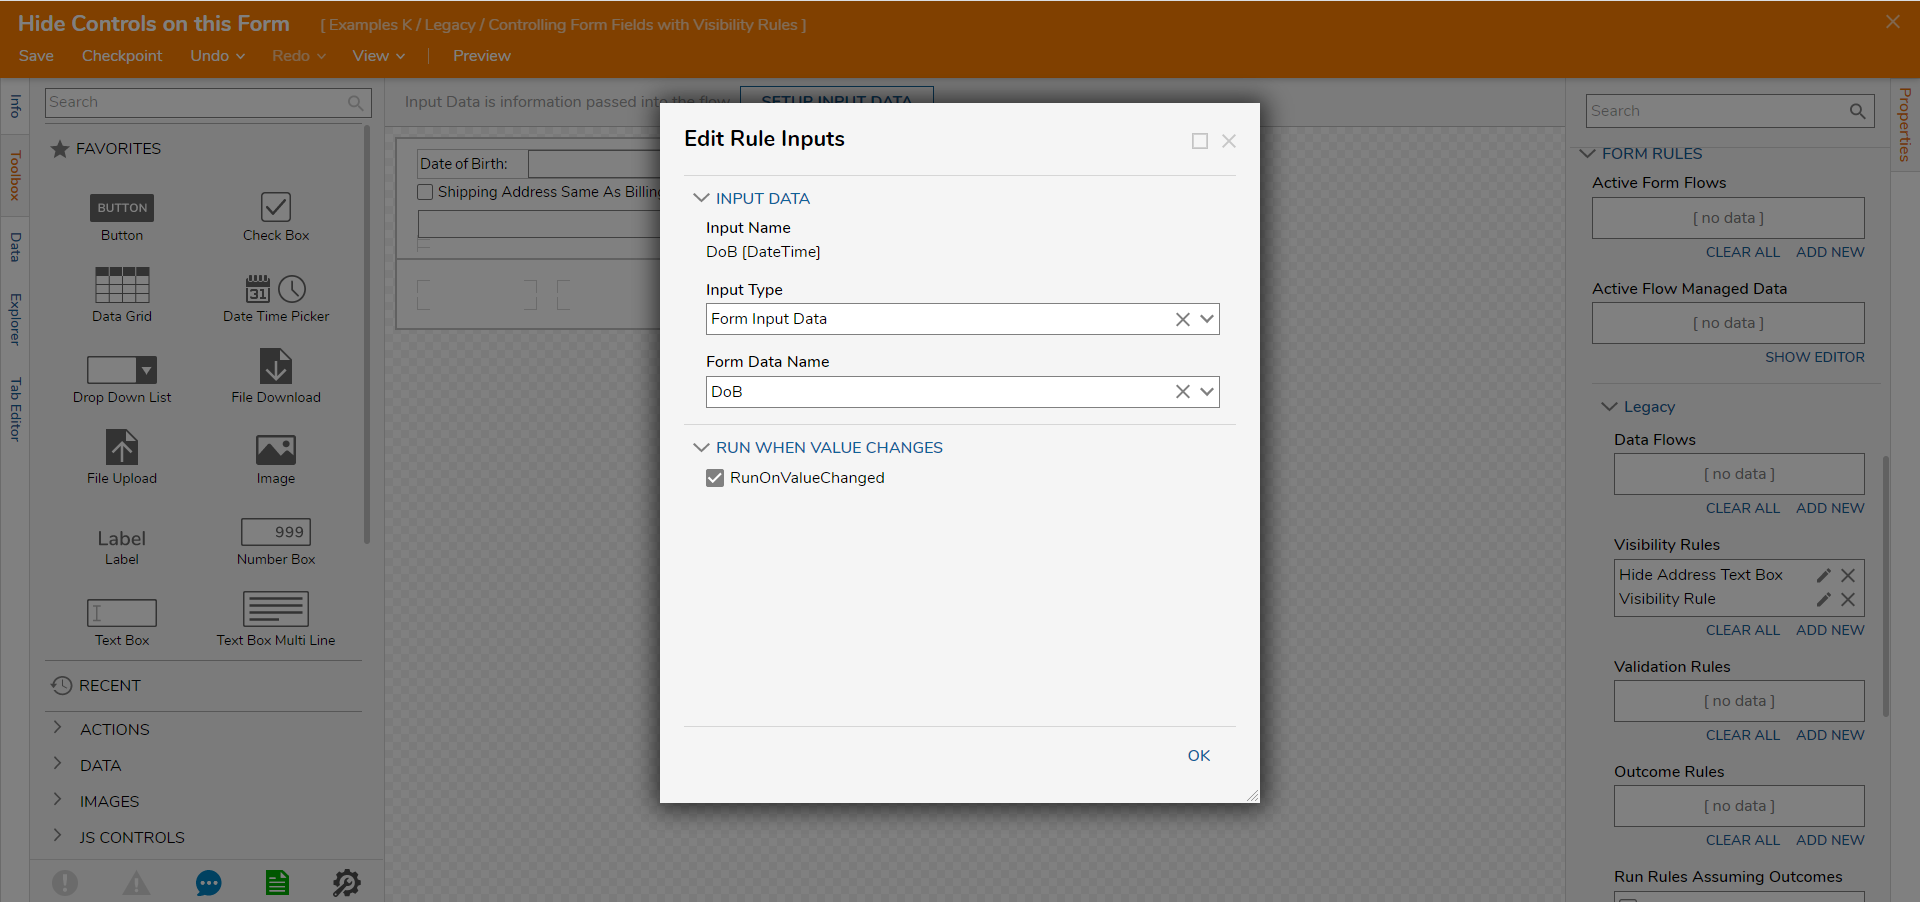
- In the Edit Rule Inputs dialog, from the Input Type drop-down list, select Form Component. To indicate which field on the form that the visibility rule will be triggered by, select "DoB" from the Form Data Name drop-down list.
- Select Ok.
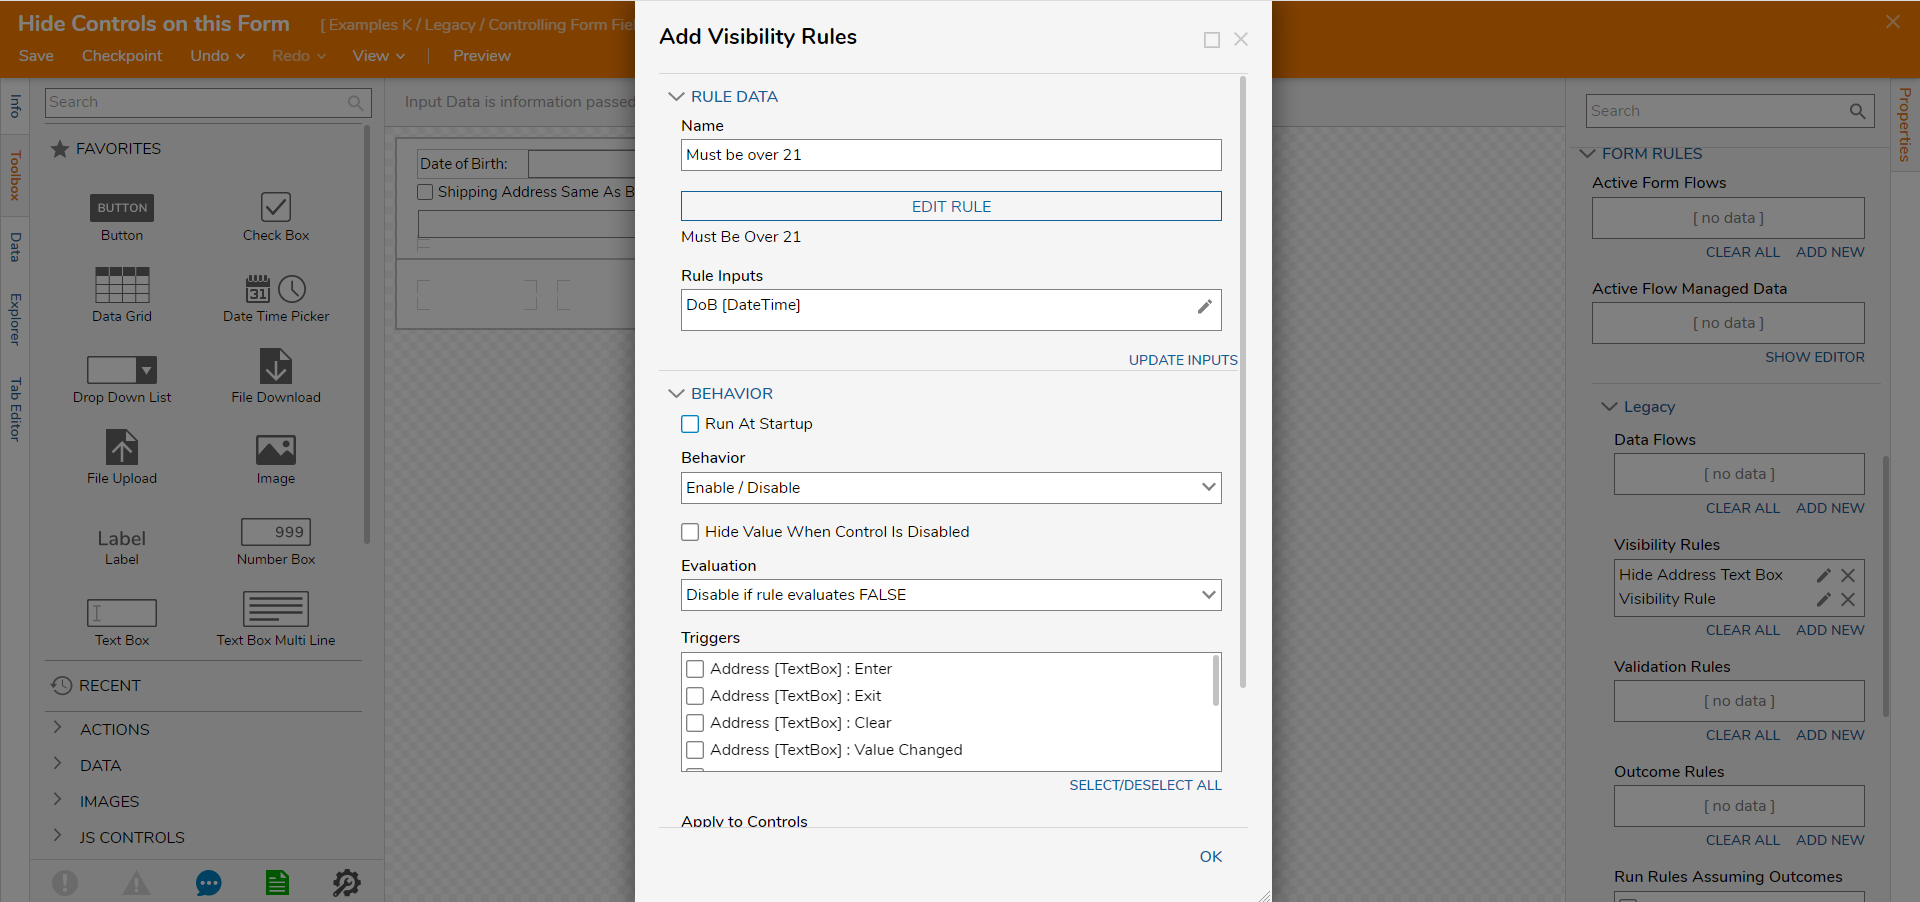
- Back in the Edit Visibility Rules dialog, in the Behavior drop-down list, select Enable/Disable.
- Change the Evaluation to Disable if rule Evaluates as TRUE.
- Under Triggers, select DateTime Picker: Value Changed.
- Finally, under Apply to Controls, select the control to disable: Button.
- Select Ok.
- Save and close the Form Designer.
.png)


.png)
Debug: Disable/Enable
- In the Flow Designer, select Debug in the top action panel.
- Select START DEBUGGING.
- Set the DoB Date Picker to be older than 21 years and younger than 21 years to disable/enable the Submit Purchase Button.

Was this article helpful?