Azure Container Setup
- 03 Jun 2022
- 2 Minutes to read
- Print
- DarkLight
Azure Container Setup
- Updated on 03 Jun 2022
- 2 Minutes to read
- Print
- DarkLight
Article Summary
Share feedback
Thanks for sharing your feedback!
Overview
The following document demonstrates how to configure a Decisions Docker Image to run a single Azure Container or ACI (Azure Container Instance).
Note on Document
Note that this document does not cover Container orchestration via such services as AKS (Azure Kubernetes Service).
Requirements
Before proceeding with the instructions provided by this document, ensure that the following prerequisites are met:
- Decisions should be installed on an Azure VM (see Installing on Azure for additional information).
- .NET SDK 2.2 must be installed on the Decisions VM. Additional Information on .NET SDK 2.2The current version of .NET SDK can be confirmed by running the following CMD command: "dotnet --list-sdks".
To download the Windows installer for .NET SDK 2.2, see Download .Net Core 2.2.Version 7.x .NET Architecture Change:
Versions 7.0.1 - 7.1 require .NET Core 3.1
Versions 7.2 - 7.9 require .NET 5
Versions 7.10+ require .NET 6Impact on Upgrades:
- ALL custom libraries will need to be recompiled for the new .NET architecture.
- Custom assemblies will need to be re-written.
- Modules may require reinstallation or design refactoring.
- Docker Module must be installed in Decisions.
.png)
.png)
Setup
- After installing the Docker Module, open DecisionsServerInstaller.exe and select RESTART SERVICE.
- After the Restart process completes, open the Azure Quickstart Center then click Start under Deploy and run a container-based app.
.png)
- From the Deploy and run a container-based app screen, click Create under Deploy and run a container-based app with Azure Container Instances.

- From the Create container instance window, leave all values default except for the following which should be configured as follows, then click Next: Networking:
- Resource group: Set this to the Resource Group that the Decisions VM is located on.
- Container name: Provide the desired name.
- Region: Match this value to the Region of the Decisions VM.
- Image source: Set this to Docker Hubor other registry.
- Image: Set to "decisionscore/unstablie:latest".
- OS type: Set to Linux.
.png)
- From the next page, set Networking type to Public and provide the desired DNS name label. Then, click Next: Advanced.

- Define the environment variables for the Container Instance so that it knows which Database (the one that Decisions was installed against), as well as the desired Decisions Account used for Container to Application communication; then, click Review + create. Note on Container Instance VariablesThe following chart represents how each of the Container Instance's Environment variables should be defined.
Note that if the default Docker Admin Account "docker@decisions.com" with the password "docker" is used, then SETTING_USERNAME and SETTING_PASSWORD may be left alone.Key Value SETTING_DATABASE_CONNECTION Points to the Decisions Database, SETTING_PORTAL_BASE_URL http://decisionsIPorDNSname/decisions SETTING_SHM_BASE_URL http://decisionsIPorDNSname/decisions/Primary/REST SETTING_TAKE_REQUESTS true SETTING_USERNAME AdminEmail* SETTING_PASSWORD AdminPassword* 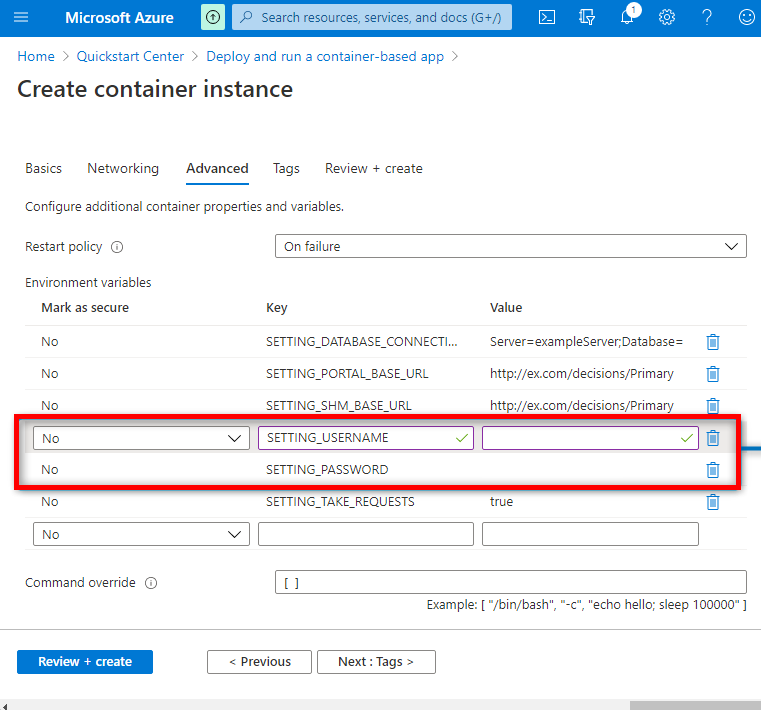
.png)

.png)


Deployment/Testing
After selecting Review + create, Azure should begin to deploy the Container Instance.
To test this new Container Instance:
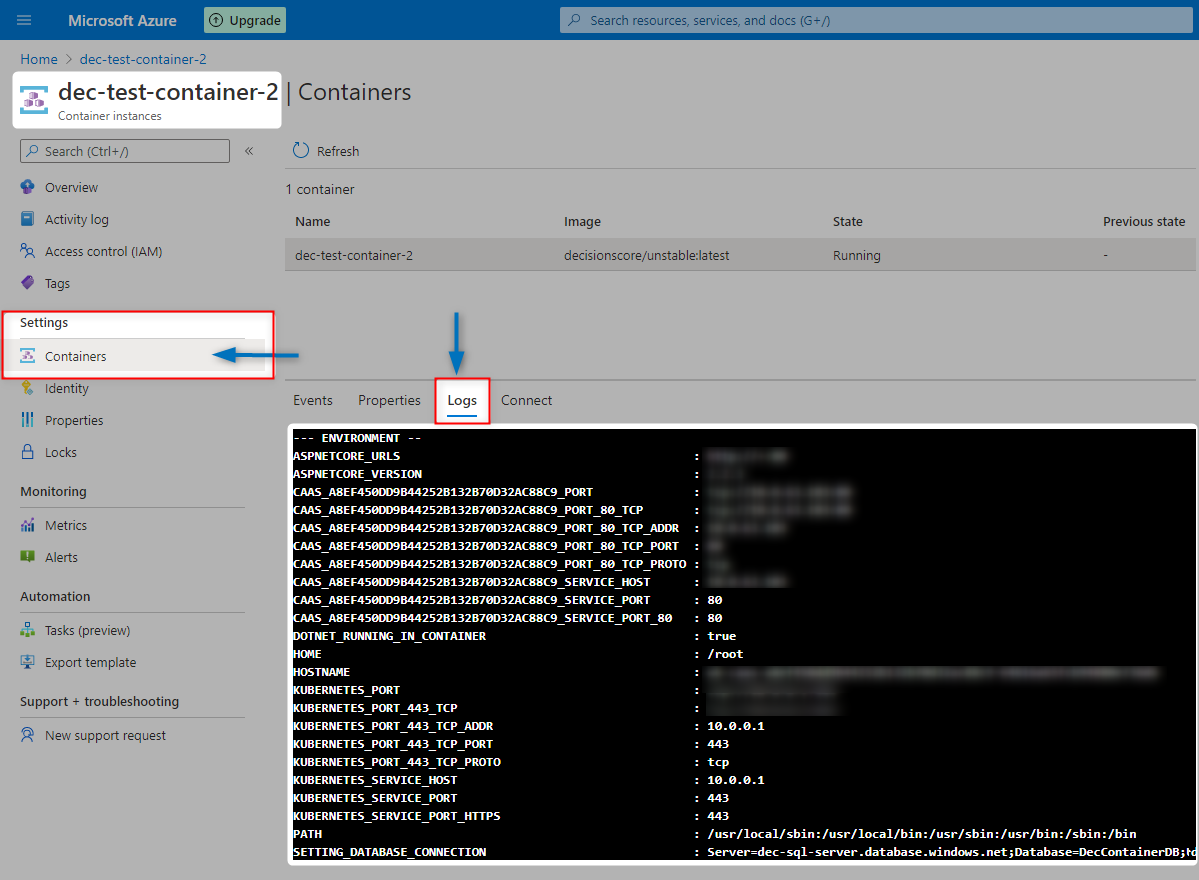
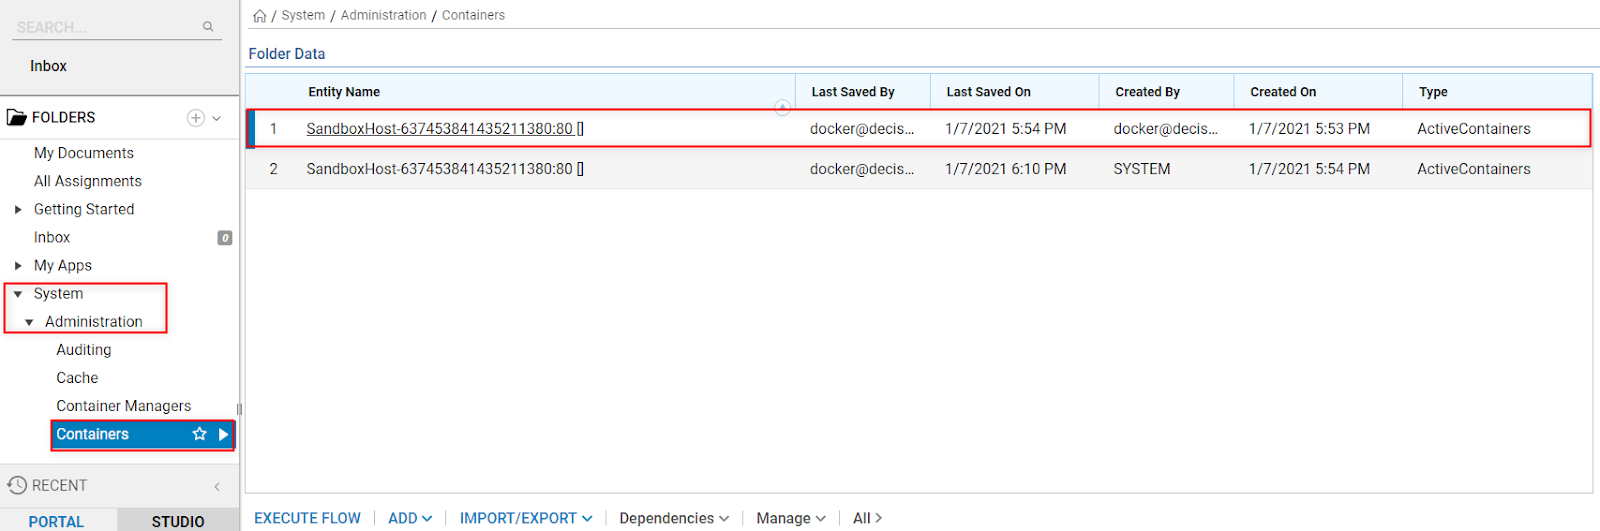
- Log in to Decisions and confirm that the Container Instance(s) are properly connected by verifying that values populate in the Report located under the System > Administration > Containers Folder. Container LogsIf the Report fails to populate, check the Container Logs for any errors that indicate that the Container failed to start/communciate, Do so by navigating to the Logs tab under Container Instance resource in Azure on the Containers page.
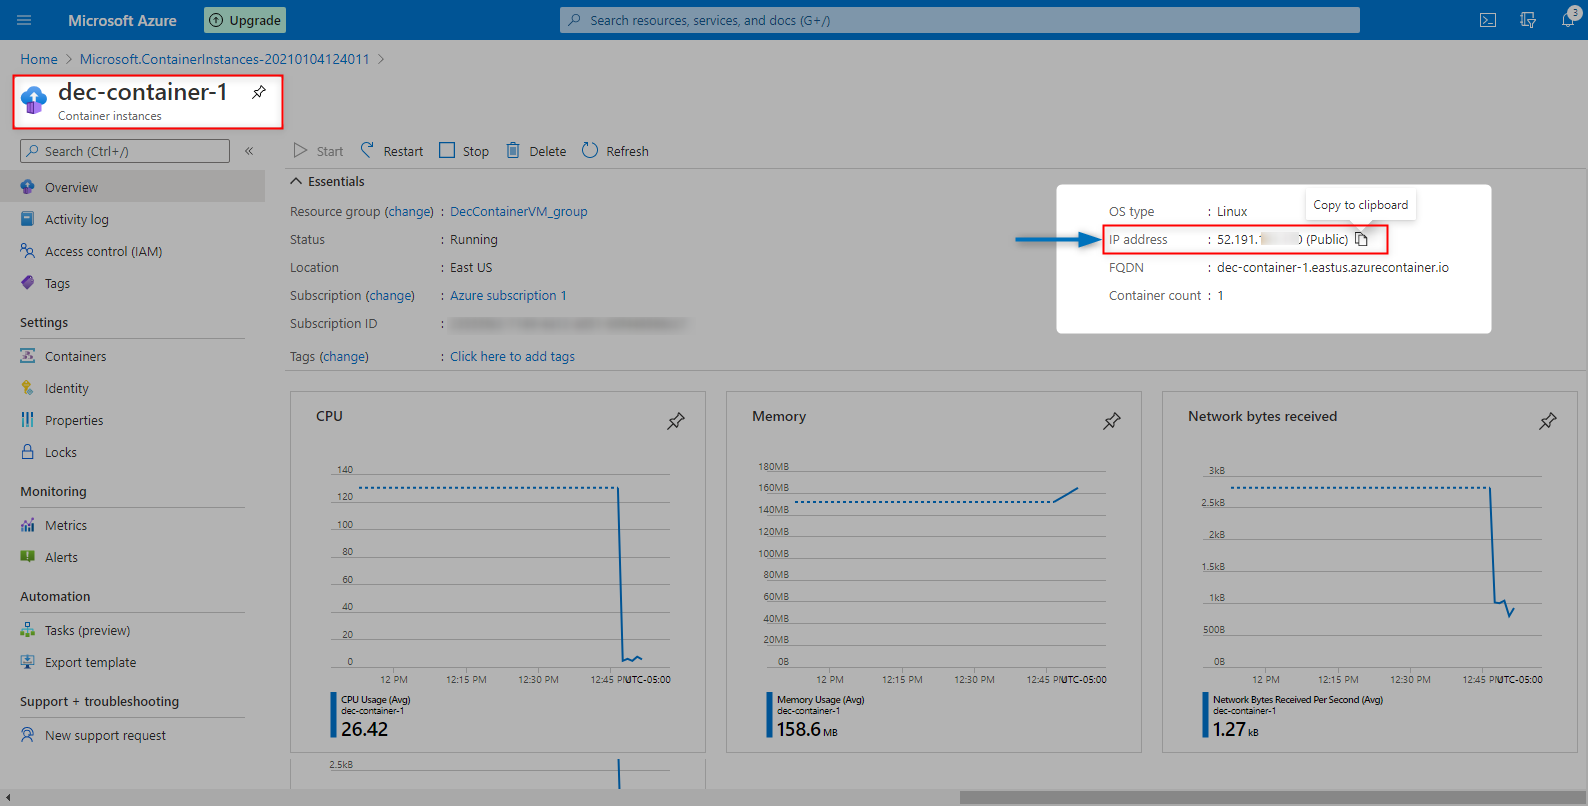
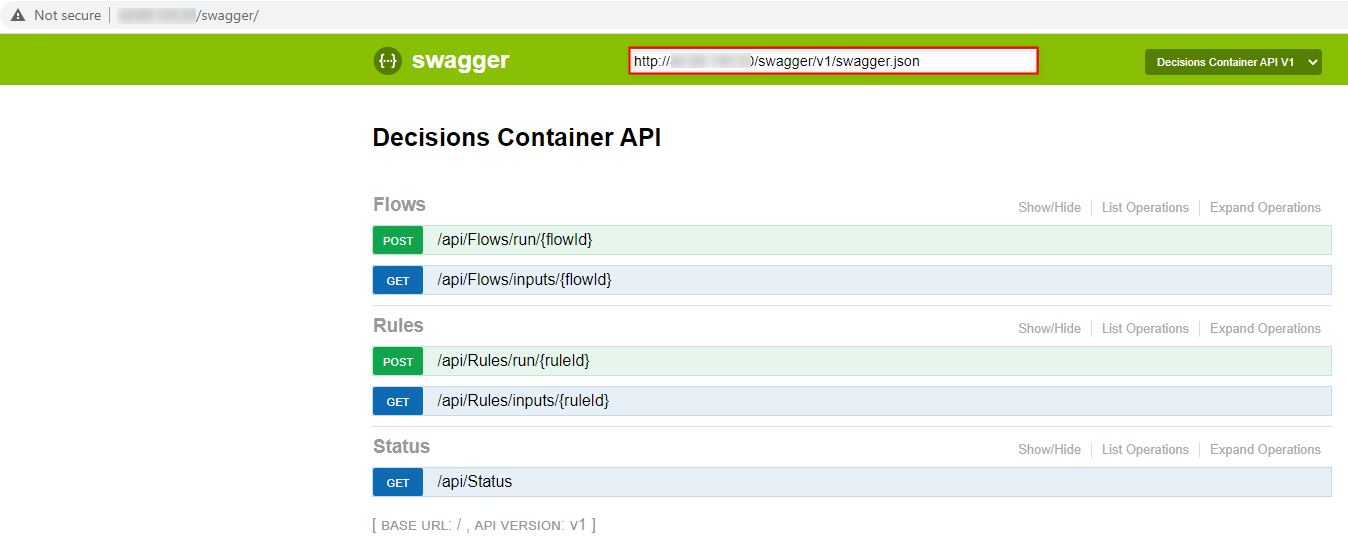
- After successful deployment, access the Container's available REST Endpoint Definitions via the Container's IP by navigating to http://[containerip]/swagger.
- Use the Request Formation Information on Swagger to confirm that the Container is able to execute a Flow/Rule via a REST Call; use the ID of a Flow/Rule created in Decisions to confirm. Additional InformationFor more information on how to execute a Flow/Rule via REST, see Calling a Flow as a REST Service.


Was this article helpful?