Advanced ZIP Step
- 08 Sep 2021
- 2 Minutes to read
- Print
- DarkLight
Advanced ZIP Step
- Updated on 08 Sep 2021
- 2 Minutes to read
- Print
- DarkLight
Article Summary
Share feedback
Thanks for sharing your feedback!
Overview
The Advanced ZIP step allows customers to create AES encrypted zipped files with a key size of 128 or 256. The following example demonstrates how to configure the Advanced ZIP step and how to download an encrypted example file for the end-user to download and access.
Example
- Navigate to a Designer Folder and select CREATE FLOW from the Global Action Bar.
- From the Create Flow window, select and name the default Flow.
- In the Flow Designer, from the Toolbox > FAVORITE STEPS section, connect a Create Data step to the Start step.
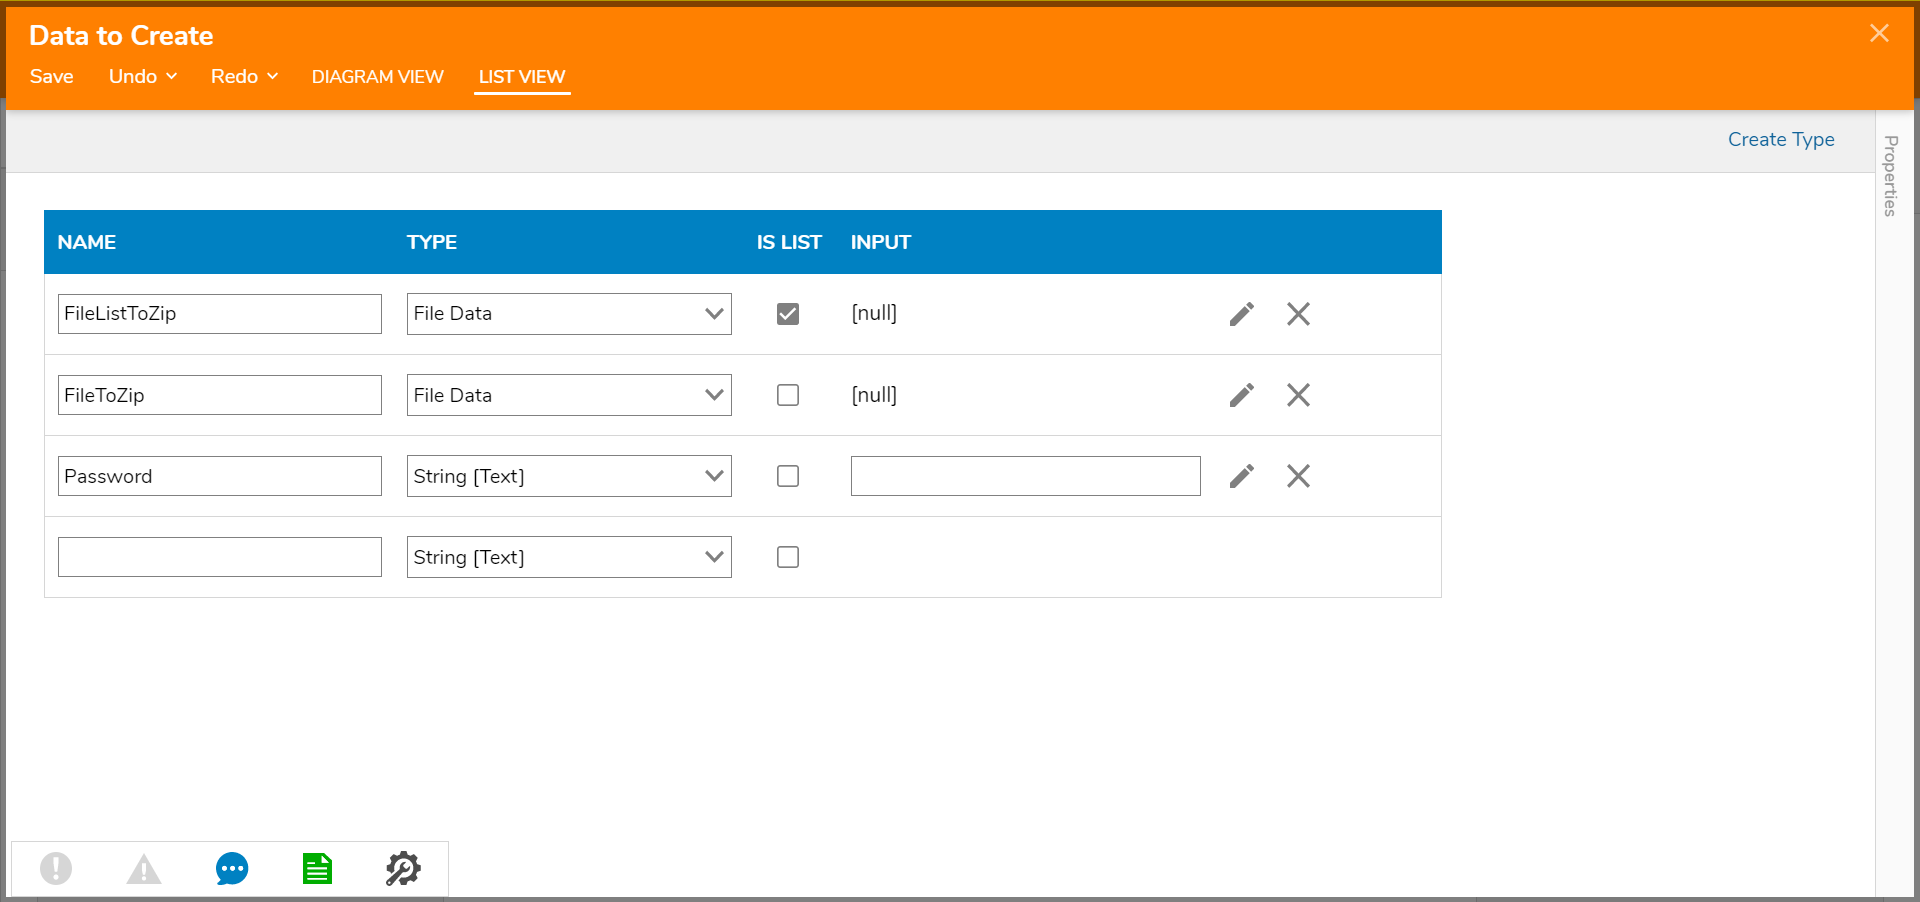
- In the Properties panel of the Create Data step, click SHOW EDITOR under DATA > Data to Create.

- In the resulting window, add the desired name for a File Data list, add a Password (String), then a FileToZip as File Data. Click Save and exit.
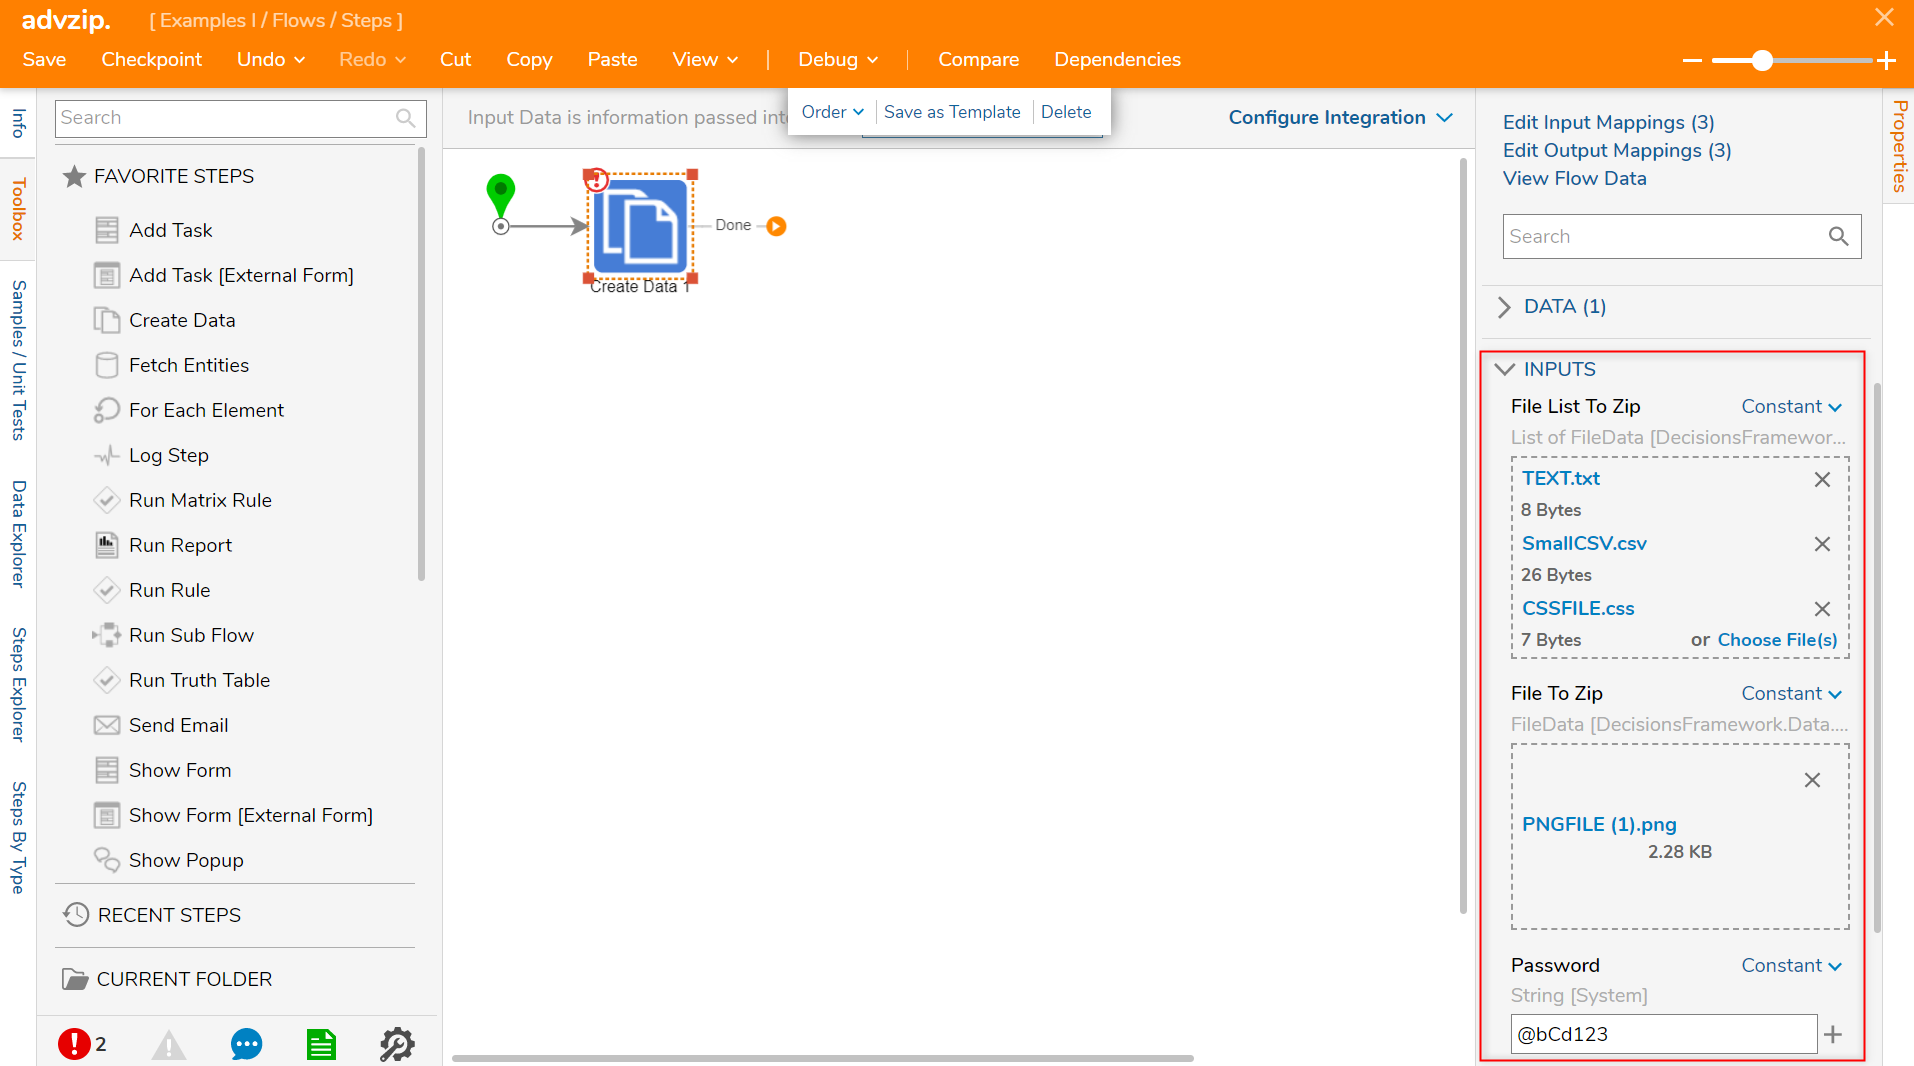
- Navigate to the List of FileData under INPUTS and make the input mapping Constant. Use the selector to add desired files.
- Next, change the input mapping for File To Zip to Constant and add a file.
- Then, make the input mapping for the Password (String) Constant and enter the password that will be used to access the files.
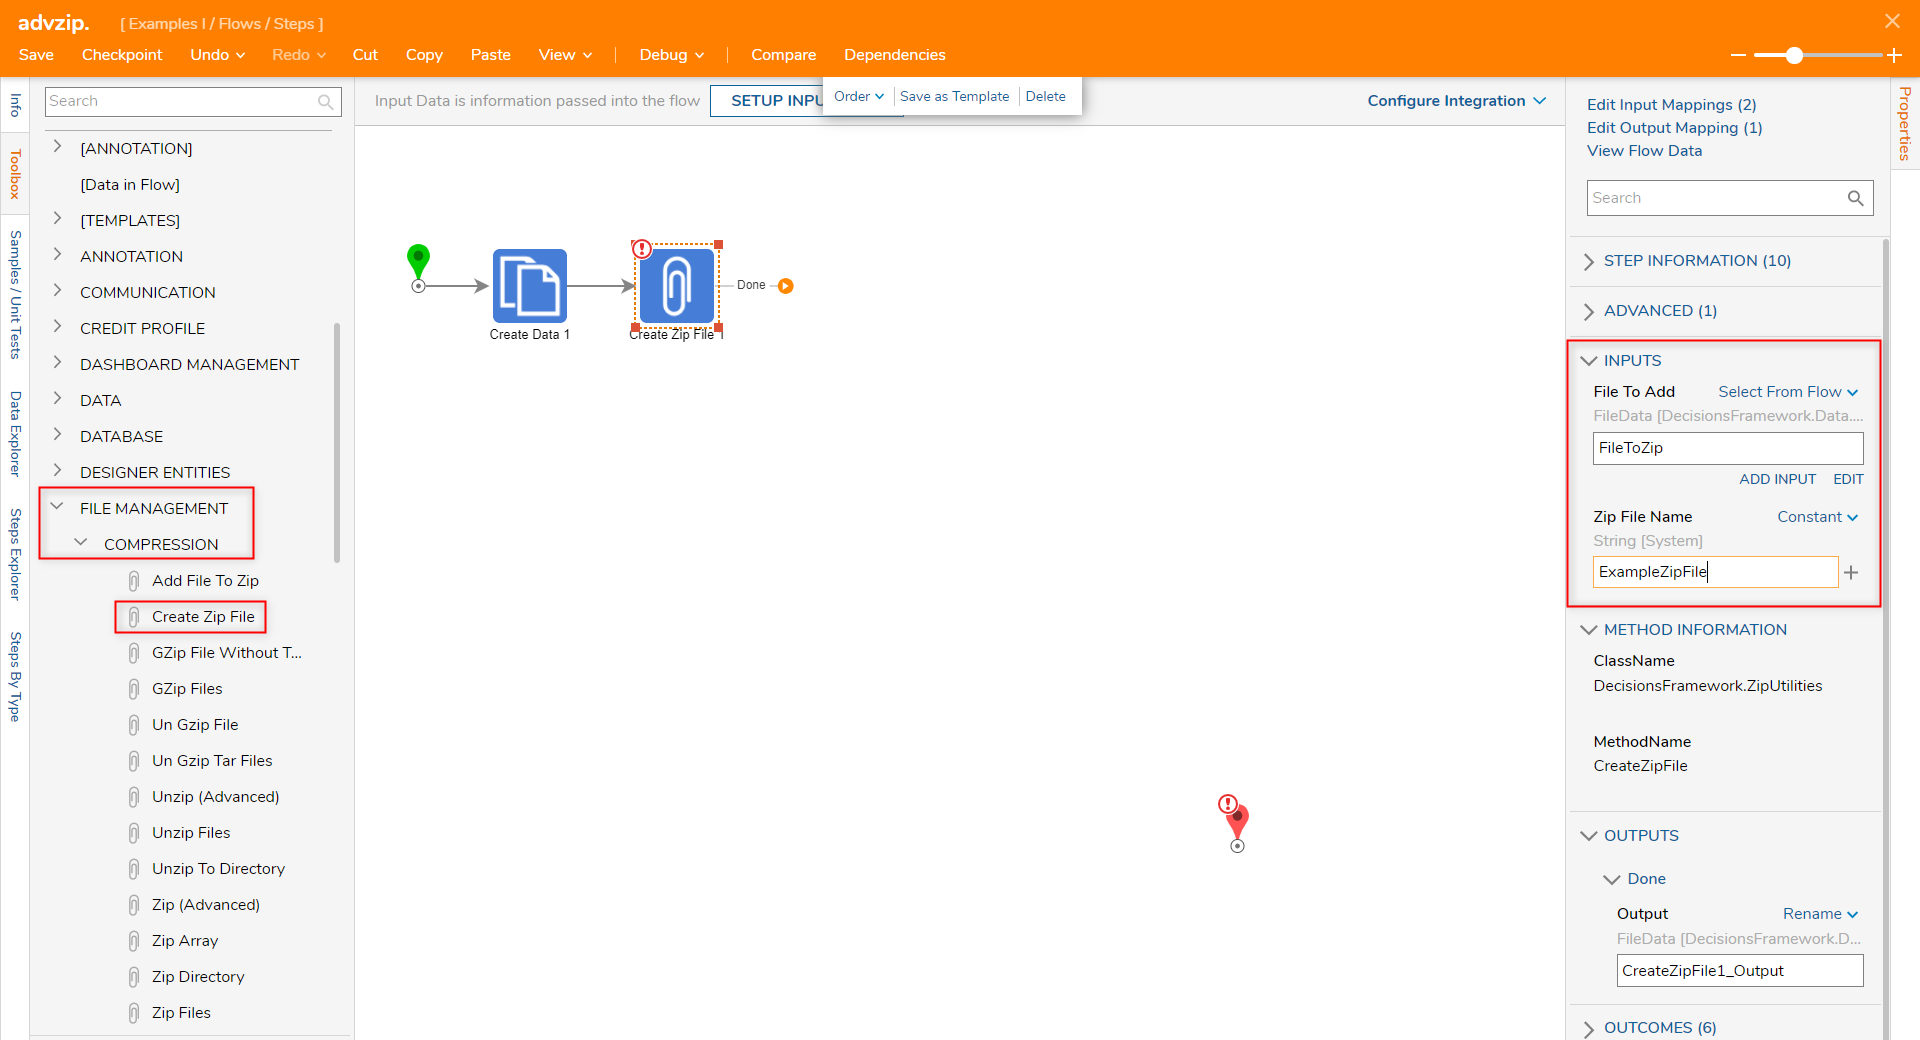
- From the Toolbox > FILE MANAGEMENT > COMPRESSION category, drag and connect a Create Zip File step to the Create Data step.
- In the Properties panel > INPUTS > File To Add field, change the mapping to Select From Flow and select the FileToZip. Set the Zip File Name to Constant and enter a relevant file name.
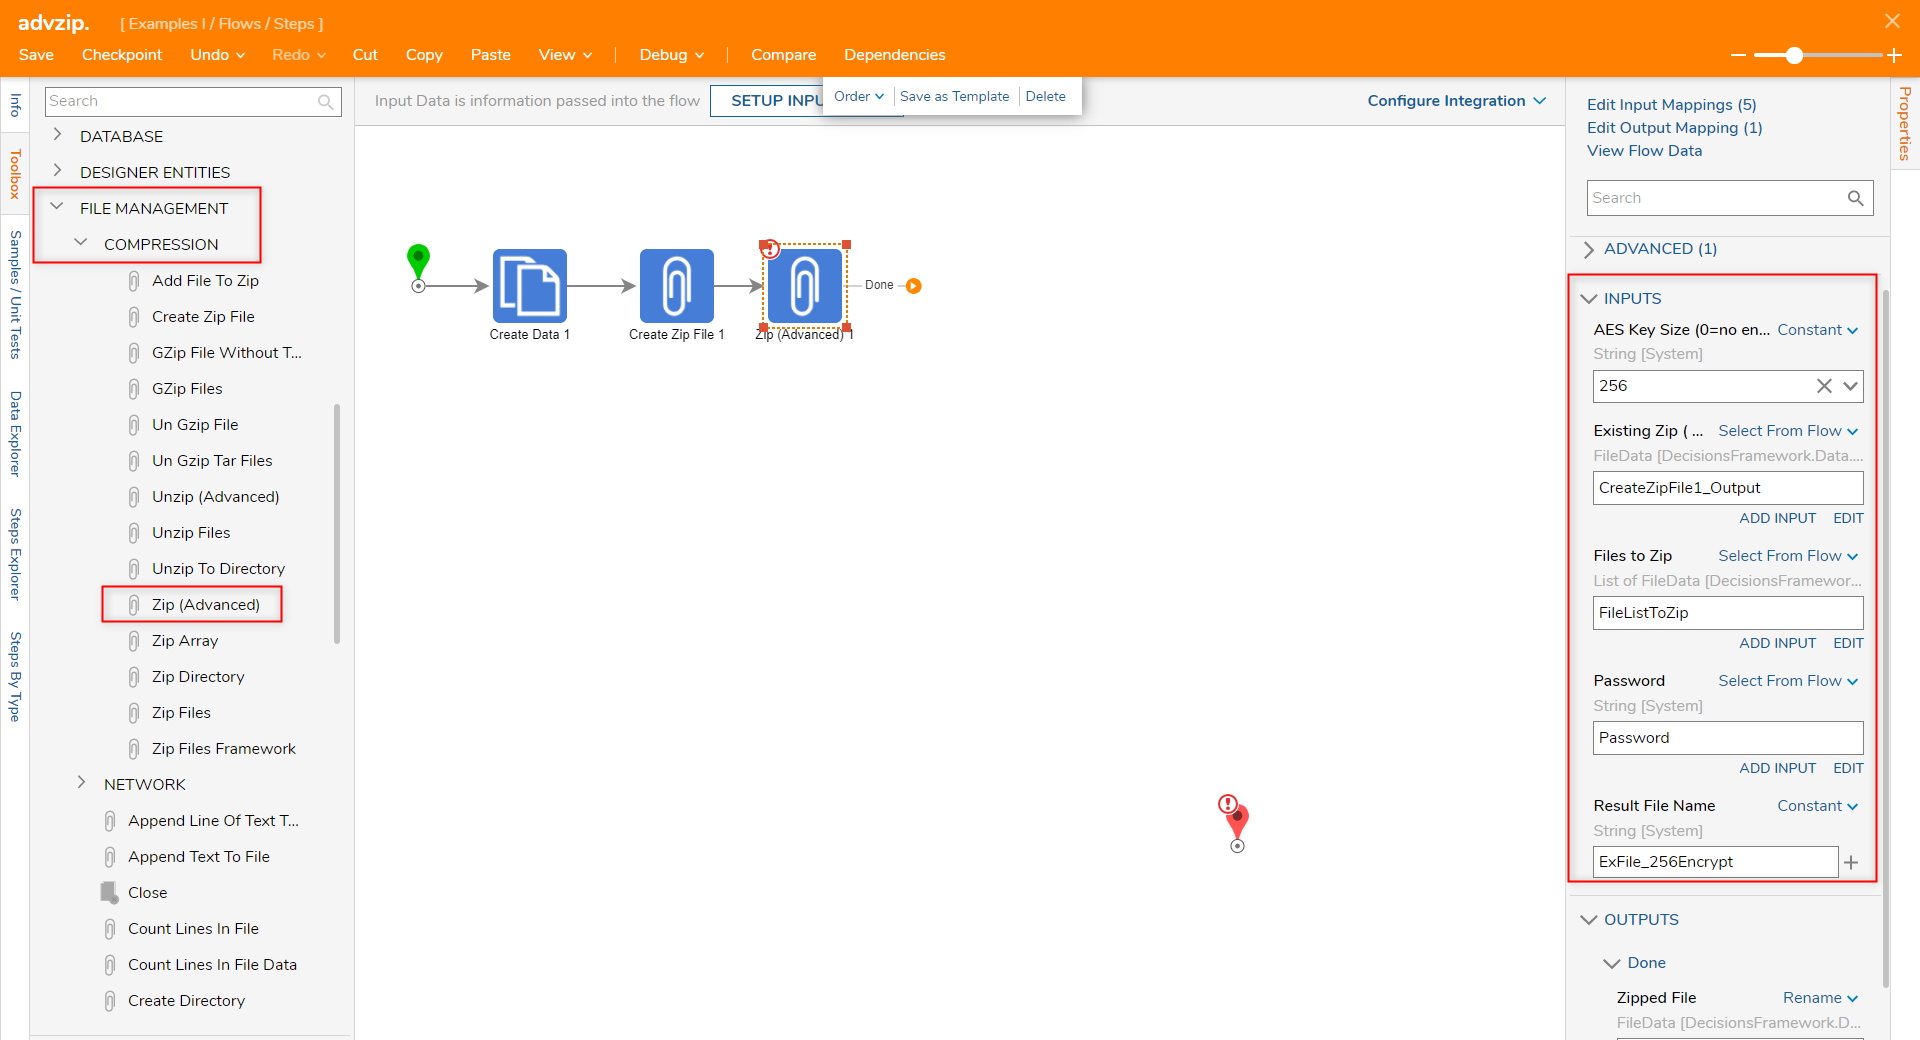
- Then, from the Toolbox > FILE MANAGEMENT > COMPRESSION category, connect a Zip (Advanced) step to the last Create Zip File step.
- In the Properties panel > INPUTS > AES Key Size field, set the input mapping to Constant and select 256. This step allows users to set the AES key size to 0, 128, or 256.
- For INPUTS > Existing Zip ( Append ), change the input mapping to Select From Flow and choose a file that will be encrypted.
- Then, for the INPUTS > Files to Zip, choose the Select From Flow mapping and choose the List of File Data input.
- Set the INPUTS > Password input to Select From Flow and select the Password string.
- Enter a Constant Result File Name. For this example, the Result File name will be ExFile_256Encrypt.
- Next, add a Show Form step from the Toolbox > FAVORITE STEPS section.
- In the Properties panel, click PICK OR CREATE FORM. Then click CREATE NEW. Select and name the default Form.
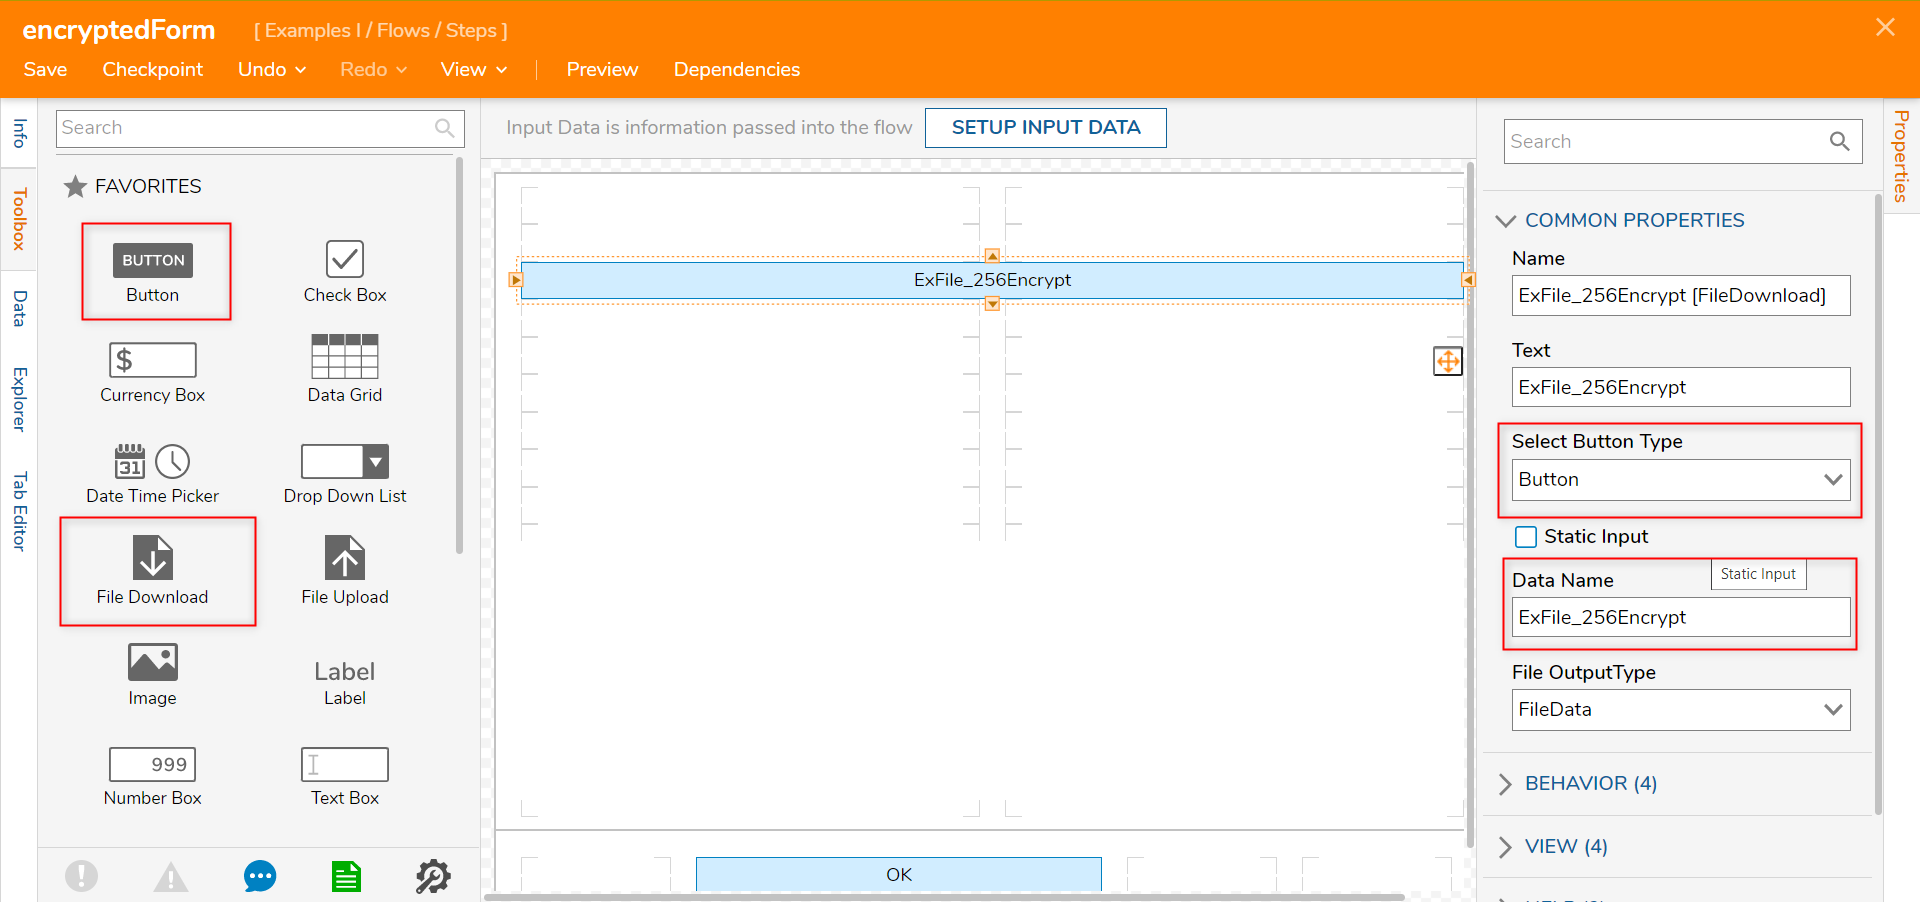
- From the Toolbox > FAVORITES section, drag and drop a Button and File Download component to the Form.
- With the File Download component selected, copy and paste the Data Name from the advanced Zip step's Result File Name input.
- In the Select Button Type drop-down menu select Button.
- Save and exit the Form Designer.
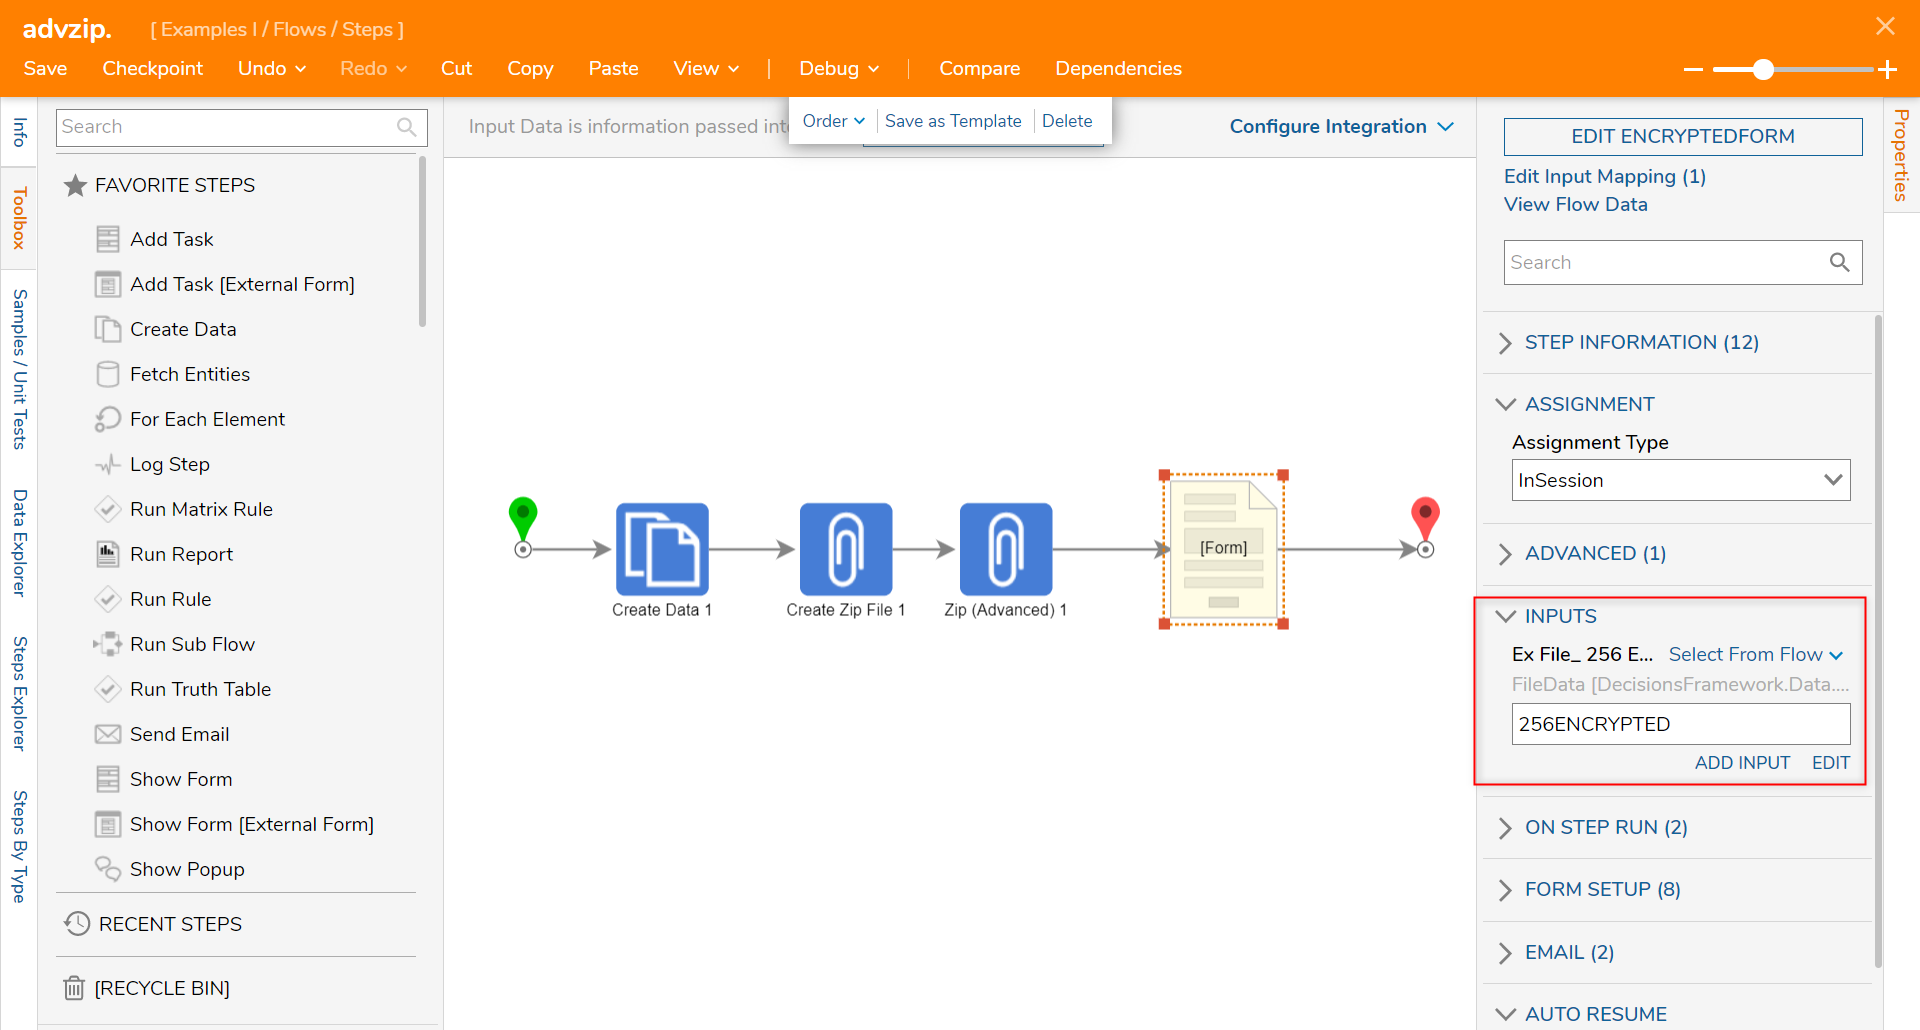
- In the Flow Designer, navigate to the Properties panel > INPUTS > ExFile_256Encrypt and change the input mapping to Select From Flow. Select the advanced Zip step output.
- Connect the Show Form step to the End step.


Debug
- Select Debug from the top bar. Click START DEBUGGING.
- In the Debugger, click on the File Download button on the Form. It will begin a download.
- As the file is opened, the file contents will be available. Click on a file and the password created earlier in the tutorial will be required. If the password is entered incorrectly, a warning message will appear.

Was this article helpful?