Overview
The ActiveMQ Module allows for integration with Apache ActiveMQ brokers. ActiveMQ is a Java-based message queue broker that currently supports AMQP, STOMP, MQTT, and JMS communication protocols. The module allows setting up and configuring a connection to an ActiveMQ message queue. The module also provides basic start/stop functionality and Flow steps to send and receive messages from the queue. Decisions has been tested and can integrate with the Classical and Artemis versions of ActiveMQ. Decisions can connect to the Artemis version through OpenWire.
Prerequisites
- Install the ActiveMQ Module.
- Create a project dependency.
Classic ActiveMQ Configuration
The following section covers the setup and configuration of a broker/message queue and is intended to serve as an example resource to integrate with Decisions. The example highlights the values needed to connect a message queue to Decisions and is meant for informational and troubleshooting purposes.
Please refer to the product's official documentation for a more in-depth and detailed guide on configuring a message queue for use in production environments.
The classic version of ActiveMQ can be integrated with Decisions through the AMQP+TLS protocol.
Prerequisites
- The latest Java Software Development Kit
- The latest version of Classic Apache ActiveMQ
- A Script to create SSL authorization certificates is needed for a valid connection to the broker. The script below is an example that is currently configured for a local install, so the script may need to be modified by the user to fit specific needs.
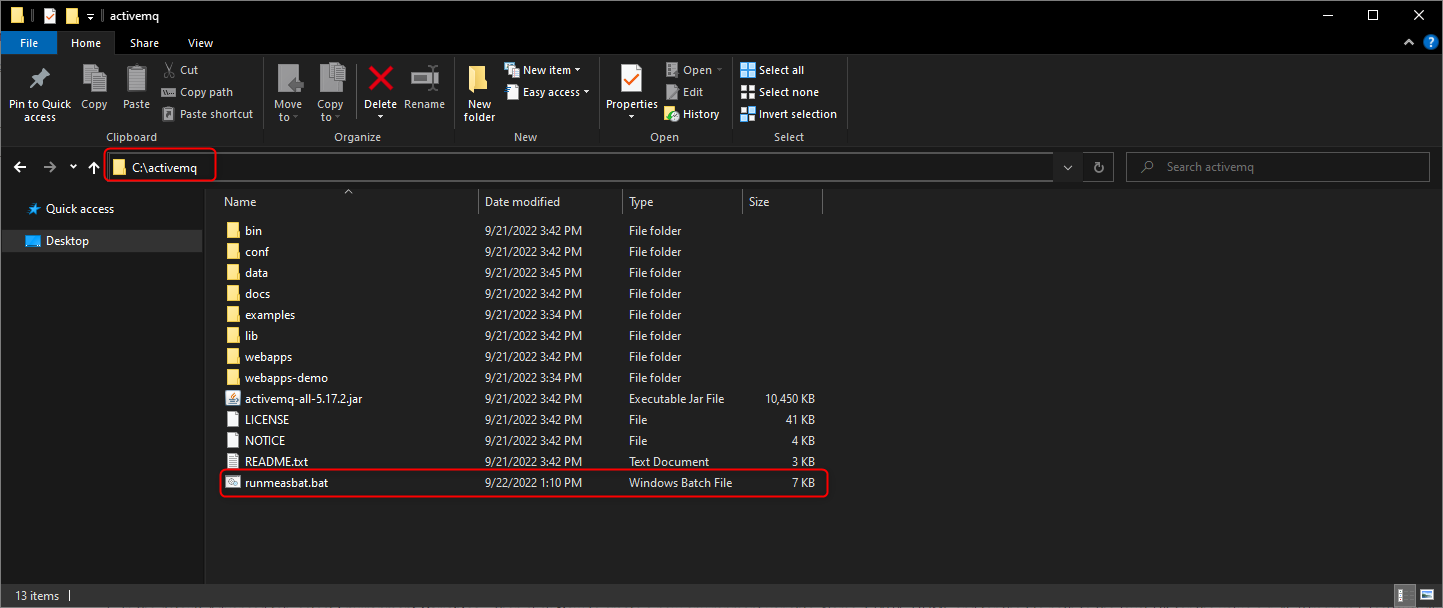
- On the environment, extract the zip file for Apache ActiveMQ.
- Inside the ActiveMQ folder, move the prerequisite .bat file into the folder.
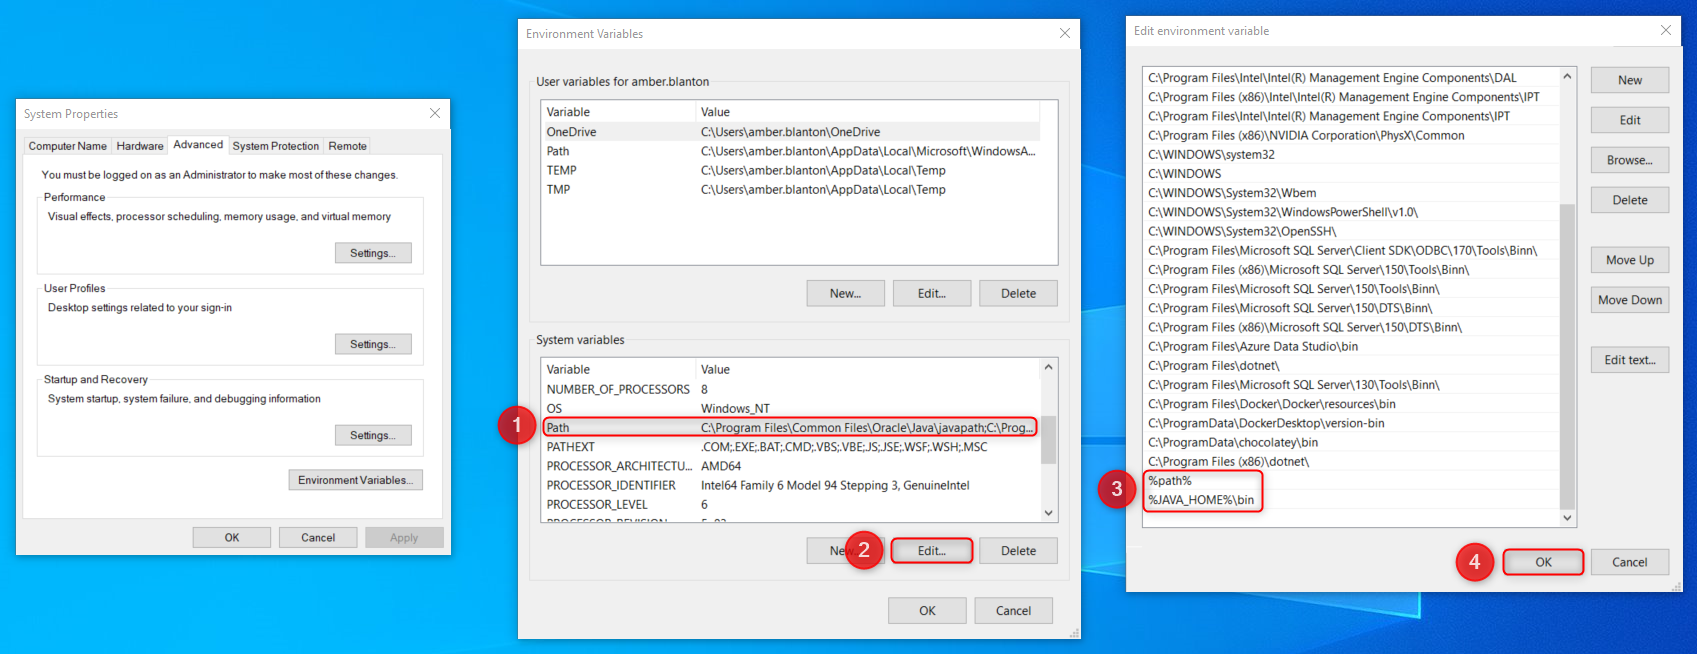
- Search for and open Edit the System Environment Variables in the Windows search bar.
- In the Advanced tab, select Environment Variables...; Click New under System variables to create a new environment variable. Enter "JAVA_HOME" for the Variable Name and enter the file path to the JavaSDK for the Variable value. Select OK to confirm variable creation. It will then appear in the System Variables table.

- Find the Path variable in the System Variables. Select and edit it to view the variable. Scroll to the bottom of the variable and add the following two lines in order: %path% and %JAVA_HOME%\bin. Select OK to confirm the edit.
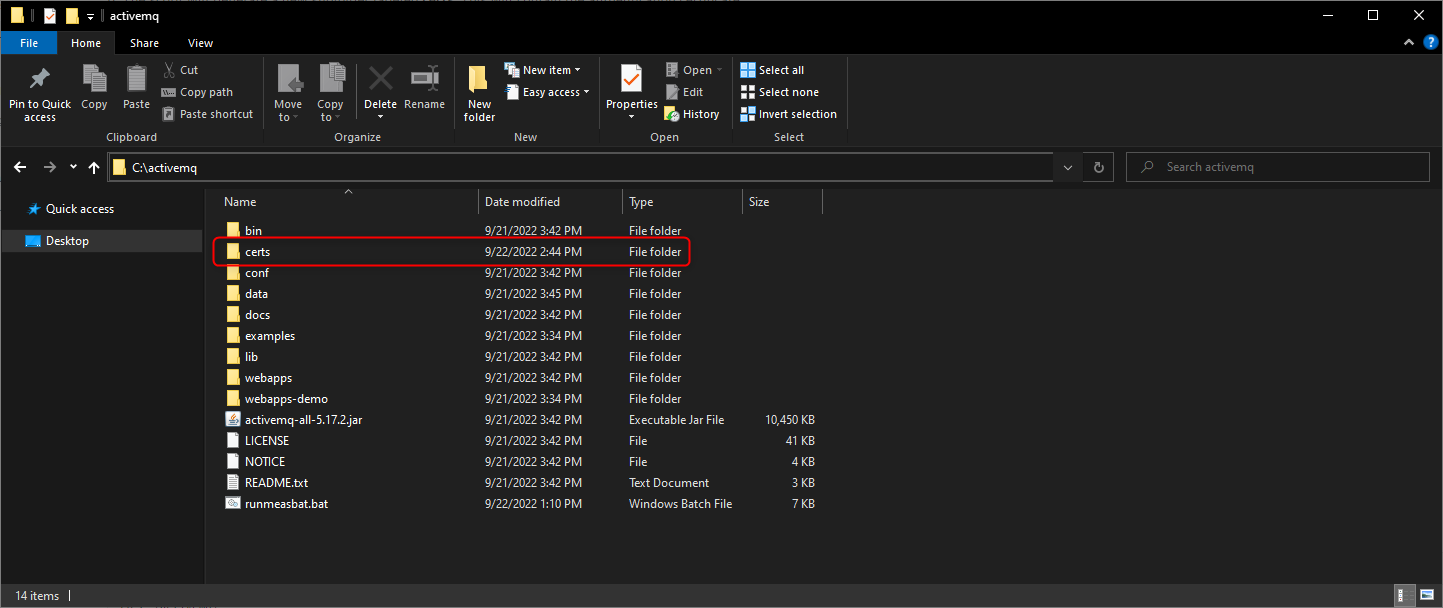
- Create an SSL authorization certificate set for ActiveMQ by running the .bat script file. The script will generate a new subfolder labeled certs. This will contain the authentication certificate.
- Open Windows PowerShell as an Administrator and navigate to the active ActiveMQ folder.
cd C:\activemq\ - Run the following commands in the folder to generate the personal and truststore certificates.
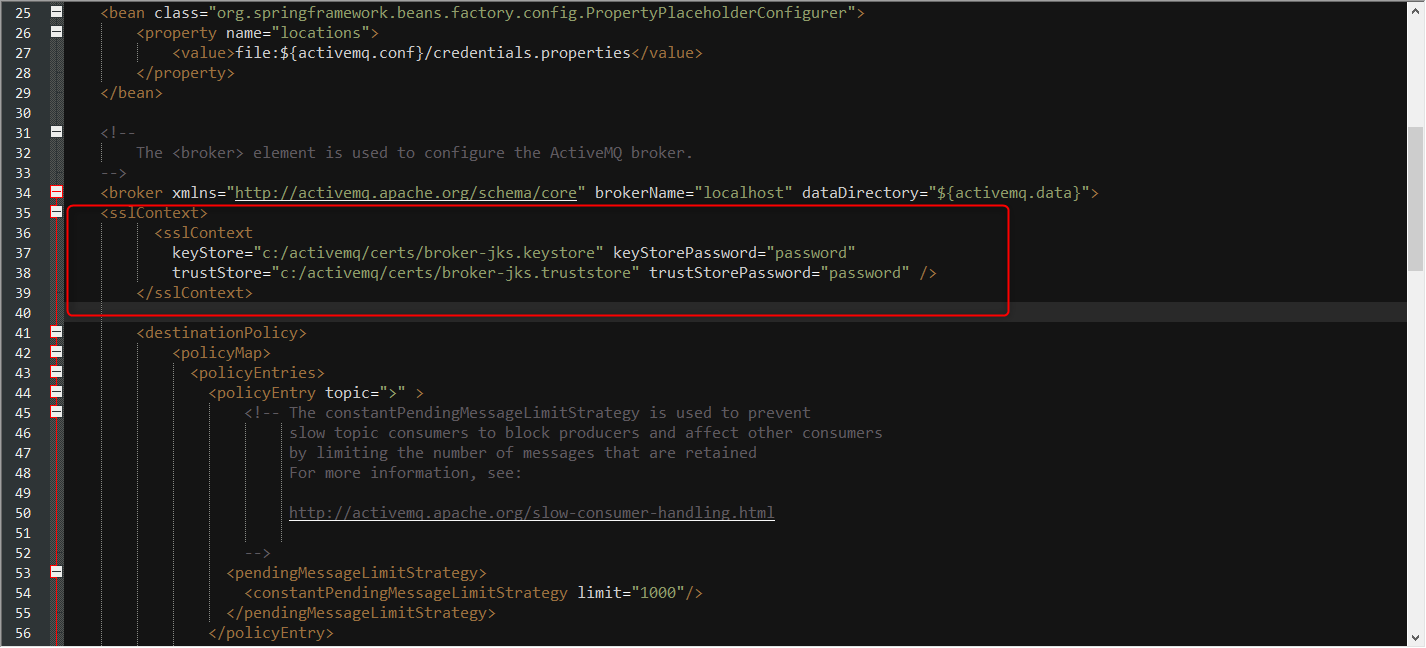
keytool -export -rfc -alias broker -keystore .\certs\broker-jks.keystore -file .\certs\broker_cert.pem -keypass password -storepass passwordkeytool -storetype jks -keystore .\certs\broker-jks.truststore -storepass password -keypass password -importcert -alias ca -file .\certs\broker_cert.pem -noprompt - In the ActiveMQ folder, open the conf folder, then edit the activemq.xml file in a text editor. After the <broker> property tags, add the following:
<sslContext>
          <sslContext
            keyStore="c:/activemq/certs/broker-jks.keystore" keyStorePassword="password"
            trustStore="c:/activemq/certs/broker-jks.truststore" trustStorePassword="password" />
        </sslContext>
The keyStore and trustStore password values can be edited to provide different credentials. By default, these values are set to password.
- Find the <transportConnectors> property and add the following line. Save and close the text editor.
<transportConnector name="amqps" uri="amqp+ssl://0.0.0.0:5671?maximumConnections=1000&wireFormat.maxFrameSize=104857600"/>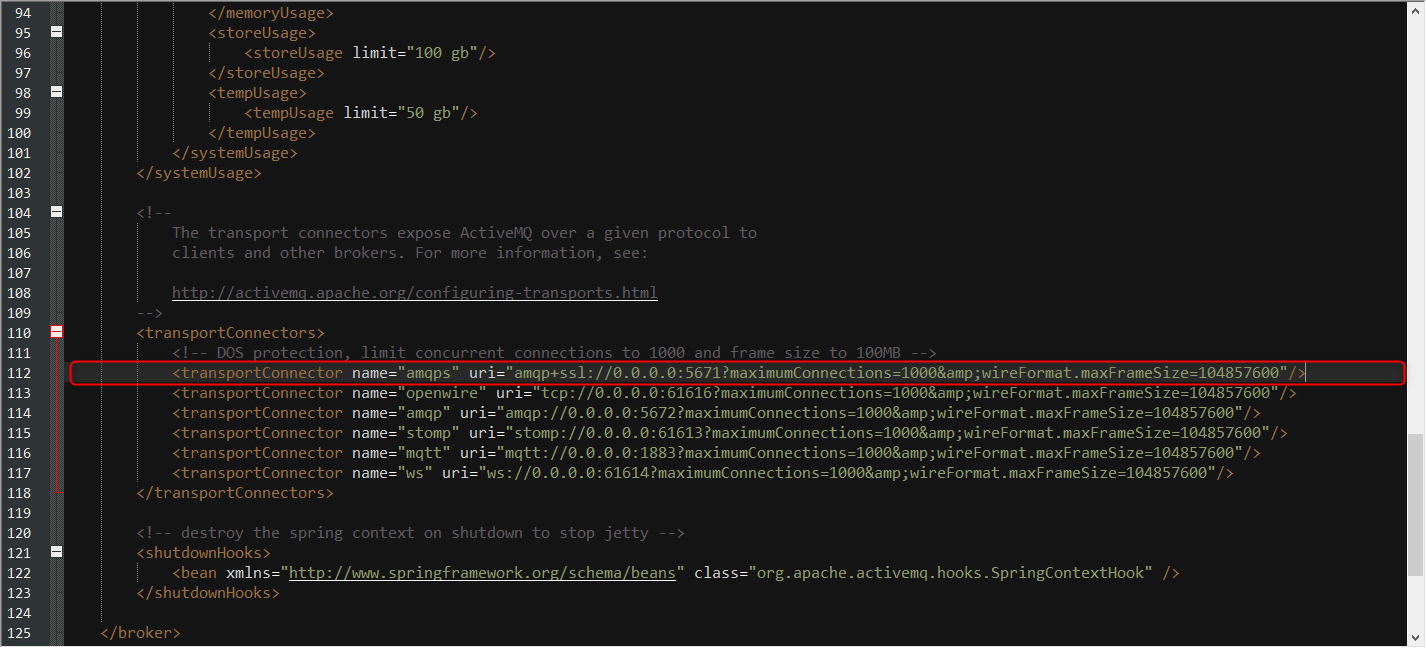
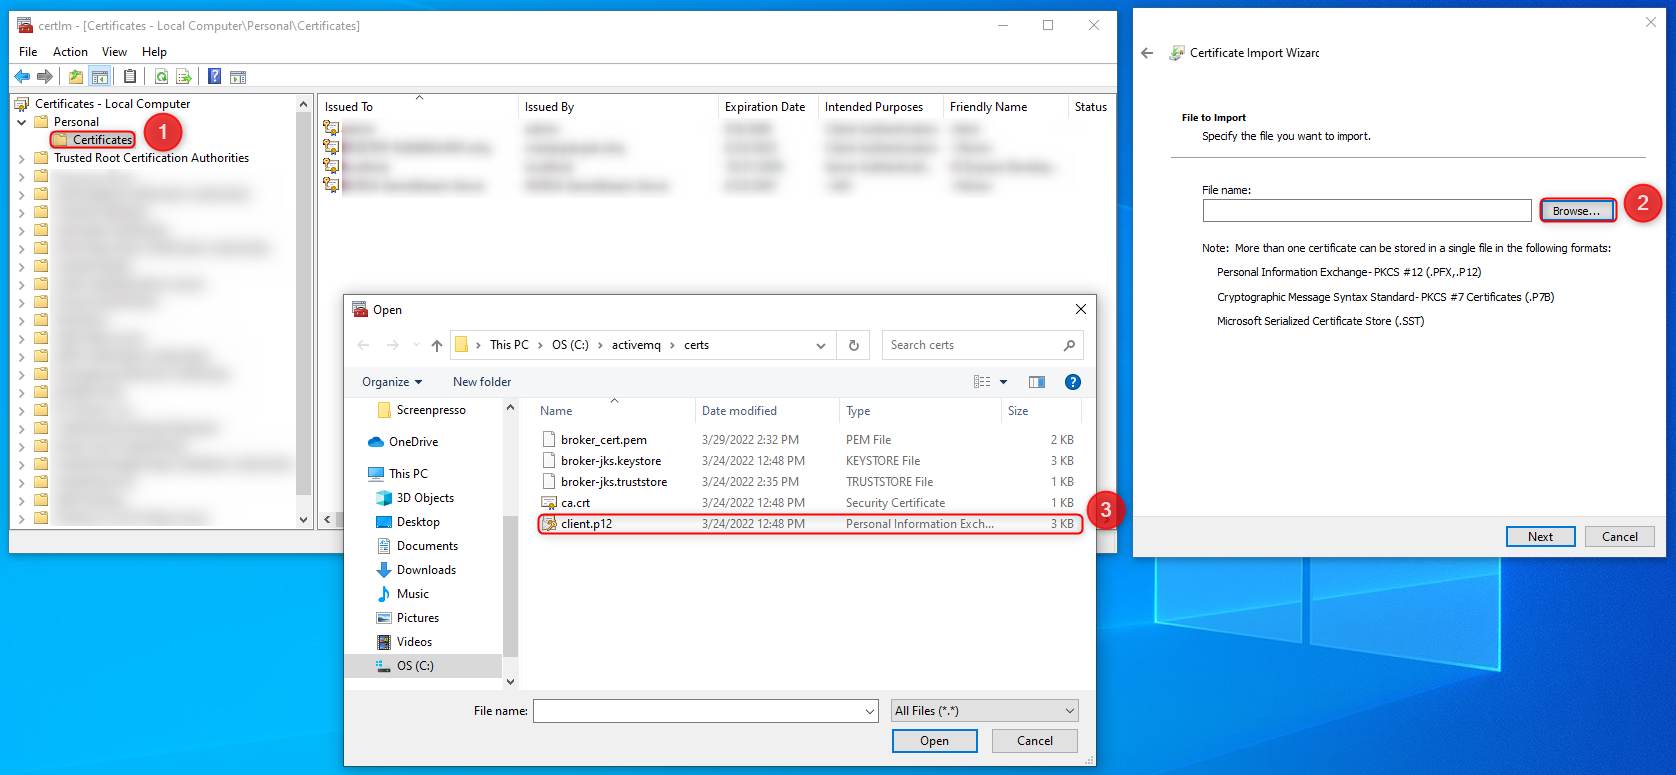
- In the Windows search bar, search for and open Manage Computer Certificates. Navigate to Personal > Certificates. Right-click on Certificates, then select All Tasks > Import.
- In the Certificate Import Wizard, select Next, then Browse. Select the certificate file generated, called client.p12, found under ActiveMQ > certs. Select Next.
- Type the password for the certificate. Select Next, Next again, and then Finish.
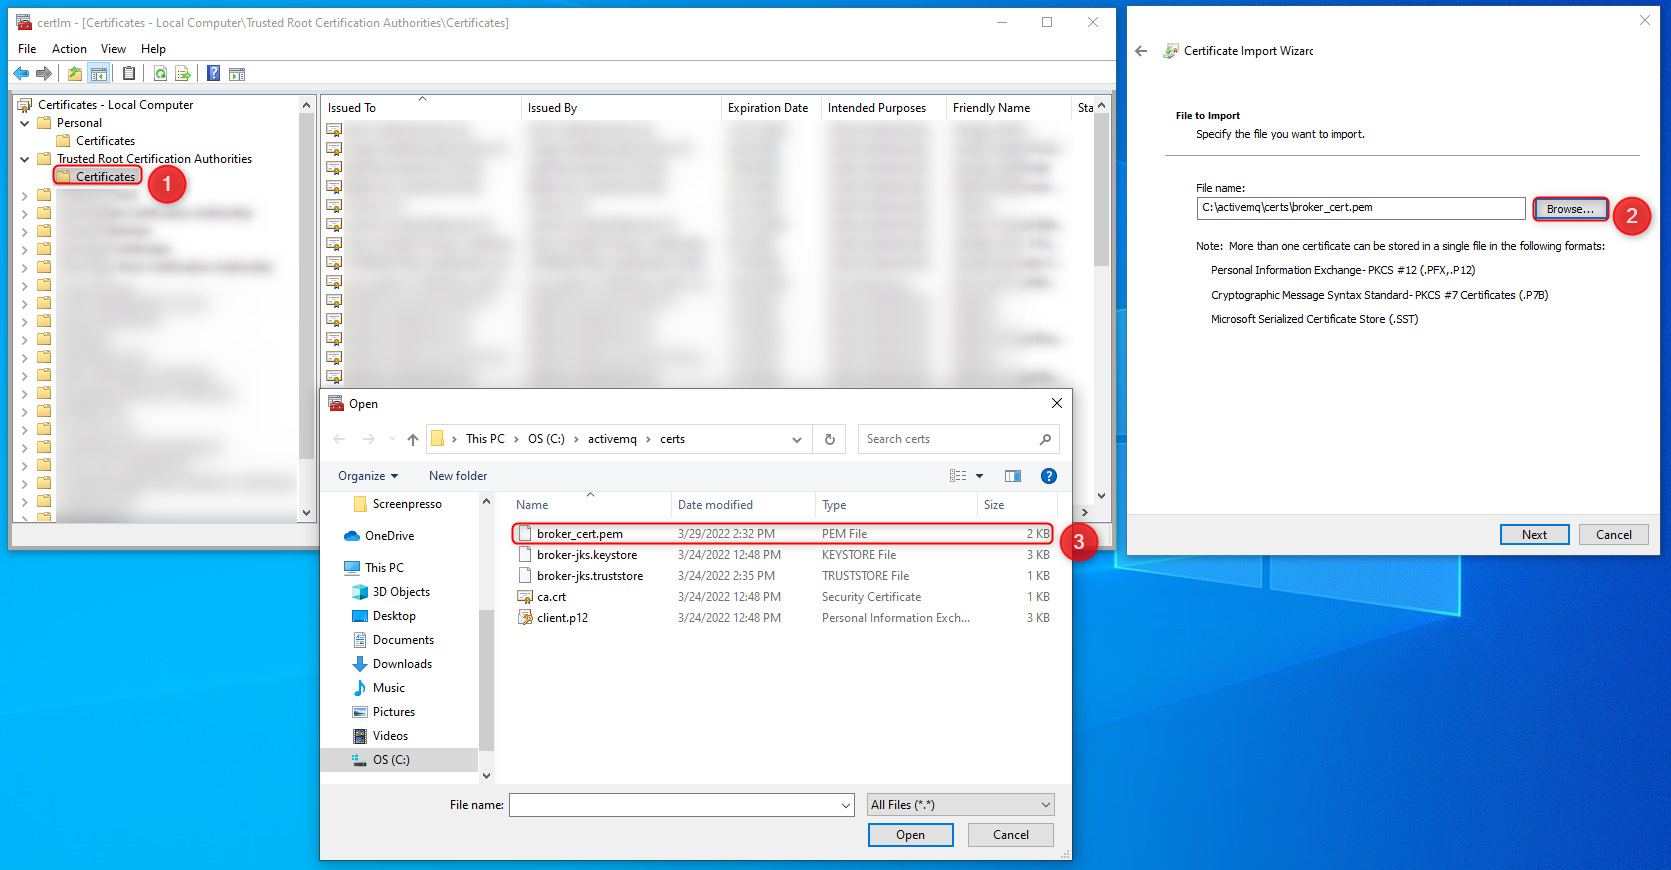
- Navigate to Trusted Root Certificate Authorities > Certificates. Right-click on Certificates, then select All Tasks > Import.
- In the Certificate Import Wizard, select Next, then Browse. Select the trusted root authority certificate "broker_cert.pem" found under ActiveMQ > certs. Select Next, Next again, and then Finish.
Starting ActiveMQ
- Open a command prompt and navigate to the activemq bin folder:
cd C:\activemq\bin - Once in the bin folder, run the following command to start the broker.
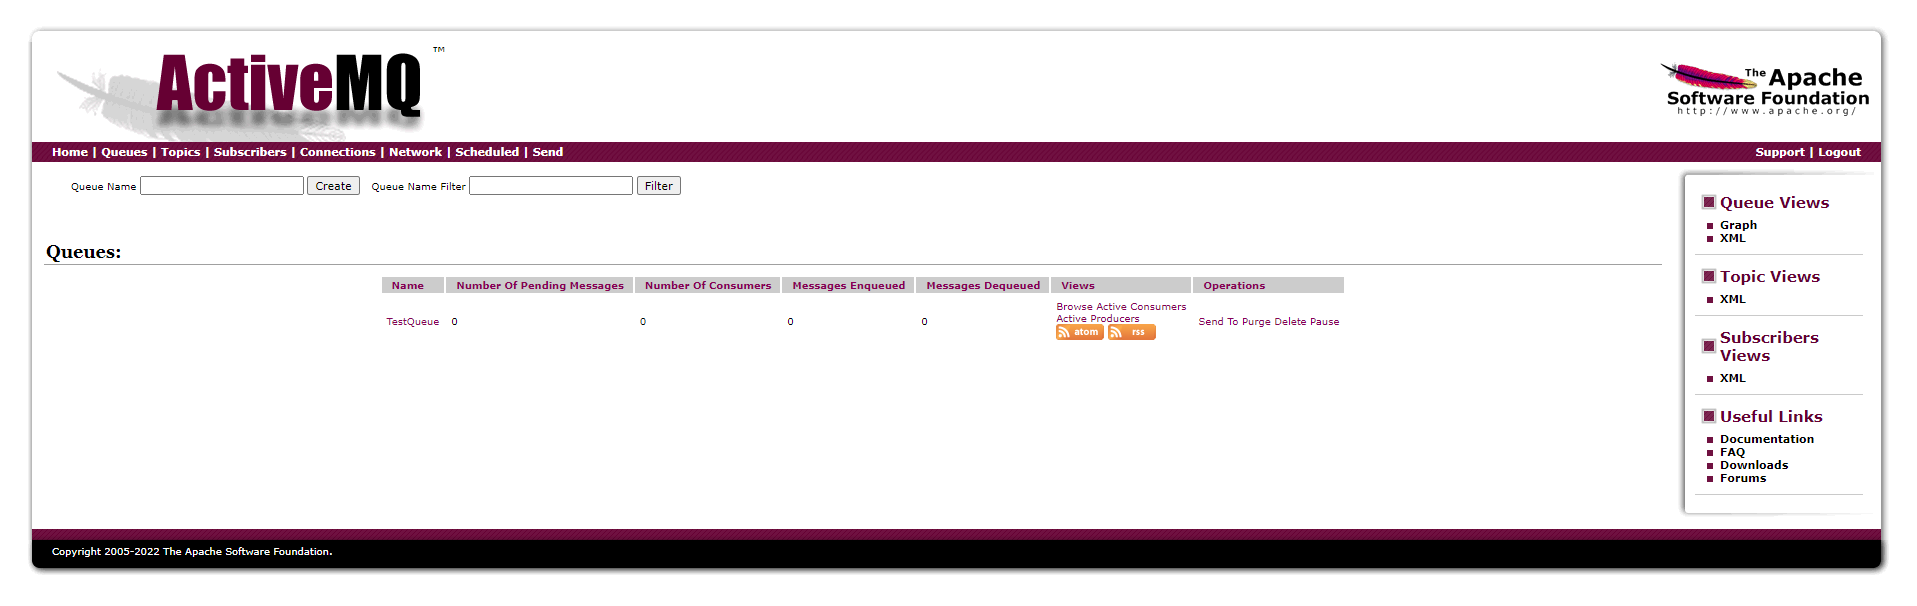
activemq start - The message queue broker will be started. To view the broker and any configured queues, open a web browser and navigate to http://localhost:8161/admin. Enter the password and username to access the broker. The default user name and password will be admin if no modifications were made to the ActiveMQ server.
Adding a queue through Decisions
- Open the Decisions instance and ensure the ActiveMQ module is installed. Navigate to System > Jobs and Events > Message Queues, then select Add Active Queue.
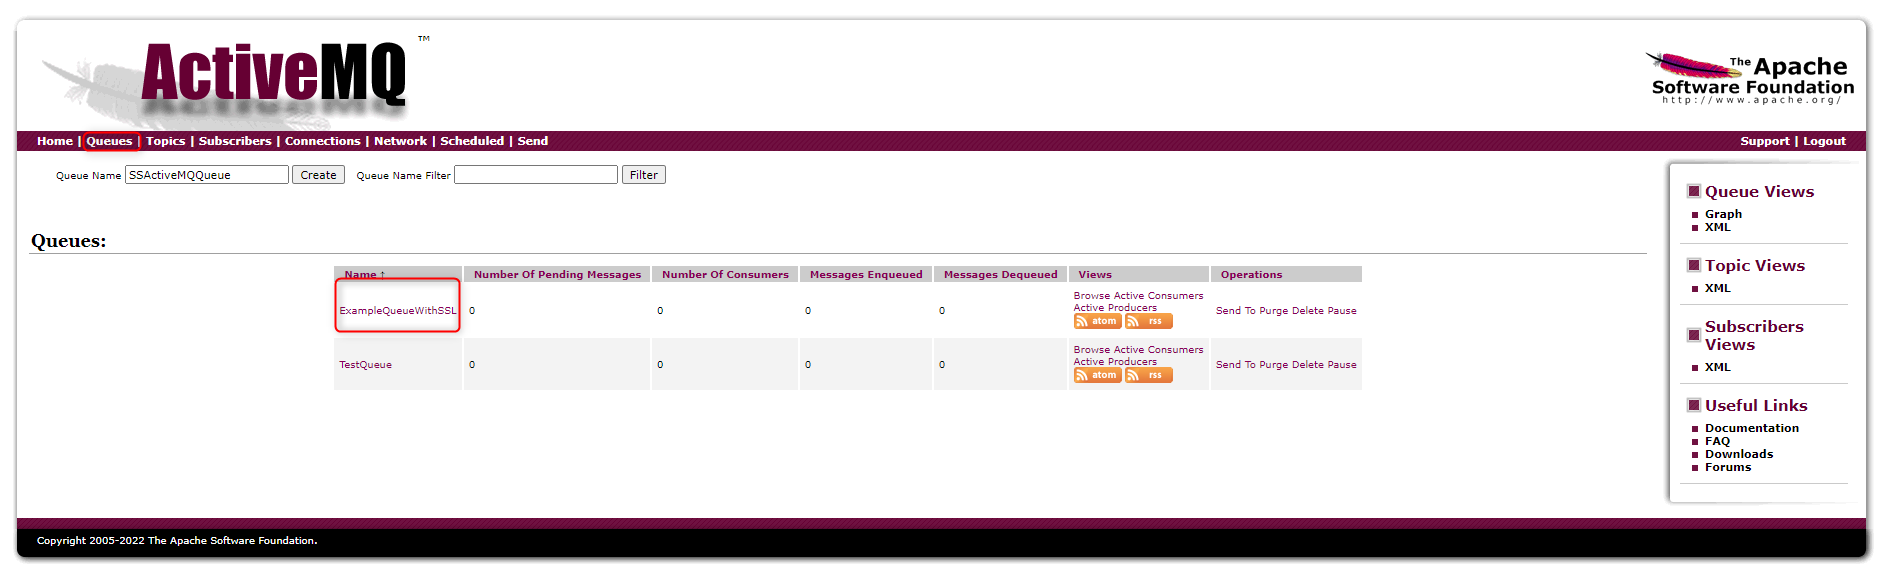
- In the Add Active Queue window, provide the Queue and Display names and in/out addresses for the connecting message queue. To locate the Queue Name in the Active MQ web console, navigate to the Queues tab. The in/out addresses should match the Queue Name field.
- Set Override Server Info to True and enter the server IP. For this example, localhost was used.
- Set Use Default Port to False. Enter the port number of the ActiveMQ instance, e.g., 5671. Ensure this port is available.
- For Protocol, select AMQP+TLS to use SSL for this ActiveMQ messaging queue.
- Set Override Queue Credentials to True. In the User Name and Password field, enter the credentials defined in the .bat file. For this example, both of these settings accept the value "admin". Select SAVE to confirm queue creation. Any messages now sent to this queue via a Message Handler Flowalso appear in ActiveMQ under the given queue name.Password Max LengthIn v8.8, the password max length for ActiveMQ is now 4000 characters
Artemis ActiveMQ
The following section covers the setup and configuration of a broker/message queue and is intended to serve as an example resource to integrate with Decisions. The example highlights the values needed to connect a message queue to Decisions and is meant for informational and troubleshooting purposes.
Please refer to the product's official documentation for a more in-depth and detailed guide on configuring a message queue for use in production environments.
The Artemis version of ActiveMQ can integrate with Decisions using the OpenWire protocol.
Prerequisite
- The latest version of Artemis Apache ActiveMQ
- The recommended version of Java Software Development Kit for ActiveMQ that was downloaded
Installing Artemis ActiveMQ
Once the files have been downloaded, the setup for Artemis will be similar to configuring the Classical version, with a few differences. The environment variables and zip file will need to be extracted, similar to setting up the Classical version.
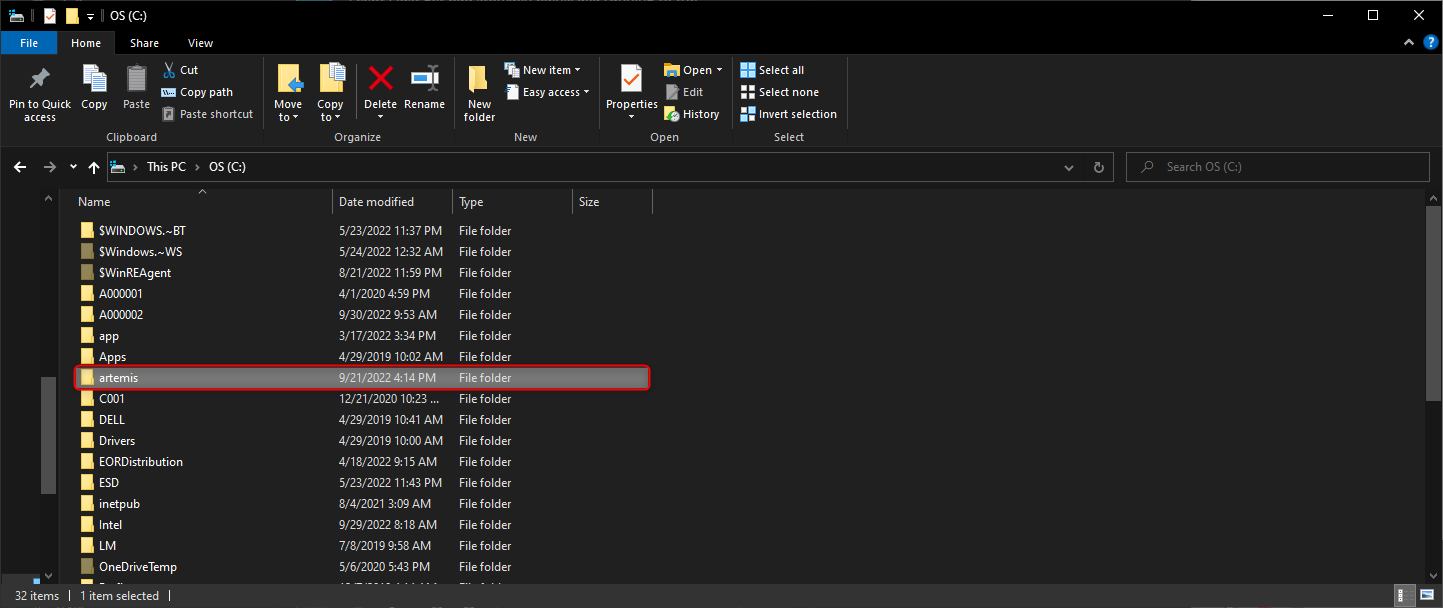
- On the environment, extract the zip file for Apache ActiveMQ.
- Open System Properties and under the Advanced tab and click Environment Variables. I
- In the Windows search bar, search for and open Edit the System Environment Variables.
- In the Advanced tab, select Environment Variables..., click New under System variables to create a new environment variable. Enter "JAVA_HOME" for the Variable Name and enter the file path to the JavaSDK for the Variable value. Select OK to confirm variable creation. It will then appear in the System Variables table.
- Find the Path variable in the System Variables. Select and edit it to view the variable. Scroll to the bottom of the variable and add these two lines in order: %path% and %JAVA_HOME%\bin. Select OK to confirm the edit.
Starting Artemis ActiveMQ
- Open a command prompt and navigate to the bin folder for the extracted Artemis installation.
cd C:\artemis\apache-artemis-2.25.0\bin - Once in the bin file, run the following command to create a new Artemis broker. The name must be specified when using the command.
artemis create TestBroker - A default username and password will be requested. By default, the password will be hidden when entered into the command prompt. For allow-anonymous, enter Y or True.
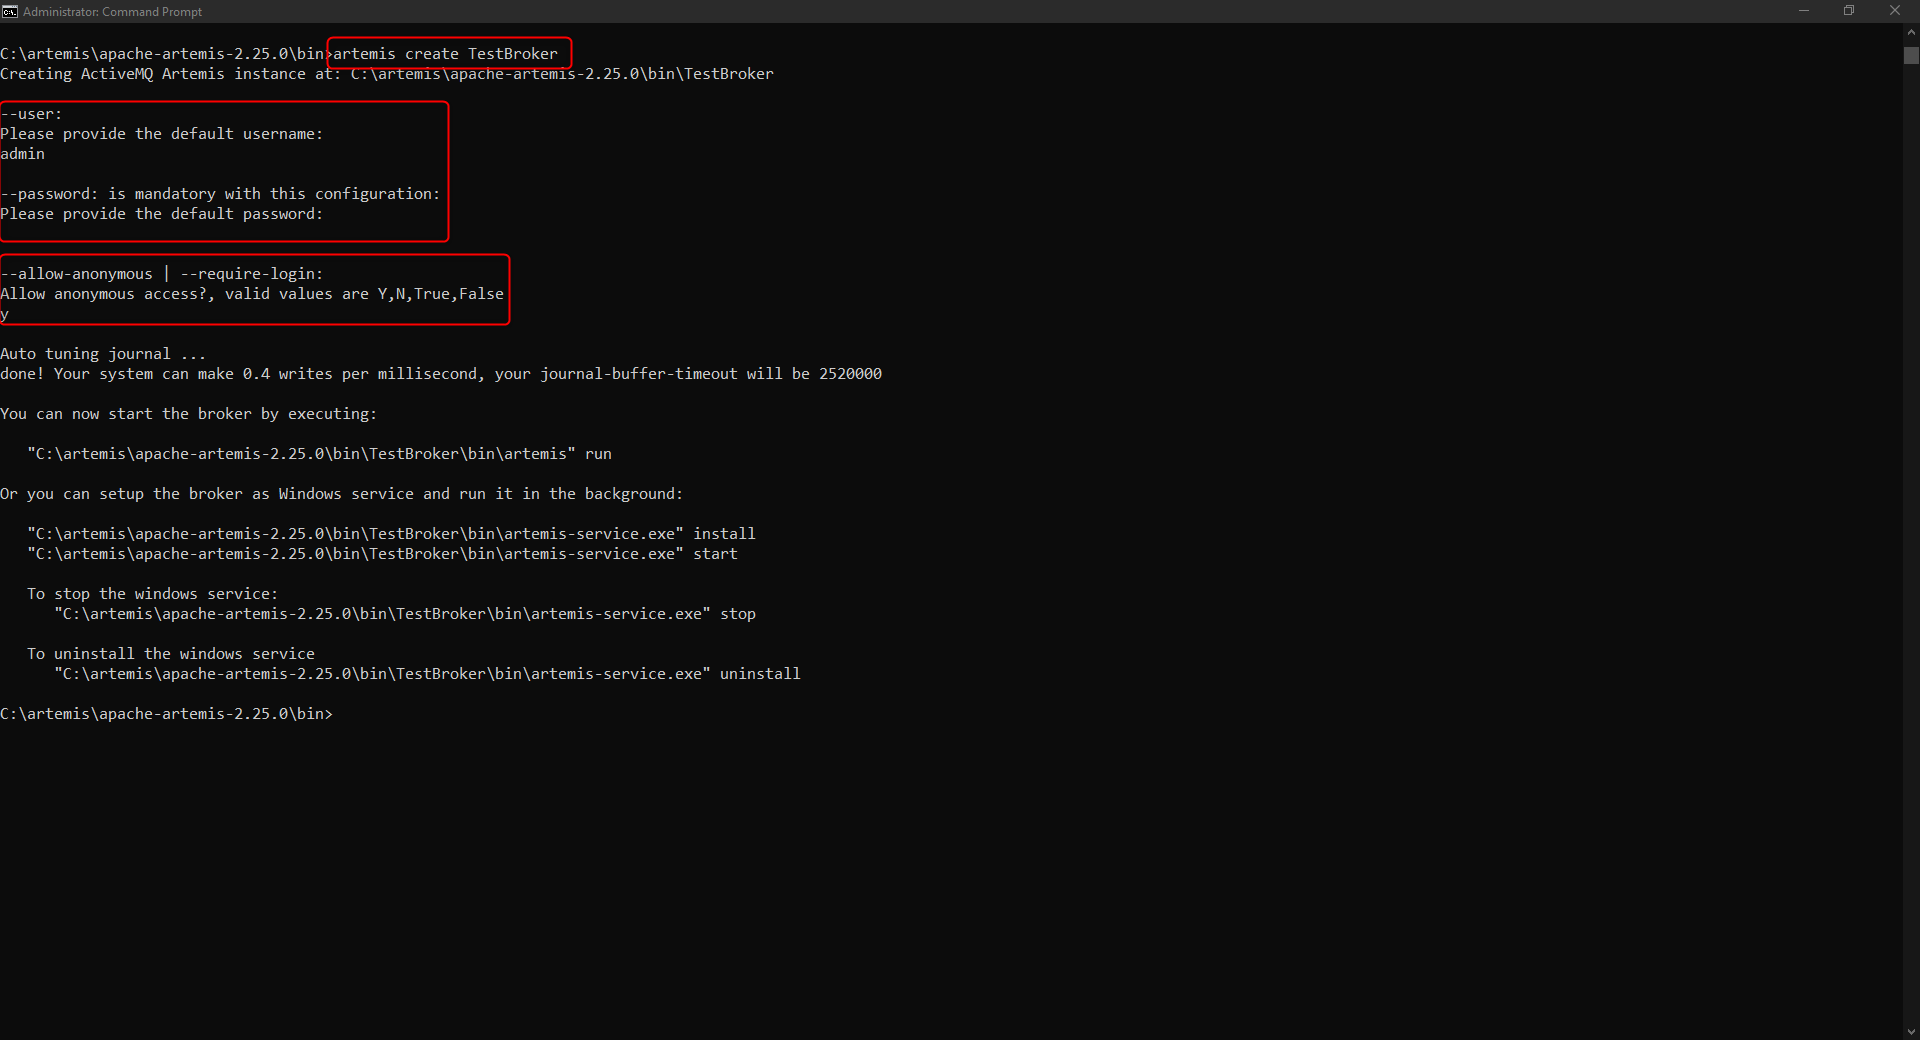
- A new folder containing the broker will be created.
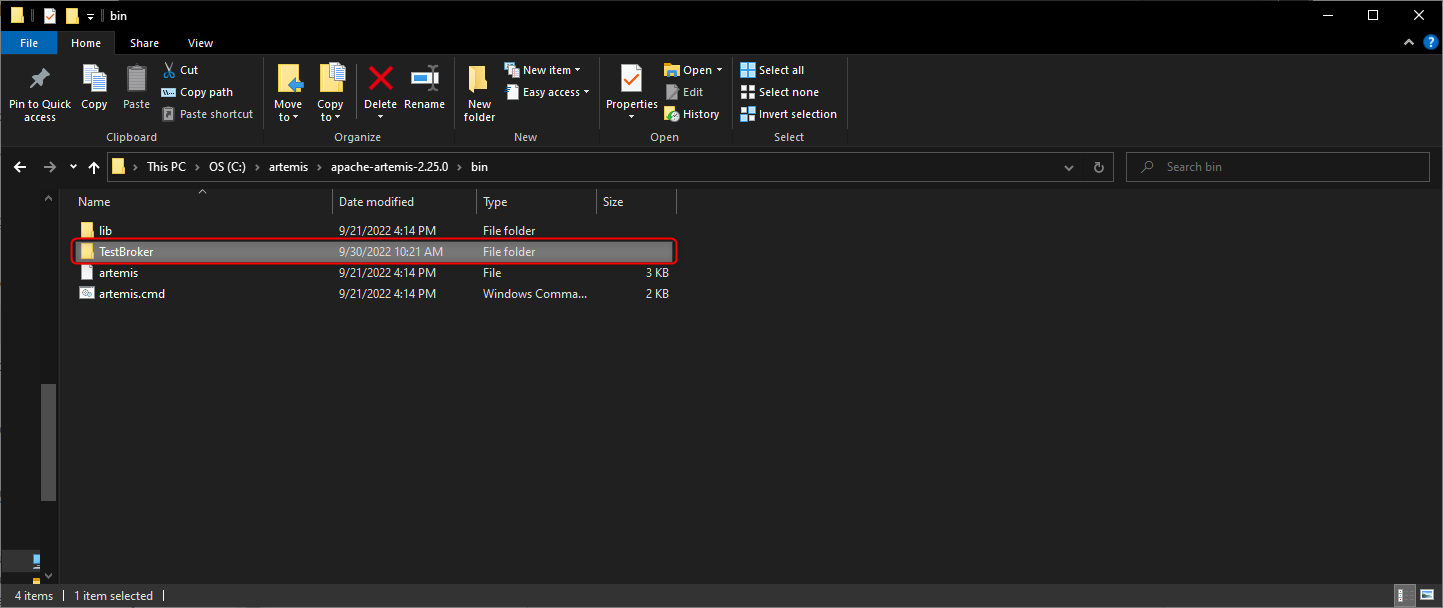
- In the same command prompt, navigate to the bin folder for the broker:
cd TestBroker\bin - Once in the directory, run the following command to start the broker:
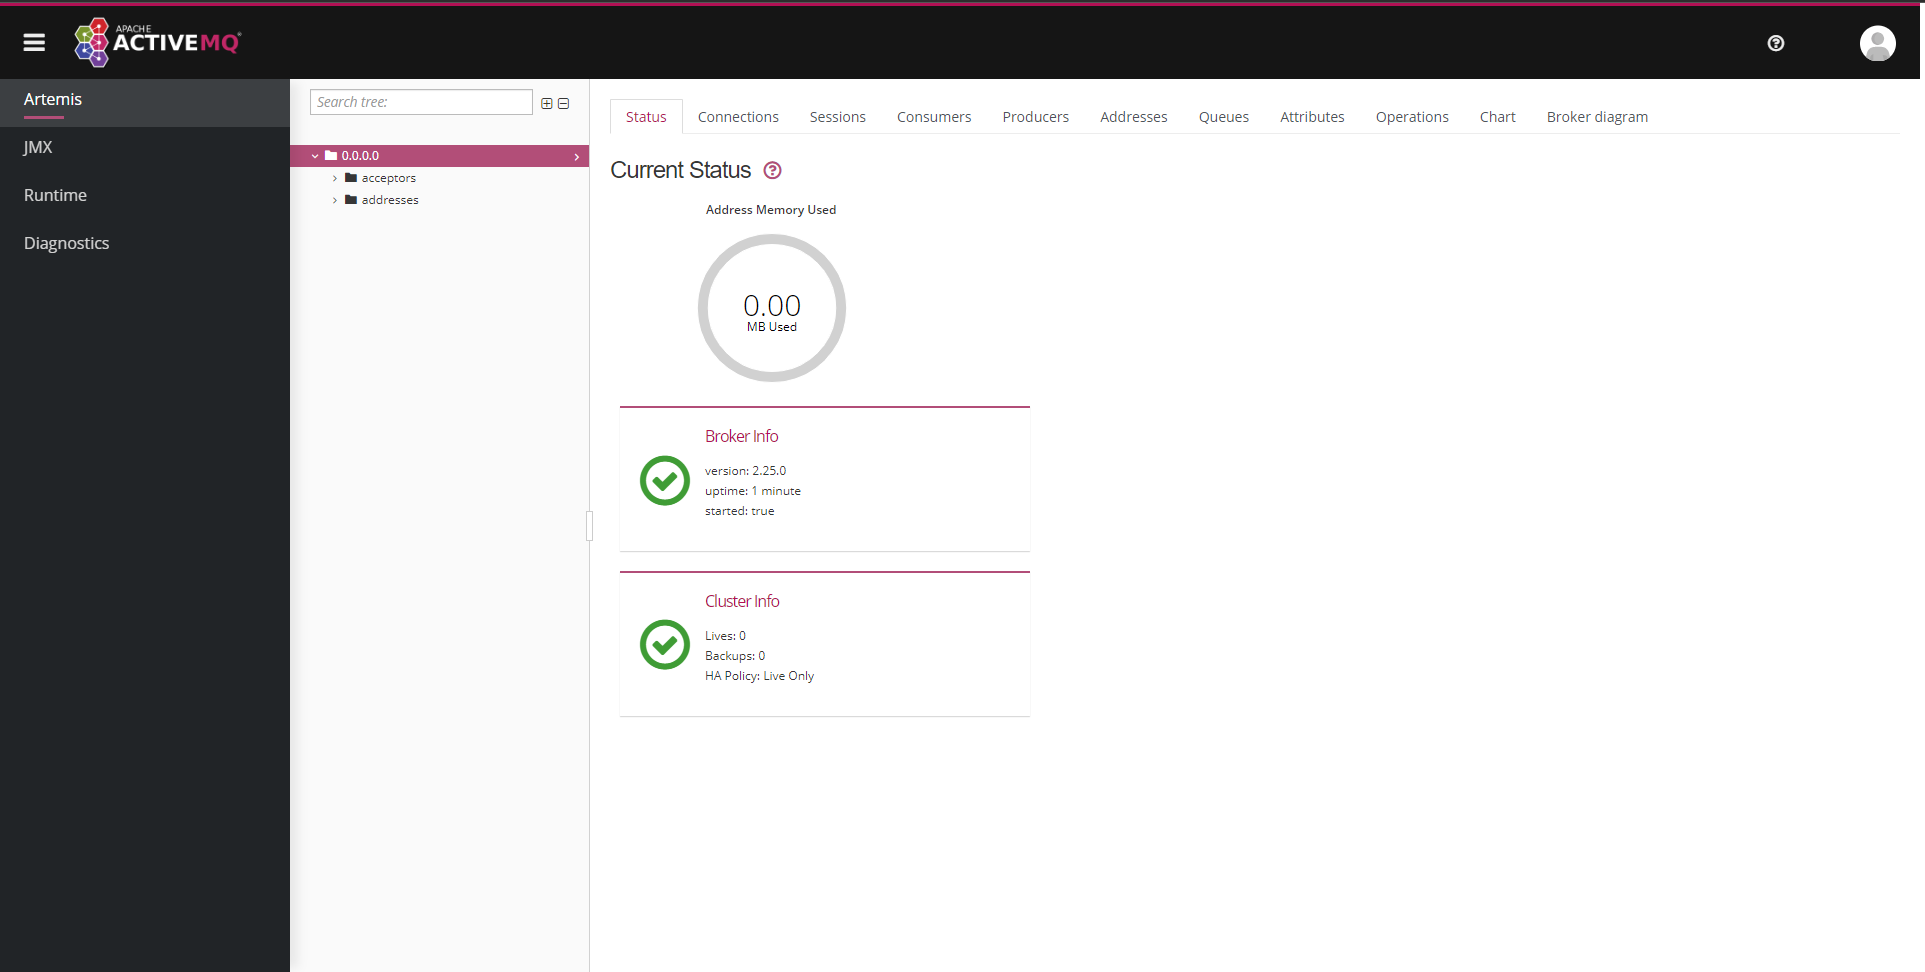
artemis run - The web console can then be accessed by entering the IP or server name configured for the broker, then selecting Management Console. In this case, since it was a default installation, the web console will be localhost:8161
Creating a Queue via the Web Management Console
Message queues can be created through the Web Management console.
- In the ActiveMQ console, select the addresses folder from the folder tree.
- Select the Create address tab.
- For the Address name, enter the name for the Address.
- Set the Routing type to Both.
- Select Create Address.
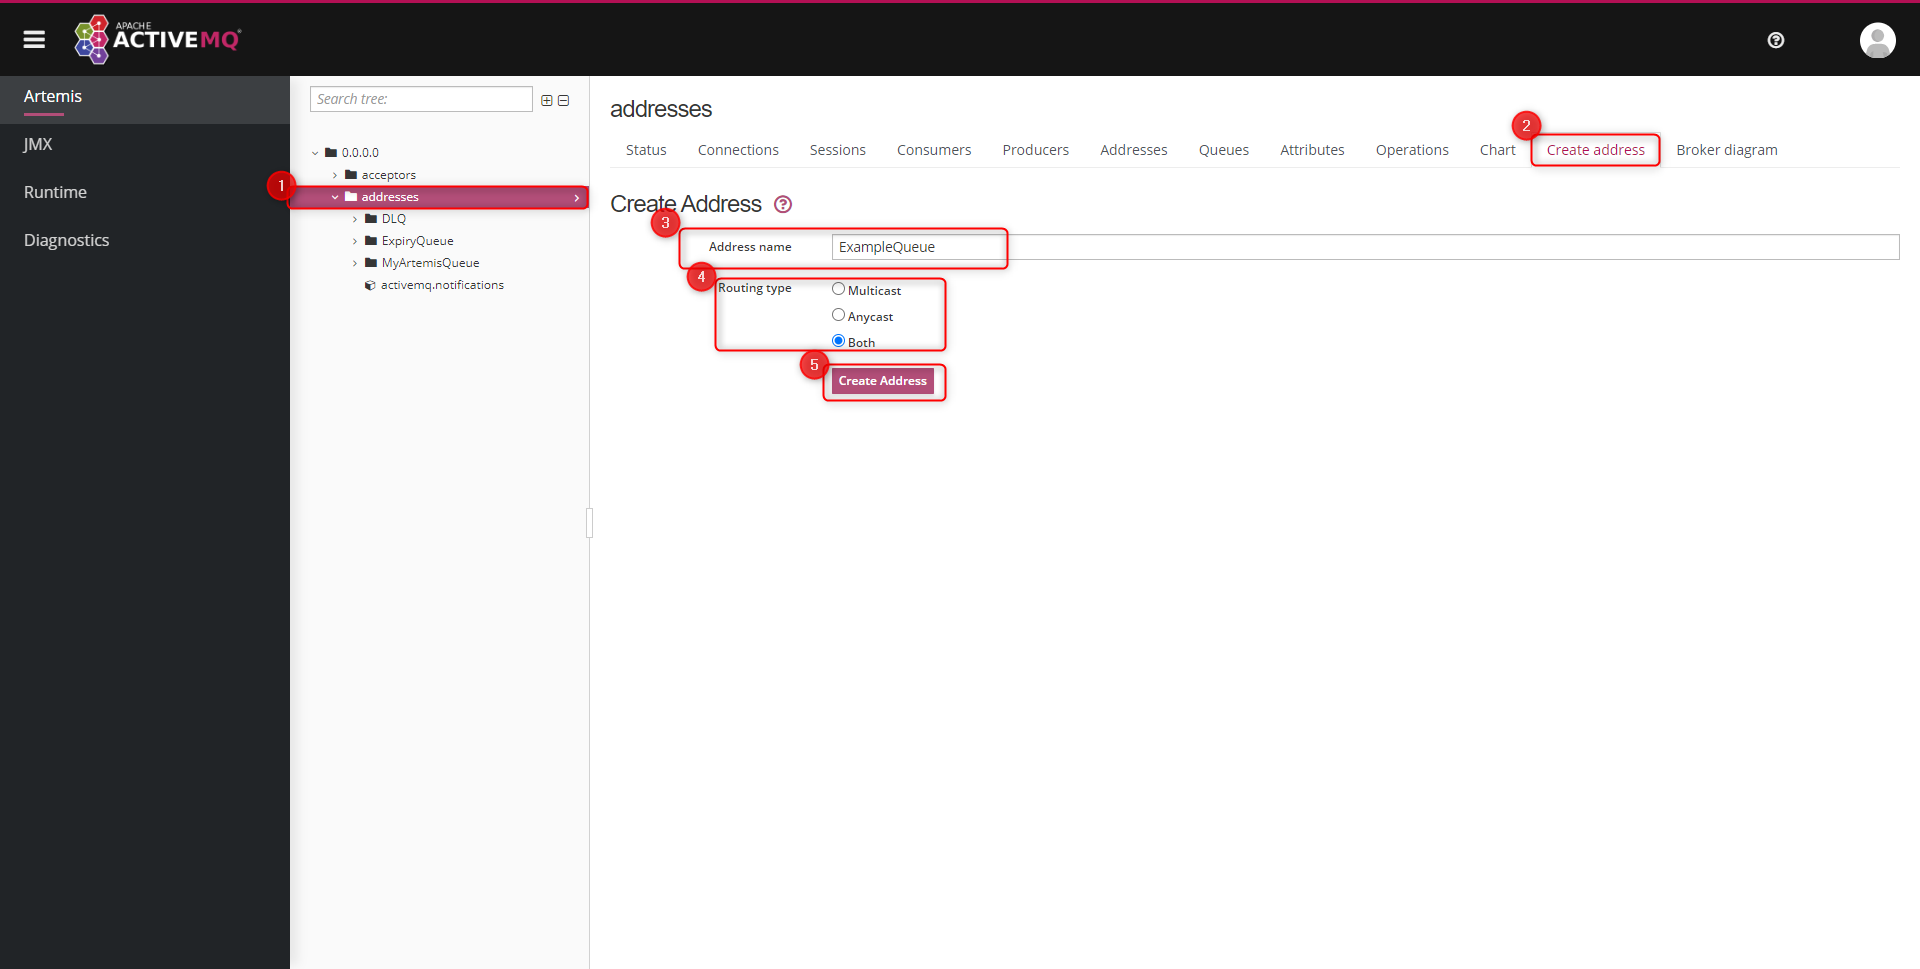
- A new queue will be created and appear in the folder tree for the console.
Connecting to the Queue from Decisions
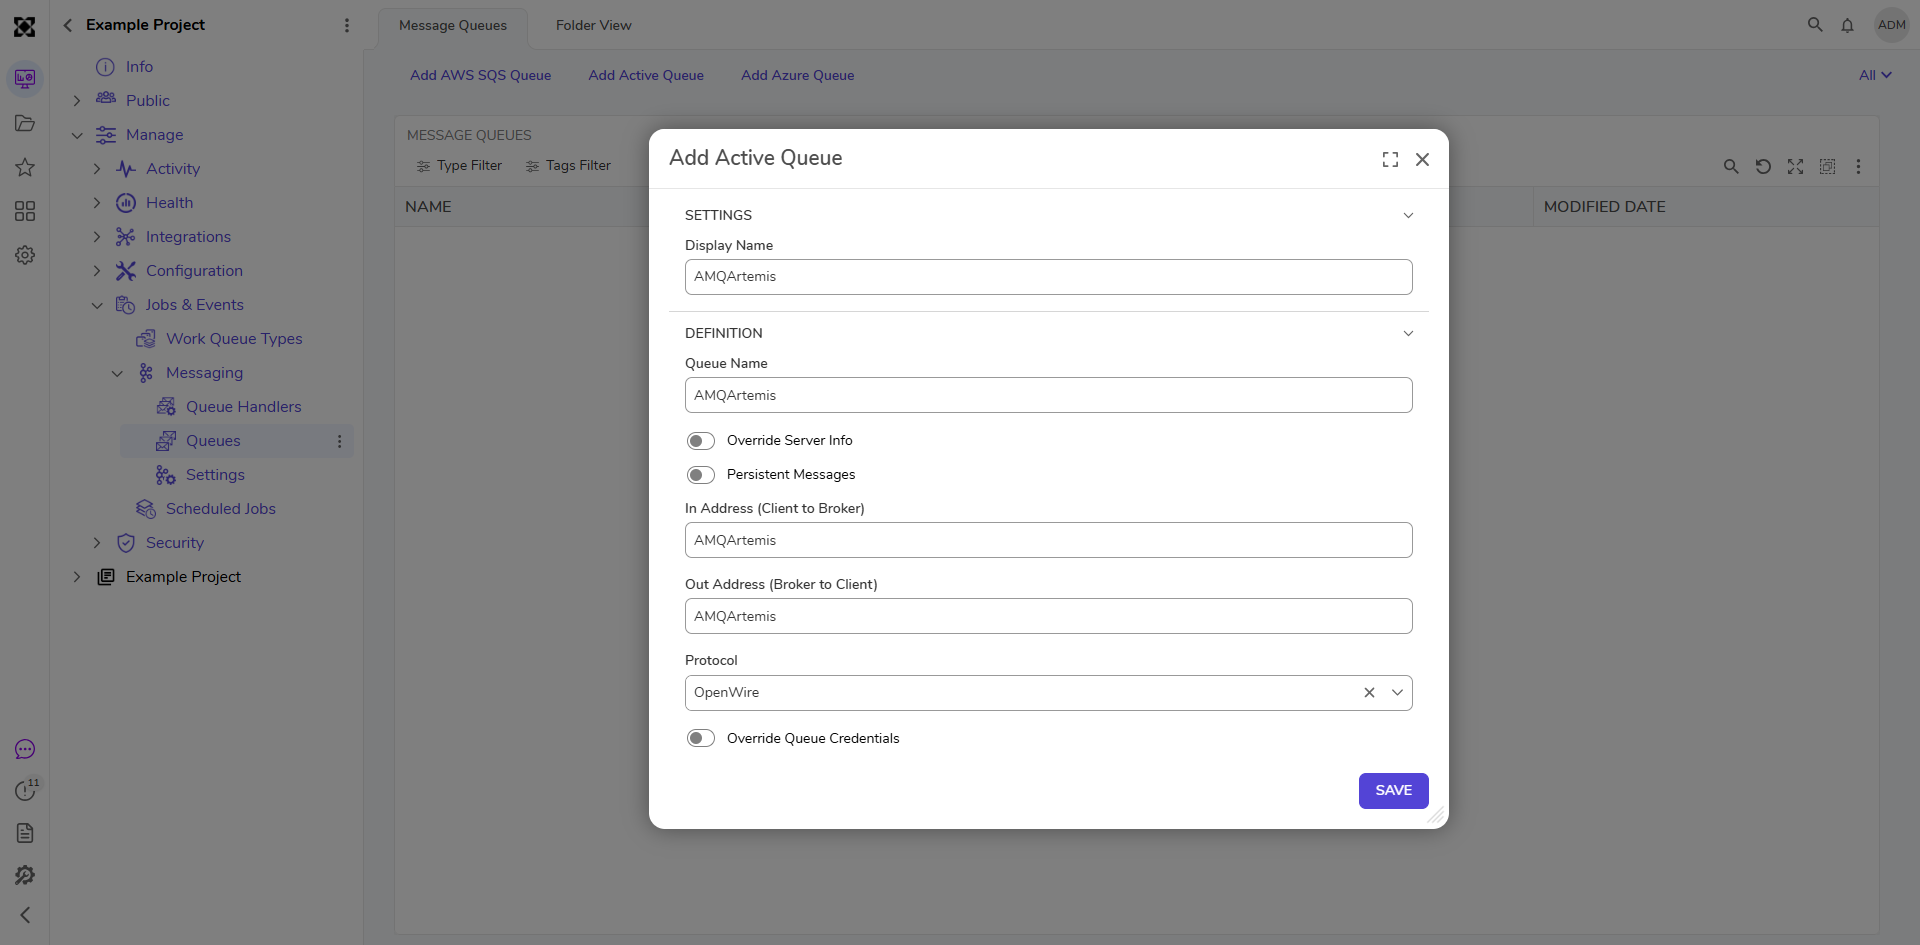
- In Decisions, navigate to System > Jobs and Events > Message Queues and click ADD ACTIVE QUEUE.
- On the Add Active Queue window, configure the settings for the message queue.

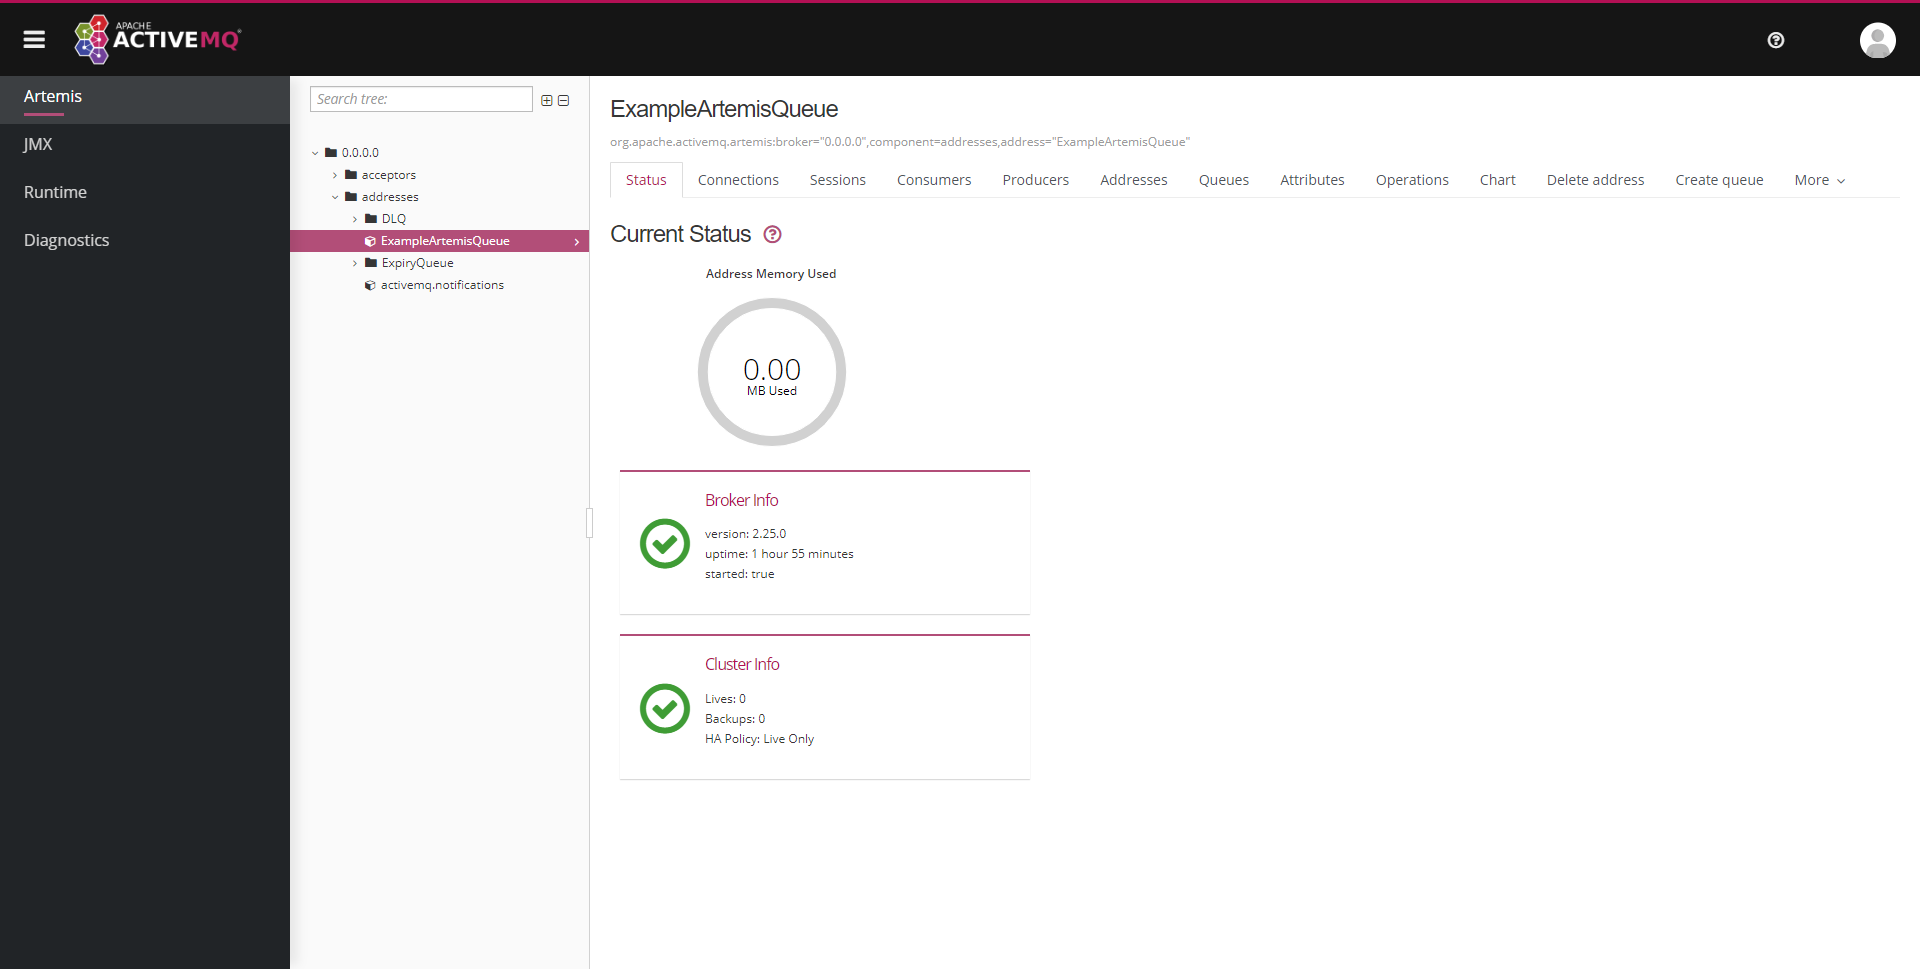
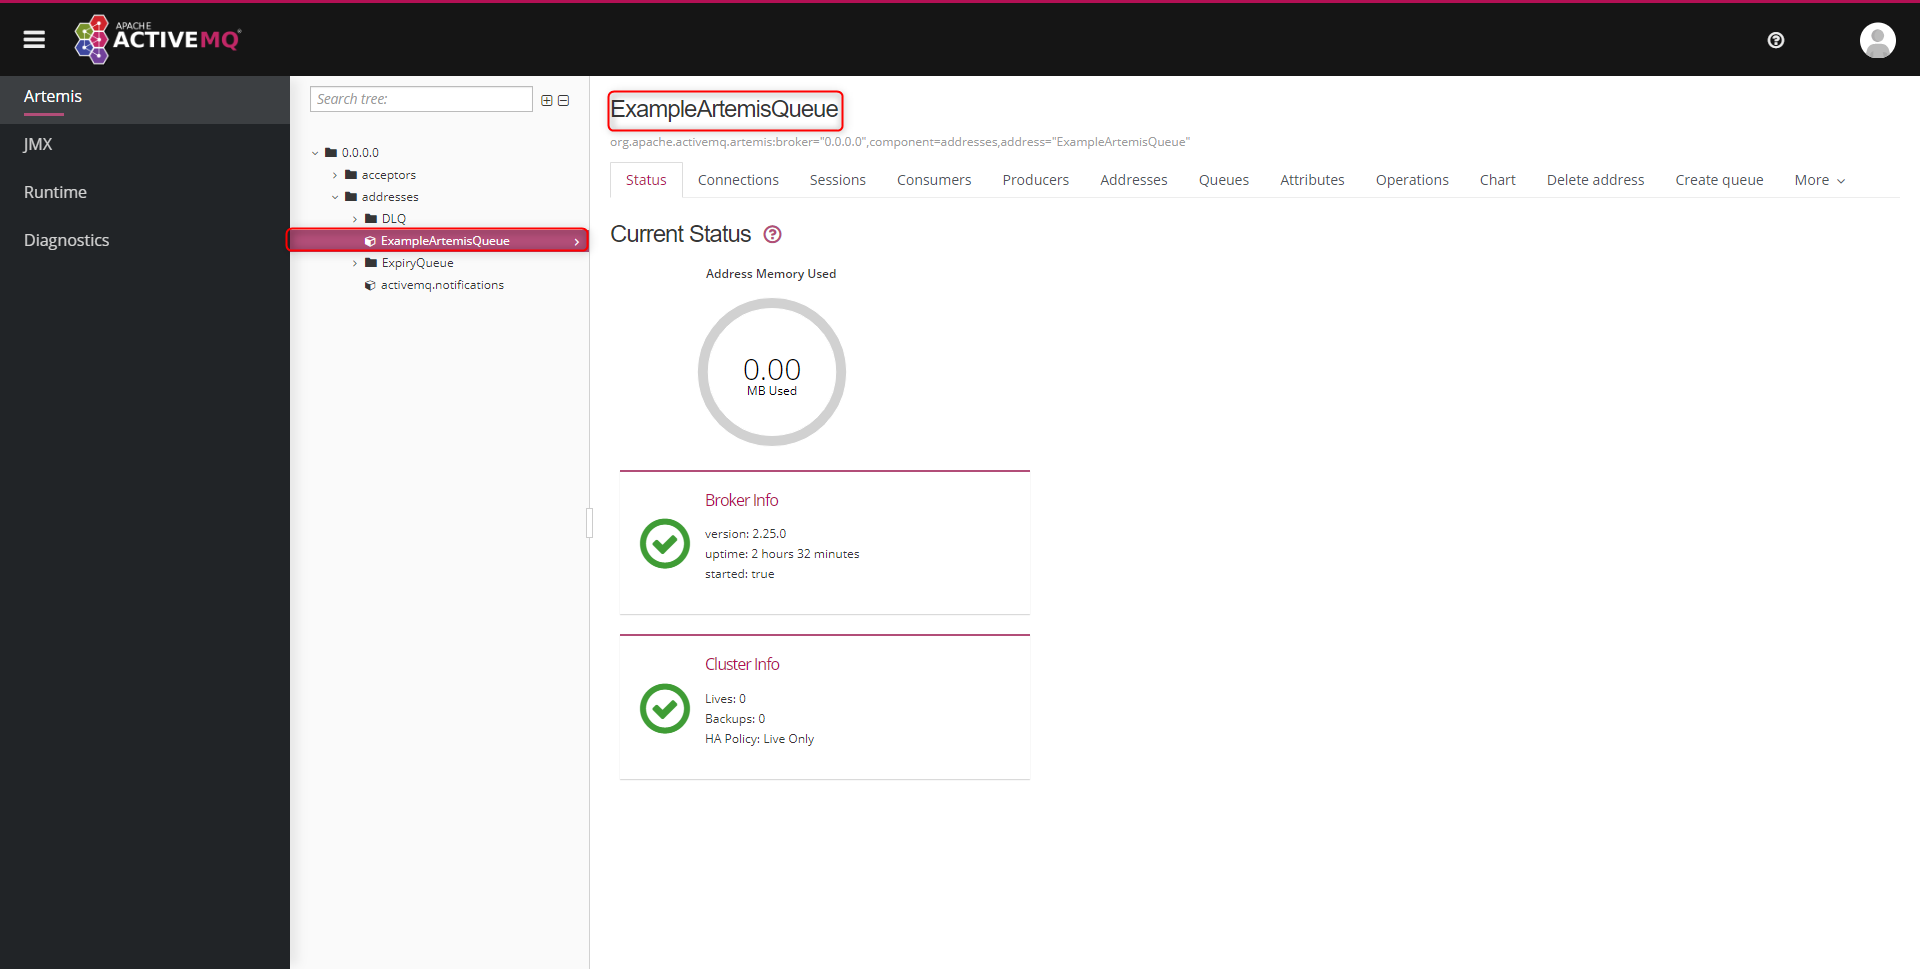
Setting Description Display Name The name for the message queue as displayed in Decisions Queue Name The name of the queue as it will appear in the broker Override Server Info Overrides the server settings defined in System > ActiveMQ Settings. Persistent Messages If enabled, this setting will allow messages to persist when the message broker is restarted In Address Used by the ActiveMQ broker to identify the name for any inbound connections to the queue Out Address Used by the ActiveMQ broker to identify the name for any outbound connections to the queue Protocol Sets the transport protocol used by the queue. Three options are available: OpenWire, AMQP 1.0, and AMQP+TLS OpenWire Uses OpenWire as the protocol to establish access to the message queue AMQP 1.0 Uses AMQP 1.0 protocol to establish access to the message queue AMQP+TLS Enables SSL connections through AMQP to the message queue Override Queue Credentials Overrides the credentials defined in ActiveMQ settings - For Queue Name, In Address, and Out Address, these values will be the name of the queue as it appears in the broker. For this example, these values will be ExampleArtemisQueue. Below is a screenshot of where to locate the name of the queue
- For the Protocol, select OpenWire and click SAVE.
Active MQ Settings
- Navigate to System > Settings. Right-click Active MQSettings and select Edit.
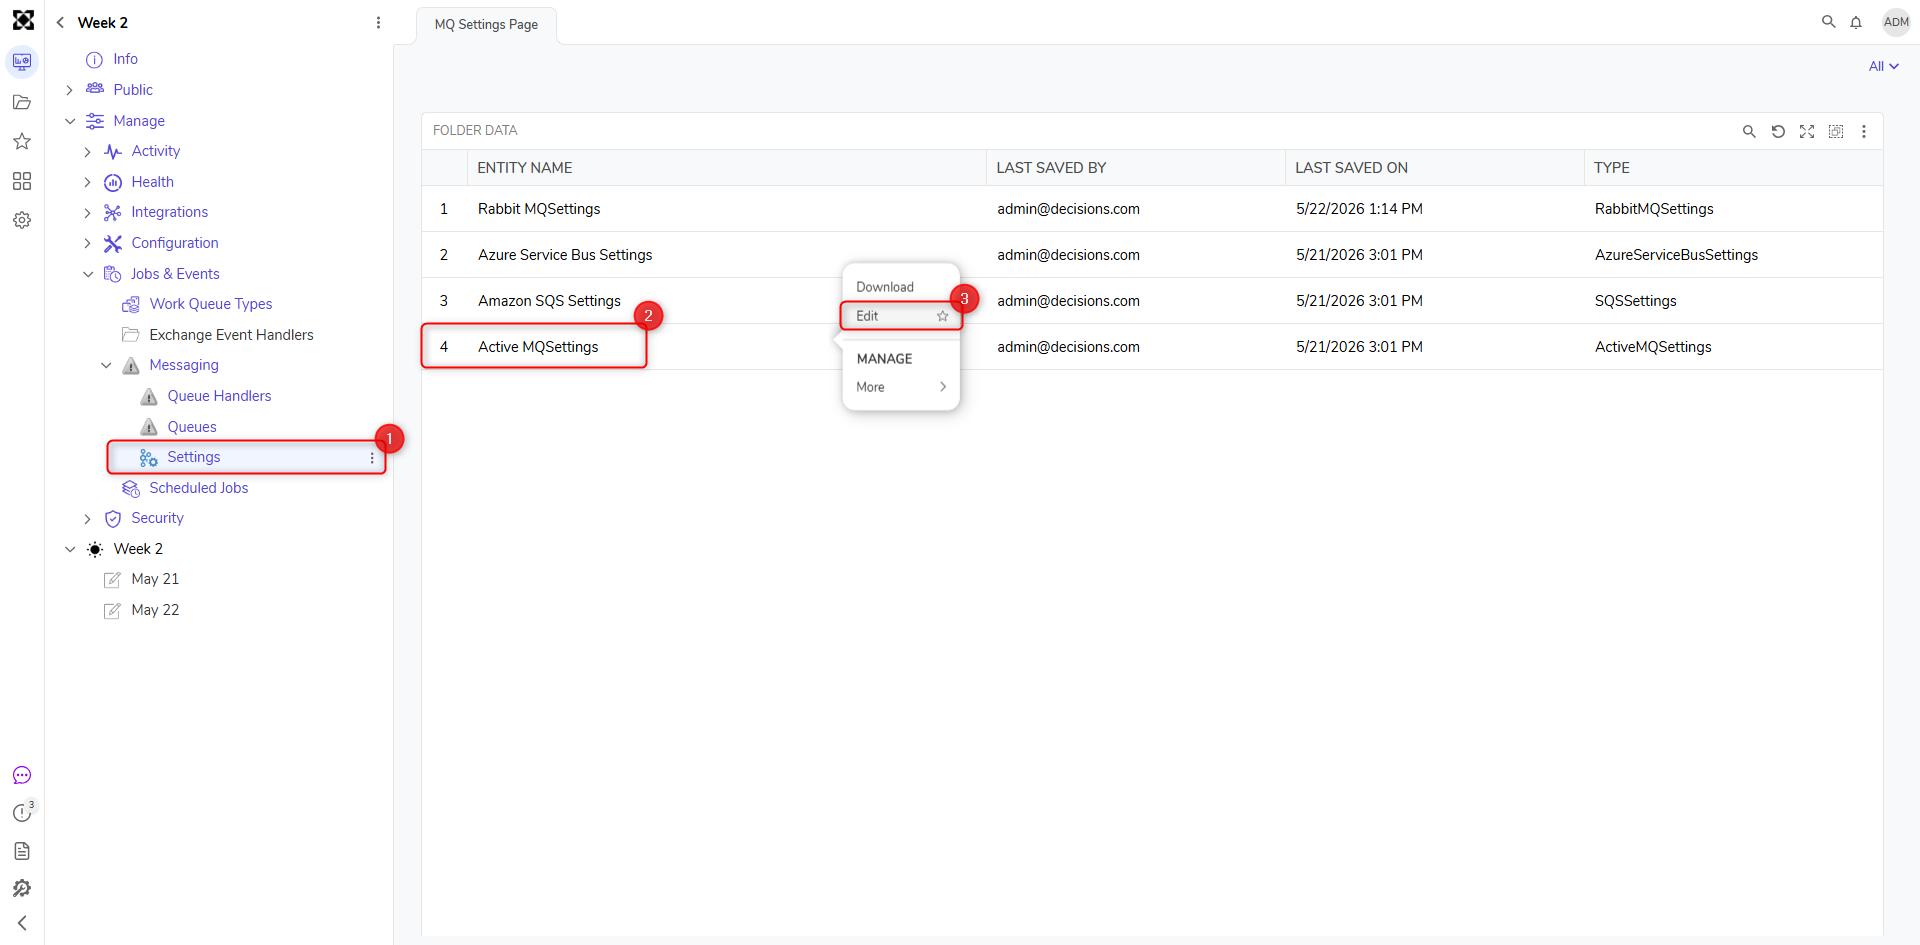
- On the Edit Active MQSettings window, enter the configuration settings for ActiveMQ and click SAVE.
Setting Description Default Server IP or Name The IP address or the server name that hosts the queue. Use Default Port If enabled, uses the default port assigned for ActiveMQ. When disabled, a new field labeled Port can be used to specify the port number Use Failover with Connection When enabled, this setting allows a different server with the same queue name to be used during a failover event. Failover Server IP or Name The server IP or Name for the Failover Server Default Virtual Host The default virtual host used by ActiveMQ. Default User Name The user name used to connect to ActiveMQ. Default Password The default password used to connect to ActiveMQ. Default Protocol Defines the transport protocol Decisions will use when connecting to the queue OpenWire Uses OpenWire as the protocol to establish access to the message queue. AMQP 1.0 Uses AMQP 1.0 protocol to establish access to the message queue 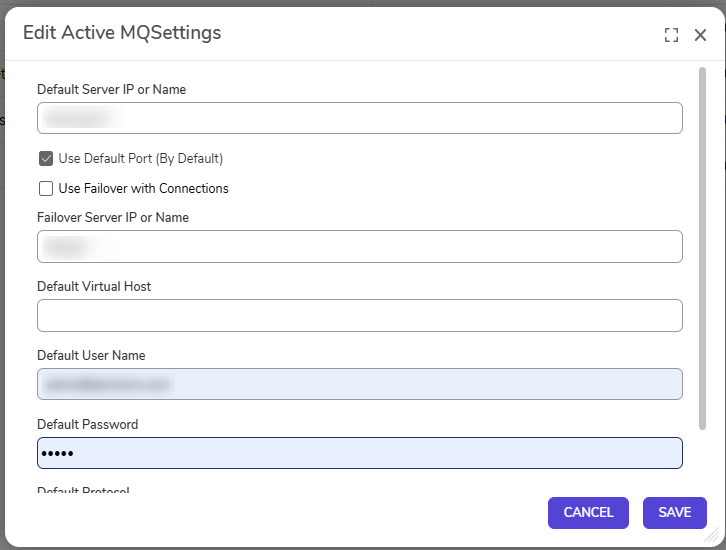
Feature Changes
| Description | Version | Developer Task |
|---|---|---|
| A hidden Module called Decisions.MessageQueues Module will be downloaded automatically when any message queue Module is installed. | 9.0 | [DT-039289] |