Setting up a Listener/Message Handler
To subscribe to messages in a queue, a Message Handler Flow needs to be configured. This will be used to interpret and run actions on messages received from the queue.
The desired Message Queue module must be installed and a dependency to that module needs to be made in the Project the Handler Flow will be created in.
The following example will demonstrate how to pull messages from a configured RabbitMQ. A similar process will be involved for other message queues.
- From a Project, go to Manage > Jobs & Events > Messaging > Queue Handlers. Click the ADD MESSAGE HANDLER action and then Create New.
- Navigate to the Properties Panel for the Flow. Under the SETTINGS category, you will see that the drop-down menu under Behavior Type has the type Message Queue Handler Flow.
Choosing this Flow behavior provides three additional Flow Inputs; Message, Handler Id, and Headers. The Message Input contains the Payload (Byte[]), Id (String), and MessageDateTime (DateTime) Inputs.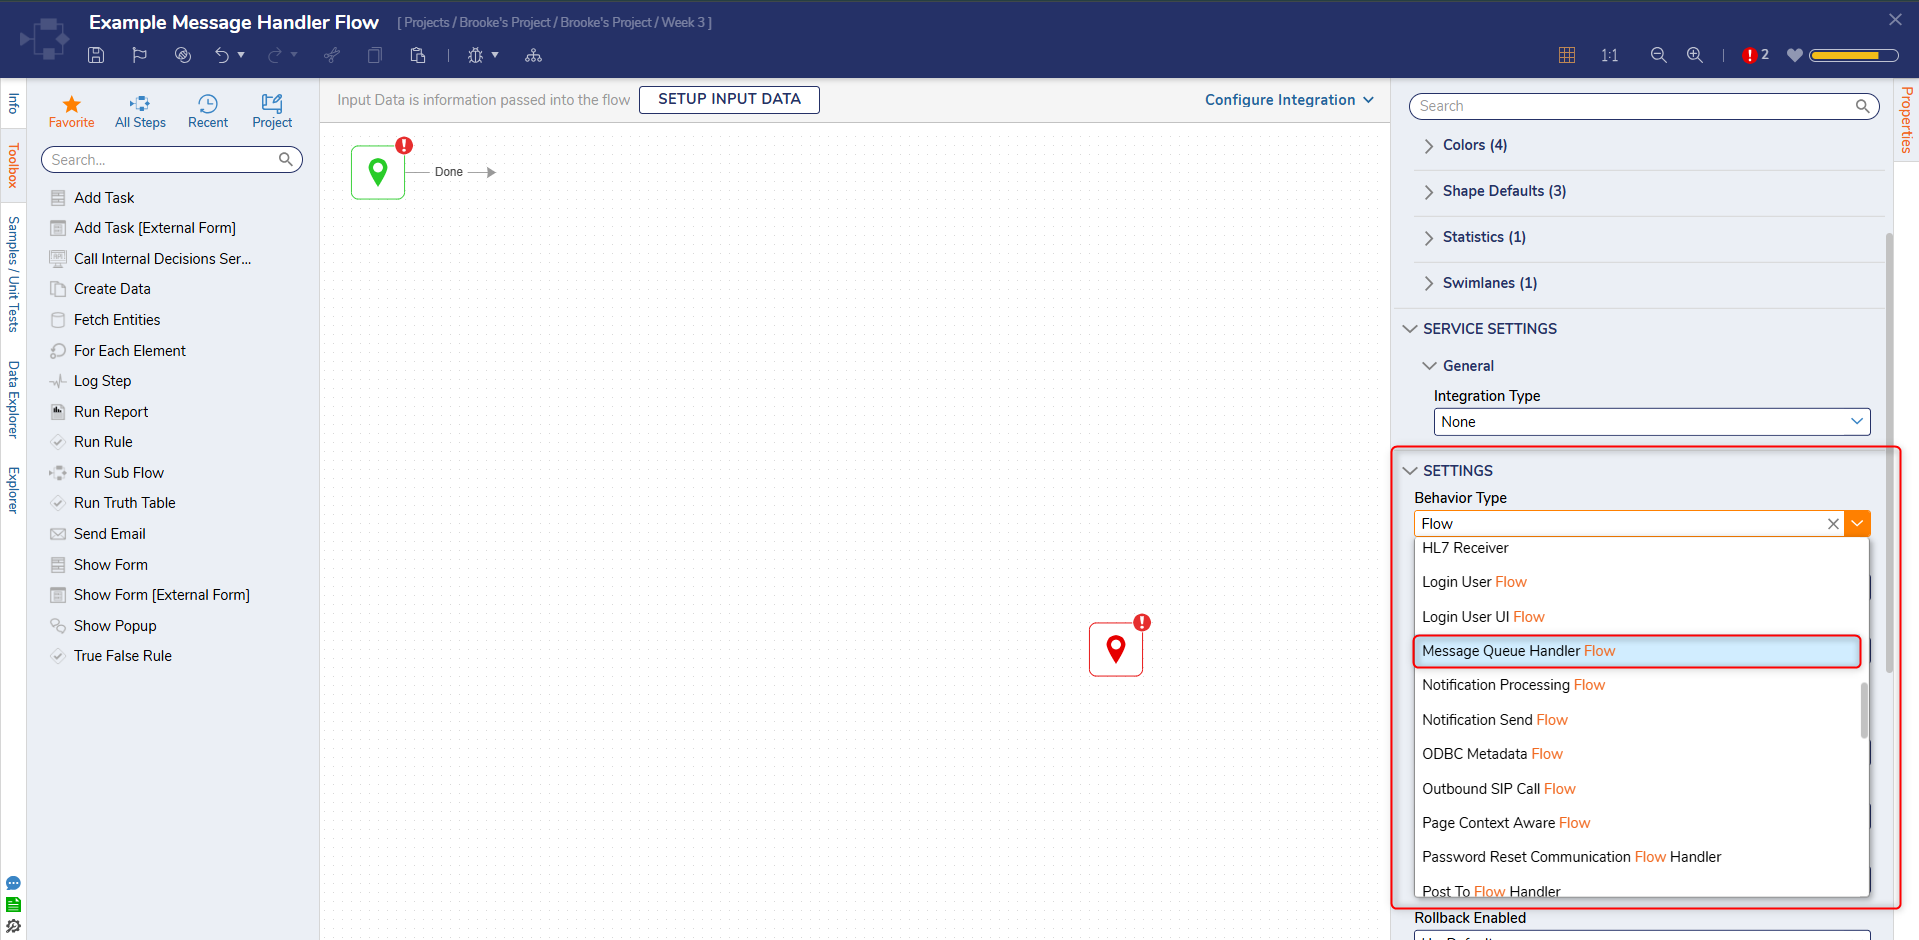
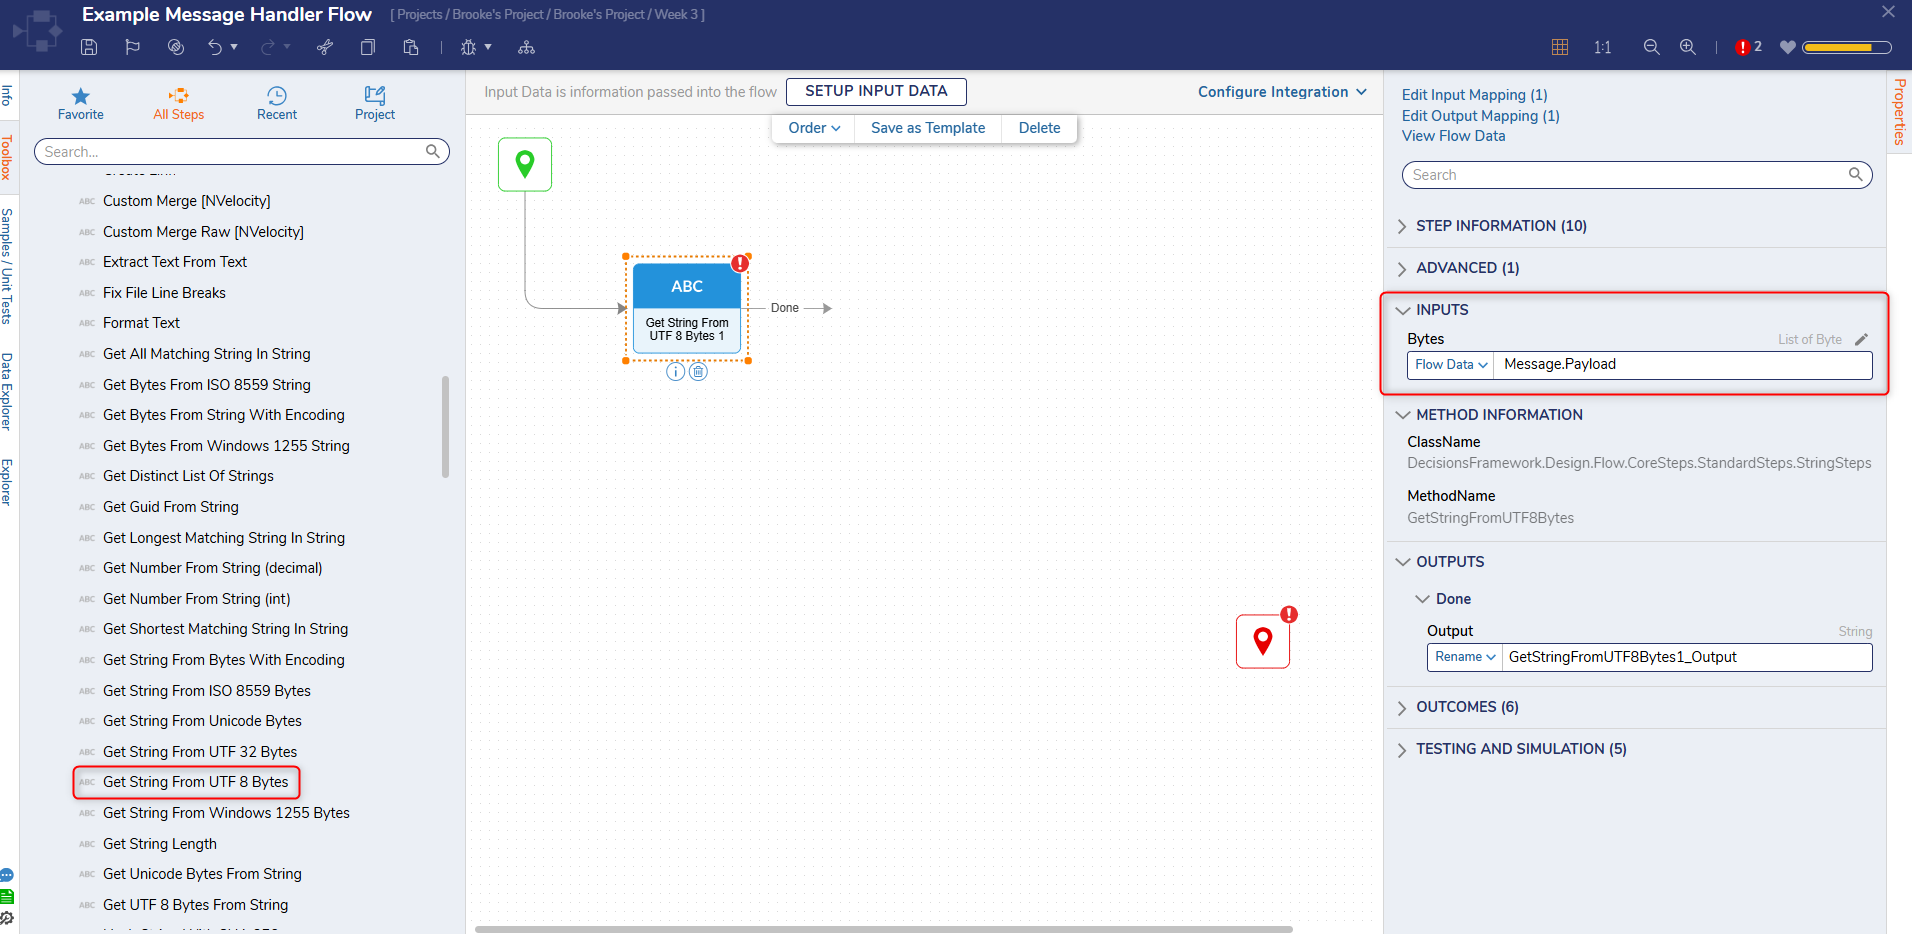
- From Toolbox, navigate to DATA > TEXT and attach a Get String From UTF 8 Bytes step to the Start step.
- On the Properties panel under INPUTS, click Unknown and select Flow Data. Click Message, select Payload, and click DONE. RabbitMQ Messages are typically encoded in UTF8. Other messengers may use Base 64, Ascii, or a different UTF decoding step to help decode the Payload.
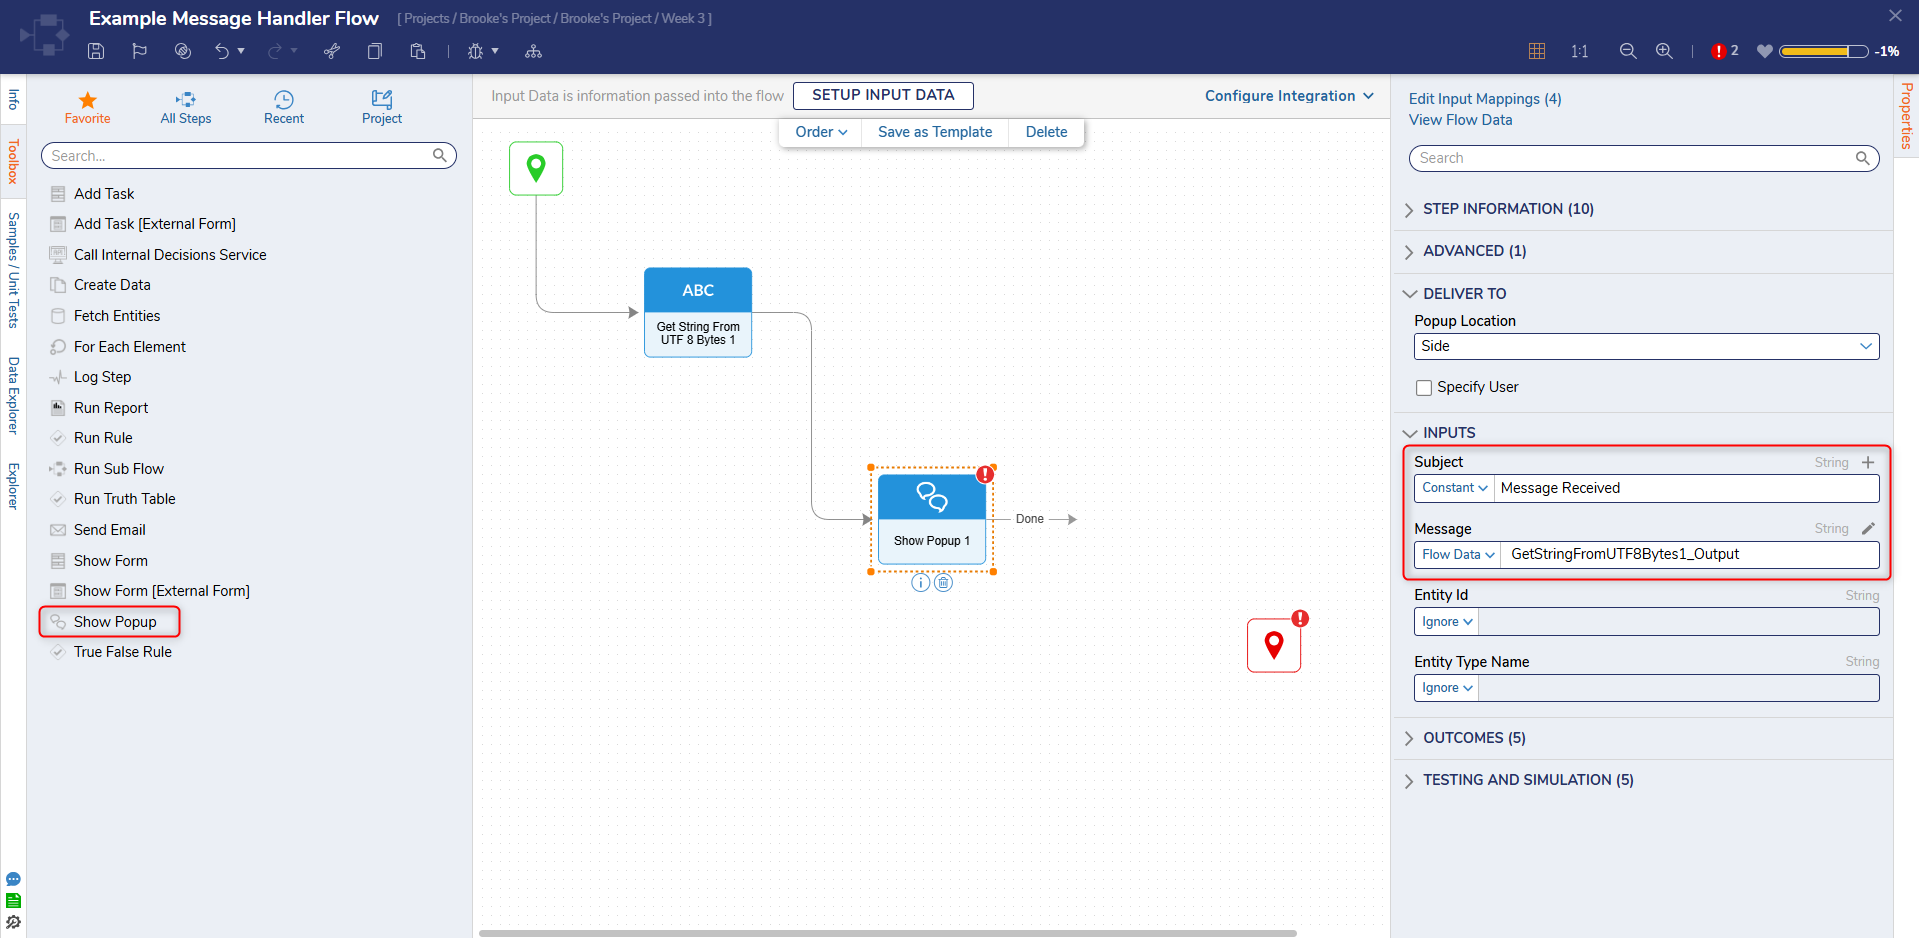
- Attach a Show Popup step from Toolbox > FAVORITE STEPS to the workspace. Map GetStringFromUTF8Bytes1_Output to Message, and Constant map the desired Subject. This is merely to demonstrate the the message is being received and is not required for functionality.
- Click Save to save changes to the Flow.
Subscribing to a Queue
The messaging system Queue will need to be configured in order for Decisions to subscribe to it.
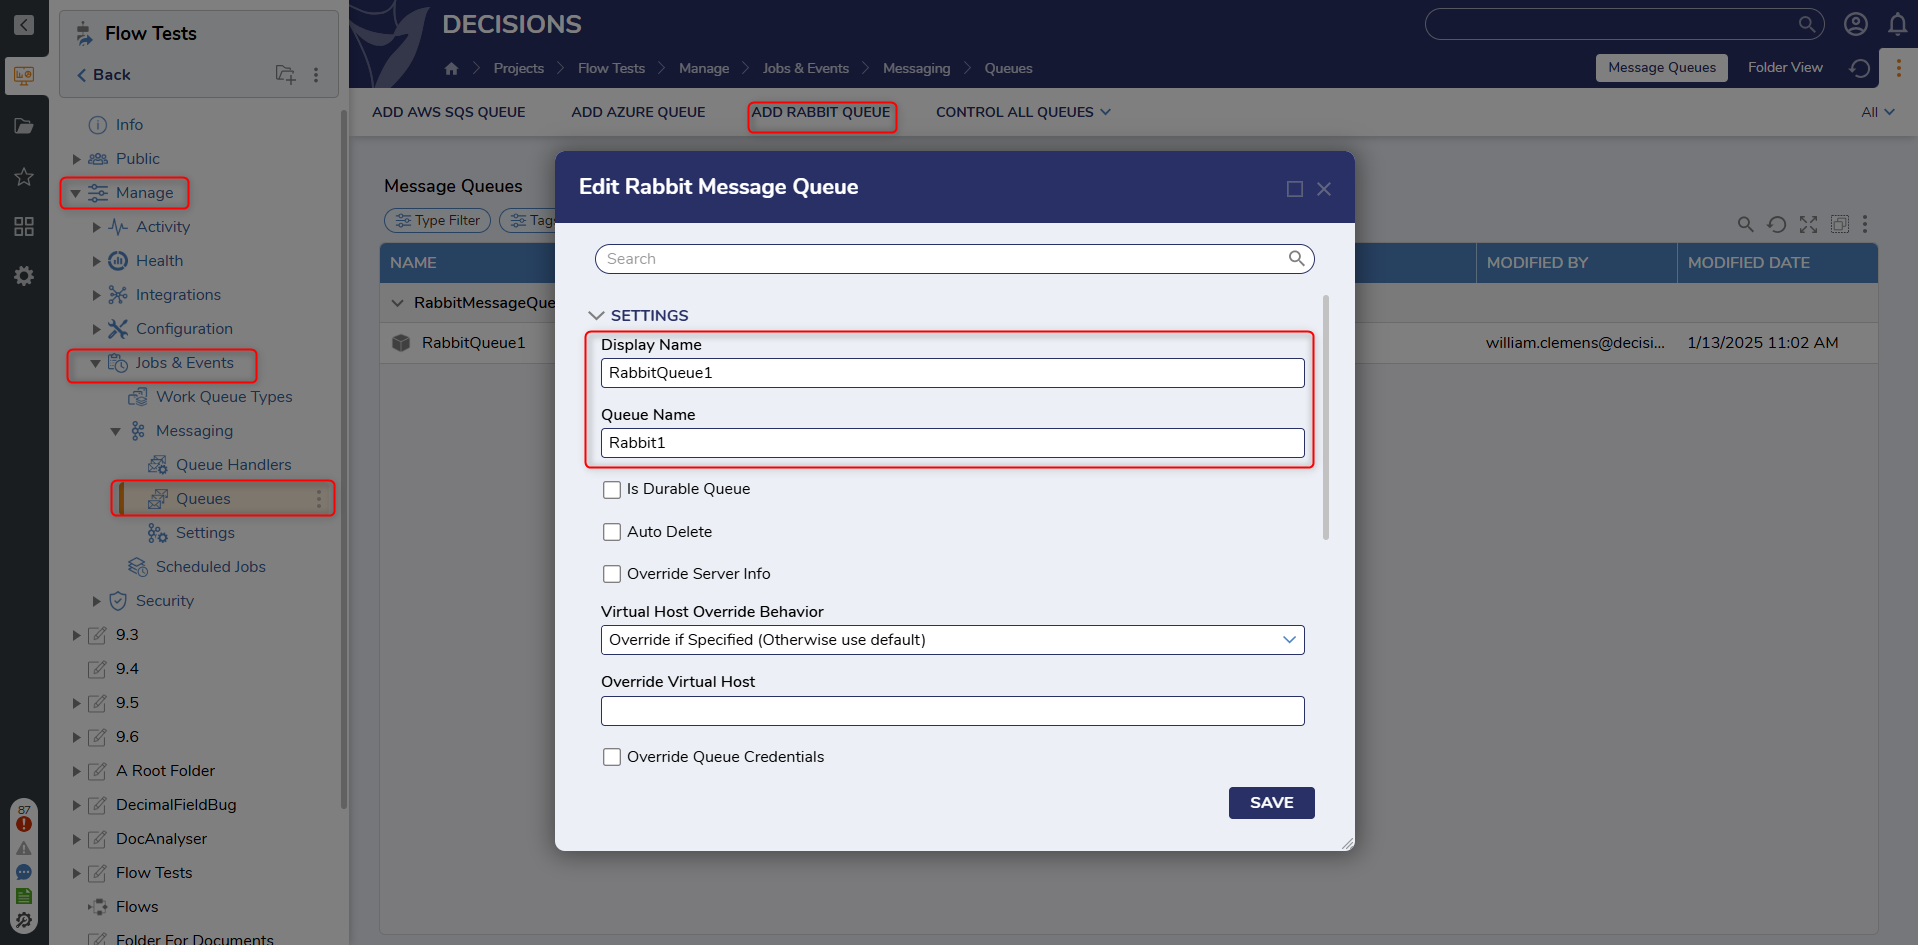
- If a Queue has not been added, navigate to the desired Project > Manage > Jobs & Events > Message Queues. Click ADD RABBIT QUEUE from the Global Action Bar.
- From the Add Rabbit Queue window, define the Message Queue parameters and click SAVE.
Connect Processing Flow to Queue
The following demonstrates a Message Queue Handler. The setting options can be overridden to specify different servers or queues by navigating to [Project Name] > Manage > Jobs and Events > Messaging > Queues, creating a message queue, and selecting the Override Server Info option.
- Navigate to the desired Project > Manage > Jobs and Events > Message Queue Handlers. Click ADD MESSAGE HANDLER.
- From the Add Message Handler window, define the desired Handler Name, select the desired Message Handling behavior, define the Active Flow Count, create or pick the Message Handler Flow, then select the Message Queue. Click SAVE.
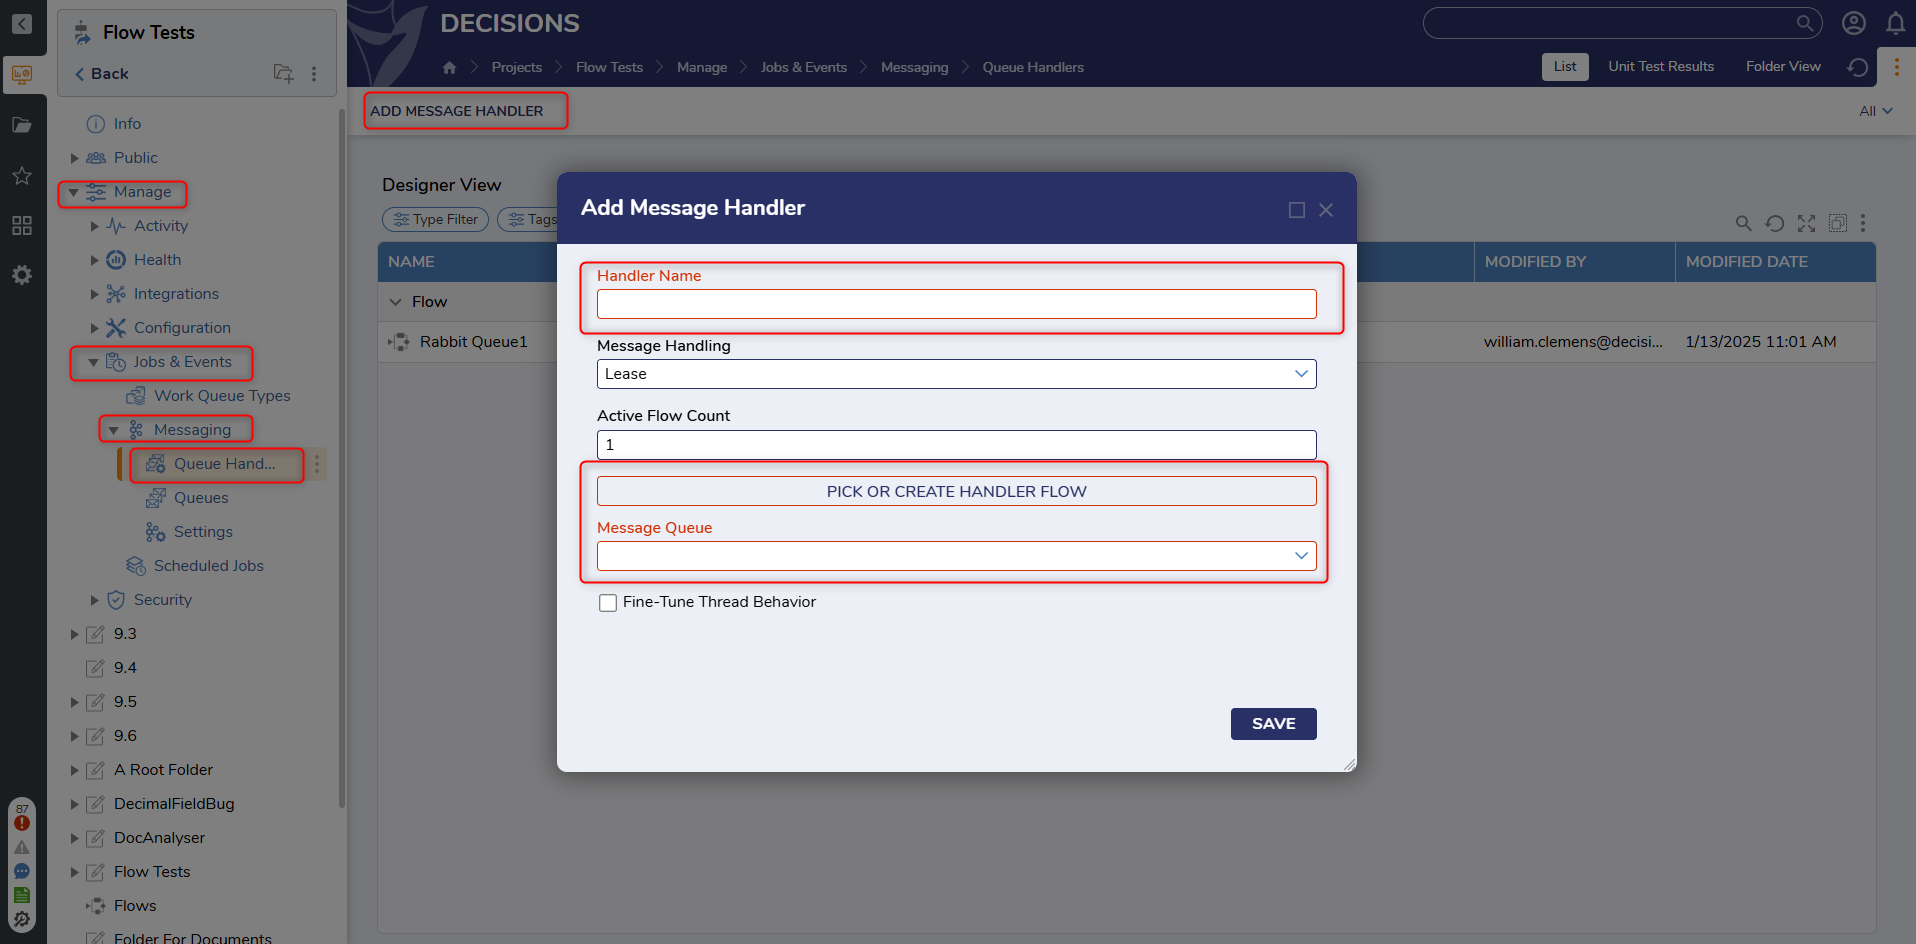
| Configuration Options | Description | |
|---|---|---|
| Handler Name | Name to display in Decisions. | |
| Message Handling | Sets the Message Handling mode to lease the message (lock), lease the message temporarily (lock with auto timeout), remove it after processing (pop), or use it but leave it on the Queue (peek). | |
| Lease | Receives a message from the queue. Decisions will send an acknowledgment to the queue once the message has completed processing. | |
| Lease w/ Expire | Shares the same behavior as leased, with the addition of sending not acknowledged signals. There are two ways for messages can time out: The Message Handler Flow throws an exception or the communication between Decisions and the message server is broken. | |
| Get | Retrieves a message from the queue. The message will be processed, and no acknowledgment will be sent to the queue. | |
| Get and Remove | Retrieves and removes a message from the queue without sending an acknowledgment. | |
| Active Flow Count | The maximum number of simultaneous Messages that Decisions will process. | |
| PICK HANDLER FLOW | The Flow is used to process Messages that appear in the Queue. | |
| Message Queue | The Queue for the Handler to listen on was configured in System Settings. | |
Thread Fine-Tuning
Starting in v9.4 users are able to configure how many threads are created to handle message queues. They can also specify how long those threads should exist when they are idle. This can help increase performance by dismissing unneeded threads.
The settings are found when first creating a Message Handler or when editing its registration entity.
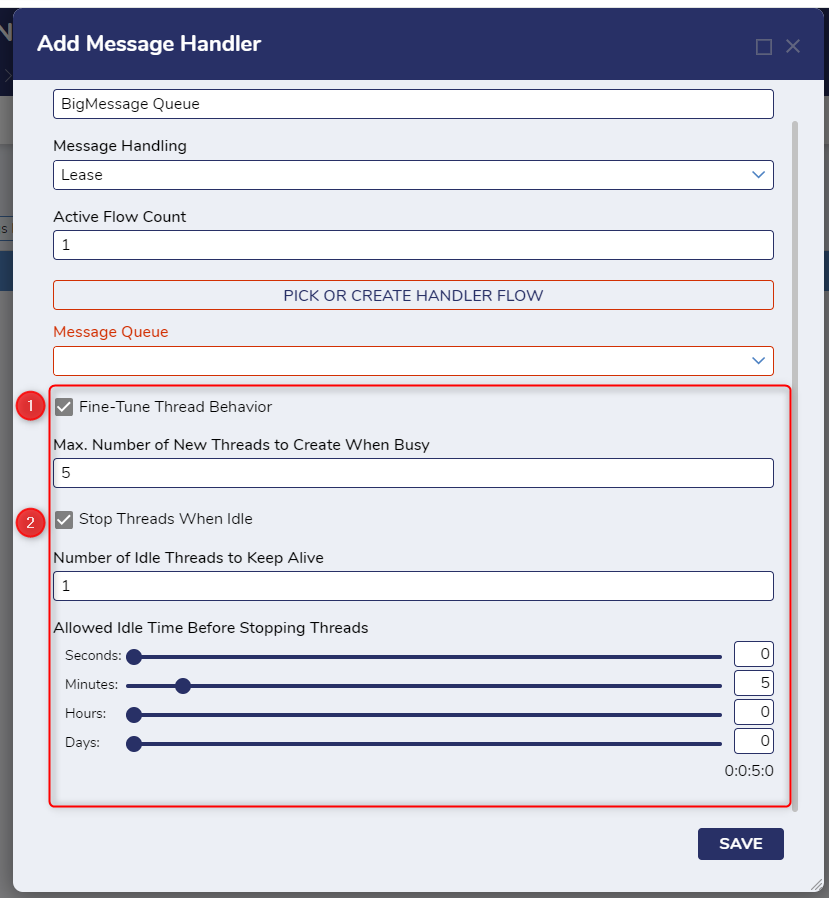
- Checking the Fine-Tune Thread Behavior option will bring up the setting for configuring the maximum number of threads to create field. It will also cause the Stop Threads When Idle option to appear.
- Checking the Stop Threads When Idle option opens up the options for idle threads and the sliders to choose how long the thread can remain idle.
| Setting | Description |
|---|---|
| Max. Number of New Threads to Create When Busy | Sets the maximum number of threads that will be created when the Message Queue is running. Default value is 5. |
| Number of Idle Threads to Keep Alive | Threads go into an idle state after they handle a Message as they wait for the next message. This will limit how many threads will remain in an idle state. Otherwise threads will terminate based on the amount of time set. |
Feature Changes
| Description | Version | Release | Developer Task |
|---|---|---|---|
| Added in settings to manage message queue thread. | 9.4 | October 2024 | [DT-039962] |
| Right clicking on a message queue folder will only show relevant actions now. | 9.4 | October 2024 | [DT-039961] |