Overview
Sub Flows (aka Child Flows) are steps in the Flow Designer that represent a preexisting Flow that can be added via the Flows category in the Steps tab. Sub Flows contain all the steps, along with their Inputs and Outputs, that were created to perform a specified function.
When a Sub Flow step is used in multiple Flows it is referred to as adding a Child Process. Given that the Sub Flow is commonly known as a Child Flow, the Main Flow that houses added Sub Flow, is referred to as its Parent Flow.
The Parent Flow will initiate a Child Flow when it reaches it within the main process and will wait for the Child Flow to complete before moving forward.
For many applications, making frequently used steps or processes (such as Sending an Email, Saving an article, Creating an alert Notification, or performing Error Handling) into a Sub Flow simplifies an application's design given that a change in the Sub Flow will be reflected in all Parent Flows. This also helps to simplify the Flow Designer's workspace and keep the focus on key processes that are distinct to each Flow.
Example
The Form and Create Data steps are used arbitrarily as this design mentality and layout may be applied to other instances that require catching an Exception within a process.
- From the Flow Designer, attach a Show Form step to the Start step and navigate to its Properties tab. From the Properties tab, select Pick or Create Form then PICK the desired Form. About the FormThe example Form being utilized contains several Text Box components that are used as Input for a customer submitting an insurance policy request.

From the Properties tab of the Insurance Policy Request Form step, set each Input to Ignore.
Next, attach a Create Data step to the Insurance Policy Request Form step. From the step's Properties tab, select Show Editor and create the desired Data Definition.
About the Data DefinitionIn this example, the Create Data step is used to create the data for the Insurance Policy Data Type which is a Folder Extension.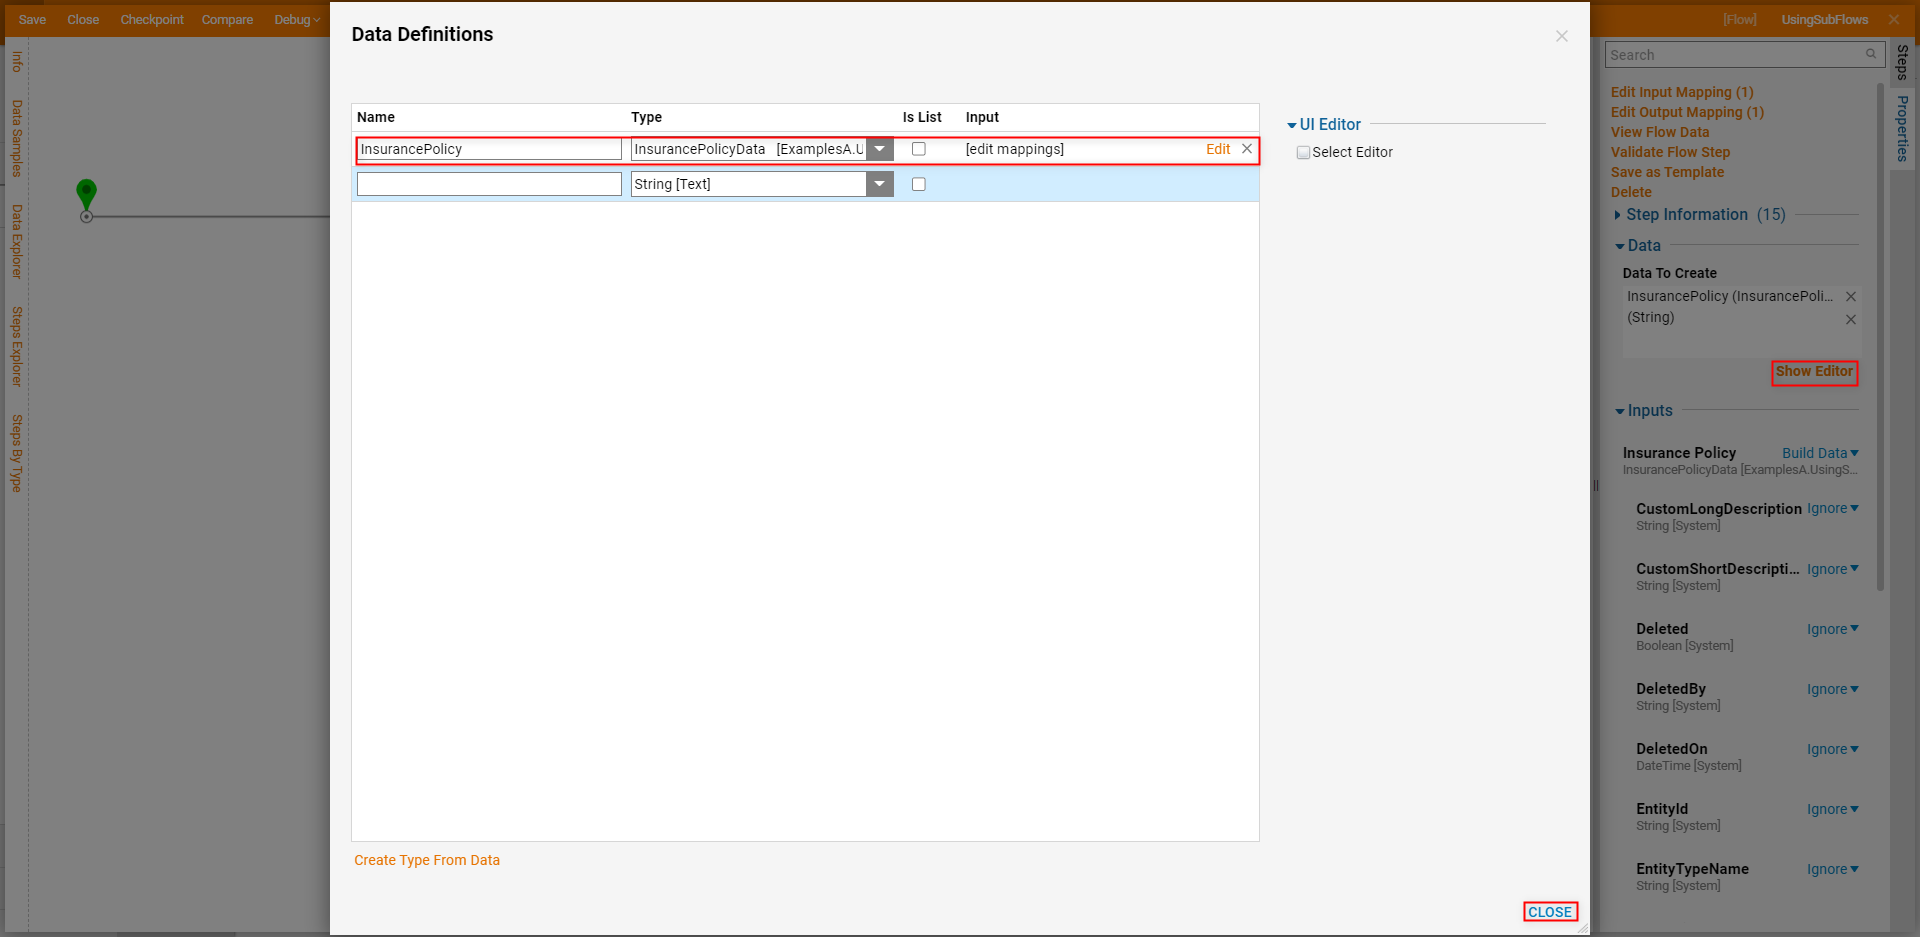
From the Properties of the Create Data step, set the Input data to Build Data, then Select From Flow map the Outputs from the Form to their respective Inputs.
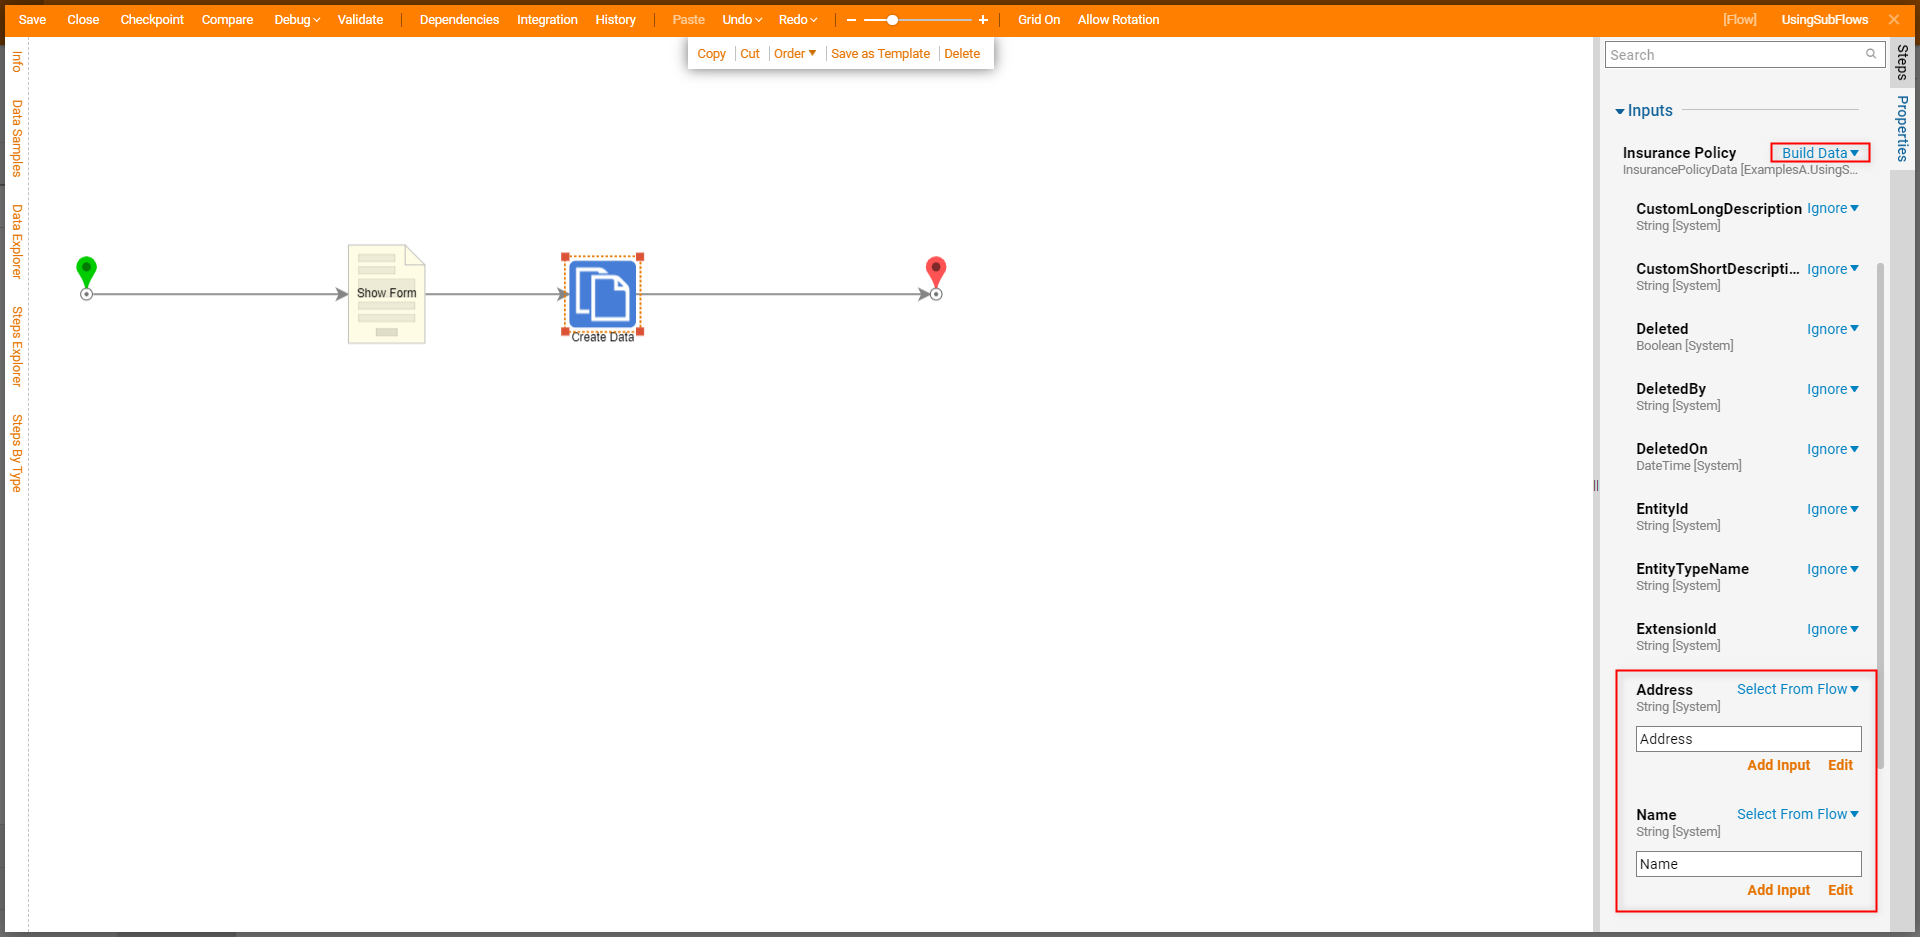
From the Properties of the End step, under Outcomes, enable Add Outcome for Exception.
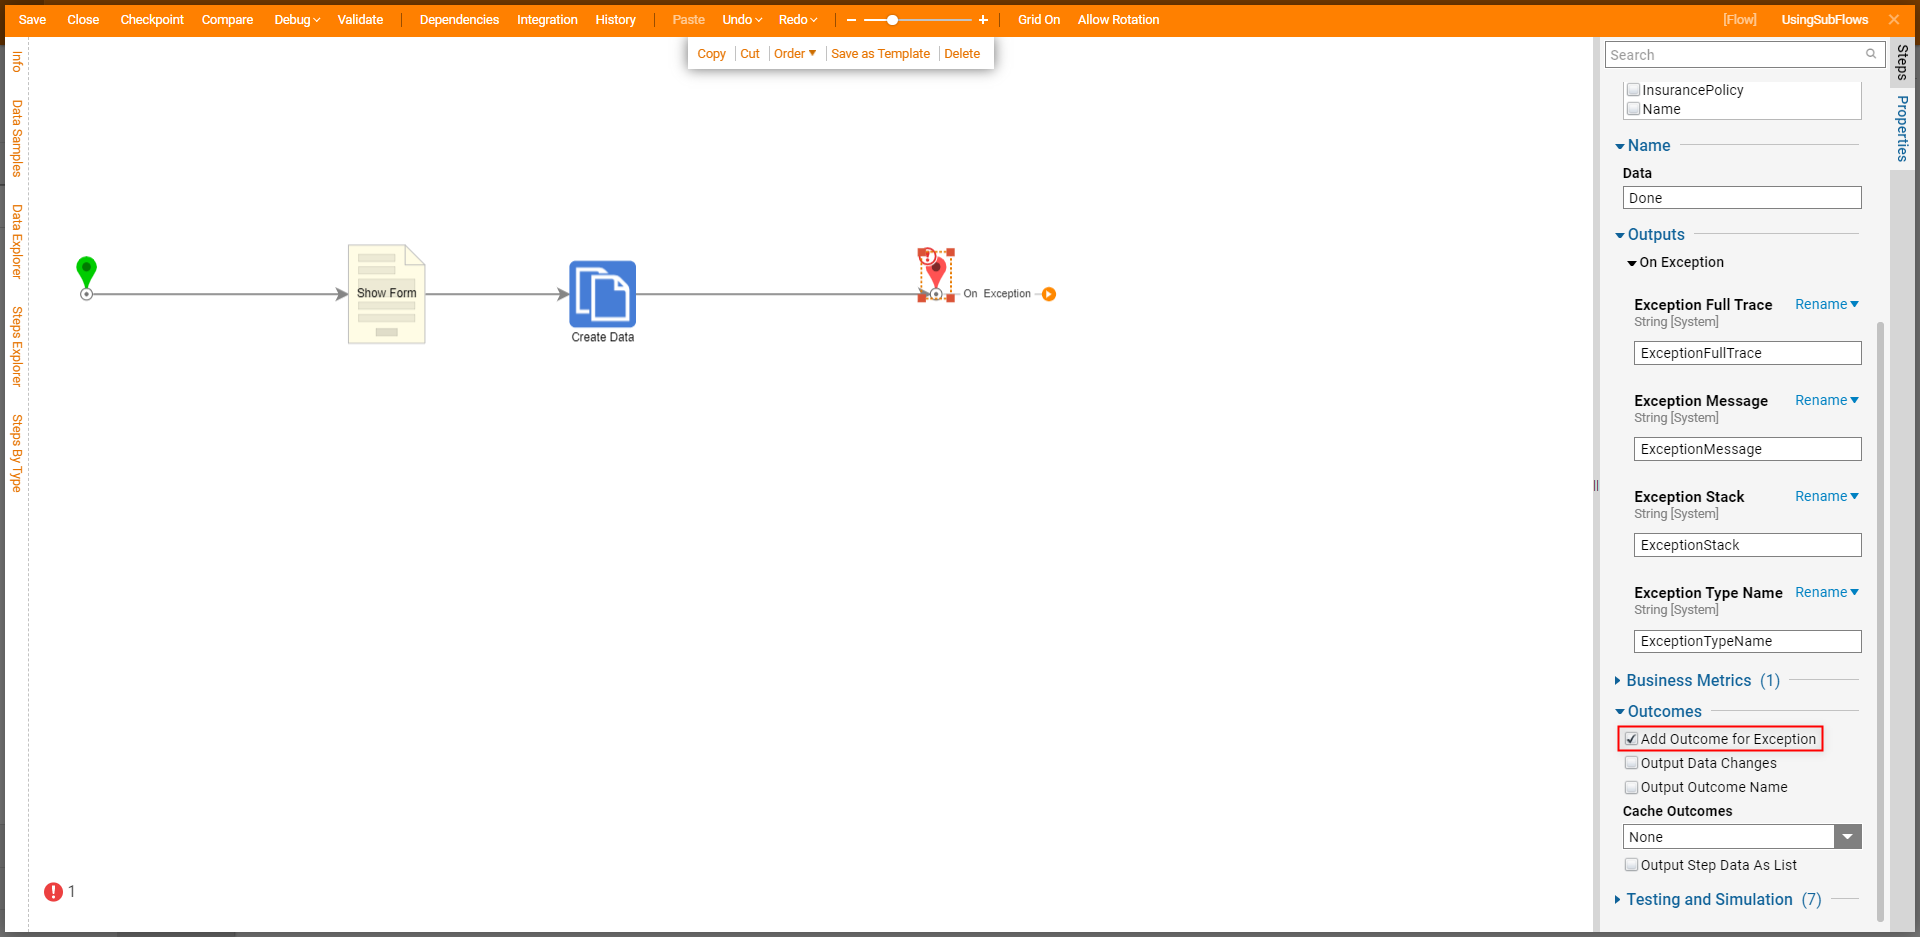
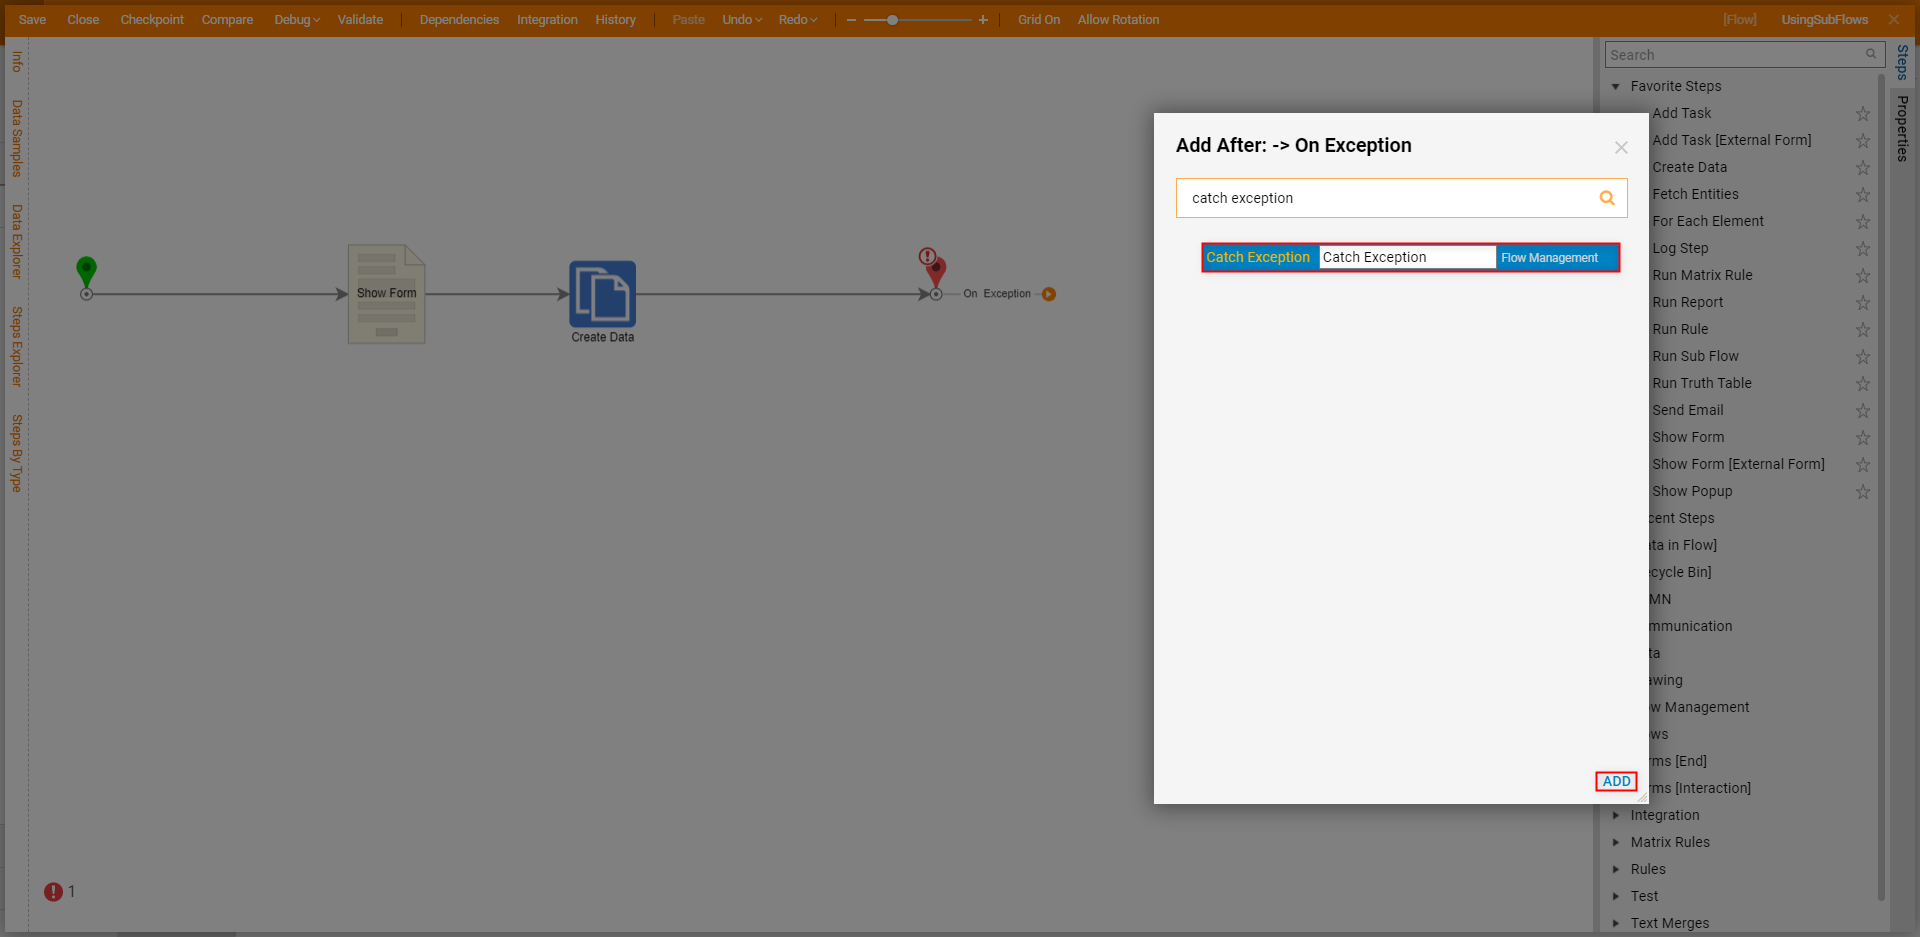
- Drag out the resulting On Exception path. Then, search for and ADD a Catch Exception step. About StepThe Catch Exception step is used to "catch" then output information in the event the Flow "throws the Exception" (encounters an error). This information is output in the form of an Exception Message.
From the Favorite Steps category of the Steps tab, attach a Run Sub Flow step to the On Exception path of the Catch Exception step. From the Properties of the Run Sub Flow step, under Target, click Create, then CREATE a new Flow.
About Sub FlowThis Sub Flow will be used as a means of assigning the ExceptionMessage to a user that is designated to process errors in the application process.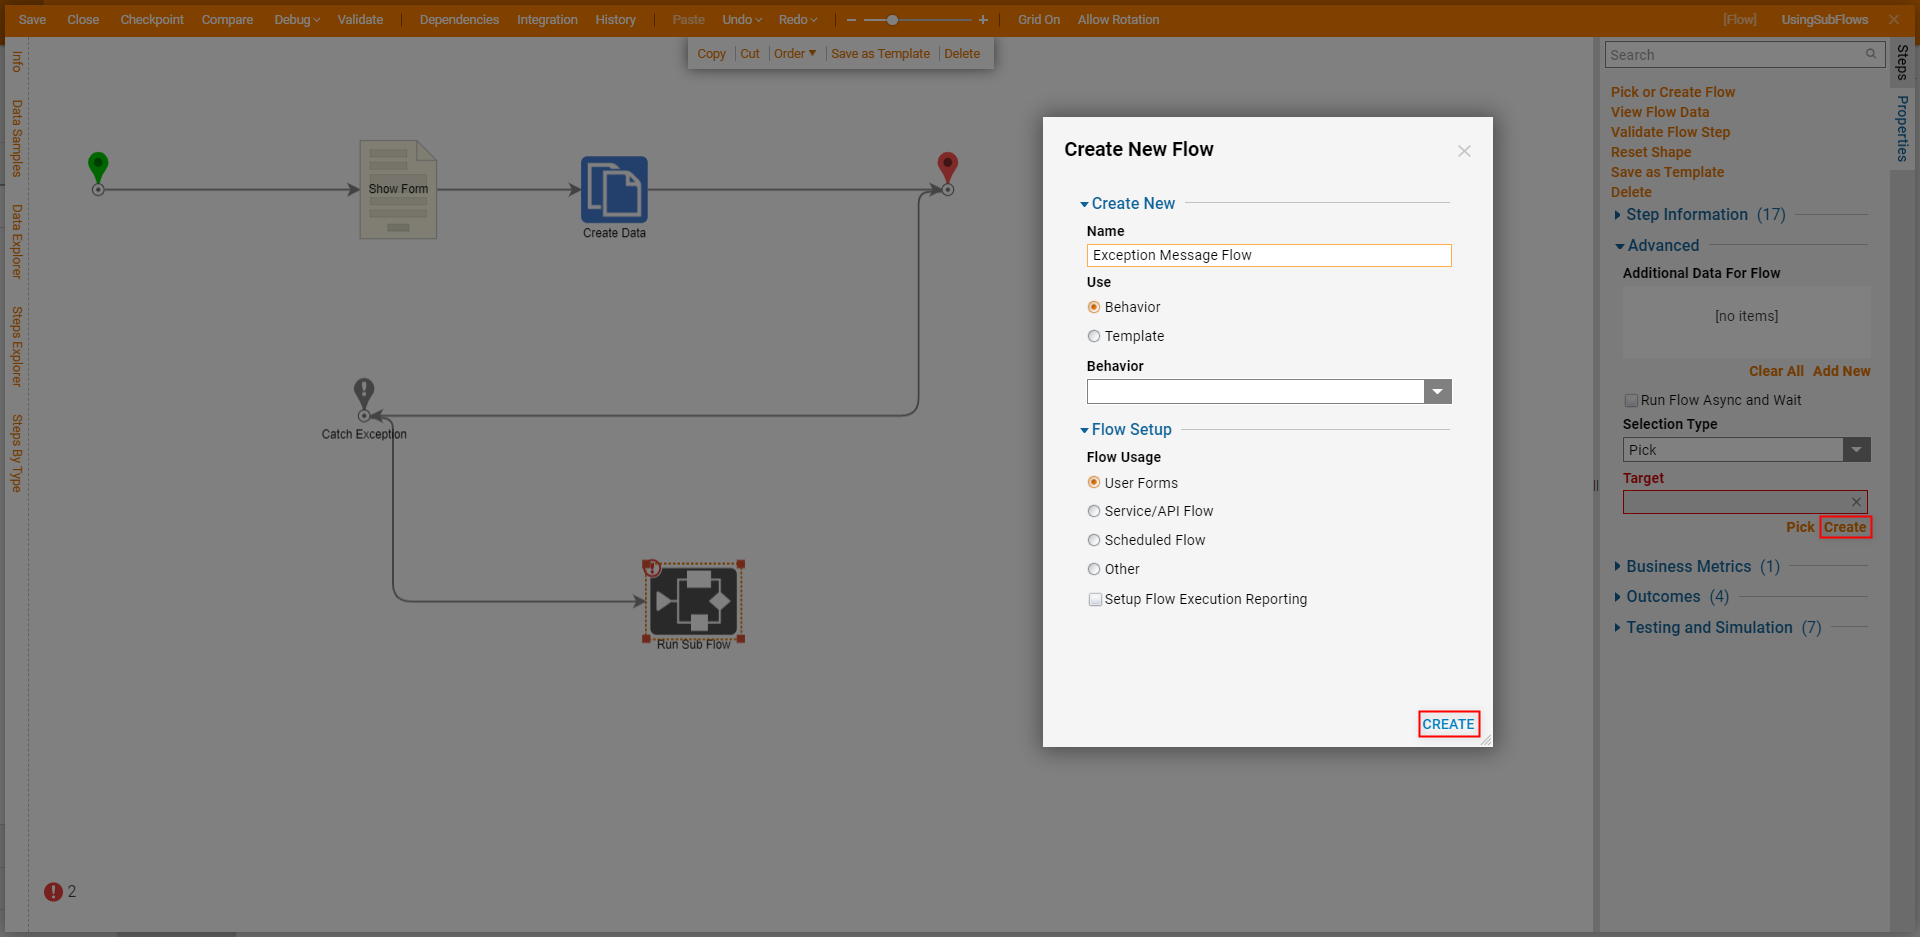
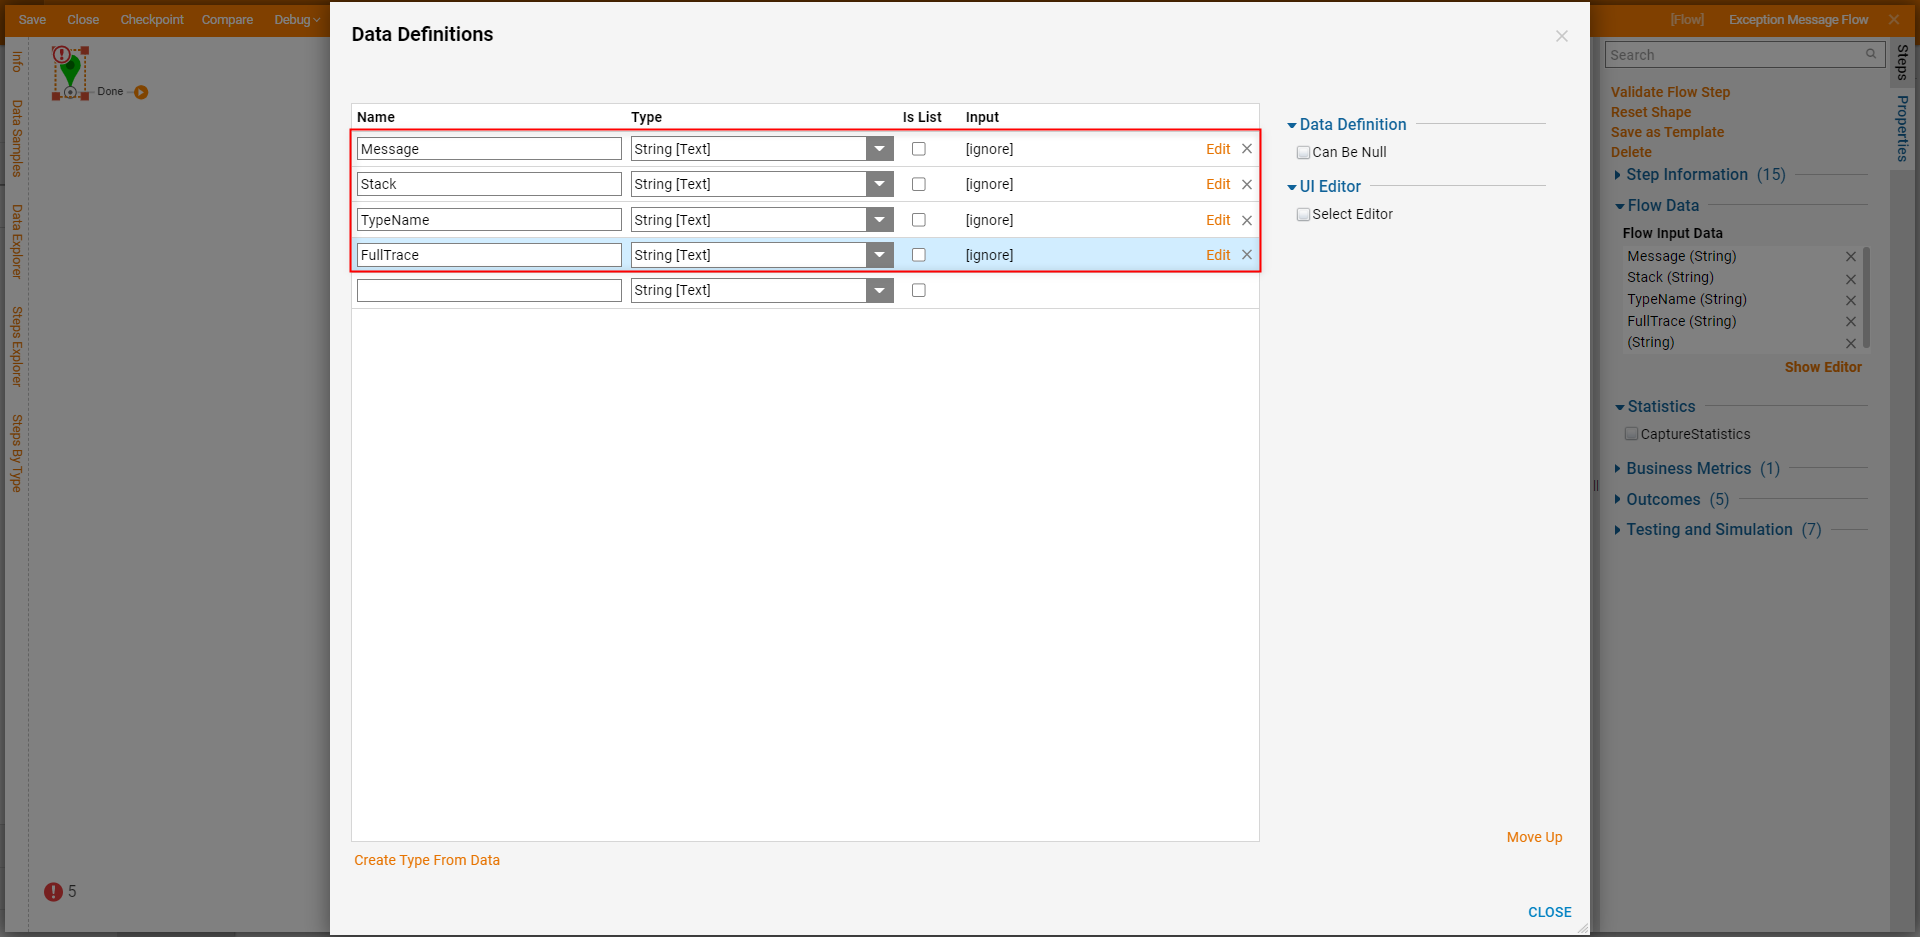
From the resulting Flow Designer for the Sub Flow, define four String Inputs on the Start step that correspond with the ExceptionFullTrace, ExceptionMessage, ExceptionStack, and ExceptionTypeName of the resulting Exception Message.
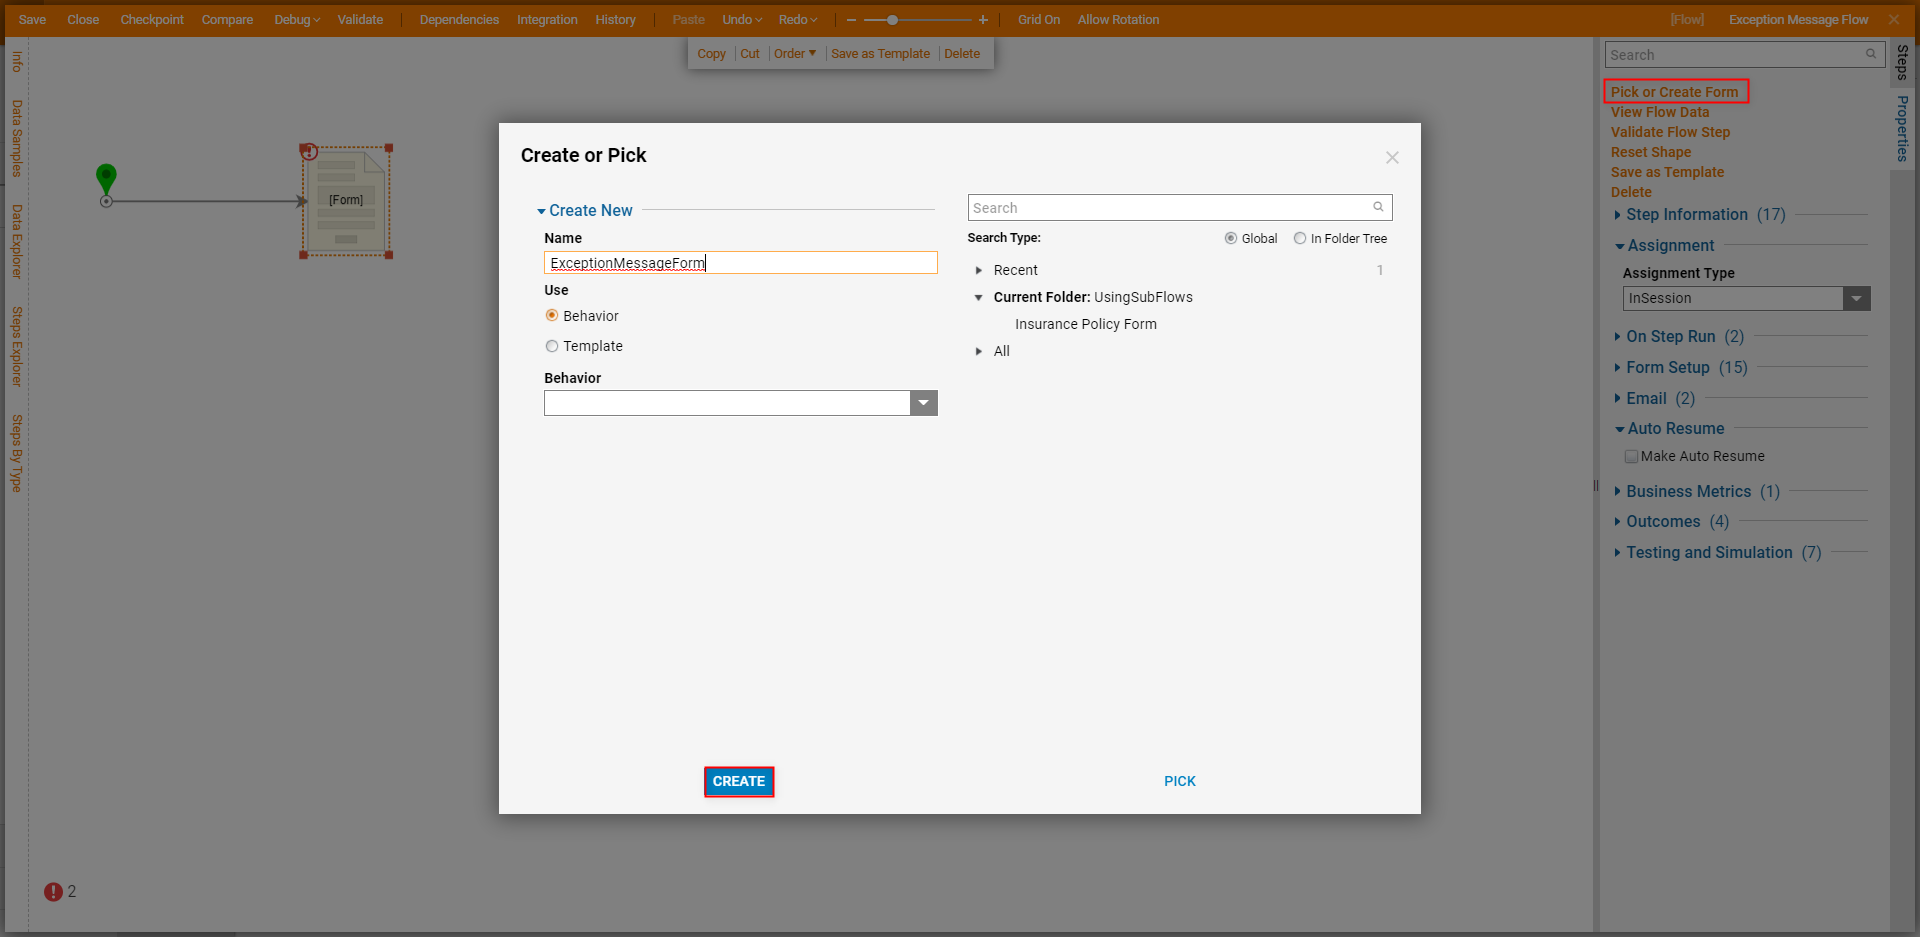
From the Favorite Steps category, attach a Show Form step to the Start step. Then, from its Properties tab, click Pick or Create, then CREATE a new Form.
From the Form Designer, add each previously created Exception Input by dragging each one from the Data tab and selecting the Label Of Data Value option for each one. Complete the Form with a Button component Labeled "Close". Save then Close the Form Designer.
About FormThis Form will be used to Assign and display the Exception Message to the designated Error Handler.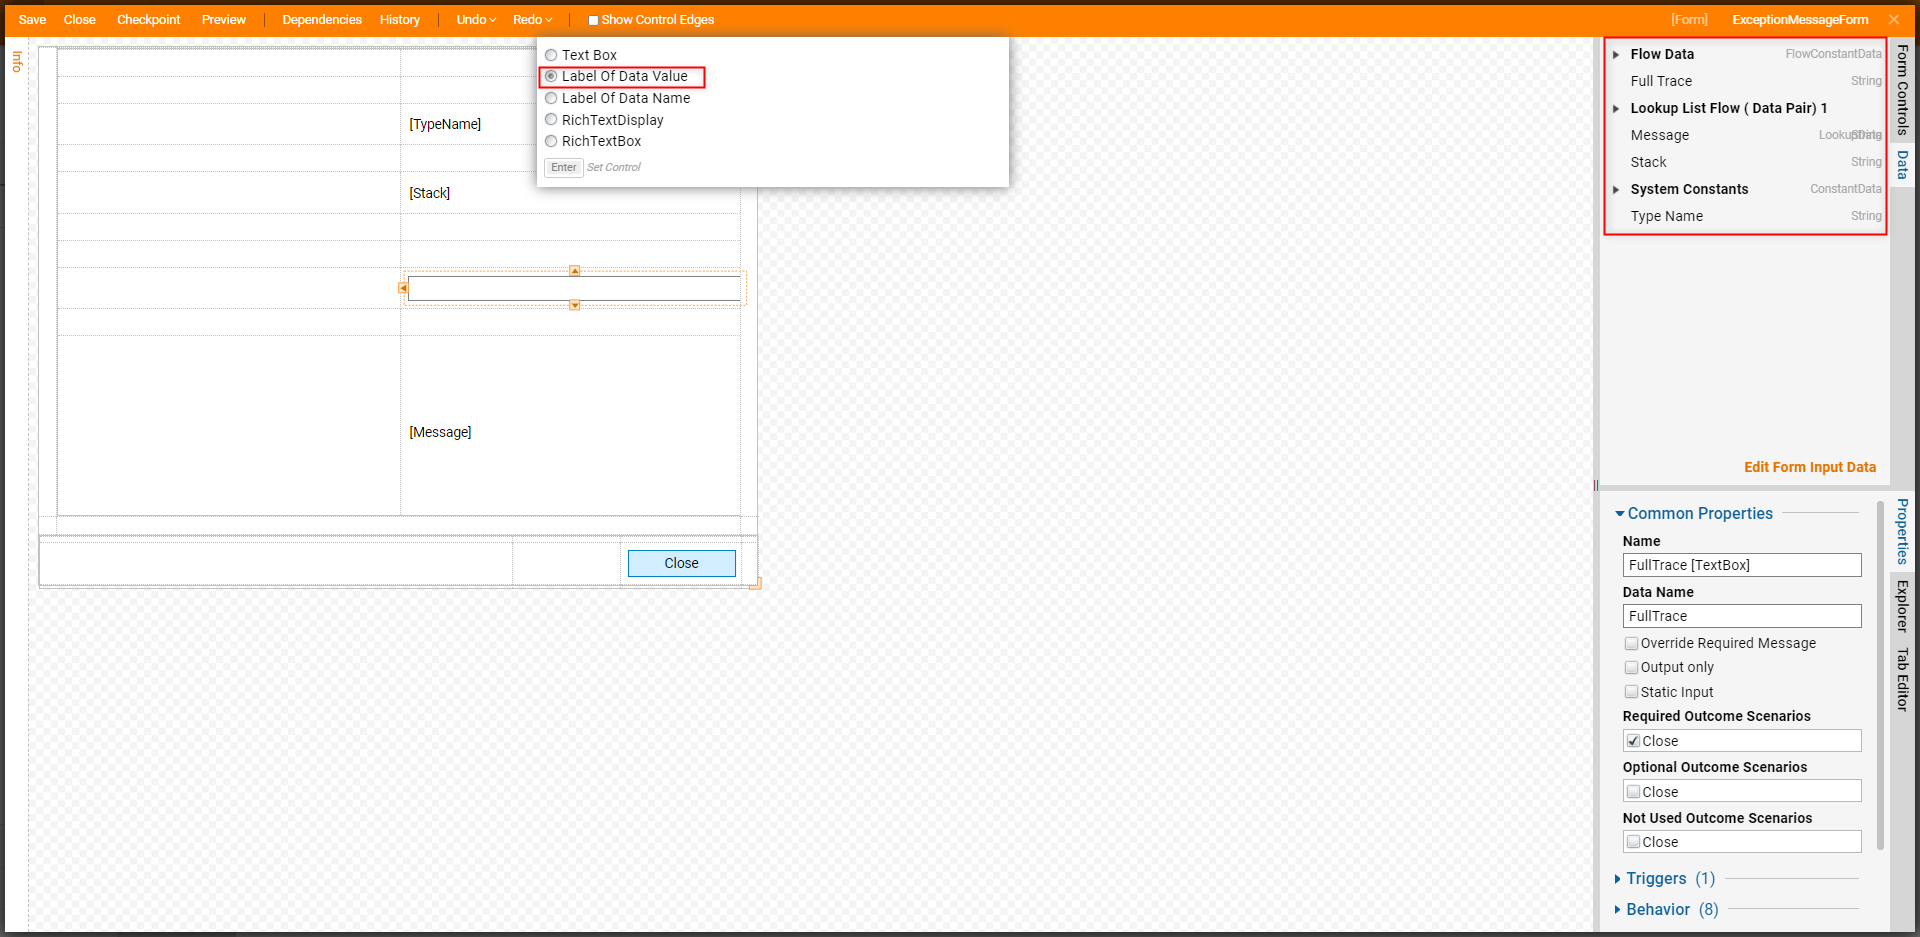
From the Flow Designer, attach the Close path to the End step. Then, from the Properties tab of the Form step, under Assignment, Assign the Form to an Account by changing the Assignment Type to Assign To and providing an Account under the Assign To Input.
Still in the Properties tab of the Form, provide an Assignment Name and Assignment Action Name.
Additional InformationThough presently the Flow will only display the Exception Message, any additional processing logic be added to the Sub Flow.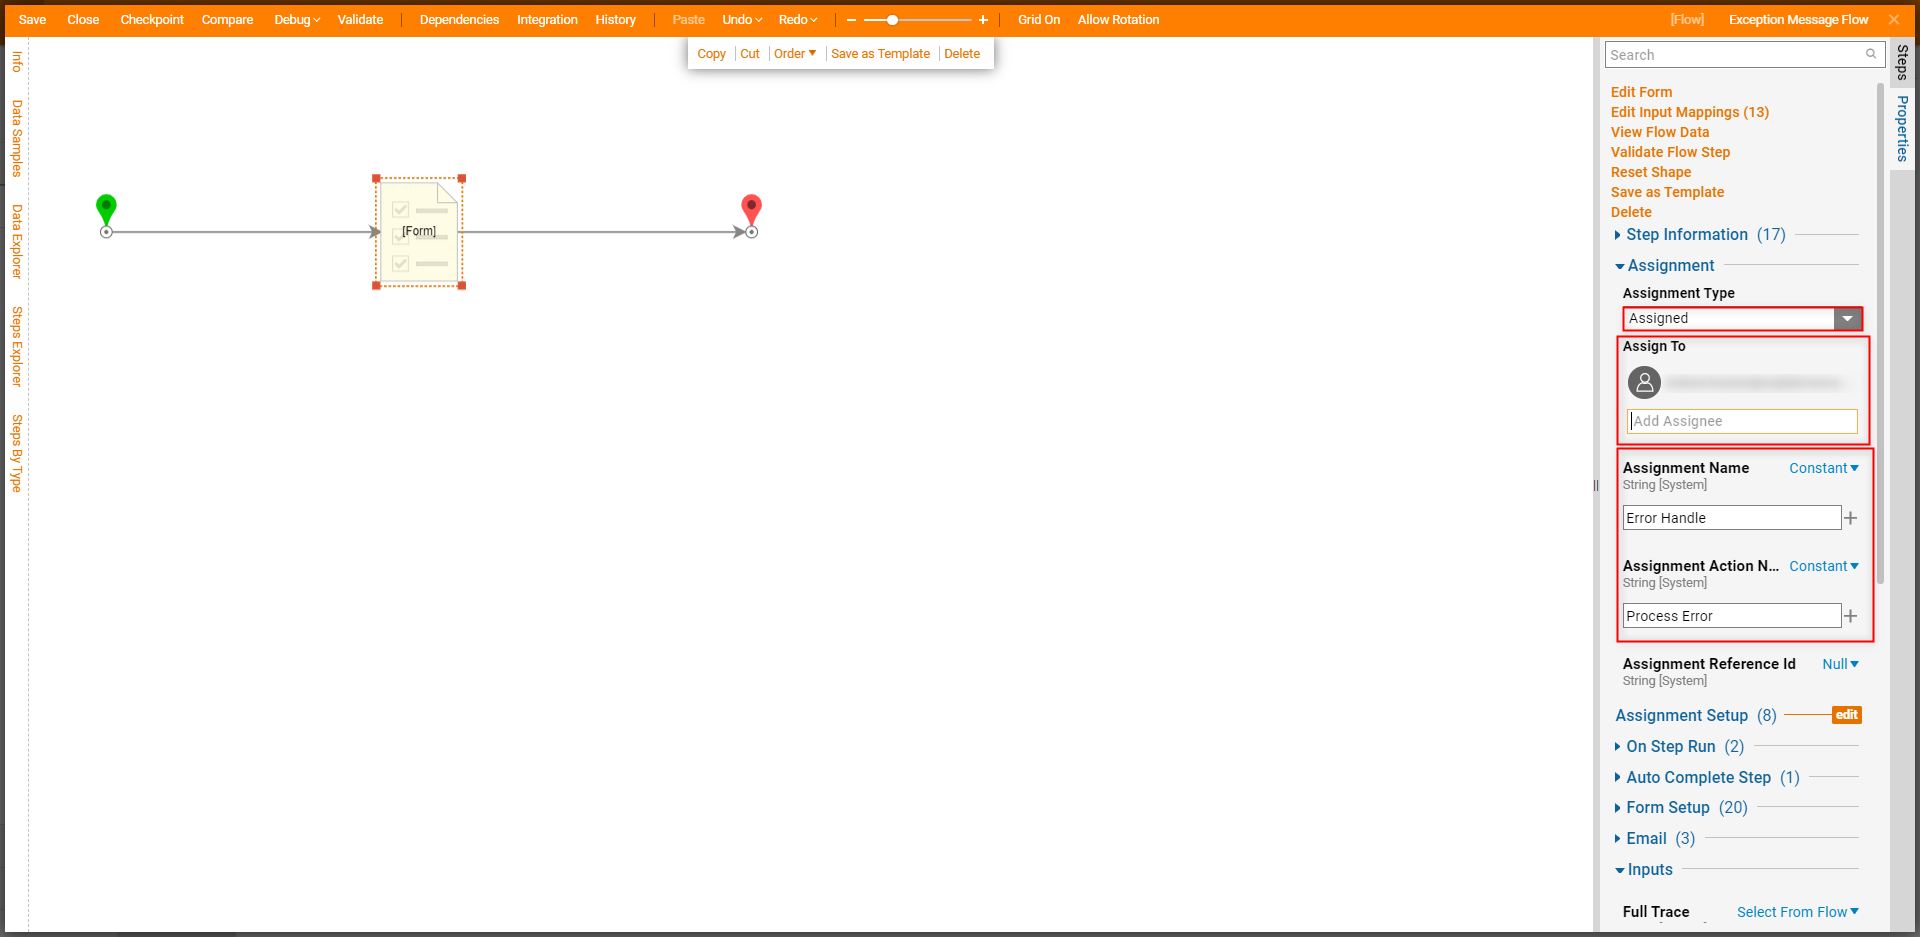
Save and Close the Sub Flow.
Back in the Parent Flow's Flow Designer, from the Run Sub Flow step's Properties, map ExceptionFullTrace, ExceptionMessage, ExceptionStack, and ExceptionTypeName to their respective Inputs in the Child Flow. Save and if desired Close the Flow.
About Flow ConfigurationWith this configuration, in the event of an Exception, the Catch Exception step would output an Exception Message to the Sub Flow which will assign the Catch Exception Form to the desired Account for processing. After clicking the Close button and leaving the Form, the Main Flow will finish.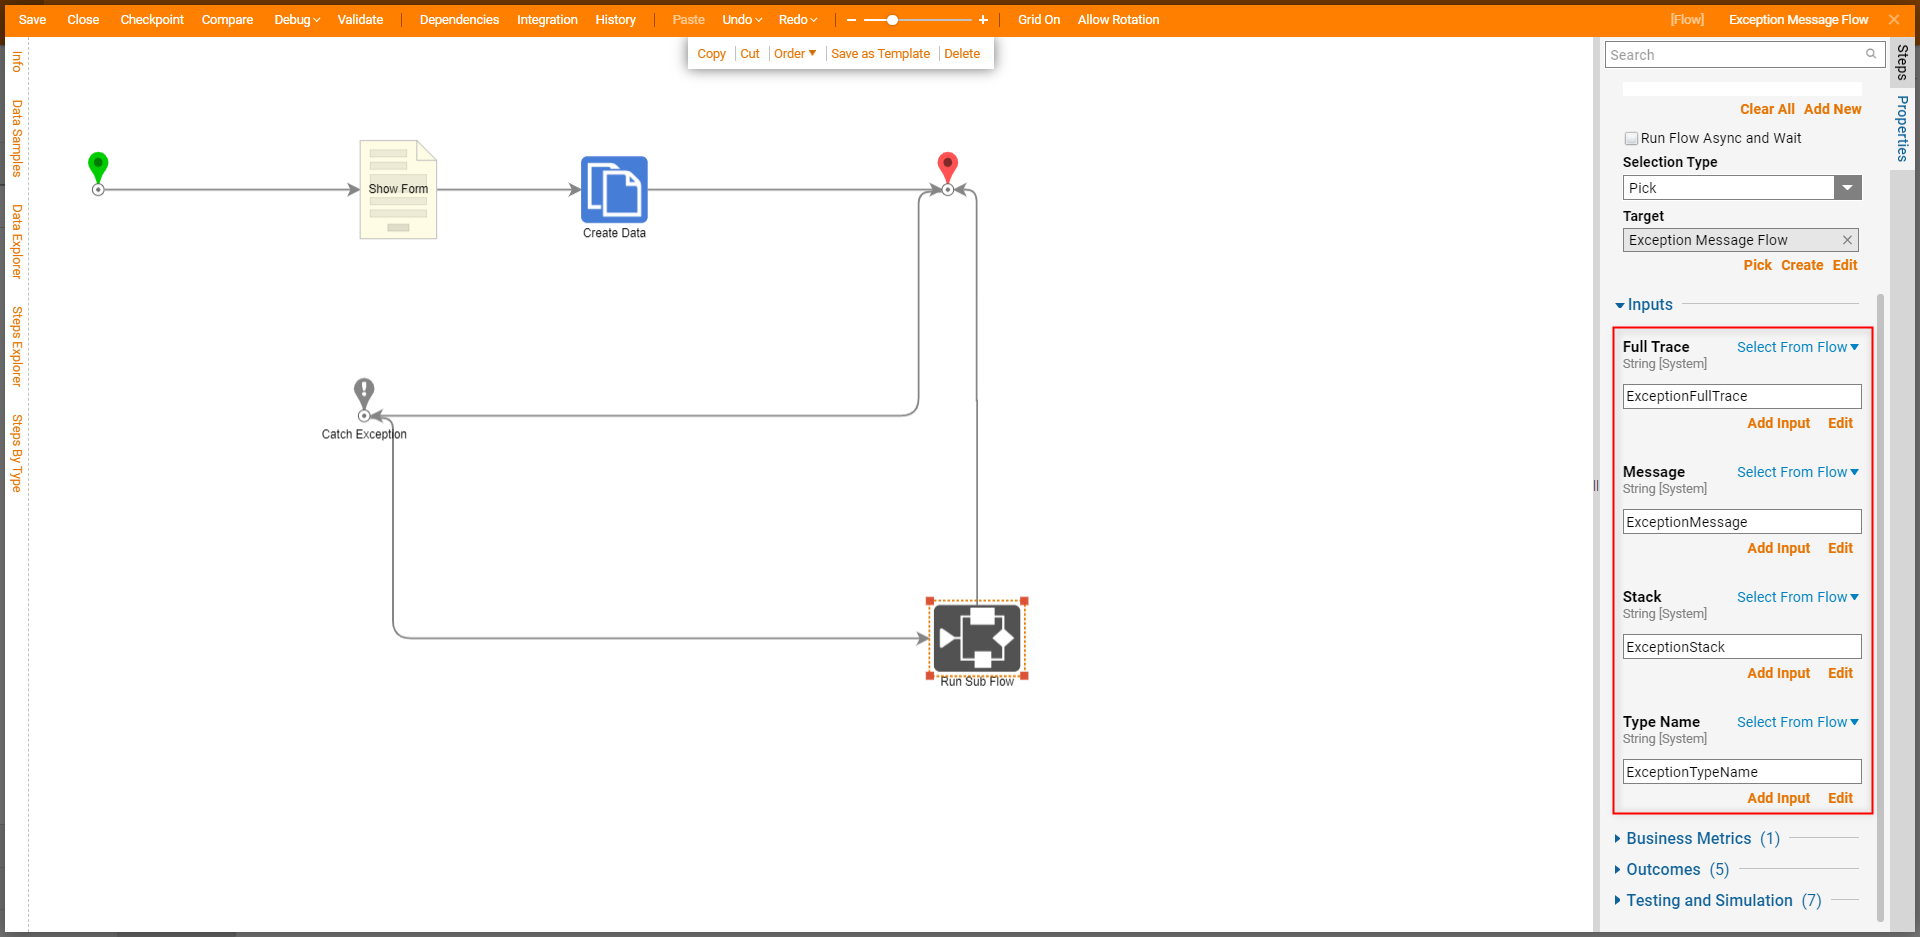
Running a Sub Flow Asynchronously
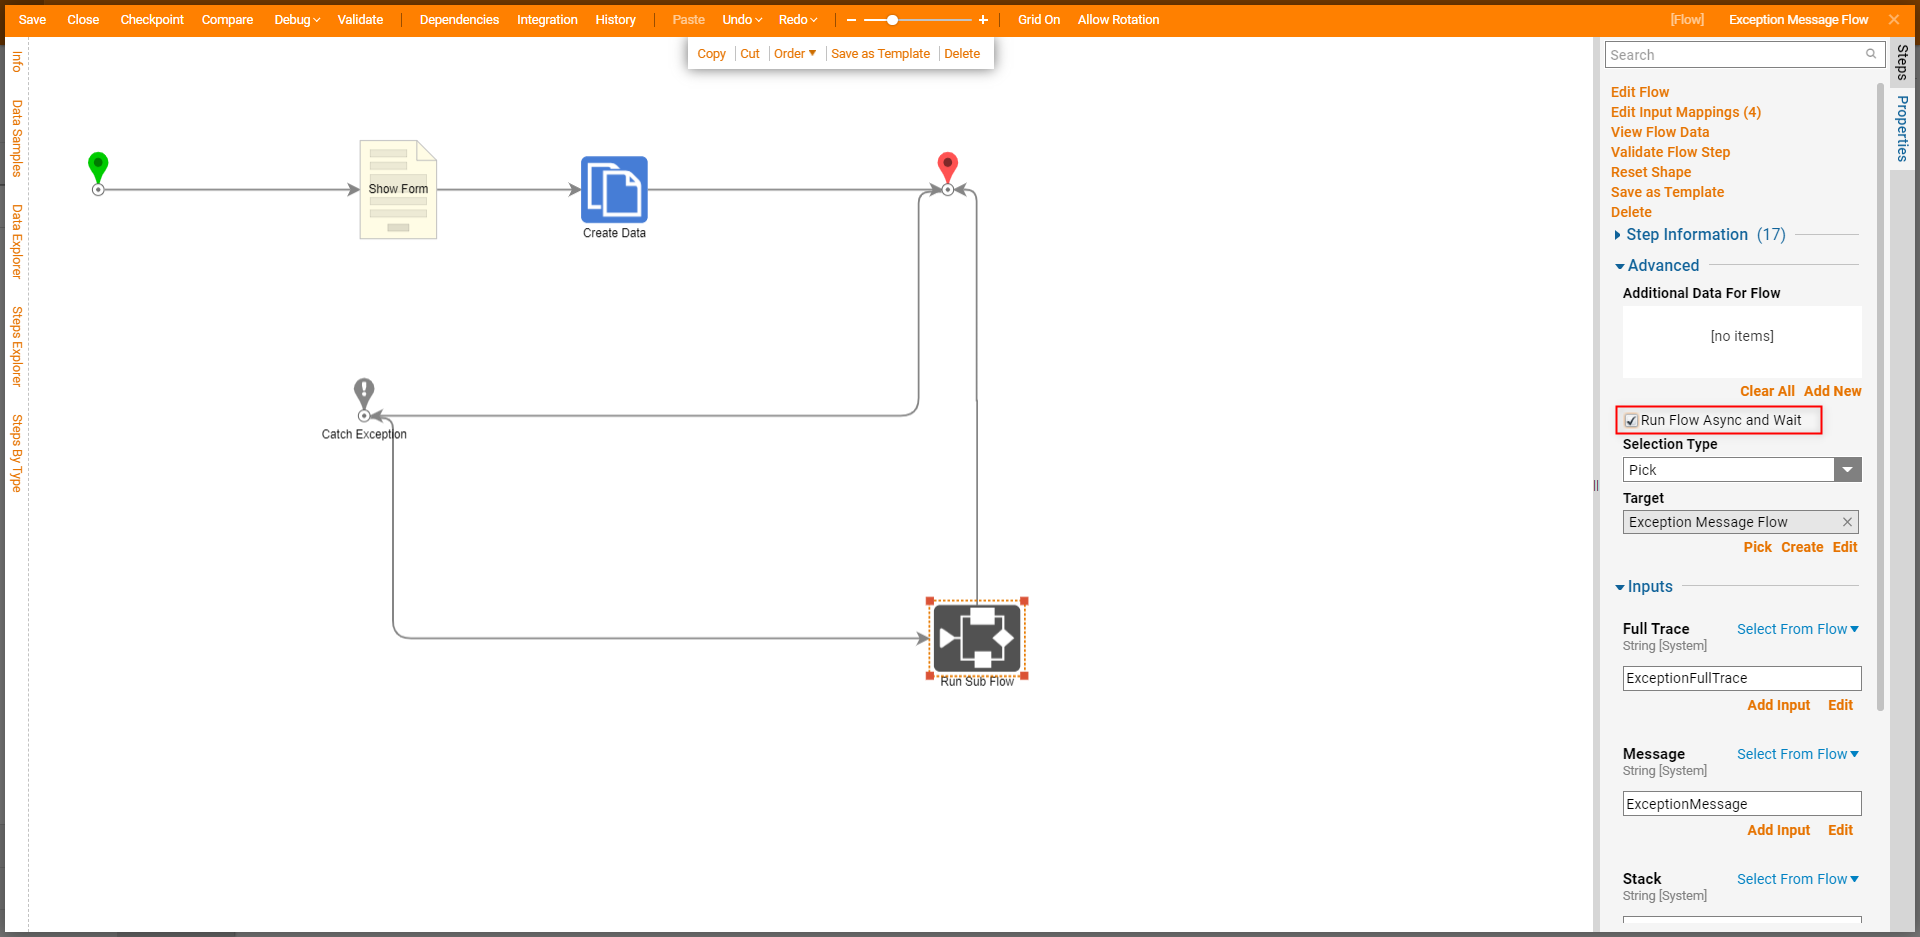
To aid with time management, Designers may run multiple processes in parallel by running processes that would typically run synchronously, asynchronously instead. This can be achieved by enabling the Run Flow Async and Wait Property on the Run Sub Flow step.
Selection Types
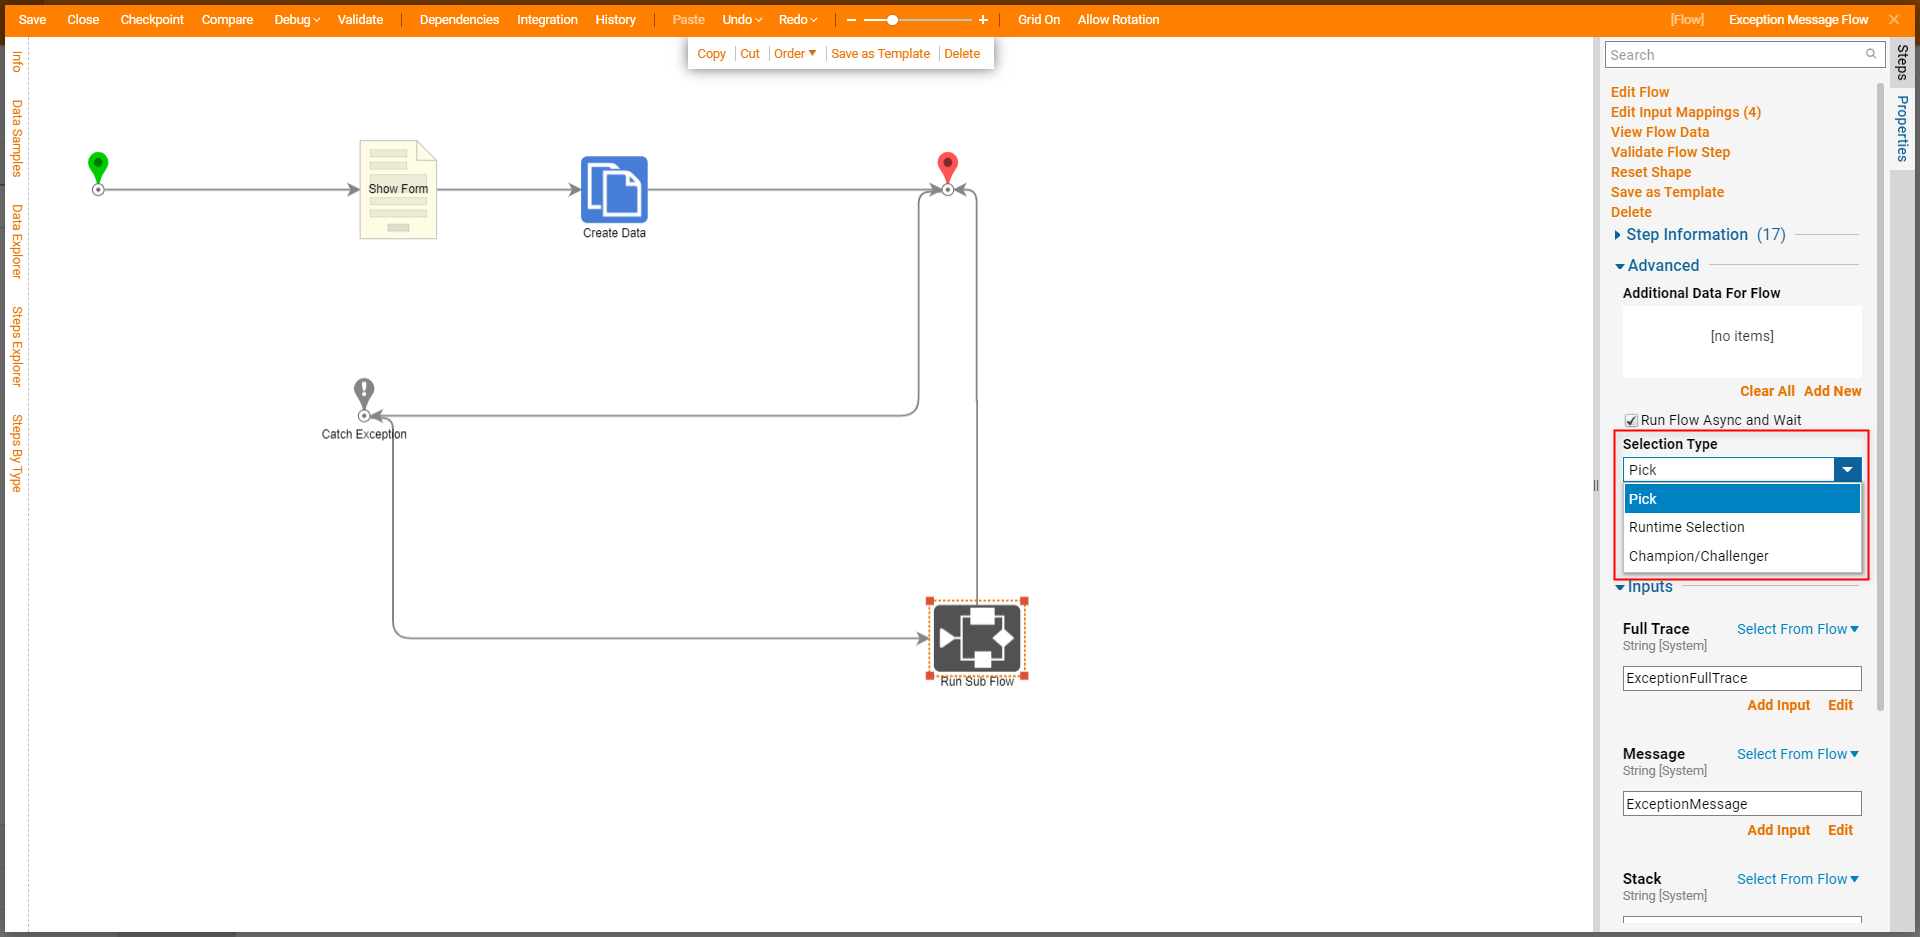
Similar to the standard Flow, Sub Flows may utilize a variety of Selection Types that may affect both how and when the Sub Flow runs.
To view the Selection Types:
- Add a Run Sub Flow step from the Steps tab in the Flow Designer.
- Click on it to view its Properties and expand the Advanced section to locate Selection Type.
Sub Flows may choose between the following three Selection Types:
| Selection Type | Definition |
|---|---|
| Pick (Default) | Allows the Designer to pick a Child Flow that runs once the Parent Flow progresses to the Run Flow Step |
| Runtime Selection | Initializes the Child Flow at runtime, reduces memory demands of Parent Flow preventing crashing |
| Champion/Challenger | Initializes the Child Flow against other Child Flows against changing logic to promote the most optimal solution |
Sequential Rules
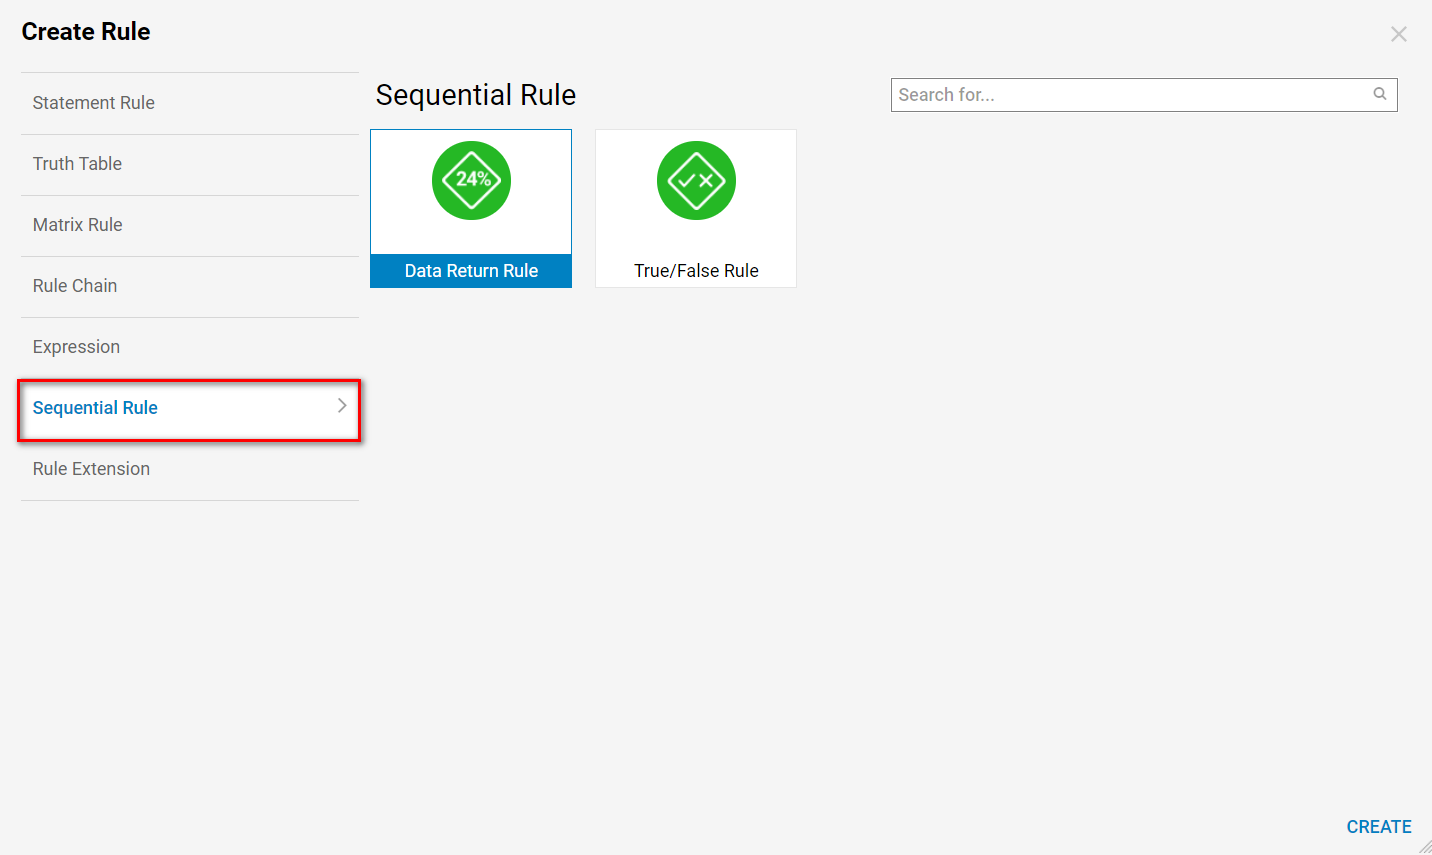
Though typically utilizing the Create Rule action redirects to a Rule Designer, creating a Sequential Rule instead opens a Flow Designer.
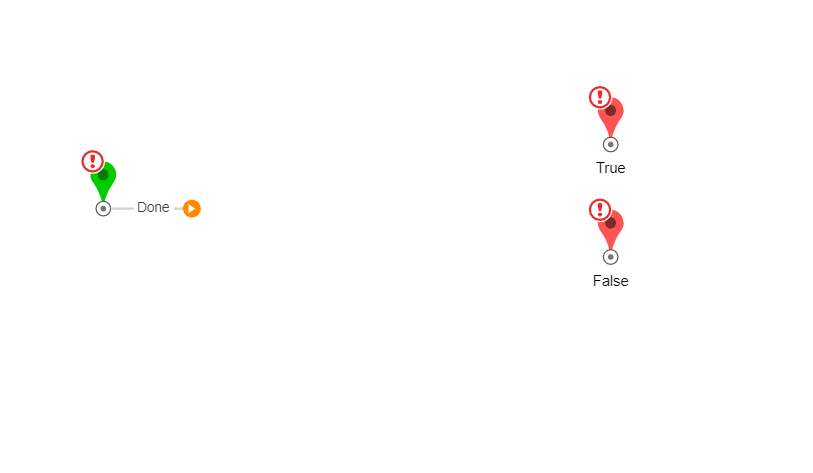
Both template options for Sequential Rules; Data Return Rule and True/False Rule; operate similar to a Sub Flow within Decisions, with the exception that the True/False Rule template has True and False End step instead of the typical single End step.
