Overview
A snapshot is a record of the reported entities’ state at the moment the snapshot was taken. A user can take a snapshot manually, or snapshots can be configured to be taken on a schedule. Snapshots are used in reports and can help track trends. Even if a report is configured to take snapshots automatically, a user can still take a snapshot manually using the Save a Snapshot button.
Example
In this example, take a snapshot of a Report and then utilize the data in another Report. Confirm that the Enable Snapshot is turned on for the report. To Enable Snapshots, edit the Report. In the Properties panel, navigate to the Settings section, check the Enable Snapshot checkbox, save, and close the Report.
- Select the Run Report button in the top action panel of the Report Designer.
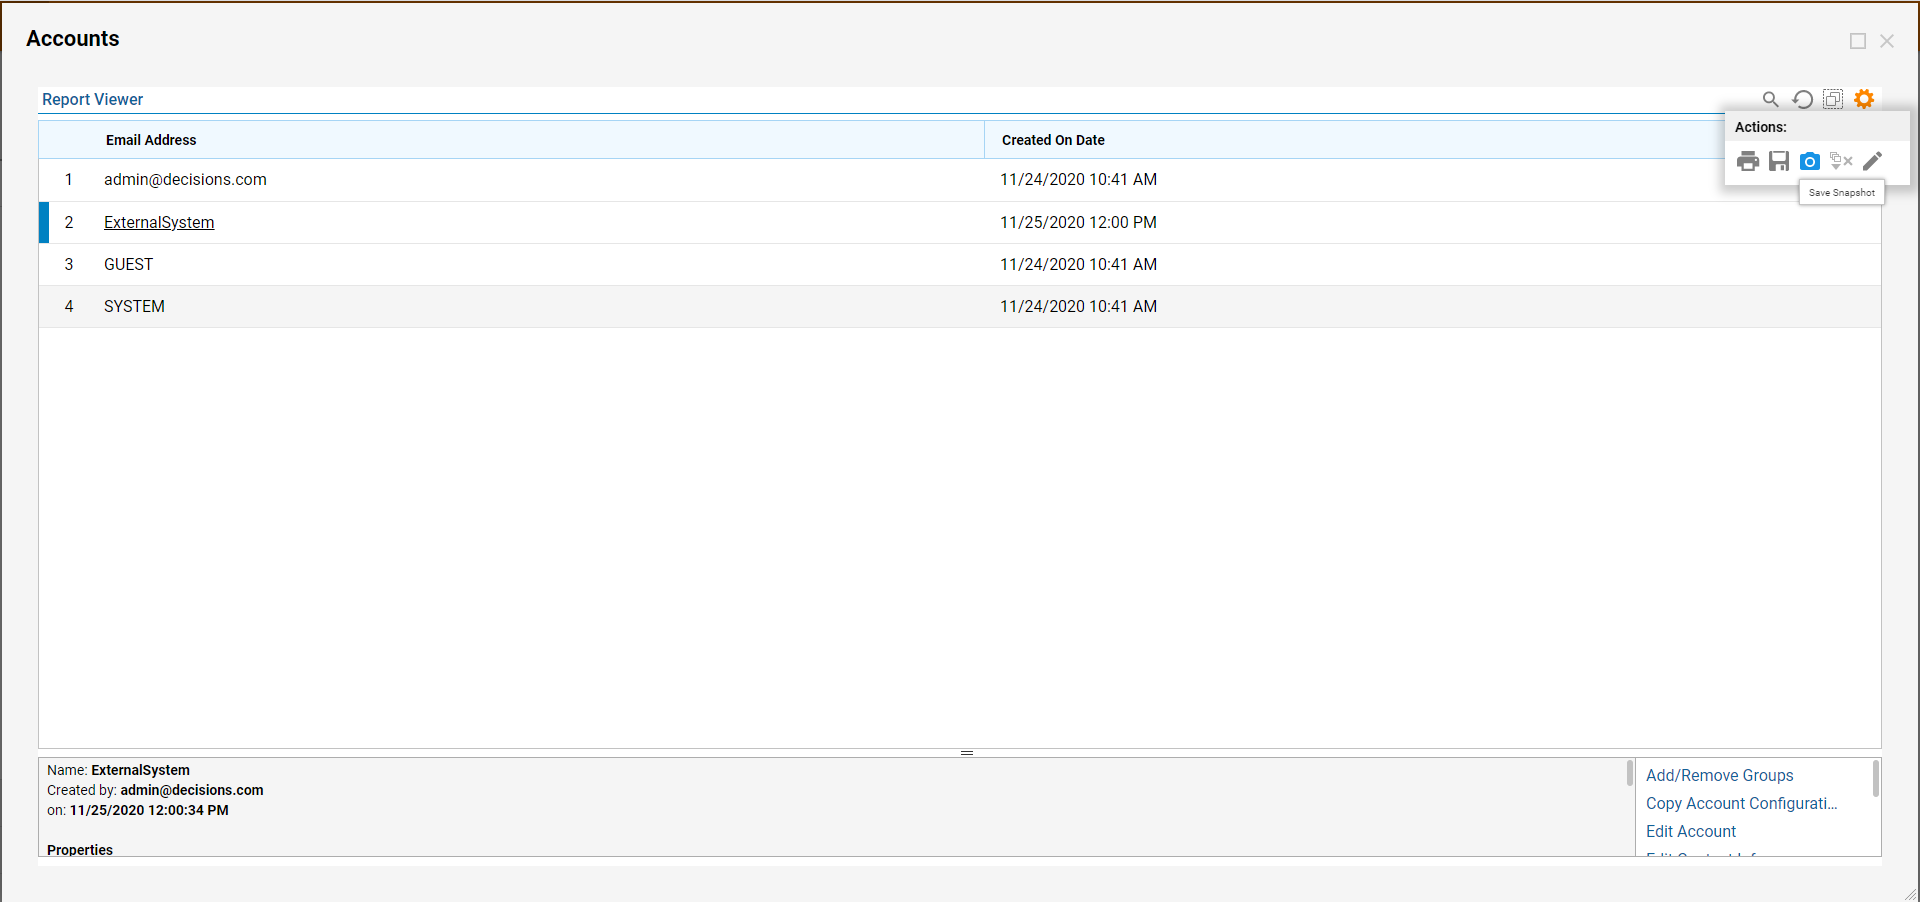
- Select the gear icon and locate the camera icon. This is the Save Snapshot button. Select it to take a snapshot. Name the snapshot and click SAVE.

- Create a new Report to use Snapshot information.
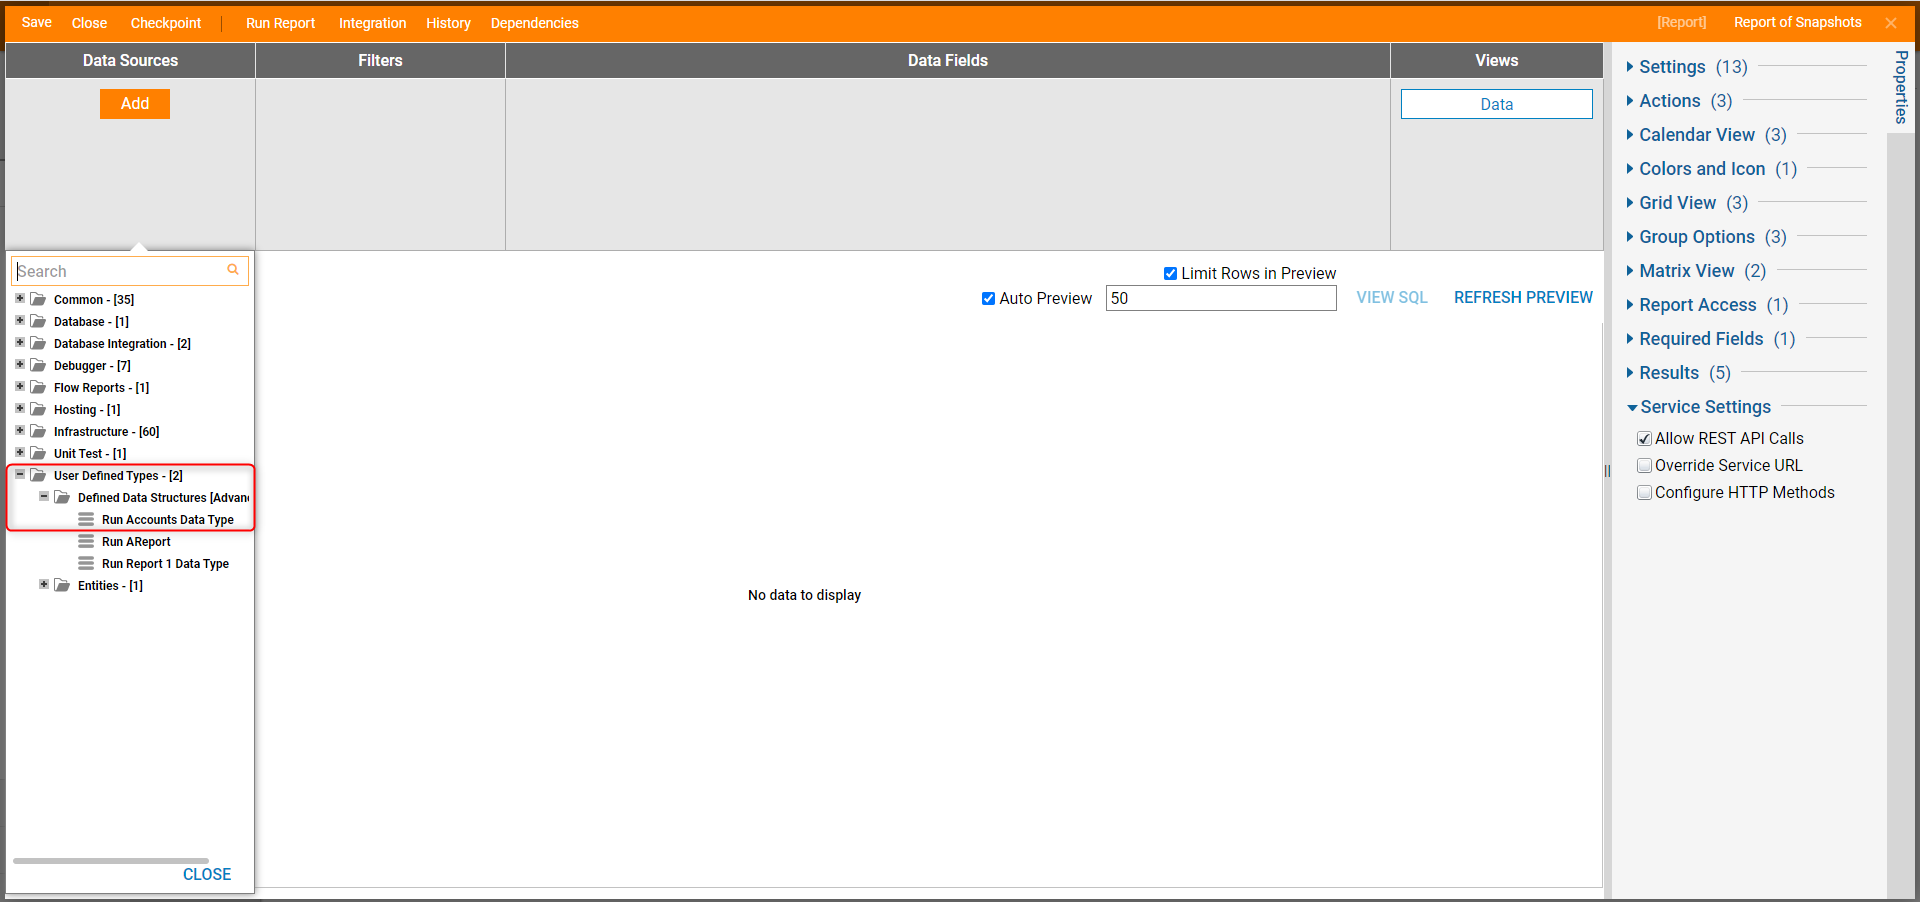
- Under the Data Sources column, select Add. If the Snapshot saves correctly, a Defined Data Structure for that Snapshot will appear under User Defined Type.
- In this example, select Run Accounts Data Type.

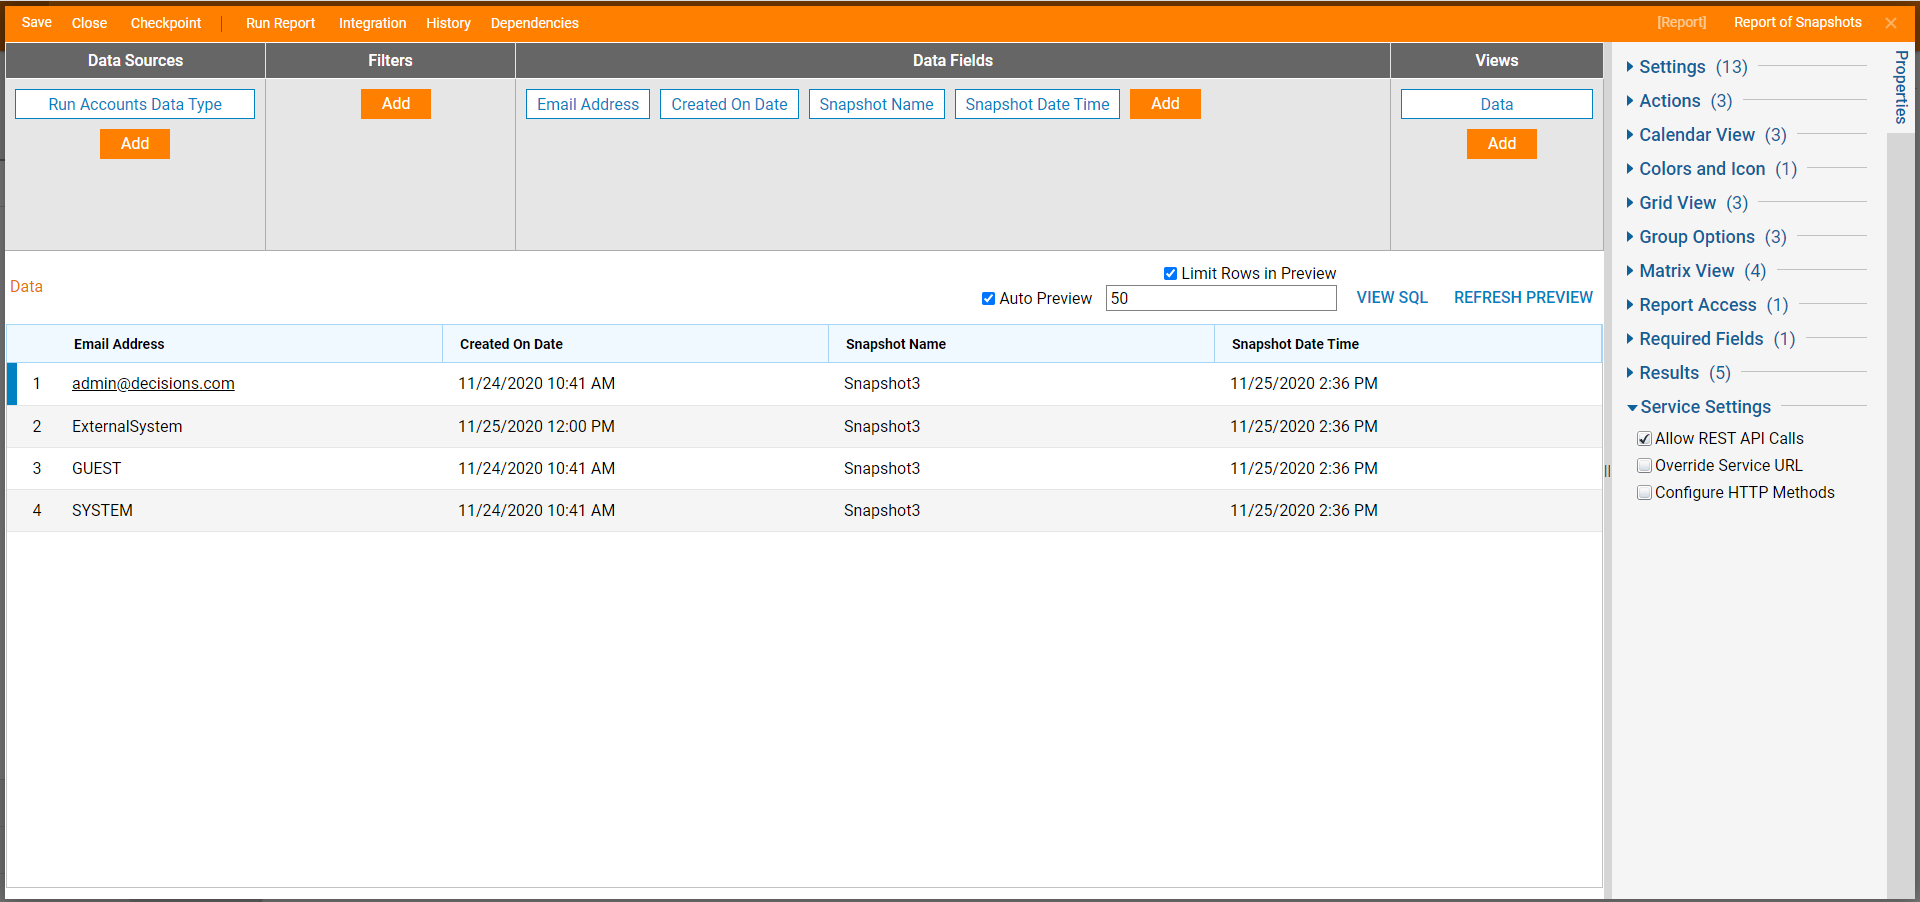
- Add columns as needed; the column options will consist of data from the original Report and data about the snapshot, such as Snapshot Name and Snapshot Date Time.
