Overview
Decisions offers the use of a Flow as a Validation Rule on a Form. This is beneficial because it extends the capabilities of Flow Validation Rules to allow for more advanced validations that can be applied to different Form Controls. After evaluating the inputs, a Validation Flow would return a collection of issues that contain data about which Form Control the error is applied to.
Additional Info
To learn about how to use State Rules as Data Validation, see: Validating Form Data With a Rule.
Example
This example will demonstrate using a Flow as a Validation Rule that will be applied to a Checkbox Form Control. The Flow Validation Rule will execute the Flow and return the expected response based on the result of the Flow and the user action on the Form. Unlike Rule Validations, Flow Validations cannot be applied to Form Layouts (i.e. a Grid).
- In a Designer Folder, select the CREATE FLOW button from the bottom Action Bar. This is not the Flow that will be used for the Form Validation, this Main Flow is responsible for calling the Form that the Validation will be applied to.
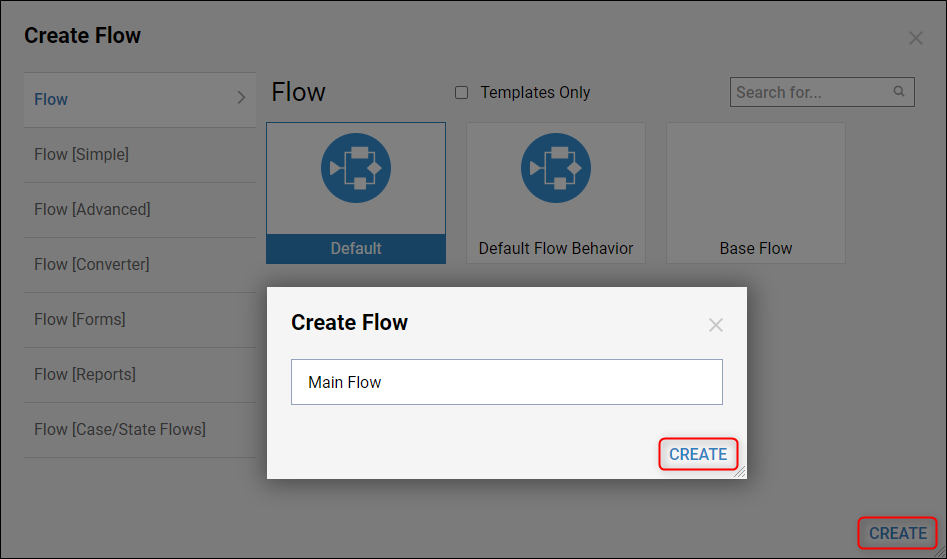
- In the Create Flow window, select the Default template and click 'CREATE', enter a name for the Flow then click 'CREATE' again.
- In the Flow Designer, click the orange arrow on the 'Done' outcome path from the Start step.
- When the Add After: -> done window appears, select Show Form from the Favorite Steps section and click 'ADD'.
- The Default Editor for the Show Form step will appear in a window. Use the left side of that window to provide a name for a new Form, then click 'CREATE'.

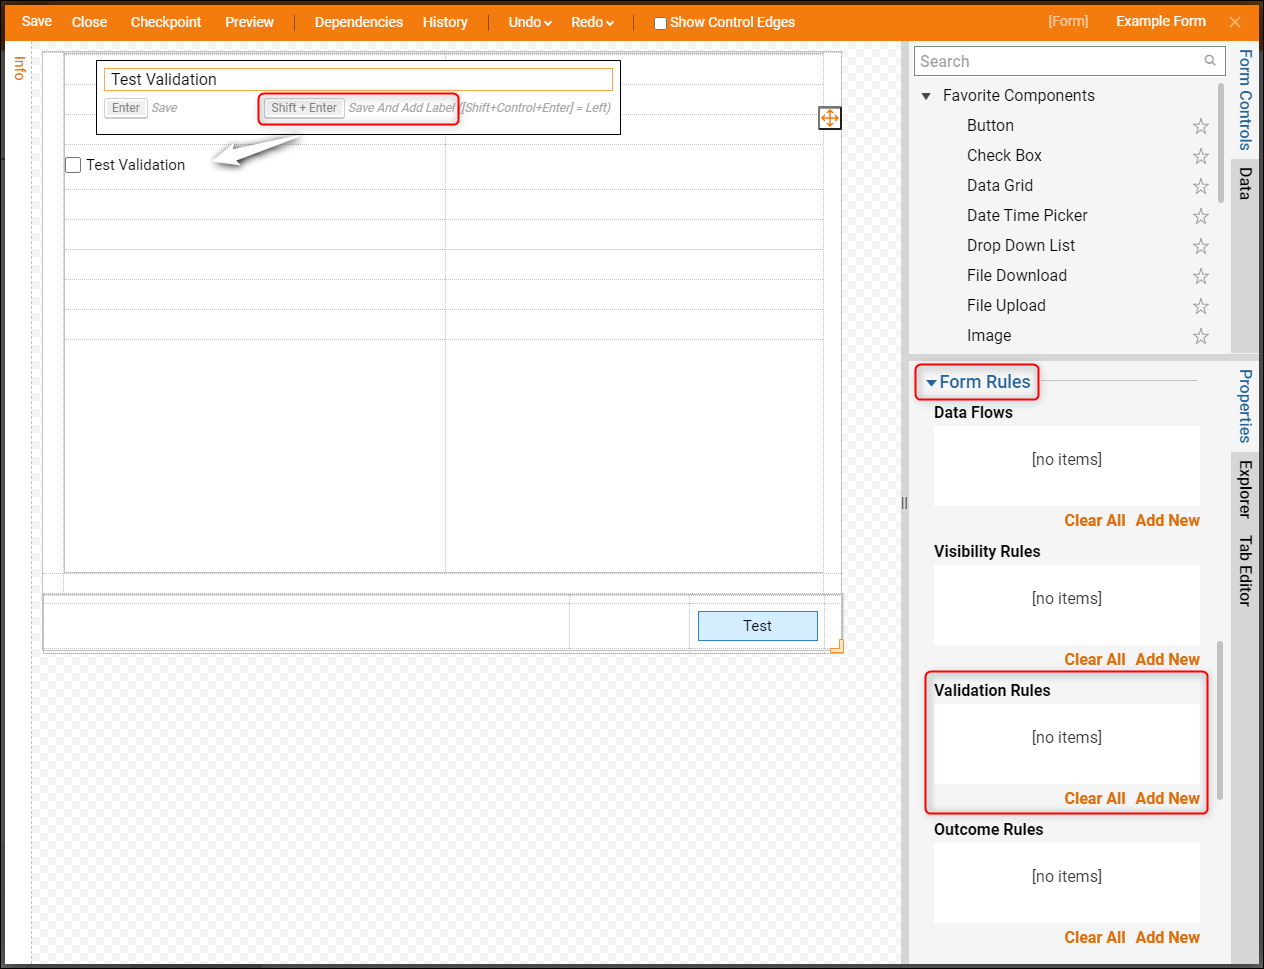
- In the Form Designer, locate Button under the Favorite Components section and drag it to the Form.
- When the Set Action Outcome Name popup appears, type Test and press <Enter> to save the Button name.
- Locate Check Box under the Favorite Components section and drag it to any blank cell on the Form.
- When the Set Data Name popup appears, type Test Validation and press <Shift + Enter> to save the Data Name as the Check Box text.
- Click into checkered space on the Form Designer and when the Properties section populates, locate the Form Rules section.
- In the Form Rules section, select Add New under the Validation Rules box.
- When the Add Validation Rules window appears, provide a name for the Validation Rule, then select Flow for the Validation Source.
- Select Create under the Flow box and when the Create New Flow window appears, provide a name for the Validation Flow and click 'CREATE'.

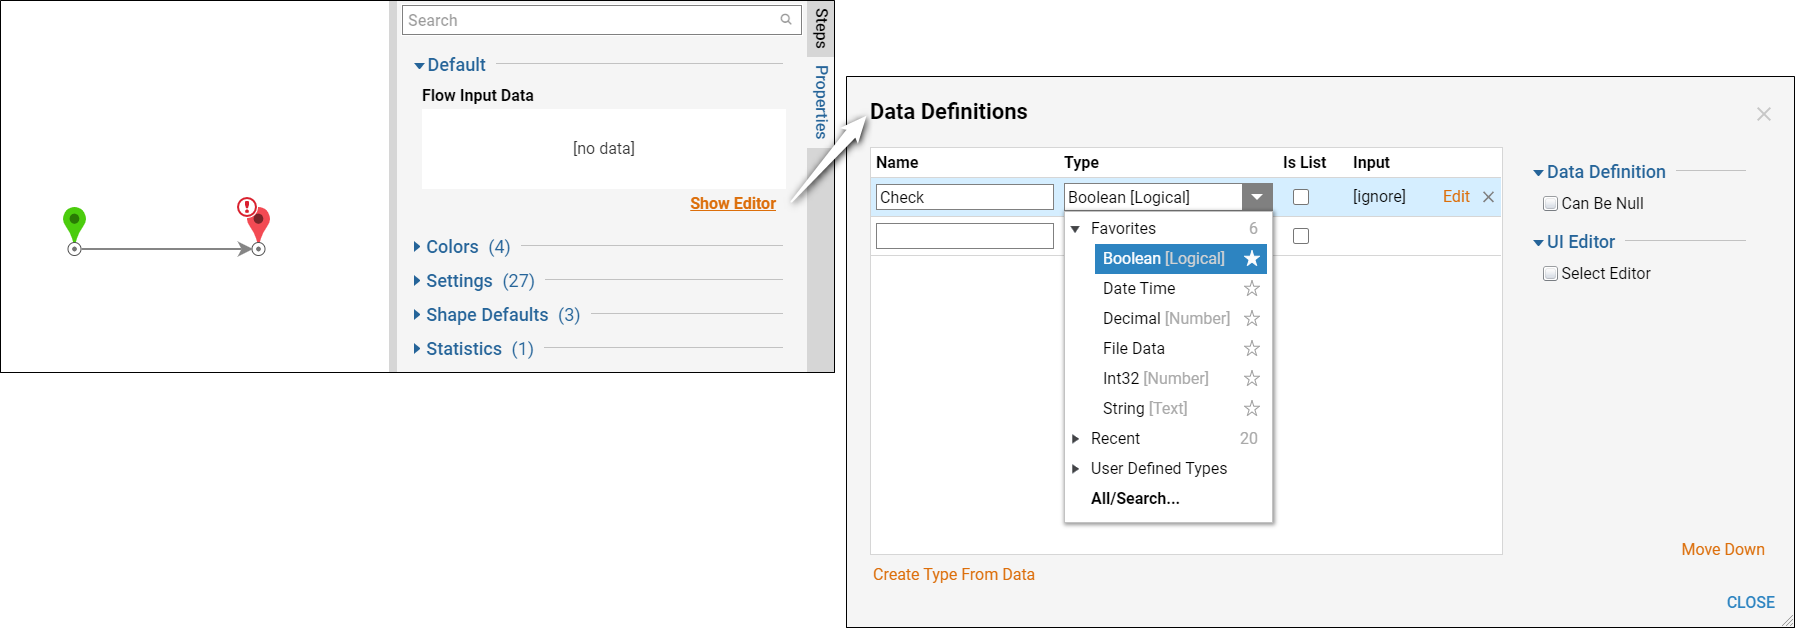
- In the Flow Designer, locate the Properties panel > Default > Flow Input Data and select Show Editor.
- When the Data Definitions window appears, enter Check for the data Name of the Input Data, then change the data Type to Boolean using the drop down.
- Close the Data Definitions window once complete.
- Next, after the Start step's 'Done' outcome path, add a True False Rule step from All Steps [Catalog] > Data > Rules > True False Rule.
- Connect the True path to the End step.
- On the False outcome path, add a Create Data step from the Favorite Steps section of the Steps Catalog.
- Connect the Create Data step to the End step.
.png)
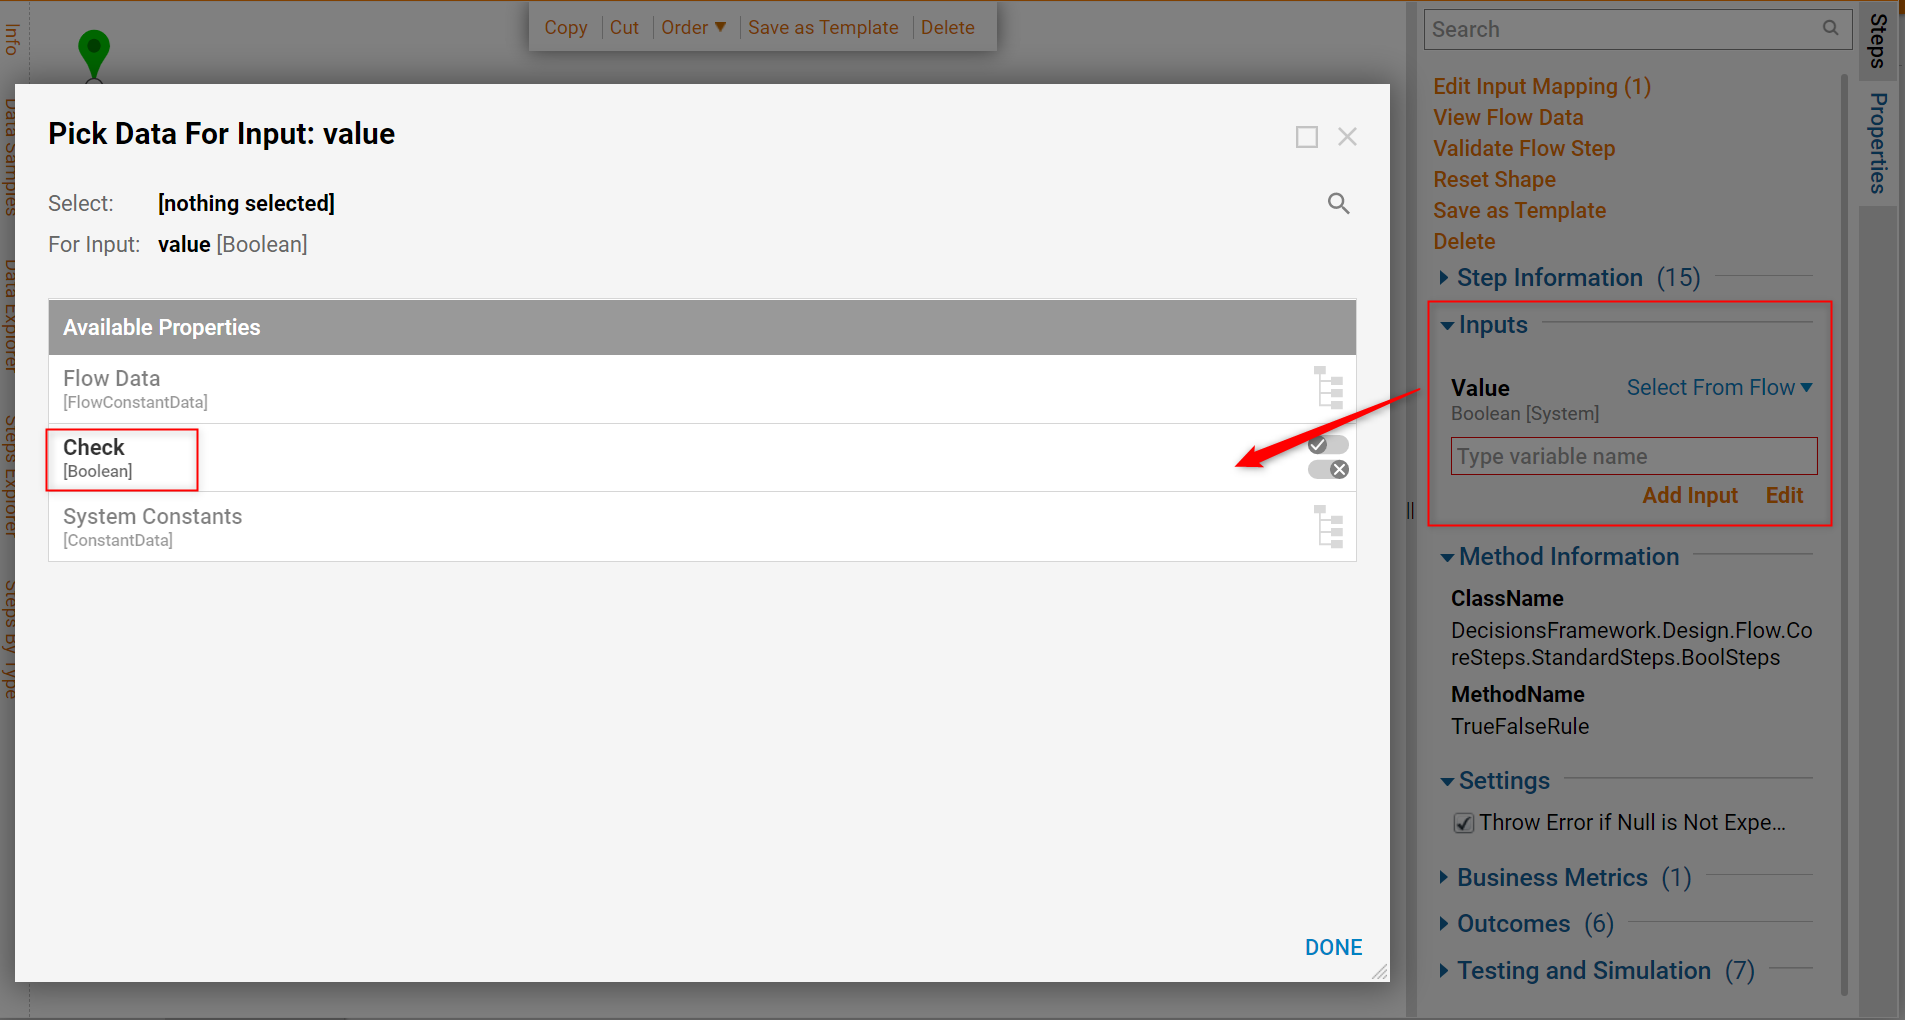
- Select the True False Rule and then navigate to the Properties panel > Inputs > Value and change the input mapping to Select From Flow.
- In the Pick Data for Input: value window, select Check.
- Select the Create Data step and locate the Properties panel > Data > Data to Create section. Select Show Editor.
- When the Data Definitions window appears, enter Validation for the name.
- In the Type drop down, enter FormValidationIssue and select the option that appears, then click 'CLOSE'.

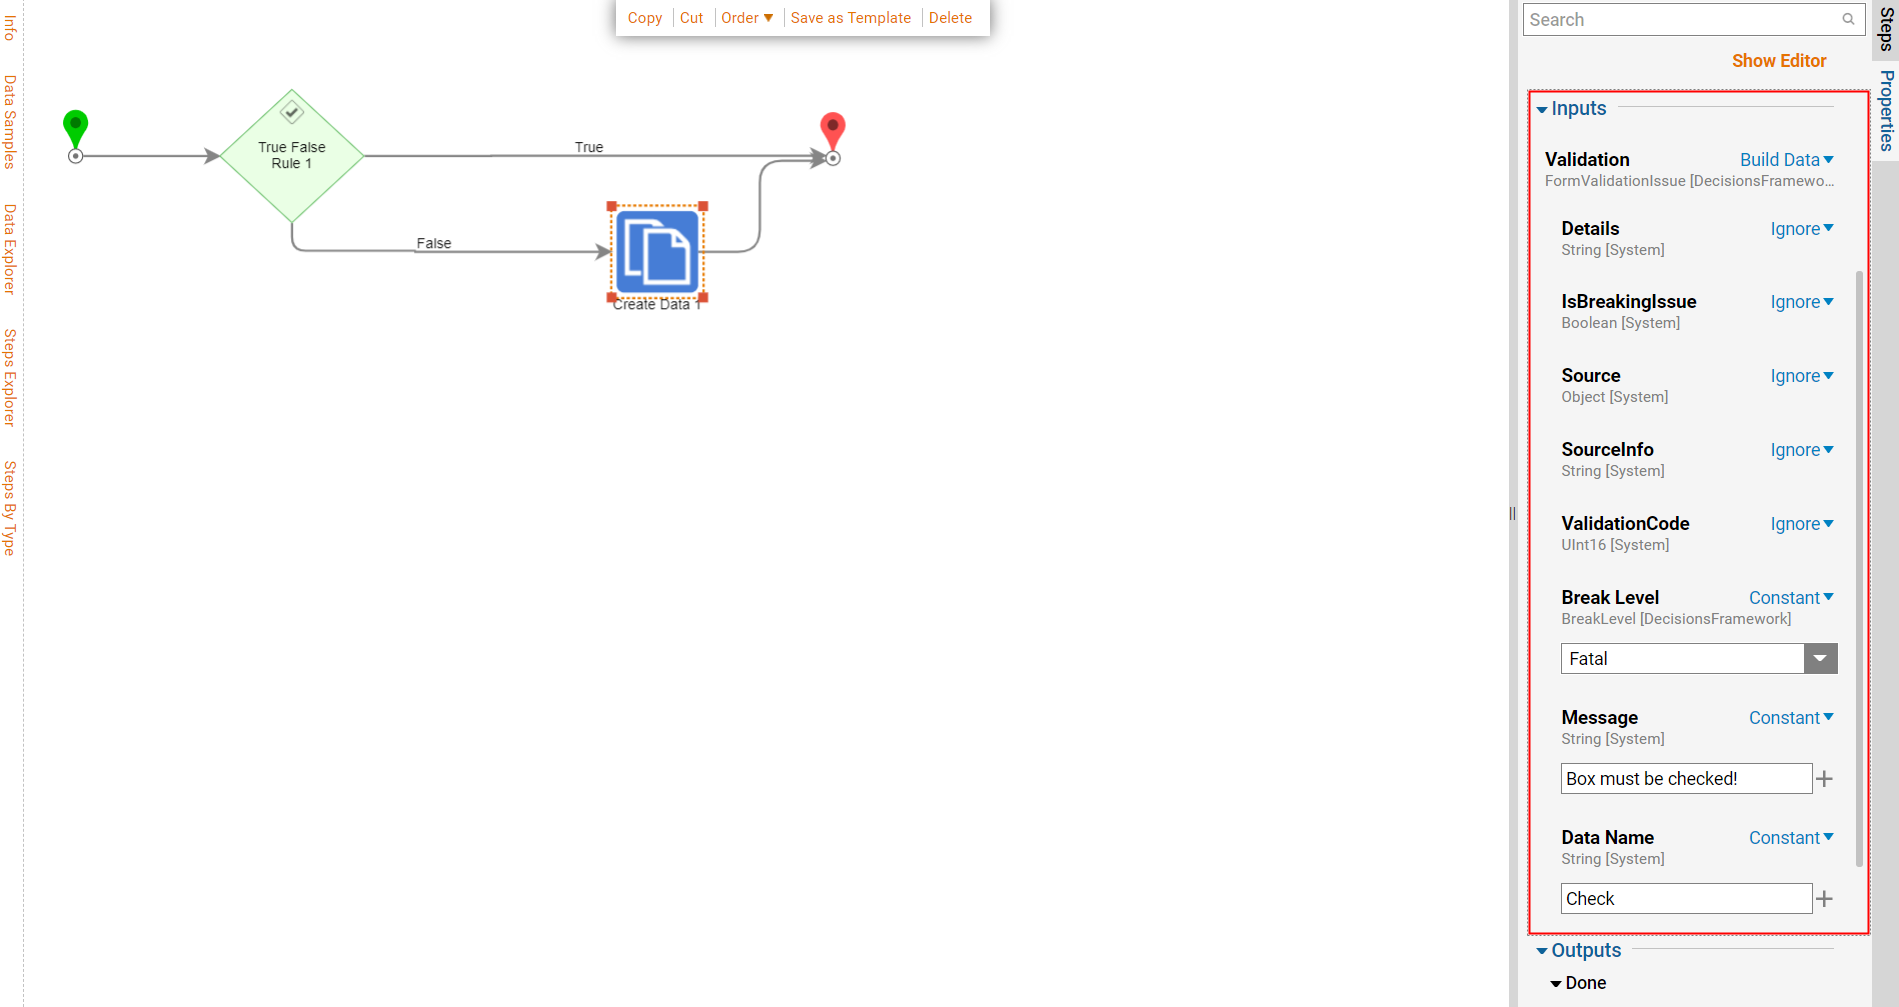
- Then, navigate to the Properties panel > Inputs > Validation and change the input mapping to Build Data.
- Locate and change the input mapping type of Break Level, Message, and Data Name to Constant and define them as shown in the screenshot below.
- Click OK once complete and click off of the step icon to lock in the configurations.
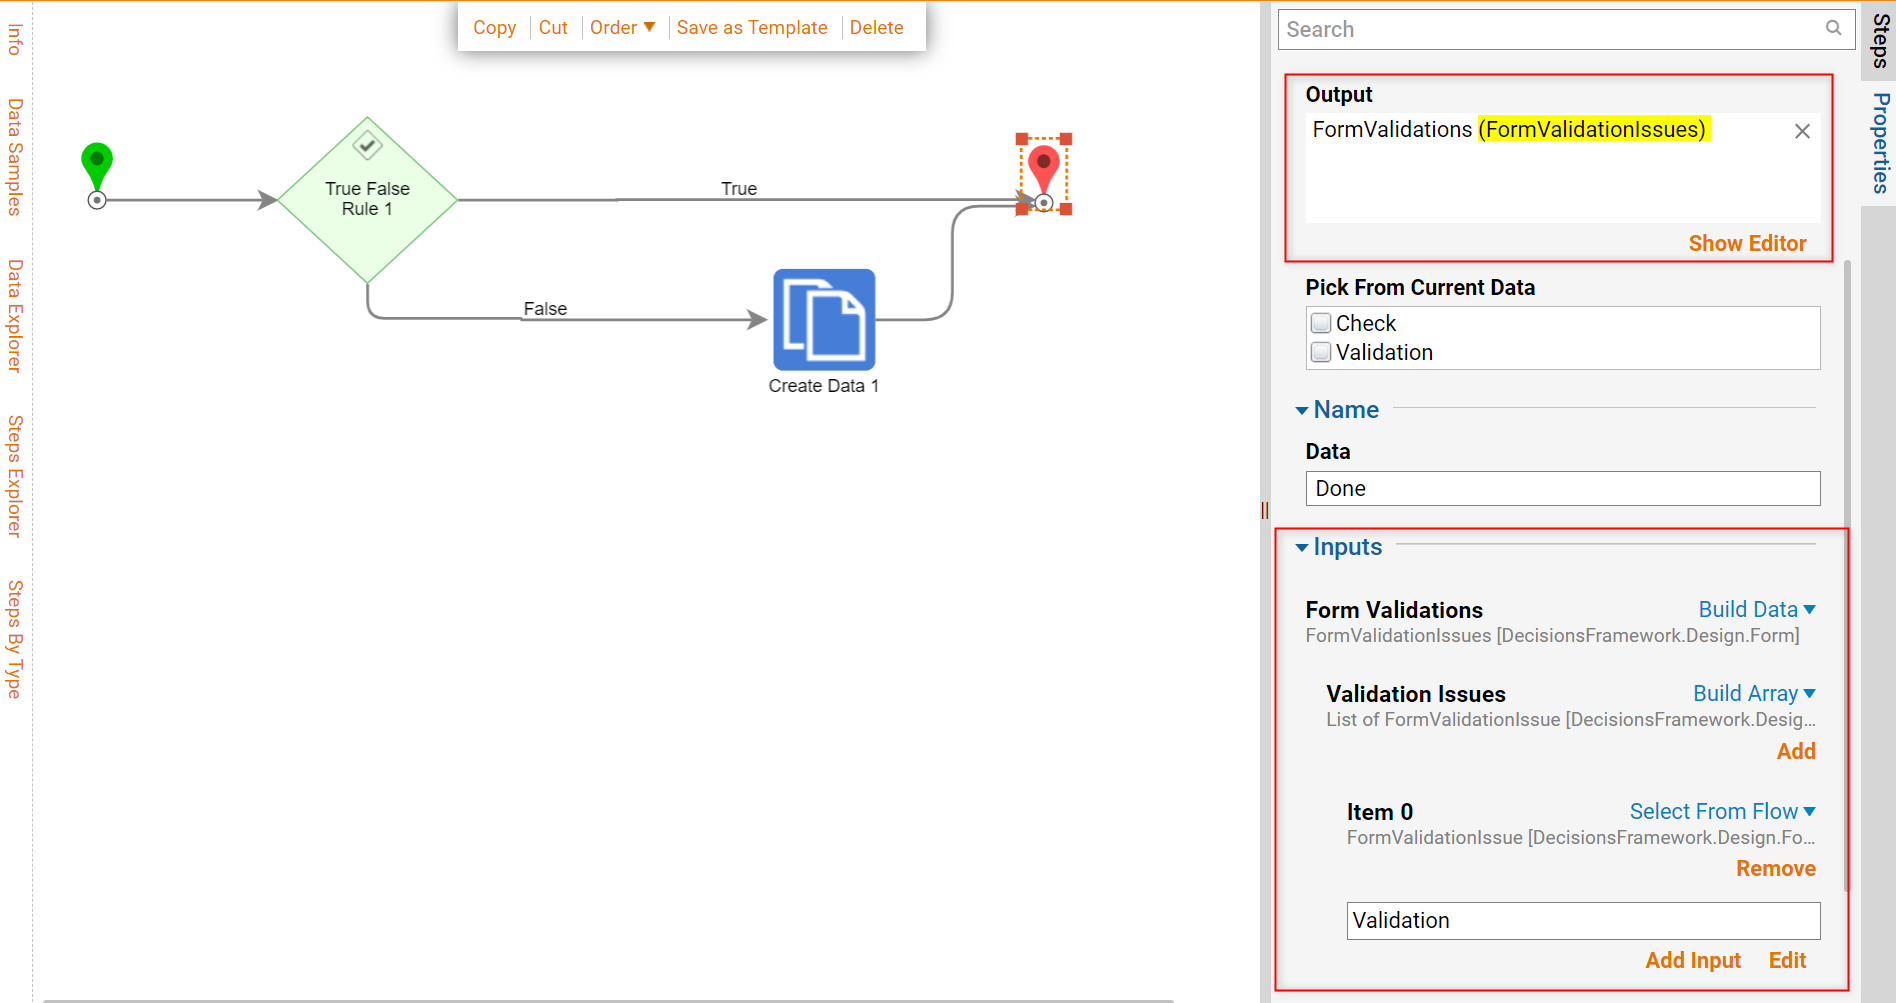
- Select the End step and navigate to the Properties panel > Data > Output and select Show Editor and repeat steps 24-25, selecting FormValidationIssues.
- Next, navigate to the Properties panel > Inputs > Form Validations and change the input mapping to Build Data.
- Then, change the input mapping on Validation Issues to Build Array.
- For the first item (Item 0) in the array, map the Validation [FormValidationIssue] value by changing the input mapping to Select From Flow. Click OK once complete.
- Save and close the Flow.
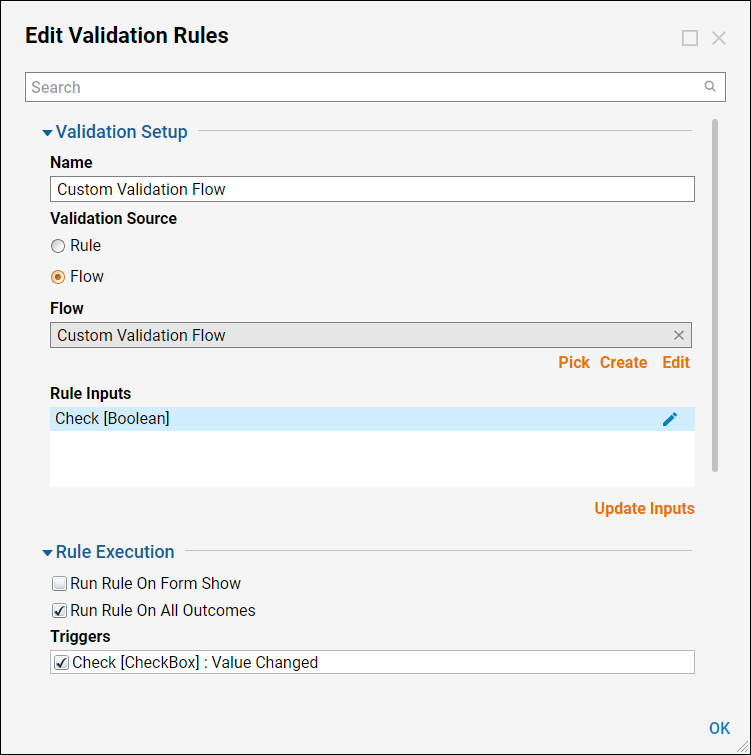
- In the Edit Validation Rules window, select the Update Inputs button under Rule Inputs so that the Check [Boolean] input appears.
- Under the Rule Execution section, make sure Run Rule On All Outcomes is selected.
- Under the Triggers sub-section, enable the box to apply this Validation Flow to the Check [CheckBox] Form Control when the value is changed.Component Trigger breakdown:
- Enter triggers once the end user initially enters data.
- Exit triggers once the end user exits the component by clicking off of it for example.
- Clear triggers once the end user clears the entered value in the component.
- ValueChanged triggers once the end user edits the entered value in the component.
- StoppedTyping triggers once the end user pauses after entering a value in the component. By default, this initiates after a 300 millisecond wait.
- Select the pencil icon next to the Check [Boolean] input.
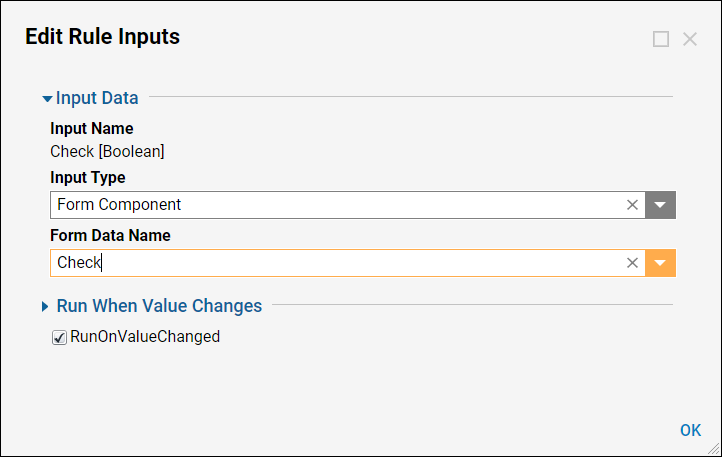
- When the Edit Rule Inputs window appears, select Form Component as the Input Type and Check as the Form Data Name. This is how the Validation knows to take the Boolean input off of the Form Control.
- Click OK on both windows once complete, then save and close the Form Designer.
- In the Main Flow, connect the outcome path of the Form to the End step. If there is a validation warning in the Flow, it is because of the Form input. This can be resolved by changing the Form input mapping type to Ignore.
Debug
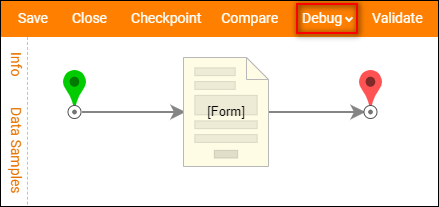
- Select Debugfrom the top action bar.
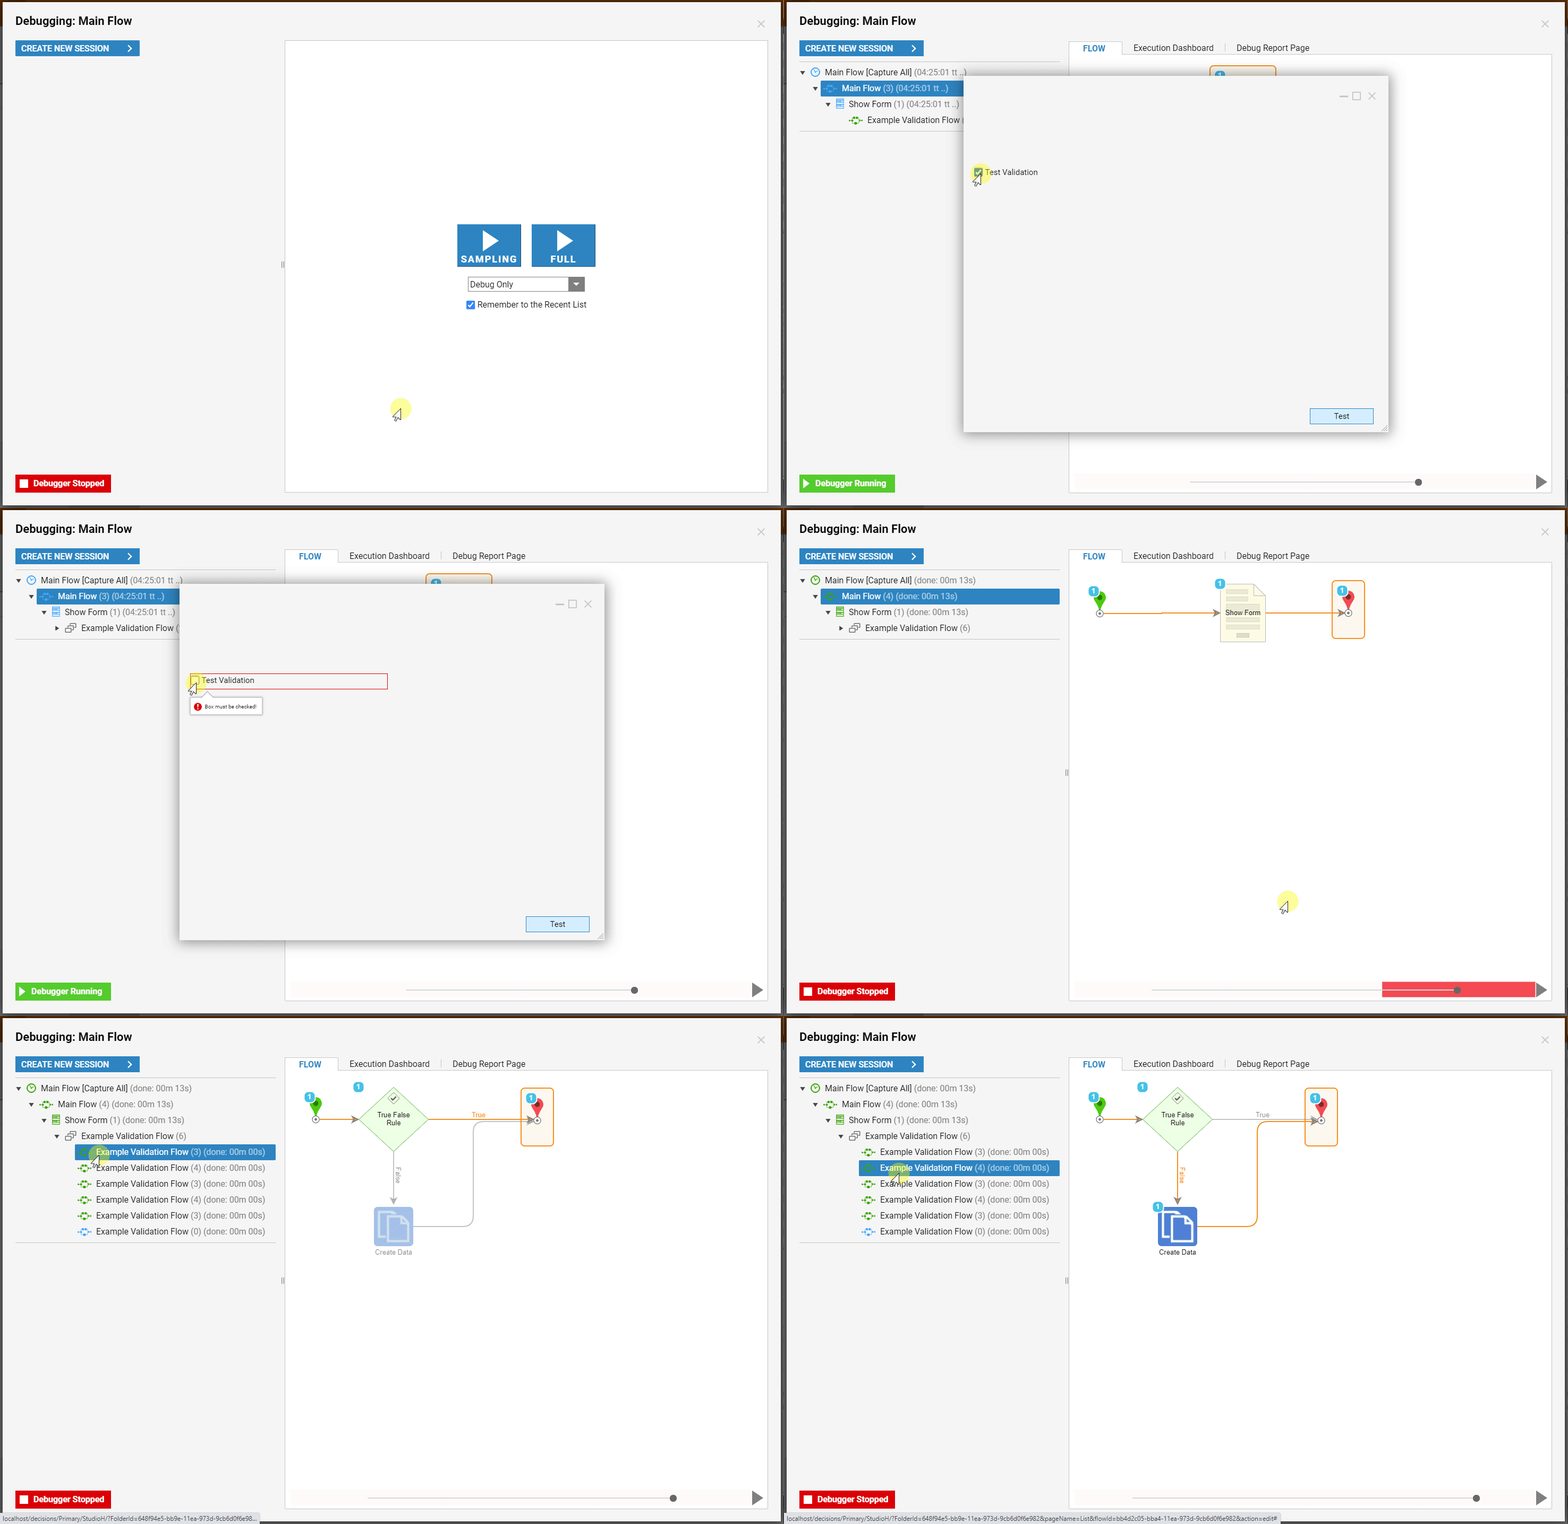
- Run a Full session and when the Form appears, select and deselect the checkbox to see the logic of the Flow Validation Rule take effect.
