Overview
Grid Mode setting under the properties tab of the Data Grid and Advanced Data Grid gives designers the ability to pass the user-interacted data as output. This data can be used within the subsequent Flow steps.
The following table describes the available options under Grid Mode.
| Grid Mode | Description |
|---|---|
| InfoOnly | This is the default view and is purely for visualization purposes. This mode does not pass any data as output. |
| SingleSelect | SingleSelect mode will allow the end users to select a single row and pass the selected data row as output. |
| MultiSelect | MultiSelect mode will allow the end users to select multiple rows and pass the selected data row as output. |
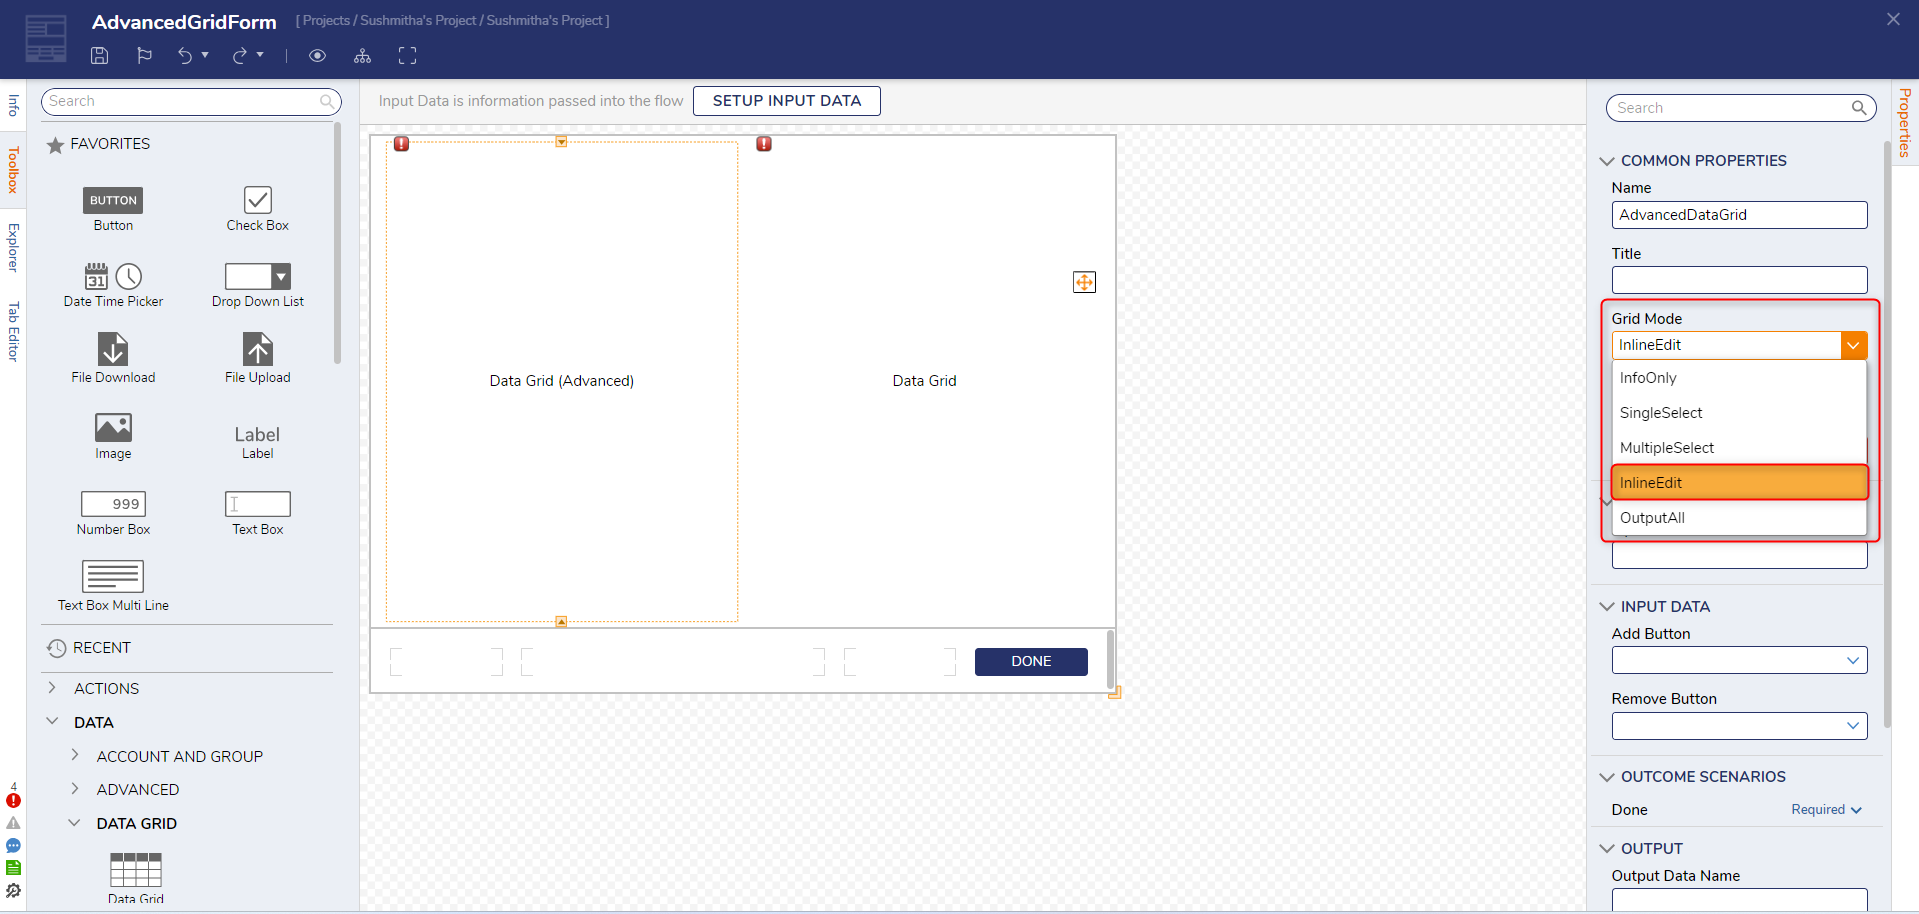
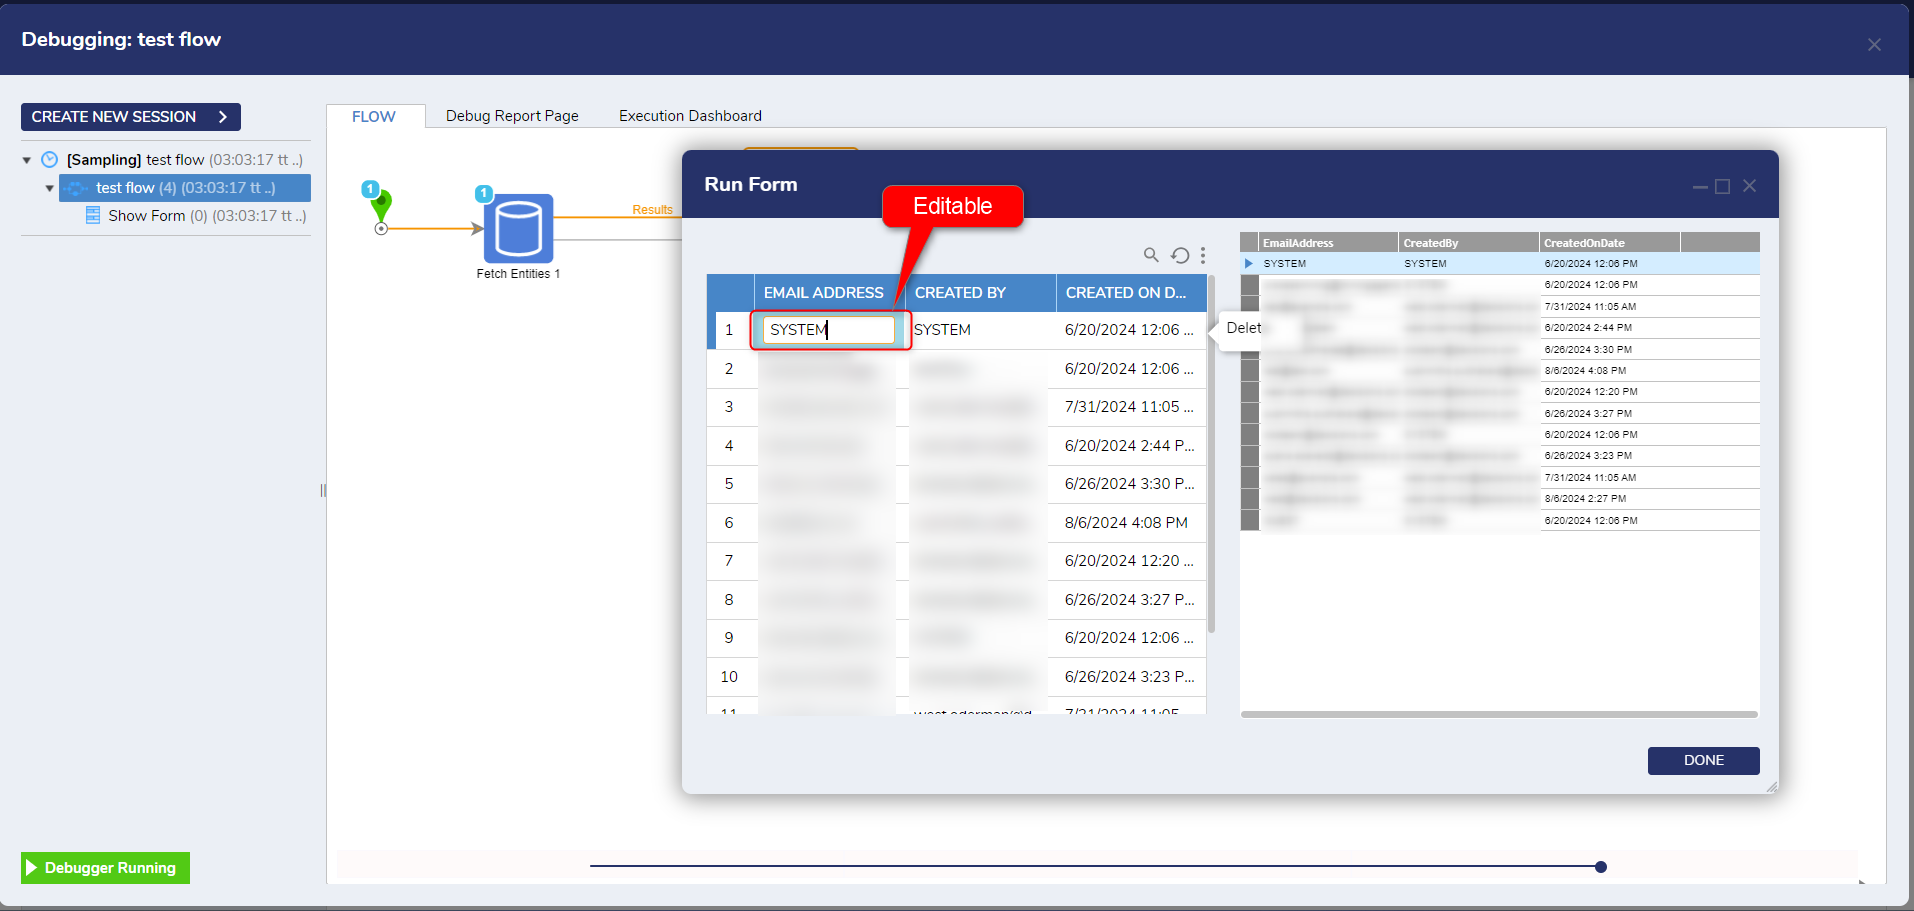
| InlineEdit | InlineEdit mode will allow the end users to edit the data from the data grid during runtime. The Inline edit feature does not save the changed data. Designers must build logic using CRUD actions to save the changed data back in the data structure. |
| OutputAll | This will output all the data present in the data grid and advanced data grid. |
| PropertyGridEdit (only available in Data Grid) | This option enables end users to edit data fields in a manner similar to InlineEdit. However, instead of directly modifying the data fields, a separate dialog box appears for editing the data. |
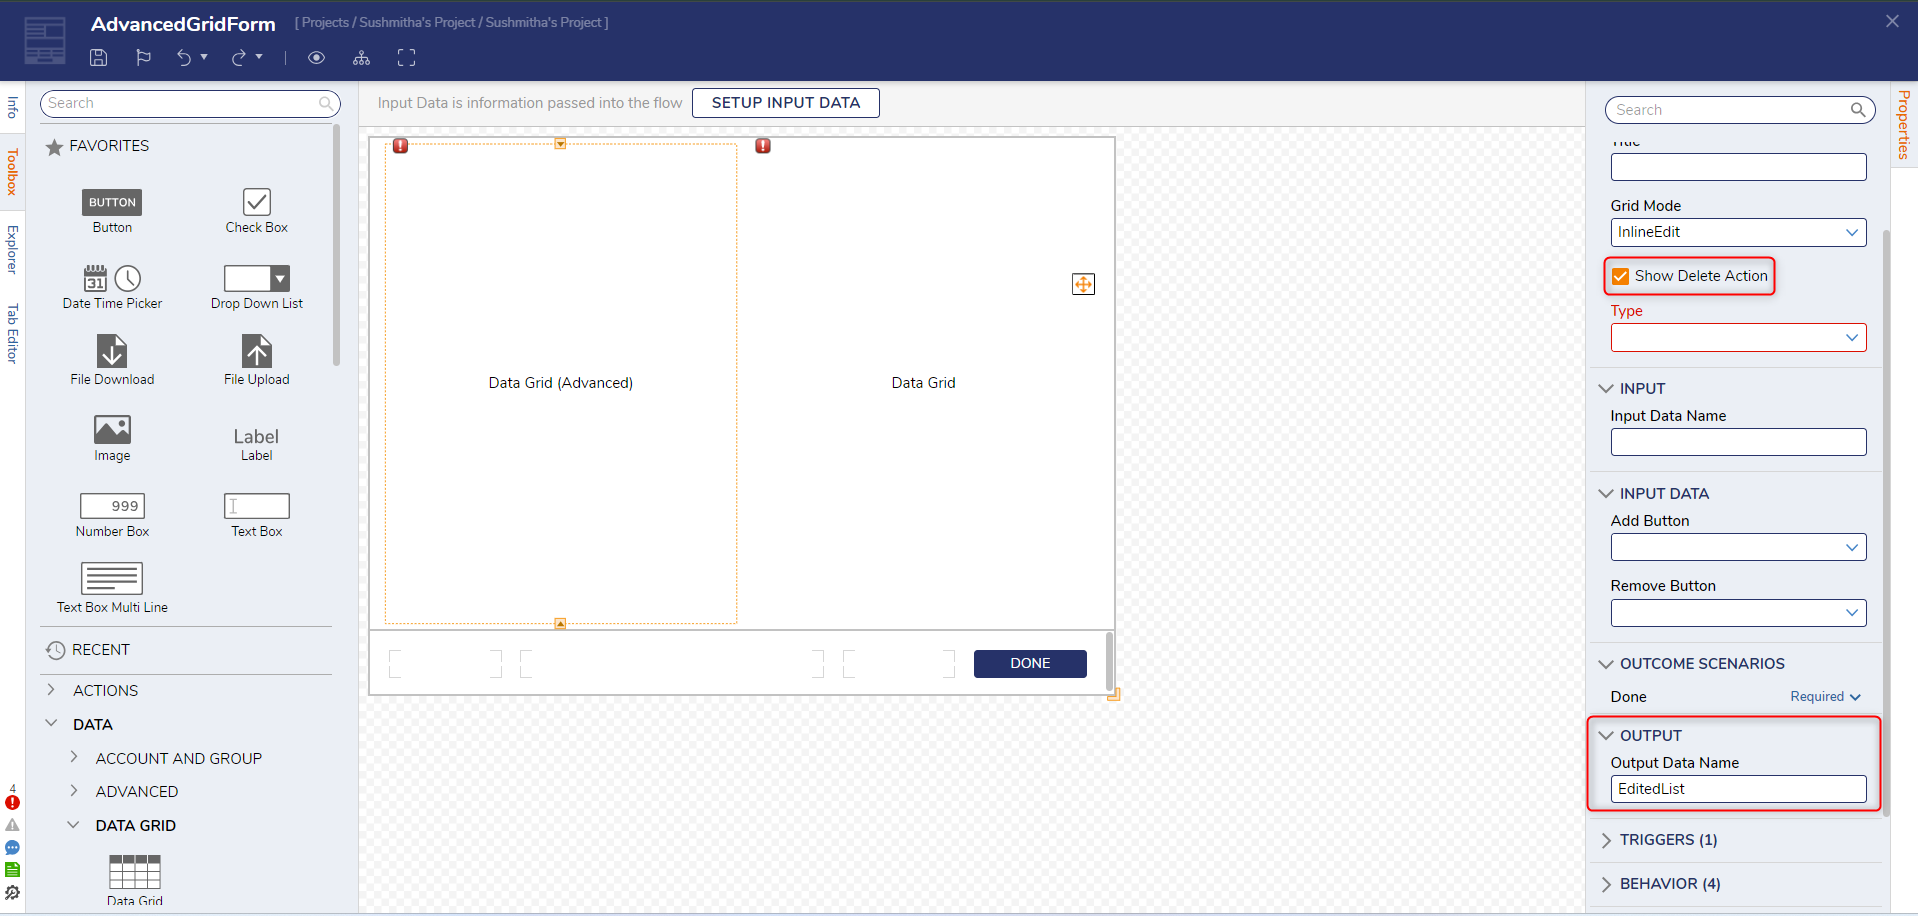
When the Grid Mode is changed from InfoOnly to another mode, a configurable required field will appear under the OUTPUT category called Output Data Name. A new data name for the Output will be required. The output data name will appear on both Grid controls.
Note:
Hierarchical View is not supported in MultiSelect and InlineEdit modes. It is only supported in InfoOnly, Single Select, and OutputAll modes.
Example
The following section demonstrates how Inline Edit from the Grid Mode can be used to edit the data fields during Run Time.
- Open a Form. Select the Data Grid (Advanced) or the Data Grid, click the drop-down list under the Grid Mode option, and select InlineEdit.

- Once this setting has been enabled, a configurable required field will appear under the OUTPUT category called Output Data Name. A new data name to the Output will be required for the user-edited list. The output data name will appear on both Grid controls. The InlineEdit option will also display the Show Delete Action option.

- Once it has been configured, users can click into a row and type in a new value.

For further information on Forms, visit the Decisions Forum.