- 13 Aug 2021
- 2 Minutes to read
- Print
- DarkLight
Decisions AWS Container Setup
- Updated on 13 Aug 2021
- 2 Minutes to read
- Print
- DarkLight
Overview
Decisions has the capability to integrate with different systems that are Container and Docker-based services. One of the most common services that utilizes this capability is AWS. The following document demonstrates how to configure a Decisions Image on an AWS Container.
For more on Containerization in Decissions, see Containerization Overview.
Example
For additional information on installing Decisions on AWS, see: Installing on AWS.
- After installing Decisions, navigate to System > Administration > Features.
- Locate the Docker Module, then click DETAILS and then INSTALL.

- After the Module installs, restart Service Host Manager.
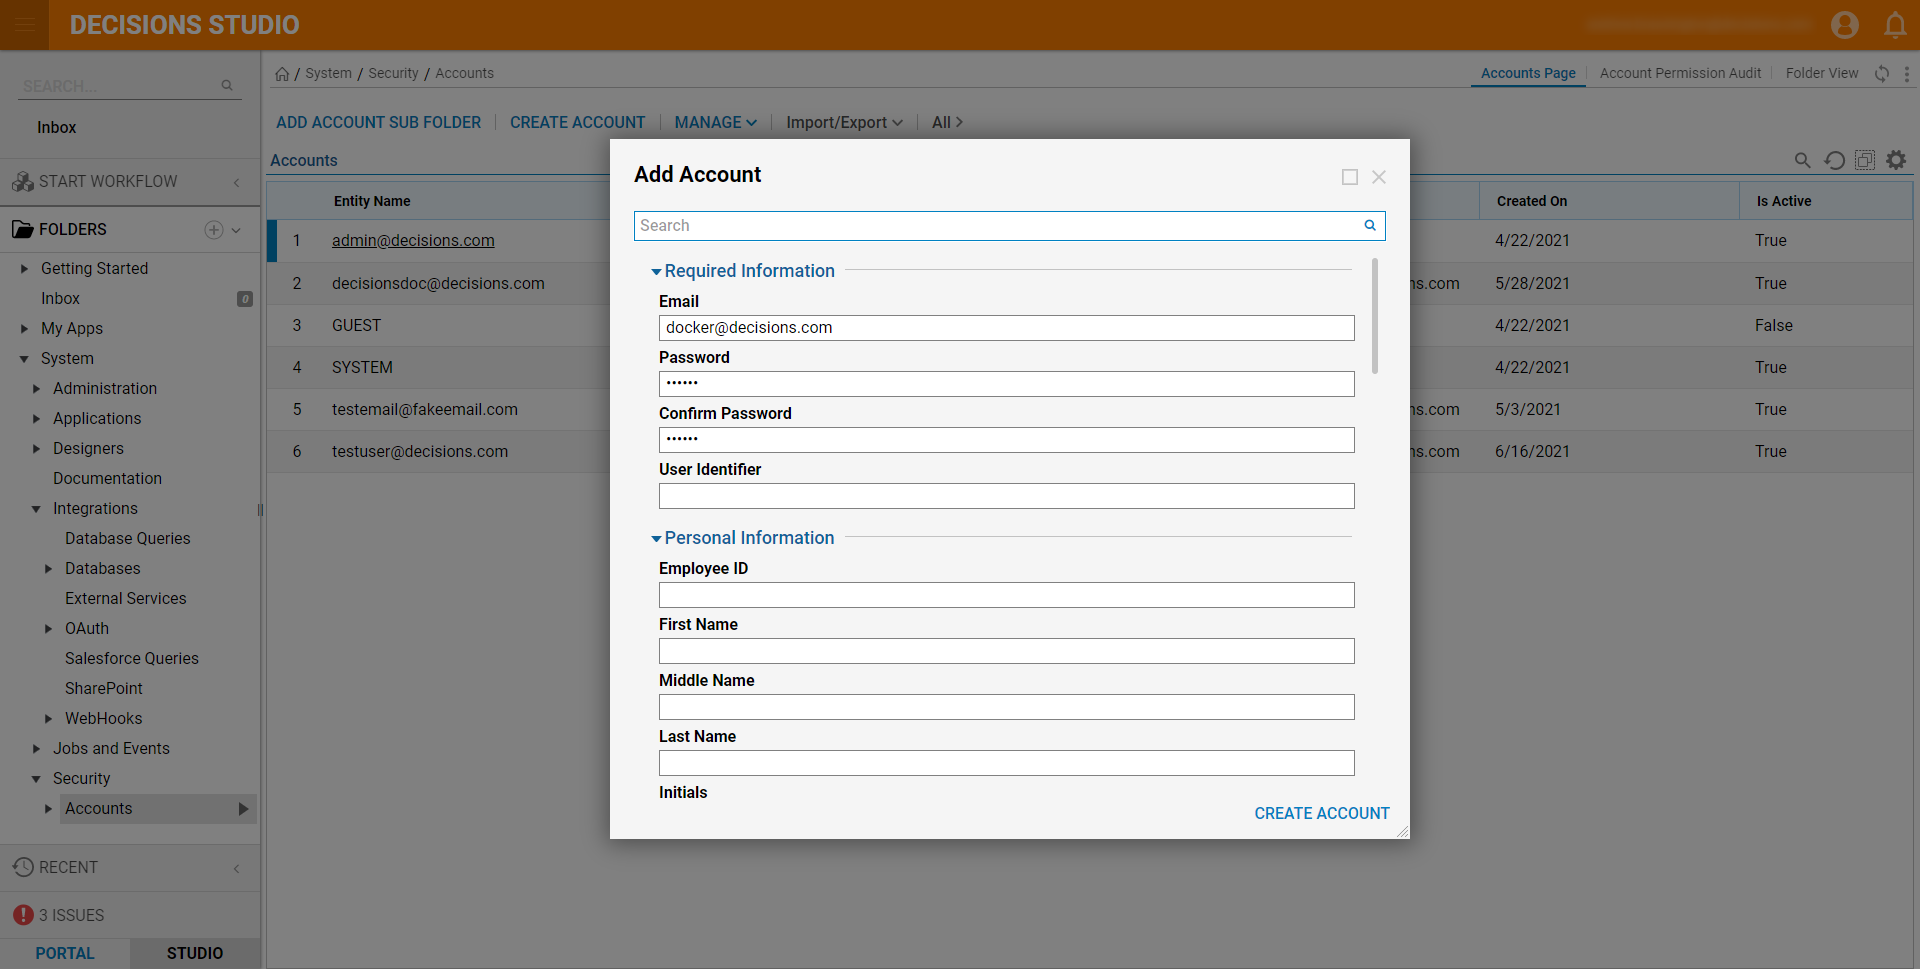
- Back in Decisions Studio, navigate to System > Security > Accounts, select CREATE ACCOUNT and CREATE a new User Account. Give the Account the username "docker@decisions.com" and the password "docker". Default Docker AccountThis docker account the default account that used to talk with the EC2 Instance. This can be changed in AWS if the default account is not desired.

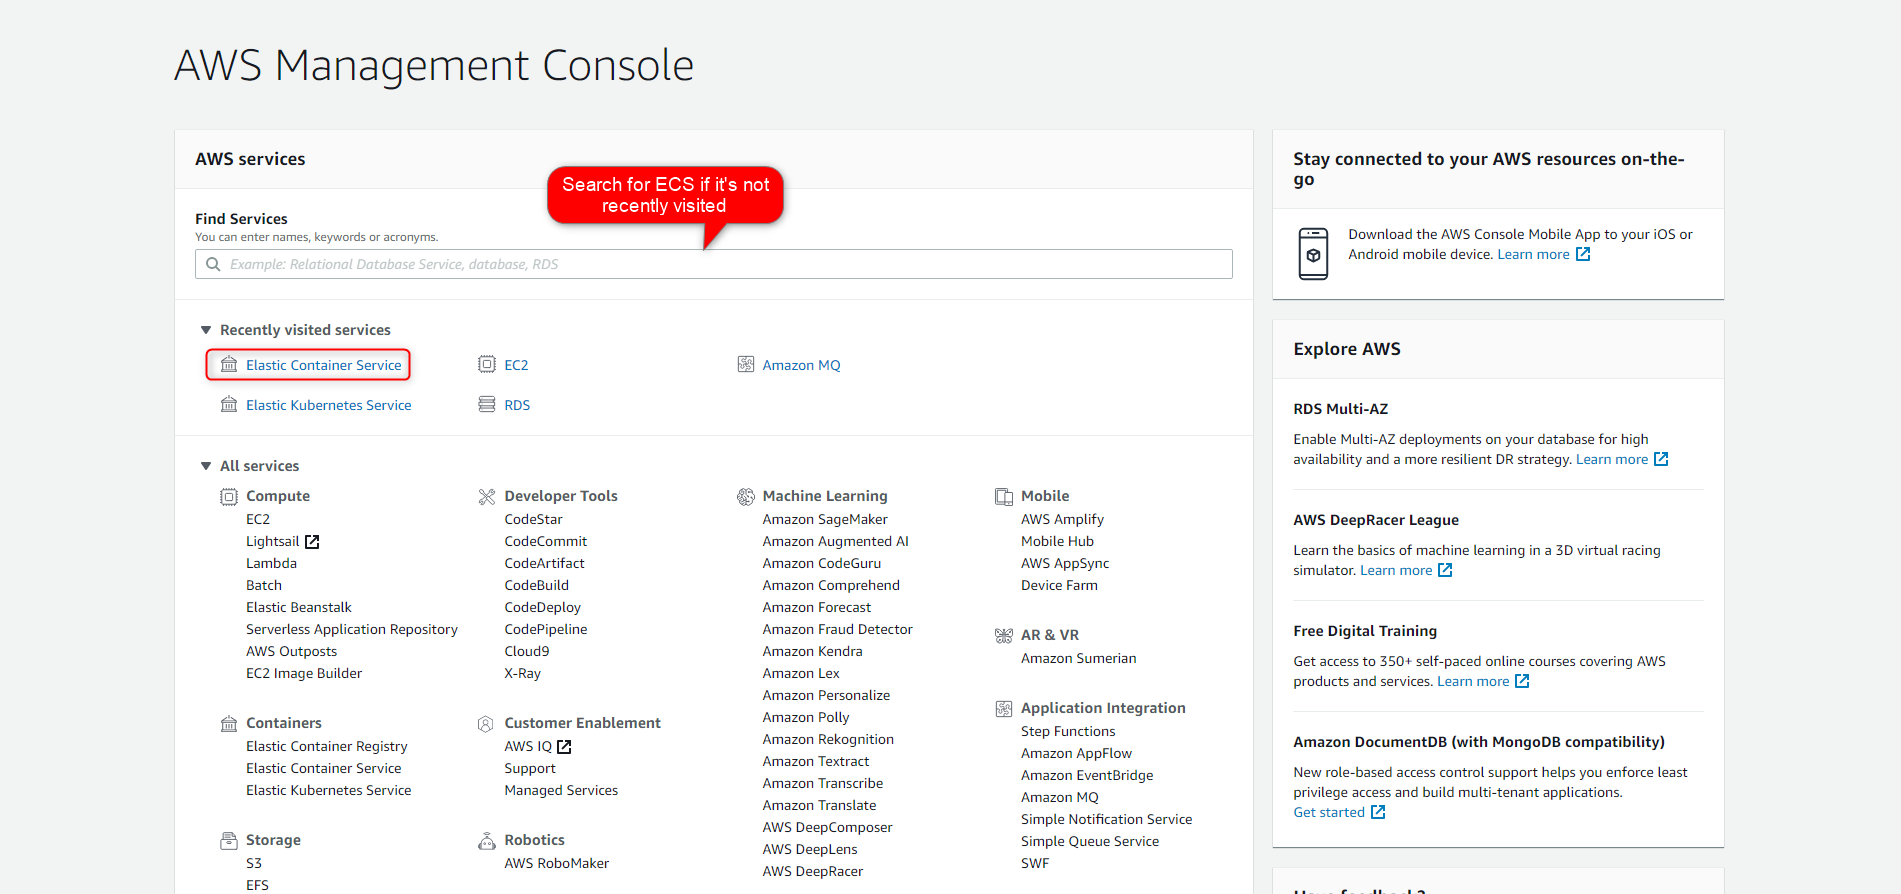
After creating the Account, create an AWS Cluster with the default configurations by navigating to Elastic Container Service > Task Definitions in the Cluster, and then selecting Create new Task Definition.


Declare a Task Defintion Name. Then for this example, set Task size > Task memory to "0.5GB" and Task CPU to "0.25GB" (these settings can be adapted at the users digression for their environment).

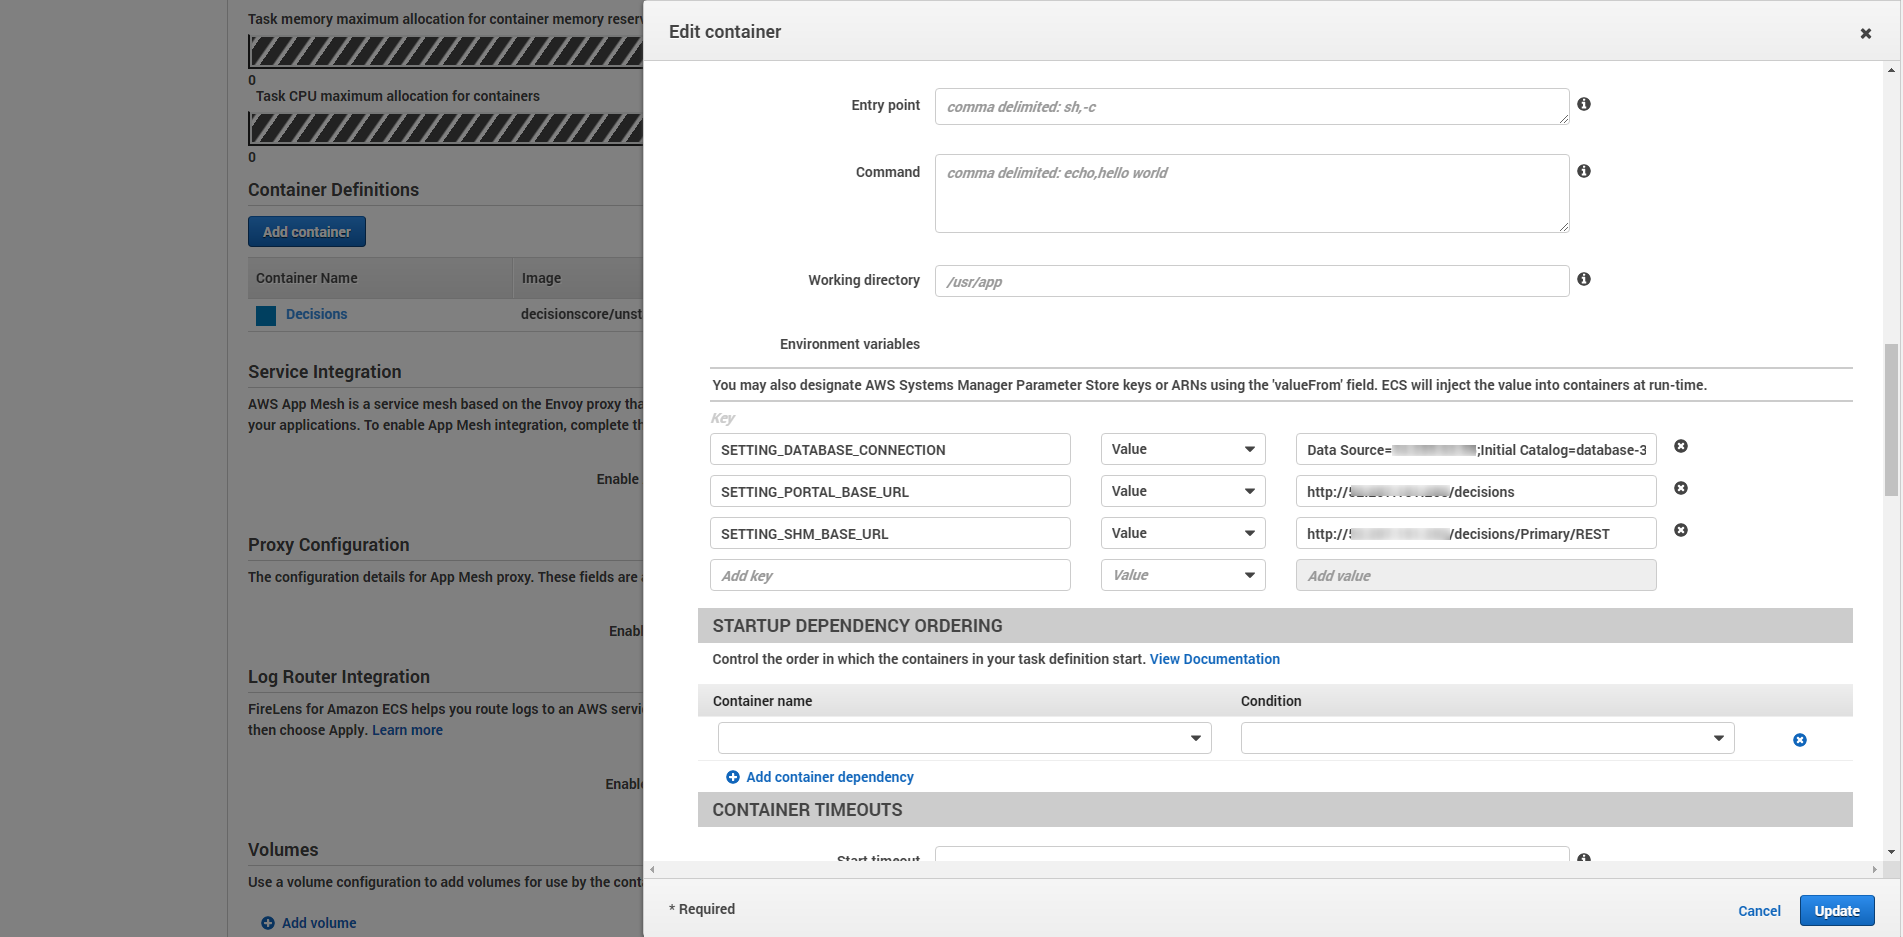
Scroll down to the Container Definitions and click Add container. Provide a Container name, add Docker Image "decisionscore/unstable:latest" to the image portion, and then configure the following fields under Environmental Variables as follows:
SETTING_USERNAME and SETTING_PASSWORD Are OptionalThese two key's and their values are optional. If these values are not used in the configuration then decisions and the EC2 instance will use the default 'docker@decisions.com' and password 'docker'Key Value SETTING_DATABASE_CONNECTION RDSConnectionString SETTING_PORTAL_BASE_URL http://decisionsIPorDNSname/decisions SETTING_SHM_BASE_URL http://decisionsIPorDNSname/decisions/Primary/REST SETTING_USERNAME AdminEmail SETTING_PASSWORD AdminPassword Select the Update button in the bottom right.

Once the container has been added, then click Create.

Navigate back to the Cluster category. Click on the AWS Cluster, then click on Tasks tab and select the Task.
.png)
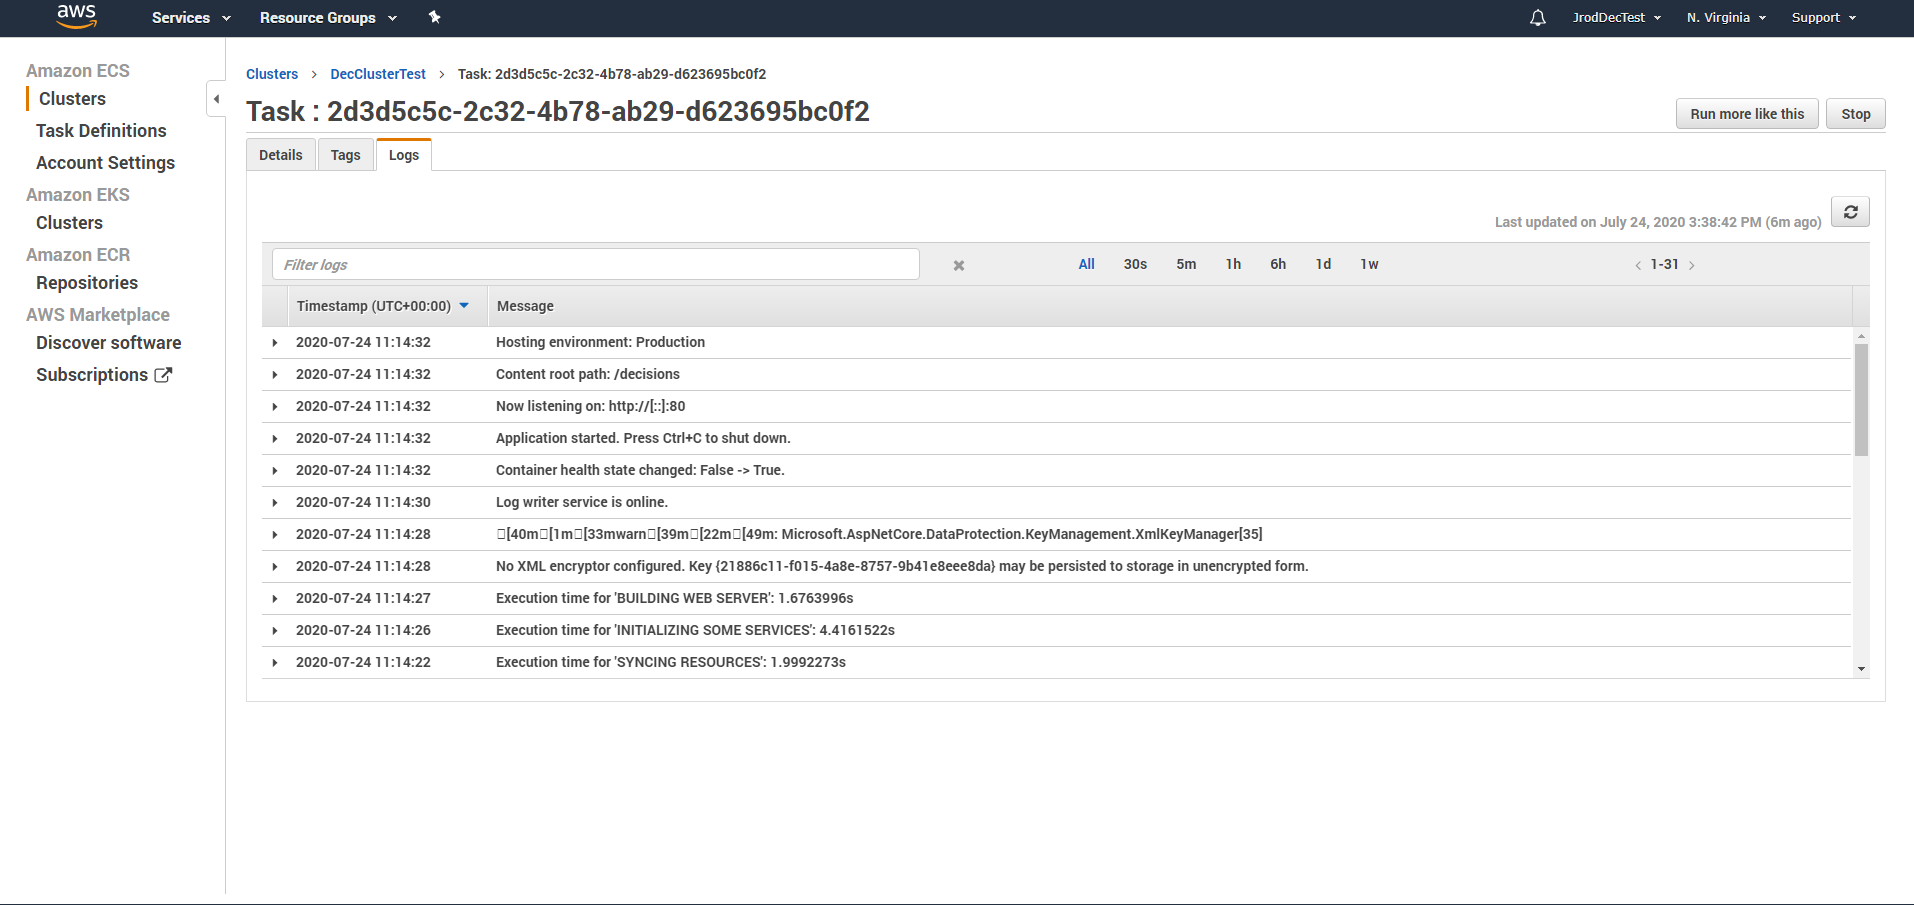
Navigate to the Logs tab; periodically click the Refresh button on the right-side of the page until the Logs populate with the Container Status.
Additional Information on LogsDepending on the type of EC2 instance that was created it may take a little bit for the Logs to populate with the Container Status. The Logs populating is an indication that the application has started.
Once the Task begins to run, ensure that the EC2 Instance is active and that the Container is displayed under System > Administration > Containers in the Studio.
.png)
Access the Docker Image by inputting the URL at Internal IP Swagger.


.png)

.png)

