Overview
The Pause Flow step delays processing of the proceeding step of a Flow until a specified time duration has elapsed. This can be useful when dealing with processes that require additional users to interact with them or that require additional information and elements to proceed.
Example
The following example will demonstrate the Pause Flow step using a delay of 5 seconds.
- From a Designer Project, click CREATE FLOW from the Global Action Bar, select Flow, provide a Name, then click CREATE.
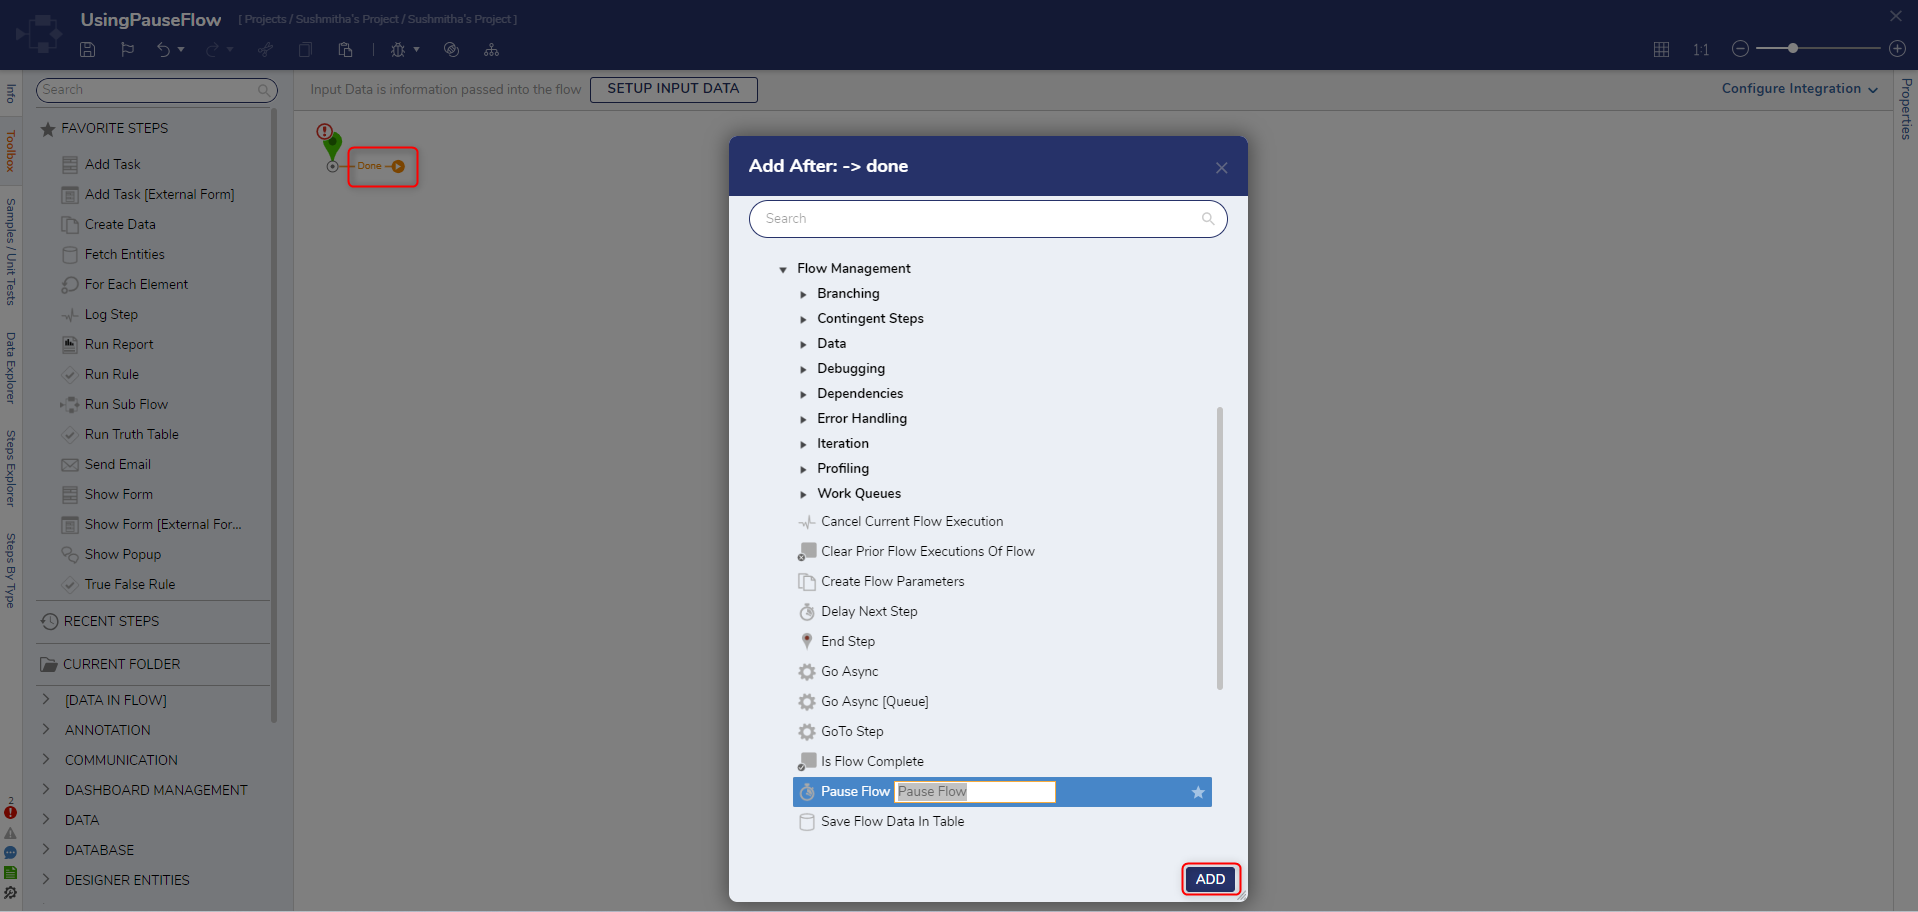
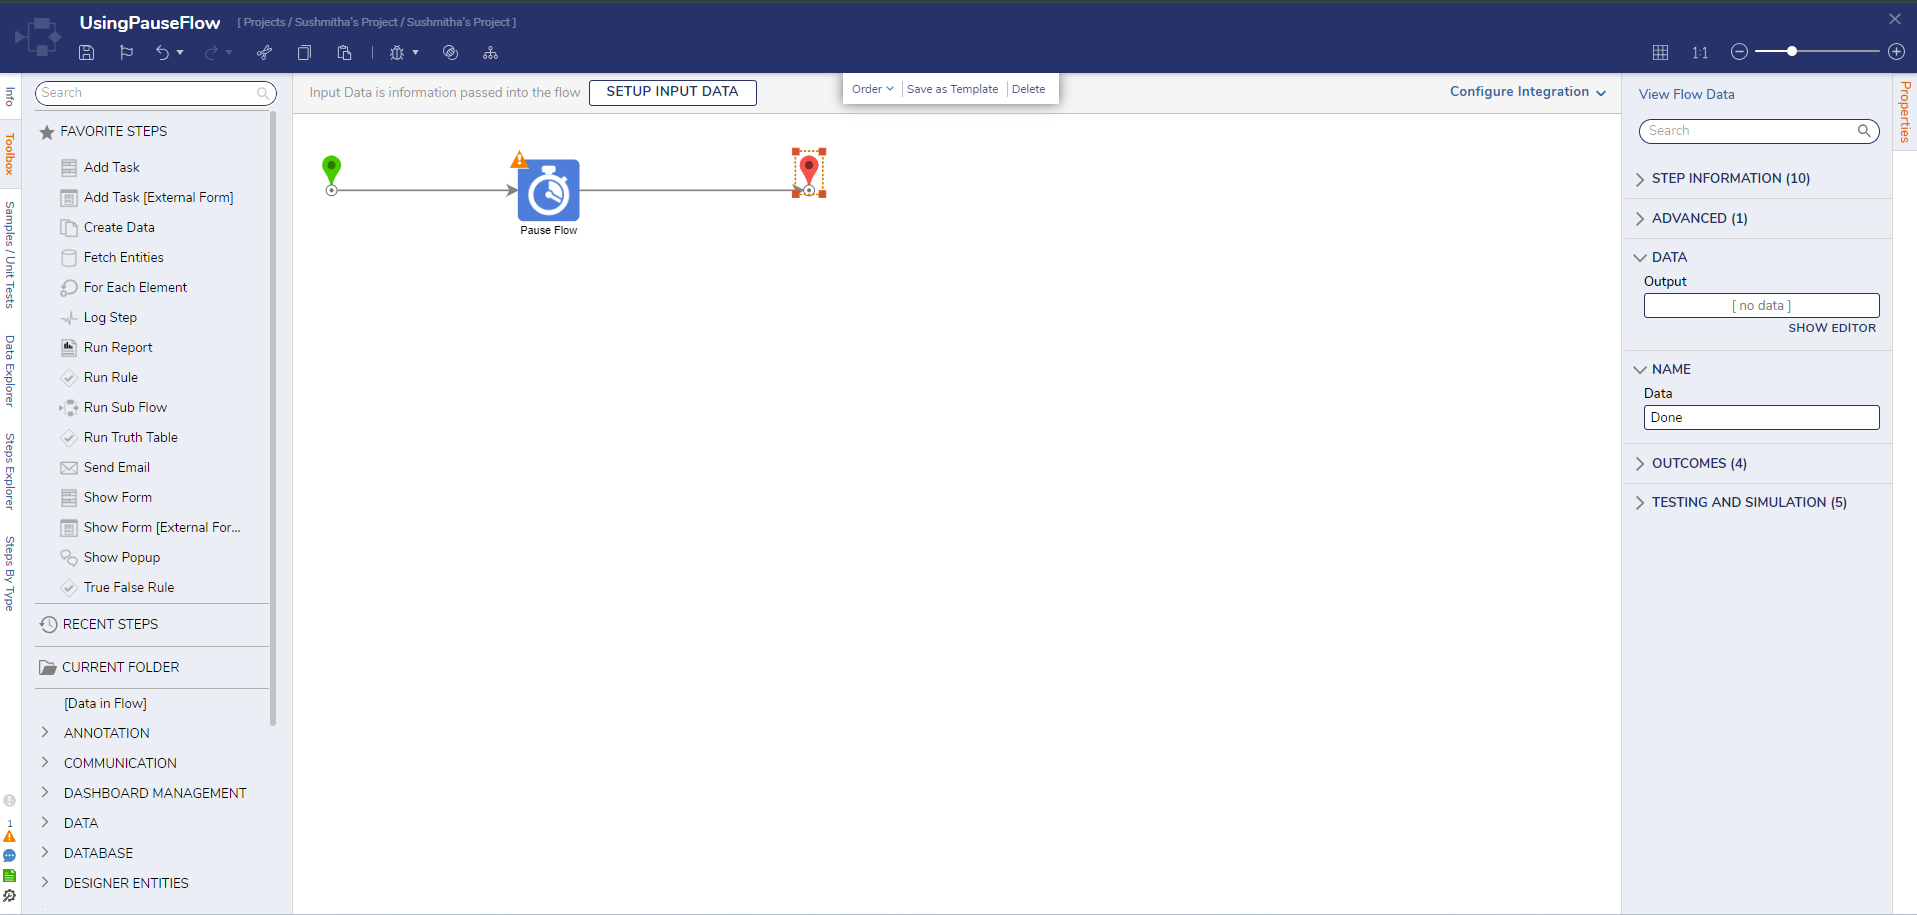
- Click the Done path of the Start step. Navigate to All Steps [Catalog] > Flow Management and select the Pause Flow step. Click ADD.
- On the Properties panel, click Unknown next to the Resume When field and select Compute Date. There are different DateTime mapping types to choose from to build a time that the Flow will pause for.
Mapping Type Description Constant Date Use when the date is the same throughout the process to allow manual selection of the date. Constant Date and Time Use when the date and time are the same throughout the process to allow manual selection of the date and time Select From Flow Use if a DateTime data type is available in the Flow Compute Date Use to create a specific date dynamic to the process Current Date Time Will set the Resume When input field to the current date and time, not pausing the Flow at all 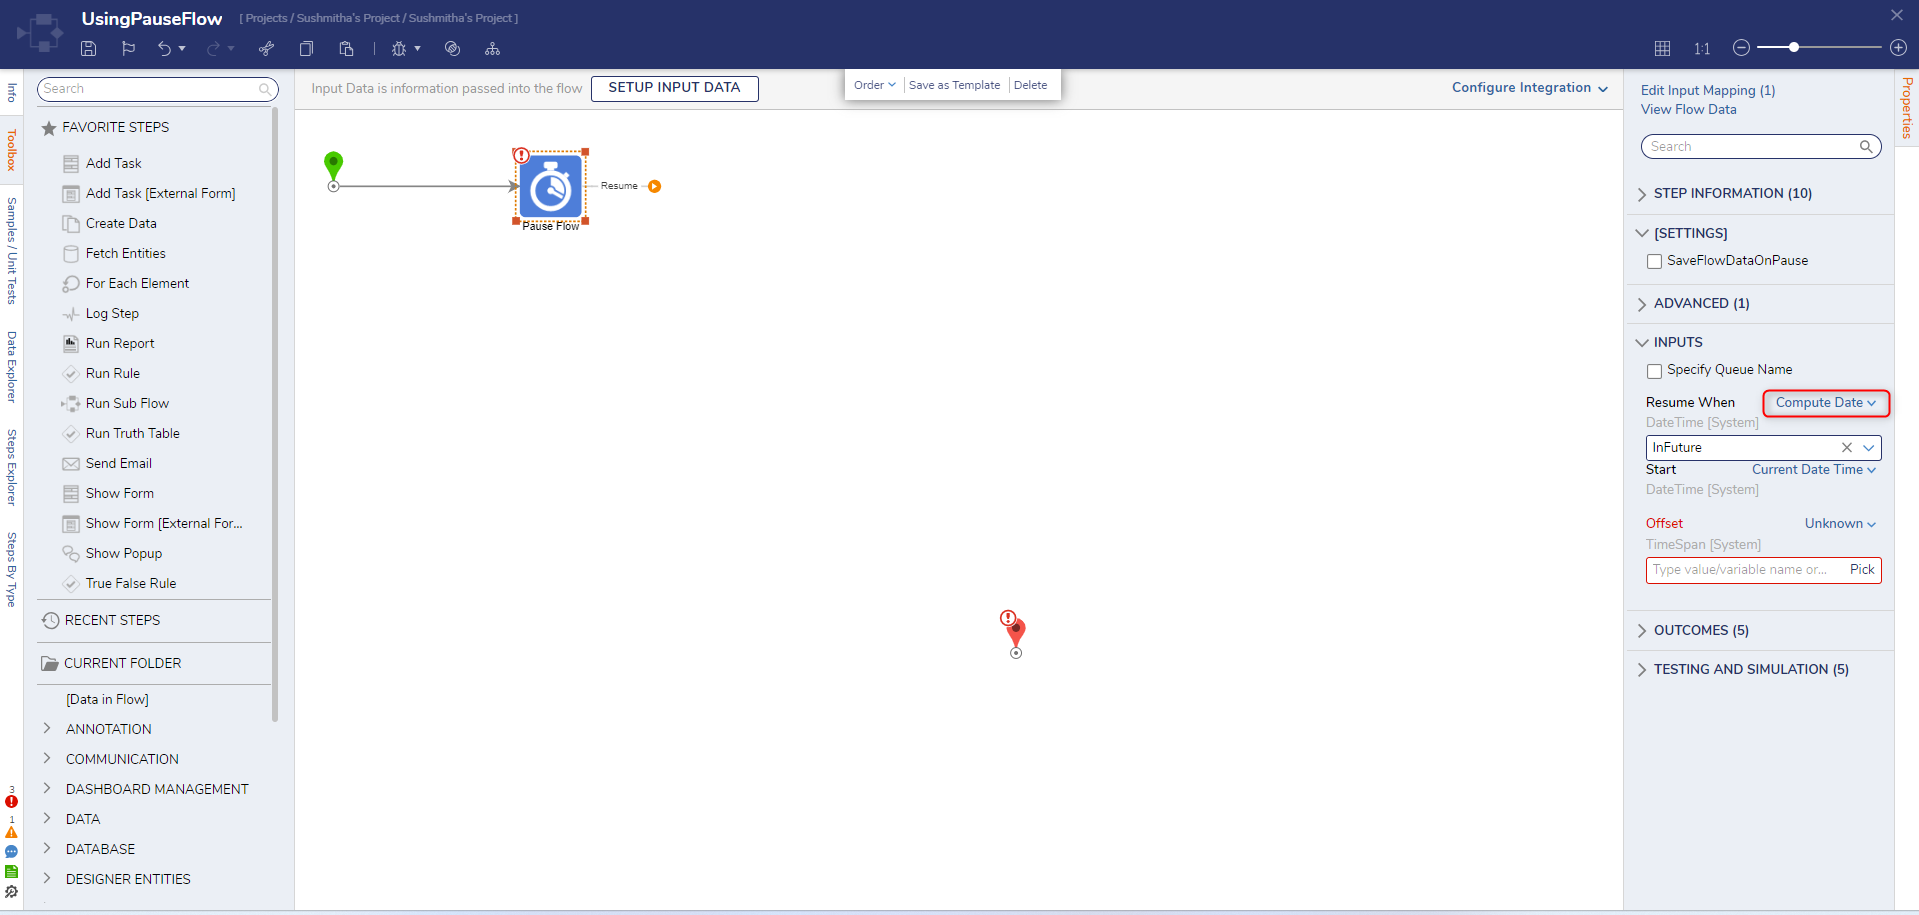
- For the Offset field, set the mapping to Constant and move the Seconds slider to 5.
The Offset value is used to determine the Resume time by offsetting the Start value by the configured DateTime value.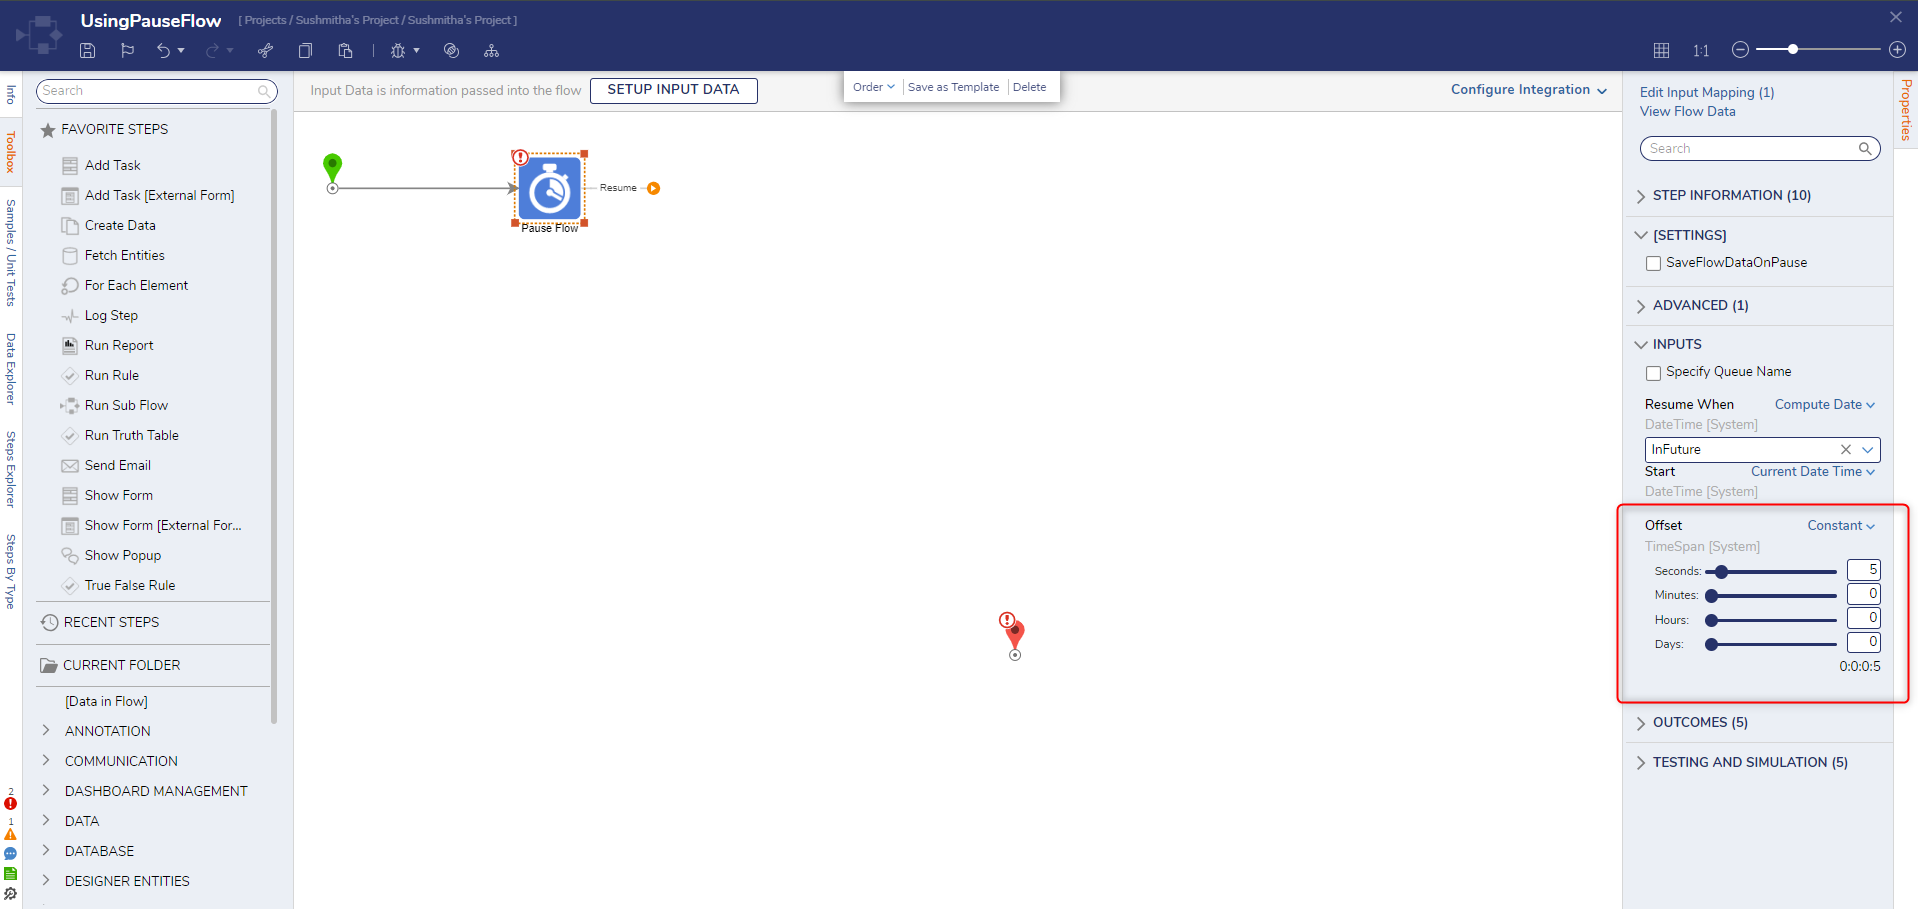
- Connect the Resume path to the End step. Click Save to save changes to the Flow.
Debug
- Click Debug on the top action bar.
- Click START DEBUGGING.
- Wait for the defined Offset duration (5 seconds) to ensure that the Flow pauses and resumes at the designated time.
Flow Behavior
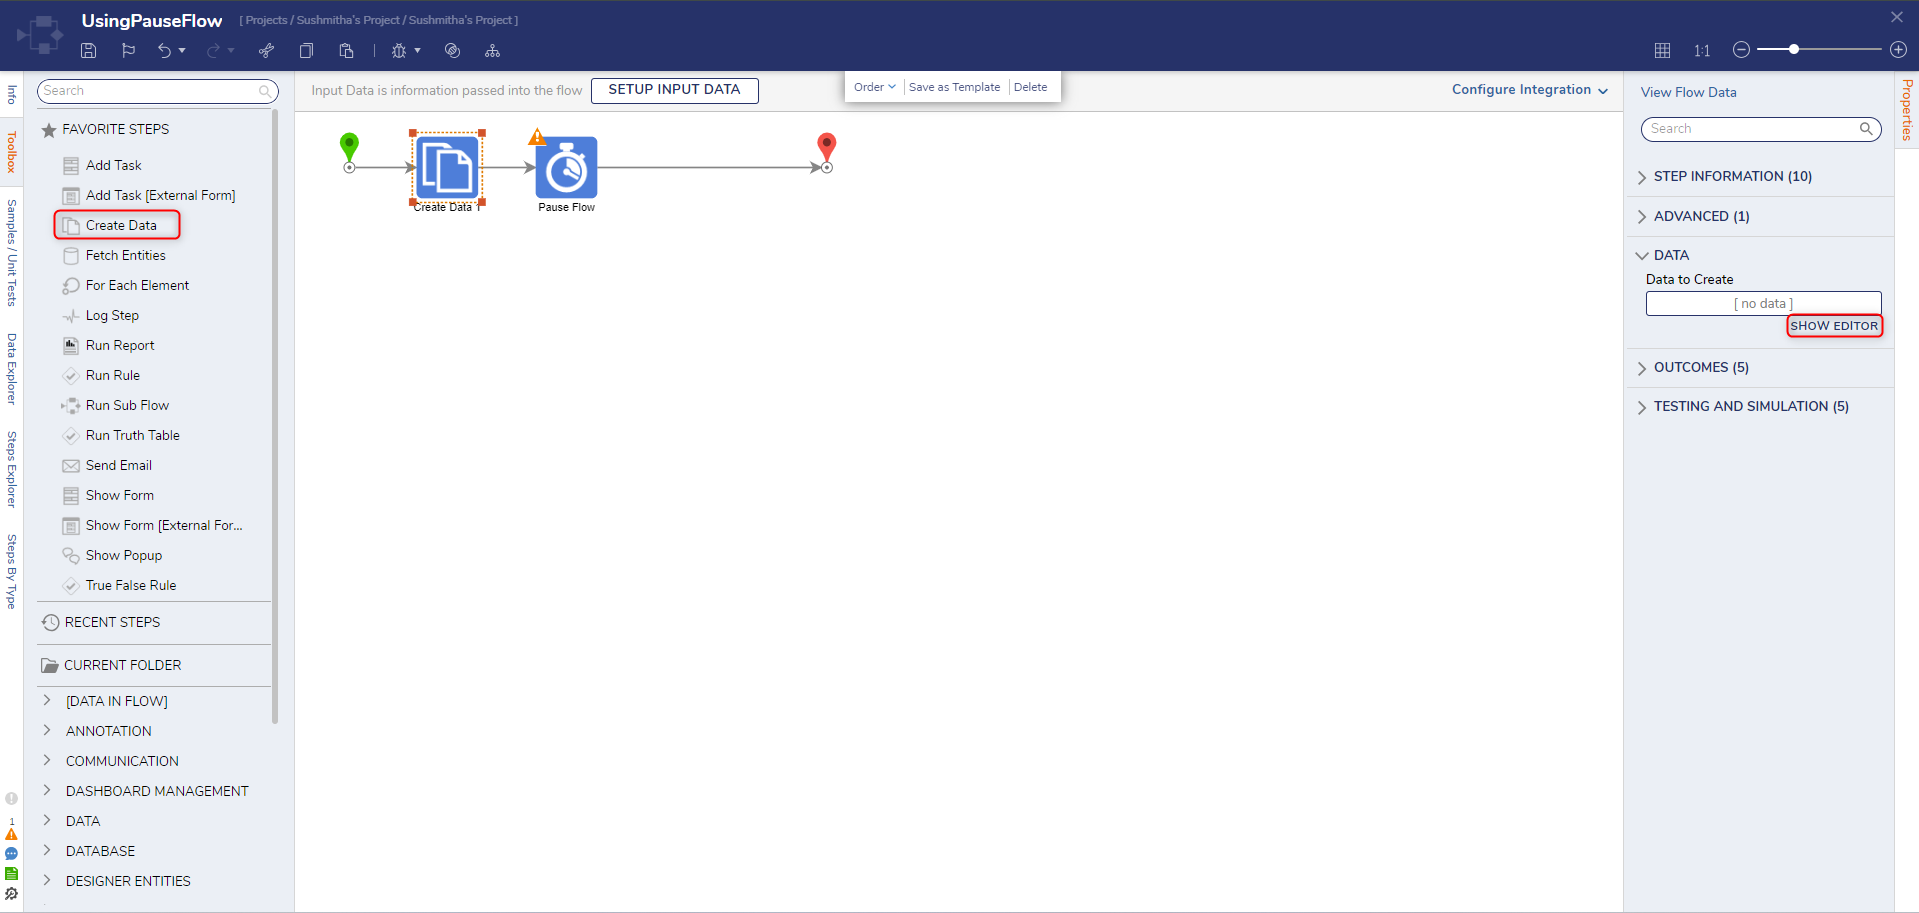
The Pause Flow step causes the Flow to switch from its current behavior to asynchronous behavior. During this Paused state, the Decisions environment may conduct additional processes or data may be changed. This means that data that occurs prior to the Pause Flow Step may be lost or changed. To avoid this issue, use a Create Data step as means of recording the data.
- From the Flow Designer, add a Create Data step from the Toolbox panel from the FAVORITE STEPS category before the Pause Flow step.
- From the Properties tab of the Create Data step, under the DATA category click SHOW EDITOR under Data to Create.
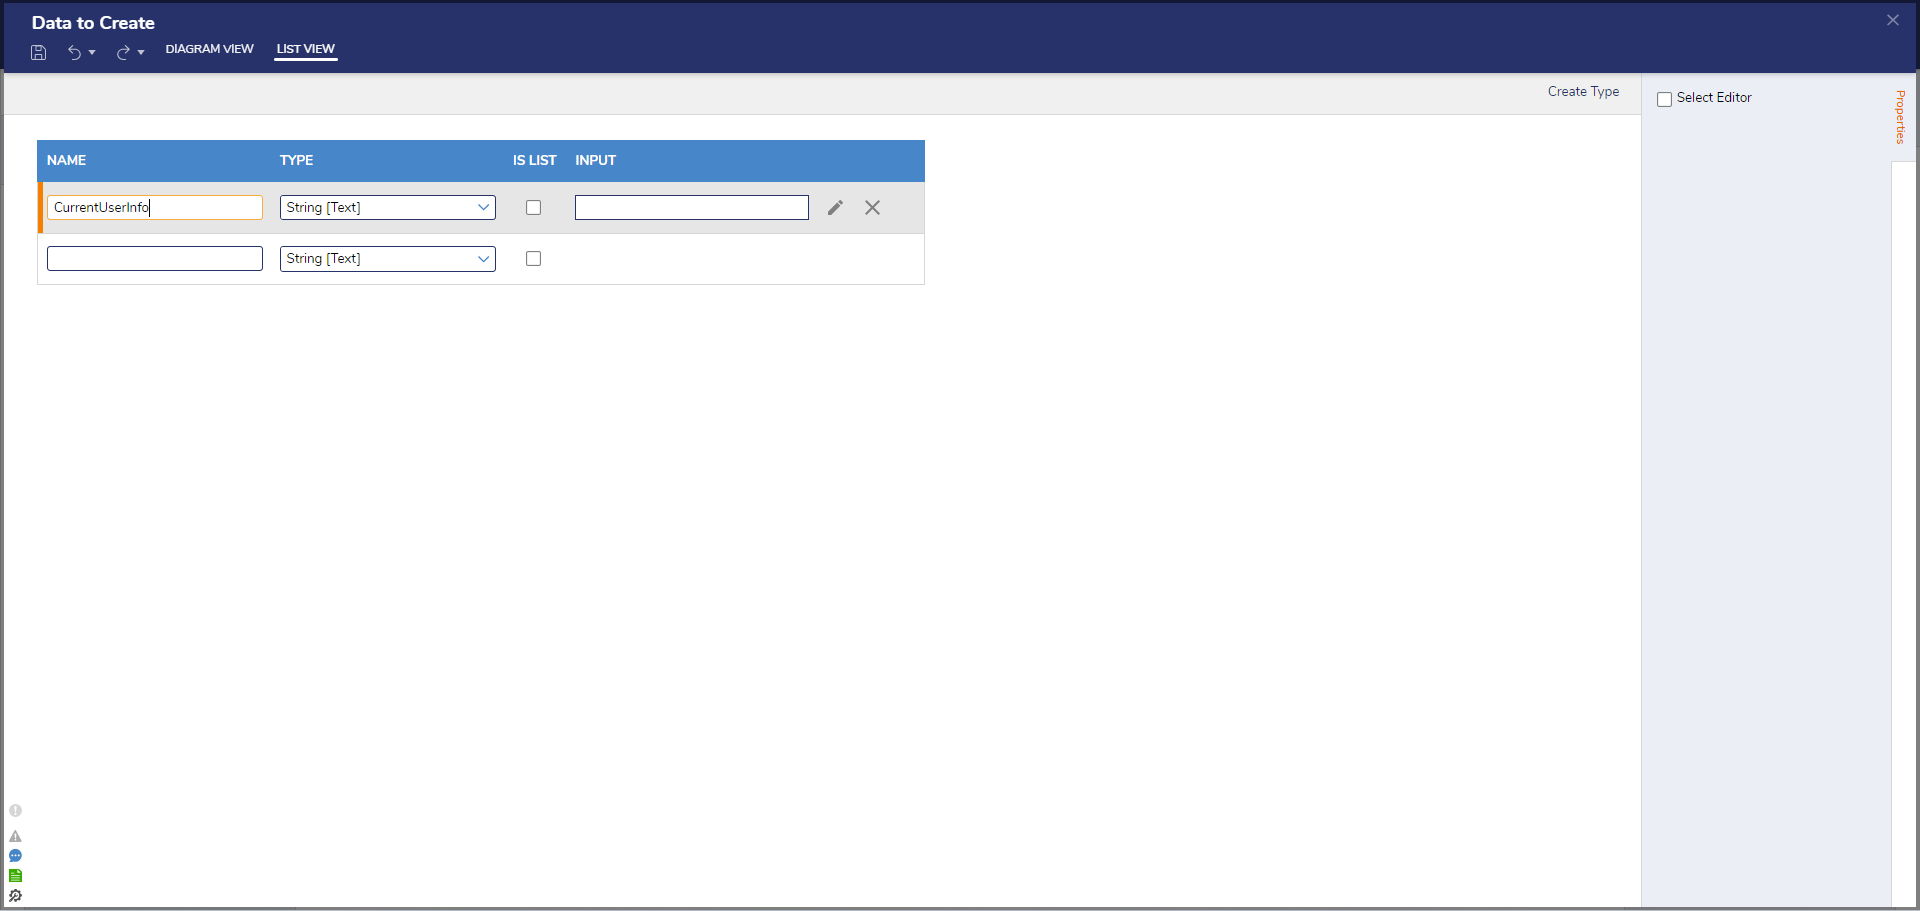
- From the Data to Create window, enter "CurrentUserInfo" under NAME and select String [Text] as the TYPE. Click Save and close the window.
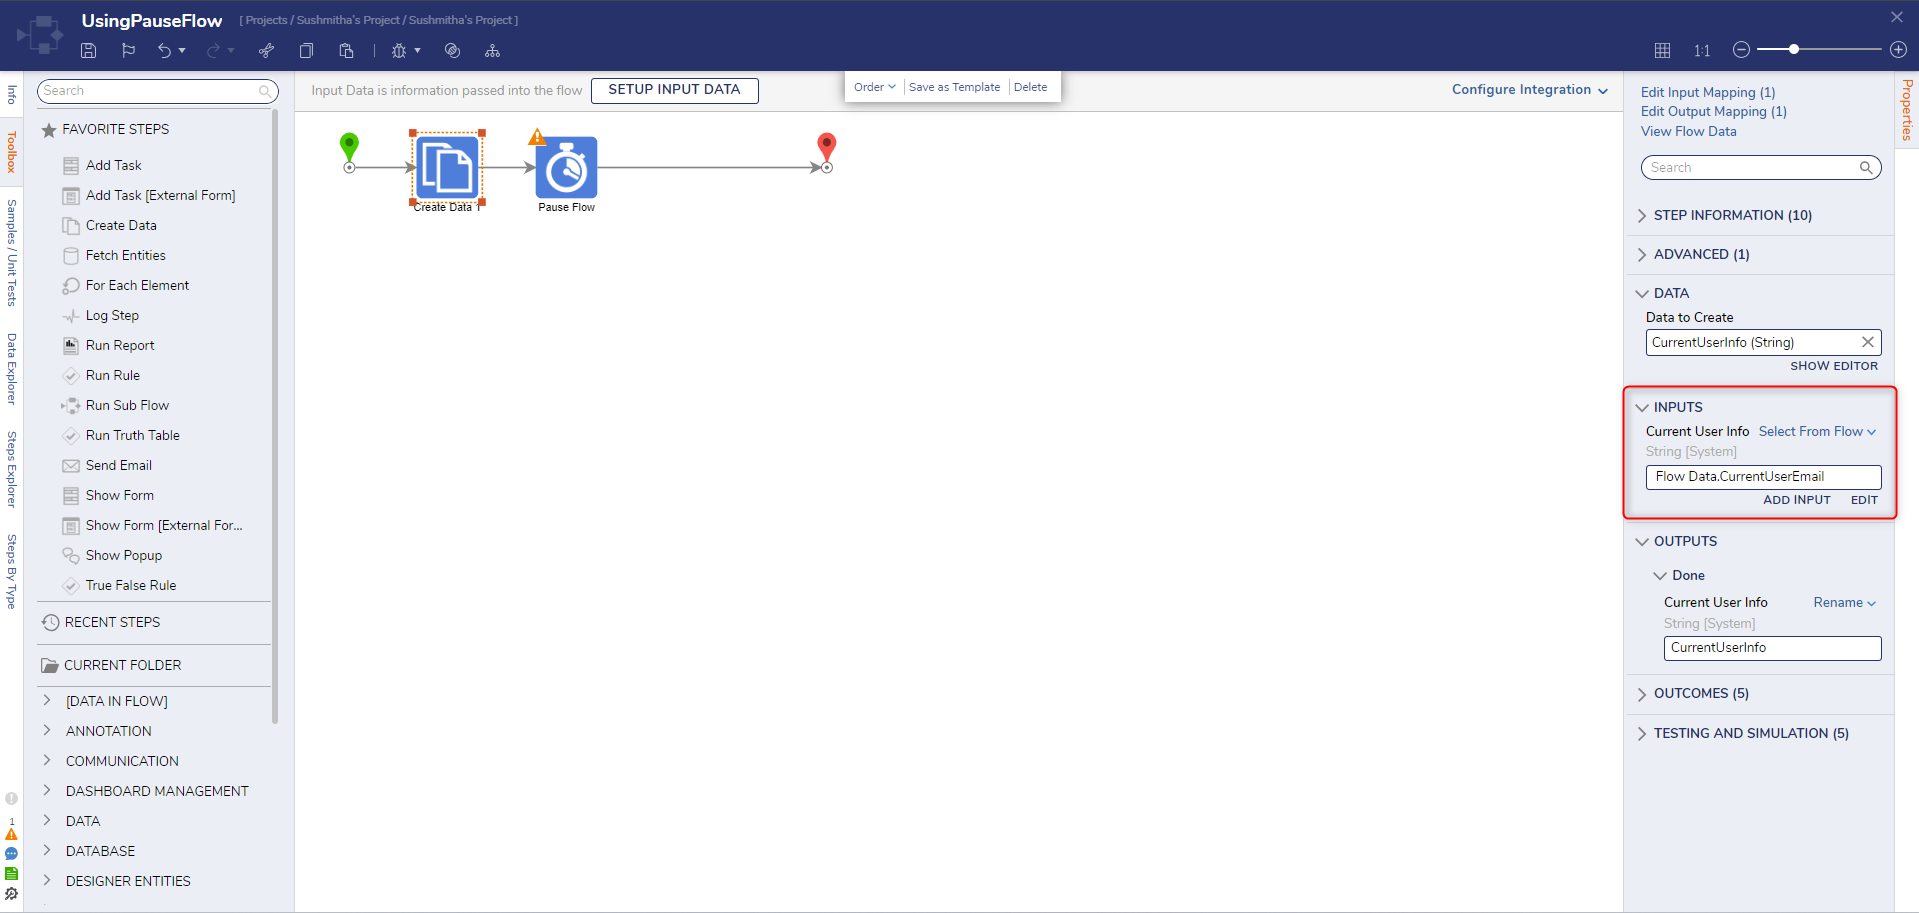
- Under the INPUTS category, set the Current User Info mapping to Select From Flow and set the input to Flow Data.CurrentUserEmail.
- Click Save to save changes to the Flow. Then, click Debug from the top action bar.
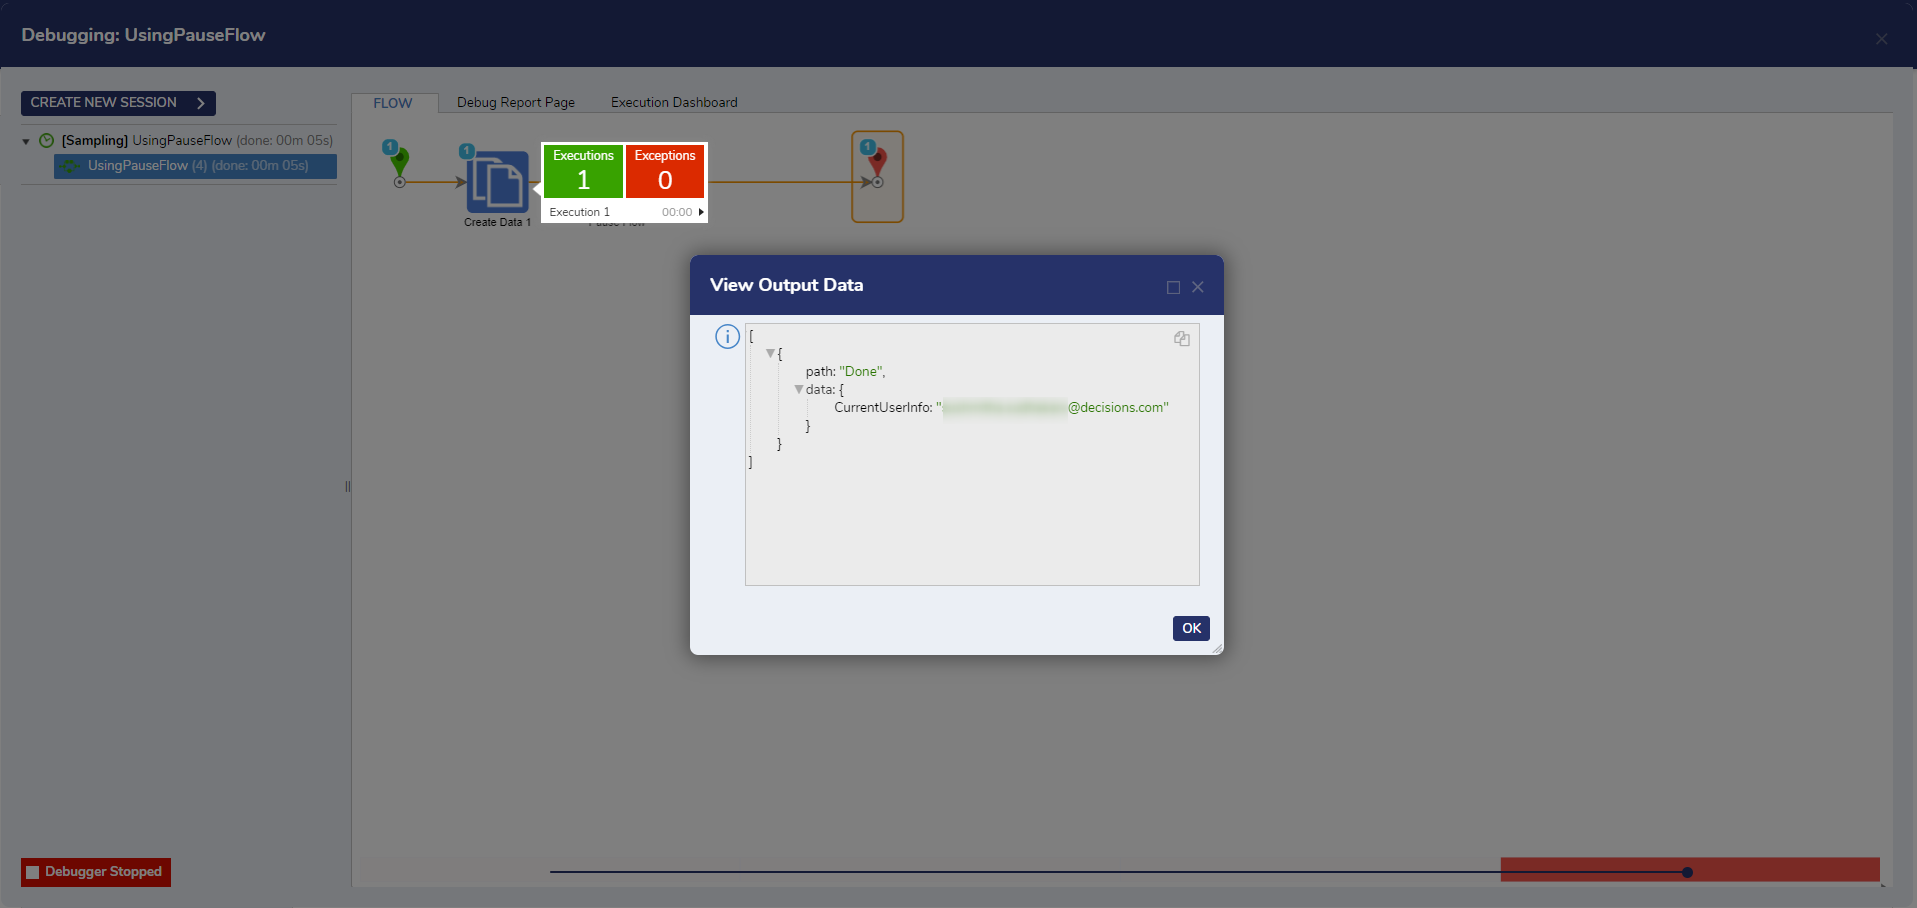
- After the debugger runs, select the Create Data step, select Execution 1, and select View Output Data to ensure that the Current User Email mapped properly to the Create Data step.
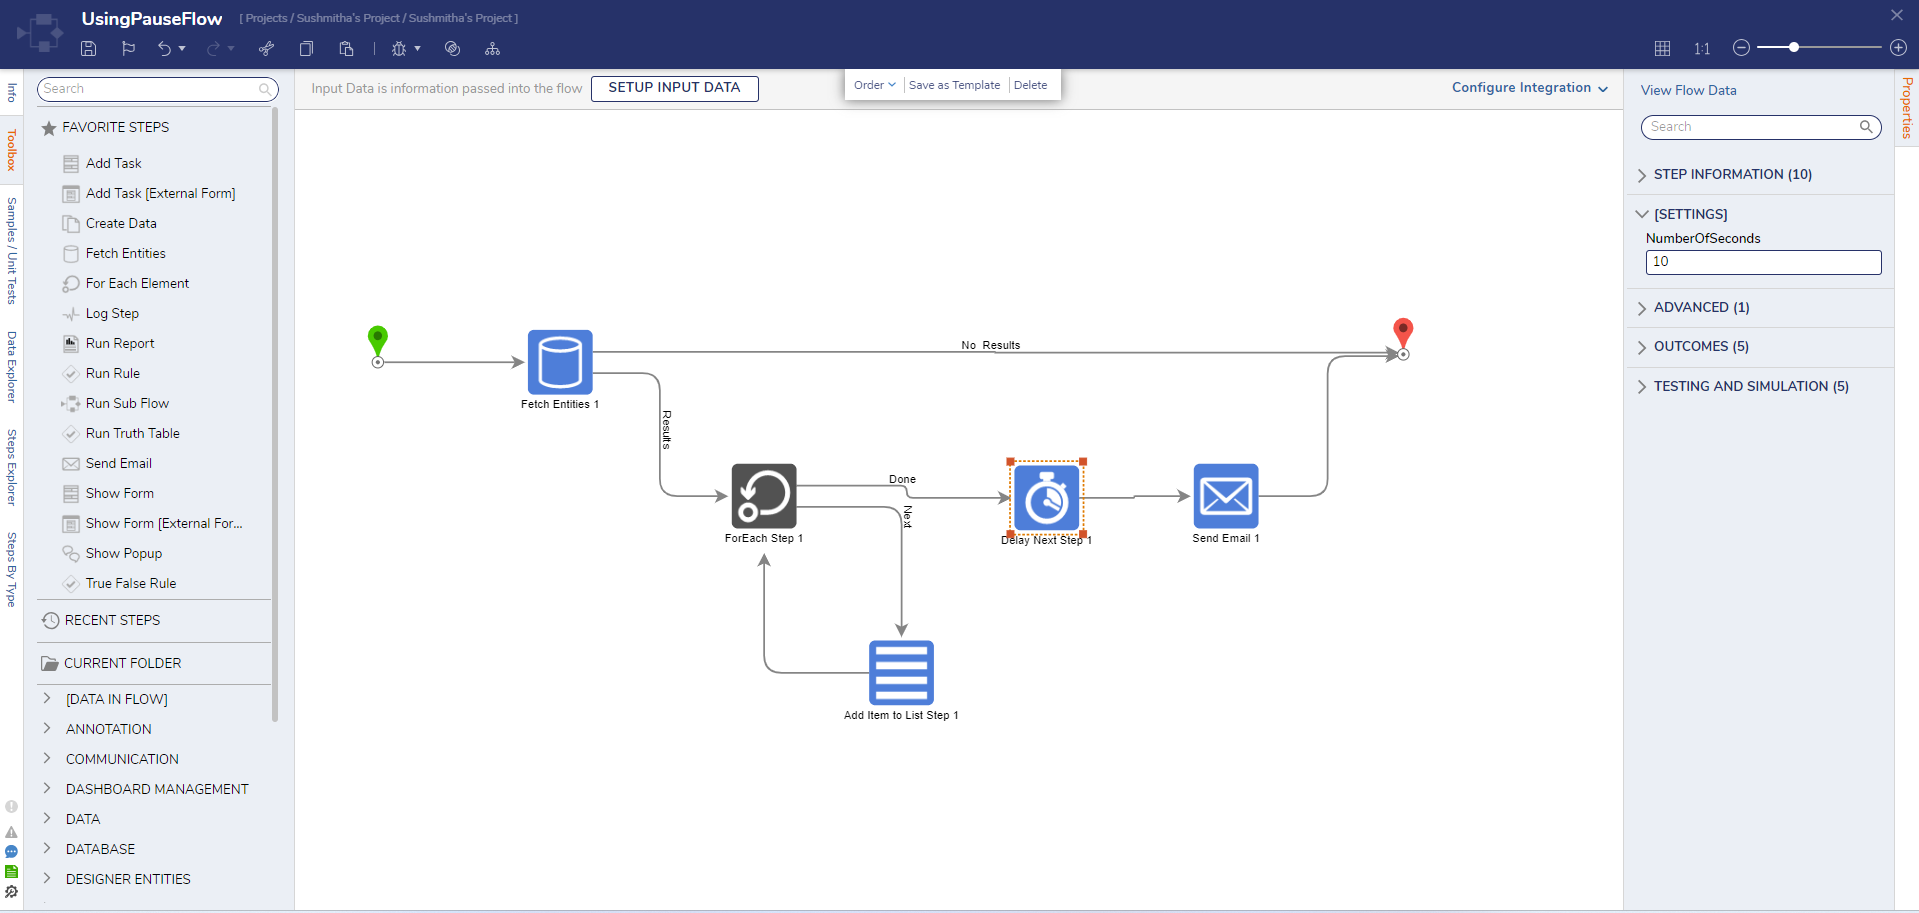
Delay Next Step
As an alternate method to the Pause Flow step, the Delay Next Step allows users to pause, or delay, the execution of a step. The step operates similarly to the Pause Flow step but differs in that it does not place the Flow in a Stored Workflow State. Additionally, the amount of time the step waits can only be defined in seconds.