Overview
Text Merges allow users to combine preexisting Designer Elements, text input, and HTML to create dynamic blocks of information. Text Merges can be created both via a Designer (such as Forms, Flows, etc...) or within the Decisions Studio. By utilizing a combination of stored Text Merges and the Flow Designer, Text Merges can be created as a Template for an email's Body content.
Creating a Text Merge
- From the Decisions Studio, navigate to a Designer Project.
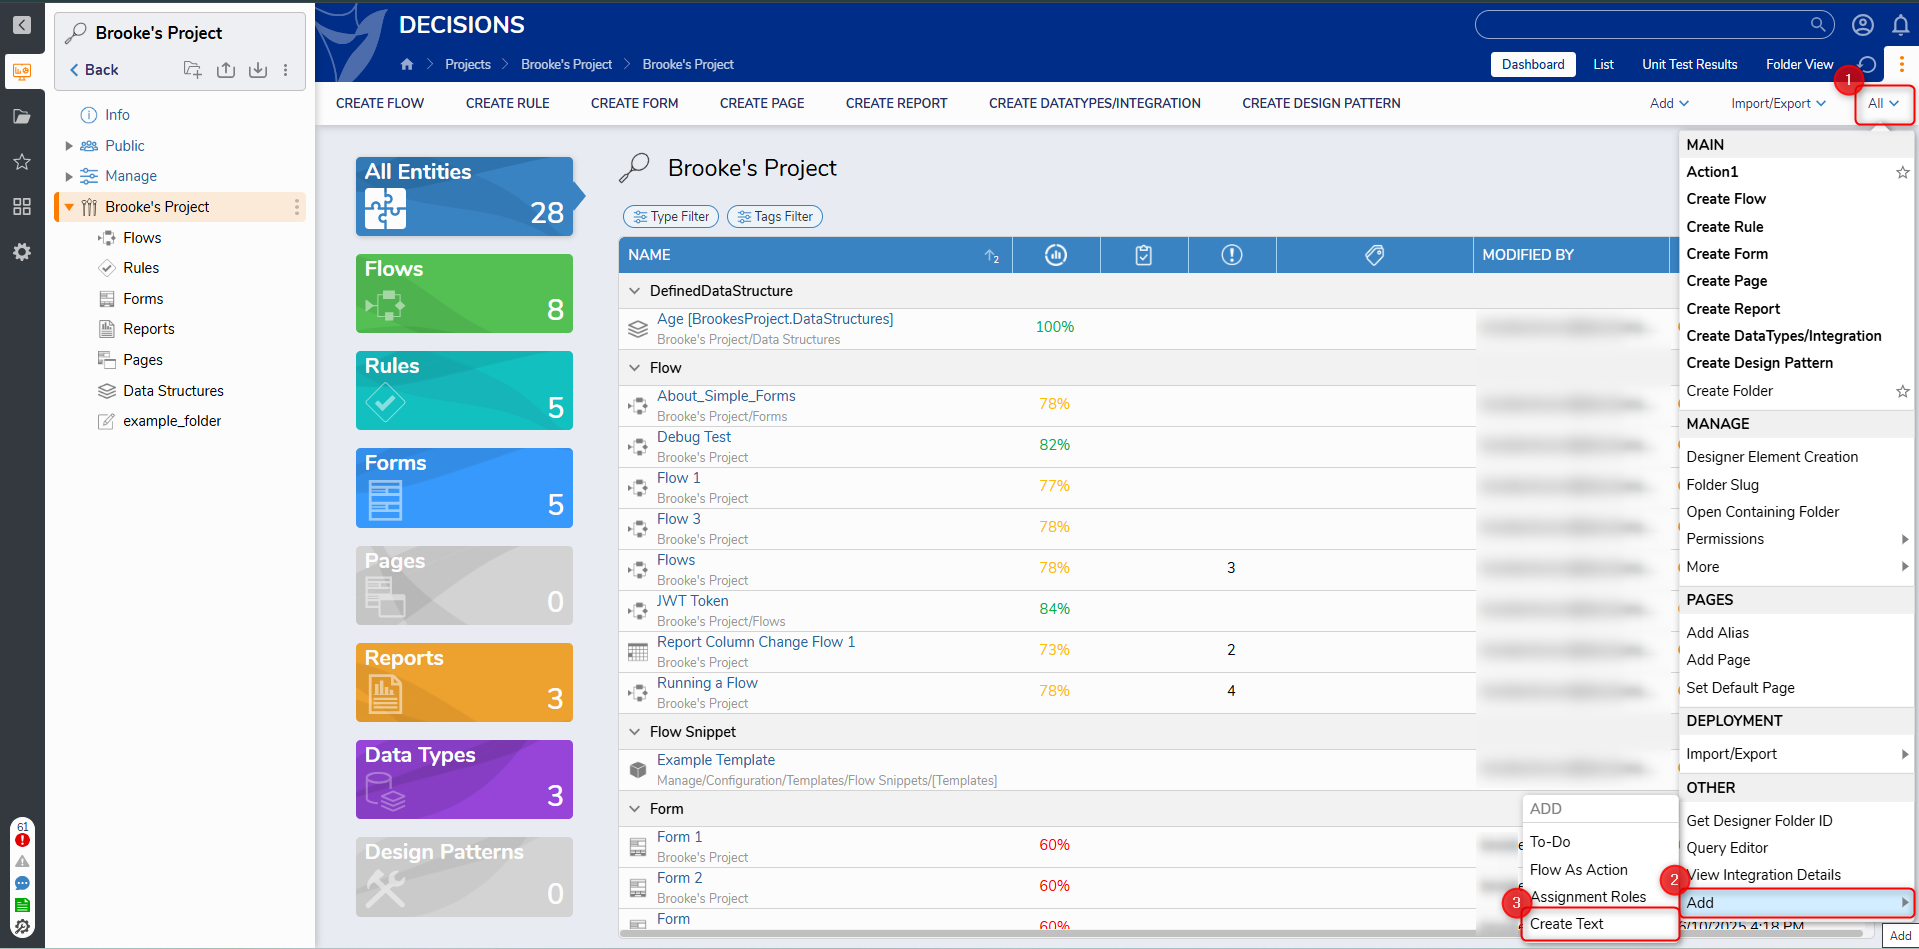
- From the Global Action Bar, navigate to All > Other and select Create Text. Provide a Name and click CREATE.
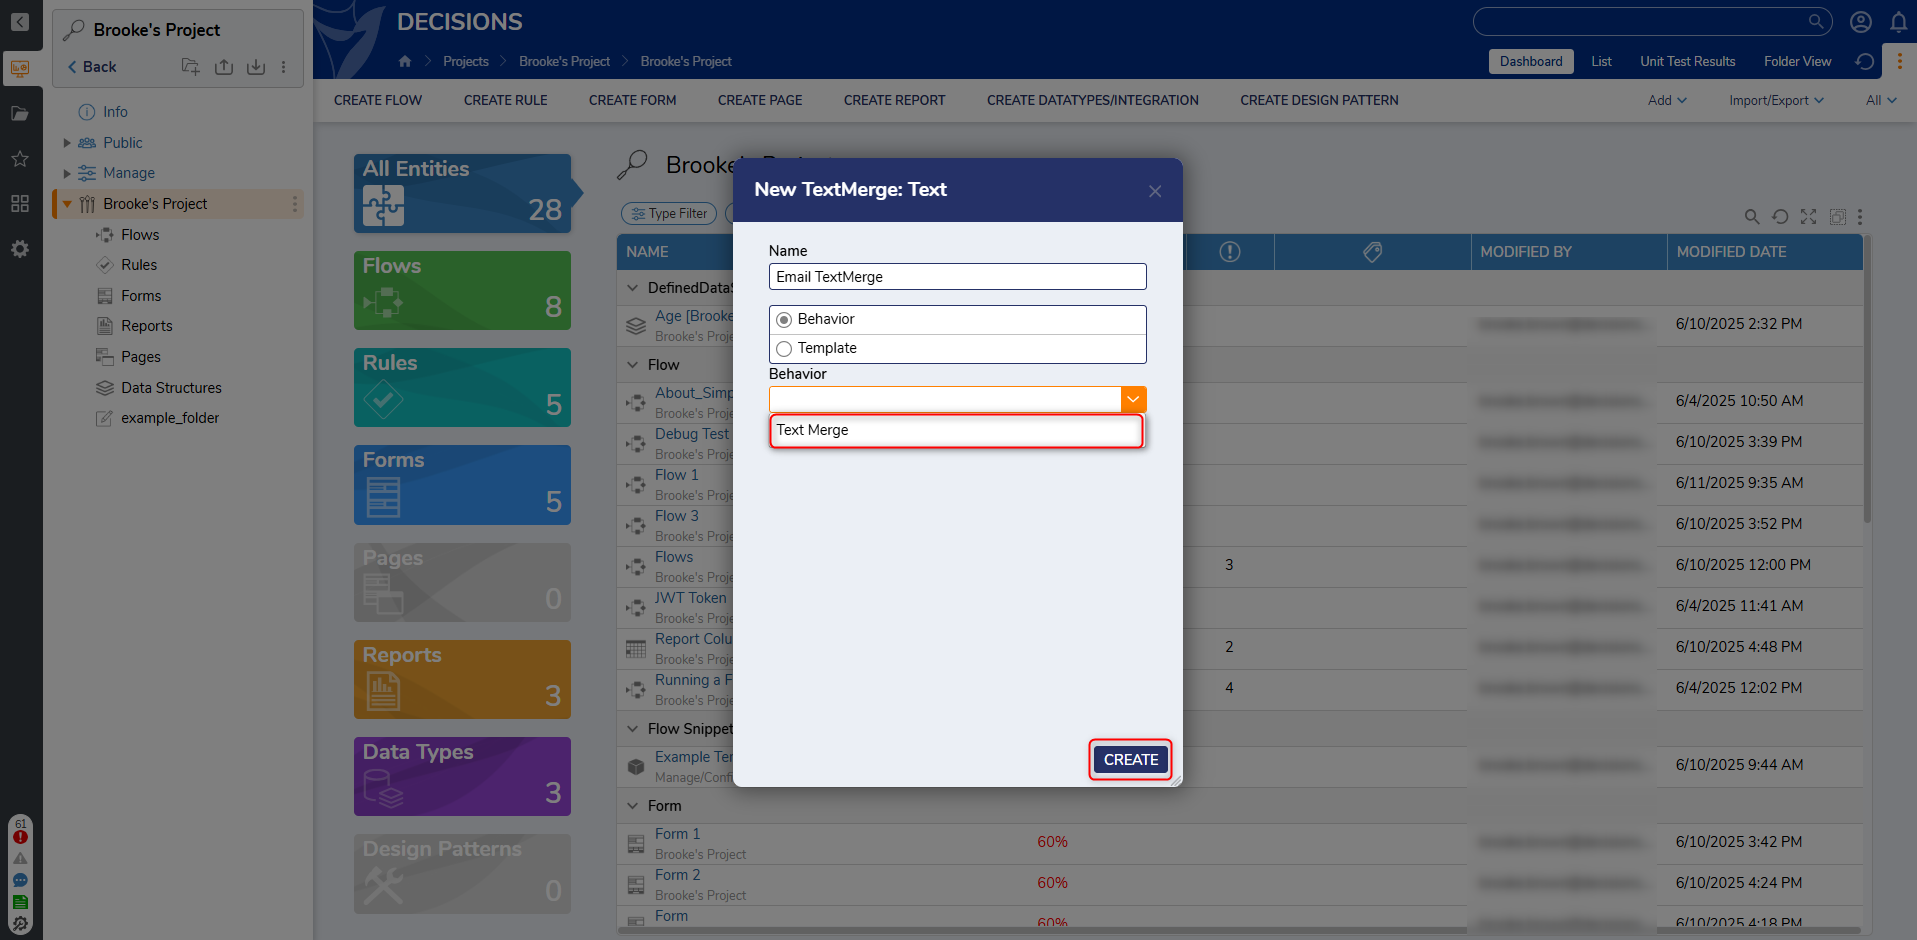
- Enter a Name and select Text Merge for the Behavior. Click CREATE.
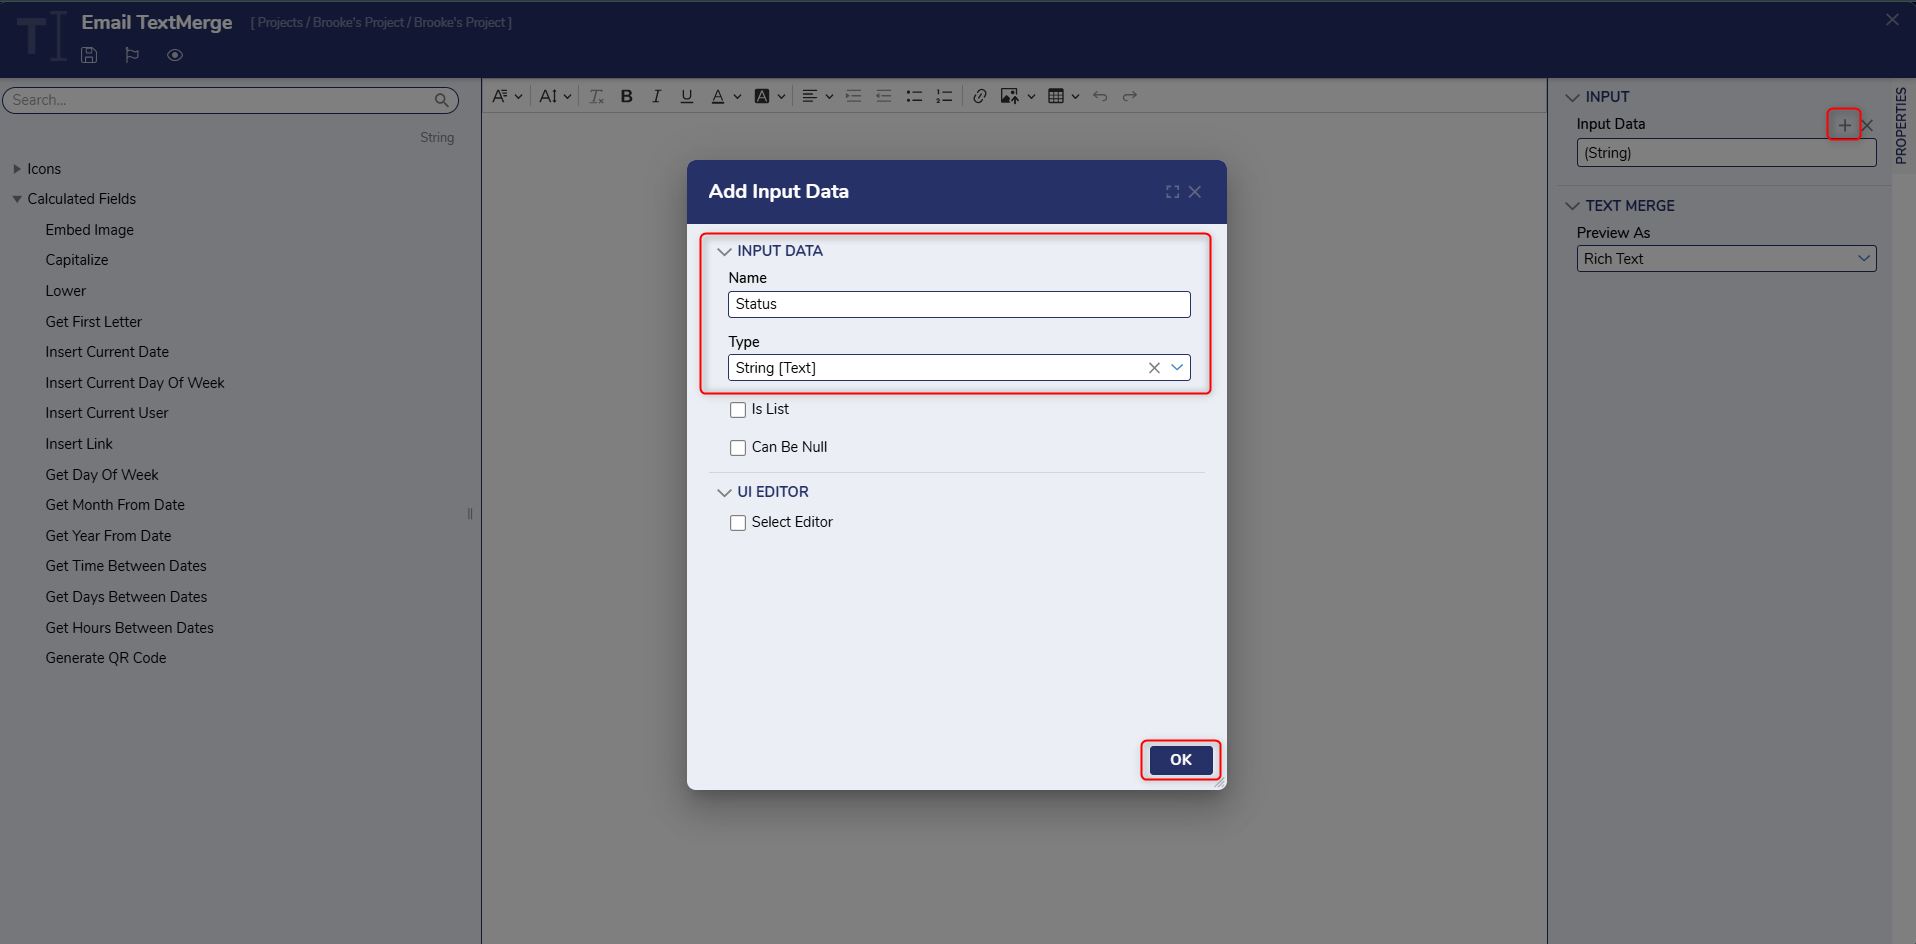
- From the TextMerge Designer, click ADD under the Input Data field under the INPUT category on the PROPERTIES panel. Enter "Status" as a String [Text] and Click OK. Add another String [Text] input for "Name".
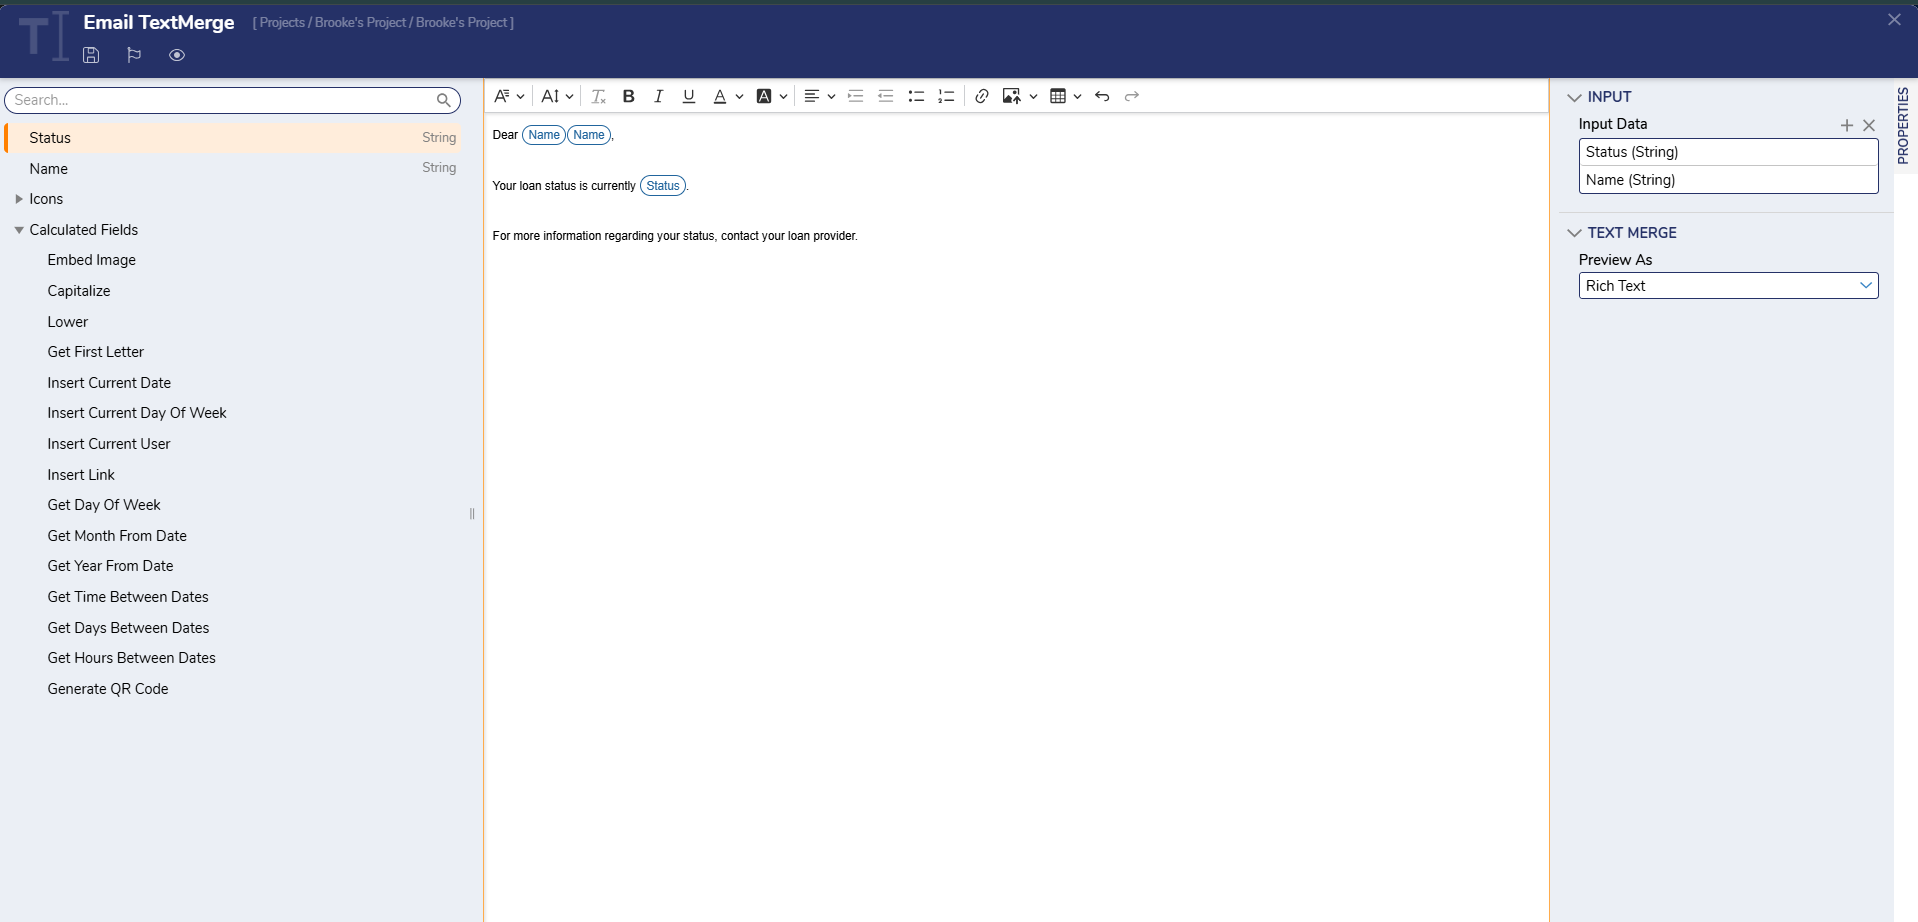
- Using the Data on the left, build a Text merge that reads "Dear [Name], Your loan status is currently [Status]. For more information regarding your status contact your loan provider.". Click Save and close the TextMerge Designer.
- From the Designer Project, click CREATE FLOW and select Flow. Name the Flow and click CREATE.
- In the Toolbox panel, navigate to DATA > TEXT > TEXT MERGES, and attach a [Pick or Create TextMerge] step to the Start step.

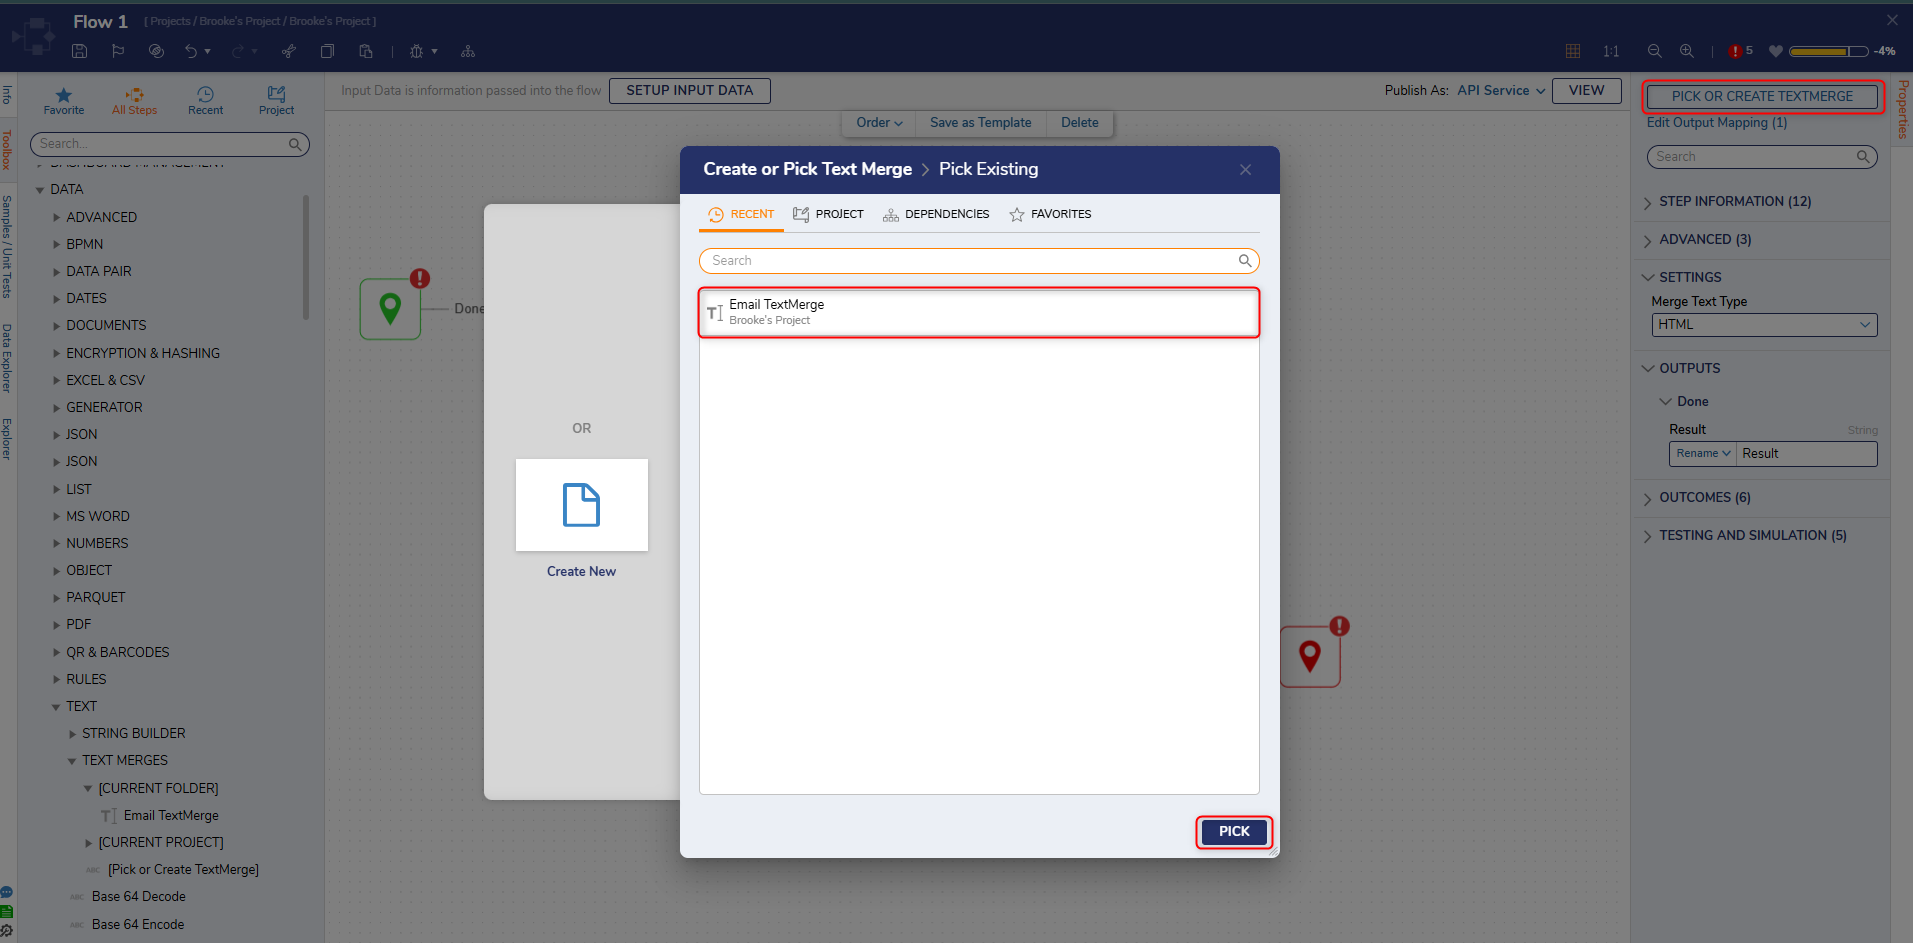
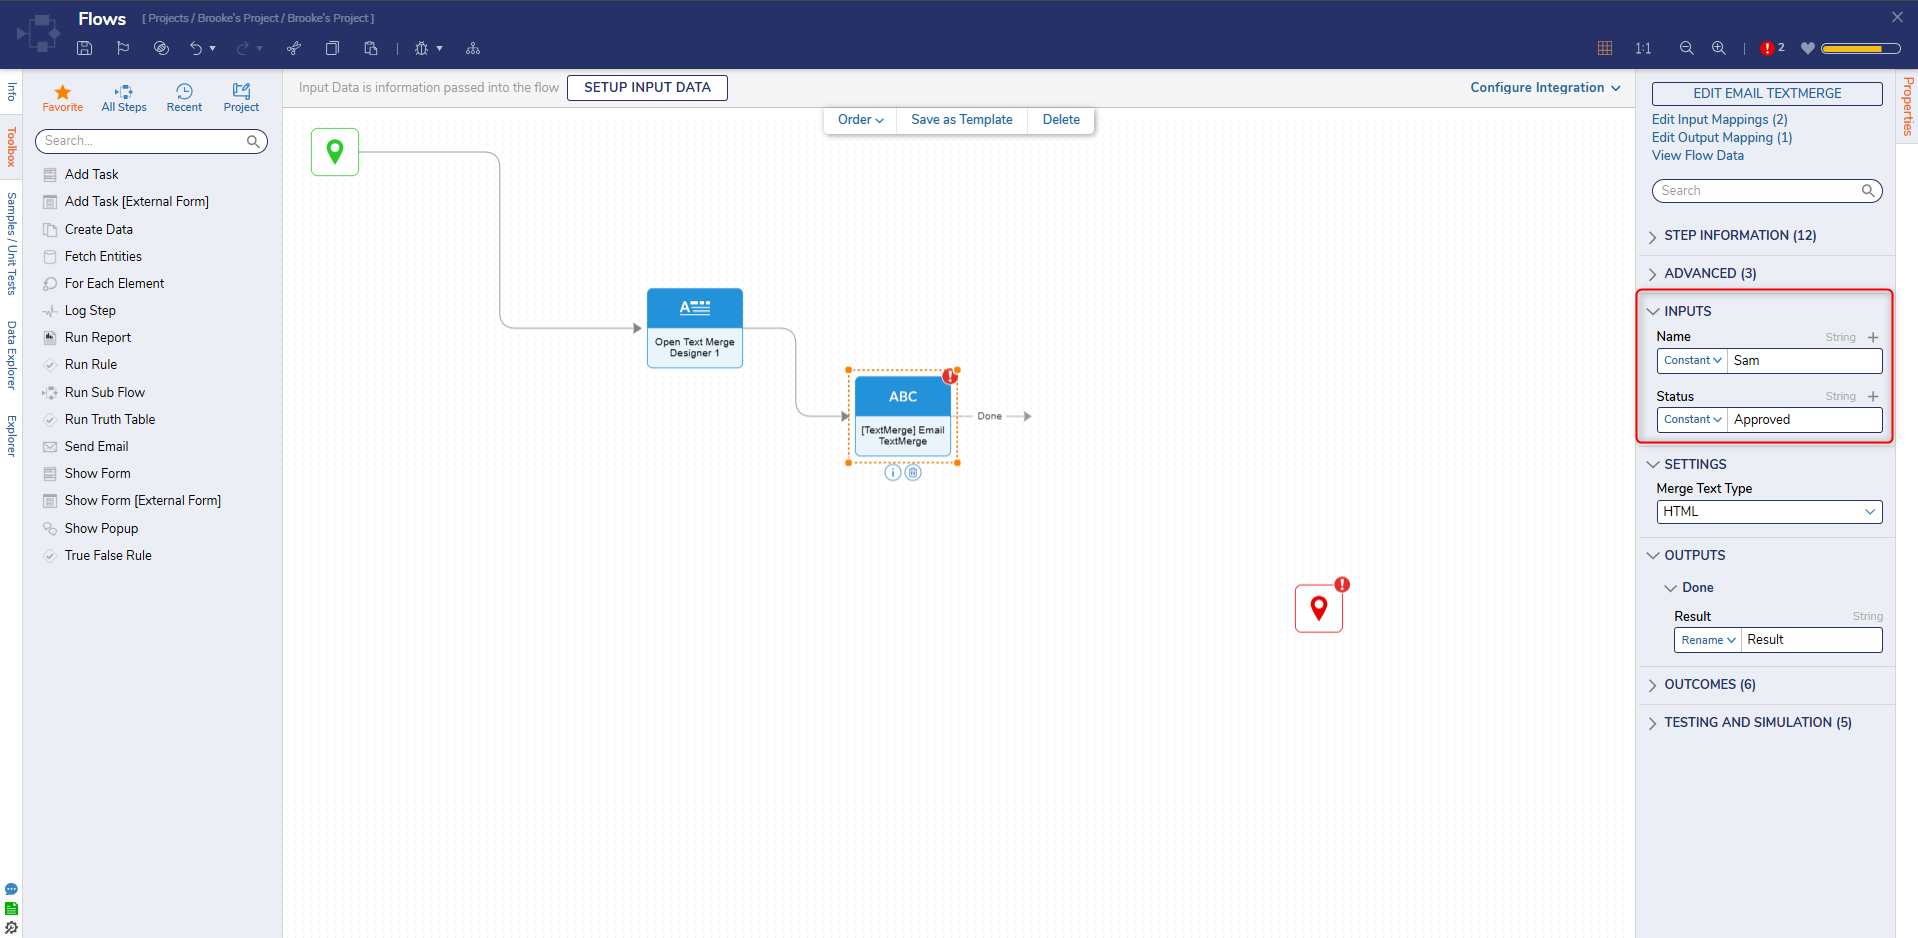
- From the Properties of the TextMerge step, select PICK OR CREATE TEXTMERGE, then PICK the previously created TextMerge.
- From the Properties of the TextMerge step, enter "Sam" in the Name field and "Approved" in the Status field. Under the SETTINGS category, select the desired Merge Text Type.
Merge Text Type Description Plain Presents the MergeText in Plain Text format HTML Presents the MergeText in HTML format PDF Displays the MergeText in PDF format DOC Displays the MergeText in .doc file format 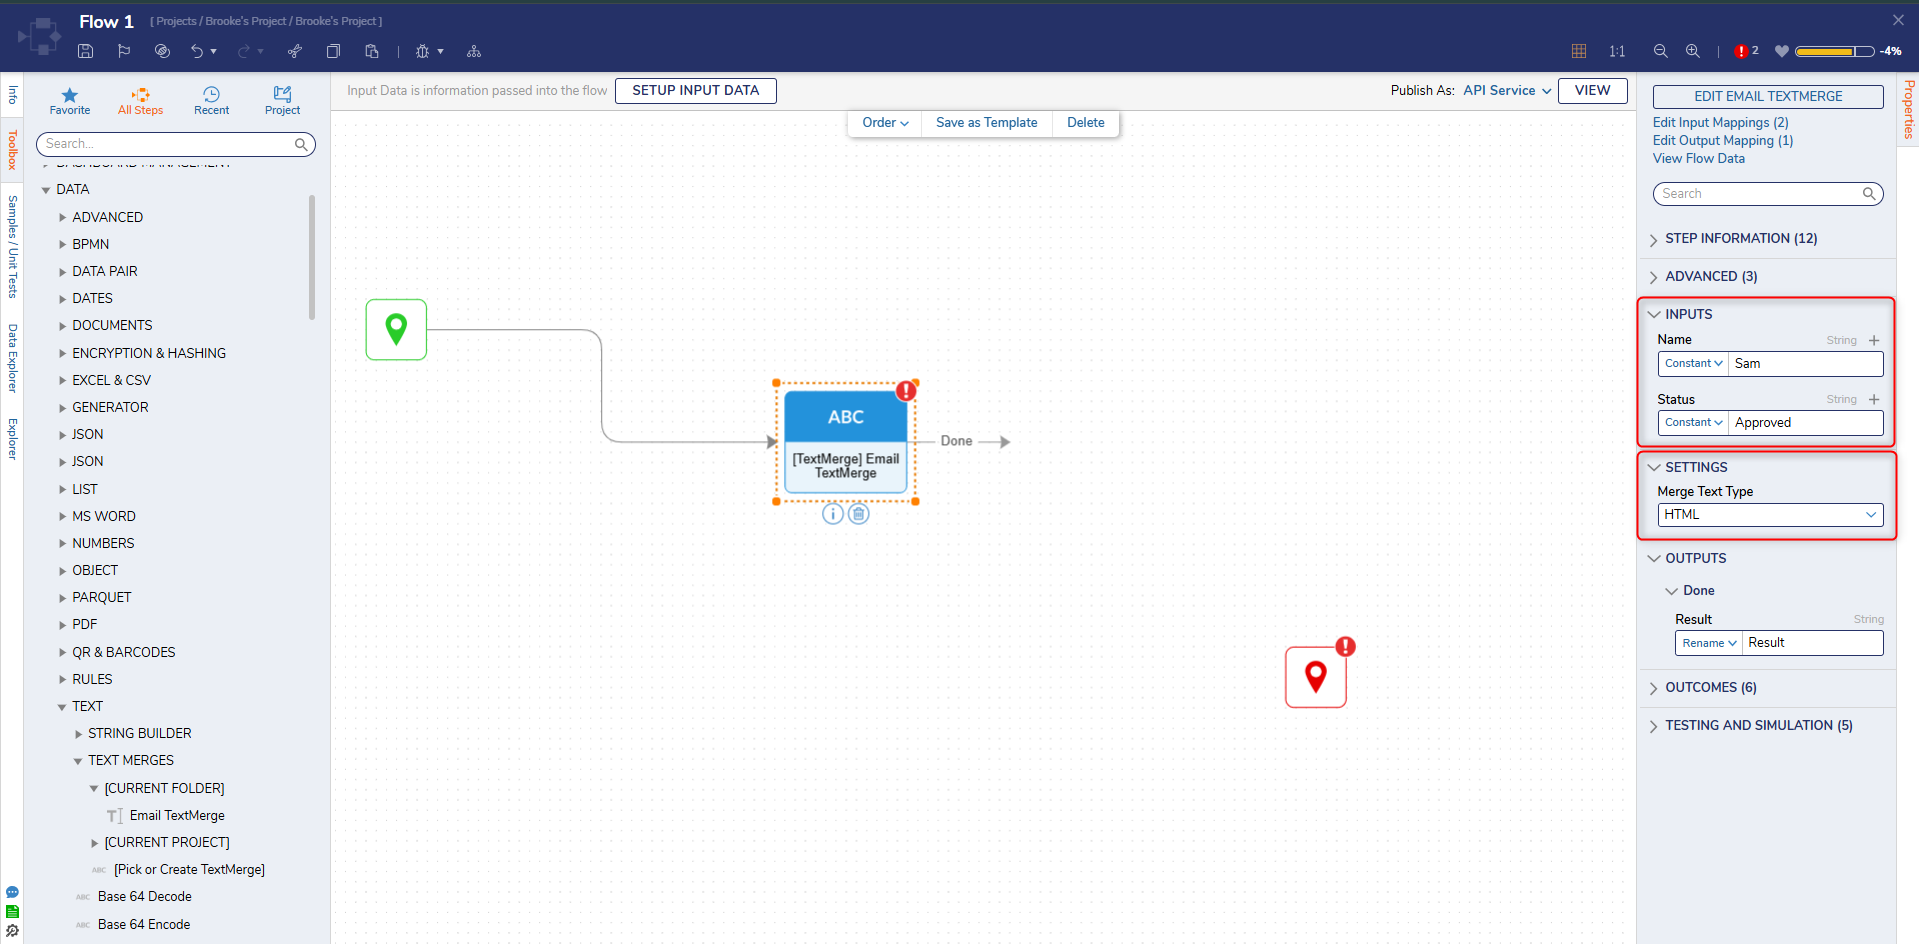
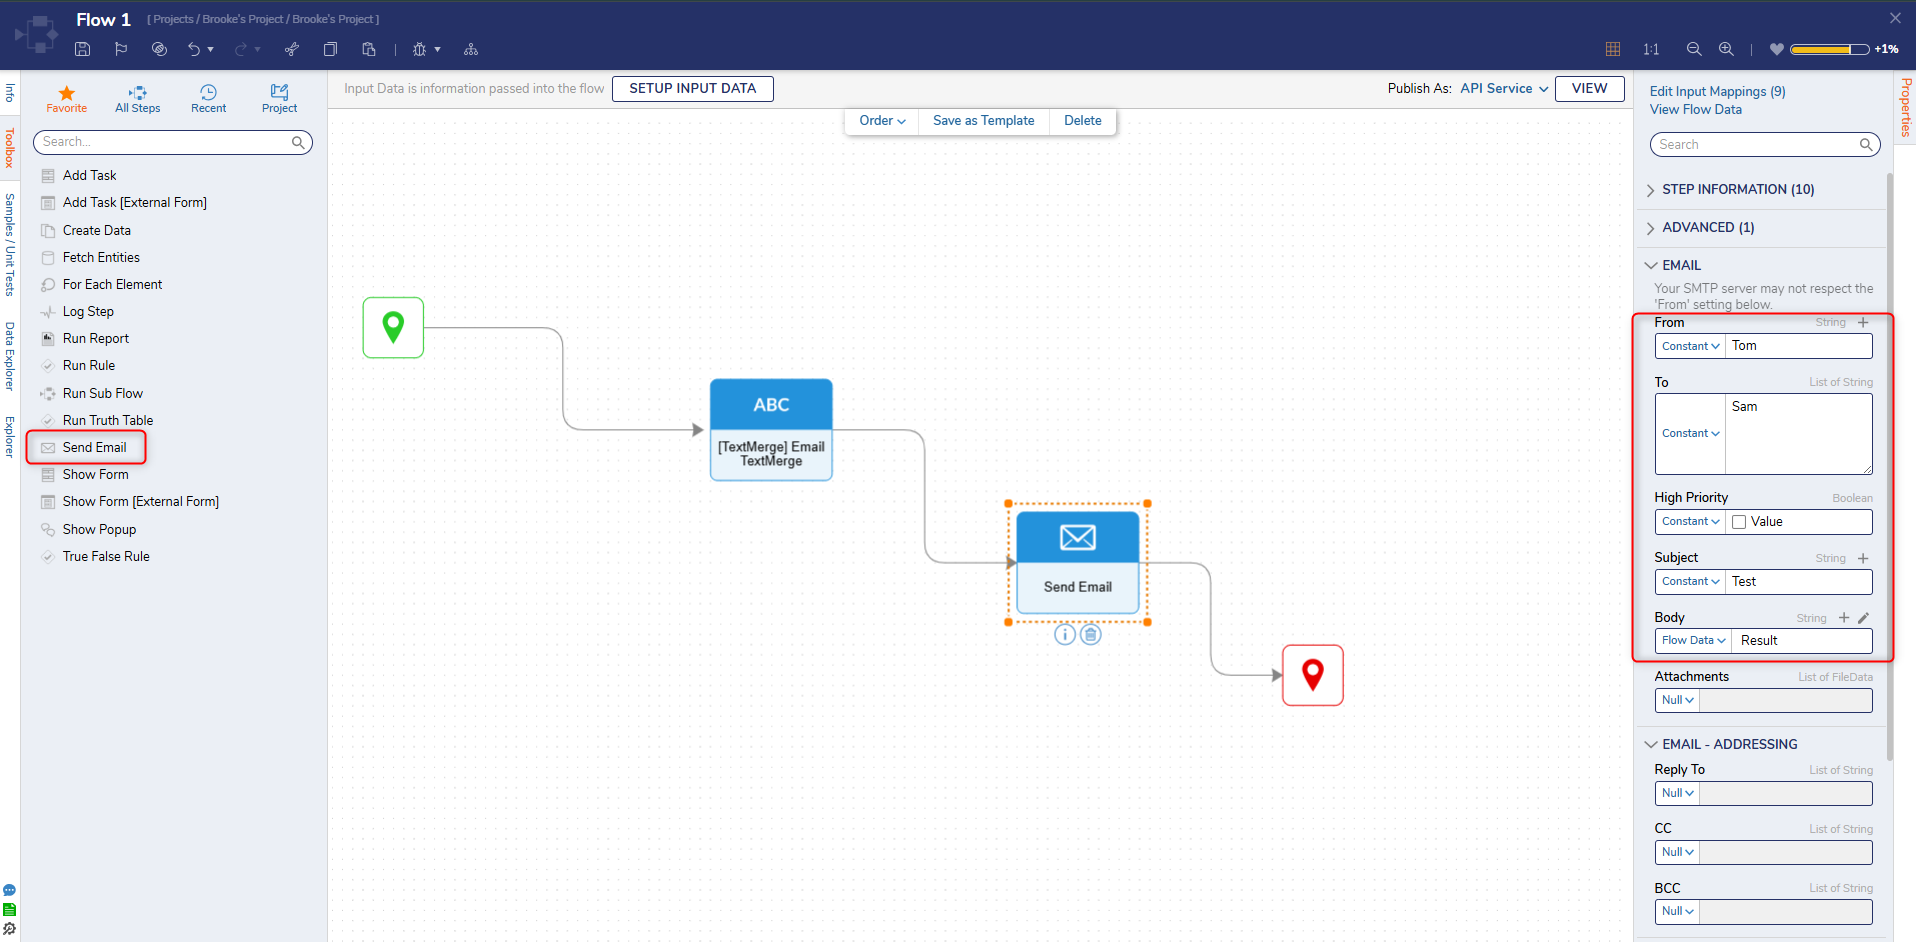
- From the Toolbox panel under FAVORITE STEPS, attach a Send Email step to the TextMerge step and the End step. On the Properties panel, enter Constant values for From, To, and Subject fields. Change the mapping for the Body field to Select From Flow and select Result.
Updating a TextMerge using a Flow
- Navigate to the Designer Project that contains the created TextMerge.
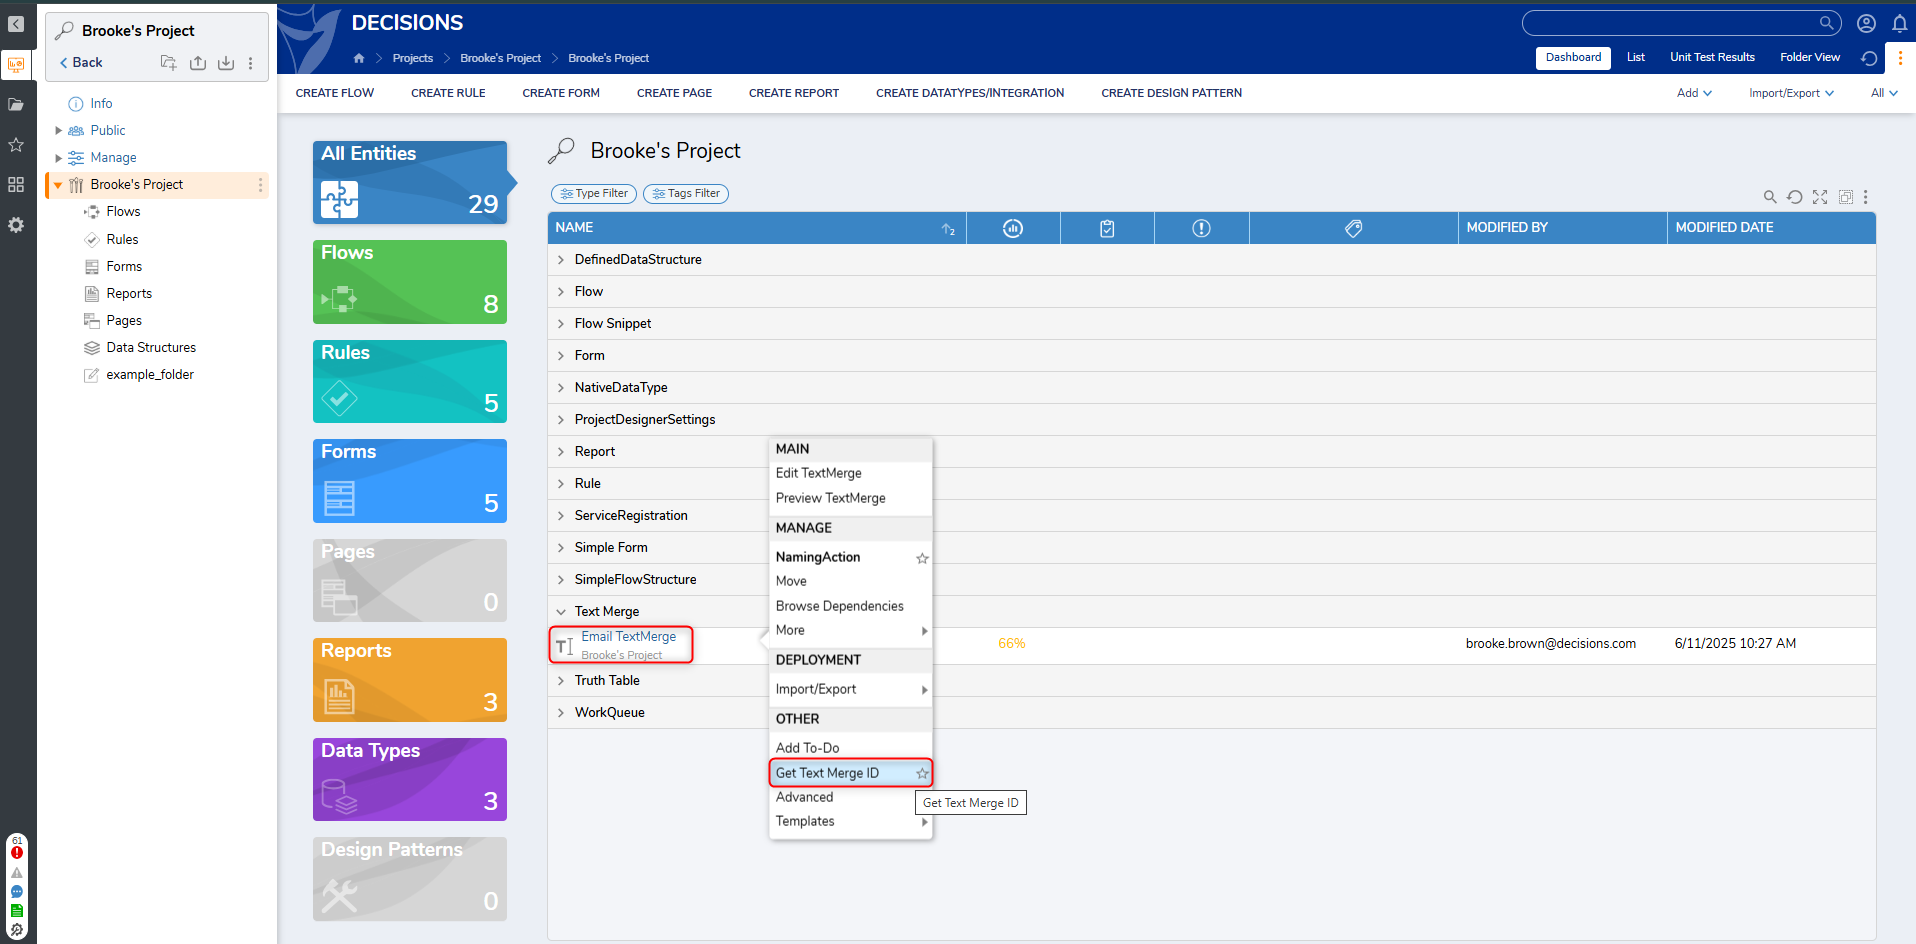
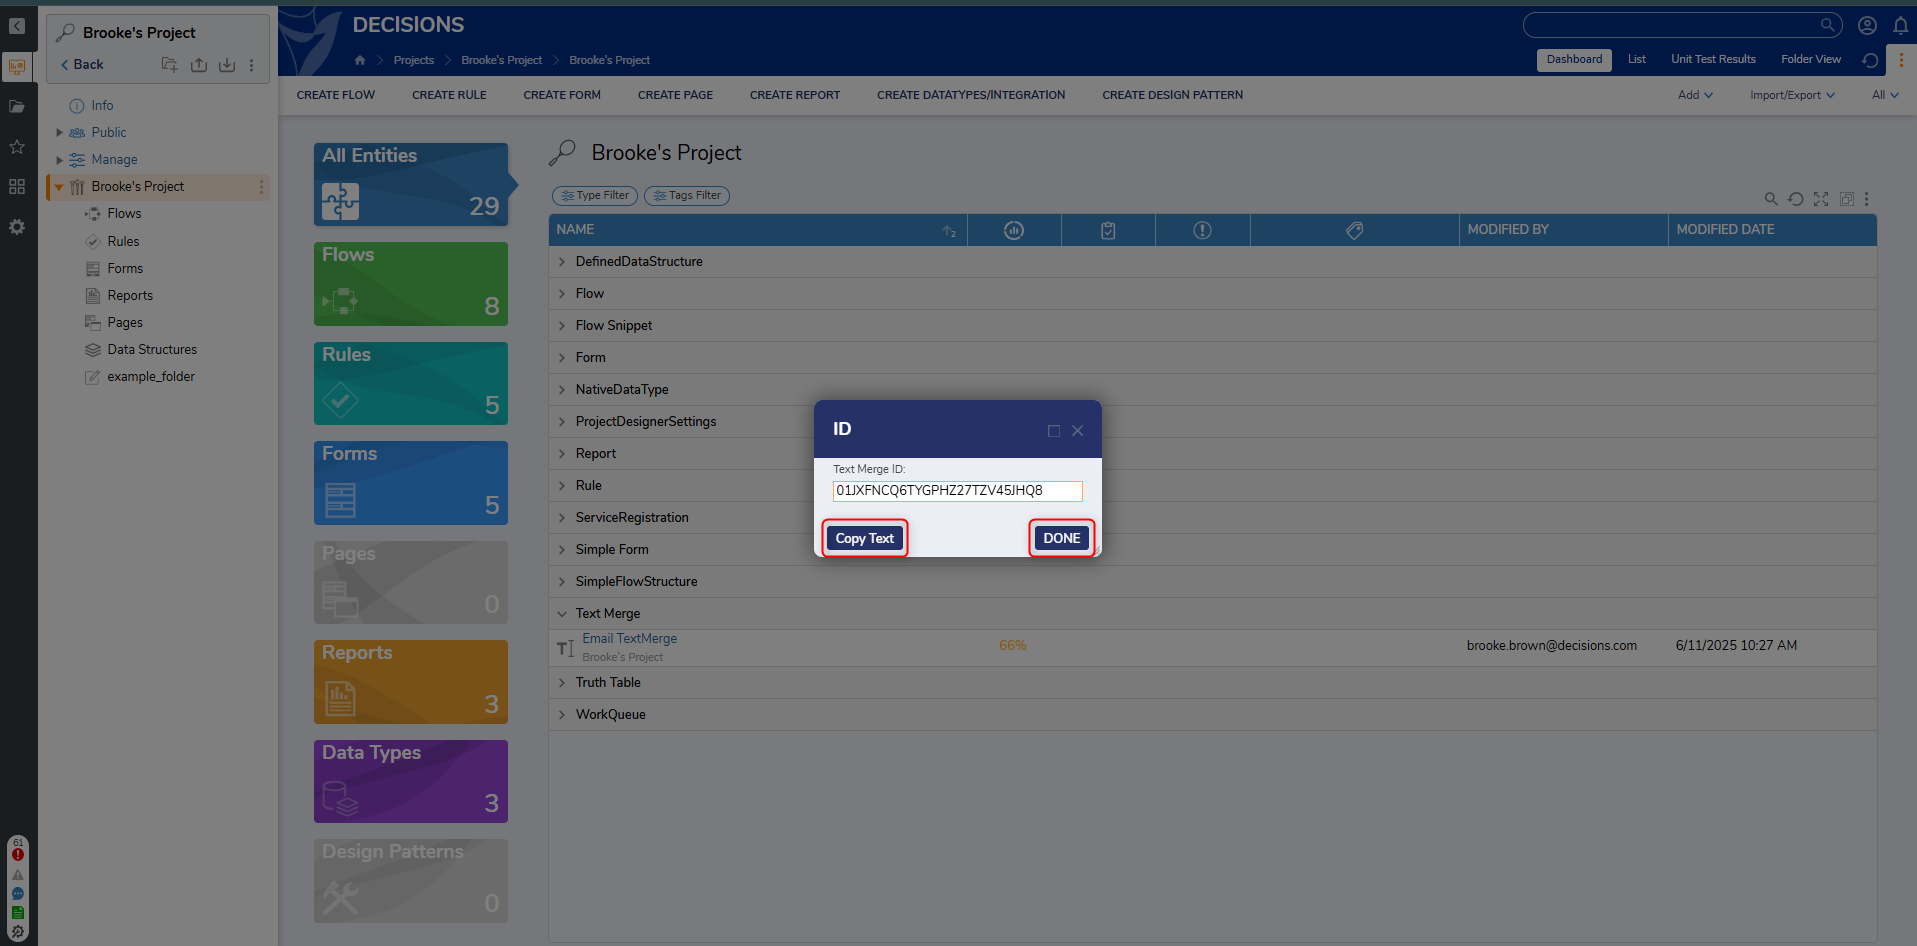
- Right-click the TextMerge. Select Manage and click Get Text Merge ID.
- From the ID window, select Copy Text, then click DONE.
- From a Designer Project, click CREATE FLOW and select Flow to create a new Flow.
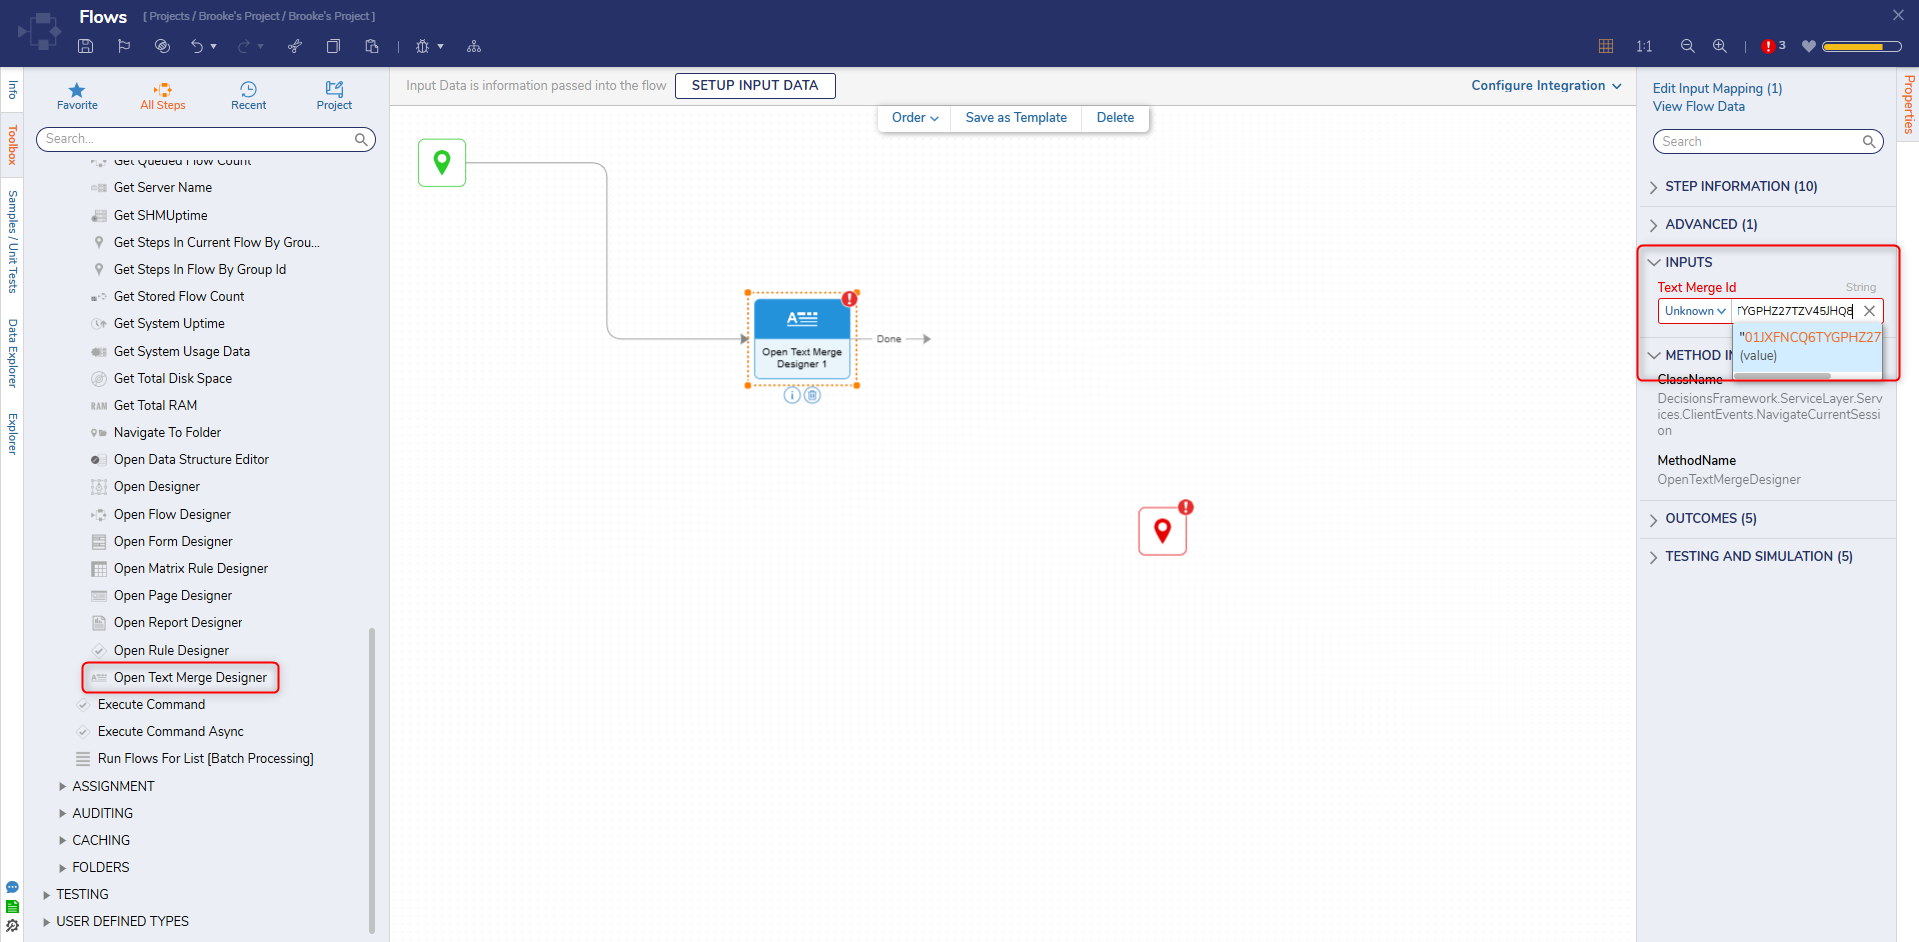
- From the Flow Designer, in the Toolbox panel navigate to INTEGRATION > INTERNAL SERVICES > TEXTMERGEEDITSERVICE, and attach an OpenTextMergeForEditing step to the Start step. From the Properties panel, paste in the copied ID to the text Id field.

- Connect a GetTextFromTextMerge step to the Done path of the Open Text Merge For Editing step. Then, under Properties > INPUTS, Select From Flow map OpenTextMergeForEditing1_Output to session Id.
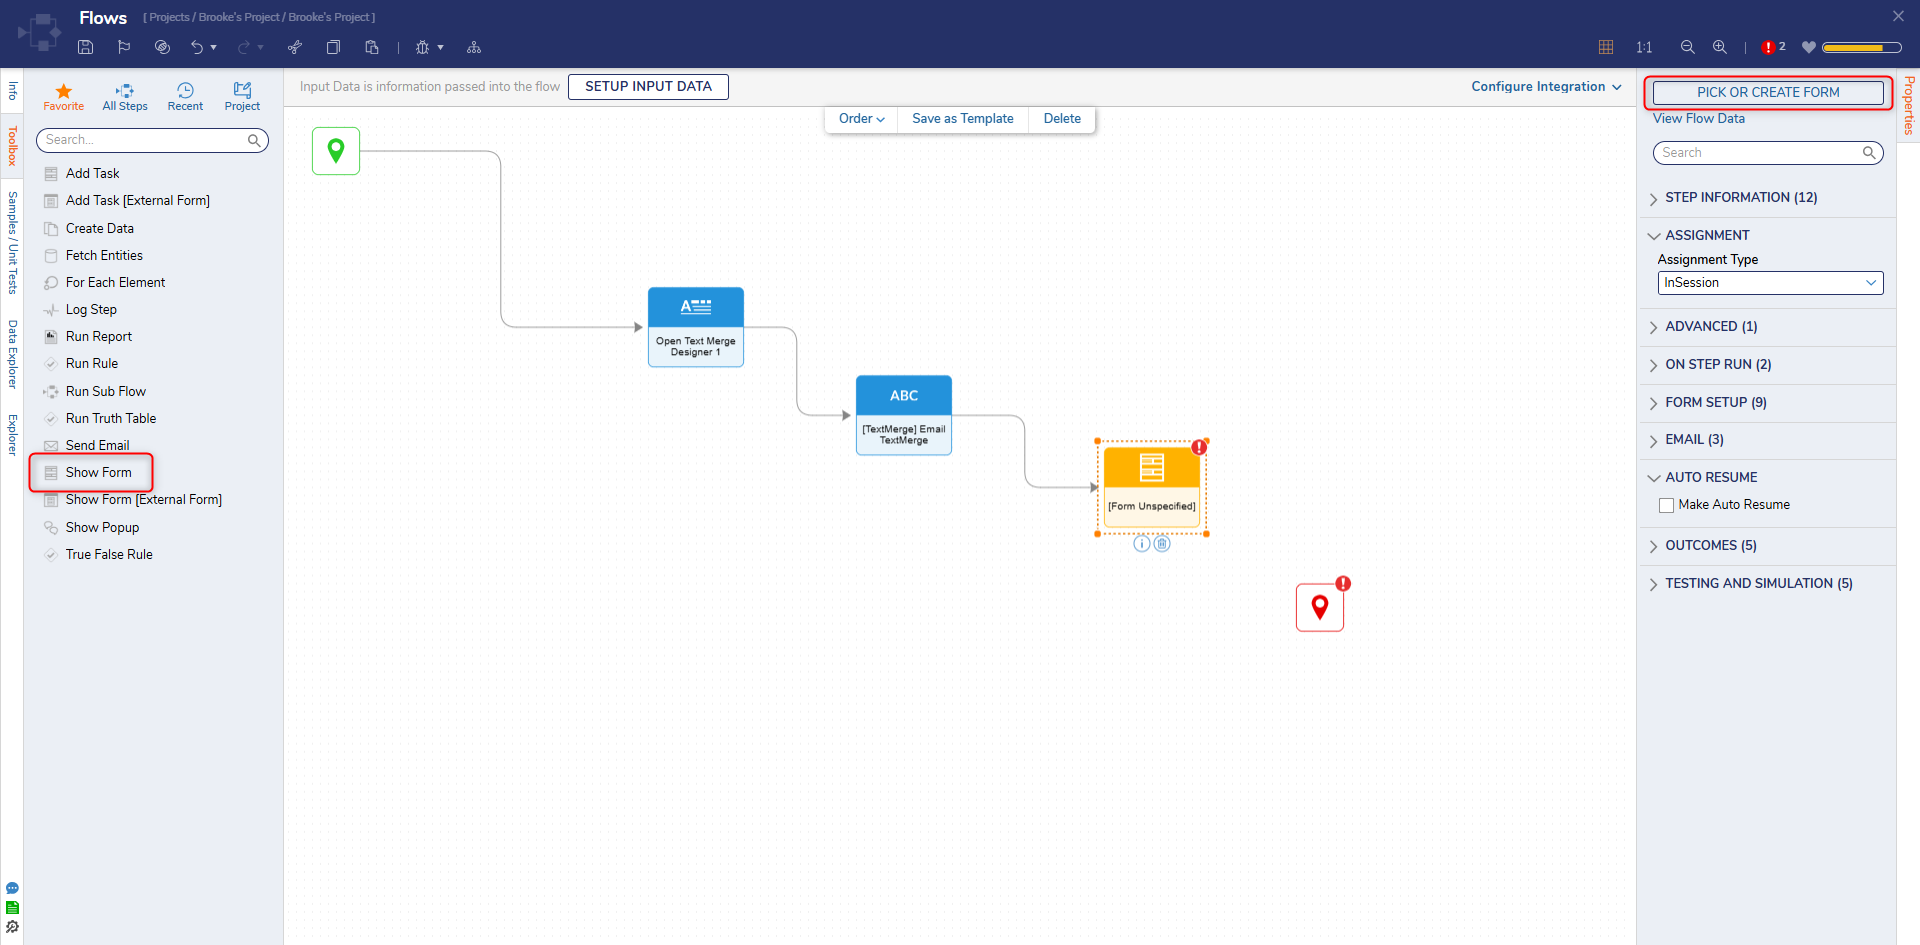
- Attach a Show Form step from the FAVORITE STEPS category to the Get Text From Text Merge step. On the Properties panel, select PICK OR CREATE FORM and select CREATE. Select Form, name the Form, and click Form.
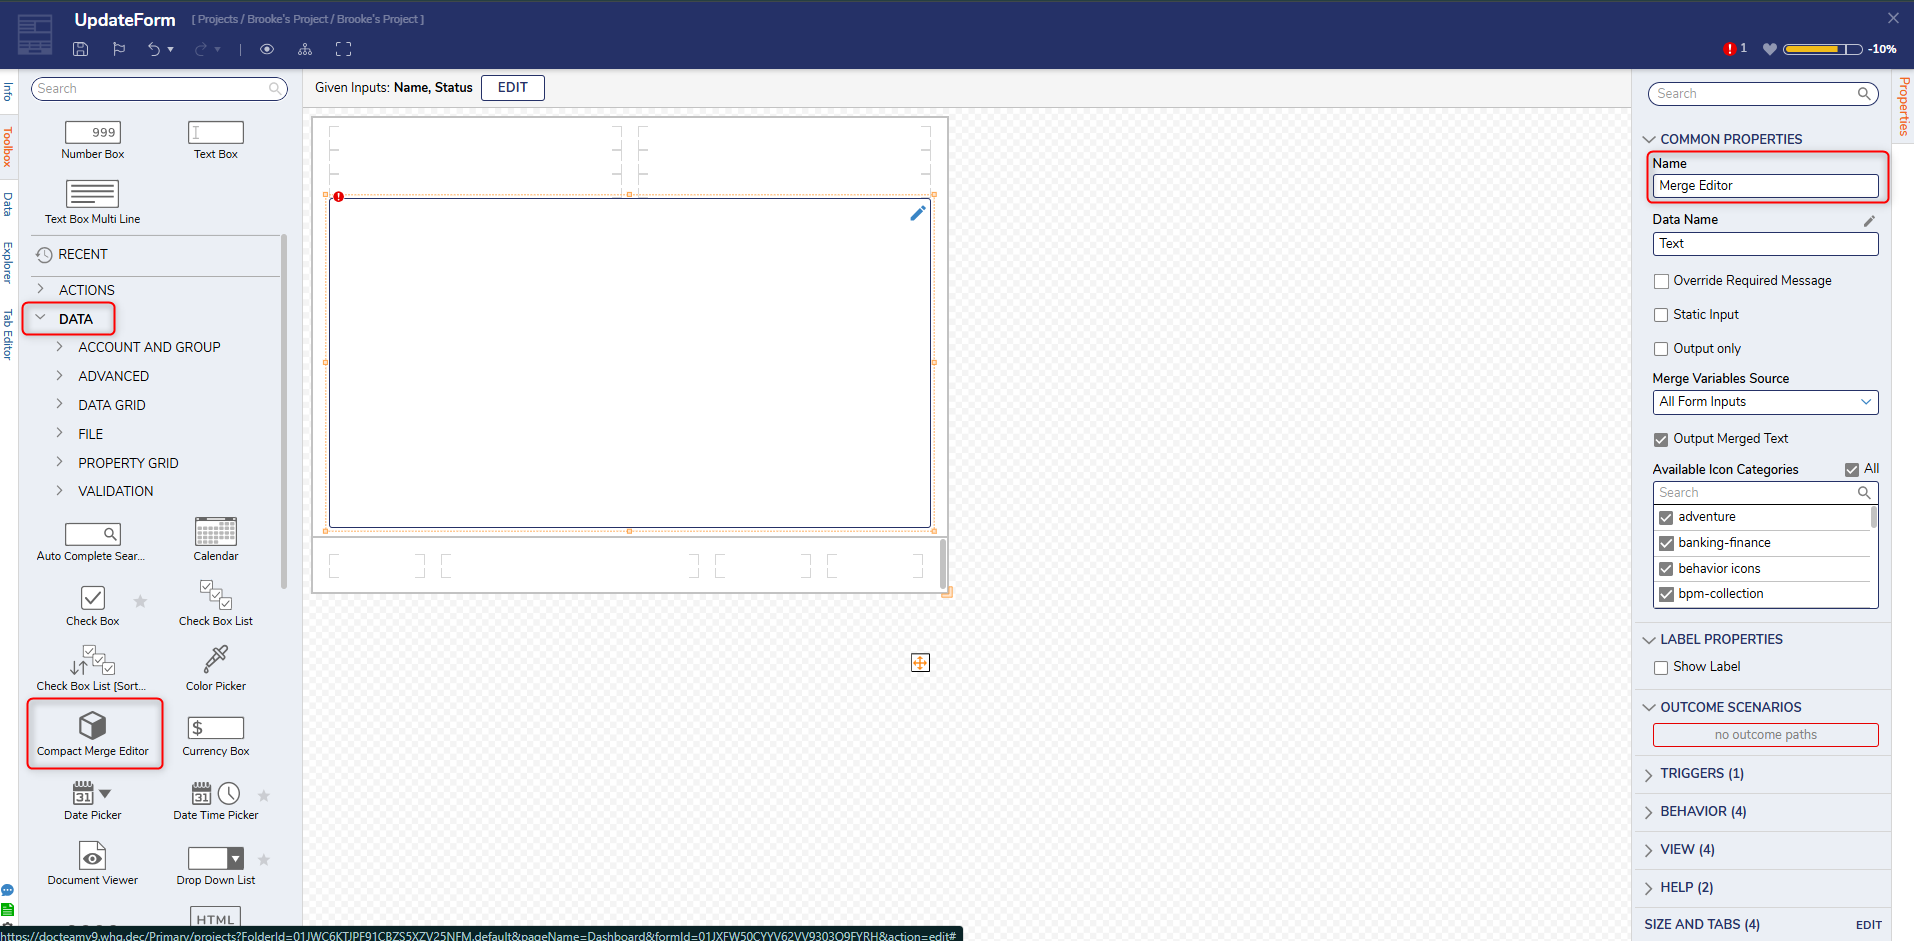
- Configure the Form with a Compact Merge Editor and a Button control. Select the Compact Merge Editor control and uncheck the Output Merge Text option.
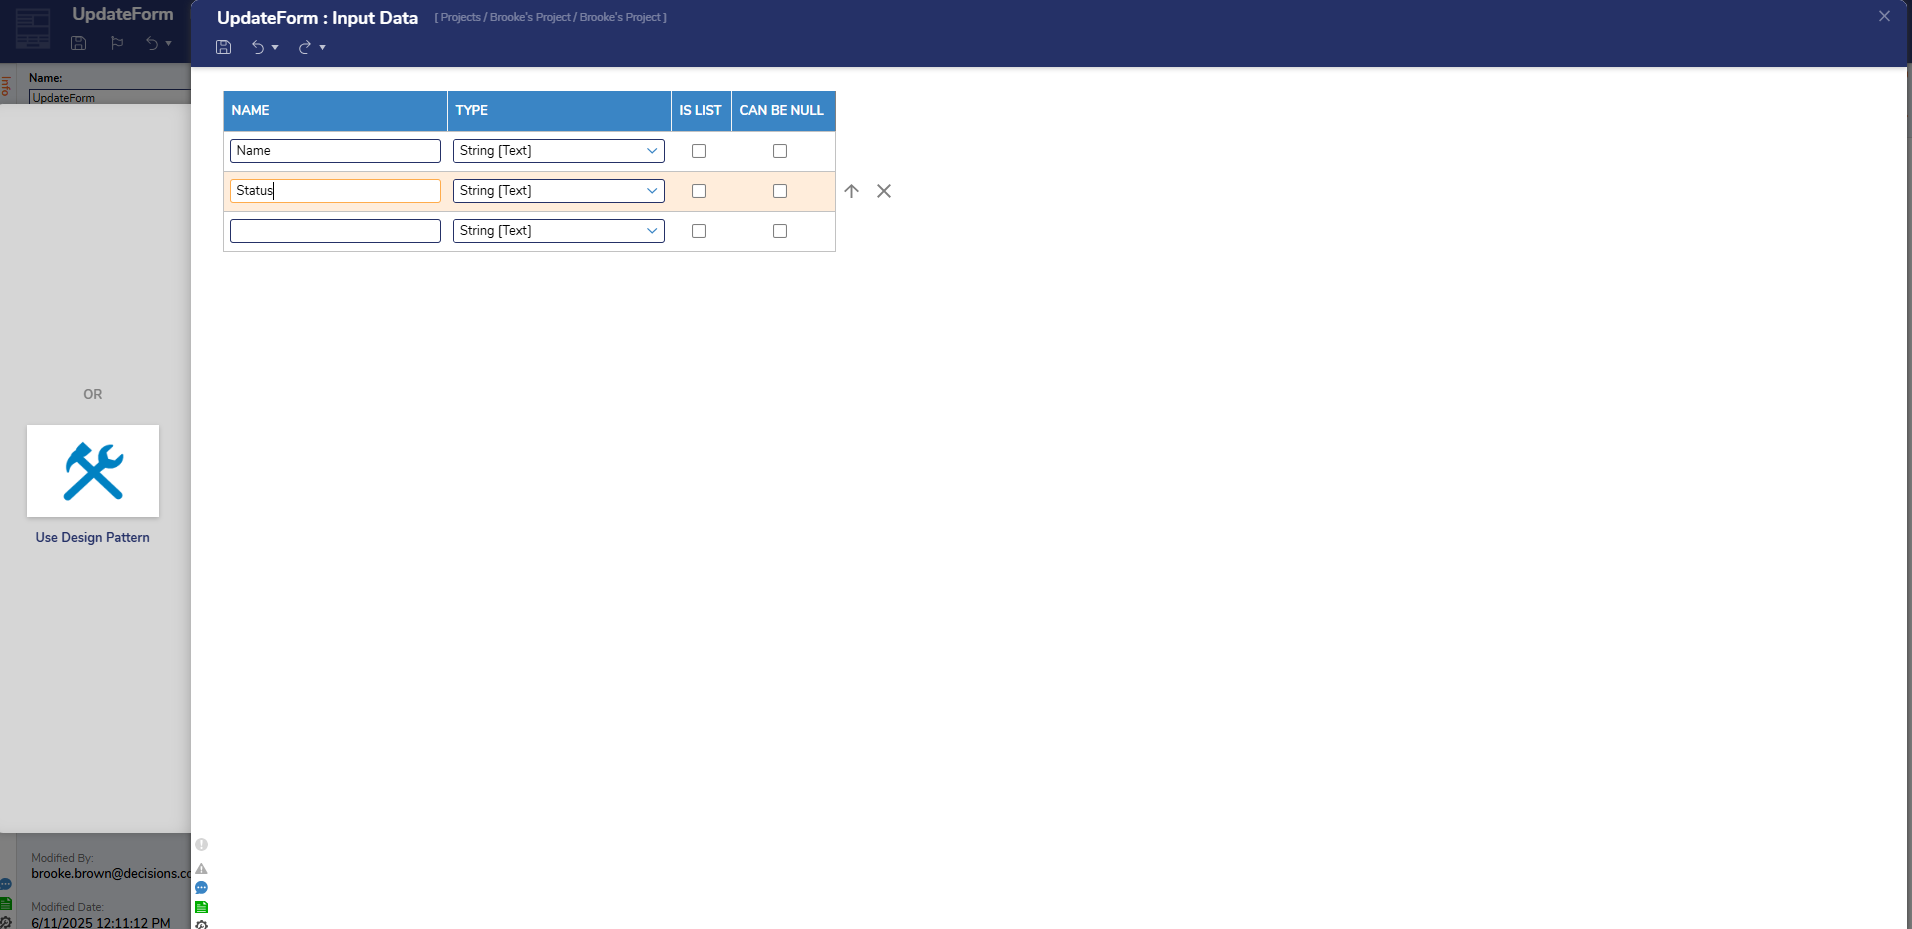
- Click SETUP INPUT DATA and select DEFINE.

- From the Input Data window, enter "Name" and "Status" as String [Text] TYPE. Click Save and close the window.
- Save the Form and close the Form Designer.
- On the Properties panel of the Update TextMerge Form, under the INPUTS category, set Name and Status to Ignore. Then, map GetTextFromTextMerge1_Output to Text.
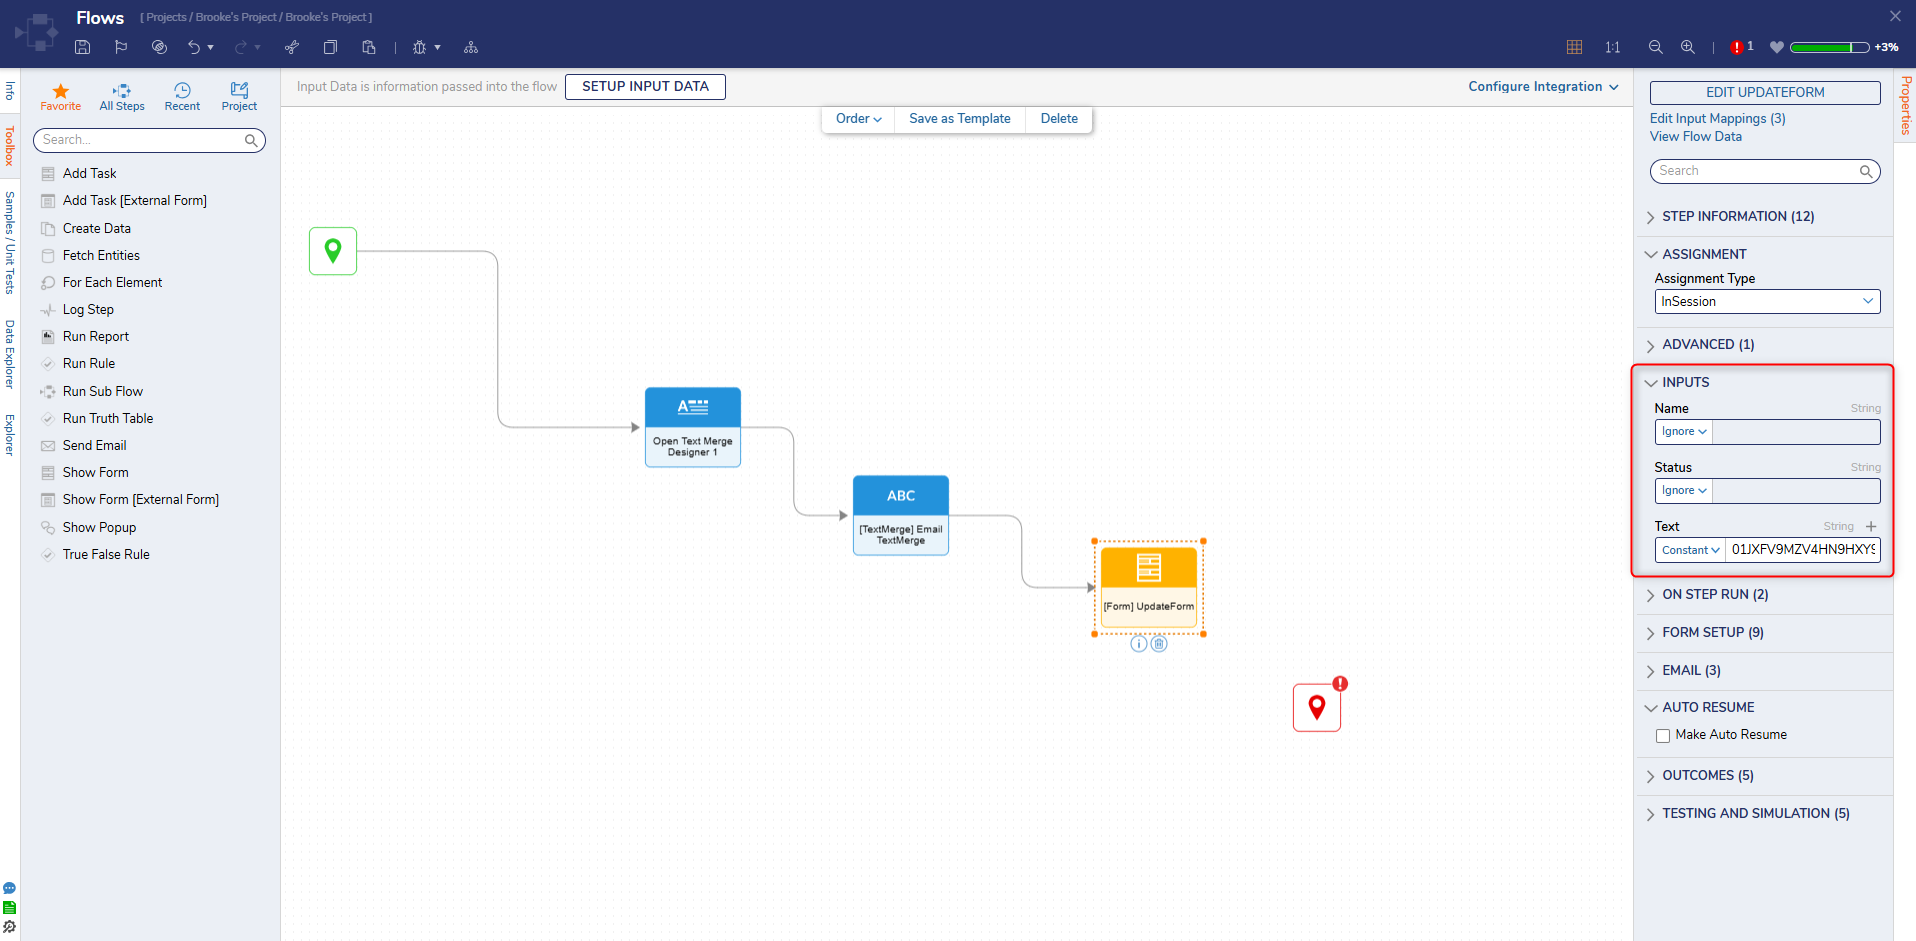
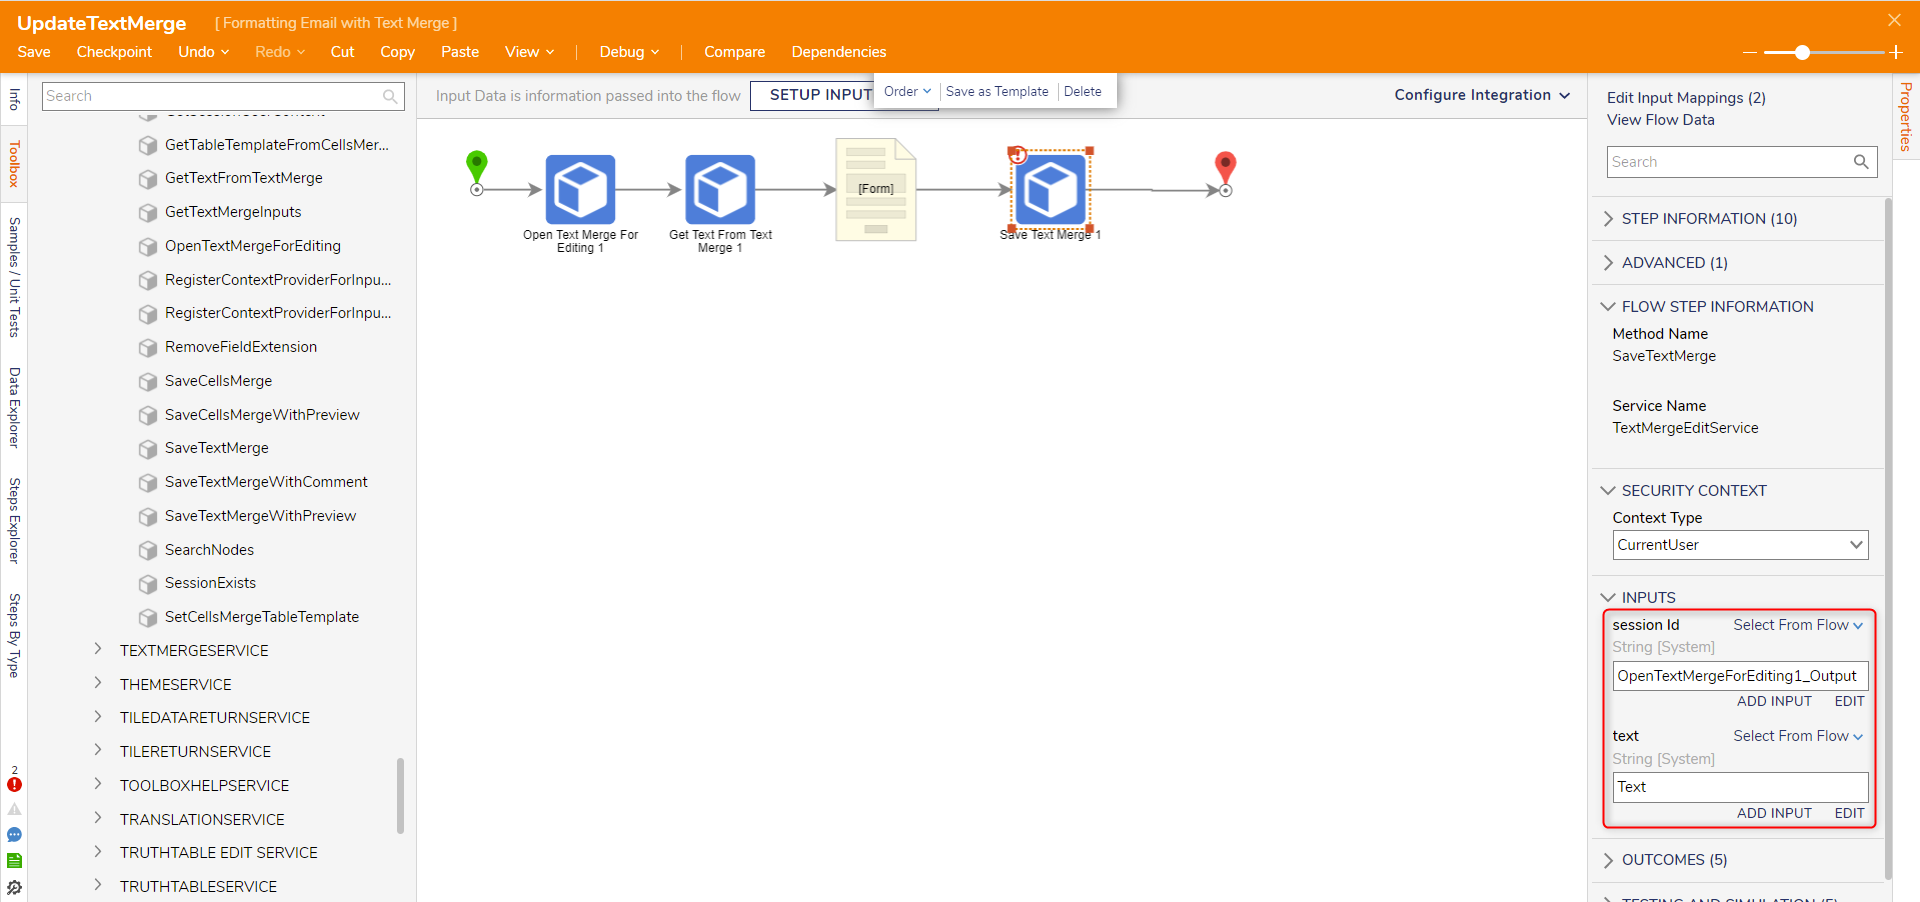
- From the Toolbox panel navigate to INTEGRATION > INTERNAL SERVICES > TEXTMERGEEDITSERVICE attach a Save Text Merge step to the outcome path of the Update Text Form and the End step.
- On the Properties panel, map Text to text and OpenTextMergeForEditing1_Output to session Id.
- Click Save to save changes to the Flow.
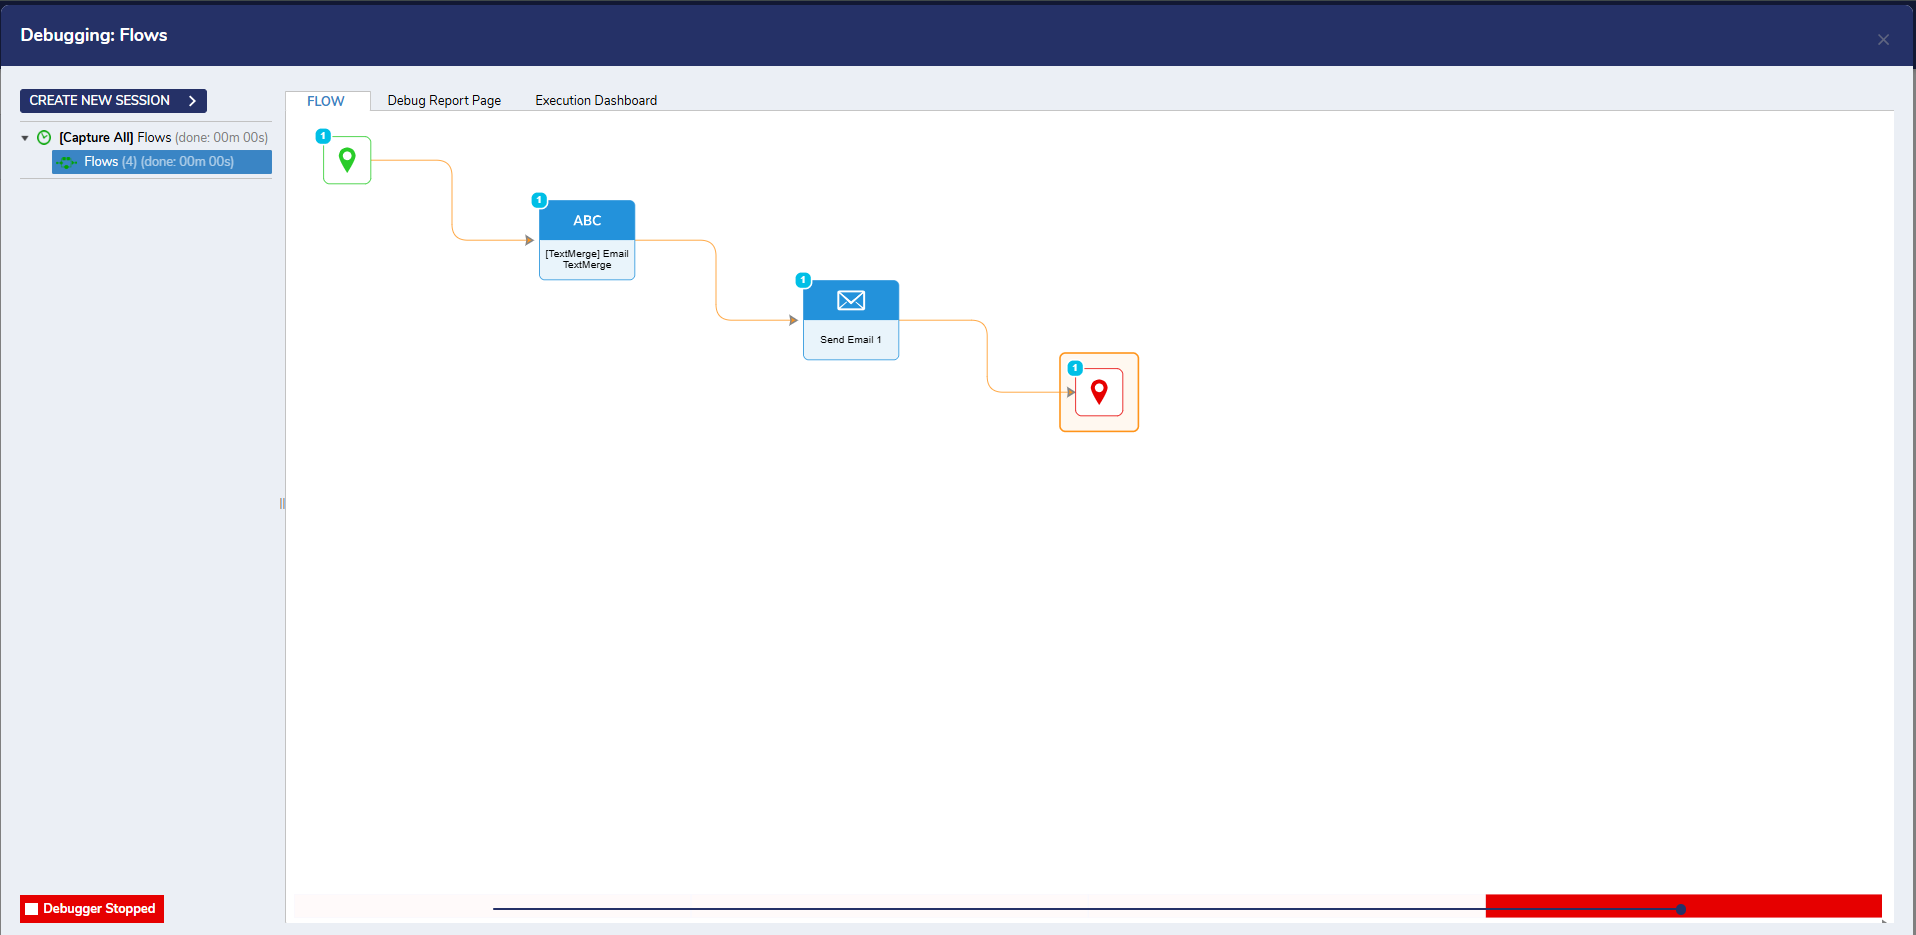
Debug
- On the top action bar, click Debug.
- Click START DEBUGGING.
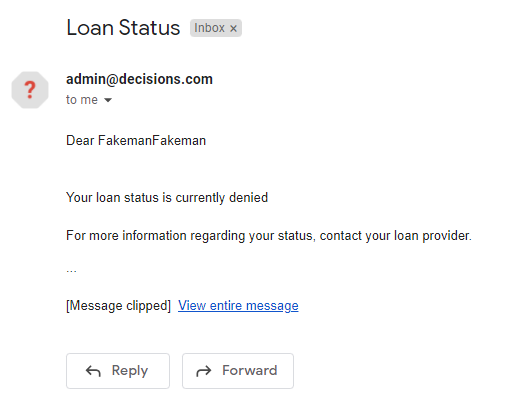
- After the Flow runs, login into the To email's Account and verify that the email was configured as expected.
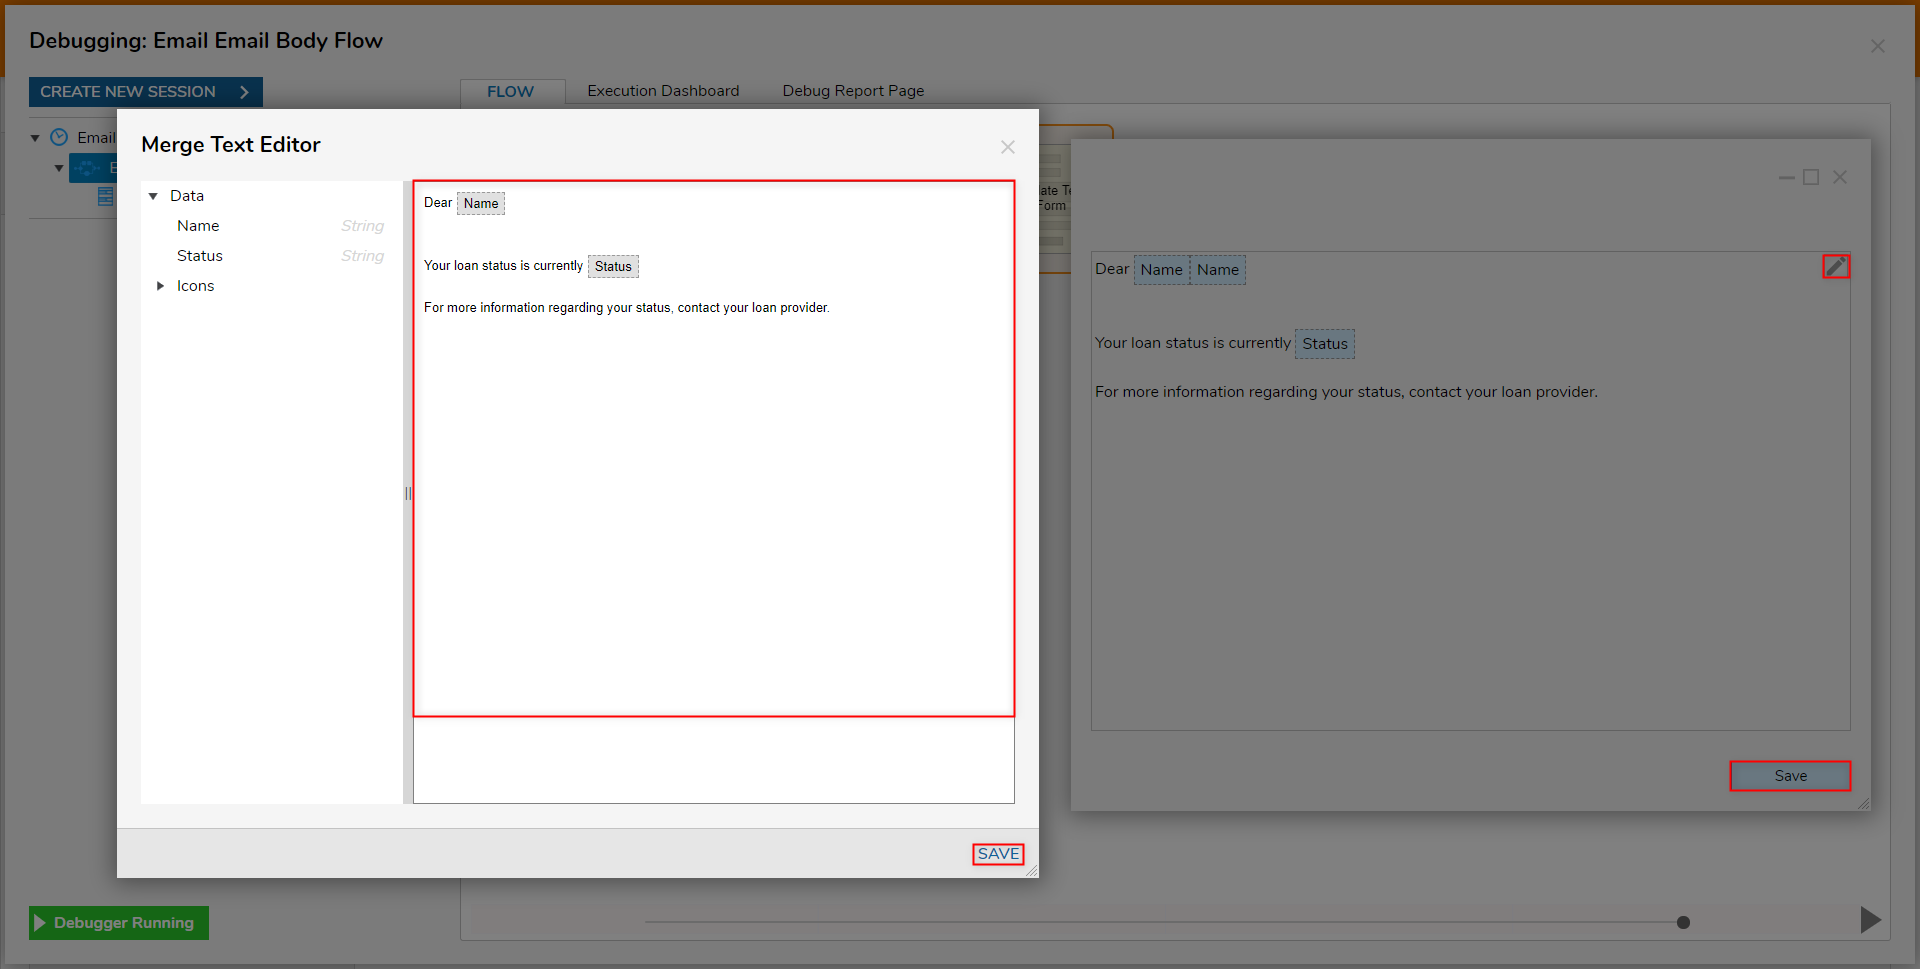
- Navigate back to Decisions Studio and open/Debug the Update Flow.
- Upon reaching the Update Form, select the Edit (pencil) icon and apply any desired edits in the Merge Text Editor window. Then SAVE the TextMerge, and click SAVE.
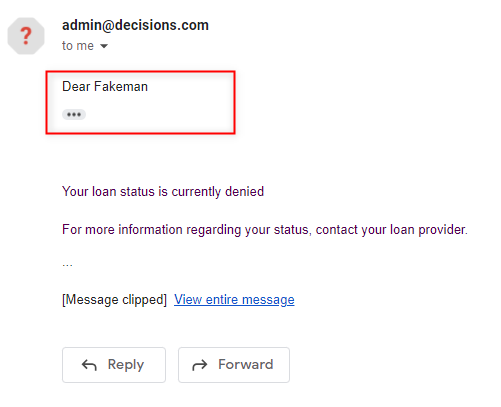
- After the Flow runs, rerun the Send Email Flow; verify that the received Email contains the new edits that were established in the Merge Text Editor.
For further information on Flows, visit the Decisions Forum.