The Event Sign-Up Accelerator is ideal for Administrators who wish to create an event and manage End-User engagement. This project includes pre-built Workflows, Forms, and Dashboards to facilitate event creation and tracking.
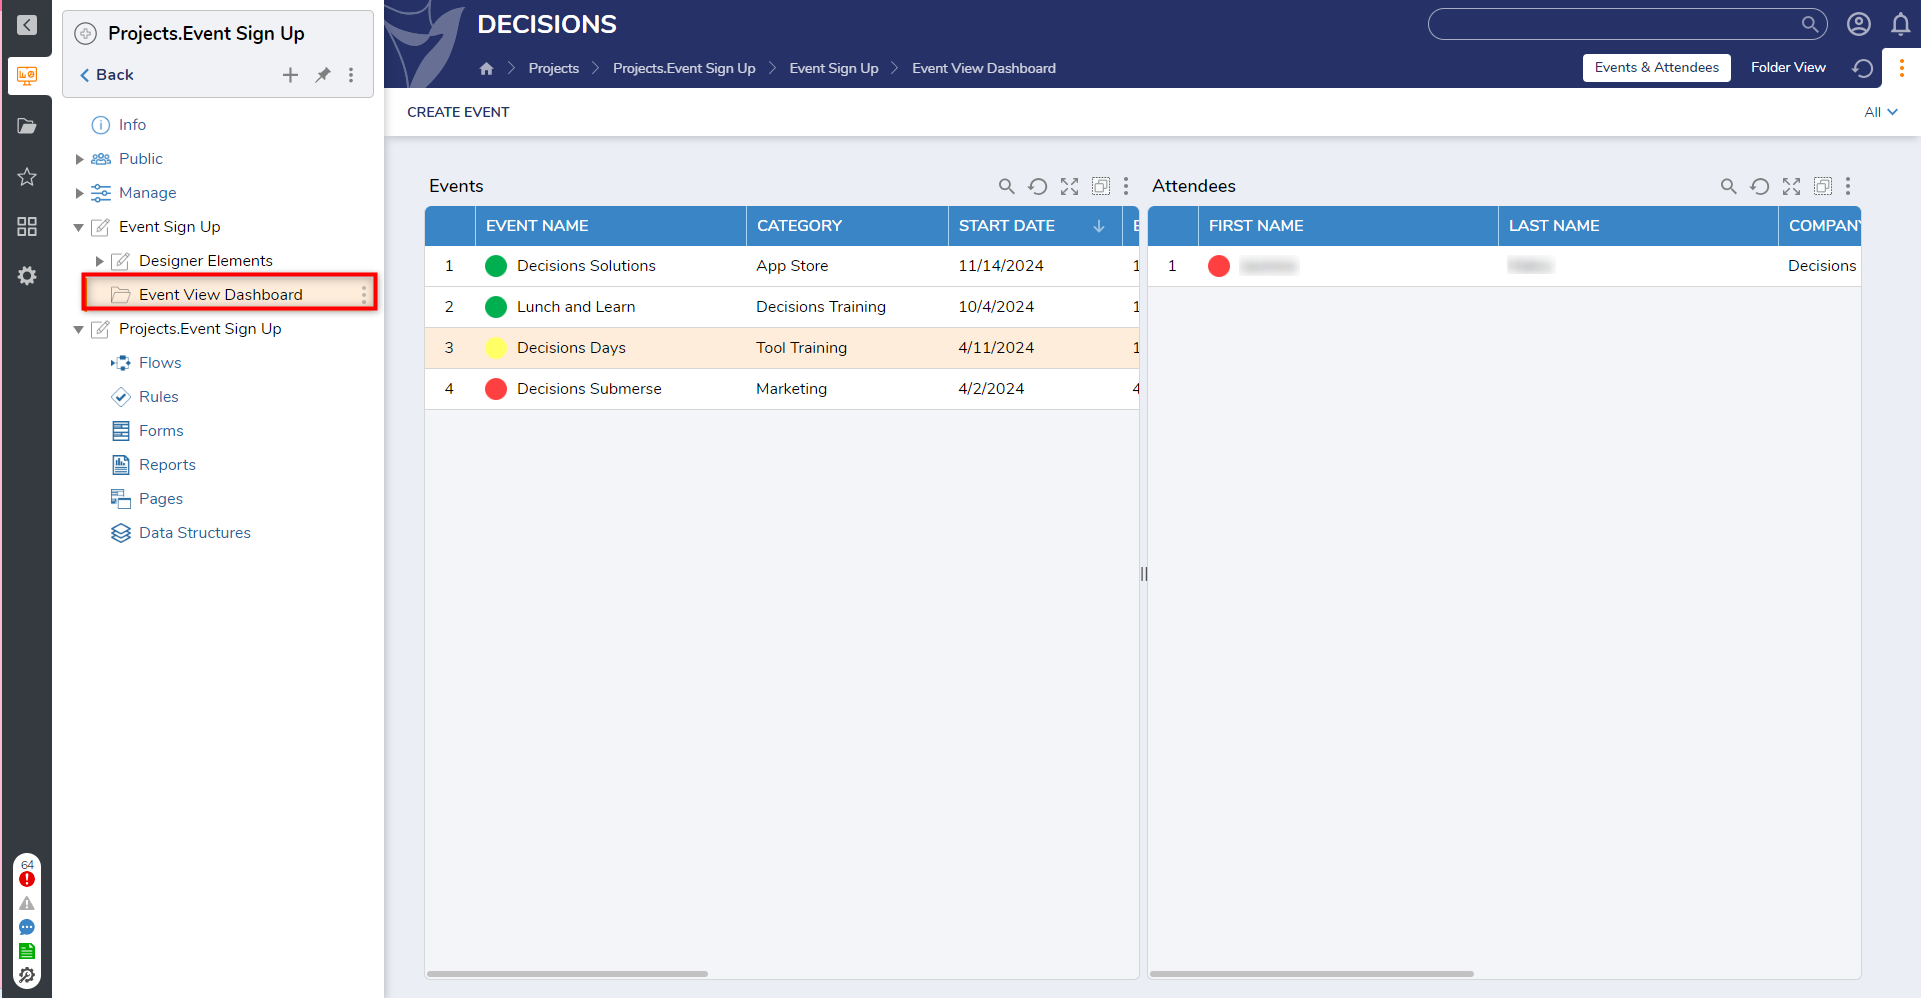
Administrators can manage attendees inside an event by right-clicking on the desired event on the Event View Dashboard. This page displays current attendees, offers editing capabilities, and mentions whether attendees have checked in. Admins can also create new Attendees from this view by selecting Create Attendees.
Once an End-User registers for an event, the system delivers an email with sign-up information to their inbox. The system securely stores data for Administrators to access at any time. End-Users can check-in and check-out during the event and can register during check-in if the setting is enabled.
The Event Sign-Up Accelerator offers a user-friendly interface for efficient event handling. Once installed, administrators can immediately create an event and configure registration for End-Users.
Key Features:
- Email notifications
- Event and End-User progress tracking
- Record Check-in and Check-out details
Considerations
- Users should have the Error Handling Accelerator installed before utilizing this Accelerator.
All projects that include scheduled jobs have them disabled by default. Users need to enable these jobs to work after importing this and other projects. For Event Sign Up, users must enable: Event Sign Up-Event Reminder. To enable the Scheduled job, navigate to:
- System > Jobs and Events > Scheduled Jobs > Event Sign-Up Reminder.
- Right-click on the job and select Enable Job.
- By default, this scheduled job will run daily.
Main Flows
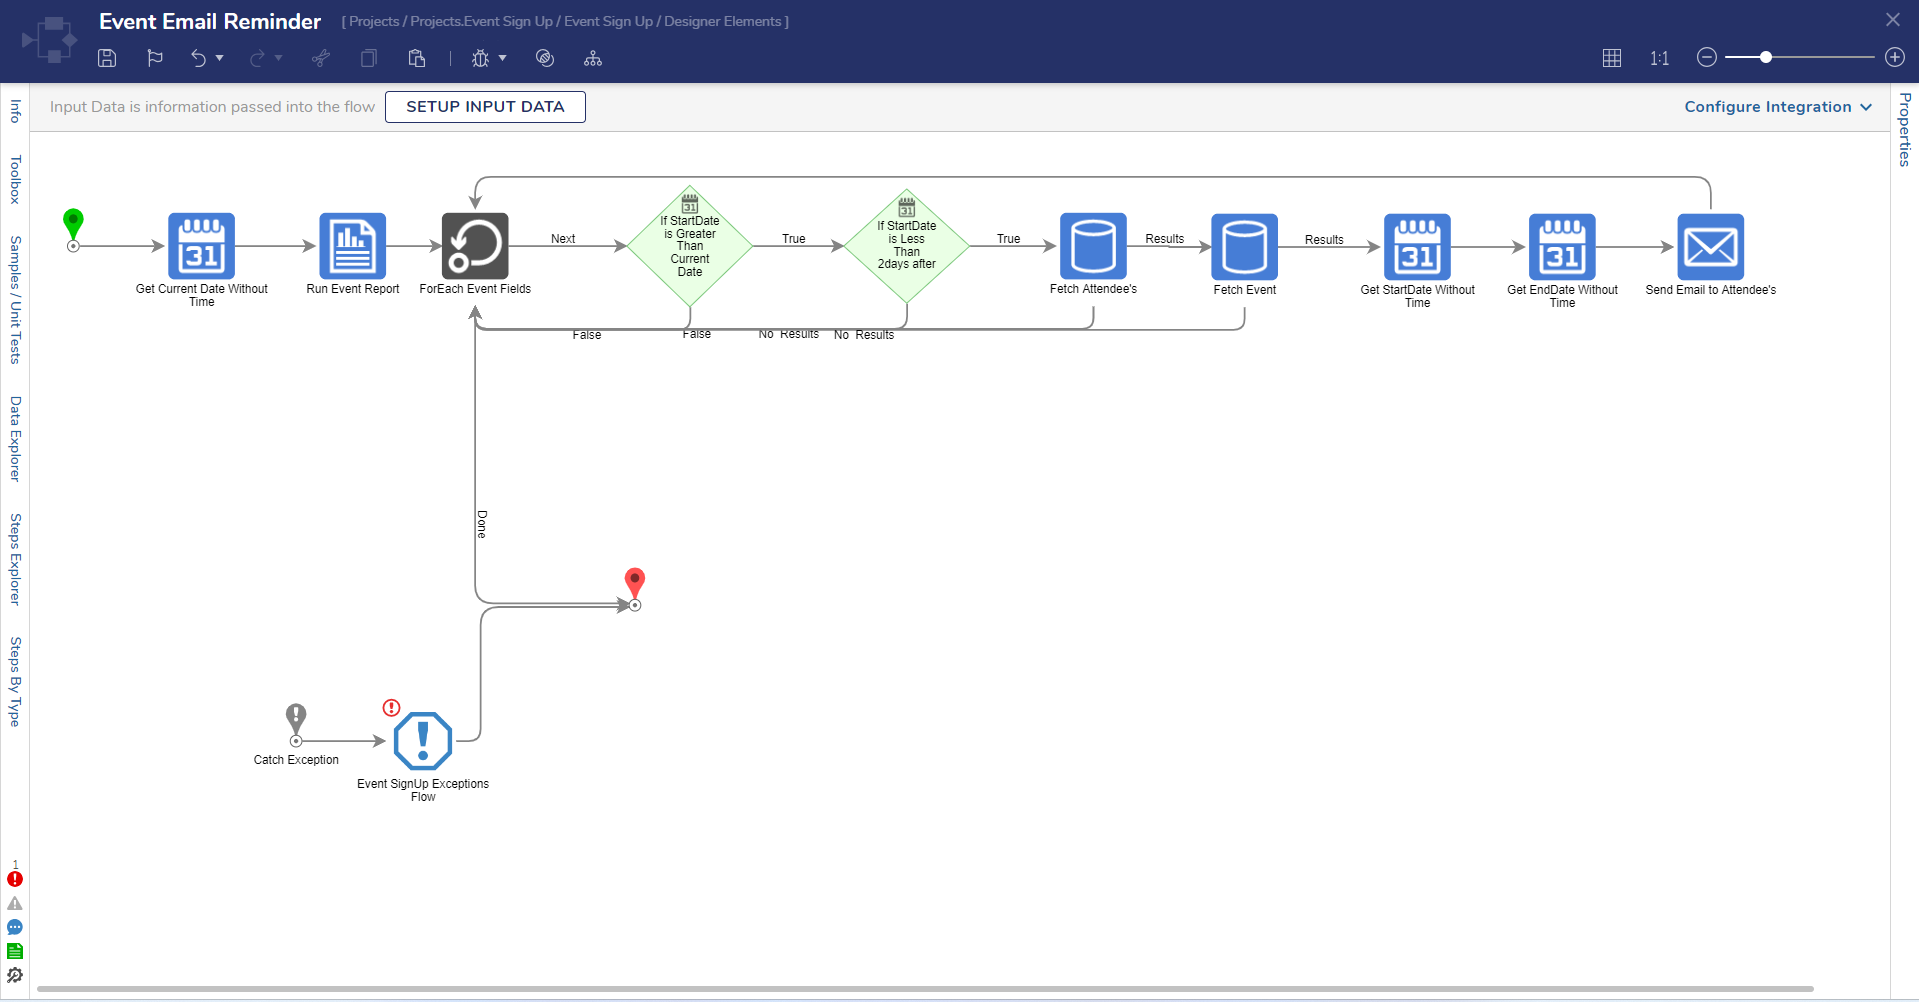
Event Email Reminder
This flow schedules a job that sends attendees emails one day before an event begins. It will also check all existing events in the Event View dashboard daily and deliver notifications for event reminders.
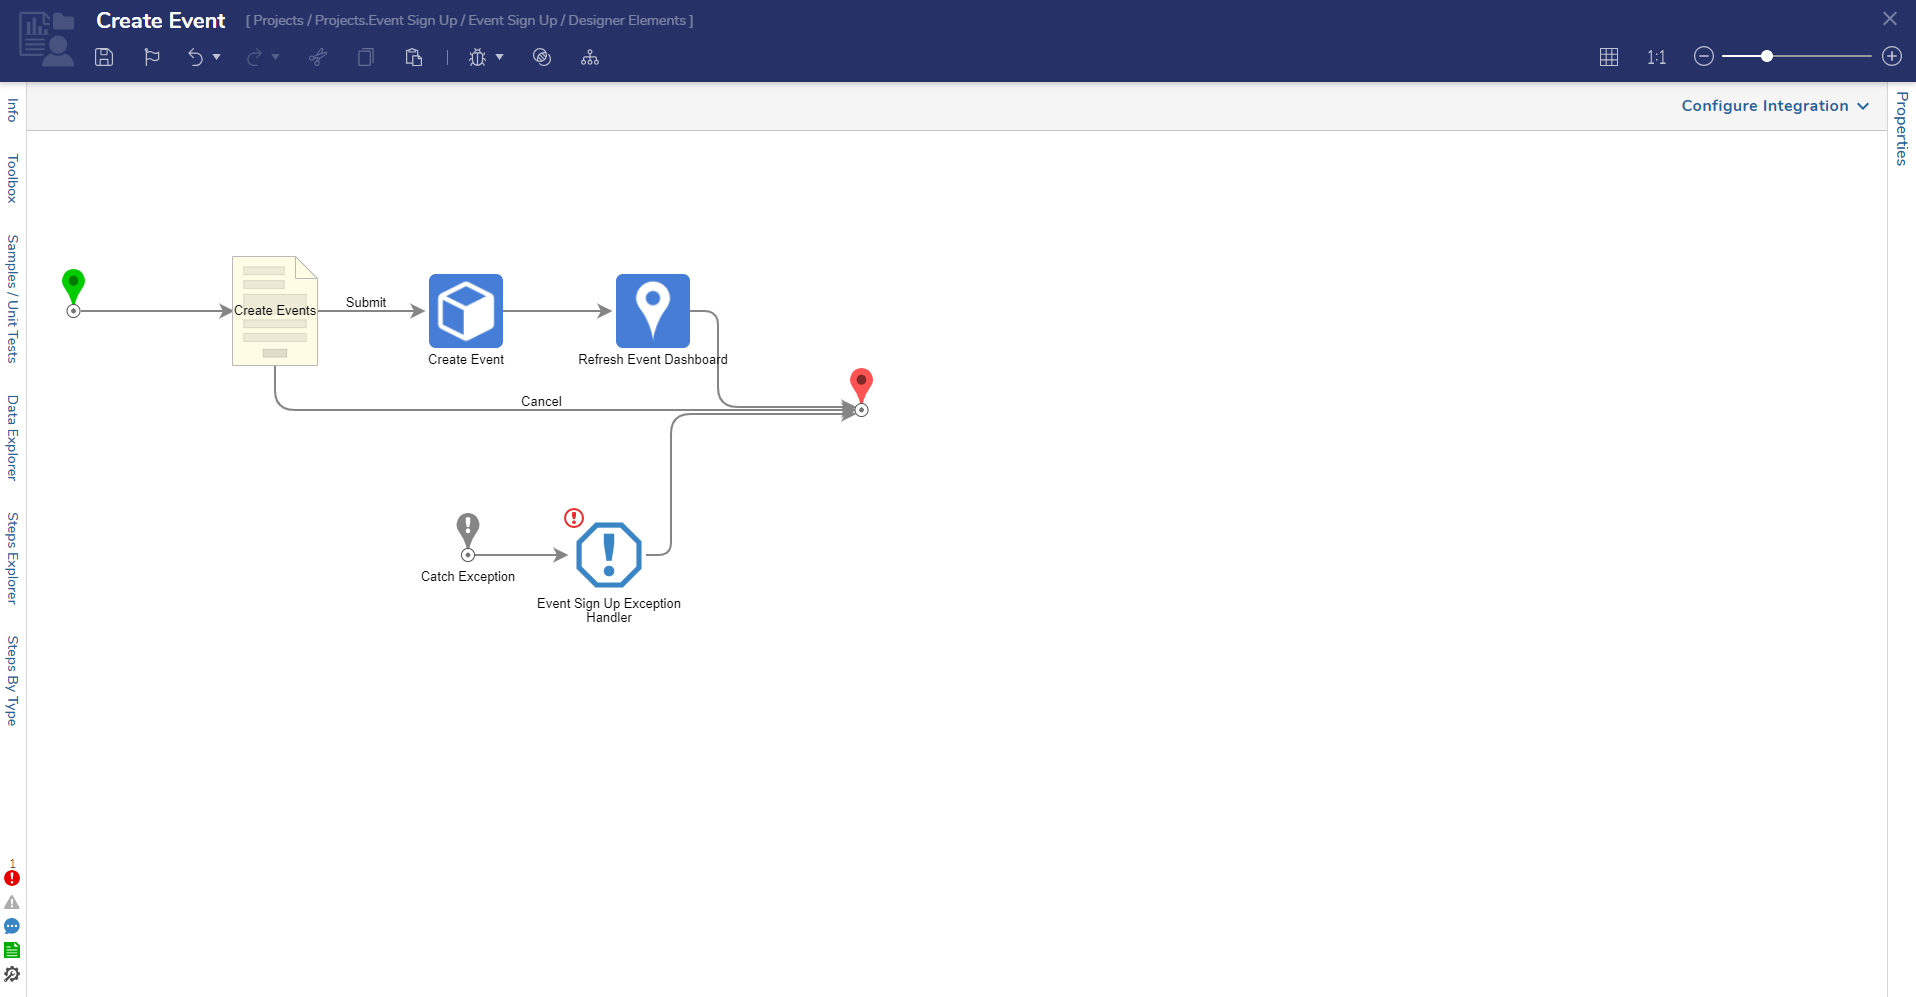
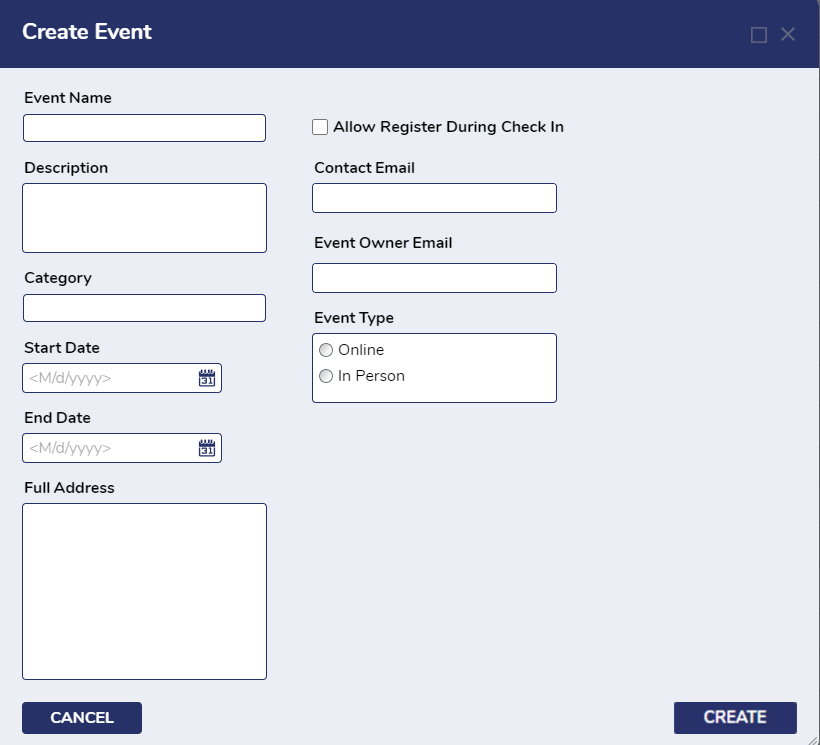
Create Event
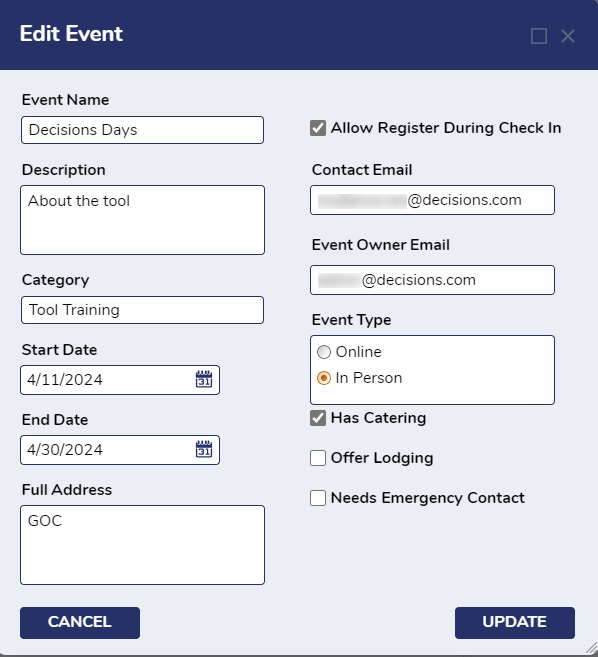
This process creates new events from the Event View Dashboard. The page will display different options depending on the Event type selected (i.e. if "In-person" is selected: Has Catering, Offer Lodging, and Needs Emergency Contact will be available.)
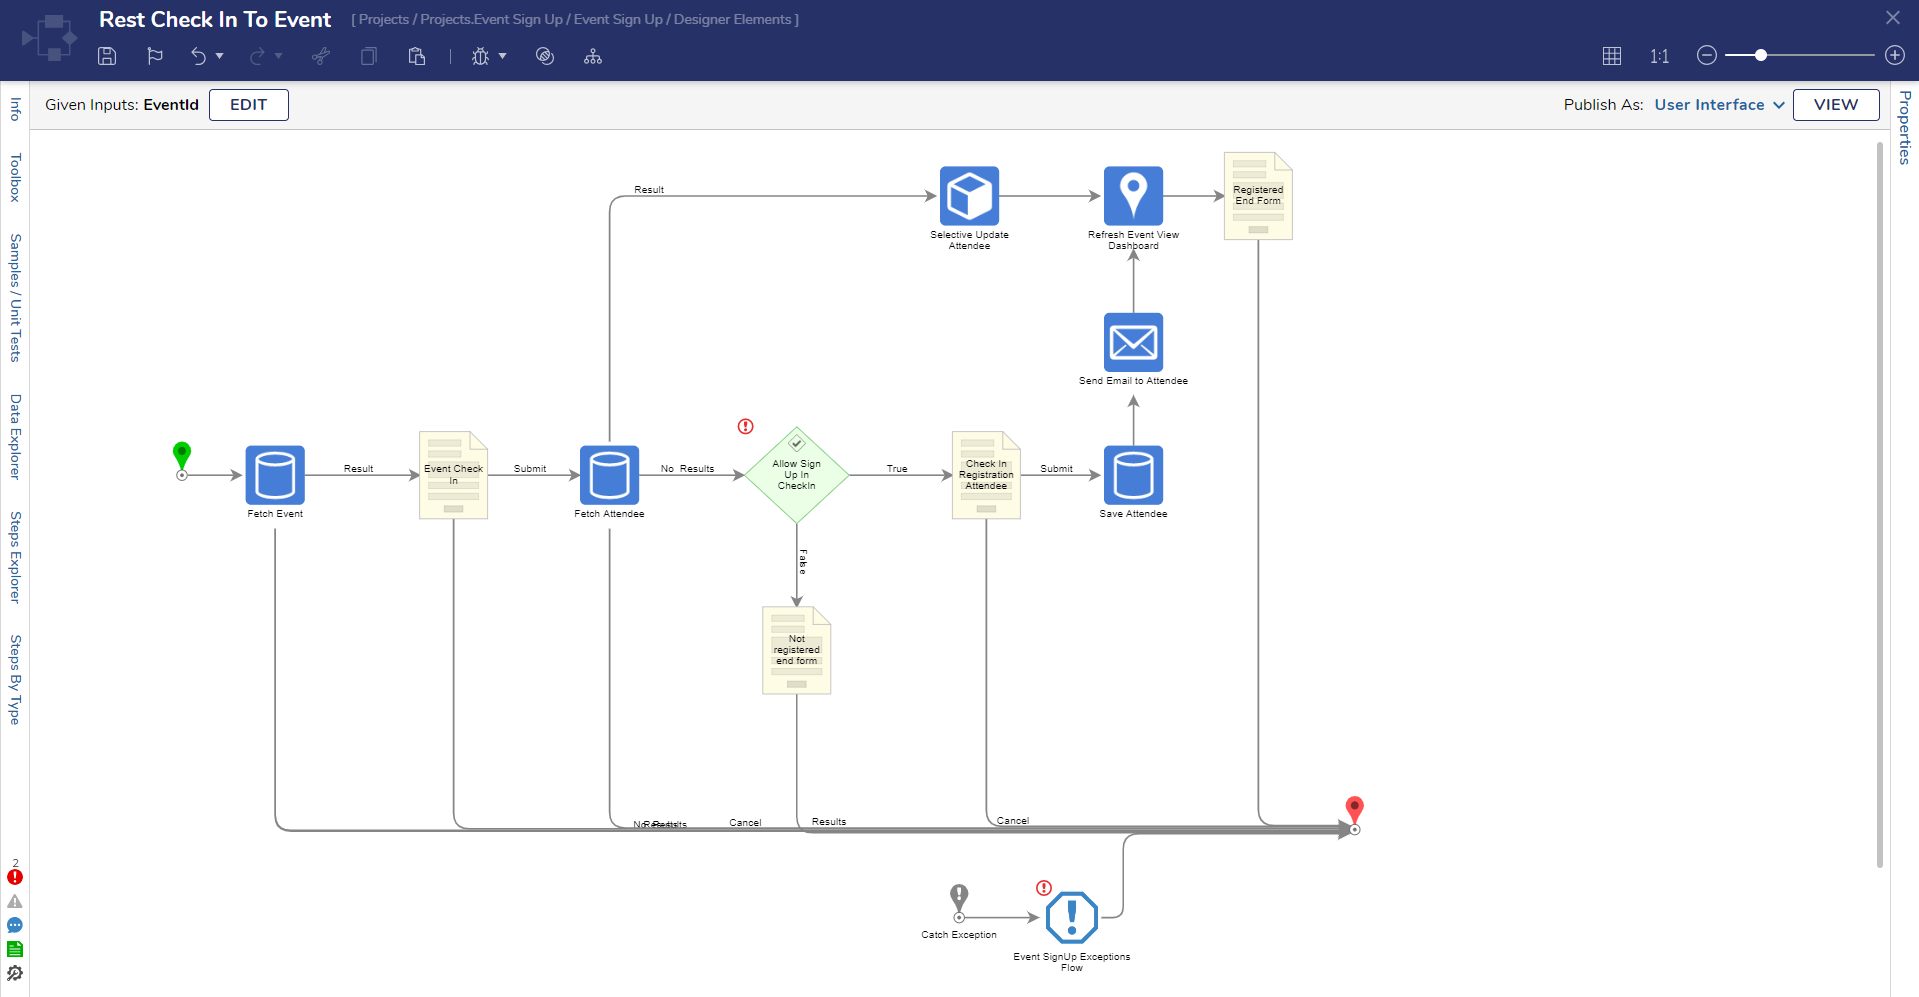
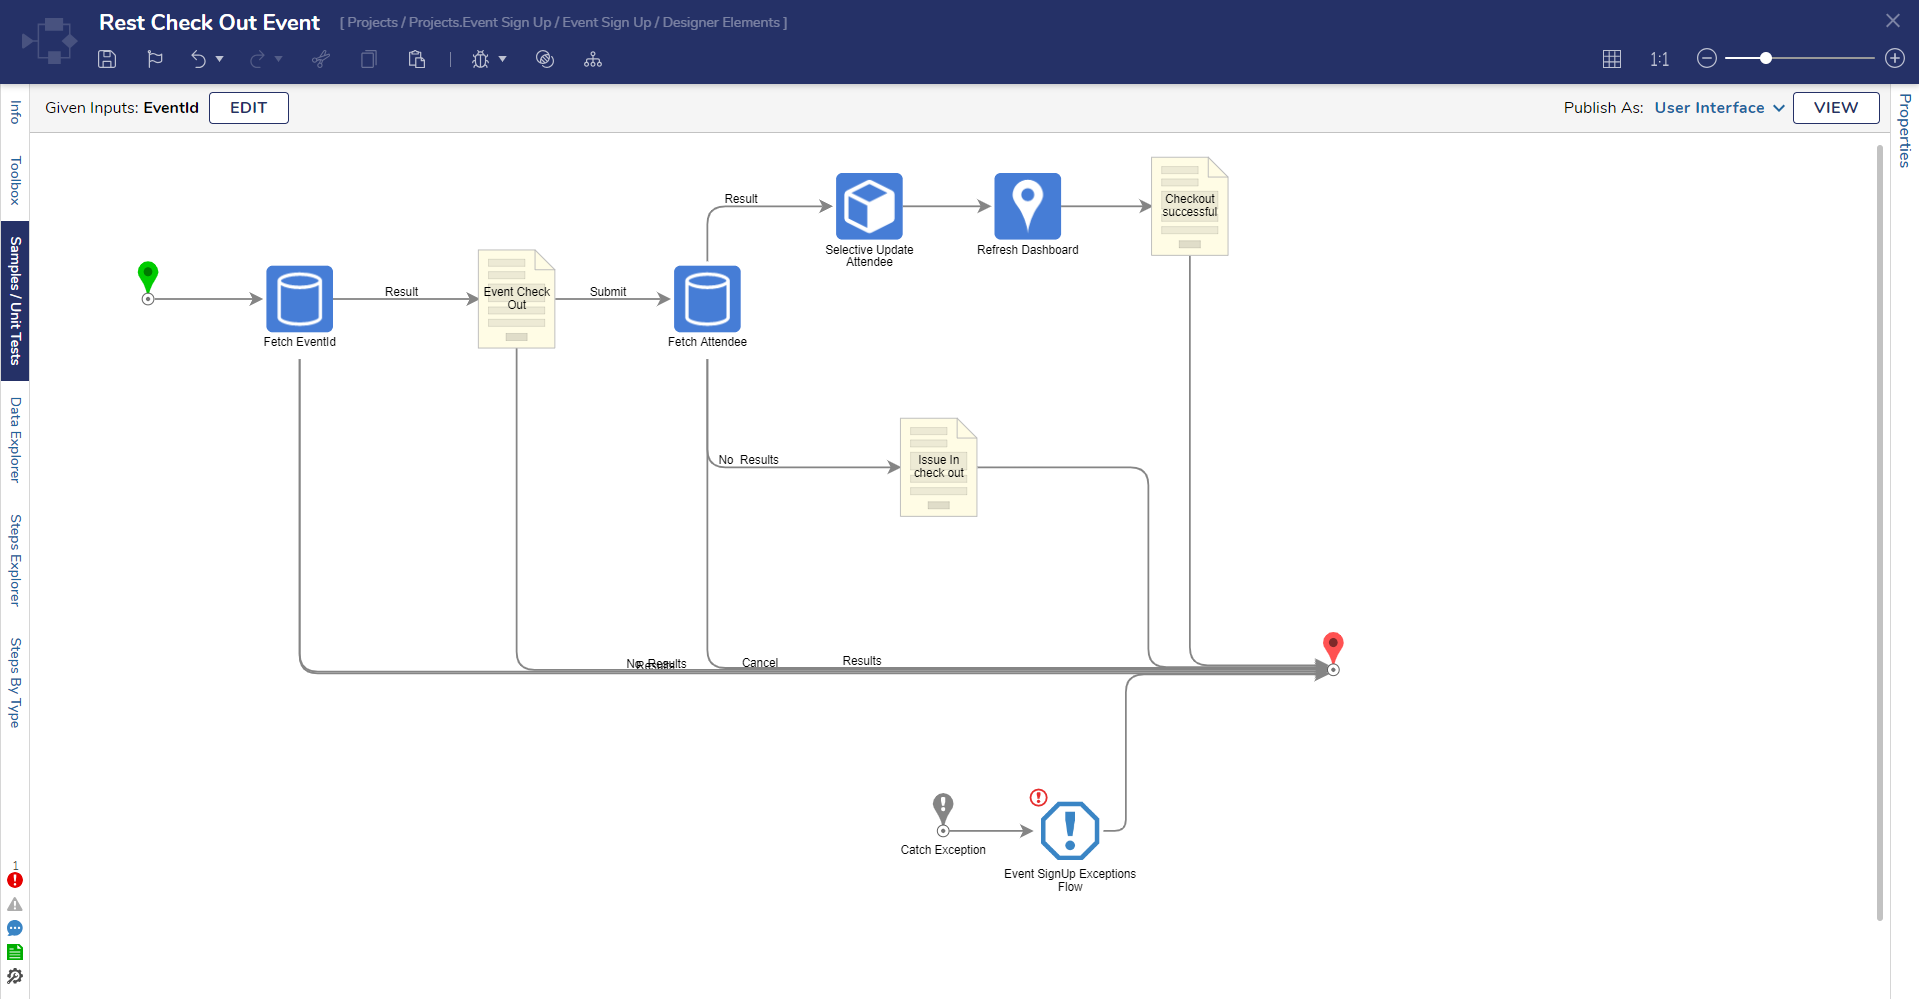
Rest Check-in and Check-out of Event
These respective flows assist with event management. The Rest Check-in Flow checks if an attendee email exists in the event and if not, will update the check-in date to the current date and register the individual. The Rest Check-out Flow checks out attendees from the event. If an email address exists in the attendee list, the check-out date will be updated, and if the email address does not exist, an error message will appear. An End Form will appear, stating whether the End-User has a successful or unsuccessful check-out.
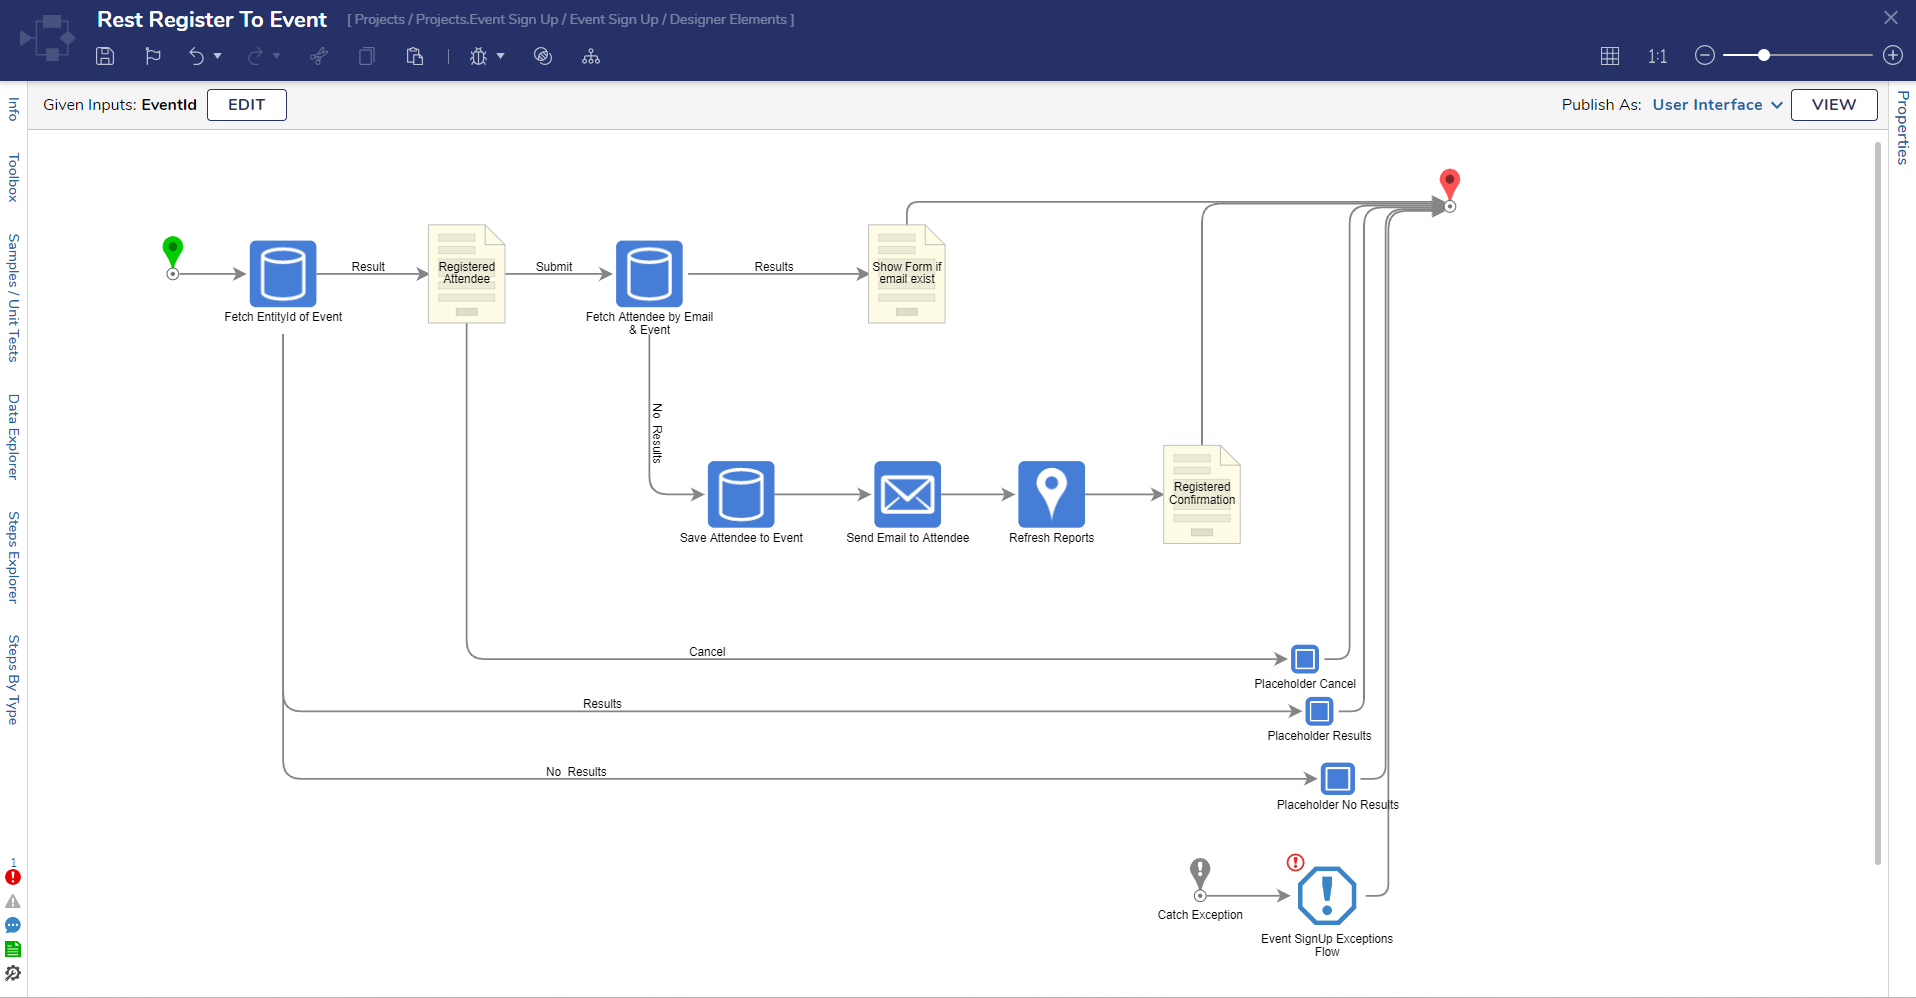
Rest Register to Event
This process retrieves event and attendee information from the user interface, records details if the attendee is not present in the event list, and sends an email to the attendee after successful signup.
How to Use Event Sign-Up
Create/Edit/Delete Events
Creating a new event:
- From the Event Sign-Up folder tree, navigate to the Event View Dashboard, and left-click on Create Event.
- Fill in the fields on the event form.
- Events will change color depending on different actions.
- The event will turn green when the start date is in the future.
- When the start date has passed and the end date is in the future, the event will turn yellow.
- When the start and end date of the event have both passed, the event will turn red.
Editing an Event:
- From the Event View Dashboard, navigate to any event.
- To edit an event, right-click on the created event and select Edit Event.
- Users can edit/update the required fields.
- After editing desired fields, select Update.
- Select Cancel to cancel updates.
Deleting an Event:
- From the Event View Dashboard, navigate to any event.
- From the Events Report, right-click on any events that need to be deleted. Users may delete multiple events simultaneously.
- Select Delete Event(s).
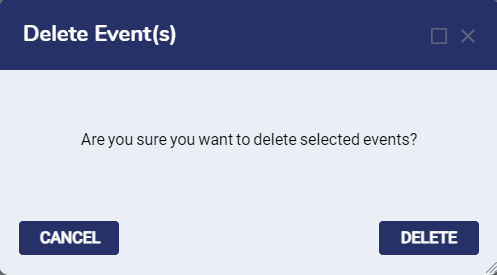
- A message will display asking users to confirm if they want to delete the selected events.
Create/Edit/Delete Attendees
Creating Attendees Inside an Event:
- Navigate to any event from the Event View Dashboard
- From the Events Report, right-click on any event
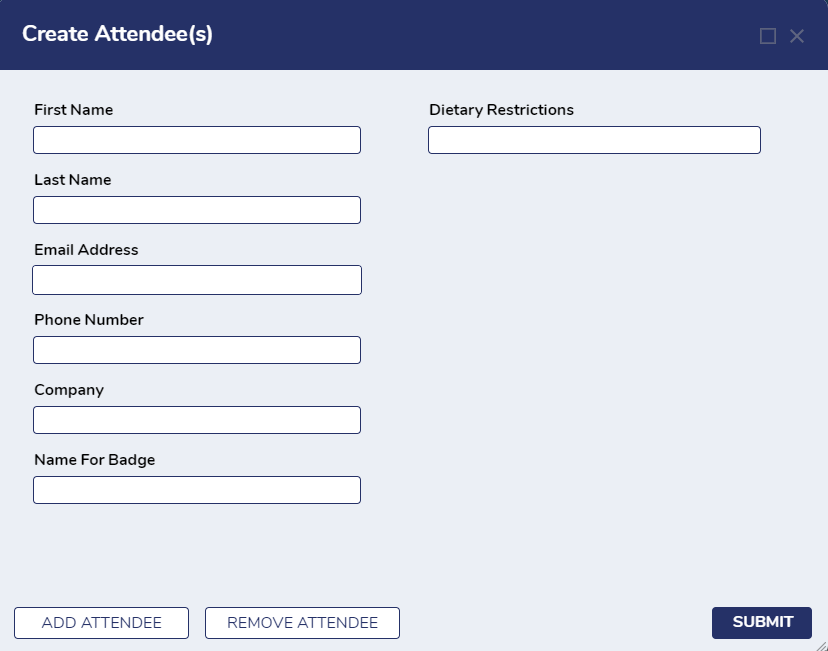
- Select Create Attendees(s) and fill out the attendee details.
- The attendee form fields will change according to the event offerings and created attendees are shown on the right side of the attendee's report for each event.
- Attendees' names will change color according to their registration status. If the check-in date for an attendee is in the future, it will turn Green. If there is no check-in date for an event, and the check-out date is in the future, it will turn Yellow. If there is no check-in date and the check-out date has passed, it will turn Red.
Editing Attendees in an Event:
- To edit an attendee, navigate to the Attendees page on the Event View Dashboard and right-click on any attendee.
- Select Edit Attendee and update the required fields.
- Select Update and close the form to save any changes.
.png)
Deleting Attendees in an Event:
- Navigate to the Attendee page on the Event View Dashboard and right-click on any Attendee that needs to be deleted.
- Select Delete Attendees(s). Multiple attendees can be deleted simultaneously.
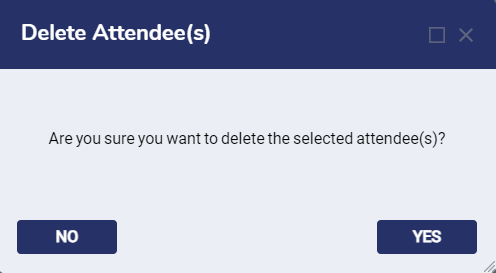
- Users will be asked to confirm whether they want to delete the selected Attendees.
Get URLs Actions
.png)
Get Check-In URL
- When users select Get Check-In URL, a form displays a URL link for users to copy and paste into their browser.
- Once the User copies and pastes the URL, a new tab will open with event details.
- Users will be asked for an email address to check if they are on the event attendee list.
- If the User is not on the list, and sign-up during check-in is enabled, it will ask the User to create an account.
- Existing users will prompt the system to update the check-in date.
Get Check-Out URL
- When users select Get Check-Out URL, a form displays a URL link for users to copy and paste into their browser.
- After opening the URL, the form will prompt the user for their email address.
- If the email address exists in the attendee list, the check-out date will be updated, and an End-Form will display, stating the check-out was successful.
- If an email does not exist in the attendee list, an error message will appear, stating there is a problem checking out the attendee.
Get Register URL
- When users select Get Register URL, a form displays a URL link for users to copy and paste into their browser.
- After opening the URL, a form will be displayed for users to enter Attendee information.
- If the Attendee is not included in the event's Attendee list, the system will create a new Attendee and notify the Attendee of their sign-up details.
- If the Attendee details exist in the system, an end-form will notify the End-User that this email has already been registered for the event.