This Accelerator helps users by providing a system for managing change control processes. This project allows the user to create, assign, and complete tasks for their change control process.
Key Features
- Users can create departments and associated resources.
- Change Activities can be associated with specific Resource Types and used to create Change Control Tasks.
- Change Activities can be copied between Resource Types.
- The ability to sign, complete, and cancel Change Control Tasks.
Considerations
- Users should have the Error Handling Accelerator installed before utilizing this Accelerator.
- The Error Handling Project should be installed prior to using Change Control Management.
- The Error Handling Project can be installed from the My Apps folder.
Main Flows
The key Flows in this build are listed below:
Create Department
This Flow allows the user to create a new department. It displays the Create Department form, allowing the user to specify a department name and the email address of the department manager. These details are used to create the new department.
Complete Change Control Task
This User Action Flow is used to complete a Change Control Task that has been assigned to the user. A Form is displayed showing the Resource Name, instructions, a text field for comments, and a file upload area. Upon filling out the form, the Change Control's state is changed to "Completed" and the comments are saved. The uploaded file is also saved. This action is only available to open tasks and can only be completed by the assignee.
Cancel Change Control Task
This User Action is used to cancel a Change Control Task that has been assigned to the user. a confirmation message is displayed, prompting the user to confirm that they want to cancel the task. The Change Control's state is then changed to "Cancelled." This action is only available on open tasks and can only be completed by the submitter.
How to Use Change Control Management
This section details how to use the Change Control Management project. This includes creating departments, creating Resource Types, and assigning, completing, and canceling tasks.
Create Department
- In the Change Control Management folder tree, navigate to the Change Control Resources dashboard. Click on the Resources tab.
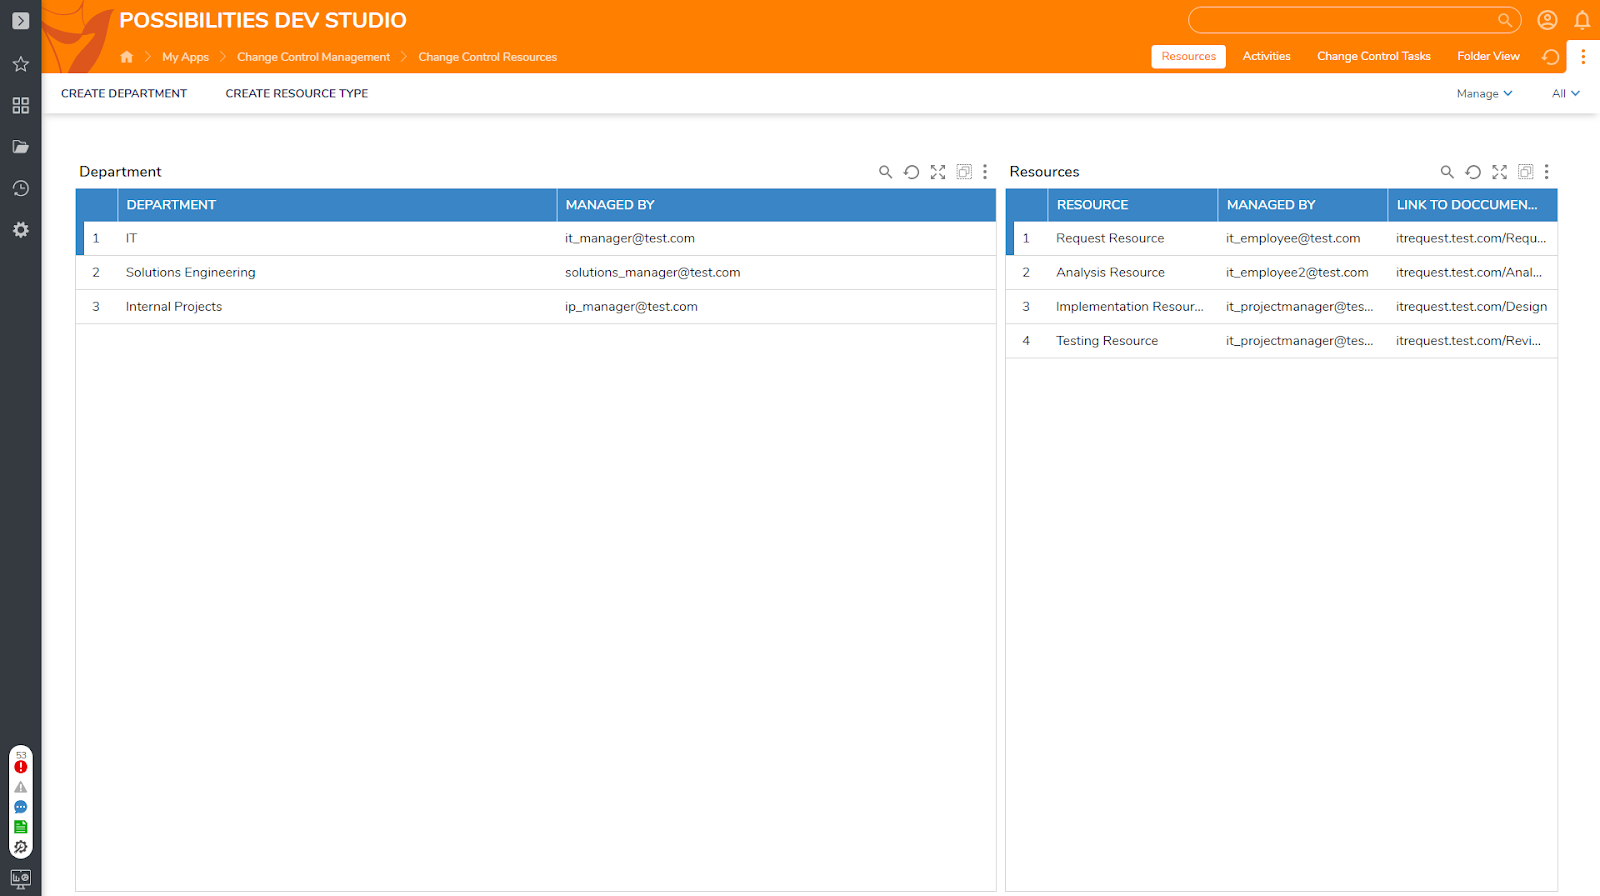
- Click the Create Department button in the top left corner of the action bar. A form will be displayed.
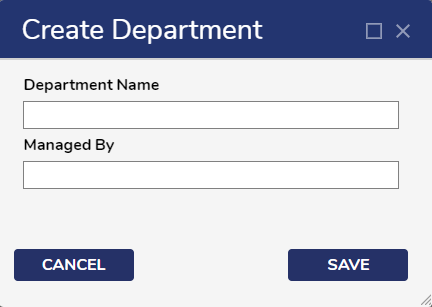
- Provide a department name and the email address of the individual managing the department.
- Click Save.
- The new department will be visible in the Department Report shown on the Page.
Create Resource Type
- In the Change Control Management folder tree, navigate to the Change Control Resources dashboard. Click on the Resources tab.
- Click the Create Resource Type button in the top left corner of the action bar. A form will be displayed.
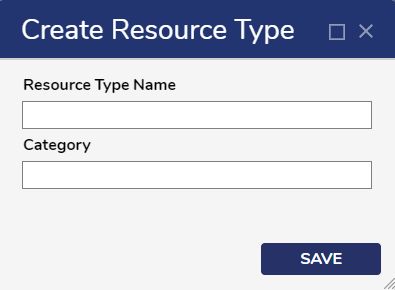
- Provide the Resource Type Name and Category in the form.
- Click Save.
Create Resource
Resources are specific to a department and have an associated Resource Type. The department and Resource Type should be created prior to creating a new Resource.
- In the Change Control Management folder tree, navigate to the Change Control Resources dashboard. Click on the Resources tab.
- In the Department Report on the left side of the page, right click on the department that you want to create a Resource for.
- Click the Create Resource user action. A form will be displayed.
- In the form, the user will provide a name, description, documentation link, and manager email for the Resource. The user will also select the associated Resource Type.
- Click Save.
- The new Resource will be visible in the Resource Report on the right side of the page.
Create Activities
Change Activities are associated with a specific Resource Type. The Resource Type should be created prior to creating new Activities.
- In the Change Control Management folder tree, navigate to the Change Control Resources dashboard. Click on the Activities tab.
- In the Resources Type Report on the left side of the page, right click on the Resource Type that you want to create Activities for.
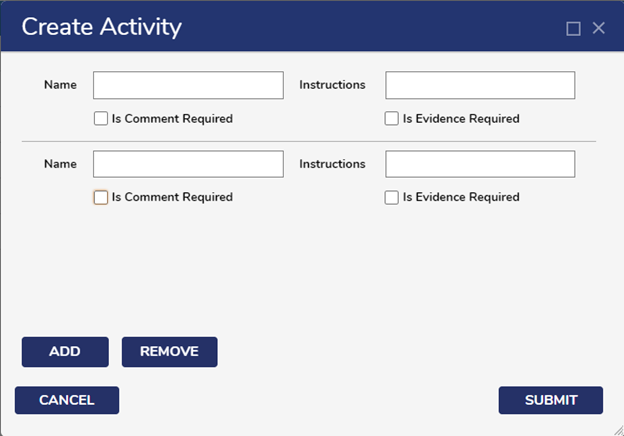
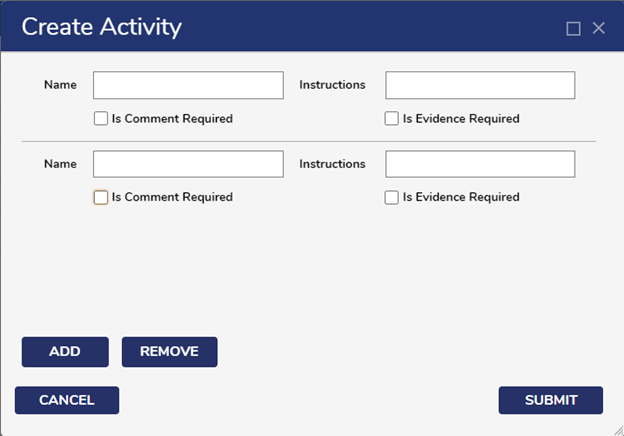
- On the form, enter the name and instructions for the new Activity. If the assignee will need to provide comments for the task, click the Is Comment Required checkbox. If the assignee will need to upload a file or document for the task, click the Is Evidence Required checkbox.
- To create multiple Activities, click the Add button and provide the details for the additional Activities.
- To remove an Activity, make sure it is selected and click the Remove button.
- Once all desired Activities have been added, click Submit.
Copy Activities
Activities can be copied between Resource Types.
- In the Change Control Management folder tree, navigate to the Change Control Resources dashboard. Click on the Activities tab.
- In the Resource Type Report on the left side of the page, click the Resource Type that has the activities that you wish to copy. This will update the child report on the right side of the page, allowing you to see its associated Change Activities.
- In the Change Activity Report on the right side of the page, right click on the Change Activity that you wish to copy.
- Click the Copy Activities user action.
- In the form, select the Resource Type that you want to copy the Activities to.
- Click Move.
Assign Change Control Task
Change Controls have an associated Resource. The Resource and Activity should be created prior to assigning a task.
- In the Change Control Management folder tree, navigate to the Change Control Resources dashboard. Click on the Resources tab.
- In the Resource Report on the left side of the page, right click on the Resource that you want to assign a task for.
- Click on the Assign Change Control Task user action.
- On the form, select the Activity and desired assignee for the task. Comments and additional information can be added in the Additional Notes textbox.
- Click Assign Task.
- This action can also be completed from the Department View, Resource View, Change Control Page, or the Change Control History dashboard.
Complete Change Control Task
Change Control Tasks can only be completed by the assignee. The action is only available for tasks that are still open.
- In the Change Control Management folder tree, navigate to the Change Control History dashboard.
- From the My Change Control Tasks Report, right click on the desired task.
- Click the Complete Change Control Task user action.
- The assignment can be completed from popup notification or email notification. This will open the task form.
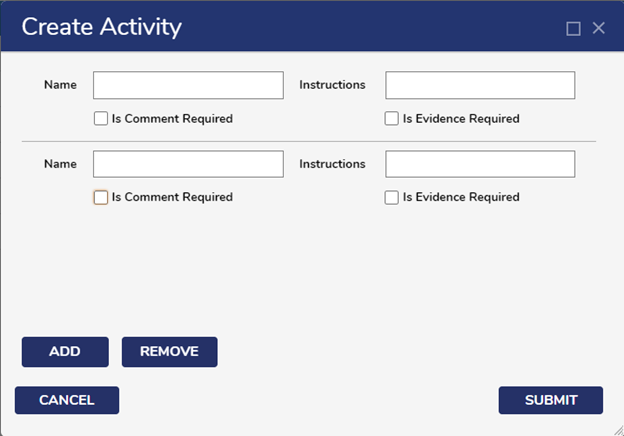
- The form will display the Resource Name and Instructions. The user can also provide comments and upload evidence.
- Click Complete Task.
- This action can also be completed from the Department View, Resource View, or Change Control Page.
Cancel Change Control Task
Change Control Tasks can only be canceled by the submitter. The action is only available for tasks that are still open.
- In the Change Control Management folder tree, navigate to the Change Control History dashboard.
- From the My Change Control Tasks Report, right click on the desired task.
- Click the Cancel Change Control Task user action.
- A confirmation message will be displayed.
- Click Cancel.
- This action can also be completed from the Department View, Resource View, or Change Control Page.