The Annual Holiday Manager Accelerator provides a user-friendly interface for End-Users to submit holiday requests, and intuitively organize requests for Administrators. This Accelerator includes pre-configured Designer Elements, like the Generate Holidays Flow, which creates holidays based on where the office is located. This Flow retrieves holiday manager settings and automatically creates a specified list for each holiday calculation.
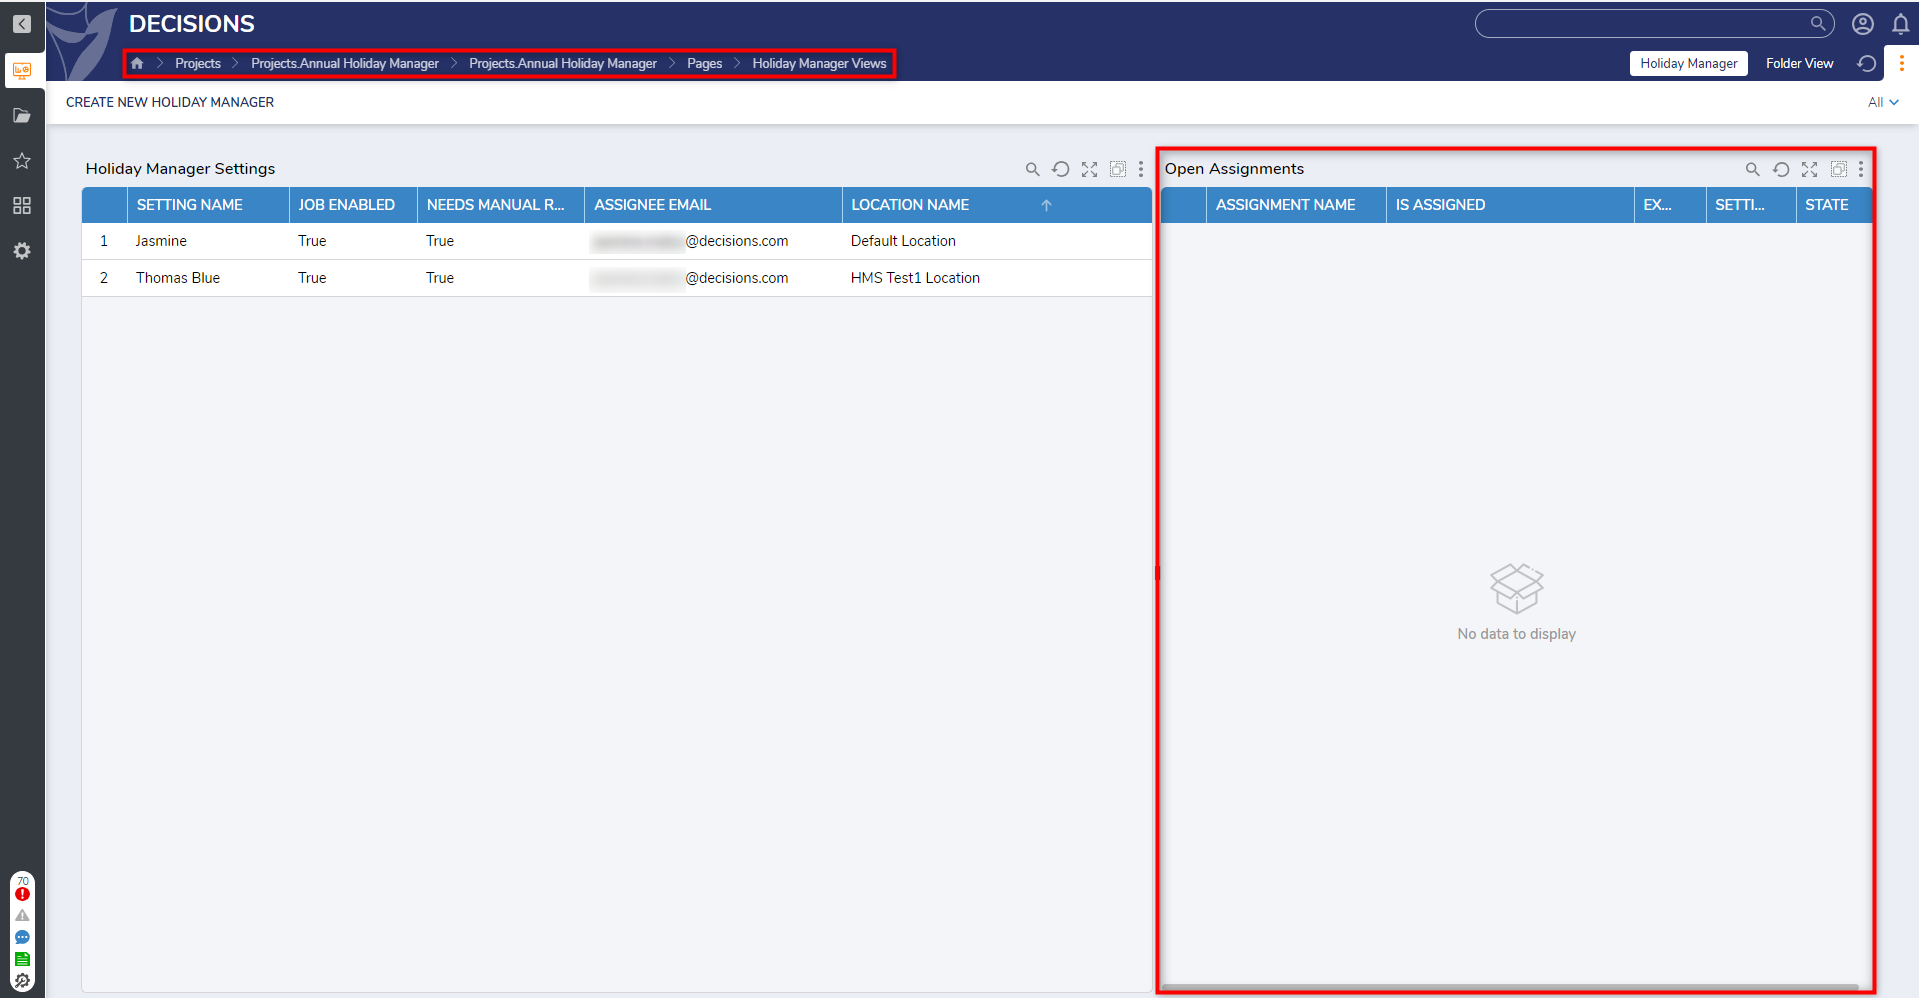
Administrators will receive an email when Users submit a holiday and can approve or deny the request from the Holiday Manager Views Dashboard by navigating to the Open Assignments Report.
The Annual Holiday Manager Accelerator effectively configures and handles custom holiday requests.
Installing App Store Applications
- Navigate to the App Store in the Projects tab (v9) or in the Folders tab (v8).
- Search for the Annual Holiday Manager and select Details.
- On the App Details Page, select INSTALL.
Key Features
- Users are able to make their own customized holiday list in a year.
- The ability to select multiple locations.
- The ability to send for manual review once holidays are created.
- Reviewers will receive an email with the list of holidays to approve or deny.
- Users can also submit One Time Holidays for existing holiday managers.
Considerations
- Users should have the Error Handling Accelerator installed before utilizing this Accelerator.
- After importing the project, the user needs to enable the Scheduled Job in the Systems folder. To enable the Scheduled Job:
- Navigate to System > Jobs and Events > Scheduled Jobs > Annual Holiday Manager.
- Right-click on the job and select Enable Job.
- By default, this Scheduled Job runs once a year on January 30th. Users will need to edit the settings for it run on a different schedule. To modify these settings:
- Navigate to System > Jobs and Events > Scheduled Jobs Folder.
- Right-click on the Annual Holiday Manager Scheduled Job.
- Select Edit Scheduled Job.
- In the Calendar Information section, Users can edit the Yearly Schedule Information. The start date for the Scheduled Job can be changed in the Job Settings section.
- Once the desired changes have been made, click Ok.
- Before using the Annual Holiday Manager Scheduled Job, the user will need to create office locations in their Decisions server. To create office locations:
- Navigate to Settings > SystemData > Locations folder.
- In the top left, click Add Location and provide necessary location information and business hours.
- Click Save.
- Repeat this process for all impacted office locations.
Main Flows
Generate Holidays
This Flow is used to create holidays based on office locations. It will fetch the Holiday Manager Settings and create a specified Holiday List for each holiday calculation. If the holiday requires manual review, the Flow triggers the holiday assignment task, and notifies the assignee via email. If manual review is not required, the created holiday is saved.
.png)
Annual Holiday Generator Scheduled Job
This is the primary Flow which asynchronously runs over all Holiday Manager Settings. The Flow will fetch enabled jobs from the holiday manager settings and generate a new Holiday List.
.png)
Add Specified Holiday to List
This Flow checks with the Date Calculation Method option selected and matches the calculation method accordingly. If the date calculation method selected is "Last Weekday of Month," then the Flow path goes to the calculation of the last weekday of the month. If the date calculation method is "Xth Weekday In Month," then it is going to calculate Xth weekday in a month. In this case, it will initialize the weekday count, parse the date in the desired month, loop through 31 iterations, and check if the date of the week is equal to the weekday. If it is equal, it will add 1 to the weekday count in the loop and calculate the Xth weekday before finally adding it to the Holiday List.
.png)
How to Use Annual Holiday Manager
Create/Update/Delete Holiday Managers
Creating a new Holiday Manager:
- In the Annual Holiday Manager Folder tree, navigate to the Holiday Manager Views Dashboard.
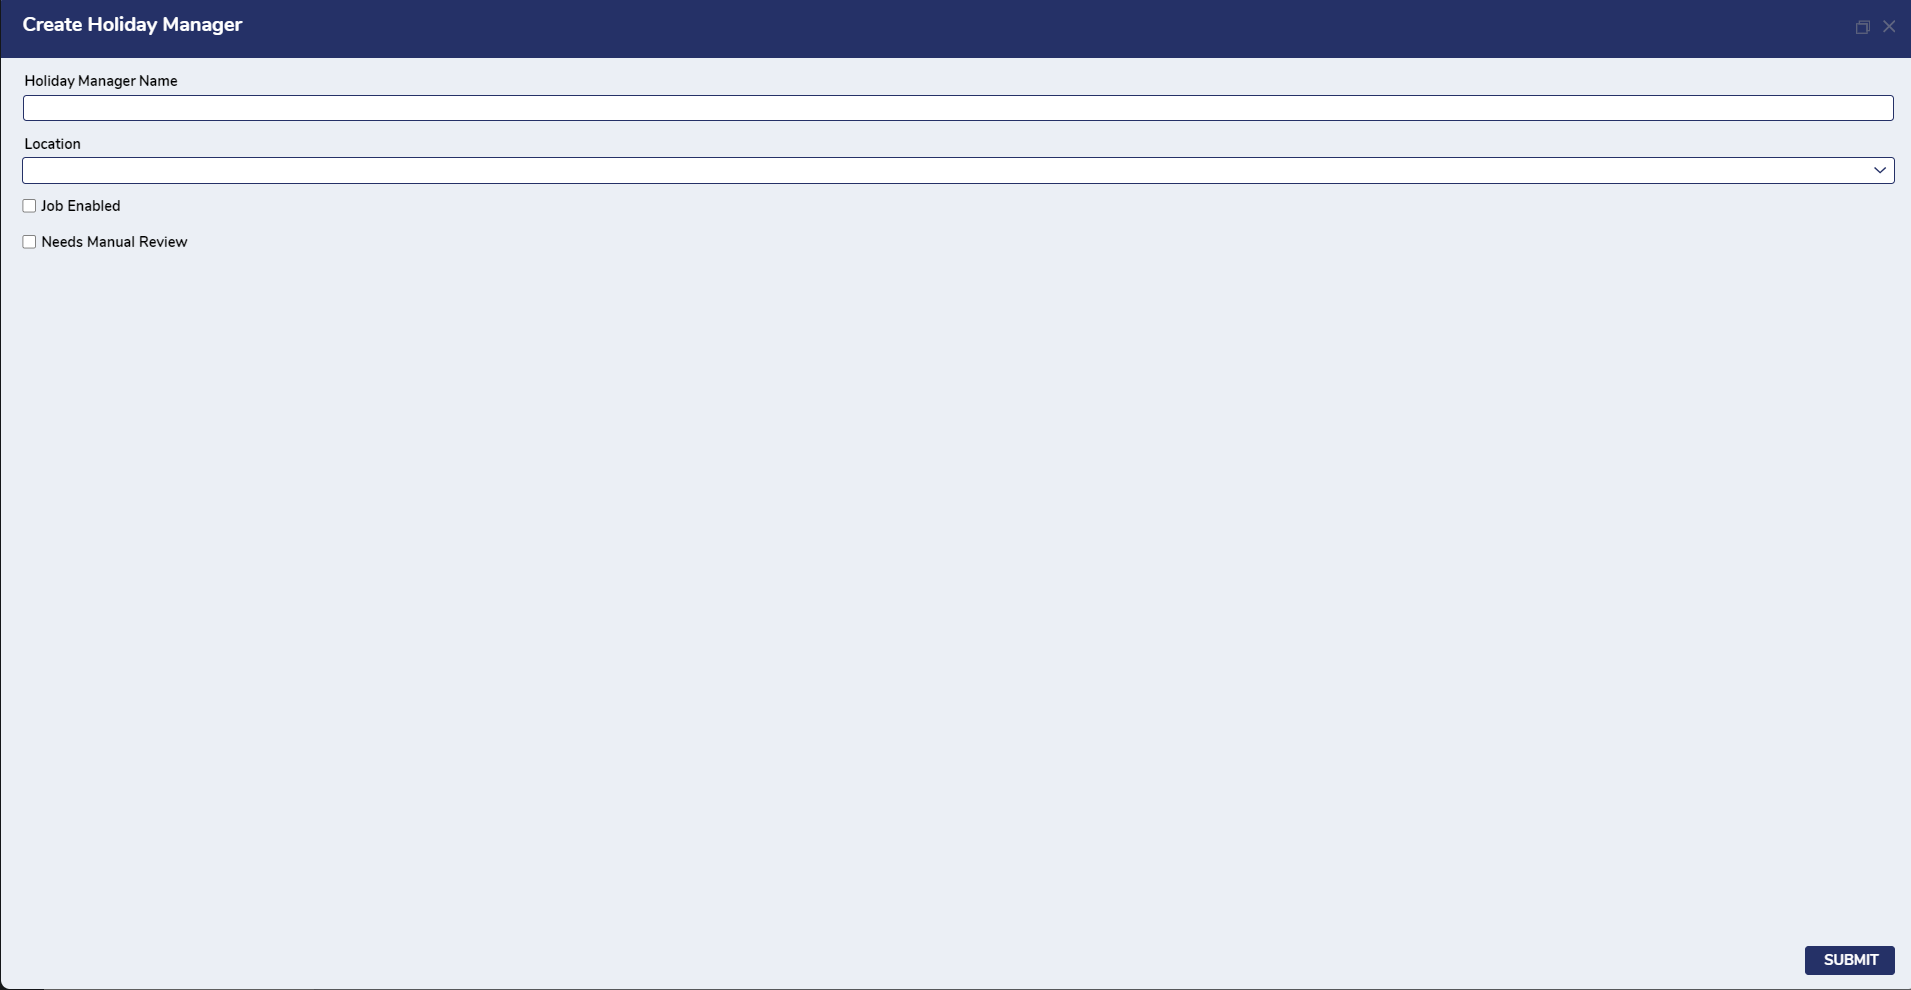
- In the top left of the Page, click the Create New Holidays Manager button.
- In the Form, enter the Holiday Manager Name and select the impacted Location.
- Select Job Enabled to run the created holiday calculations.
- If holidays require manual review, select Needs Manual Review. From the Dropdown list, select the Assignee Email.
- Click Submit.
Updating a Holiday Manager:
- In the Annual Holiday Manager Folder tree, navigate to the Holiday Manager Views Dashboard.
- On the Holiday Manager Settings Report, right-click the Holiday Manager that needs to be updated.
- Select the Update Holiday Manager Settings User Action.
- From the Form, the user can update the Holiday Manager Name, Job Enabled, and Manual Review settings. The office location cannot be updated.
- Once the desired changes have been made, click Update to store the changes.
.png)
Deleting a Holiday Manager:
- In the Annual Holiday Manager Folder tree, navigate to the Holiday Manager Views Dashboard.
- On the Holiday Manager Settings Report, right-click the Holiday Manager that needs to be deleted.
- Select the Delete Holiday Manager Settings User Action.
- A message Form will be displayed asking the user to confirm that they want to delete the Holiday Manager Settings. To delete these settings, click Yes.
- This action will delete all Holiday Calculations that were created under those settings.
Create/Update/Delete Holiday Calculations
Creating New Holiday Calculations:
- Once the Holiday Manager is created, Holiday Calculations can be created from the Holiday Manager Views Dashboard or the Dashboard for the specific Holiday Manager Settings.
- From the Holiday Manager Views Dashboard, the user can right-click on the Holiday Manager in the Holiday Manager Settings report and select the Create Holiday Calculation(s) User Action.
- Alternatively, the user can left-click on the Holiday Manager to navigate to the page for those settings. From there, the user can click the Create Holiday Calculation(s) button in the top-left.
- To create calculations, enter the name of the holiday you want to add and select the type of date calculation method. There are three different calculation methods in the Drop-down menu:
- Fixed Day in Month is for holidays that occur on the same date every year. When selecting this calculation method, Users will also need to enter the Expected Month and Expected Day as integers. For example, a holiday that is always on October 31st would have an expected month of 10 and an expected day of 31.
- Xth Weekday in Month is for holidays that occur on a certain weekday in a specific month. For this calculation method, Users will need to specify the Expected Month and Xth Weekday as integers and select the Weekday Name from the Drop-down list. For example, a holiday that is on the fourth Thursday of November would have an expected month of 11, an Xth weekday of 4, and the weekday name would be Thursday.
- Last Weekday of Month is for holidays that occur on the last weekday of a specific month. The user will need to specify the Expected Month as an integer and select the Weekday Name from a Drop-down list. For example, a holiday that is on the last Sunday in May would have an expected month of 5 and a weekday name of Sunday.
- Users can also add multiple calculations using the Add Calculation button at the bottom left. This will add a new row to specify a calculation.
- To remove a calculation, select the row containing the calculation and click the Remove Calculation button in the bottom left.
- Once all calculations have been entered, click Submit.
- Created calculations will appear on the right side of the Holiday Manager Settings page in the Holiday Calculations report. For the calculations to also appear in the Holiday Settings calendar report on the left side of the Page, Users will need to run the Scheduled Job Flow.
- To view the Report in a calendar view, click on the three dots on the top-right side of the Report. Click on the second icon under Views to view the calendar.
.png)
To update a Holiday Calculation:
- In the Holiday Calculations Report, right-click on the desired calculation and select the Update Holiday Calculation User Action.
- In the Form, the user can update the Holiday Name, Date Calculation Method, and associated fields.
- Once the desired changes have been made, click Update.
To delete Holiday Calculations:
- In the Holiday Calculations report, right-click on the desired calculation and select the Remove Holiday Calculation(s) User Action. Multiple calculations can be deleted using CTRL + right-click followed by clicking the checkbox next to the desired Holiday Calculations.
- A message form will be displayed asking the user to confirm that they want to delete the selected calculation(s).
- To delete the calculation(s), select Yes.
Submit One Time Holidays
Users can also create one-time holidays. These are non-recurring holidays that occur on a specific date and do not have an associated calculation method.
- On the page for the specific Holiday Manager Settings, click the Submit One Time Holiday(s) button in the top middle.
- Alternatively, this user action can be executed from the Holiday Manager Settings report on the Holiday Manager Views Dashboard.
- On the Form, specify the Holiday Name and Date.
- To add another one-time holiday, click the Add Holiday button. Another row will be populated on the form.
- To remove a holiday, select the desired row and click the Remove Holiday button.
- Once the desired holidays have been specified, click Submit.
- One-time holidays will be visible in the Holiday Settings report.
- These holidays can be deleted by right-clicking on the holiday from the Holiday Settings report and selecting Manage > Delete Holiday. A message will be displayed, prompting the user to confirm the deletion.

Review Open Assignments
- The open assignments will show on the right side of the Holiday Manager Views Dashboard in the Open Assignments Report.
- Open assignments can be closed directly from the Dashboard or from the assignee email.
- From the Dashboard, left-click on the assignment and select Review Holidays.
- From the email sent to the assignee, click Respond to This Task and submit the manual review.