Overview
The Designer Repository contains all shared Designer Projects that have been stored and saved within an environment. These Projects can be accessed from, Checked out from, or Added to the Decisions Repository.
To take full advantage of the Repository Actions, entities can be assigned to the correct Project, and a Designer Project can be added. The following document demonstrates how to use the Designer Repository in Decisions.
Add a Project to the Repository
To add and attach Entities to a Project on the Repository:
- Navigate to the desired Designer Project.
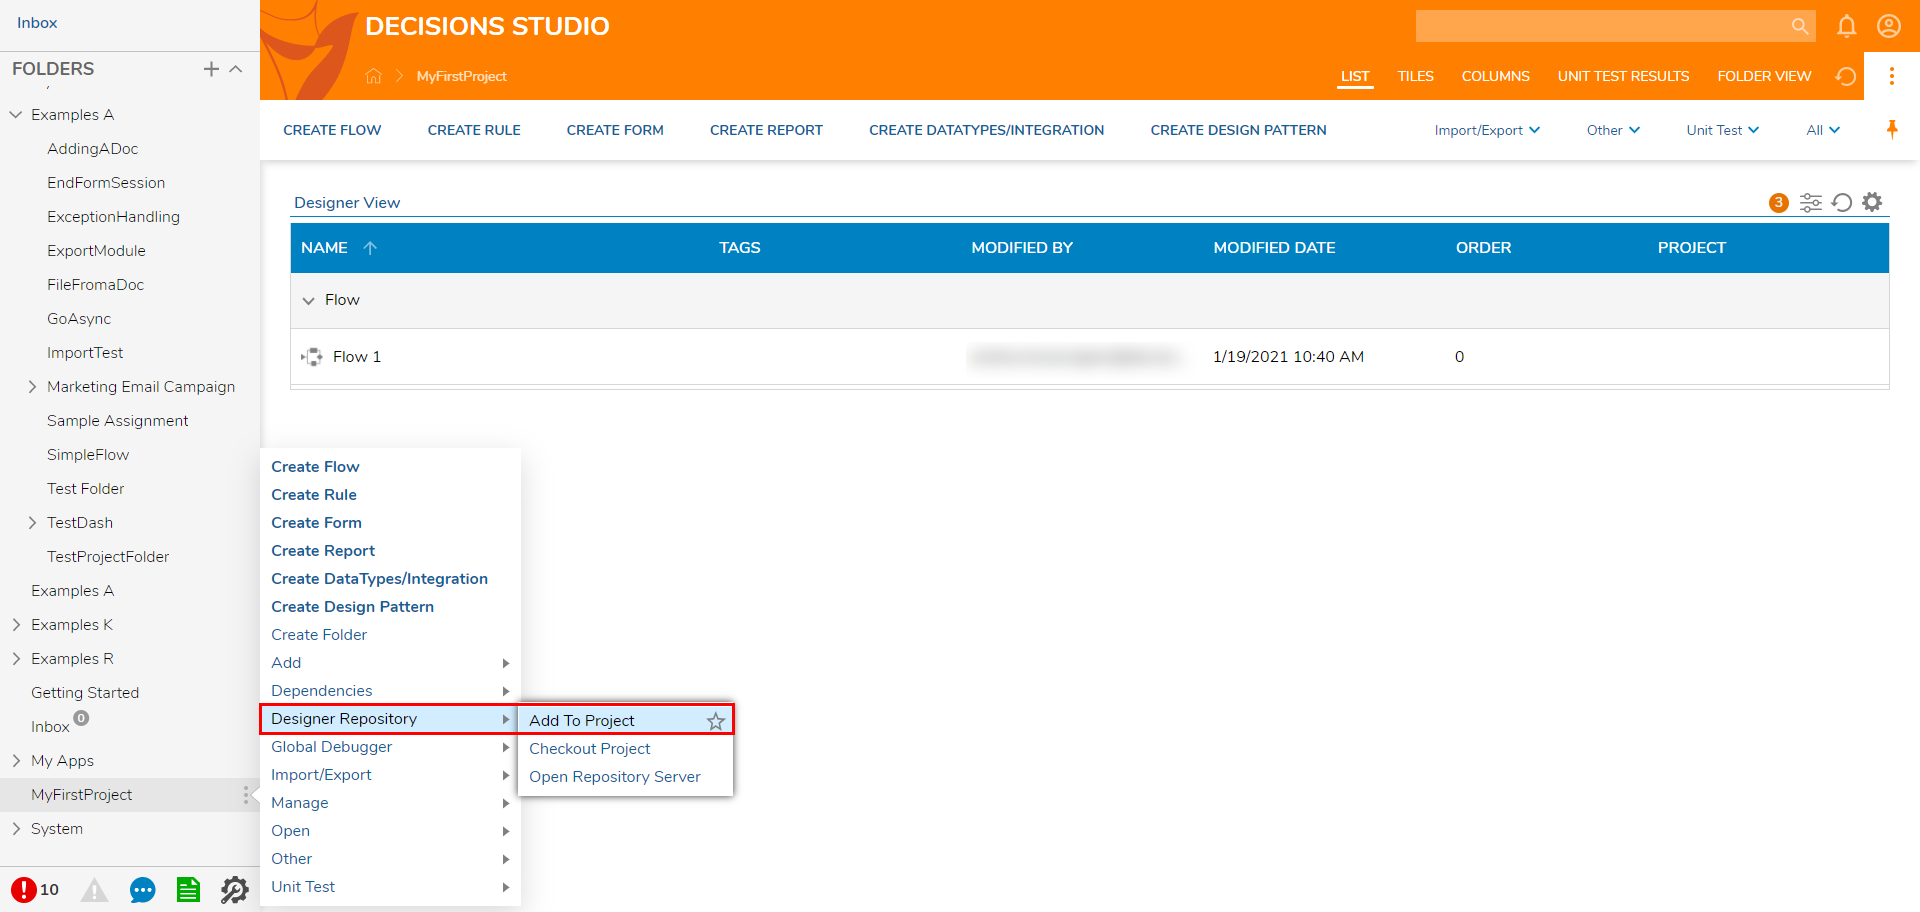
- Right-click the Designer Project, select the Designer Repository, and choose and Add to Project.Note on Checking in Single ItemsNote that if a user wishes to Check In a single Item (such as a Flow, Data Structure, etc...) to the Designer Repository, it must be assigned to a Project. This Project may be created either for the Checked In Item or a pre-existing one.
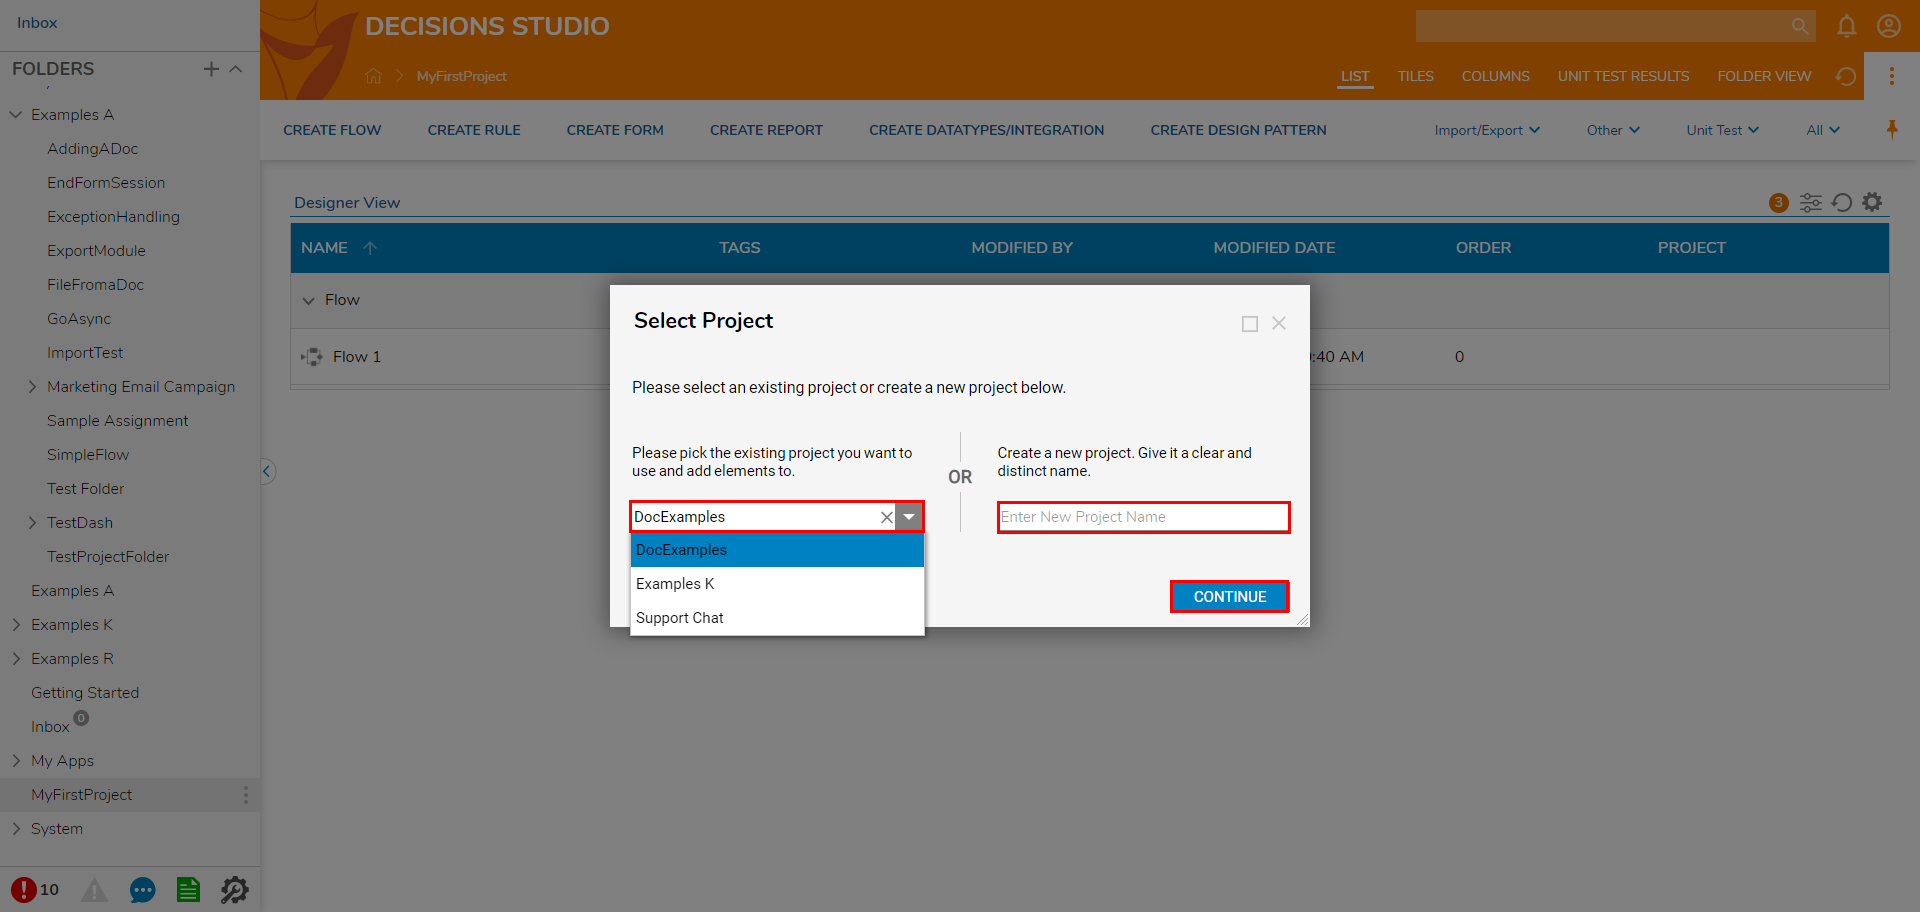
- Either Select an existing project, or Create a new Project by Entering New Project Name, then click CONTINUE.
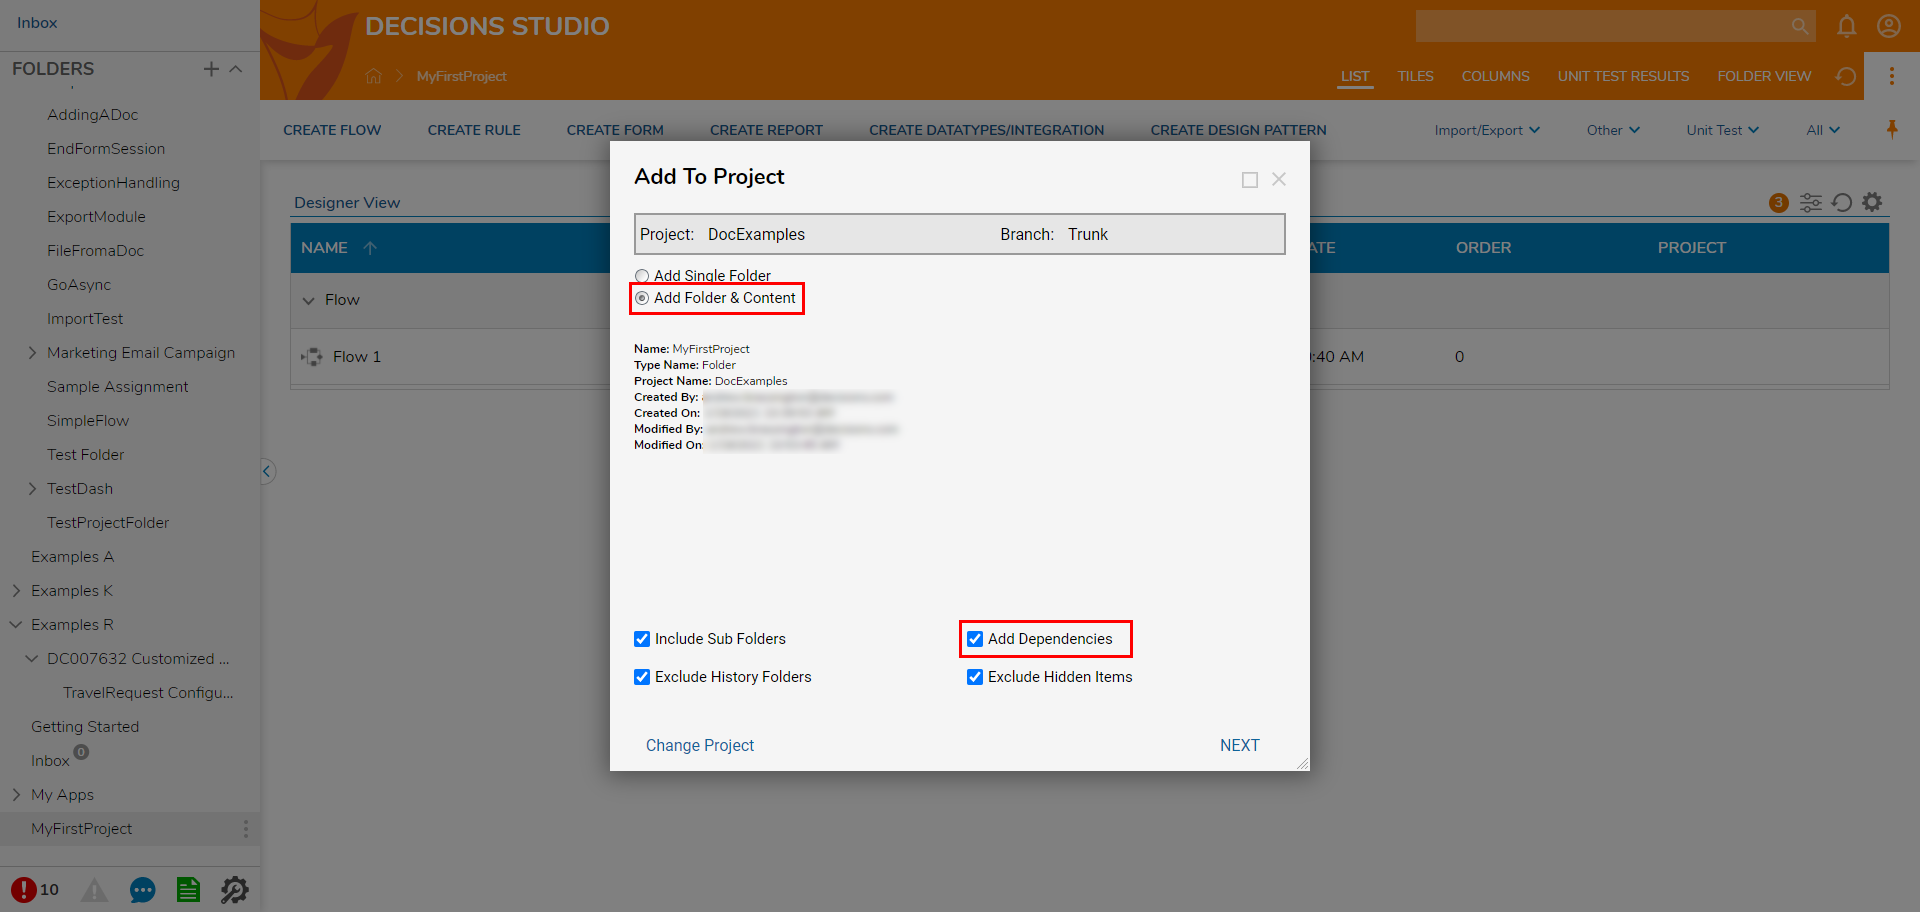
- Choose either Add Single Folder or Add Folder & Content, then click NEXTIf Add Folder & Content is selected, users can Include Sub Folders, Add Dependencies, Exclude History Folders, and/or Exclude Hidden Items.
- Ensure that Add Dependencies is checked, then click NEXT. Including all dependencies helps to ensure the avoidance of any conflict or issues in adding to the Project.
- Reviewed the checked items, then click ADD.
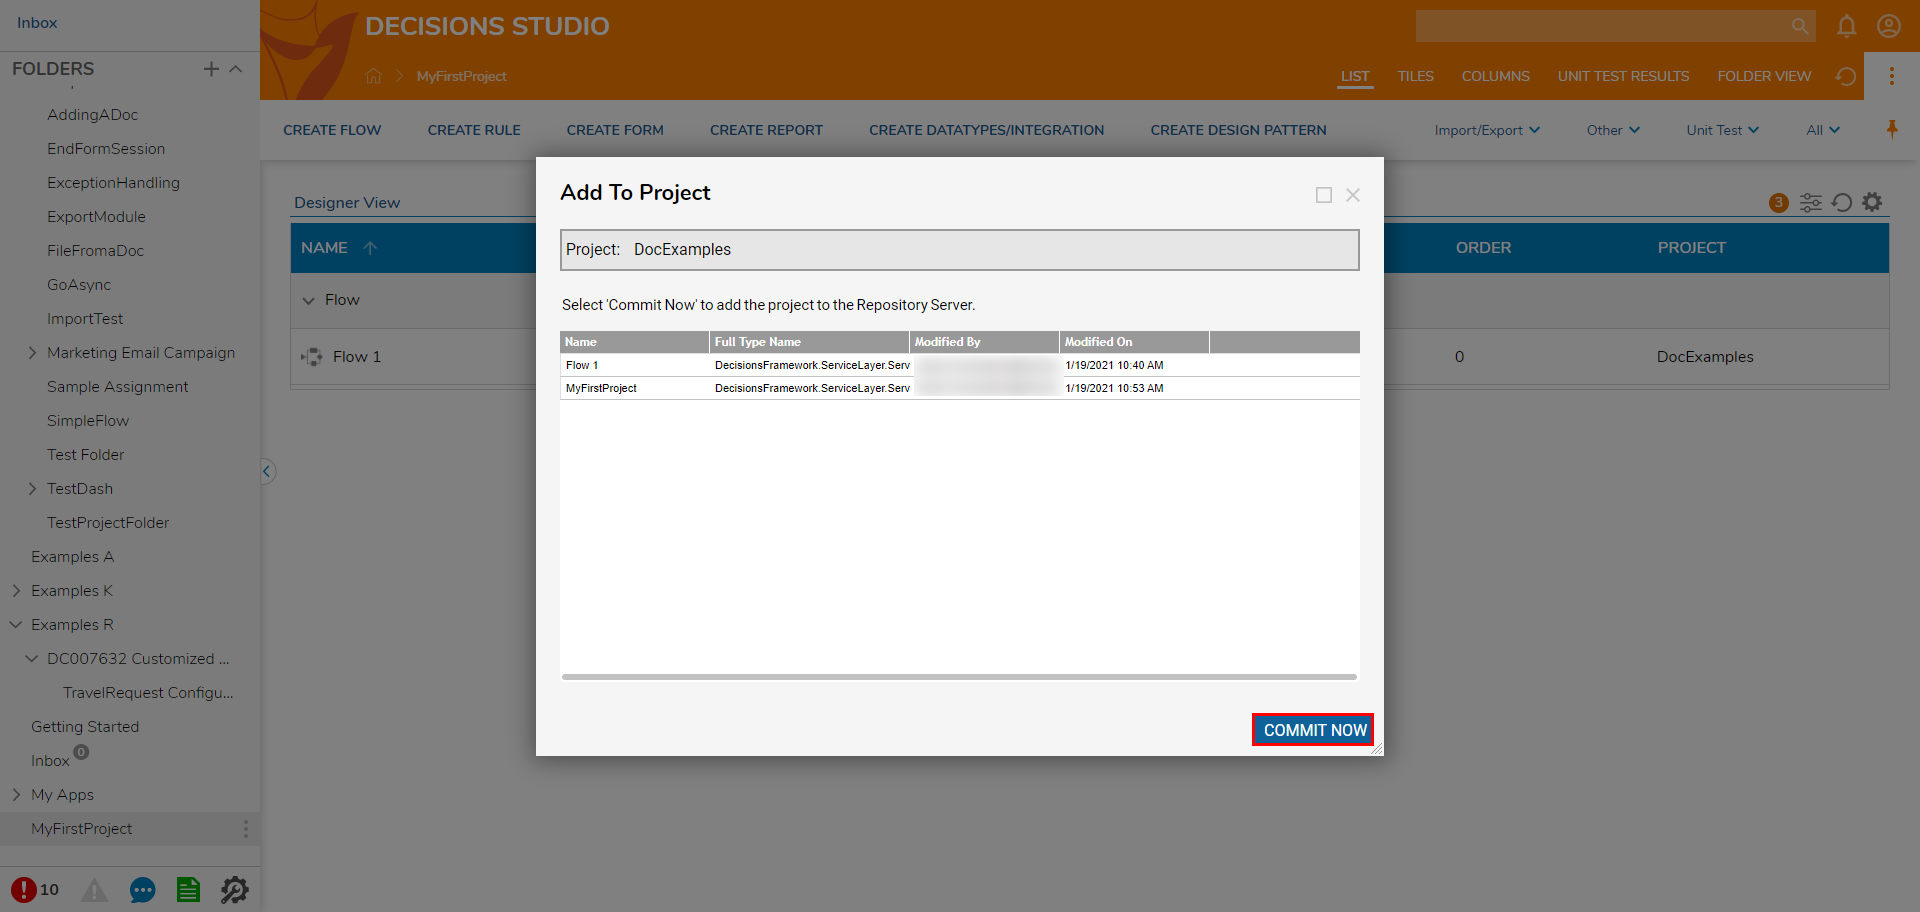
- Click COMMIT NOW to finish adding the Project to the Repository Server.
Checkout/Update Project from Repository
To Checkout/Update a Project from the Designer Repository to the Decisions Server:
- Log in to the Decisions Server (Prod/Dev/UAT).
- Navigate to System > Designers > Repository.
- Select the CHECKOUT/UPDATE PROJECT button from the top Action bar.
- Search for a select the desired Project, choose the Branch, then click CHECKOUT.
- If any items require updating, select UPDATE. If not, close out the window via X. The Designer Repository window will display all associated Project Data that needs to be updated.

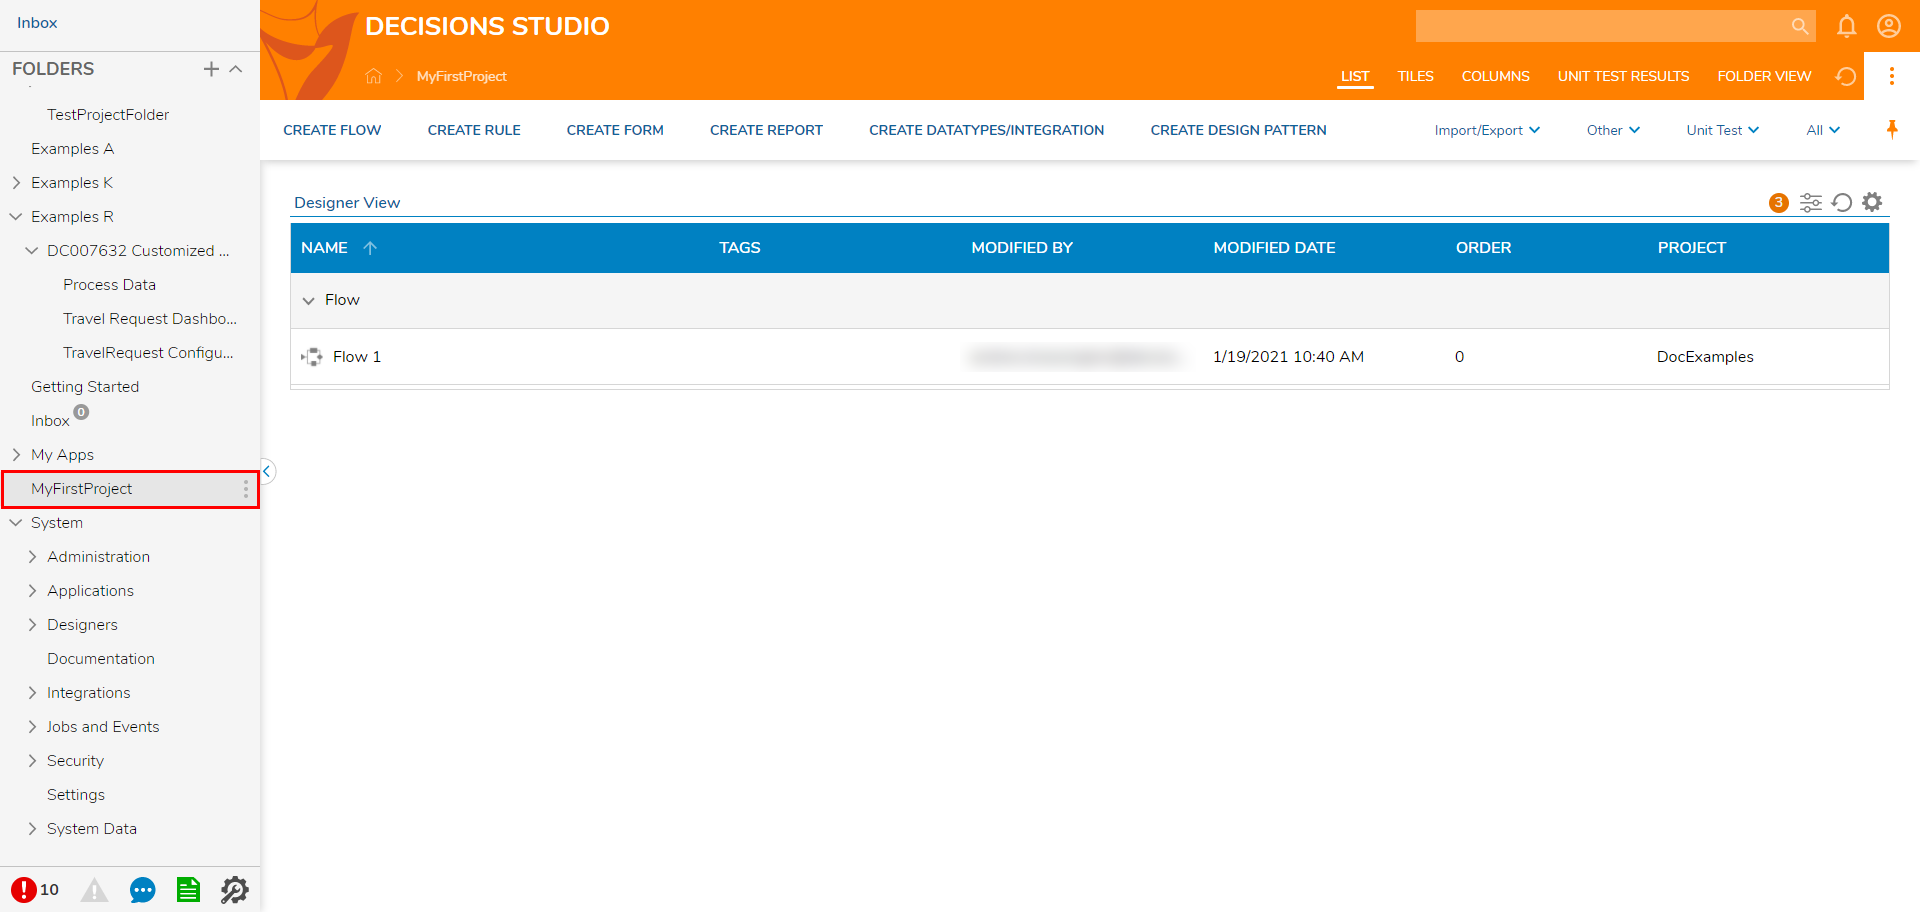
After the Project has been checkout from the Designer Repository, the Project will be available in Designer Folders. This is an image of the selected Project.
Removing/Detaching Entities From Project
To remove an Entity from a Project:
- Right-click the Entity.
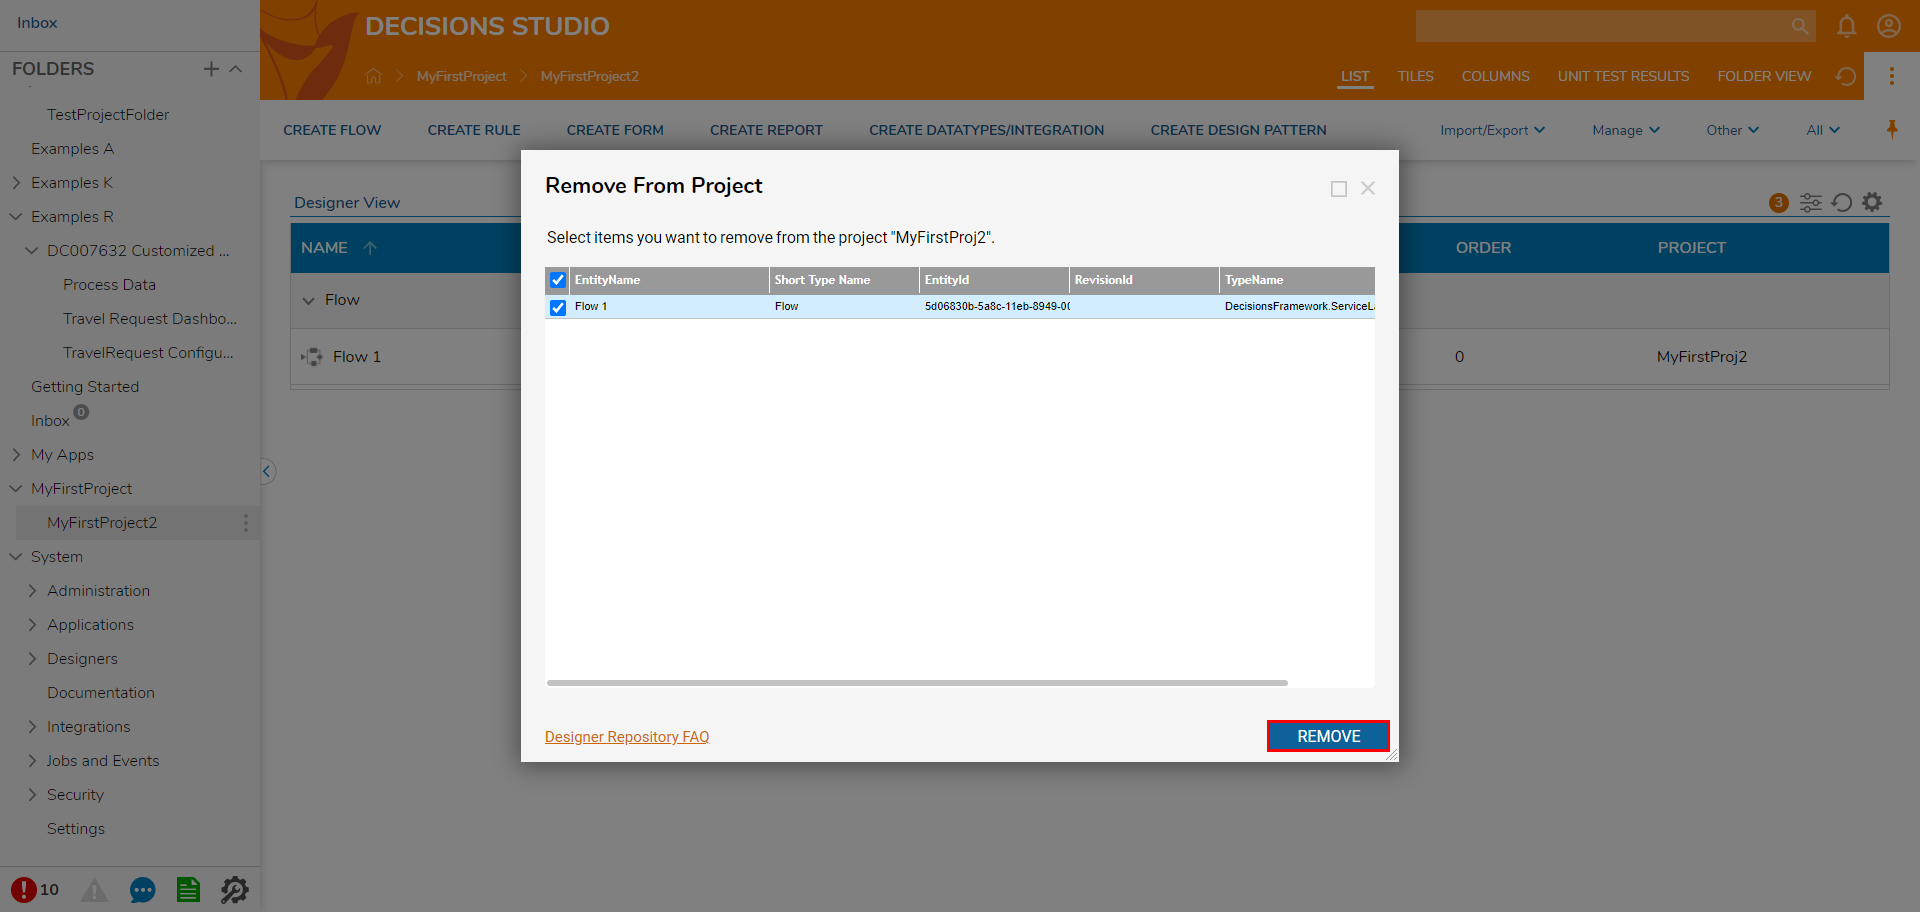
- Select Designer Repository > Remove from Project [Project Name].
- Confirm with YES
- Check the Entity that is desired for removal and select REMOVE.Removing the Entity will remove it from the Project and any association with that Project.
Committing/Sending Project Changes To the Repository
Any Project changes that have been made to the Repository Server can be manually sent forward.
To do so:
- Right-click the desired Entity.
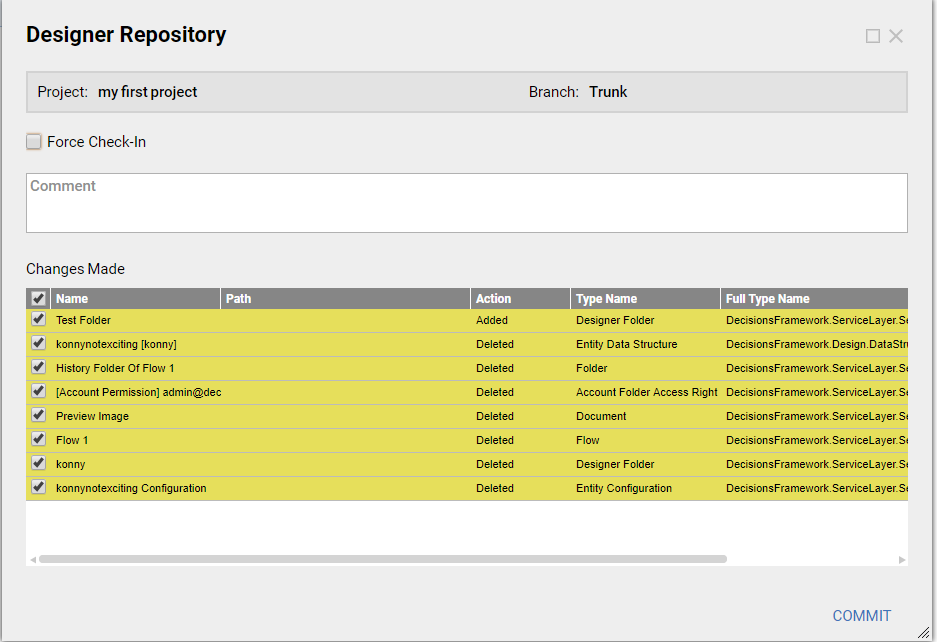
- Select Designer Repository > Checkin Changes for Project [Project Name].
- Select all the Entities that need to be updated then click COMMIT.
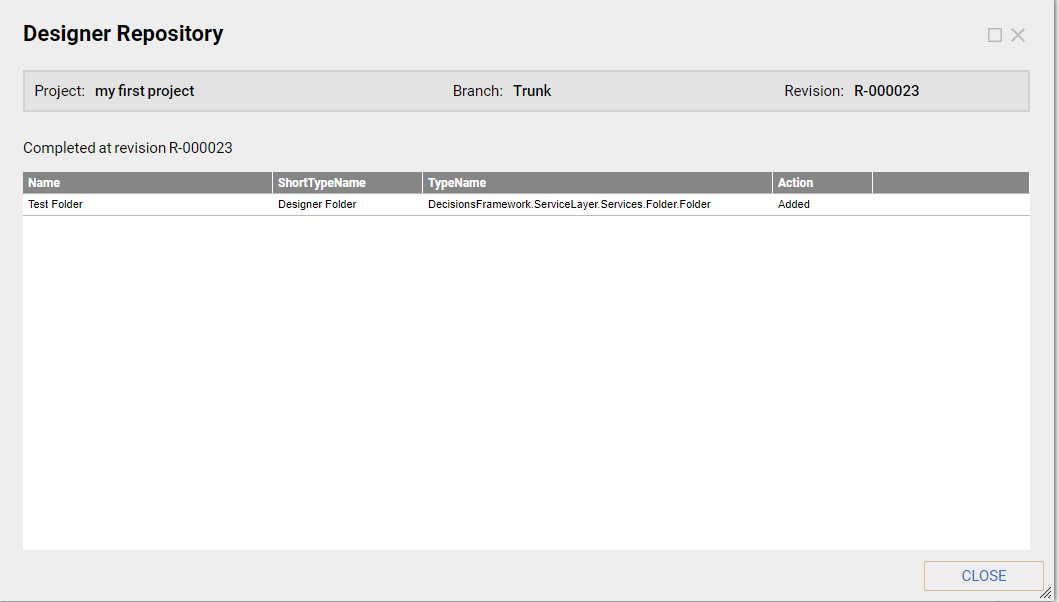
- Select CLOSE after confirming that the Changes were committed.
Revert Changes In Project
This option allows the user to revert back any changes that may have been made in the Project.
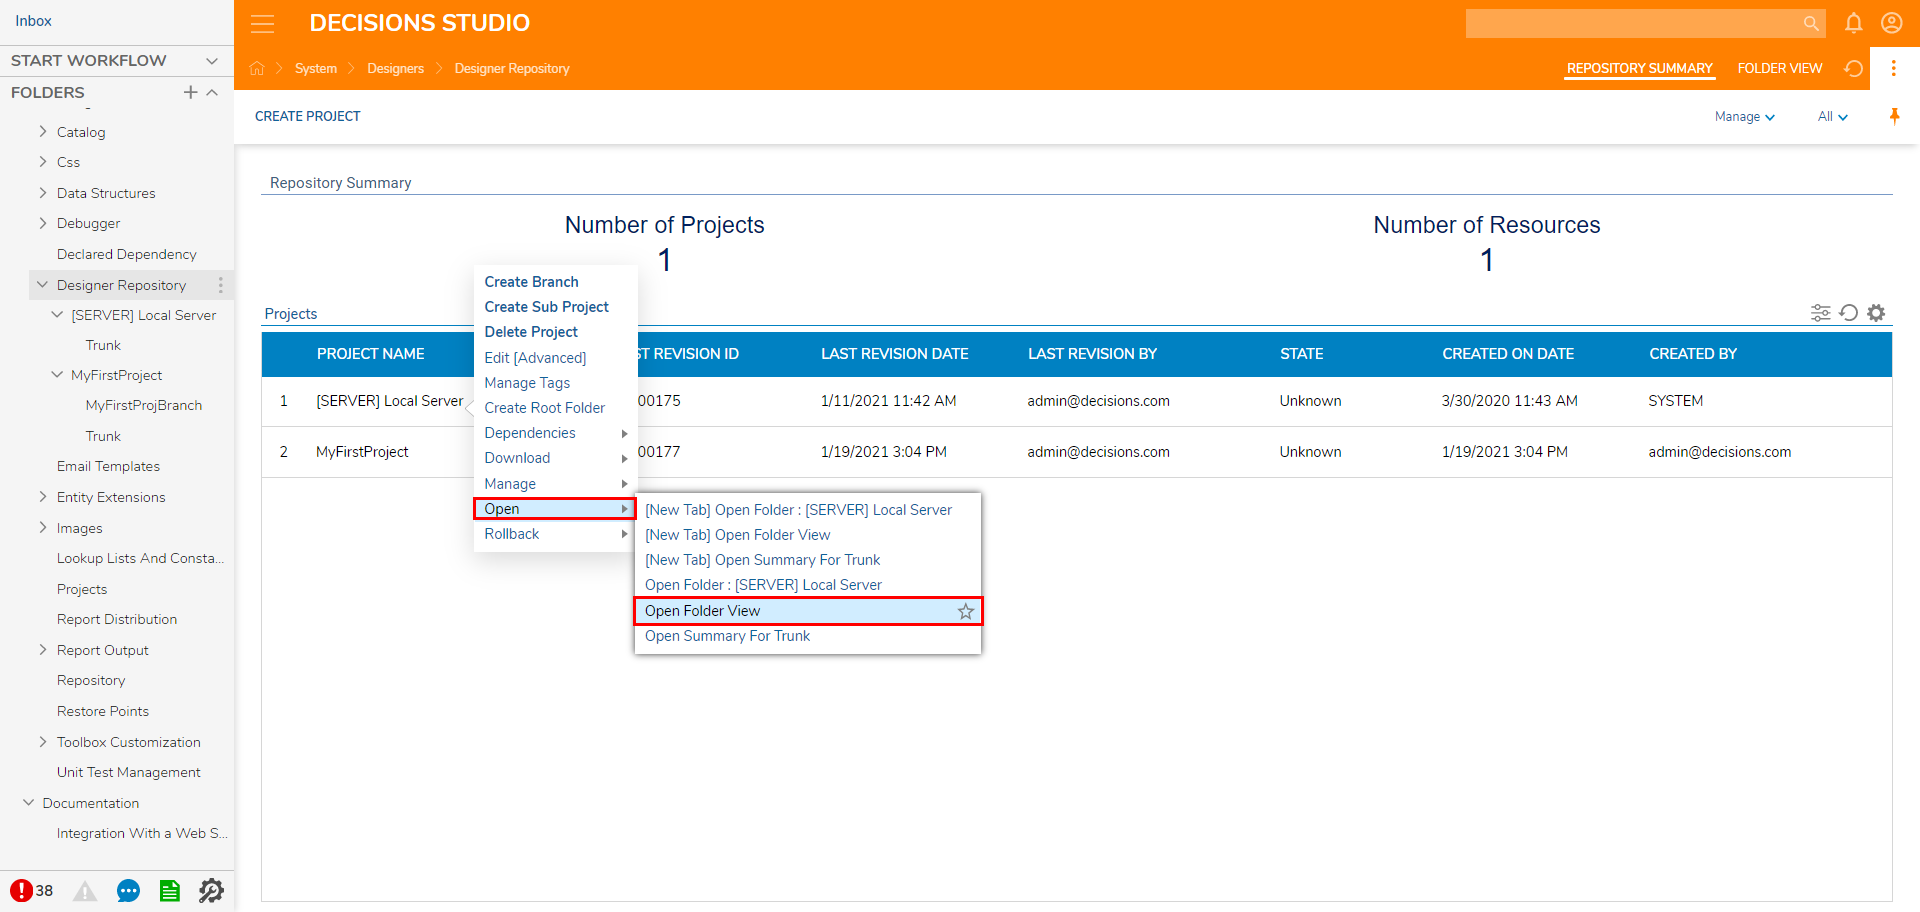
- Right-click the desired Project.
- Select Open > Open Folder View.
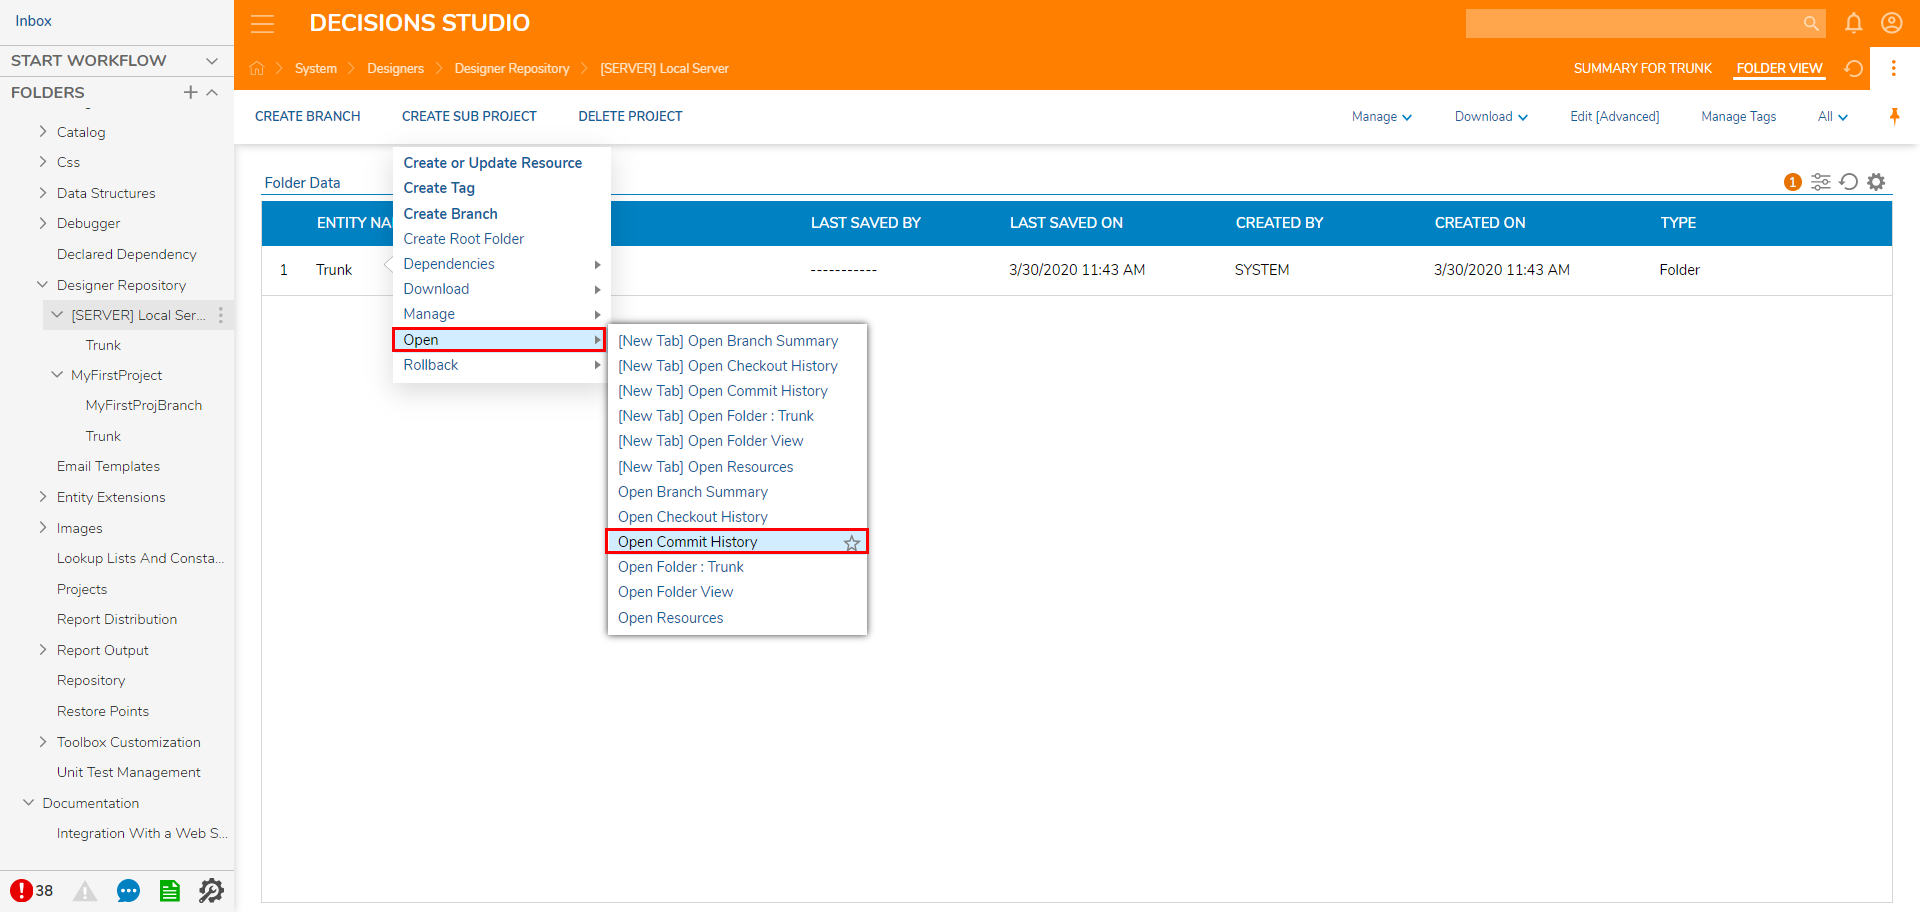
- Right-click the Entity Name and select Open > Open Commit History.
- Right-click the desired Revision ID and select Revert Revision.
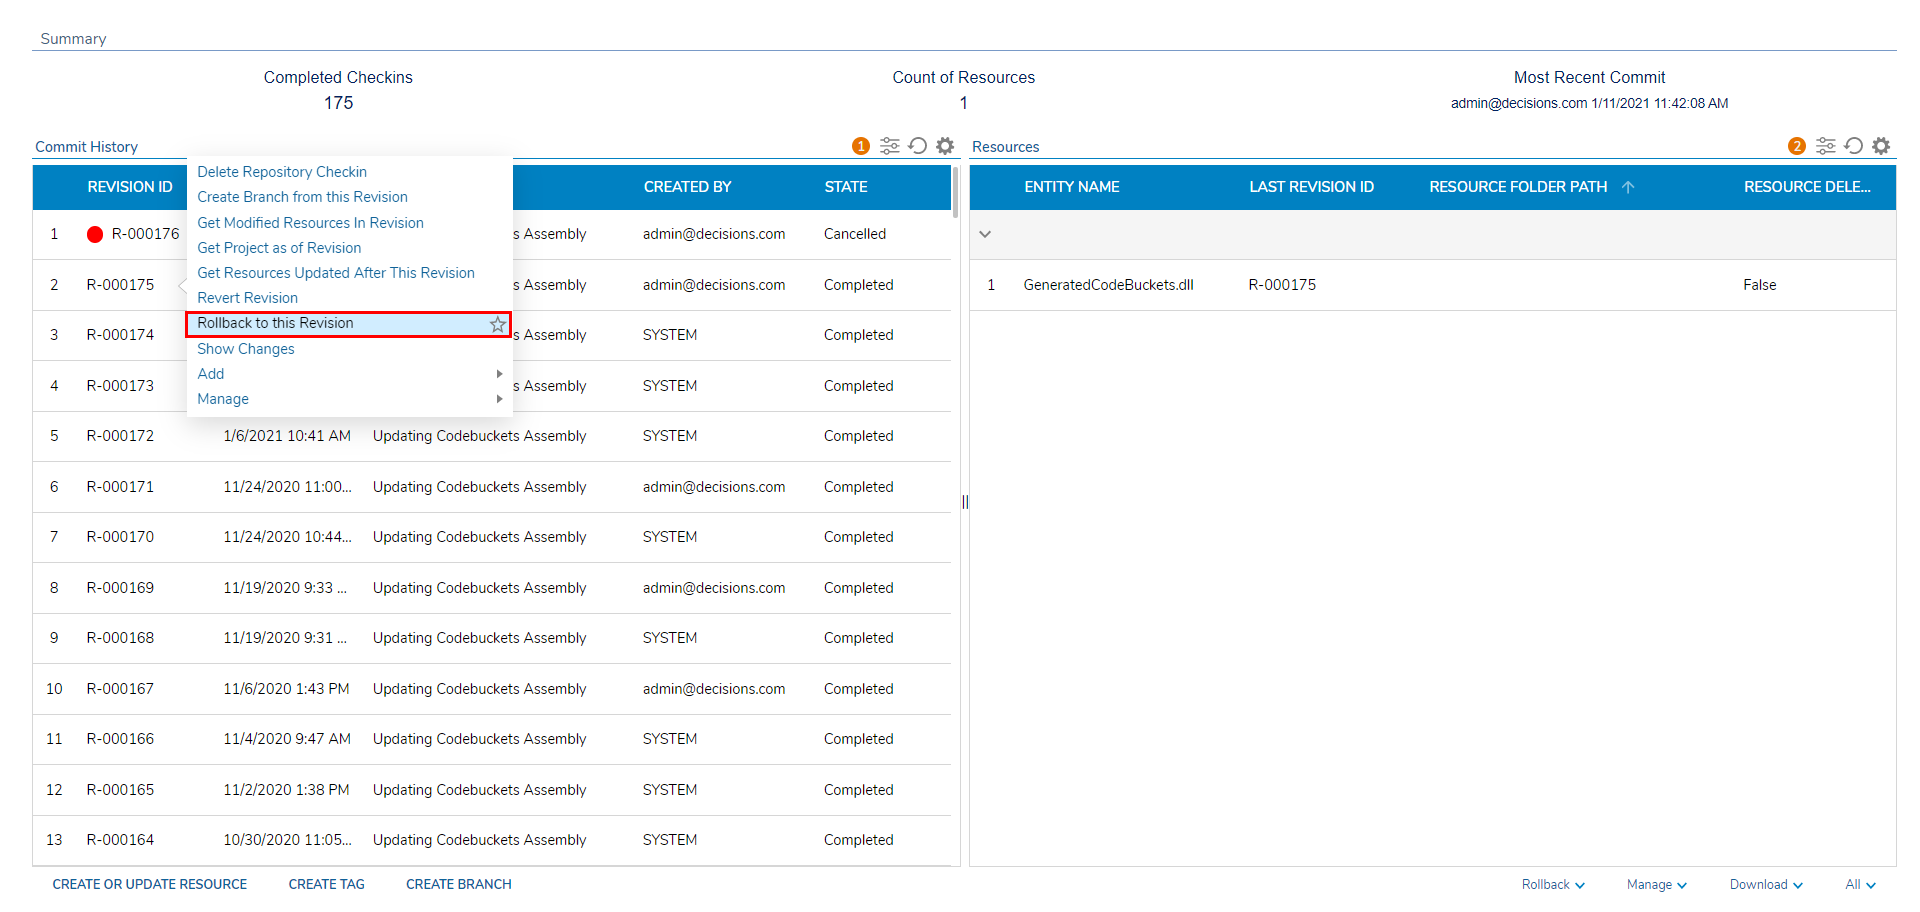
- Confirm with OK.