Overview
This tutorial demonstrates how to create and use a Startup Job in the Decisions Studio. A Startup Job is a type of a Job introduced in Decisions 4.1. that allows users the ability to pick a Flow that is going to run each time Decisions is starting up.
Example
In this example, create a simple Flow that sends an Email. Then, create a Startup Job to run the Flow when Decisions is starting up.
- Navigate to a Designer Project and click the CREATE FLOWbutton on the top Action bar.
- Select Flow, provide a Name, and click CREATE.
- From the Flow Designer, add a Send Email step from the FAVORITE STEPS category of the Toolbox tab, to the Done path of the Start step.
- Select the Send Email step to navigate to its Properties tab.
- Constant map in values for the From and To addresses, as well as the Subject and Body.

- Constant map in values for the From and To addresses, as well as the Subject and Body.
- Connect the Sent path to the End step, then Save the Flow, and close with X.

- Navigate to System > Jobs and Events > Scheduled Jobs and click the Add Startup Job button on the top Action bar.
.png)
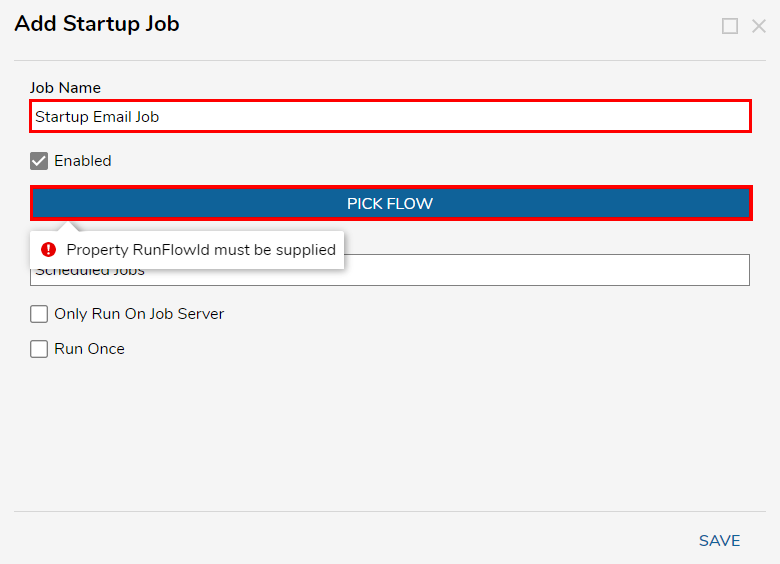
- Provide a Job Name, then click PICK FLOW.

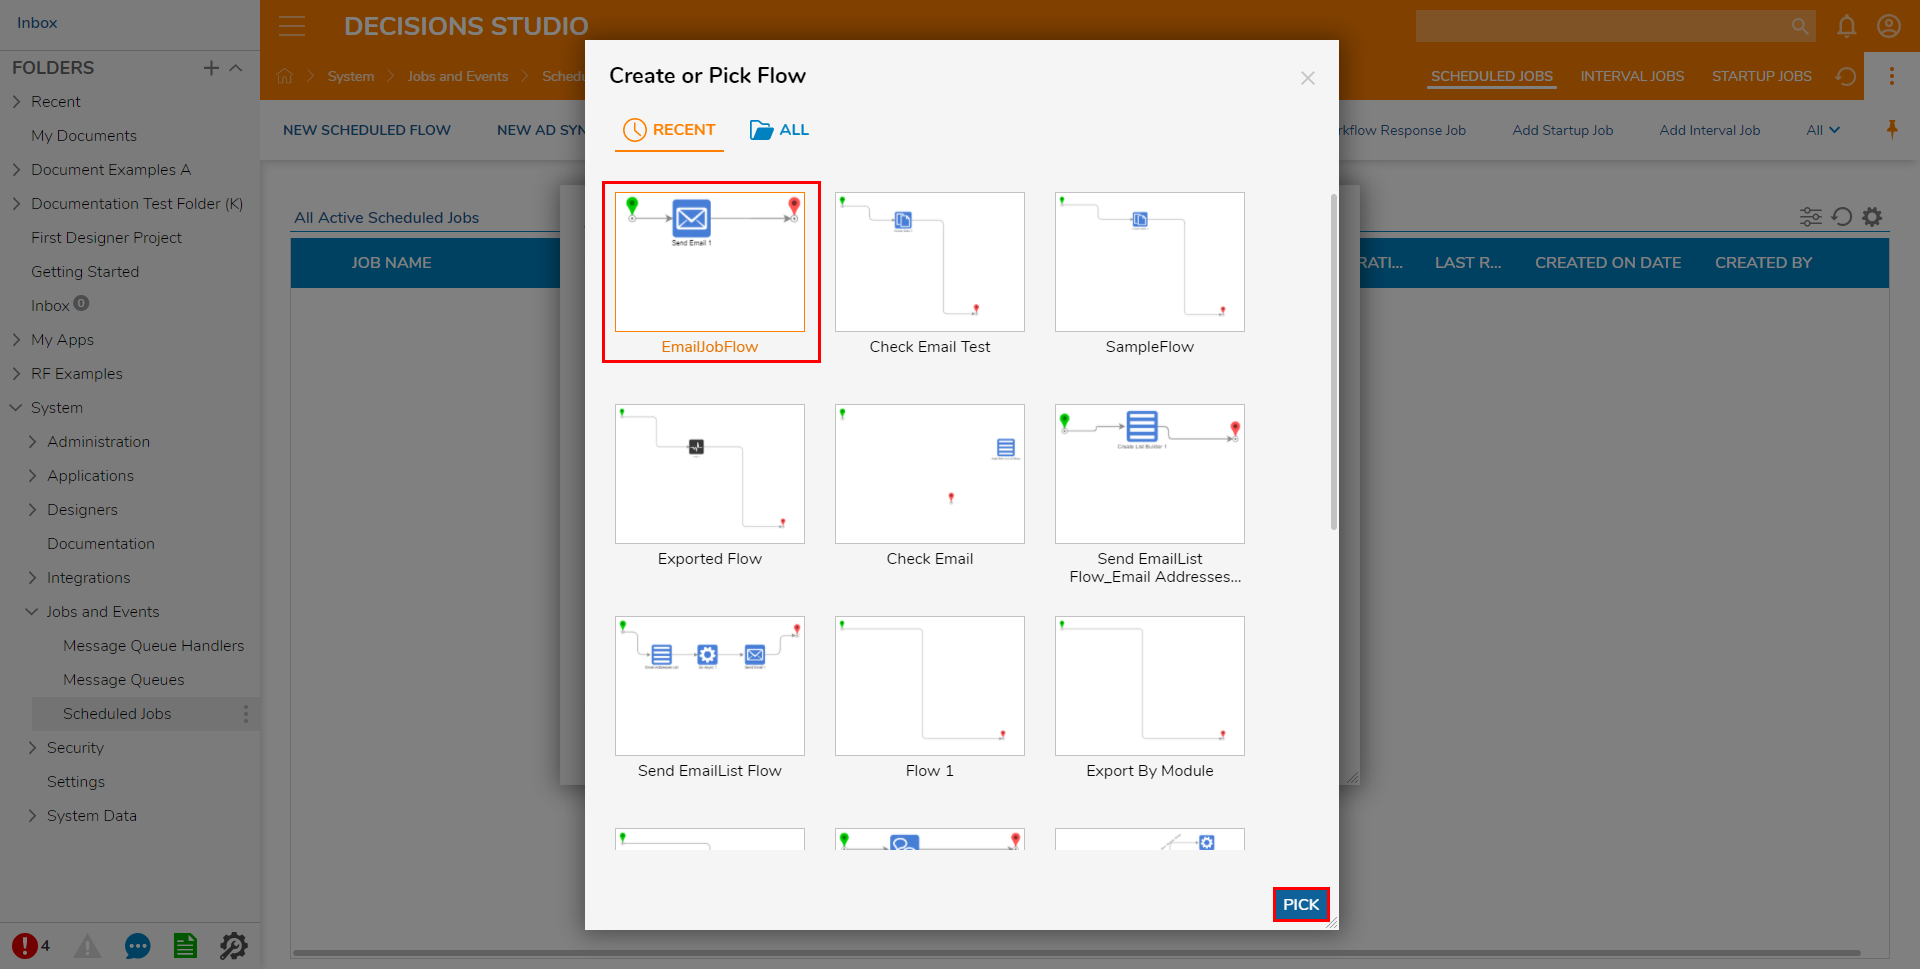
- Select the Email Flow that was created in the previous steps, then click PICK.

- Click SAVE to save the Job and exit.
- Select the Email Flow that was created in the previous steps, then click PICK.
Debug
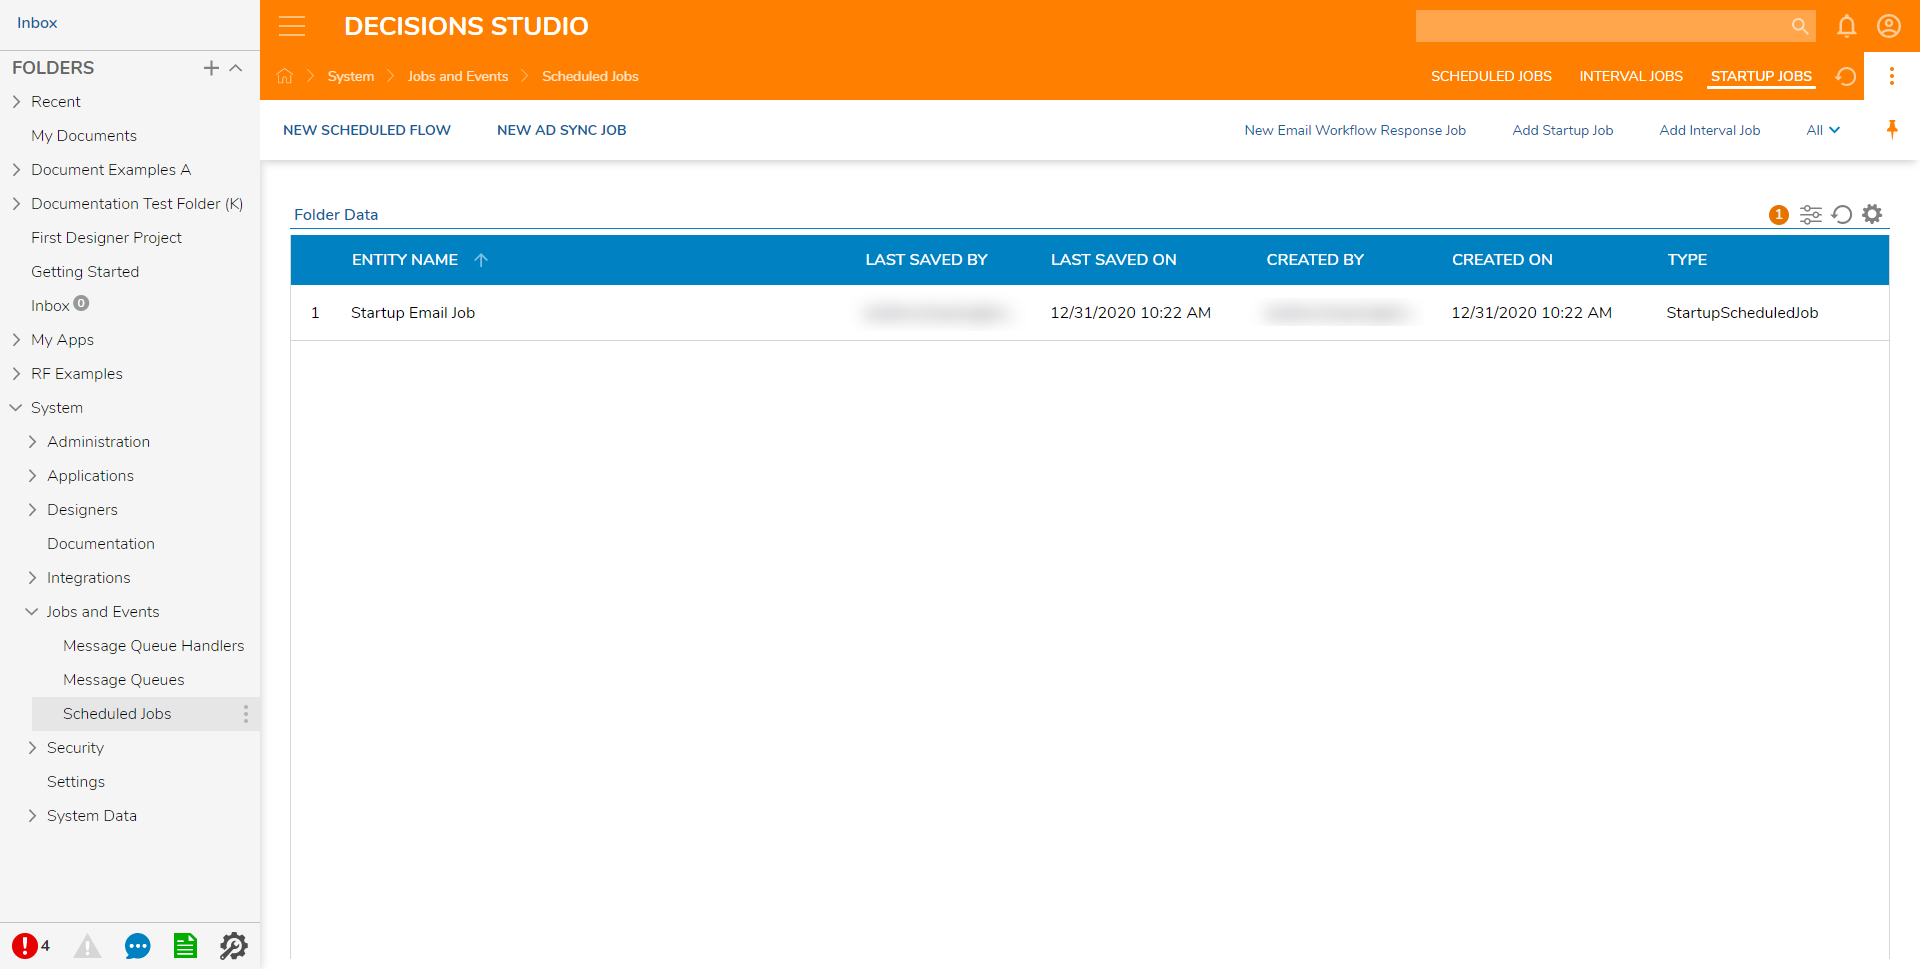
- From the Scheduled Jobs Folder, navigate to the Startup Jobs tab to view the established Startup Job.

- To test the Startup Job, restart Server Host Manager.
- Reconnect to the Server.
- On startup, check the inbox for the To address in the Email Flow. Successful execution of the Startup Job will result in the sending of an email to the To address defined in the example.
.png)