Overview
A Cluster is a configuration of one or more Application Servers running on the same Database backend. The Servers work together to appropriately distribute load/work so that one server is not over or underutilized. The most common configuration is to have a Load Balancer sit in front of two Servers that distribute work to those Servers.
For more information on Deployment Configurations, please refer to Deployment Configuration Options.
Setting Up A Cluster
In setting up a clustered environment, two or more Windows Servers will need to be fully configured with all of the following dependencies:
- IIS (Dynamic Compression must be enabled)
- Latest .NET Framework
- An existing SQL Server
- Both Windows Servers with the same time zone settings
- A network device or shared storage accessible to both servers
The IIS Servers will need to have fully configured certifications for this setup. In addition, a fully configured Load Balancer will be required.
- Begin by installing a Decisions environment on each Server.
- During the installation, do not enable Redirect Root Requests on either of the nodes; that behavior should be configured on the Load Balancer itself.
- Ensure that both Servers are pointed to the same Database and apply the appropriate Decisions Licenses on each Server.
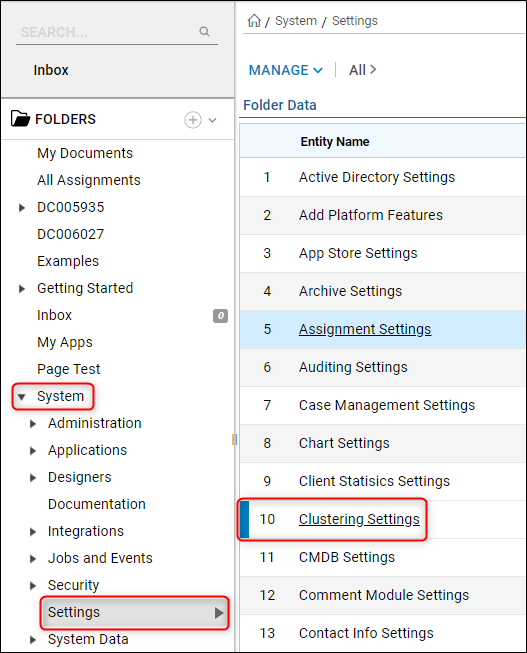
- Enable the Turn On Clustering setting in the Decisions environment by navigating to System > Settings > Cluster Settings.The Use HTTPS setting should be disabled. If this setting is needed, please contact the Support team before proceeding with the setup.
- Decisions will need to be configured to run as a Service Account, which can be done in either the Installer or in Windows Services because both Servers will need to run the same service Account. This allows the Servers within that cluster to access a network-shared drive.
- If SSL is terminating, then the ForceBaseURI line will need to be added to the web.config file, located at C:\Program Files\Decisions\Decisions Web Host\web.config.
- This change will require that the following line is added to the keys section under appSettings in the web.config file, as shown in the screenshot below.
<add key="ForceBaseURI" value="[HTTPSAddress]"/>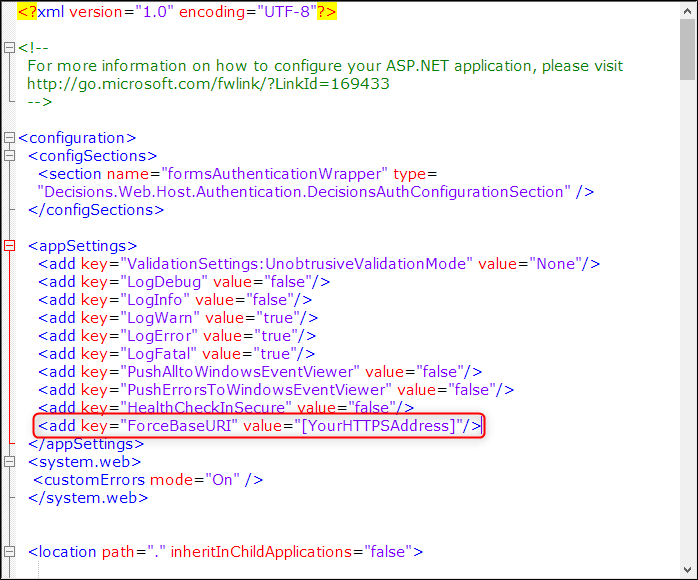
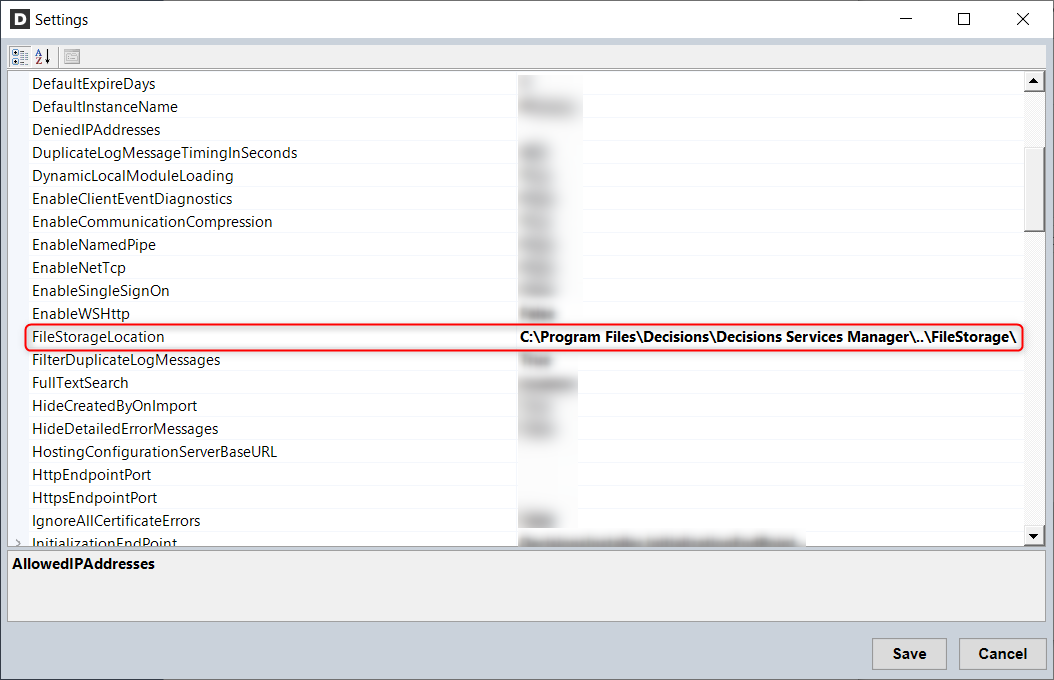
- Next, configure the FileStorageLocation setting in the Settings.xml file. Be sure that the Service Accounts on each Server have access to the File Storage location. A Flow can be executed that saves a file to ensure each server can successfully write a file to the location configured. File Storage Locations can also act as a Network Share.
 Azure File Storage LocationIf using Azure for File Storage, the UNC file storage path should be similar to the following:
\\DesiredServerName\testfileshare\filestorage\. For more information, refer to Microsoft's documentation: Use an Azure file share with Windows.Complete the following before using Azure File Storage for storage on a ClusterCustomers must complete the following on all nodes in the Cluster: set up a local Account; provide this Account with a Username that matches the one for the Azure File Storage account, with a password containing a value matching the Azure Storage Account's "Key." Then, Change the account settings so that password does not expire and users cannot change the password. Add the account to the IIS_IUSRS group. Finally, set the AppPool running Decisions to run under this account.
The 'IIS_IUSRS' group needs to be granted service permissions to the Service Host Manager/DecisionsServiceHost.exe. This can be done through CMD, PowerShell, or by downloading the Process Explorer executable and running it as an administrator.In some File Storage configurations, the same Service Account running Service Host Manager will also need to be configured in the Application Pool Identity.
Application Pool Identity LocationThis setting is found in IIS under Application Pools -> DecisionsAppPoolLocation -> AdvancedSettings -> Identity.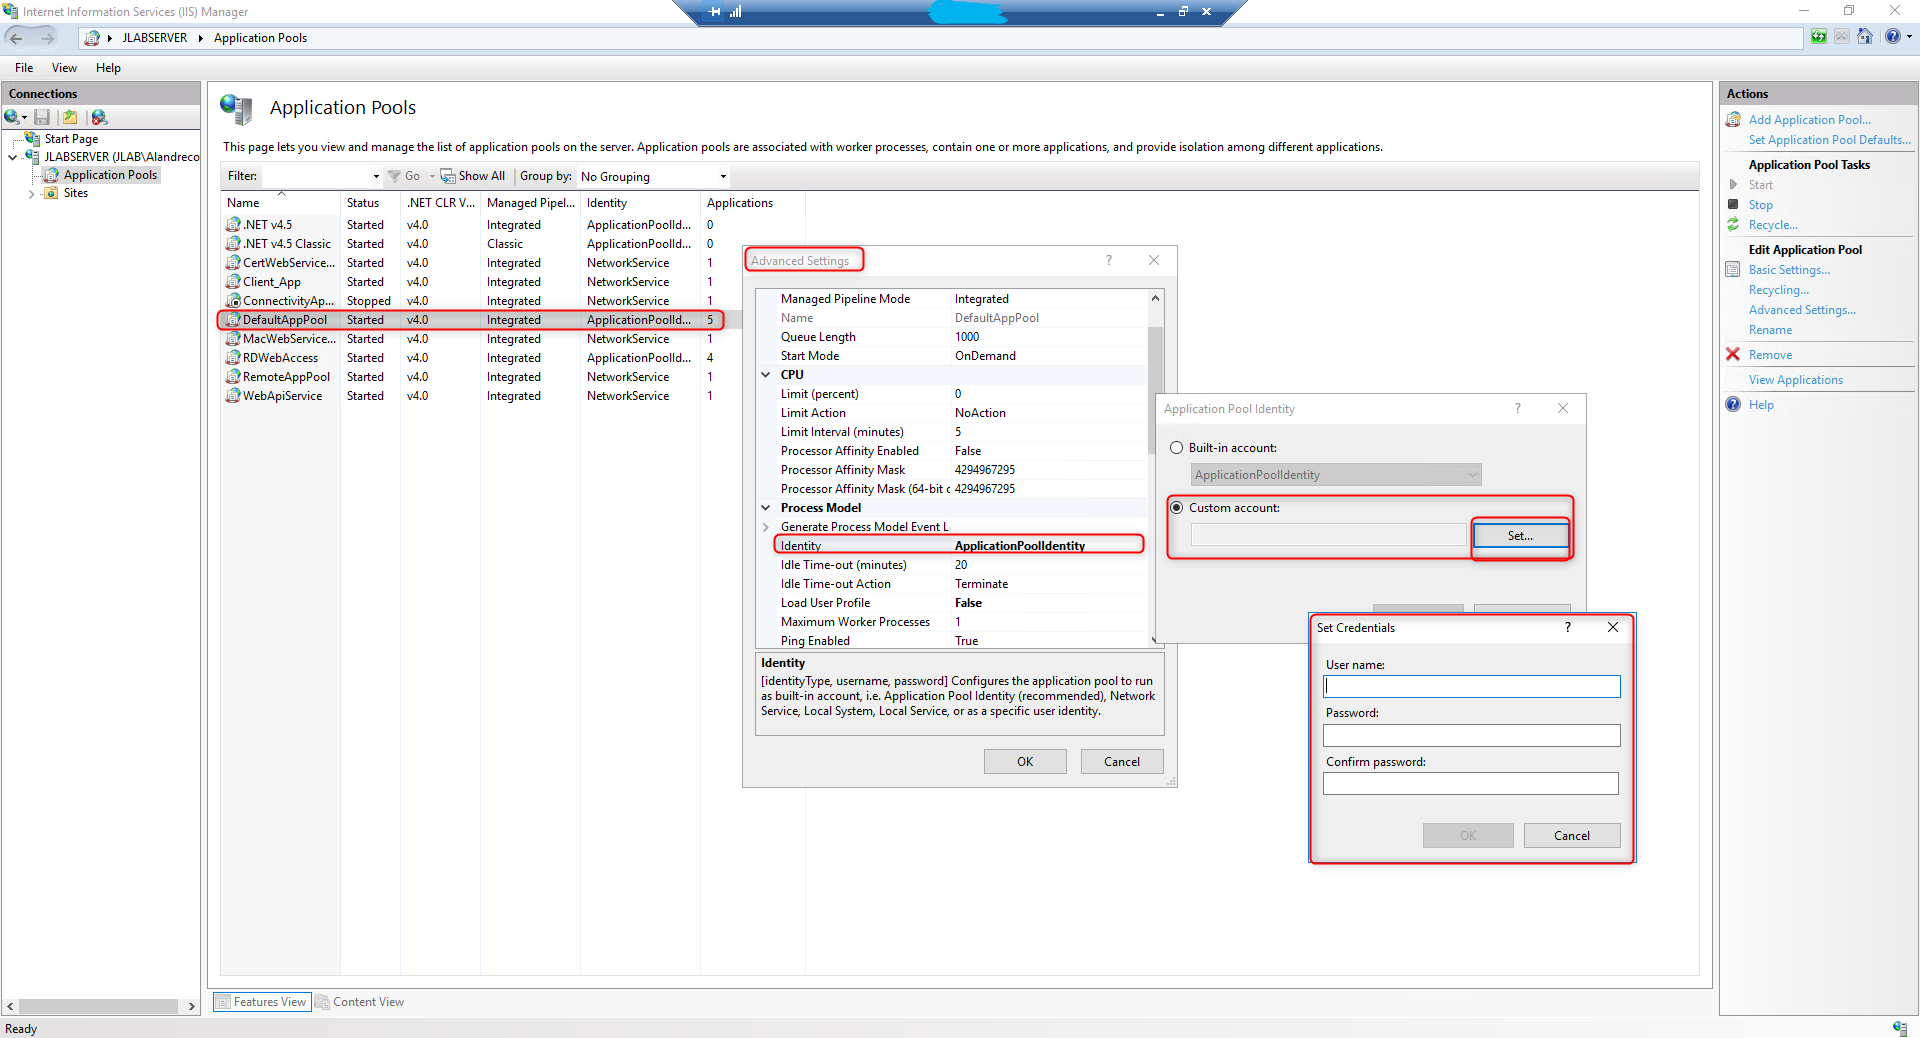
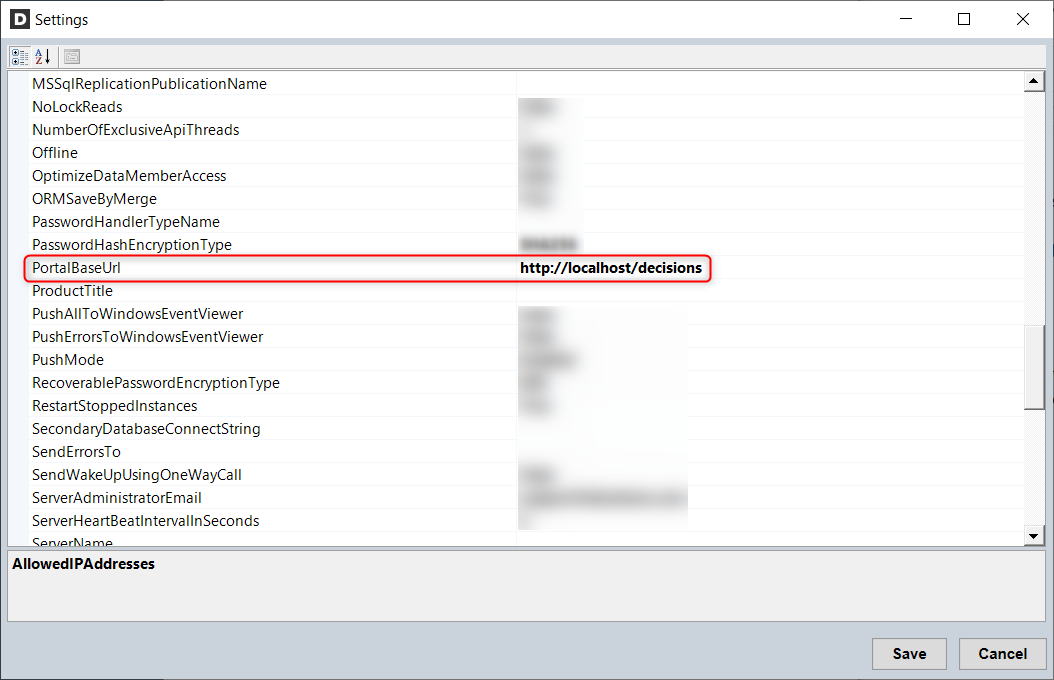
- Set the PortalBaseURL in the Settings.xml file to the URL used by the Load Balancer and include /decisions if it is not installed to the Root Directory.
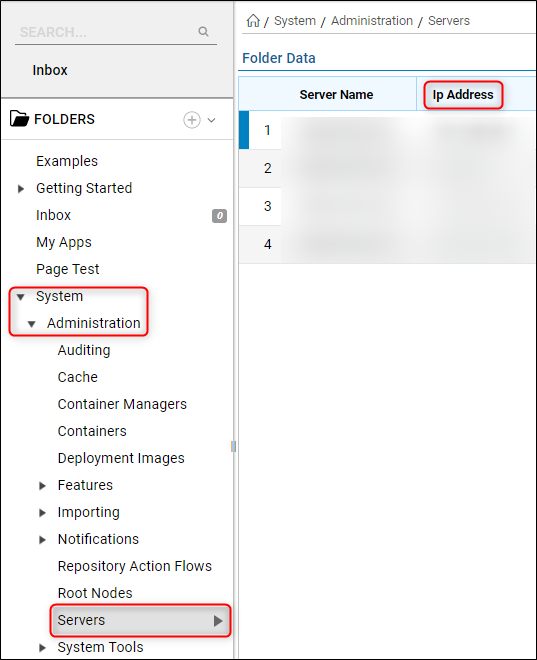
- To ensure that the communication between Servers is effective, Remote into each Server and hit the IP Address/site to confirm that they can make HTTP Calls to one another.
- Add Host File Entries on each server to make the PortalBaseURL resolve to "127.0.0.1." on each node. This checks that all Portal traffic is routed to the local instance instead of making a round trip back through the Load Balancer.
- Next, update the Platform_server table by setting base_urlto_Portal = load balanced endpoint.
- Set the Load Balancer health check to the login Page (http://AppIPorDNSname/decisions/healthcheck.aspx); this will fail and need to be altered if enableSingleSignon is set to True in the Settings.xml file.
- Confirm that the SMTP Server Settings for each Server are identical and correct.
- If HTTPS is not being terminated at the Load Balancer, then ensure that the LocallyAddressableIPorDNSName value is set to FQDN on each Server. Please note that this might be different from the PortalBaseURL, depending on the particulars of the configuration.
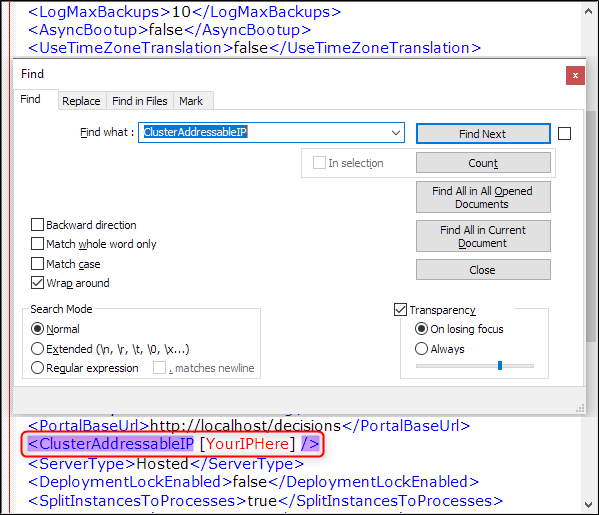
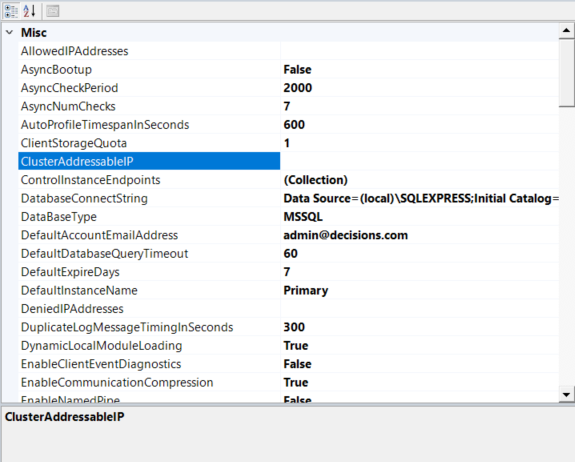
- Set ClusterAddressableIP with the same IP as the Server of the property being modified. This can also be edited from the Decisions Installer > Edit Settings.
To find out more about SSO interference with Load Balancer health checks, please refer to Configuring Load Balancer Health Probes In Decisions.
The Peer Communication Test Action on items within the Server's Report will fail if the keys.dat file does not match across Servers in the Cluster.
Steps To Validate
- It is important to validate the steps that were followed in the section prior. Go to each Server and ensure that the Portal can be logged into from HTTP (unless intentionally removed) and HTTPS in a local browser session.
- Log in to each Server in the cluster and ensure that each one can write a file to the Shared File Location if this was not confirmed in the section prior.
- Check Load Balancer Timeout: try adding a document to a Folder that is over 100MB and see if it trips the LB timeout threshold.
- Go through the load-balanced URL, locate the Servers Report, and then find the Server that has Is Me set to true to affirm which Server the Administrator is currently on. Turn this Server off and ensure that the redirection goes to the other (still active) Server after the timeout duration configured in the Load Balancer settings has passed.
- Now, make sure the Load Balancer Health Check Settings are up. Turn one Server off and ensure that it becomes red or negative on the Health Check Report, then repeat these same steps with any additional Servers. Begin turning back on each Server to ensure that they return to a healthy state when online.
- Remote into each Server, then open a browser and make sure that the IP address of the other nodes in the Cluster can be reached. Repeat this process for every node in the Cluster to ensure each node can reach the Login Page for every other node in the Cluster from a local browser session.
- Add/update an Account on one node. Login to the other node and make sure the changes appear there too.
- Go to a node in the Cluster and Login to the Decision Studio, navigate to the MyApps Folder, then create a new Flow.
- Logout and go to each additional node in the Cluster to confirm that this Flow also exists in the MyApps Folder when going straight to them.
- While in the MyApps Folder, create a new Flow that sends an email.
- Go straight to each node to ensure that the appropriate party receives the email sent from each local Flow run.
Updating a Decisions Cluster
Decisions Clustered environments support rolling upgrades; this involves taking one server offline at a time to perform the following actions:
1. Stop Service Host Manager.
2. Run the Decisions Installer.
3. Start Service Host Manager (Once all servers have been updated).