Overview
This article example uses a Flow to add a Tag to the current user email address in the Decisions environment. Since the Account data type properties are readily available as Flow Data by default, this setup can reference the CurrentUserEmail property. For more information about Tags, please visit the About Tags article.
Adding a Tag to an Object in a Flow
- In a Flow Designer, navigate to Integration > Internal Services > TaggingService in the Steps tab, then drag and connect an AddTag step to the Start and End steps in the workspace.
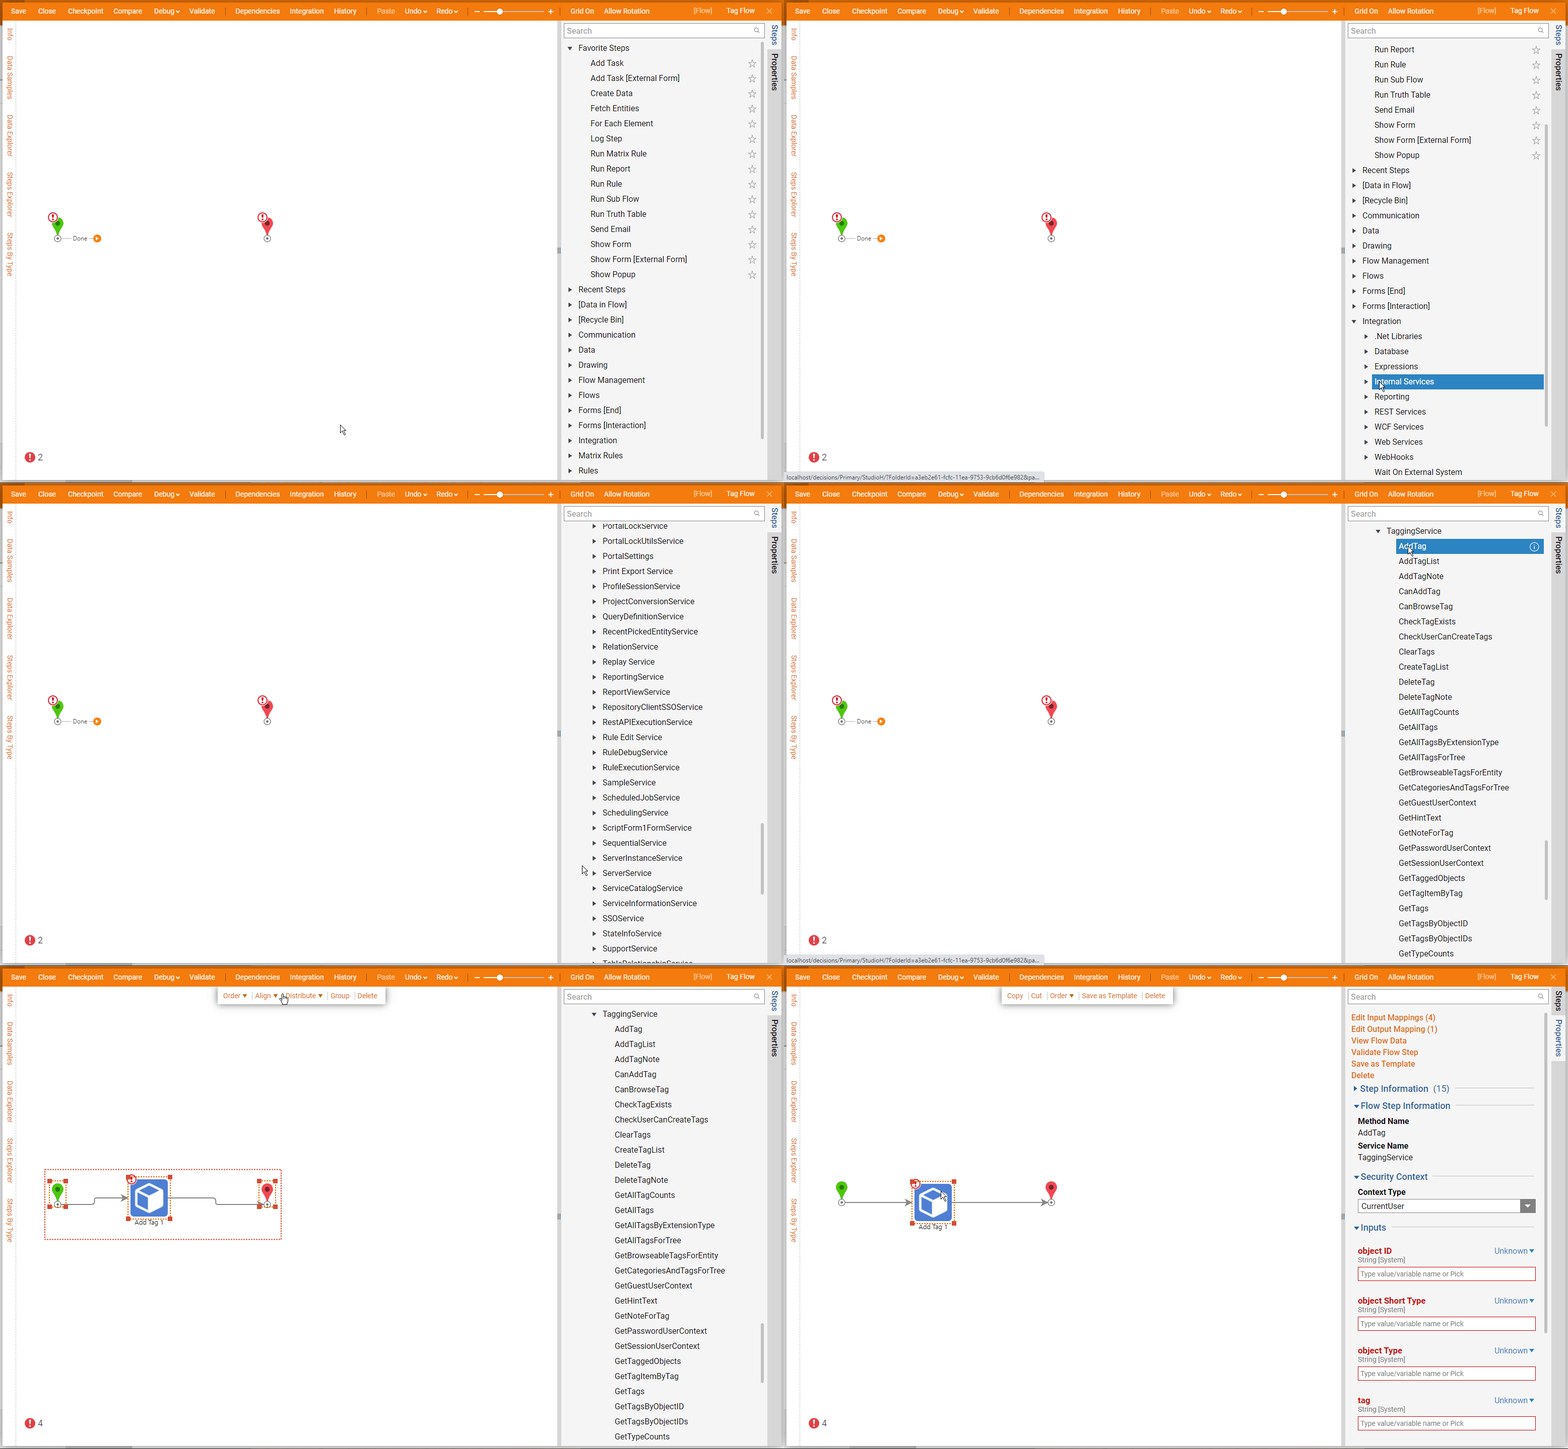
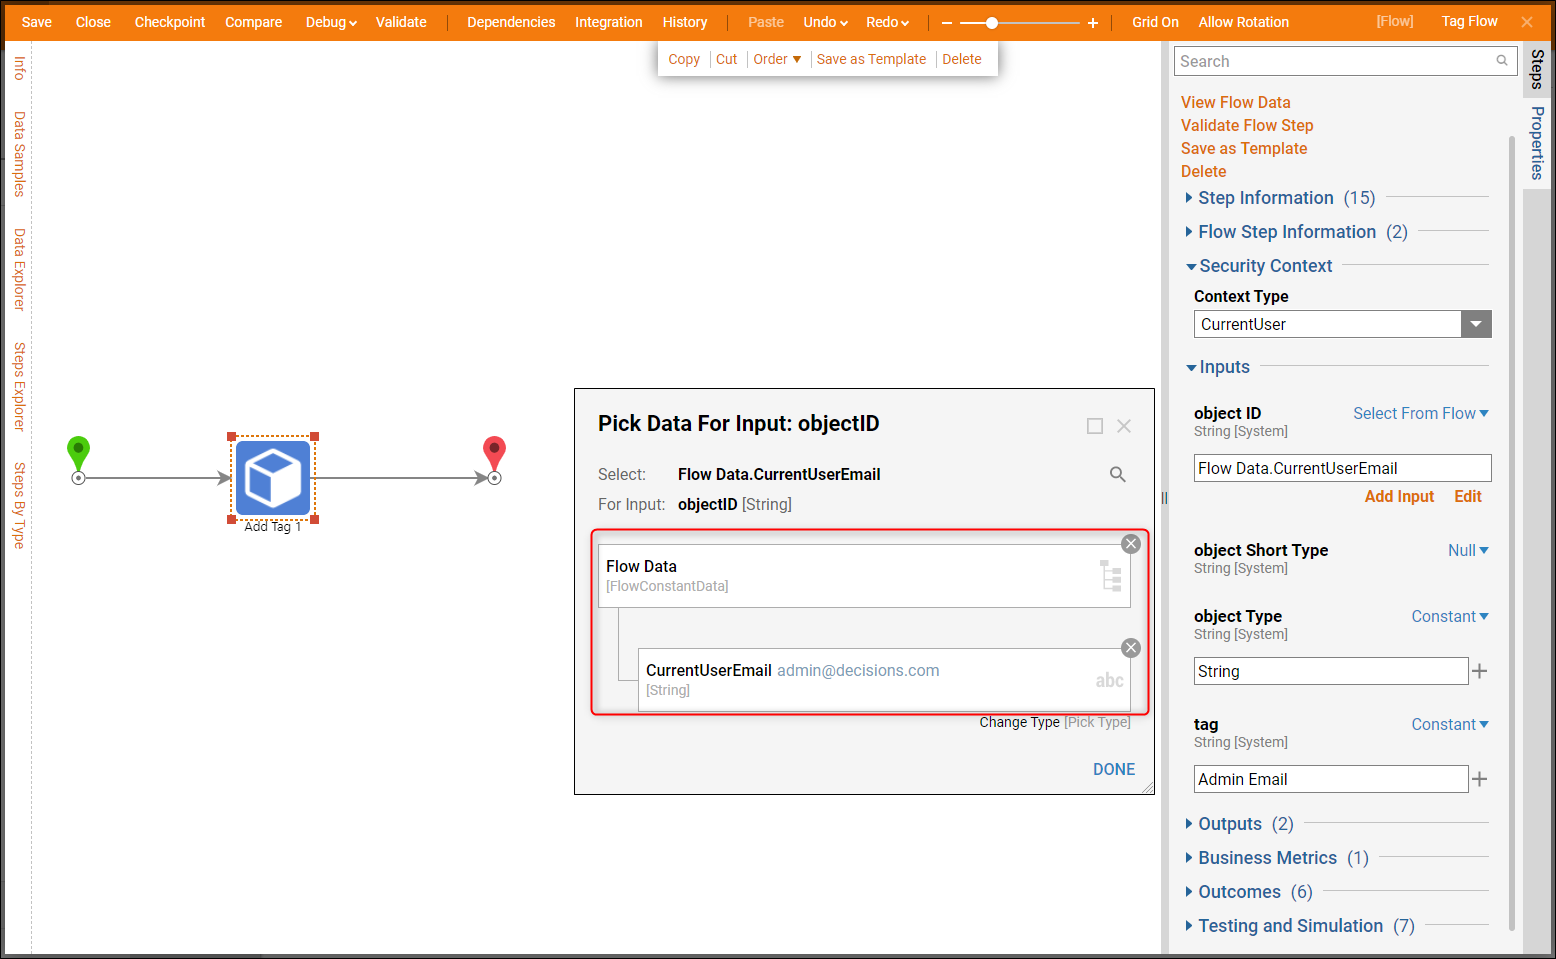
- Navigate to the Inputs section of the properties and select the Unknown mapping type for object ID and choose Select From Flow from the menu.
- In the Pick Data For Input window, select Flow Data, then find and select CurrentUserEmail from the available properties. This configuration has now defined the object ID with the CurrentUserEmail property.
- The object Short Type is an optional mapping used to define the short data type of the object; it can be set to Null for this example.
- The object Type can be defined with a Constant value of the object data type or mapped to the object ID.
- The Tag can be set to a Constant value of the desired Tag name as it will appear in the Decisions environment. This Tag will also be accessible for assigning to other Decisions objects.
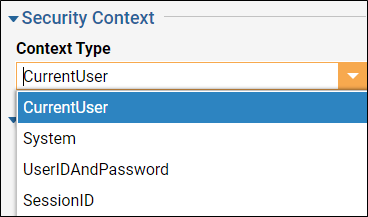
 Security Context > Context TypeThe Context Type is used to configure which environment level this Tag context will apply to. By default, it is only applied to the current user. The Tag context can also be applied system-wide to a specific user ID/password combination or a referenced Session ID.
Debug
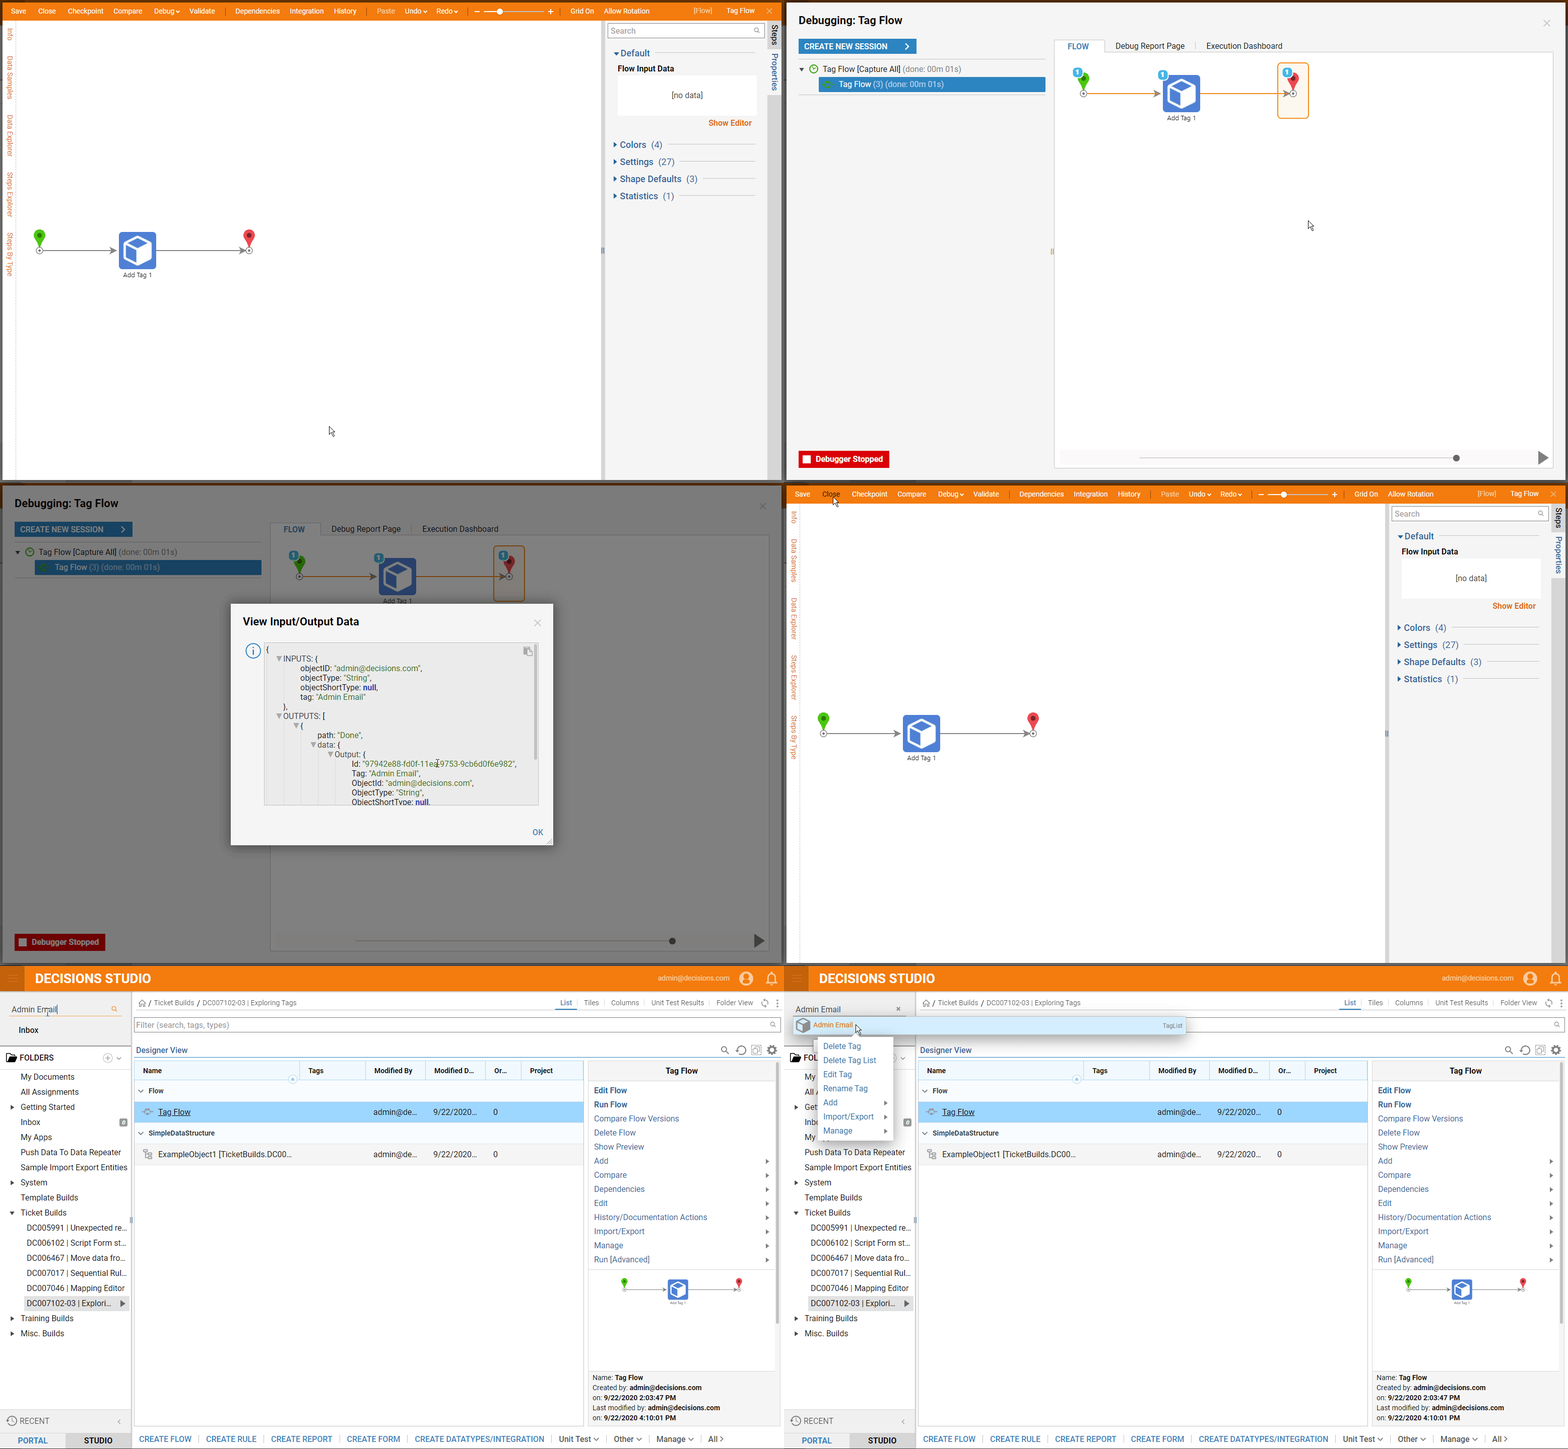
- Select the Debug button at the top of the Flow Designer, then run a Full Debugging test.
- When the results appear, select the Add Tag step icon and the Execution time, then choose the View Input/Output Data option to see where the Tag was applied.
- Save and close the Flow, then search for the Tag in the Decisions environment to find it created as a TagList.
- Right-click the Tag as it appears in the search to reveal options for managing the newly added Tag.
Adding a Tag in the Designer Studio
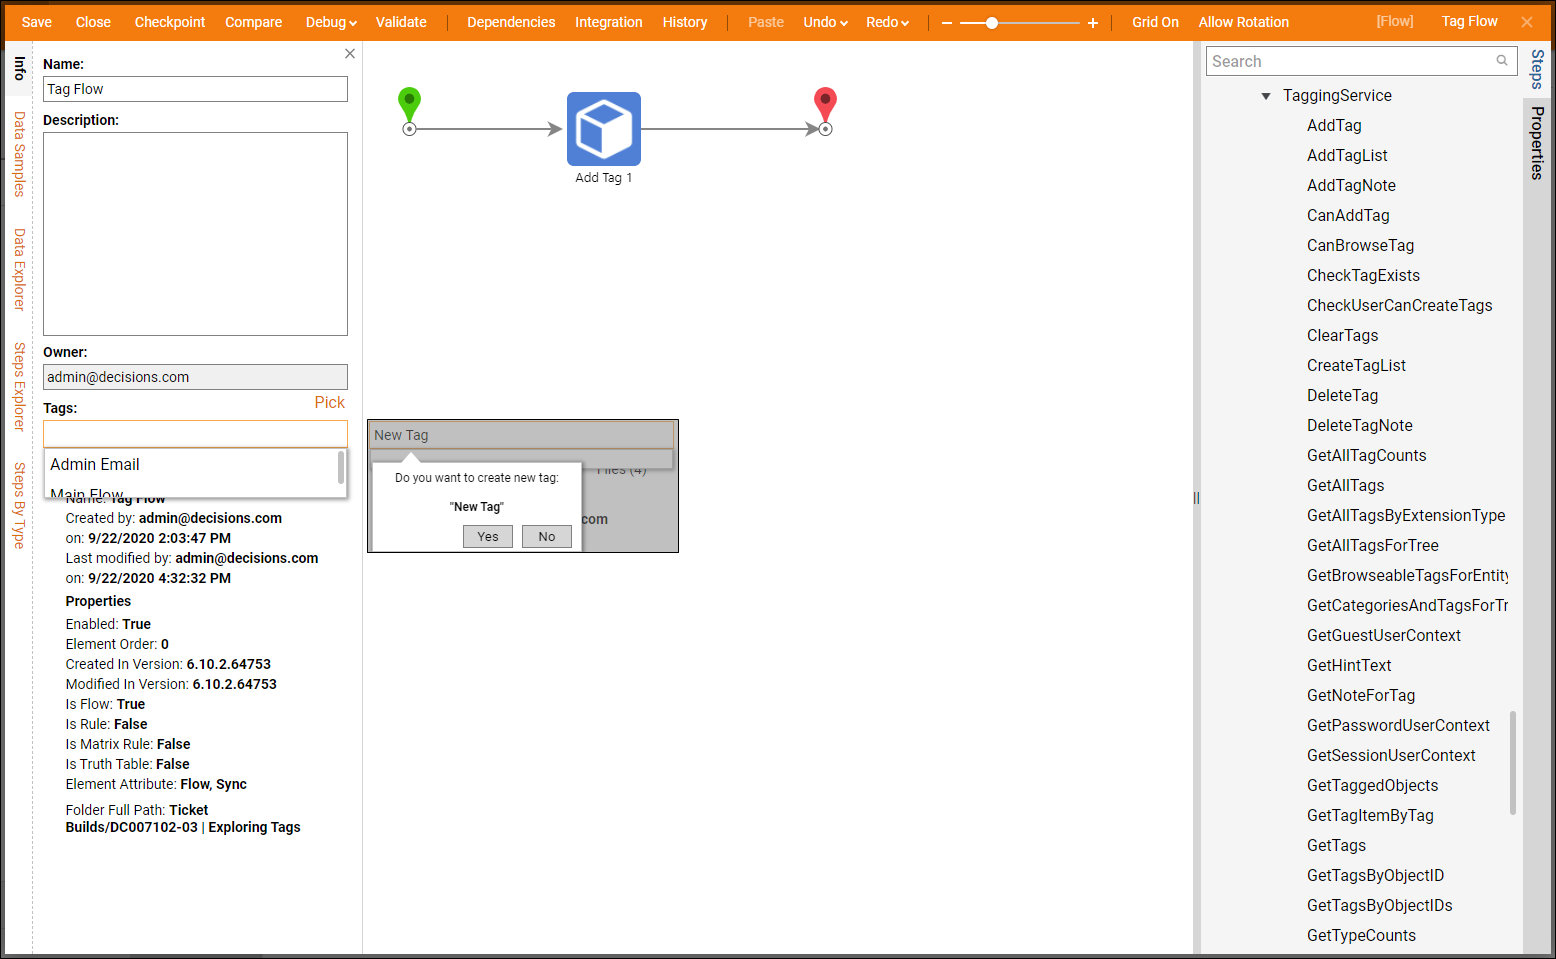
- Most Designer Studios have the option to assign or create a Tag for the Decisions object it represents; select the Info tab in a Designer Studio to reveal some administrative details about the Decisions object being created.
- Use the drop-down list under the Tag section to select an existing Tag, or start typing the name of a new Tag and press "Enter" on the keyboard. A prompt will appear to confirm the creation of a new Tag and apply it to the object.
Adding a Tag from the Action Menu
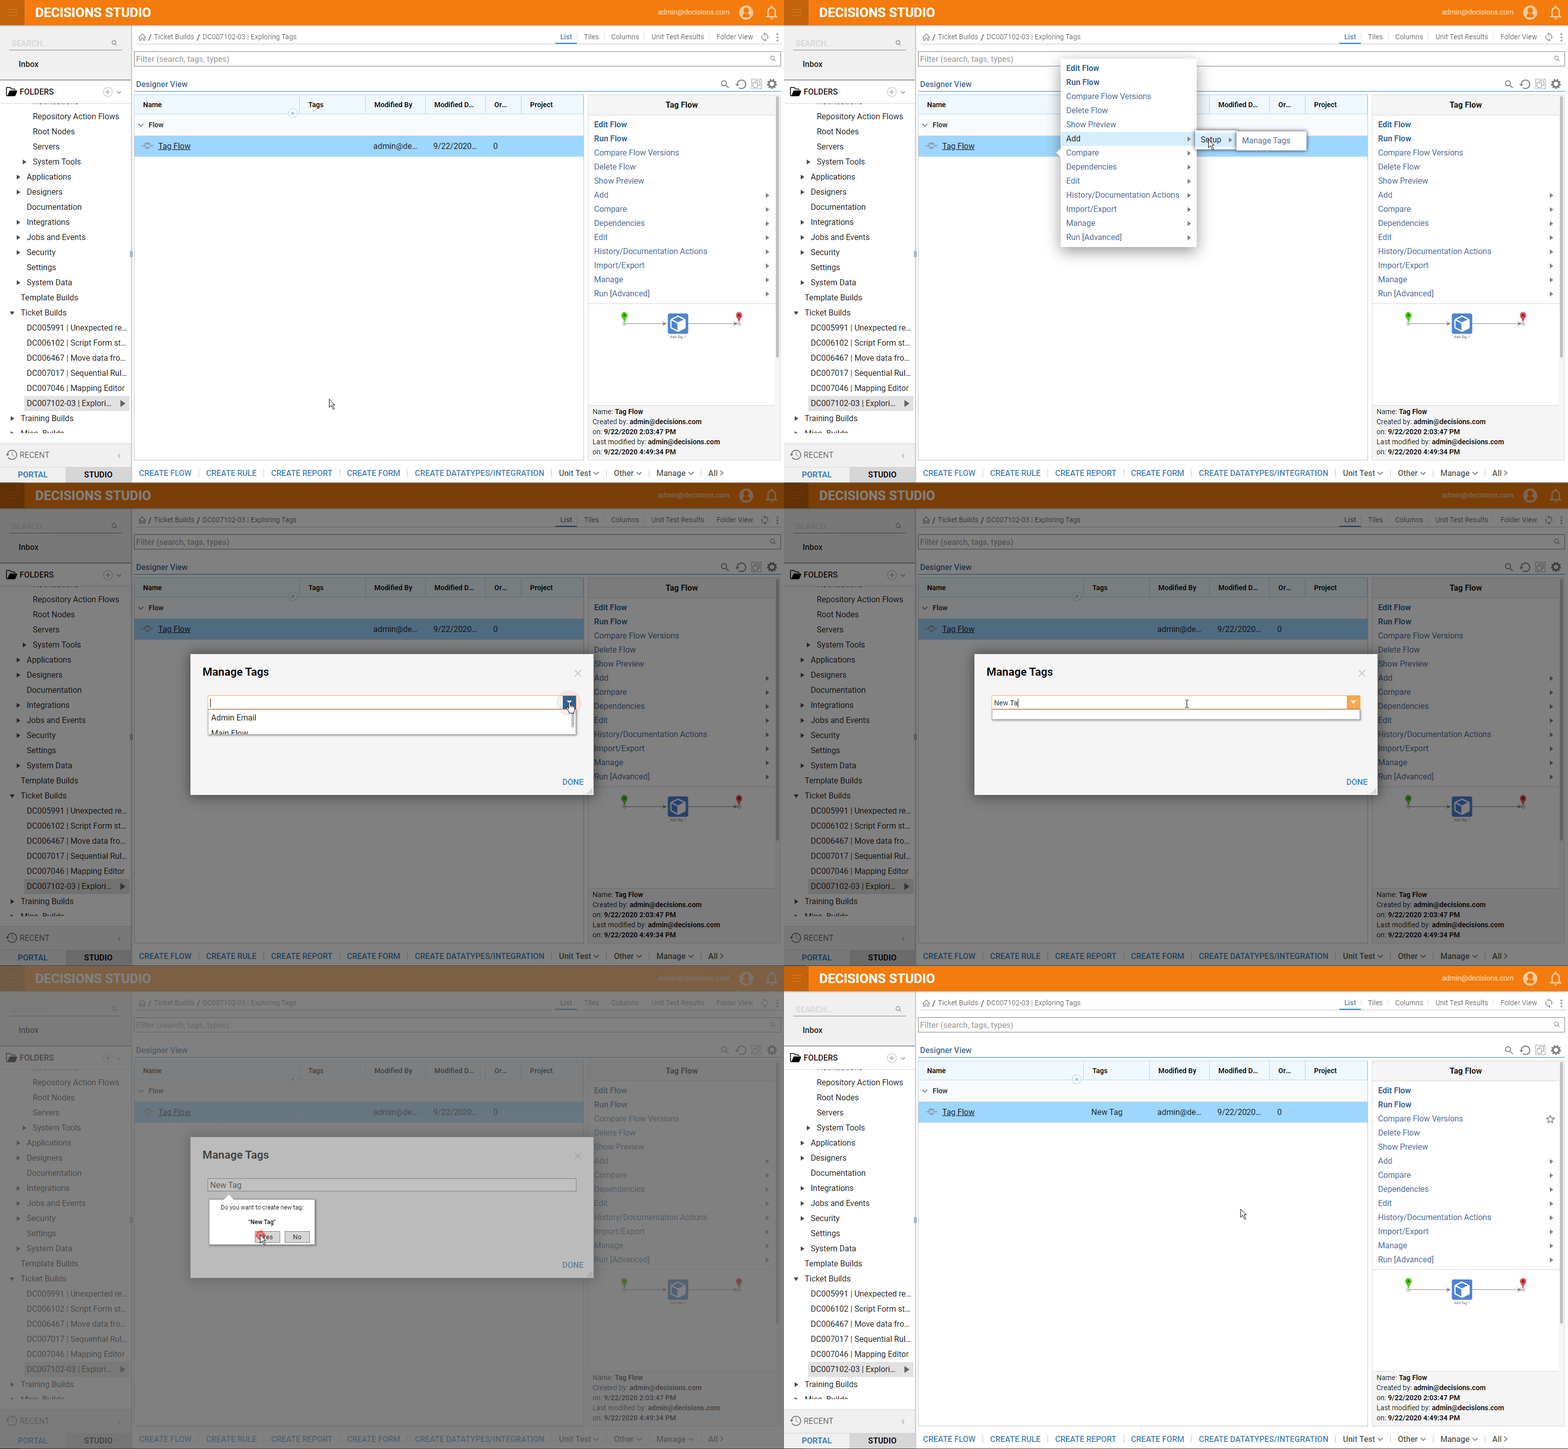
- To quickly manage Tags, use the action menu of any object in a Designer Folder; right-click the name of the object and navigate to Add > Setup > Manage Tags.
- From the Manage Tags window, a Tag can be selected or created, as shown.
