Overview
Similar to how Flow Input Data is configured on the Start step to pass data into a Flow, Flow Output Data can be configured to pass data out of a Flow. This data can be reached in another Flow or via an API call.
Example
This example will walk through the use of Flow Output Data in another Flow and via a GET URL.
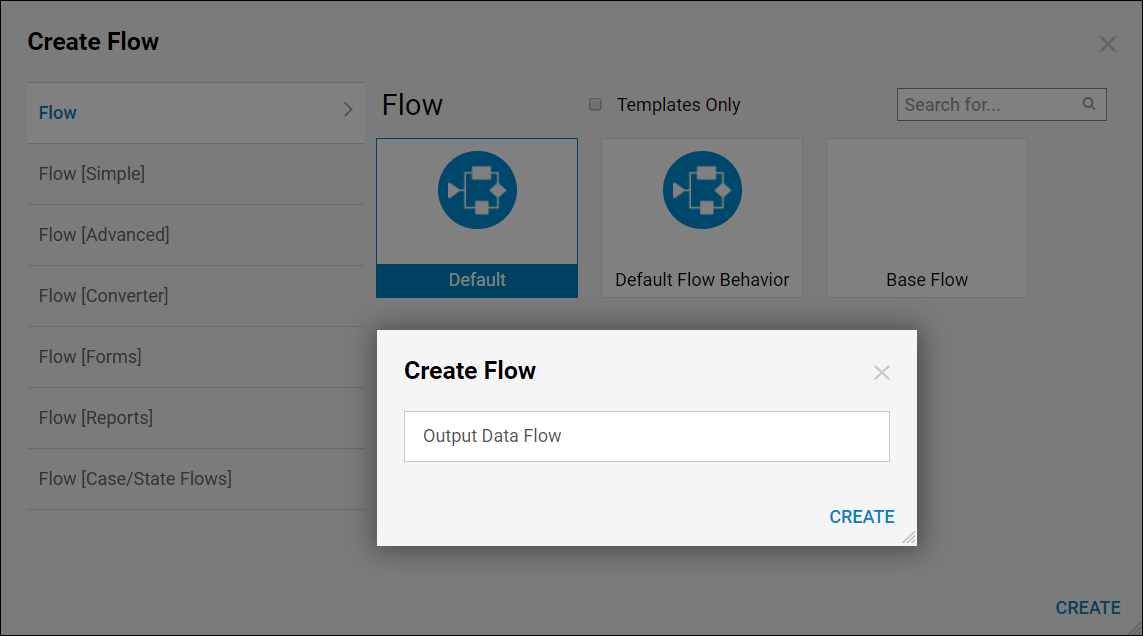
In a Designer Folder, select the Create Flow button from the bottom Action Bar. Select the Default template and click Create, name the Flow, then click Create again.
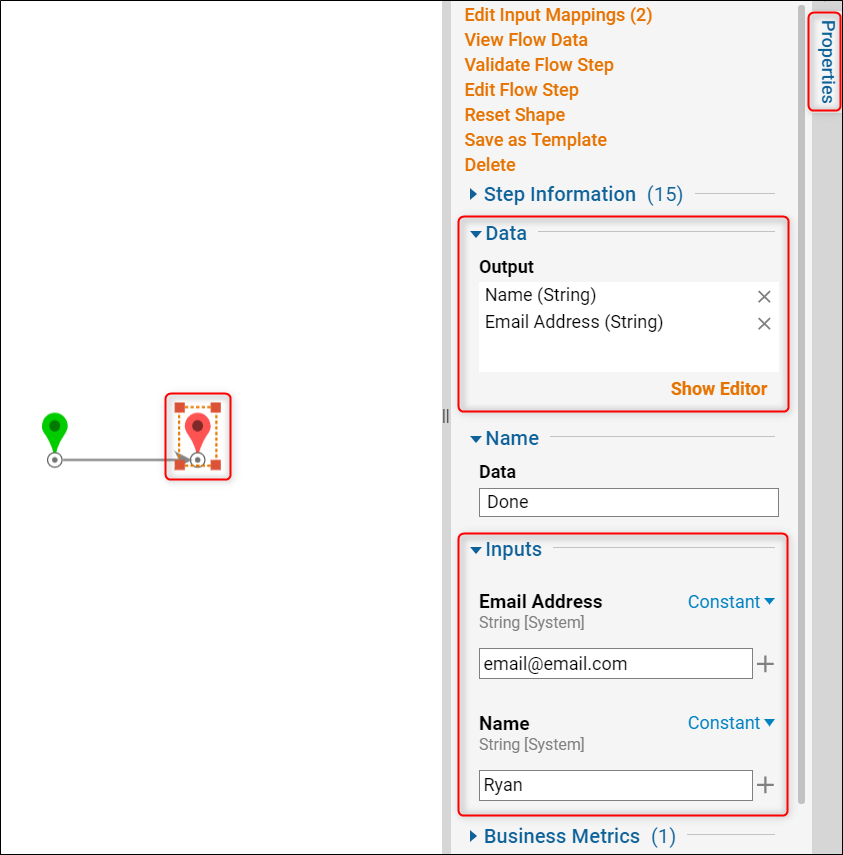
In the Flow Designer, connect the Done path from the Start step to the End step. Select the End step so that the Properties appear for it on the right. Locate the Data section of the Properties for the End step, then select the Show Editor button under the Output box.
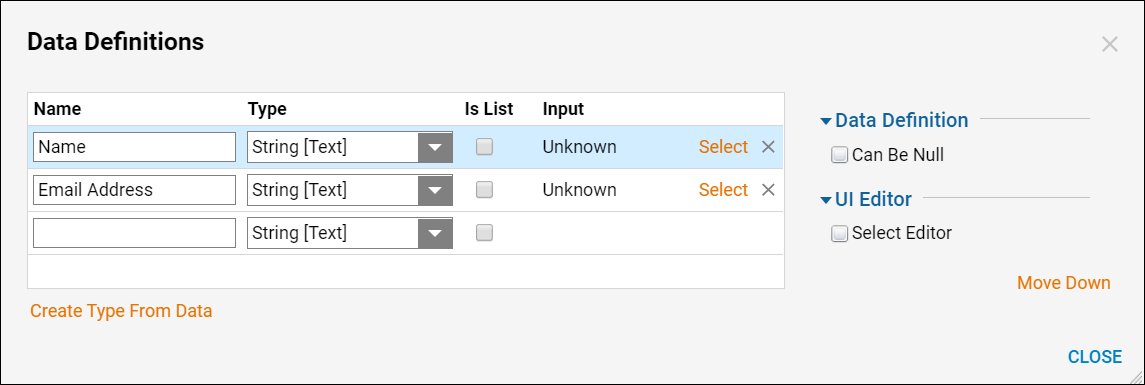
Configure two pieces of data in the Data Definitions window; Name and Email Adress, both of the String [Text] data type. Compare the configuration to the screenshot below, and select Close on the Data Definitions window once complete.
In the Properties panel for this step, two new corresponding inputs should now be available under the Inputs section. Select the Unknown dropdown list and choose Constant from the list for both inputs. In the text box that appears, enter your name for Name and enter an email address for Email Address.
Click off the step and into some blank space to set the Input mappings. Use the Save button on the left side of the top Action Bar to save the Flow, but remain in the Flow Designer.
Output Data Via API
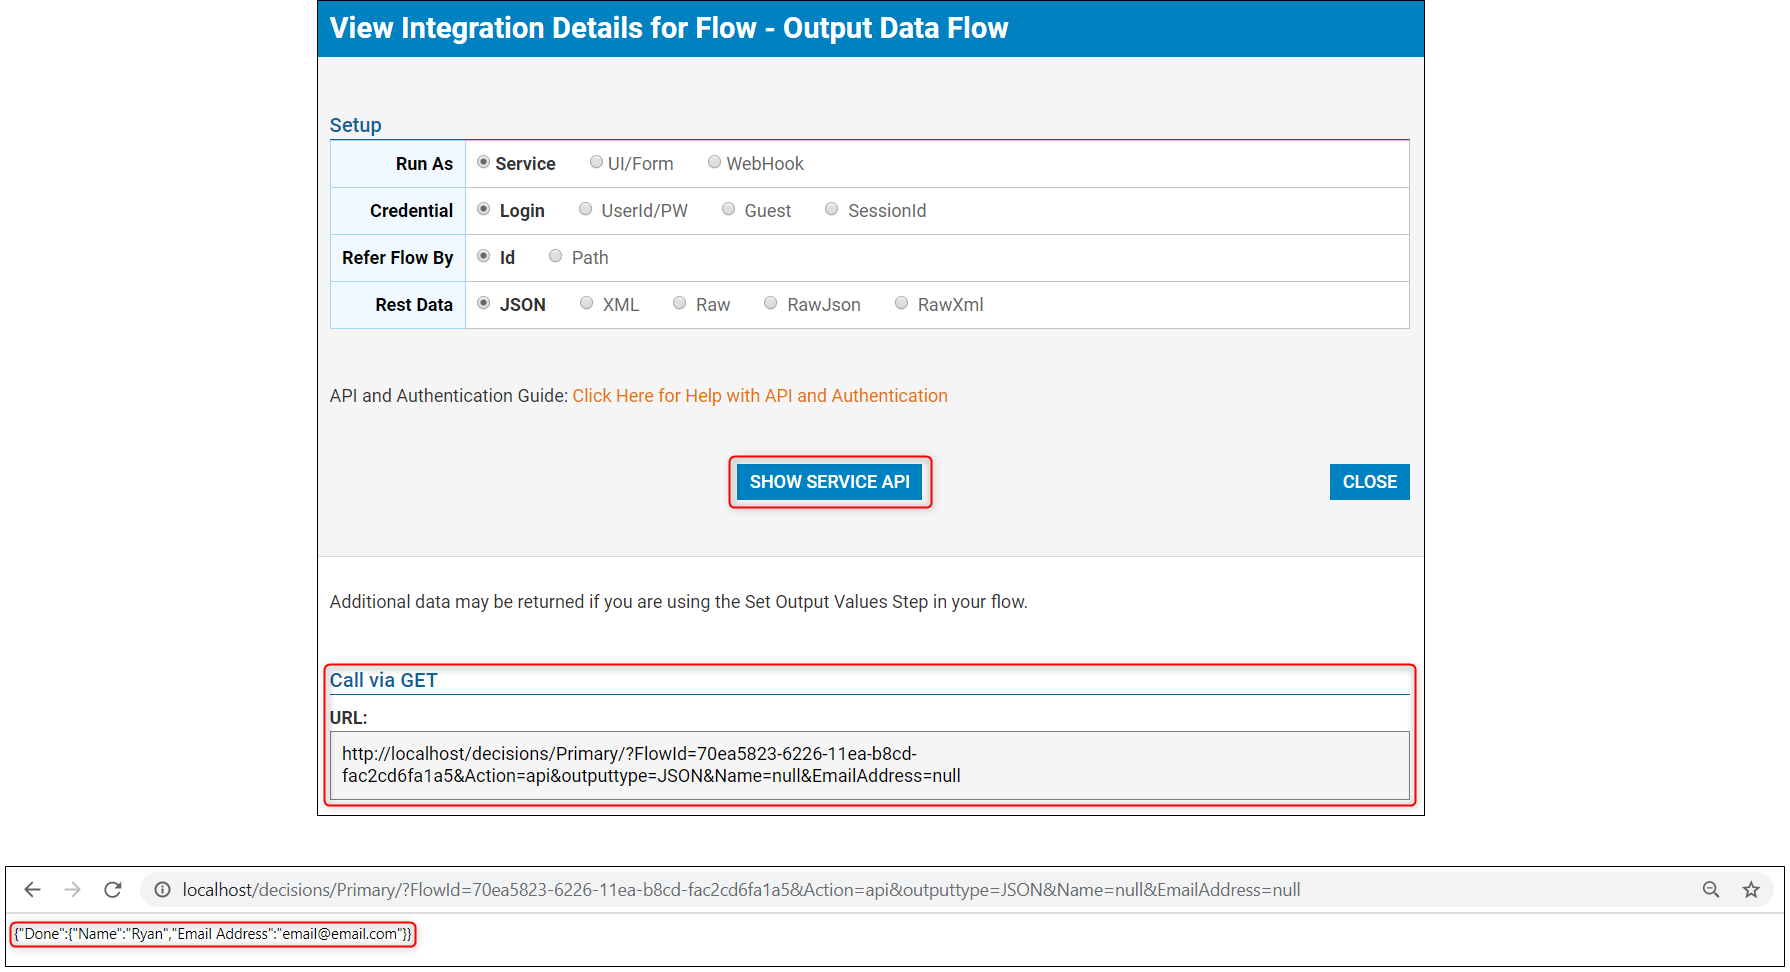
In the Flow Designer, select the Integration button on the top Action Bar; the View Integration Details window will open in another tab. In this window, keep the settings configured, then click the Show Service API button.
Copy the URL from the Call Via GET box and paste it into a separate browser tab, then navigate to the address. Notice that the defined Constant value appears for the Name and Email Address via this URL; thus, the Flow Output Data can be called via API. Save and close the Flow once complete.
Output Data Via Flow
In the Designer Folder, create a new Flow using the Create Flow button on the bottom Action Bar. Select the Default template and click Create, name the Flow, then click Create again.
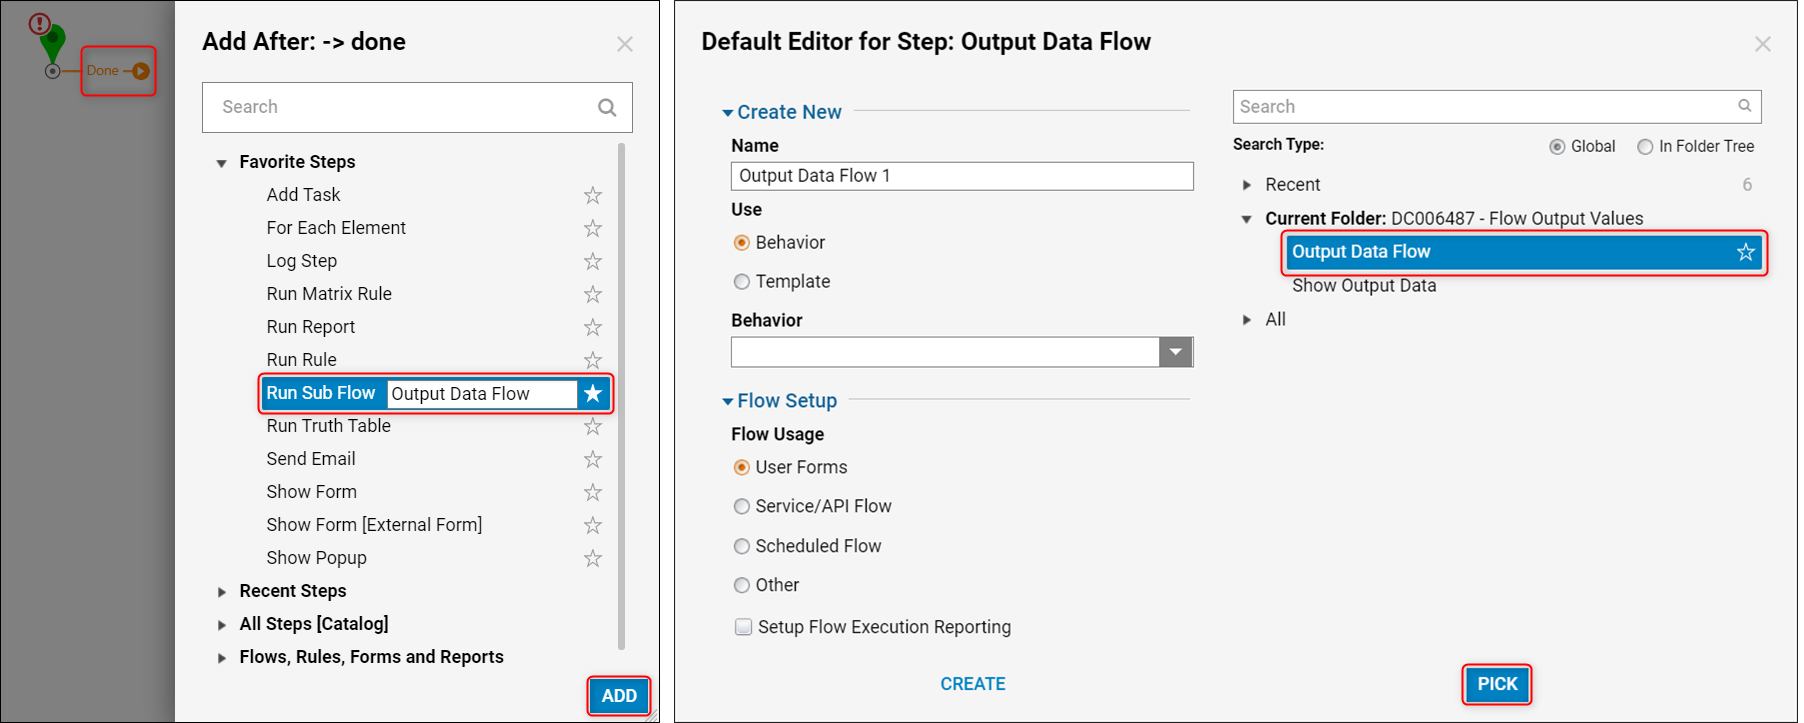
In the Flow Designer, click the orange arrow on the Done path from the Start step and select the Run Sub Flow step from the list, then select Add. When the Default Editor window appears, choose the Output Data Flow from the Current Folder list on the right side, then select Pick.
Select the Run Sub Flow step and locate the Inputs section of the Properties panel. Change the mapping type of Name and Email Address to Constant and define them with the same values as before.
Click the orange arrow on the Done path from the Run Sub Flow step and select the Show Form step from the list, then select Add. When the Default Editor window appears, provide a Name for a new Form on the left side, then select Create.
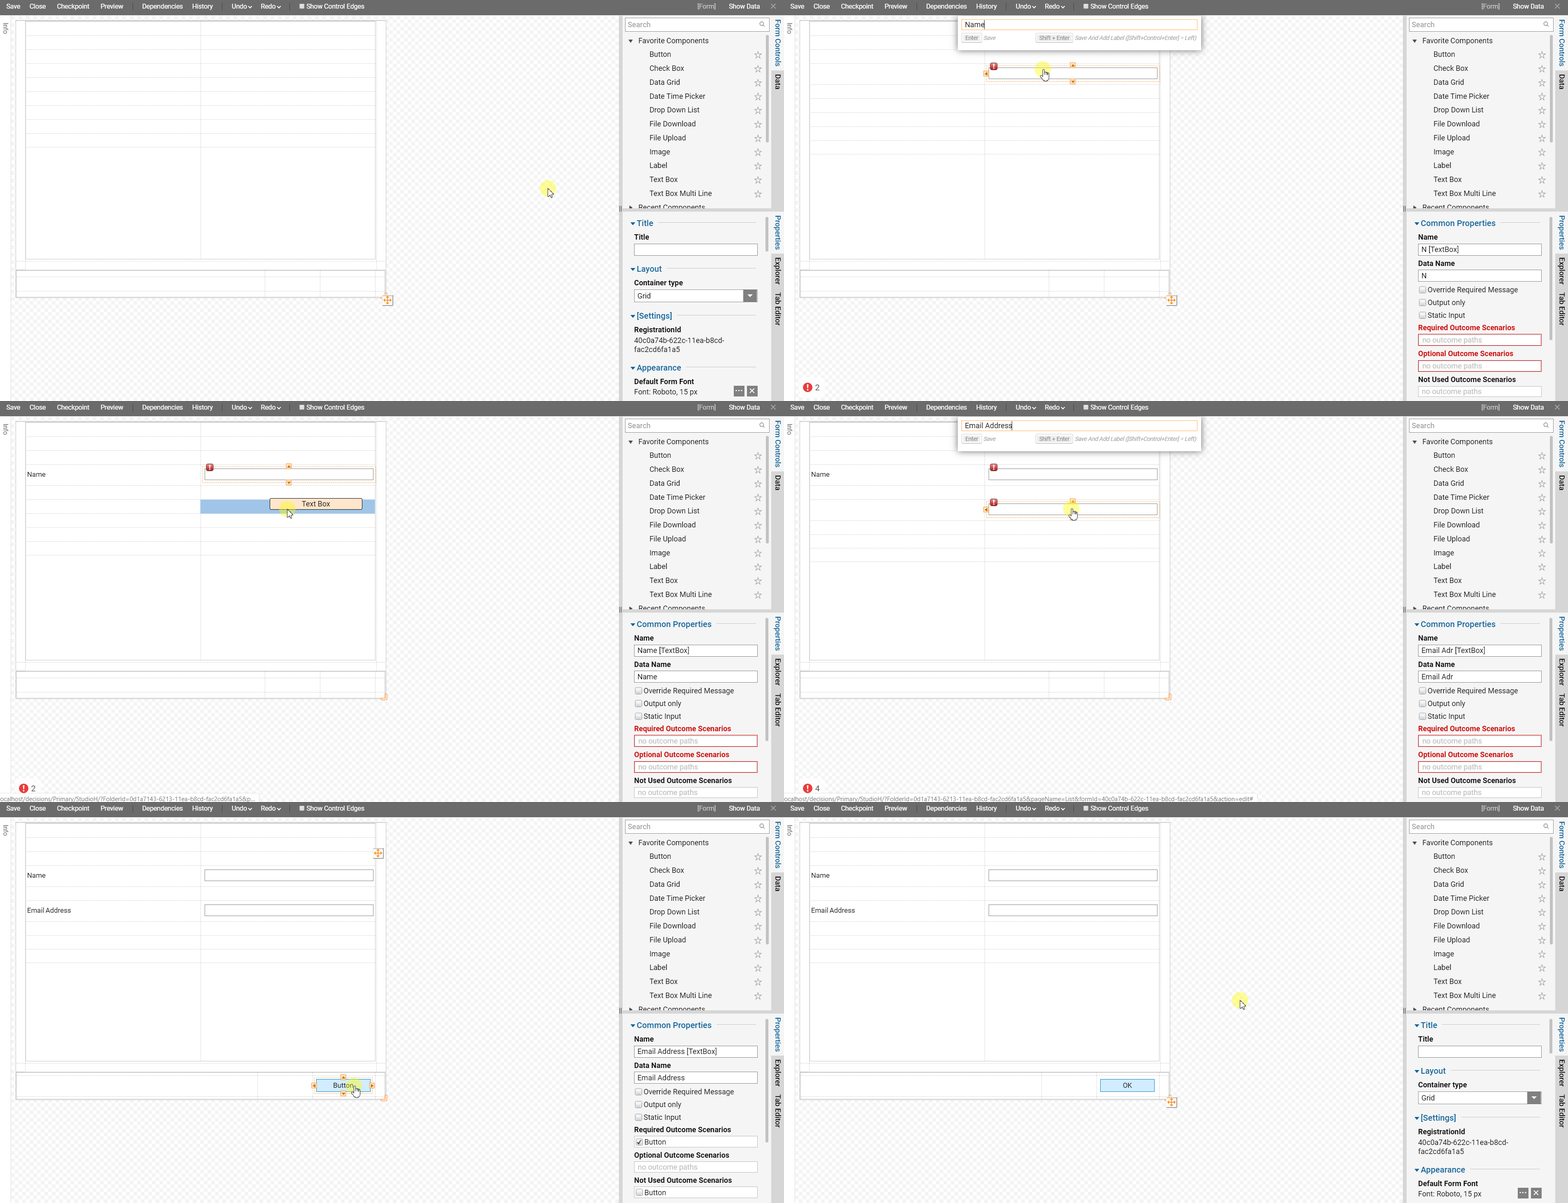
Once redirected to the Form Designer, use two text boxes, two labels, and a button to design a Form as shown in the GIF below. Keep in mind that when a Text Box is added to the Form, pressing Shift + Ctrl + Enter will insert a Label to the left of the Text Box. When the Form is complete, save and close the Form Designer to return to the Flow Designer.
Connect the OK path from the Show Form step to the End step. The Run Sub Flow outputs should automatically map to the Show Form inputs; if they do not then, it will need to be mapped from the Properties panel of the Show Form step. Use the Select From Flow mapping type and choose the corresponding output data from the Run Sub Flow step.
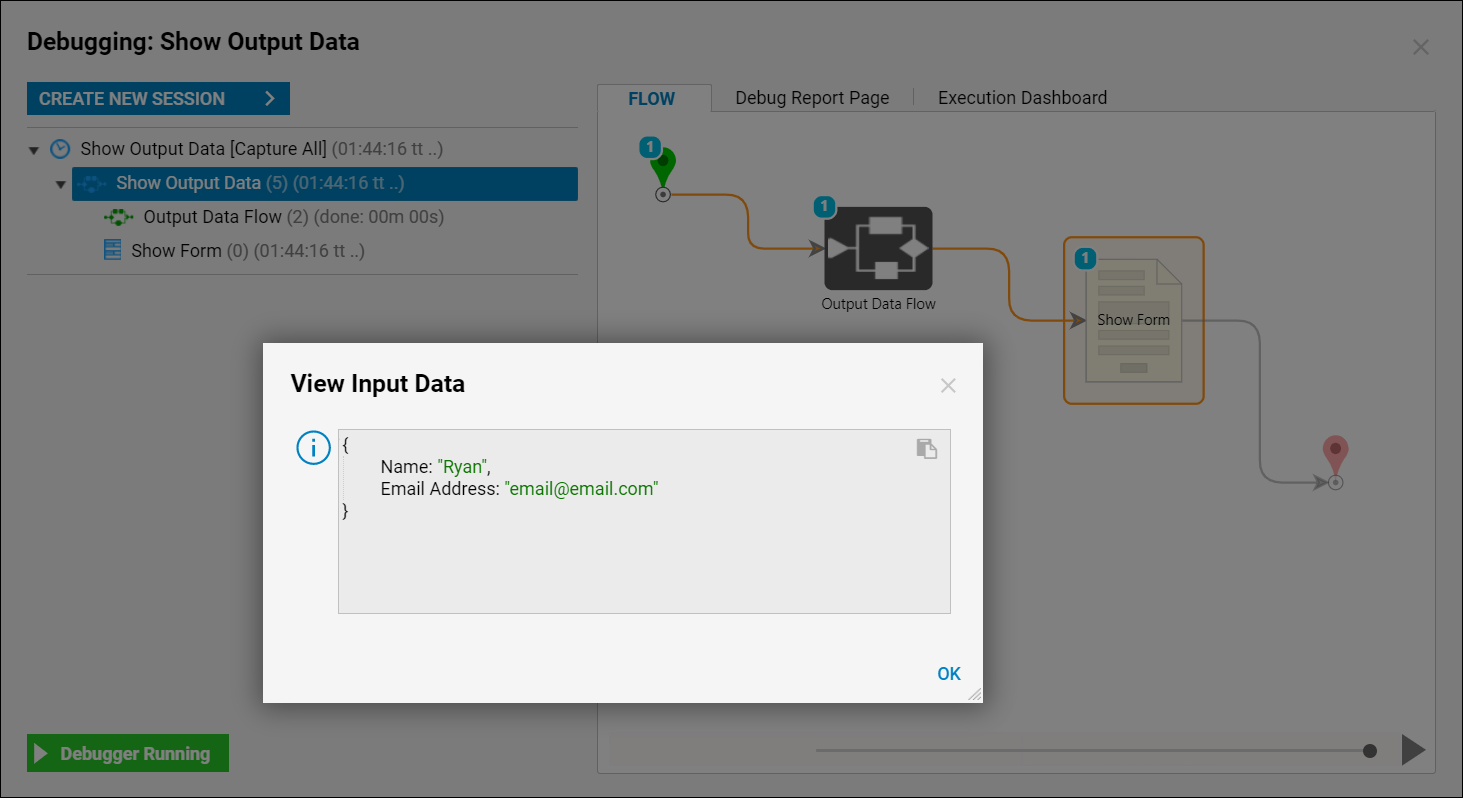
Debug the Flow to see that the Flow Output Data from the first Flow has moved to the new Flow and is shown on a Form. There are multiple variations of how this data can be configured and moved throughout Flows, to be explored depending on the use case.
