Overview
You can run unit tests on flows from the Flow Designer. Unit tests run like regular tests in the debugger, but they let you define boilerplate flow input data (so you don't have to enter it manually each time you want to run a test). This assumes your flow has input data; if not, the unit test option will not appear in the debugger. Using a unit test is especially helpful during the development of a flow that uses many input data.
Unit tests also let you define an output rule for evaluating flow output data. Again, this assumes your flow has output data; if not you can ignore it. This lets you evaluate whether your flow is returning the output data you expect when you've run it with a certain set of input data.
To run a unit test on a flow open in the Flow Designer, click Debug Flow in the top bar. If the flow has input data, you will be prompted to enter it in the right panel and given the option to save it as a unit test input.
Example
This example flow will add 10 to any number and output the result. For this example, two test scenarios will be defined.
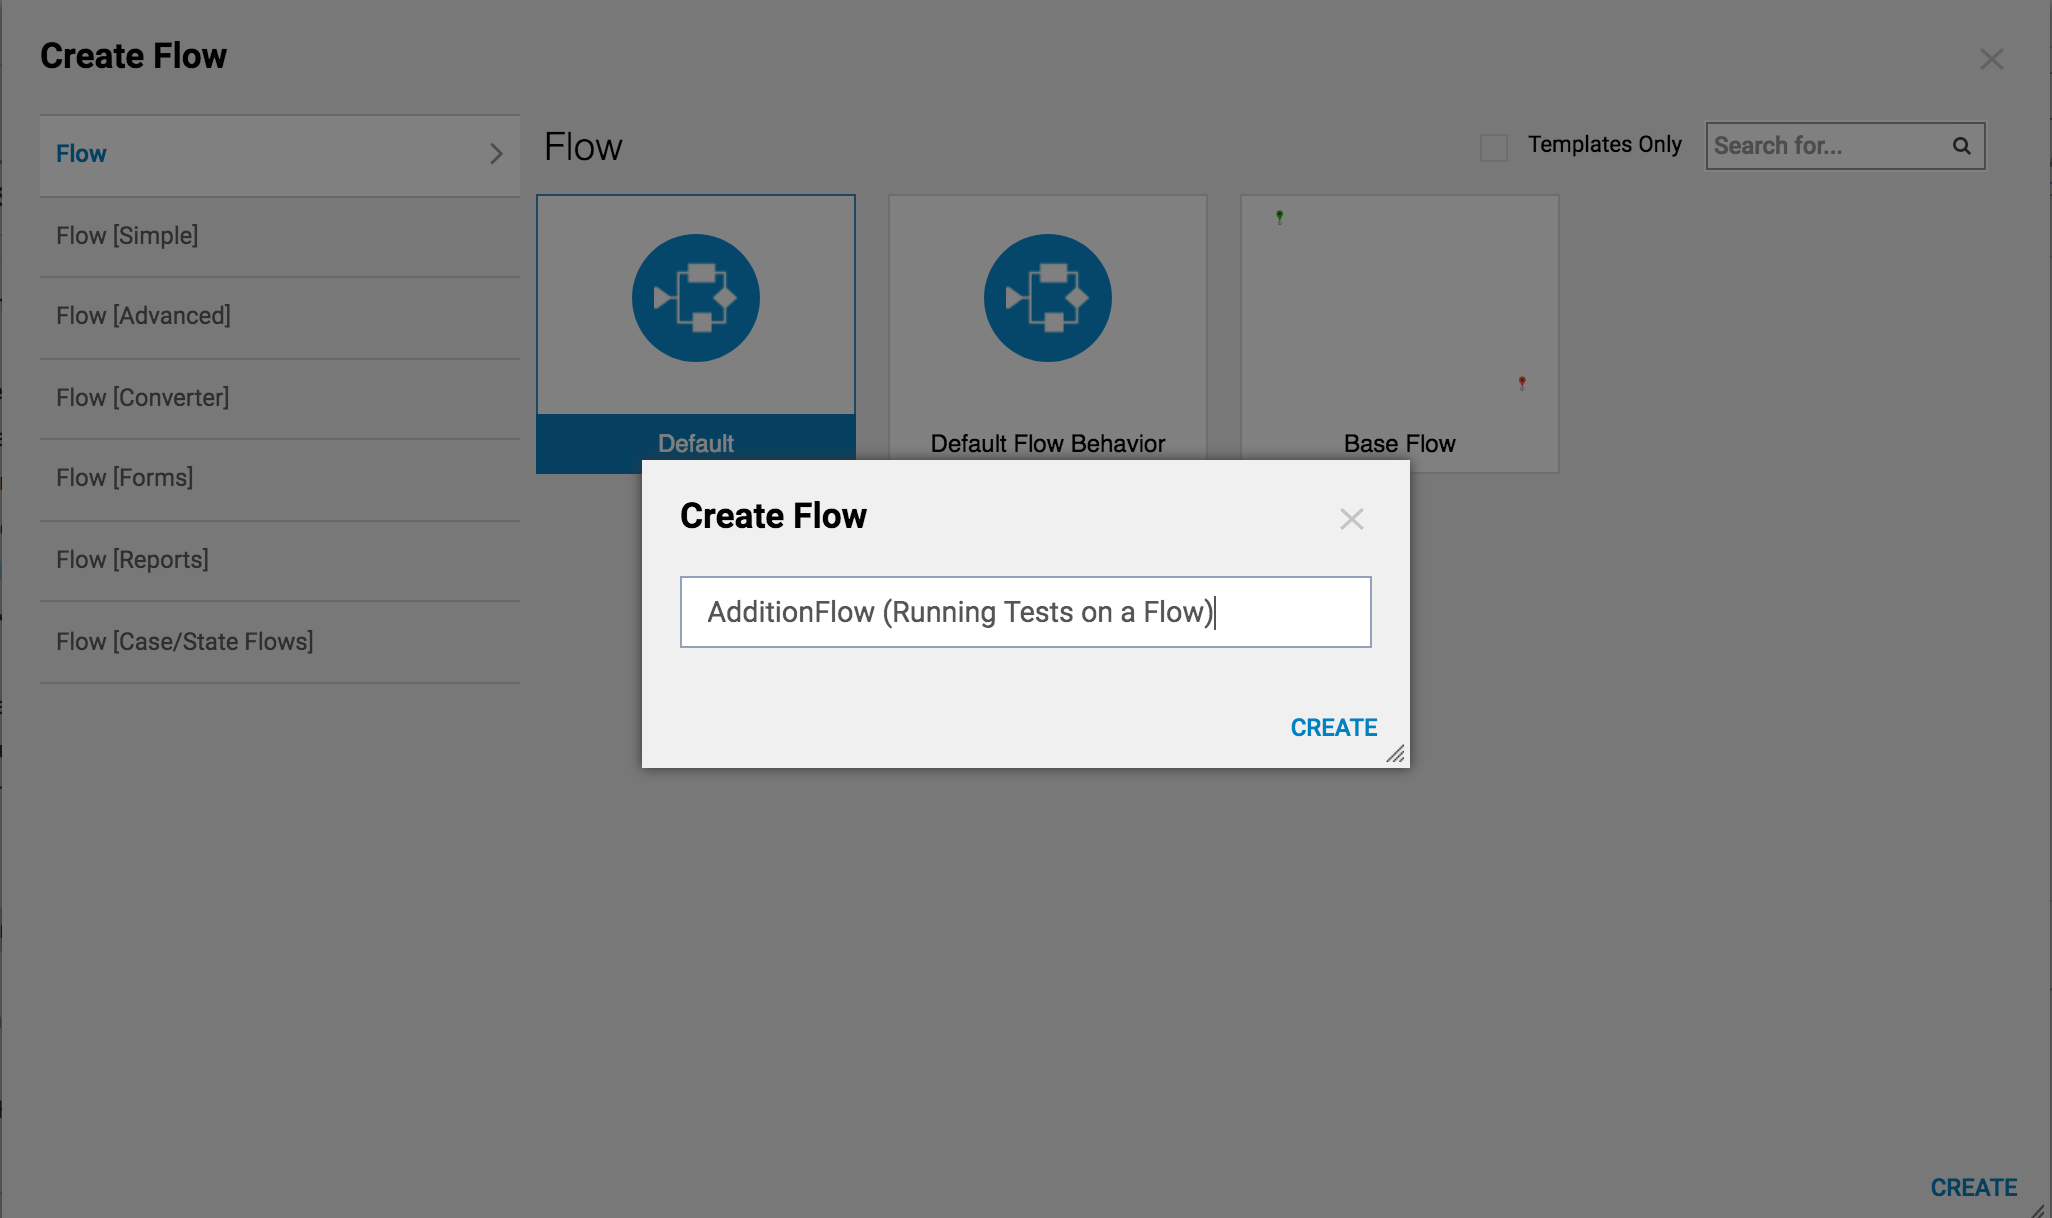
Begin by creating a new flow in a Designer Folder. For this example name the flow AdditionFlow.
For more information on creating a flow, see Creating Your First Flow.
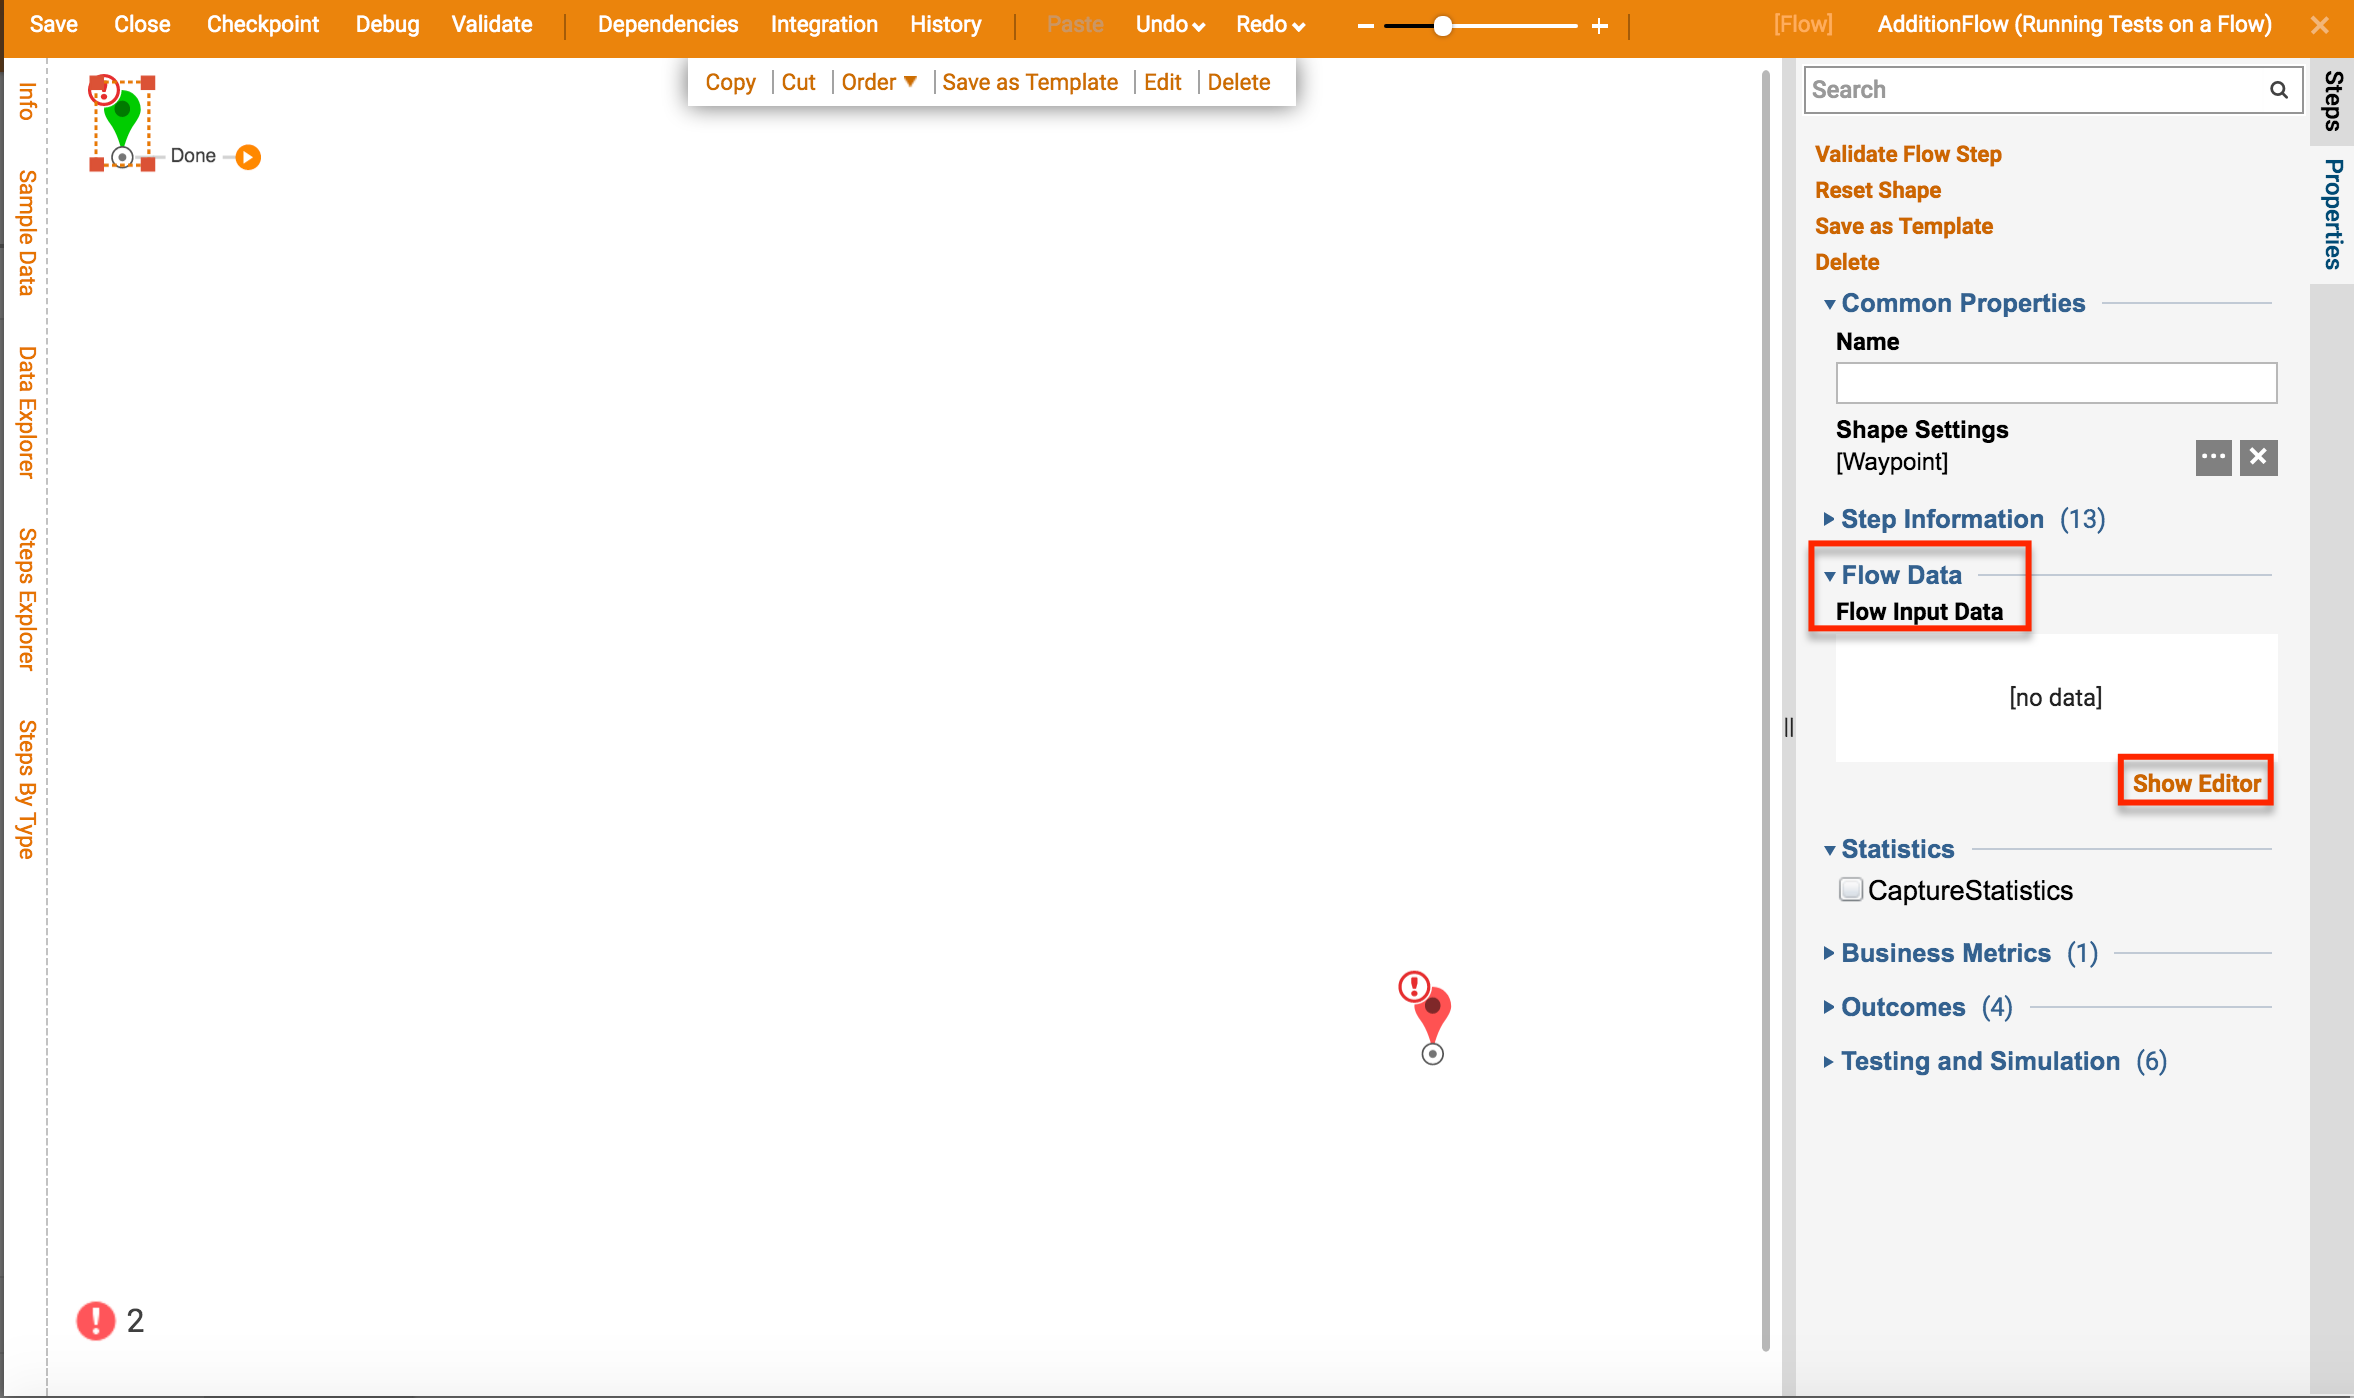
First, select the Start Step of the flow and in the Properties panel on the right under Flow Data, select Show Editor.
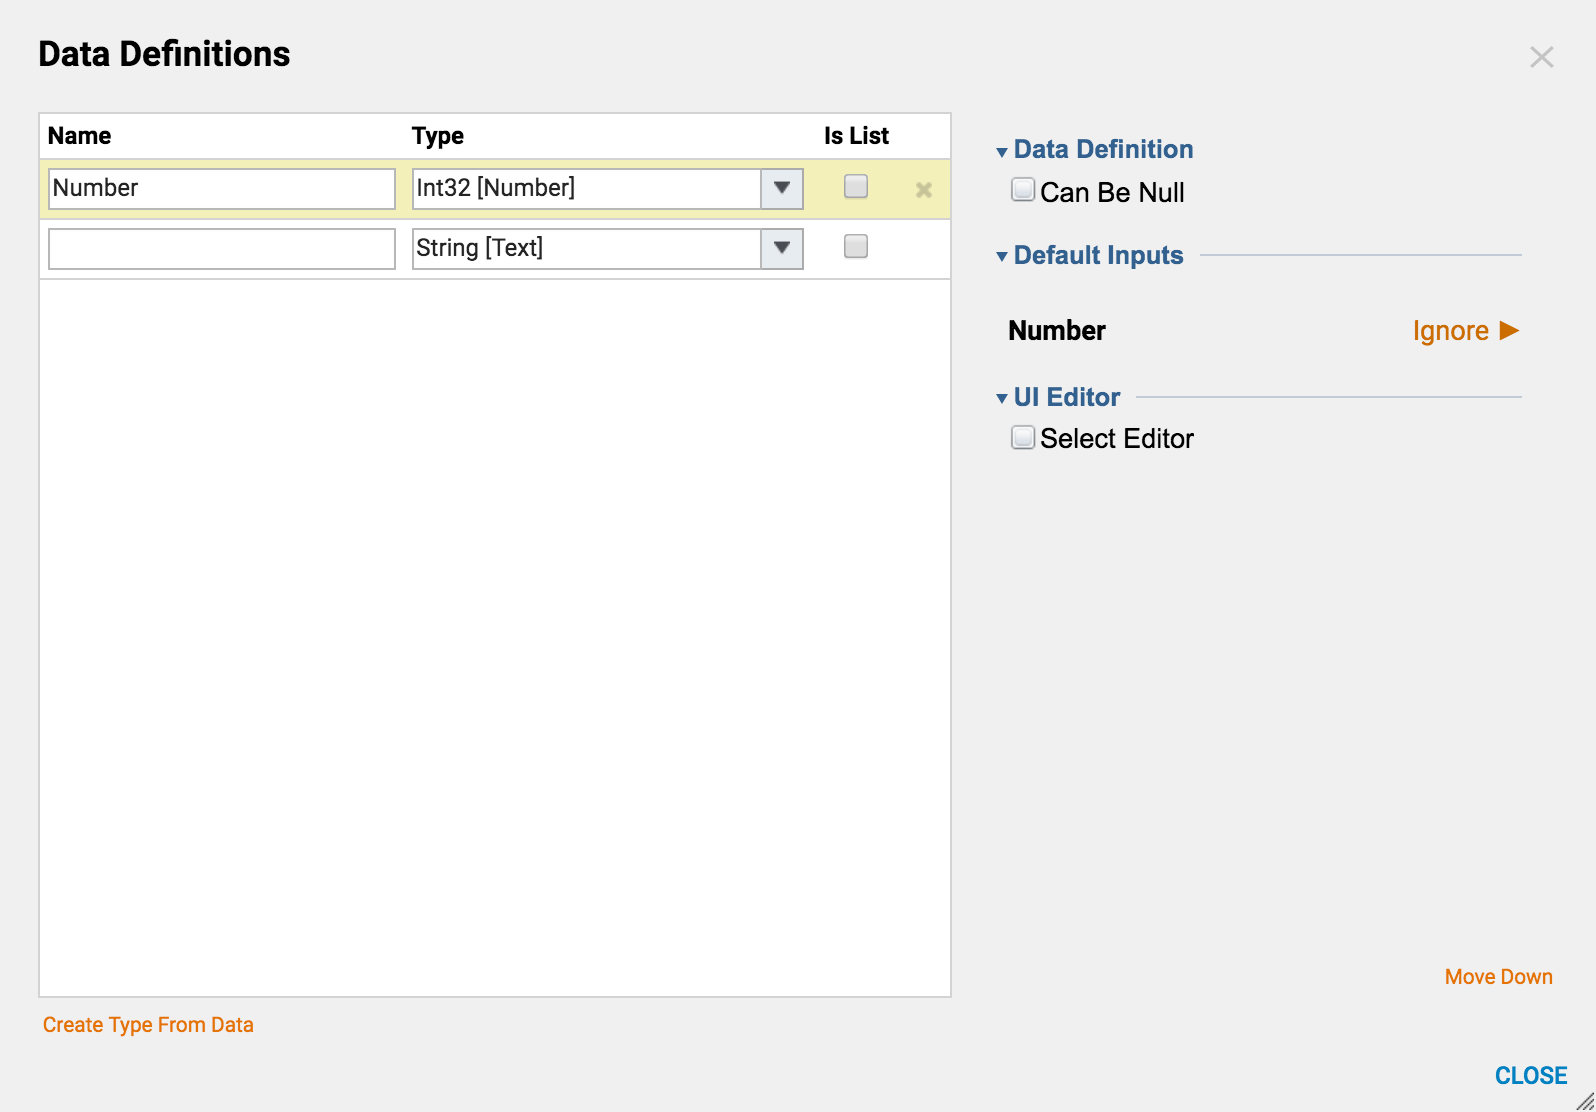
In the Data Definitions dialog, define an input called "Number" with a type of Int32 and select Close.
Back in the Flow Designer, in the Steps panel under Data > Numbers, drag an Add step onto the workspace.
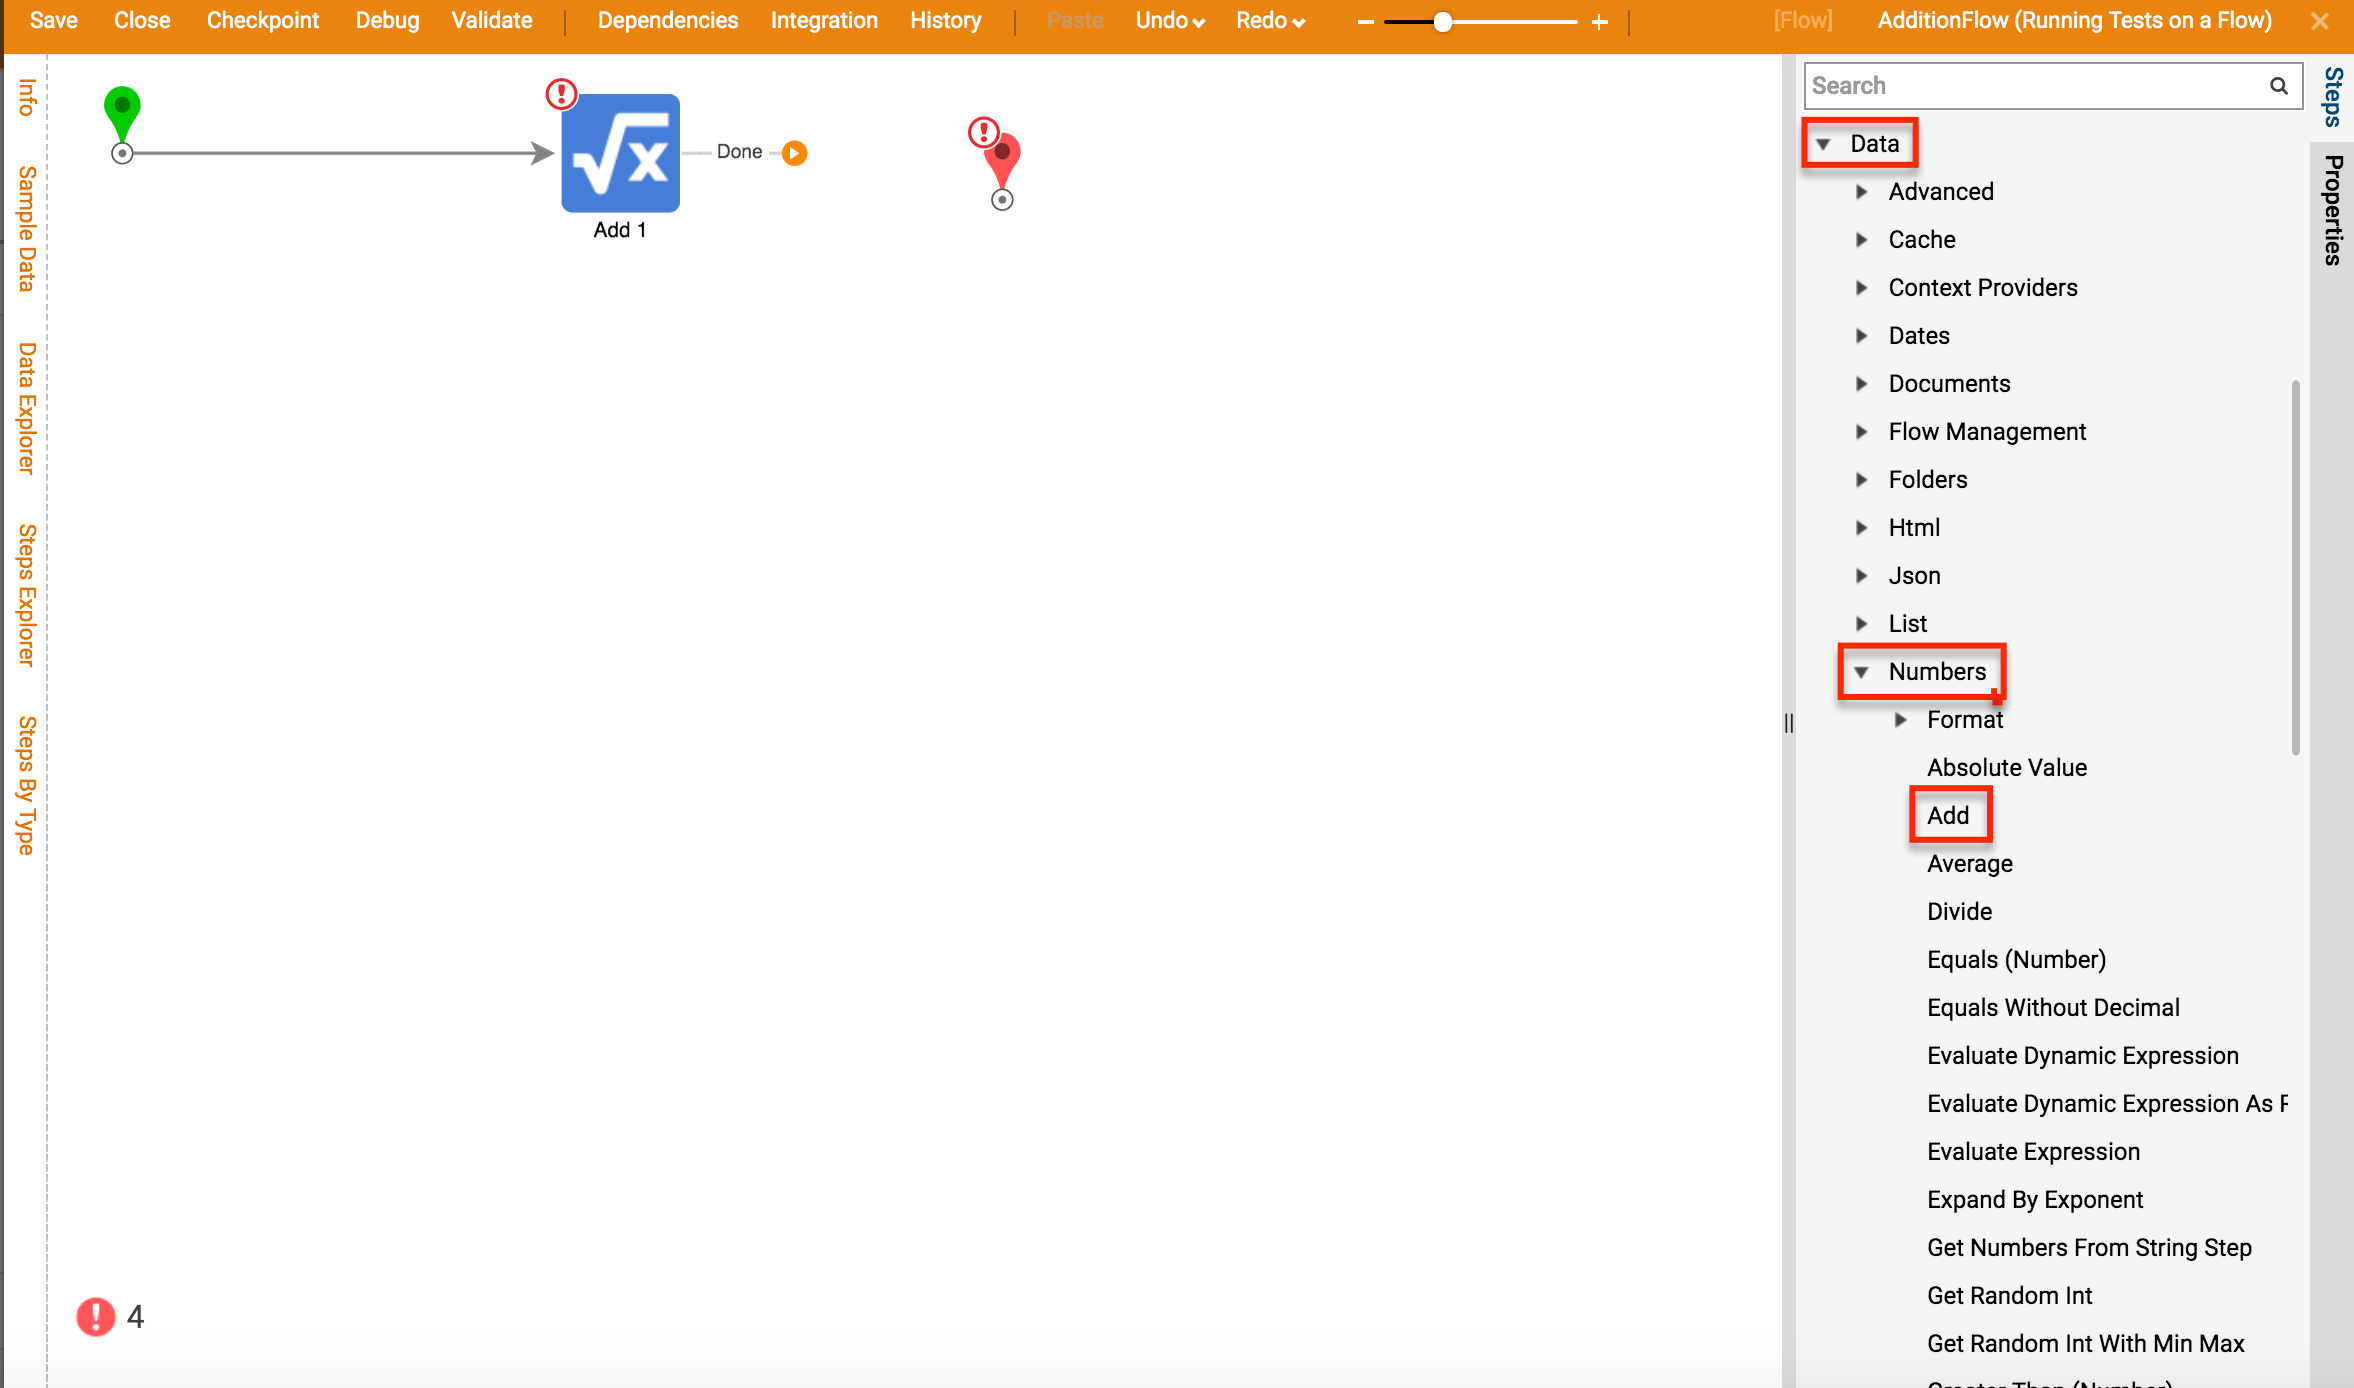
This step will take the Int32 input data that was created, "Number", and add 10 to it (10 is an arbitrary value that was chosen for this example).
To configure the Add step, select it, then in the Properties panel on the right side select Edit Input Mappings.
Configure the mapping editor as follows:

Next, click and drag the outcome path of the Add step to the End Step.
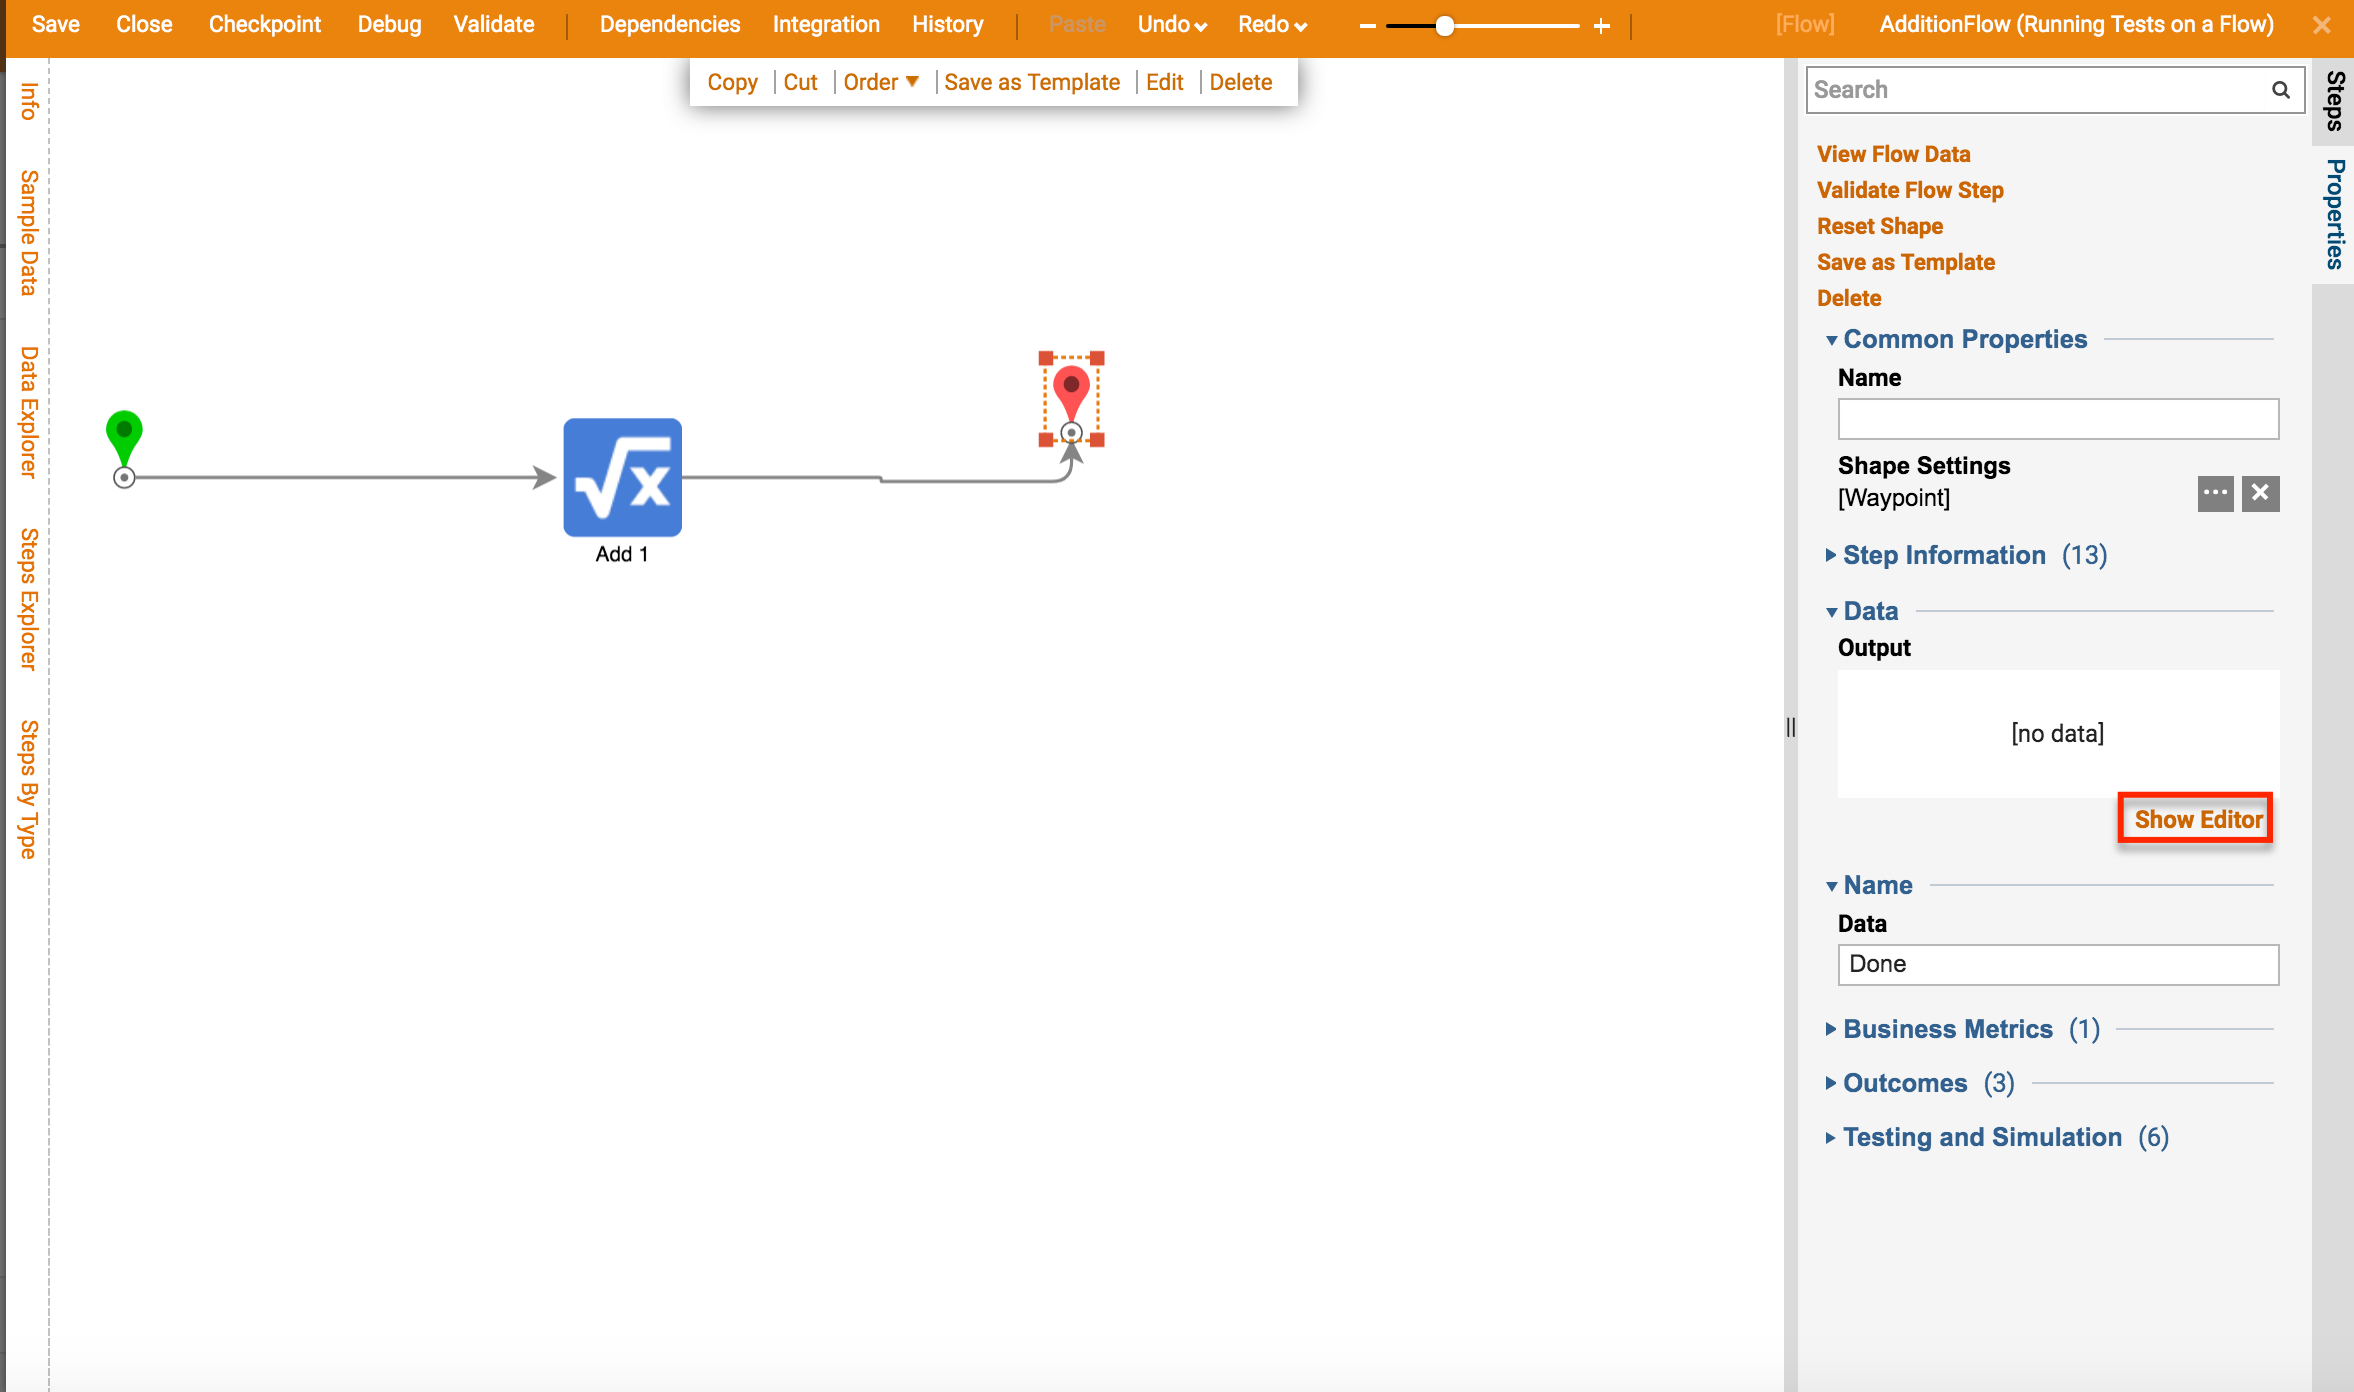
When we test this flow we will want to see and be able to evaluate the output data from the Add step. To do this create output data.
Select the End Step and, in the Properties panel under the Output section, click Show Editor.
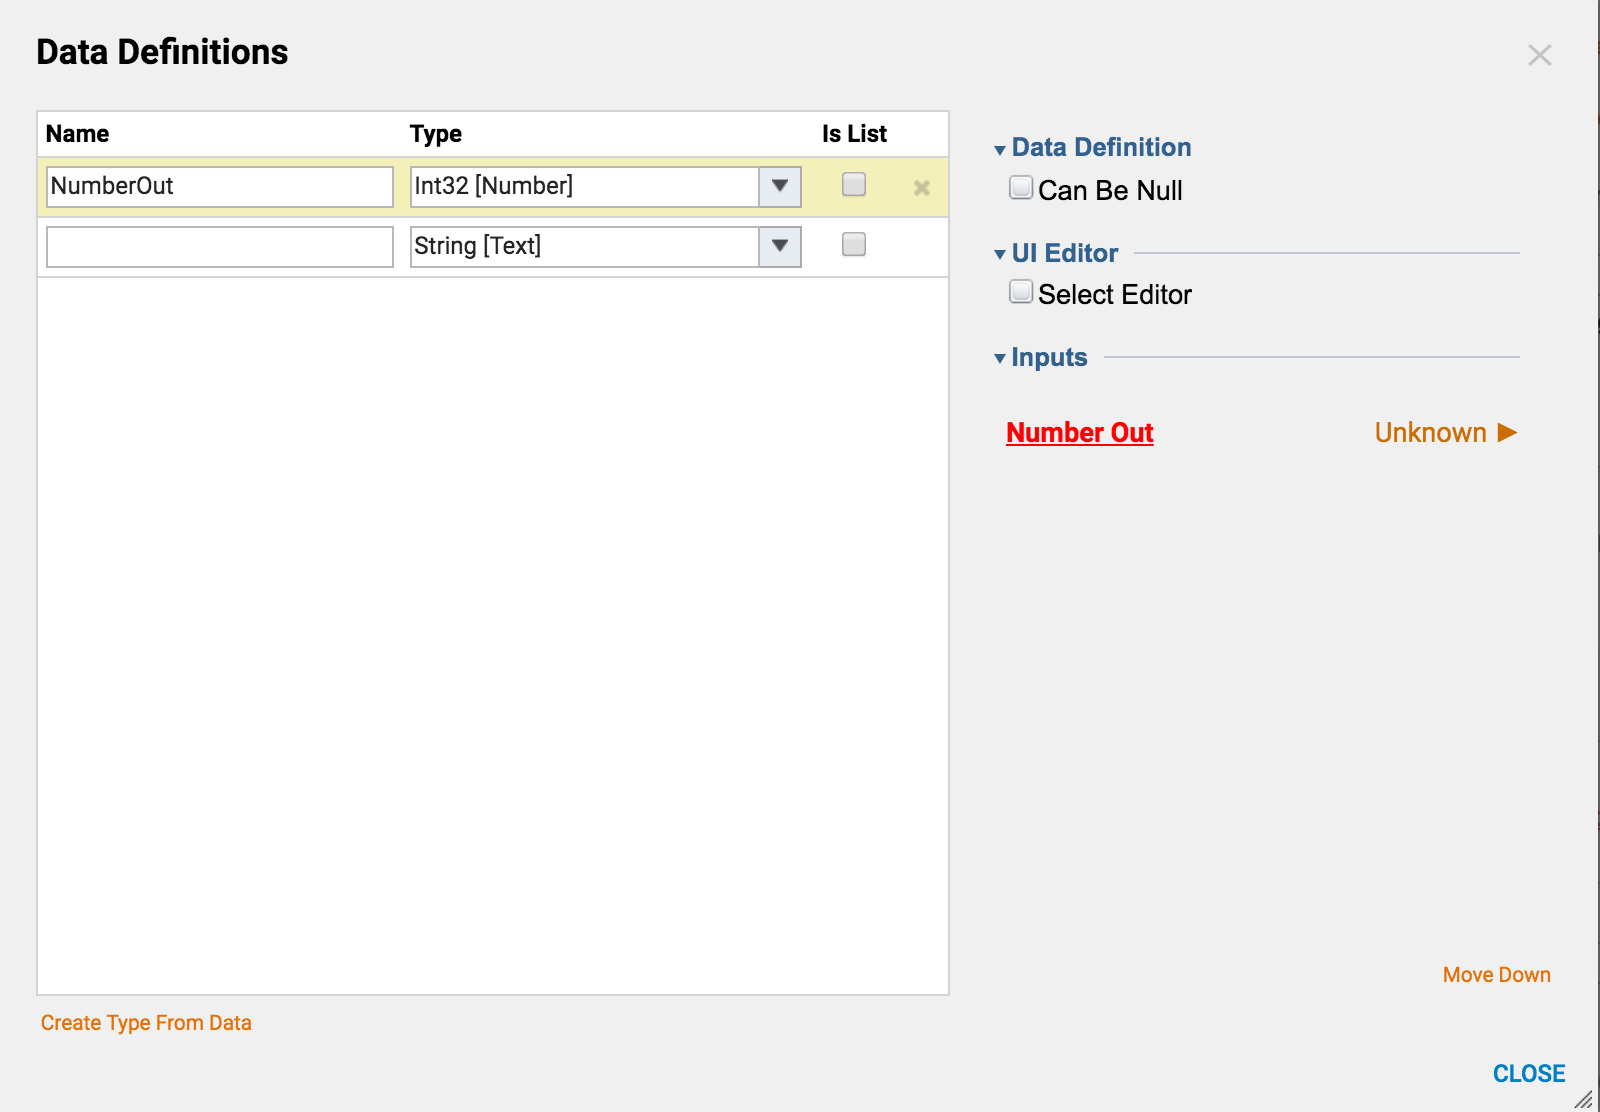
In the resulting Data Definitions dialog, create an output called "NumberOut" with a type of Int32 and map the output from the Add step, "Add_Output", to it. Click Close when finished.
The flow is complete.
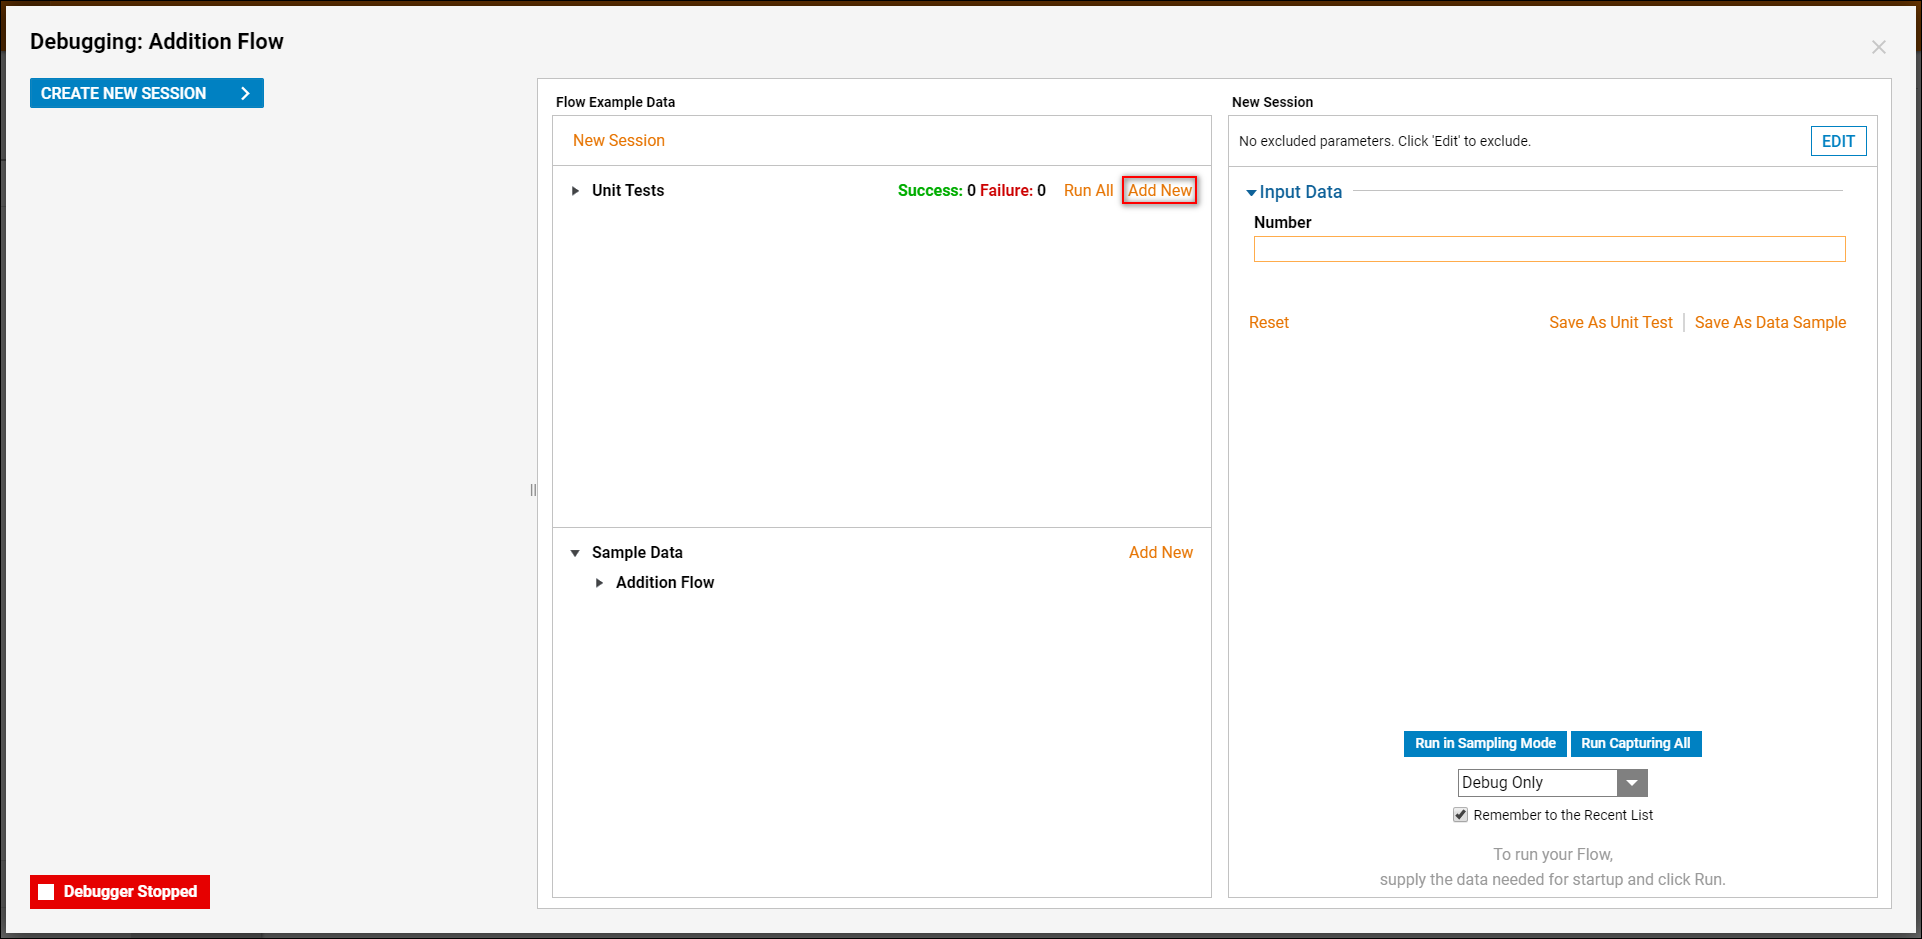
To run a unit test on it, select Debug Flow in the top action panel.
Under Unit Test, select Add New.
Type the Test Name, "Failed Test". Under Input Data > Number type 5, this will add 5 to 10 (the number chosen as the constant within the flow. Then select the Edit link under the Test Result Evaluation Rule.
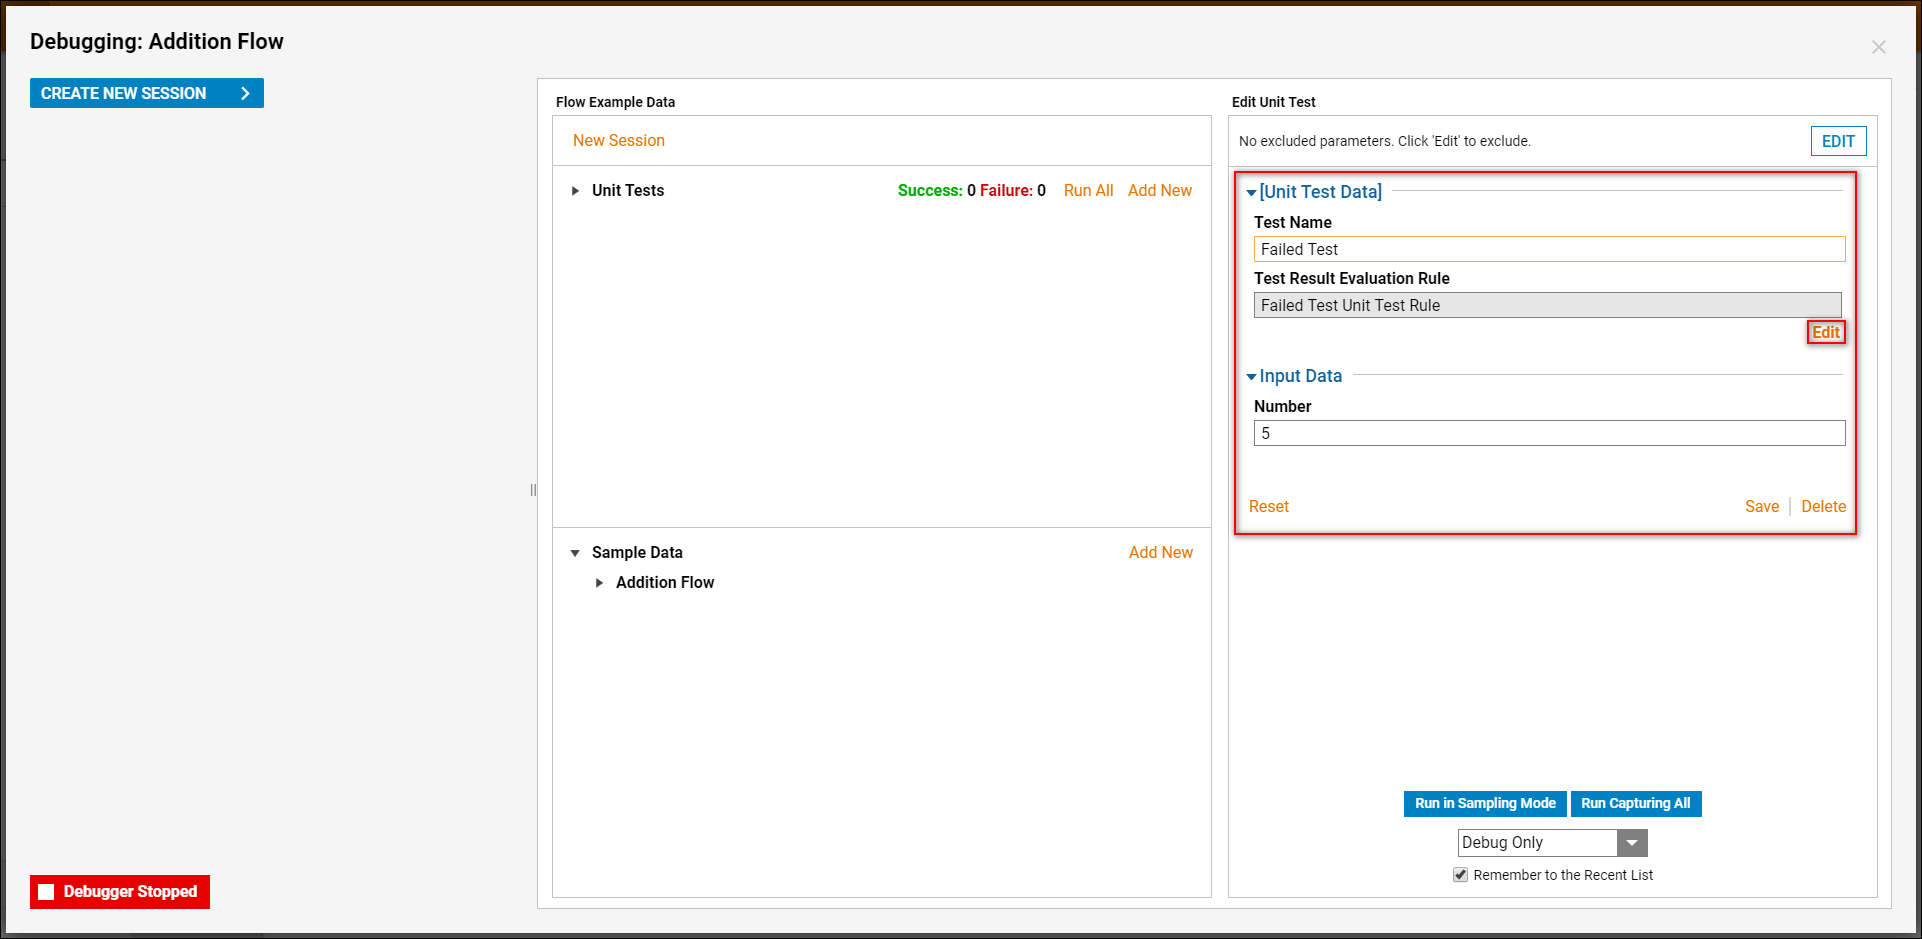
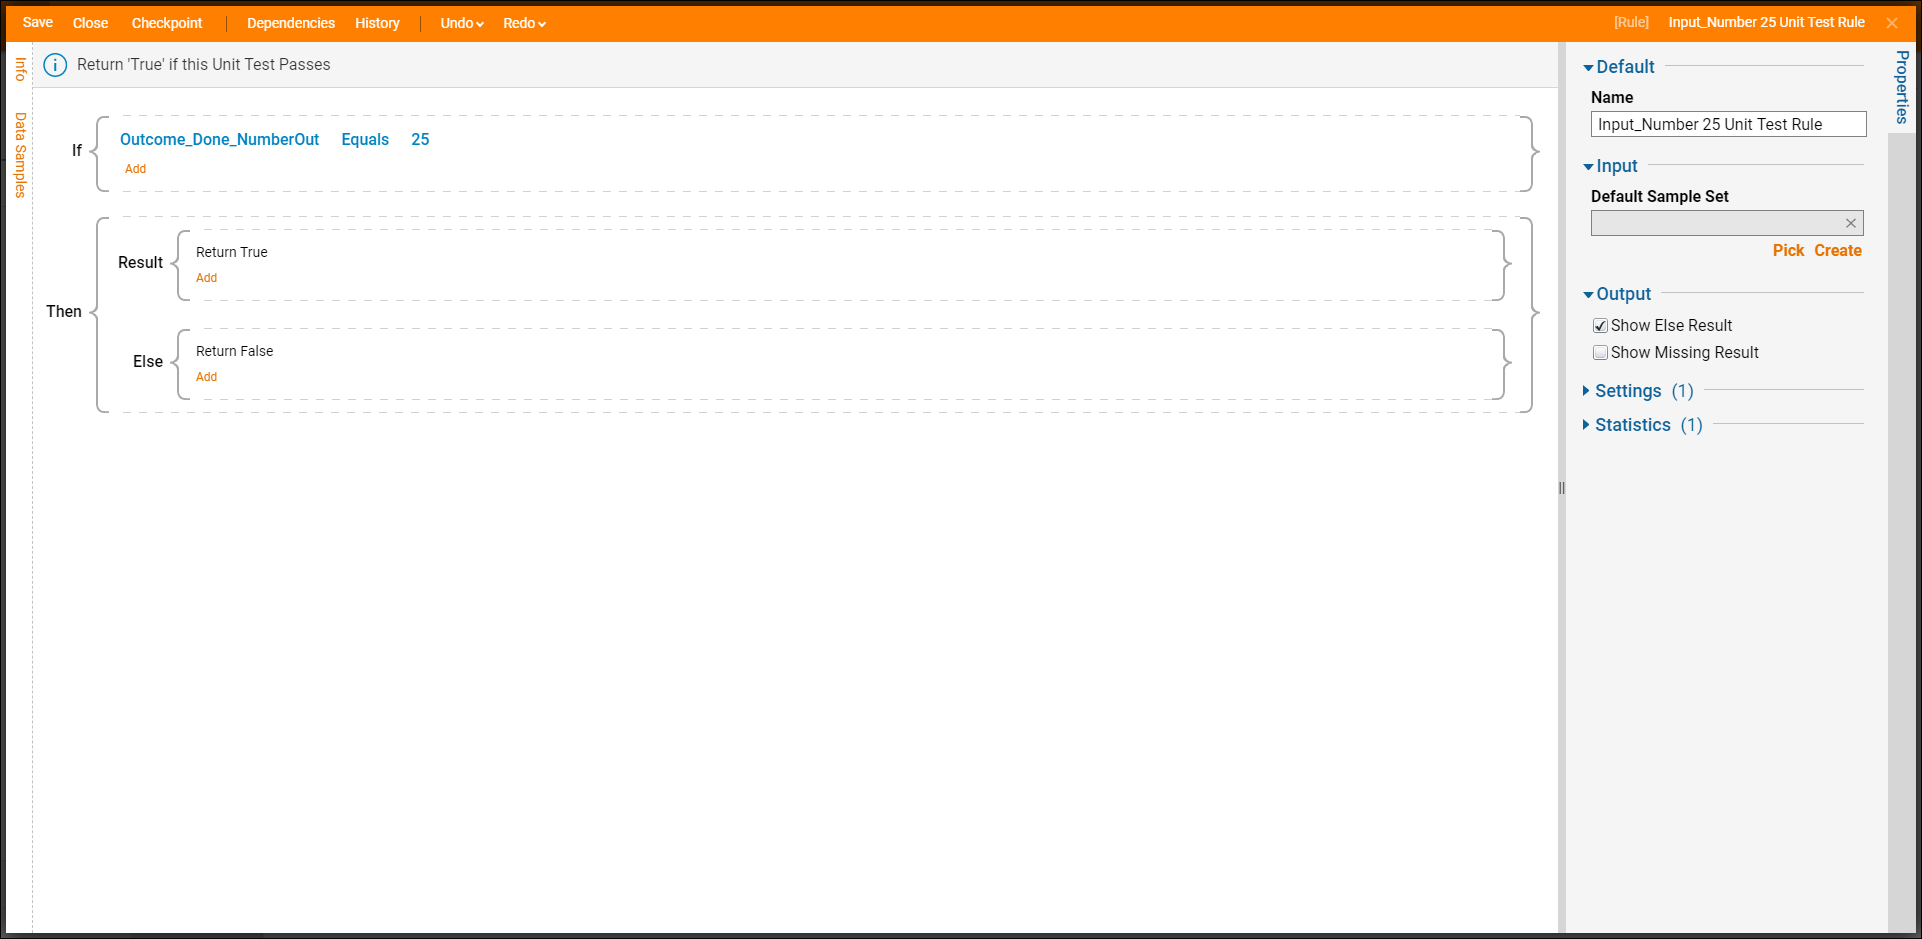
This rule expects the sum to be 25, therefore the Unit Test will show a failed result. Save and close the Rule then select the Save button under Unit Test Data.
Next, establish another Unit Test with a new rule to return a true result. Under Unit Test, select Add New.
Here, the name is "Successful Test". Under Input Data > Number type 5, this will add 5 to 10 (the number chosen as the constant within the flow. and we expect a sum of 15. Then select the Edit link under the Test Result Evaluation Rule.
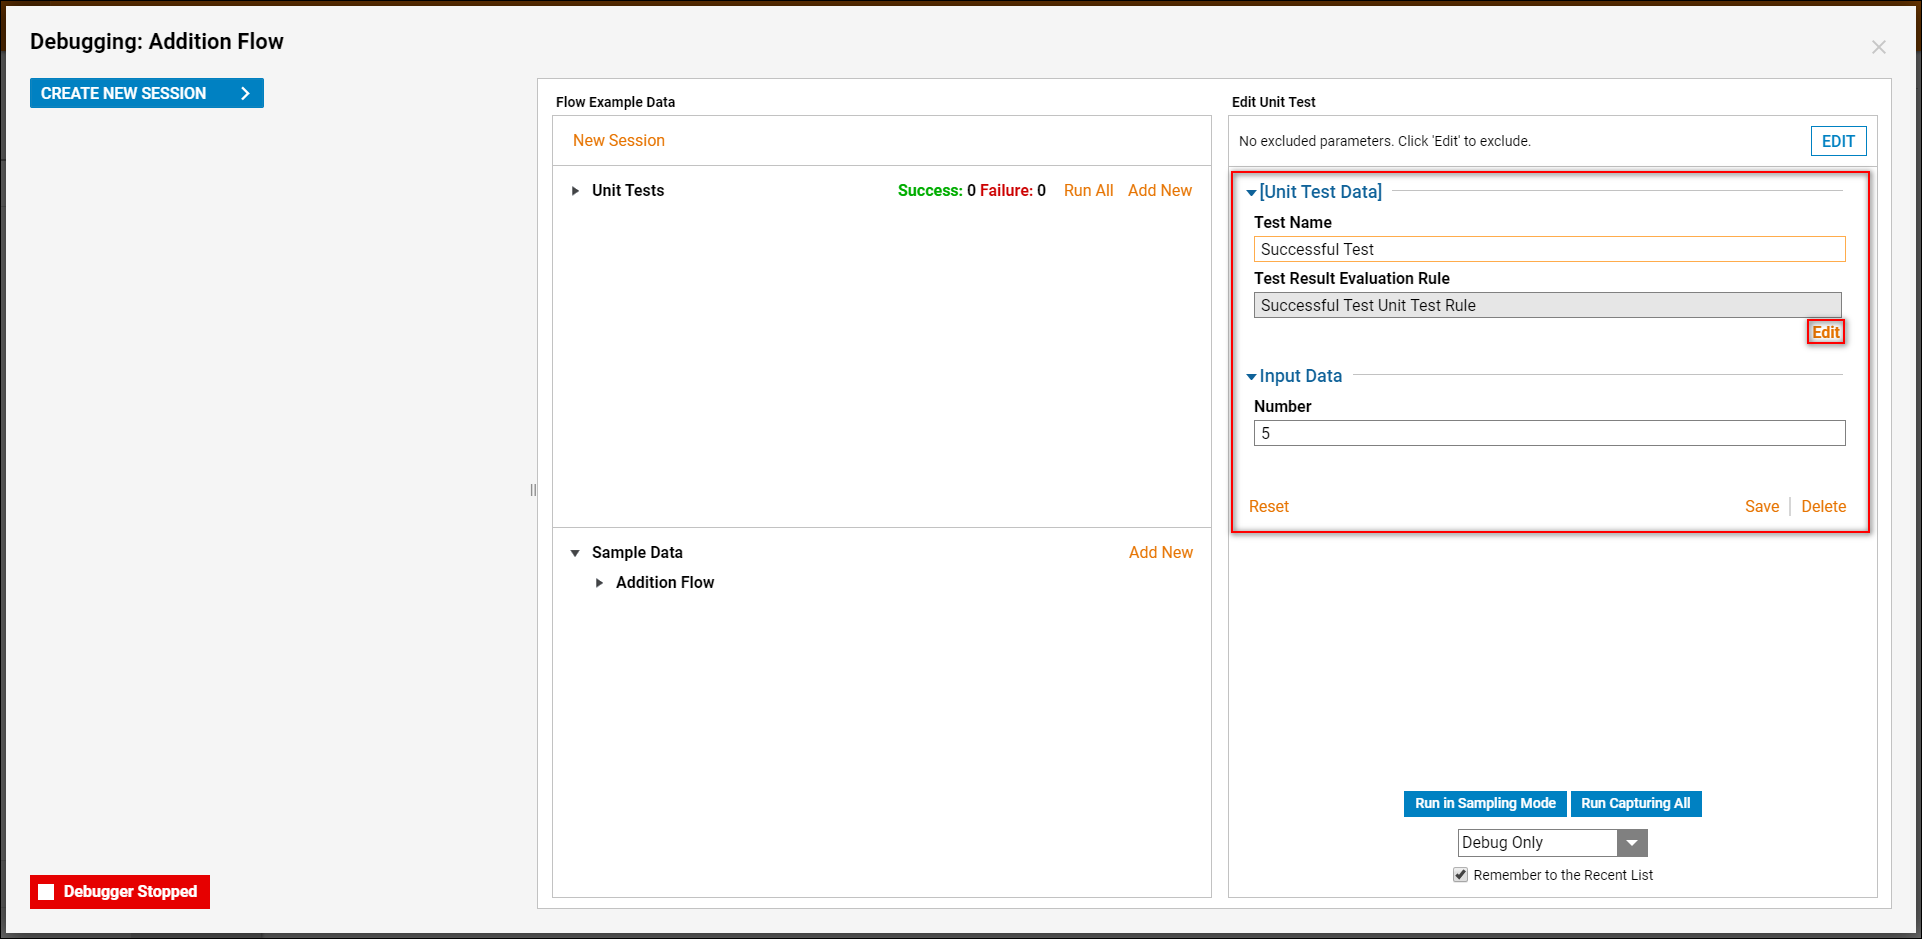
The Rule will evaluate this result as True and Pass the Unit Test.
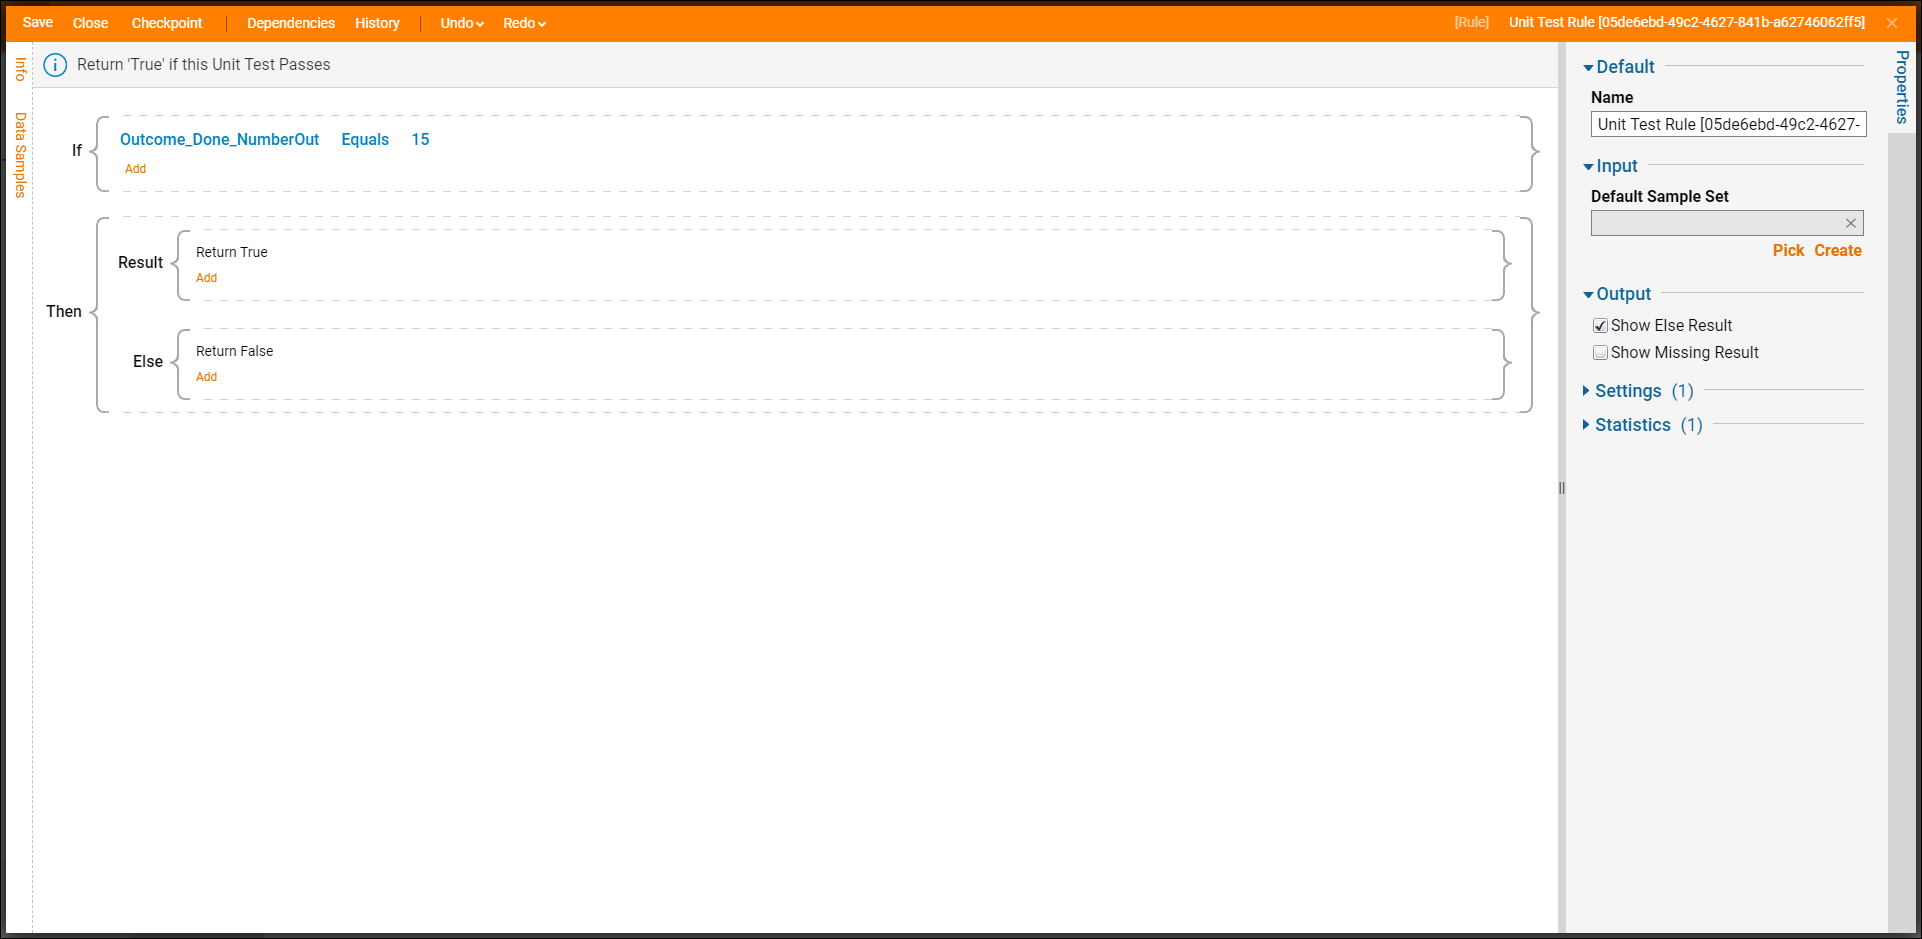
To run the tests, select the Run All button. The first test will have a Failure result. The second test will have a Success result. To run a test individually, we can use the play button on the right side of each unit test entry. To remove or modify, use the right-hand side field.
