Overview
New Rules can be created and used by creating public methods in a class file project.
Example
This example will add the proper attribute to a method in Visual Studio to make a Flow Step available as a Rule Verb.
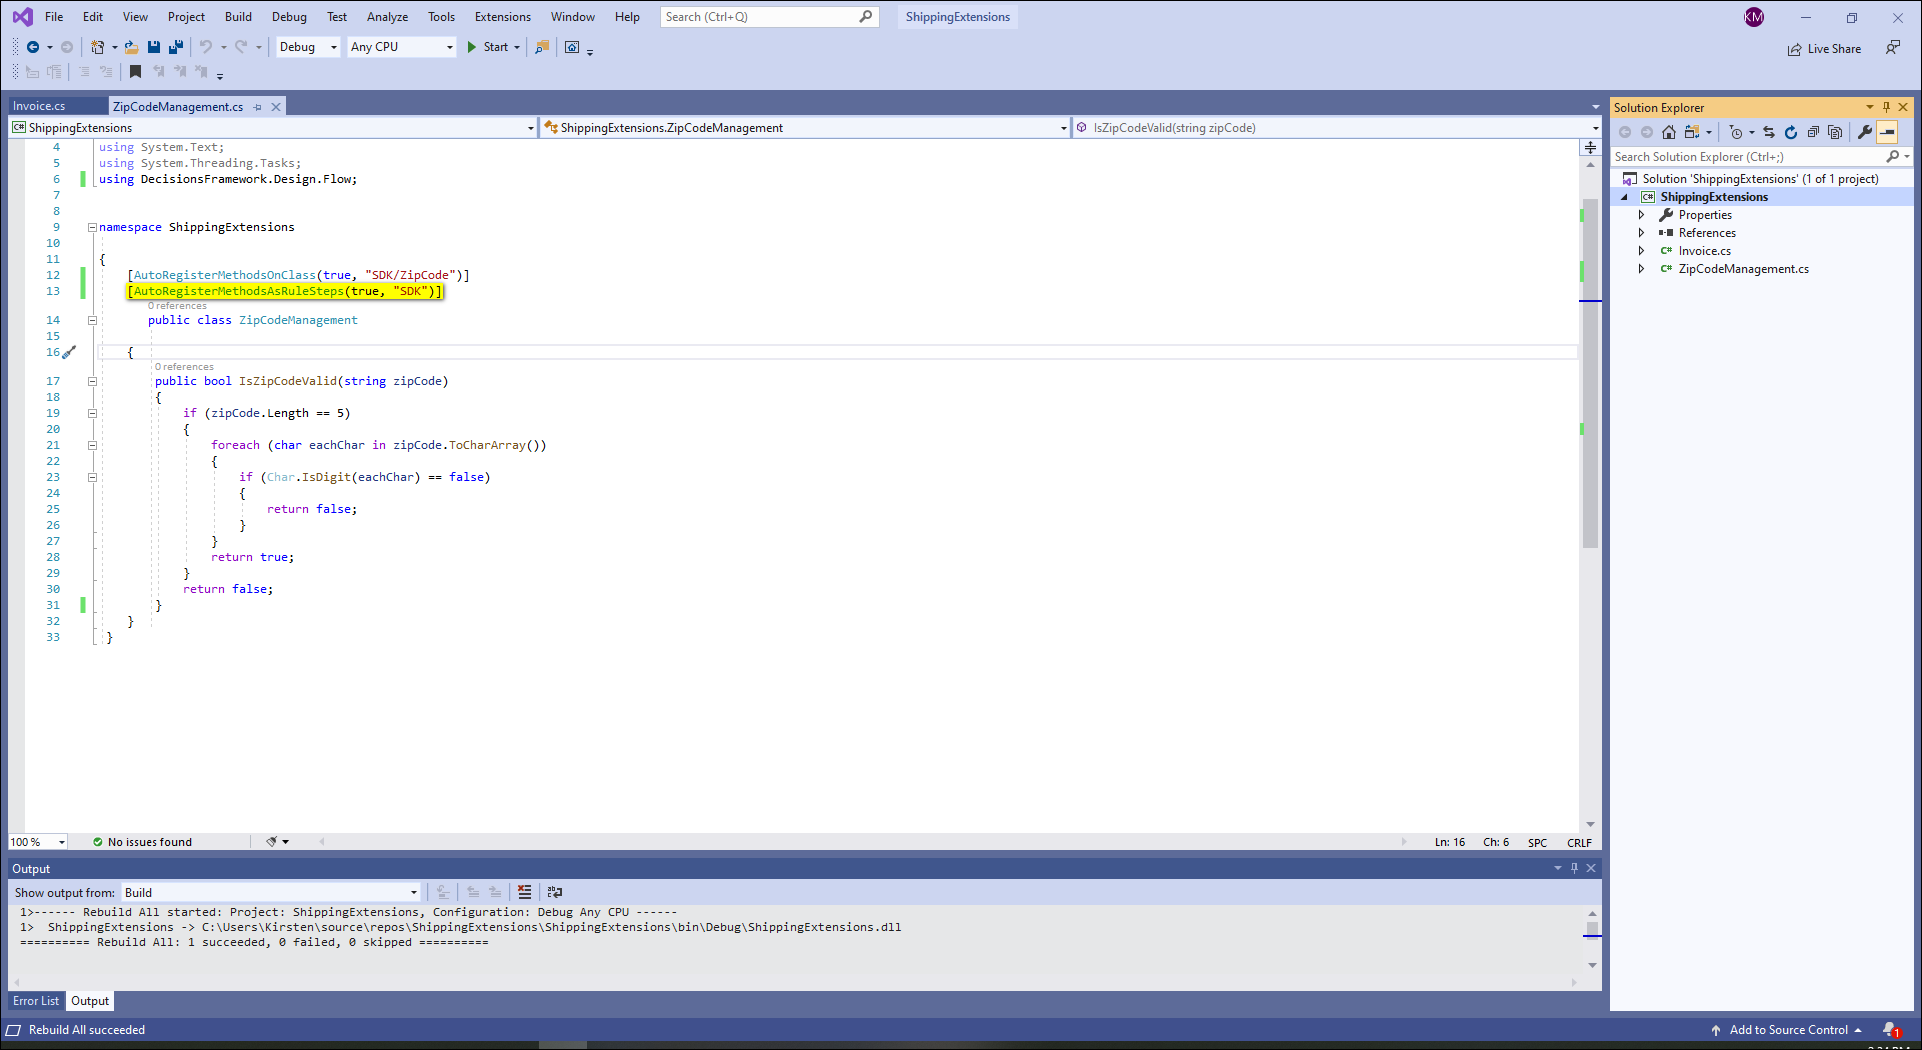
- At the beginning of the code add the attribute [AutoRegisterMethodsAsRuleSteps(true, "SDK")]. This attribute will allow the code to show as a Rule Verb within the SDK category in the Rule Designer. In order for the method to be picked up by Decisions as a Rule Verb, it must return a boolean. The name of the method will be the name of the Rule. Also, the inputs and outputs of the method will become the inputs and outputs of the Rule.For more information on AutoRegister Attributes, see AutoRegister Attribute Glossary.
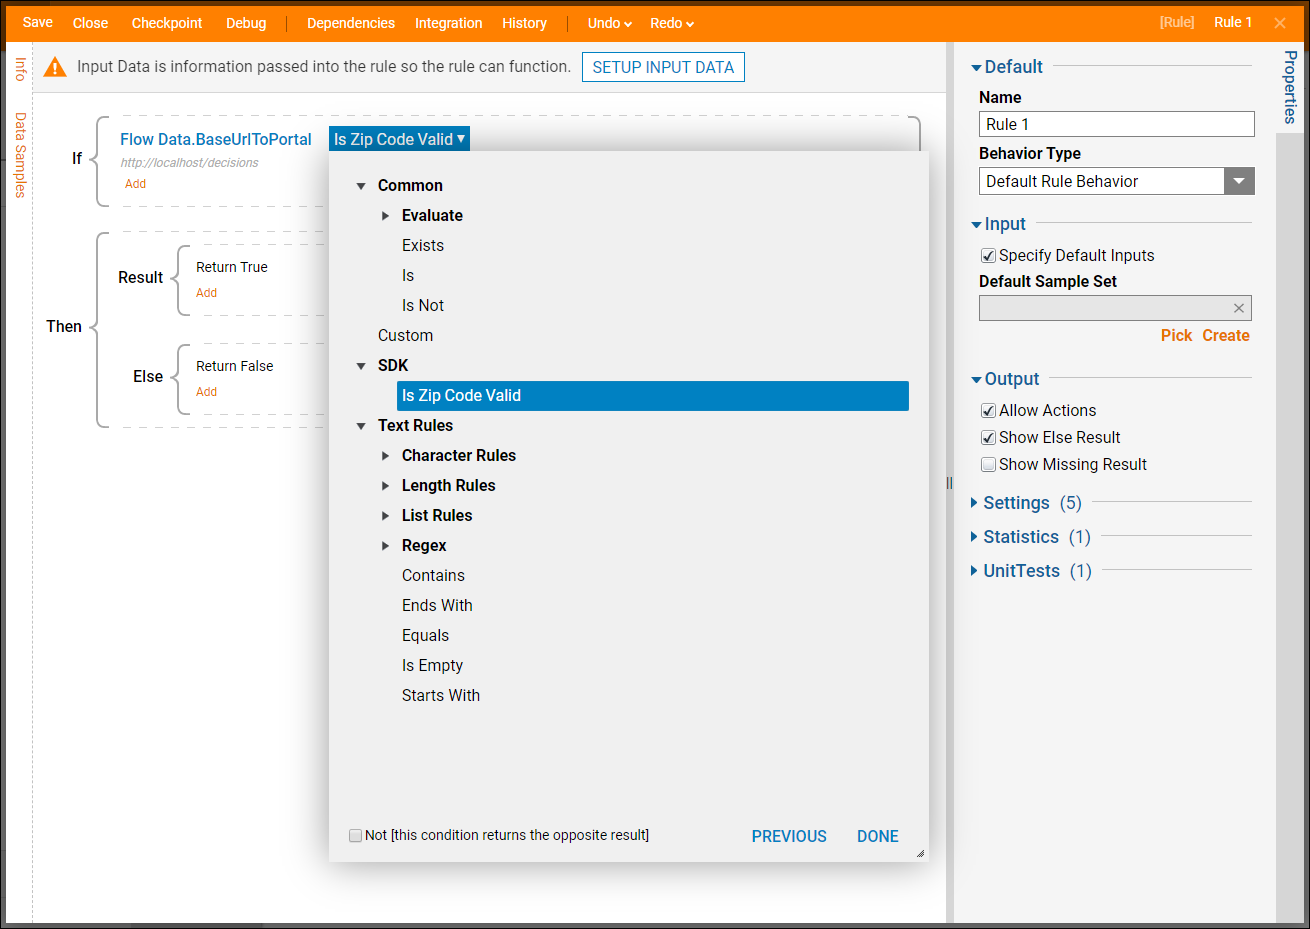
- After writing the method, add it to Decisions by following the steps in the Getting Started in Visual Studio article. Then, log into the Decisions Studio and create a new Rule to open the Rule Designer. The new Rule will be available in the Rule Designer as a Rule Verb.
Adding Parameters
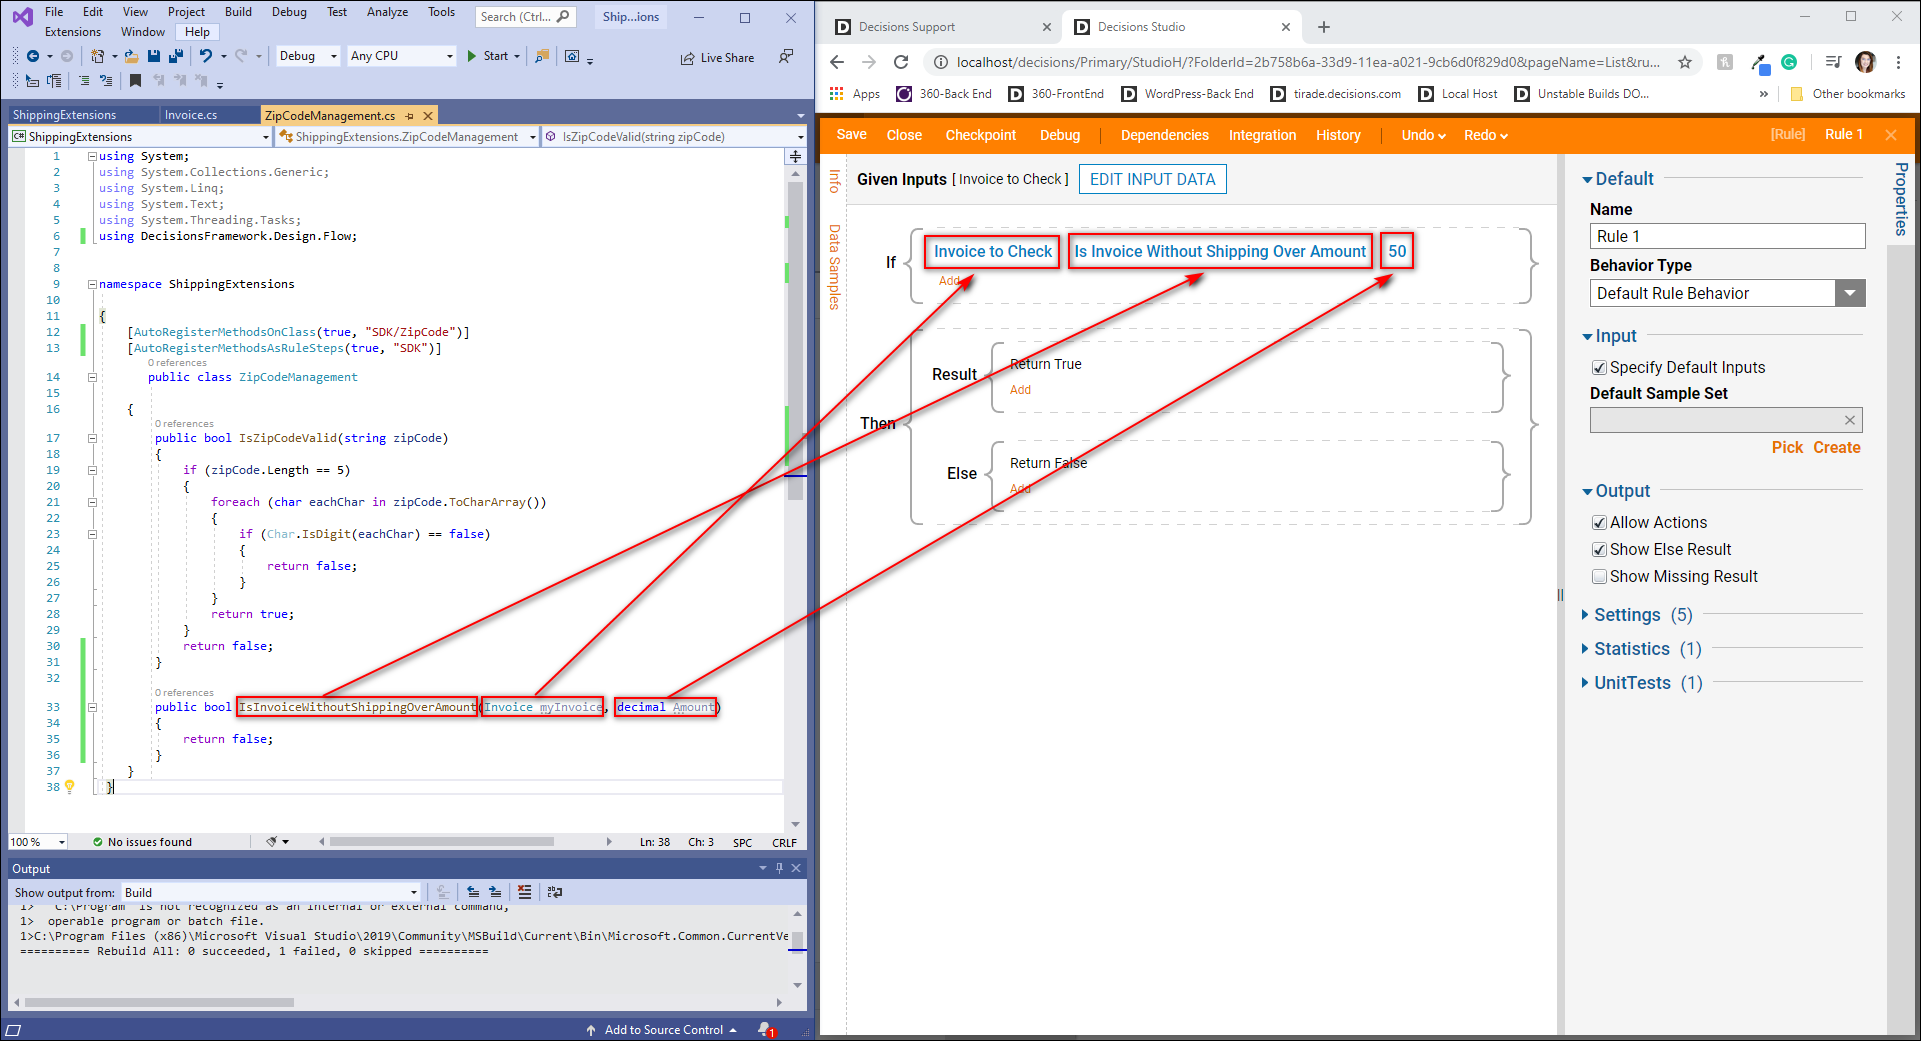
Developers are able to add parameters to the method to make the Rule more complex and easier for business users to use. The following code is named IsInvoiceWithoutShippingOverAmount. The anchor data is a data type called Invoice that was created in the Creating Custom Data Types article and the input is a decimal.
public bool IsInvoiceWithoutShippingOverAmount(Invoice myInvoice, decimal Amount)
        {
            return false;
        }
After writing the method, add it to Decisions by following the steps in the Getting Started in Visual Studio article. The new Rule Verb is now available to use only when the anchor data is the type Invoice. When the Rule verb is applied, the decimal input then populates. Keep in mind, multiple parameters can be added to a Rule Step to make the Rule more complex.
Property Classification
The following code example shows how to add property value to a Rule. This Rule evaluates the length of a string to see if its length is less than a number value.
[WritableValue]
private int number;
[PropertyClassification(0, "Number", "Settings")]
public virtual int Number
{
    get { return number; }
    set
    {
        number = value;
        OnPropertyChanged("Number");
    }
}
The run method would use the property like this:
 public override bool Run(RuleStepExecutionData data)
{
   return (((string)data.Data[this.AnchorData.Name]).Length < number);
}
Design-time validation can also be added to the Rule which would prevent the user from entering a number value less than 1. To do this, configure the class to inherit from and implement the IValidationSource interface. Also, add InvalidateVerbInfo() to the property so that the validations show up correctly in the designer when the value of the property is changed. The property and implemented IValidationSource would look like the following:
 [WritableValue]
private int number;
[PropertyClassification(0, "Number", "Settings")]
public virtual int Number
{
    get { return number; }
    set
    {
        number = value;
        OnPropertyChanged("Number");
        InvalidateVerbInfo();
    }
}
public ValidationIssue[] GetValidationIssues()
{
    List issues = new List();
    if (number < 1)
        issues.Add(new ValidationIssue(this, "Number must be greater than 0", null, BreakLevel.Fatal, "Number"));
    return issues.ToArray();
}

