- 08 Sep 2021
- 3 Minutes to read
- Print
- DarkLight
Manipulating Lists Overview
- Updated on 08 Sep 2021
- 3 Minutes to read
- Print
- DarkLight
Overview
By utilizing the power of the Flow Designer, as well as the Data Definitions window, users may create a singular List of any Data Structure. After establishing a List, users may then use a number of Flow steps to edit and manipulate the List as desired/needed. The following document discusses how to use three List manipulation steps (Add Item(s) to List, Remove Item From List, and Get Item By Index) to edit Lists in from the Flow Designer.
Creating Lists
To create a List from the Flow Designer out of any Data Type:
- From the Decisions Studio, select CREATE FLOW from the Global Action Bar, then CREATE a new Flow.
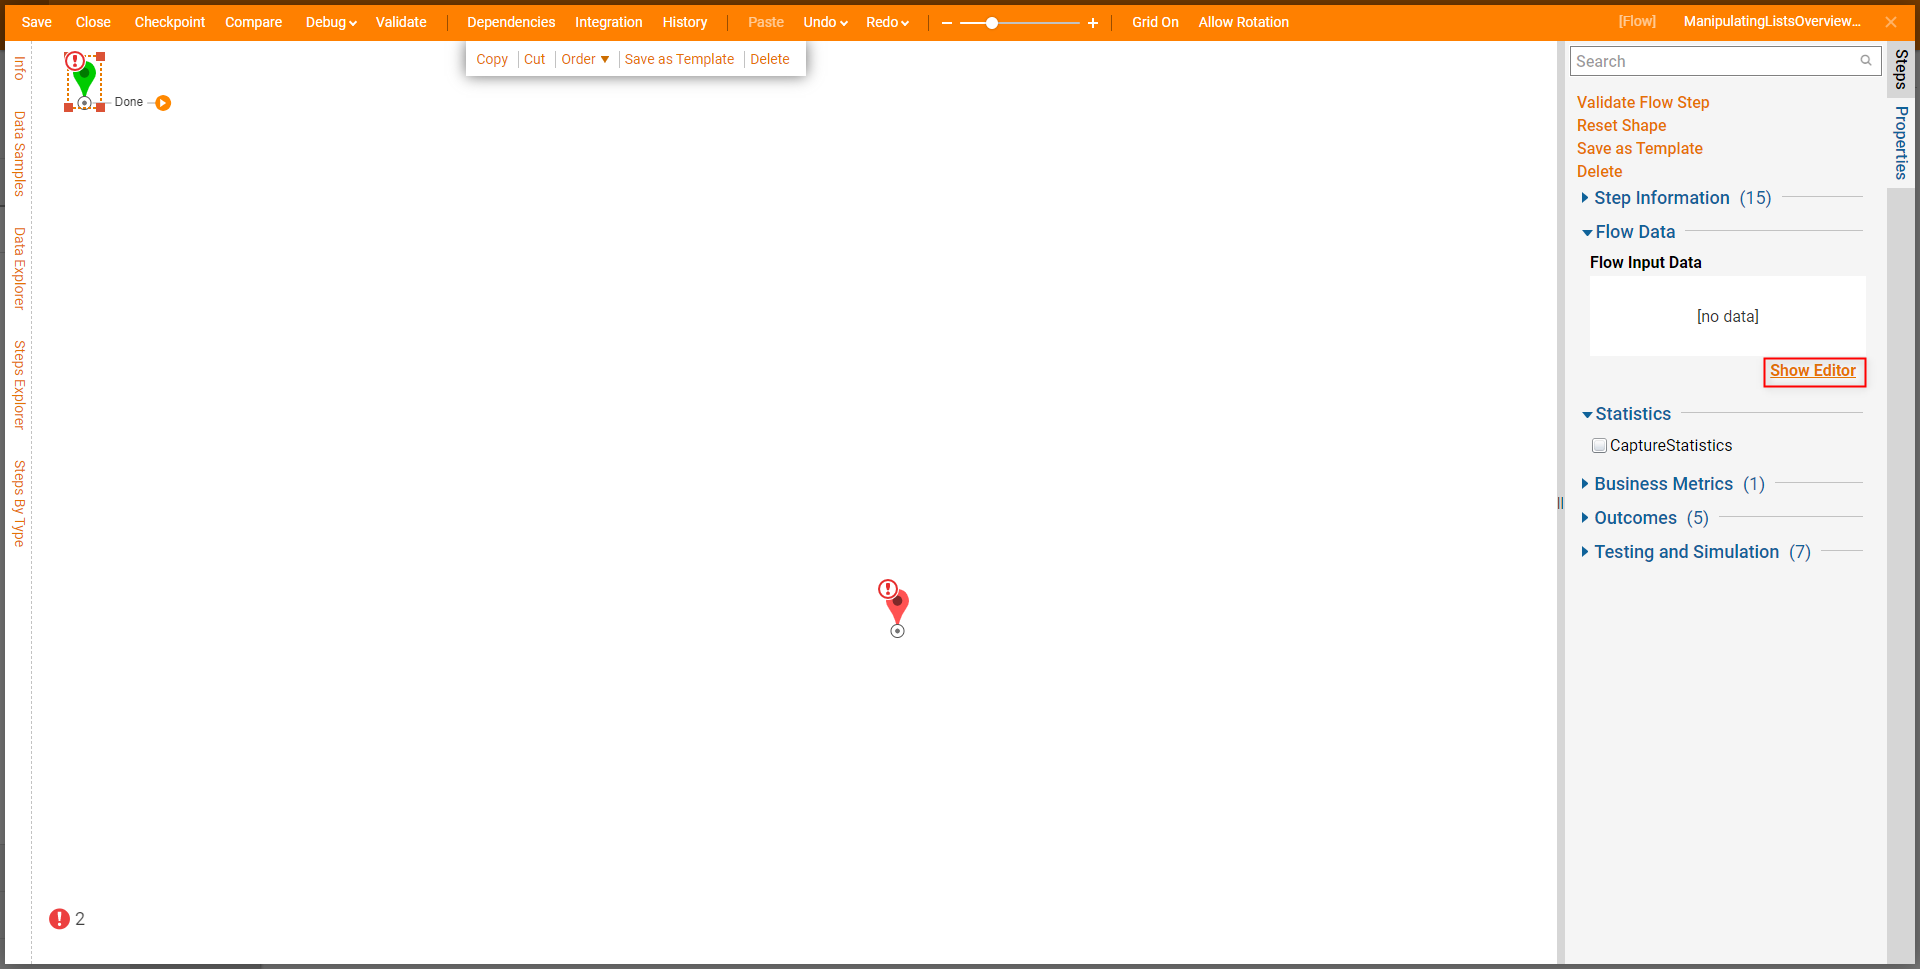
- From the Flow Designer select the Start step. Then, from the Properties tab, under Flow Data > Flow Input Data, select Show Editor.
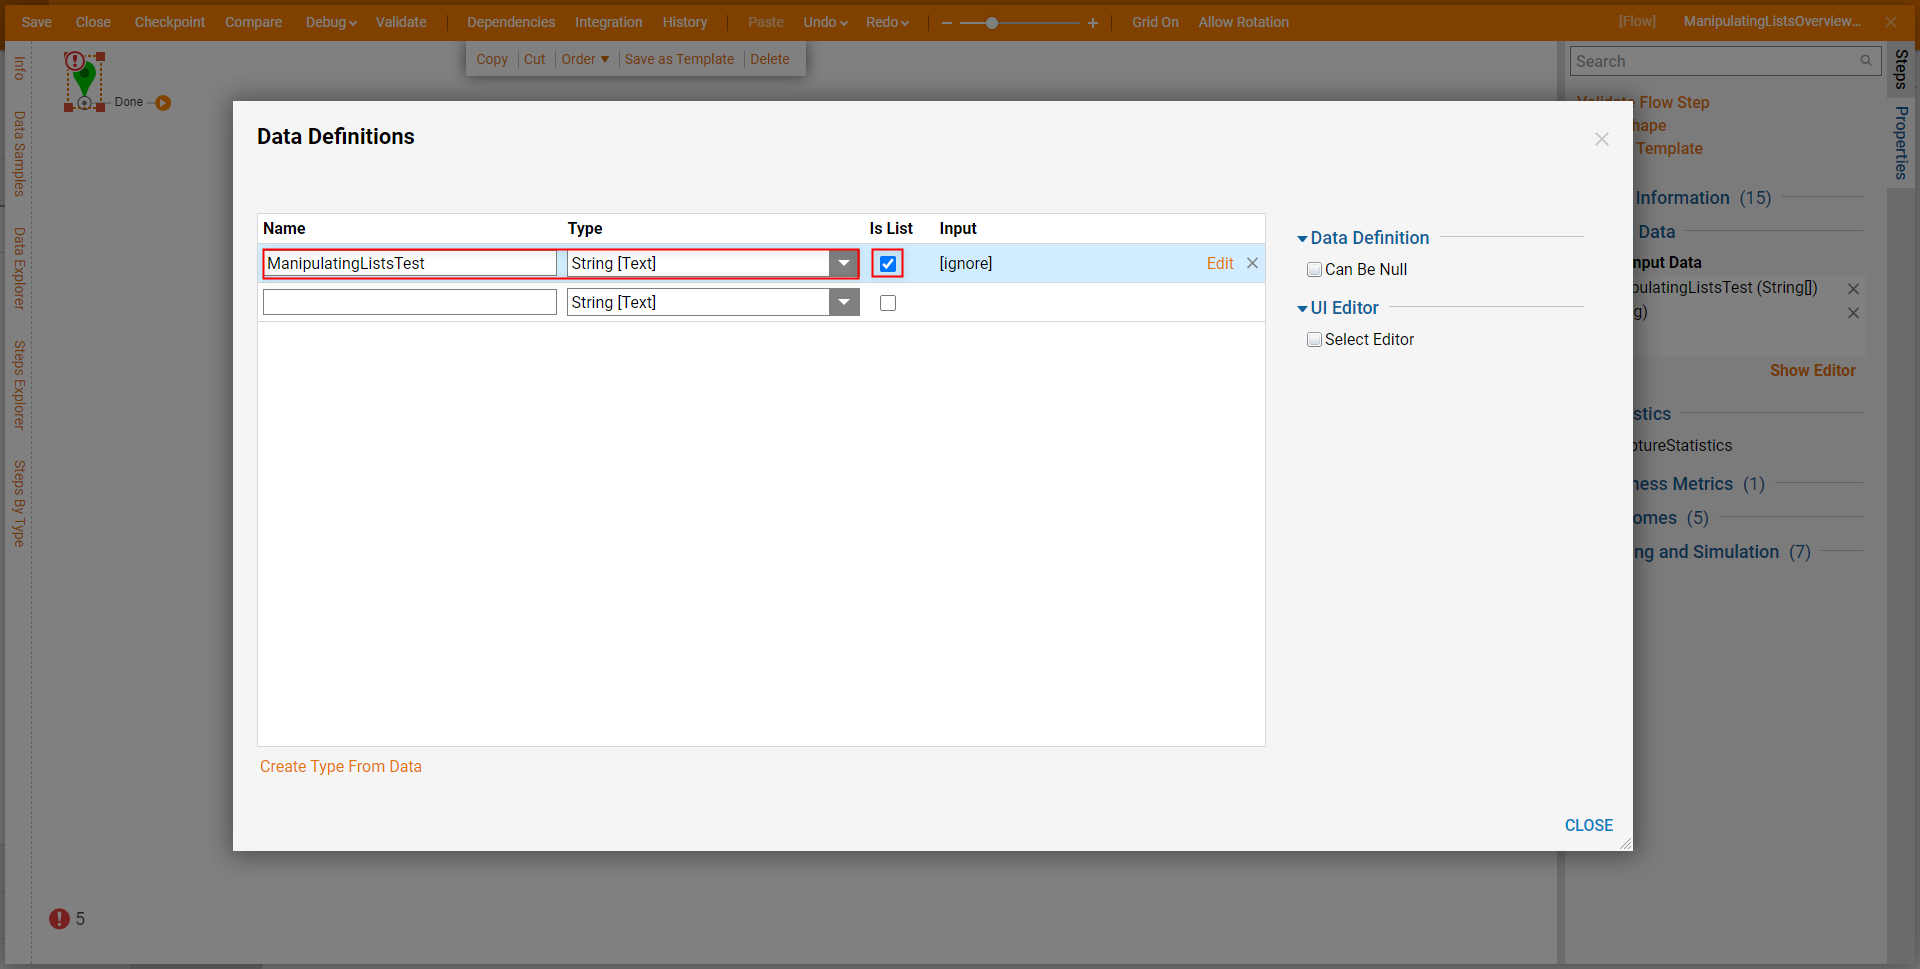
- From the Data Definitions window provide a Name. Then under Type, select desired Data Type (for this example select String [Text]). Then, check the Is List Boolean.
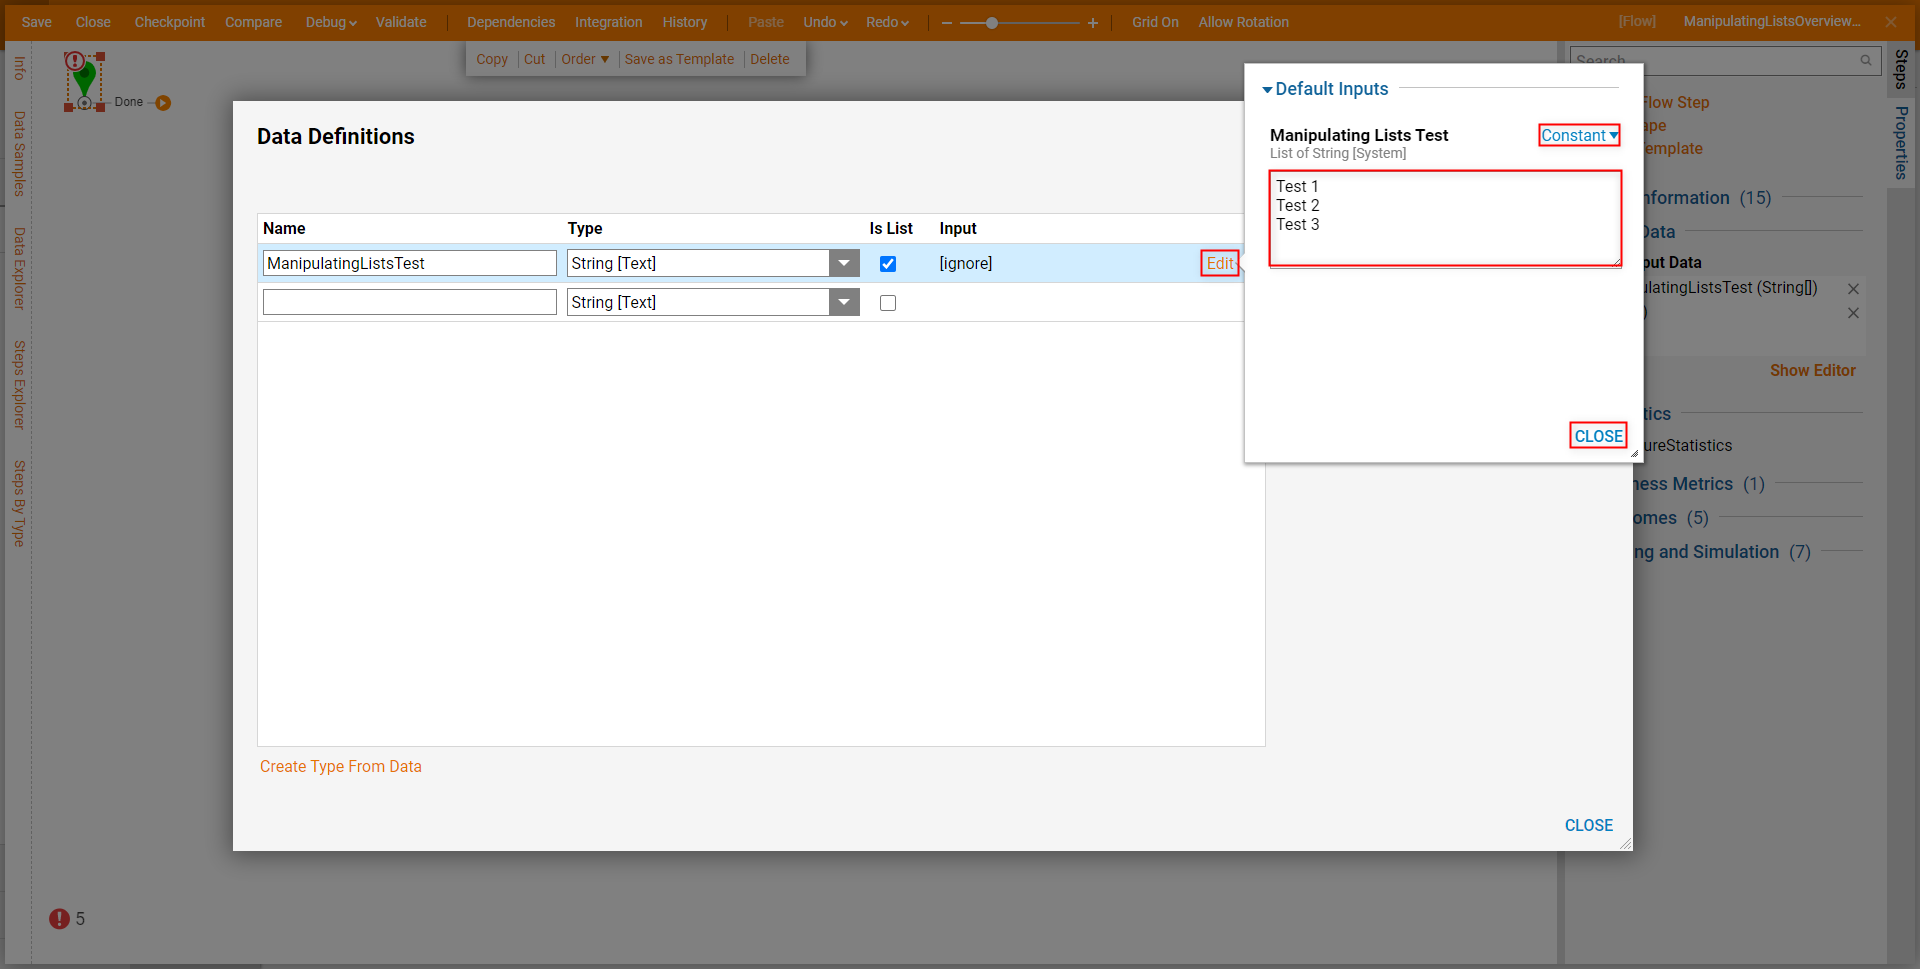
Under Input, select Edit. Then, Constant map the desired List of String Input, separating each value by line. Then click CLOSE.
CLOSE the Data Definitions window.
Example A: Add Item to List Step
To configure an Add Item to List Step:
- From the Flow Designer, from the Steps tab, navigate to Steps > Data > List, and add an Add Item to List Step to the Start step.
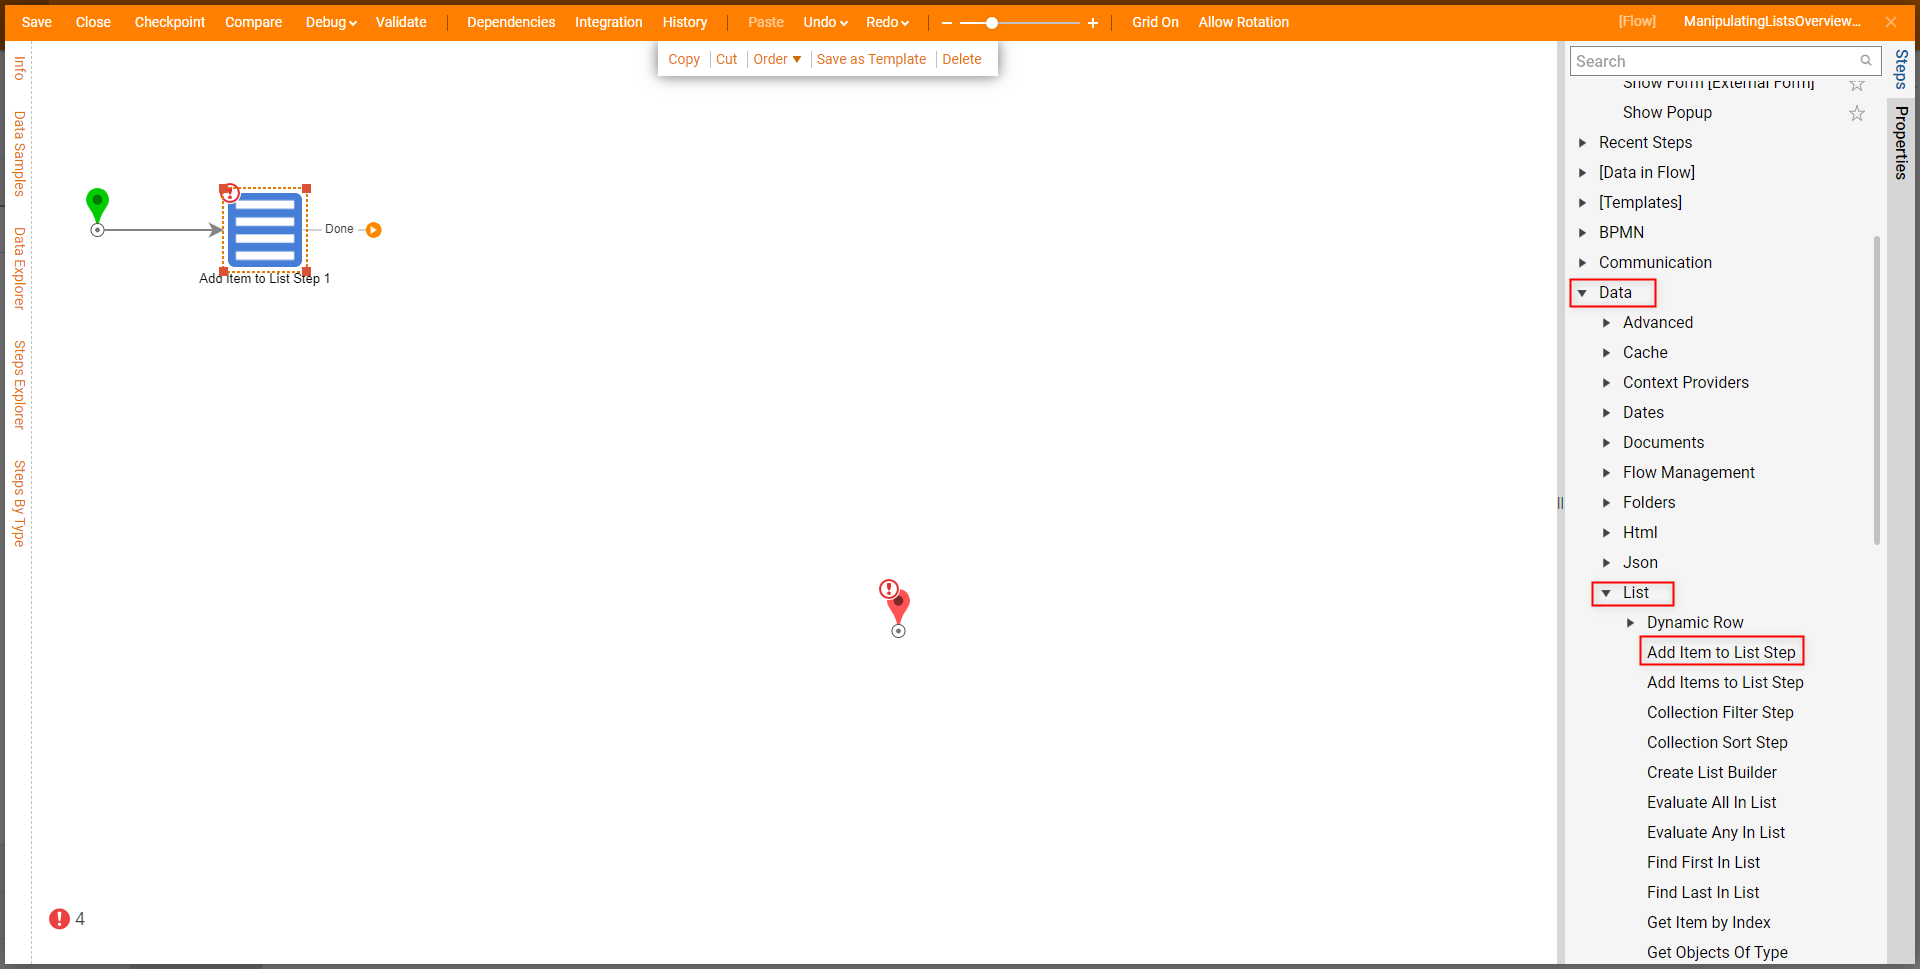
- Select the Add Item to List Step to navigate to its Properties tab.
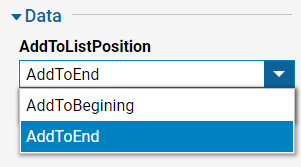
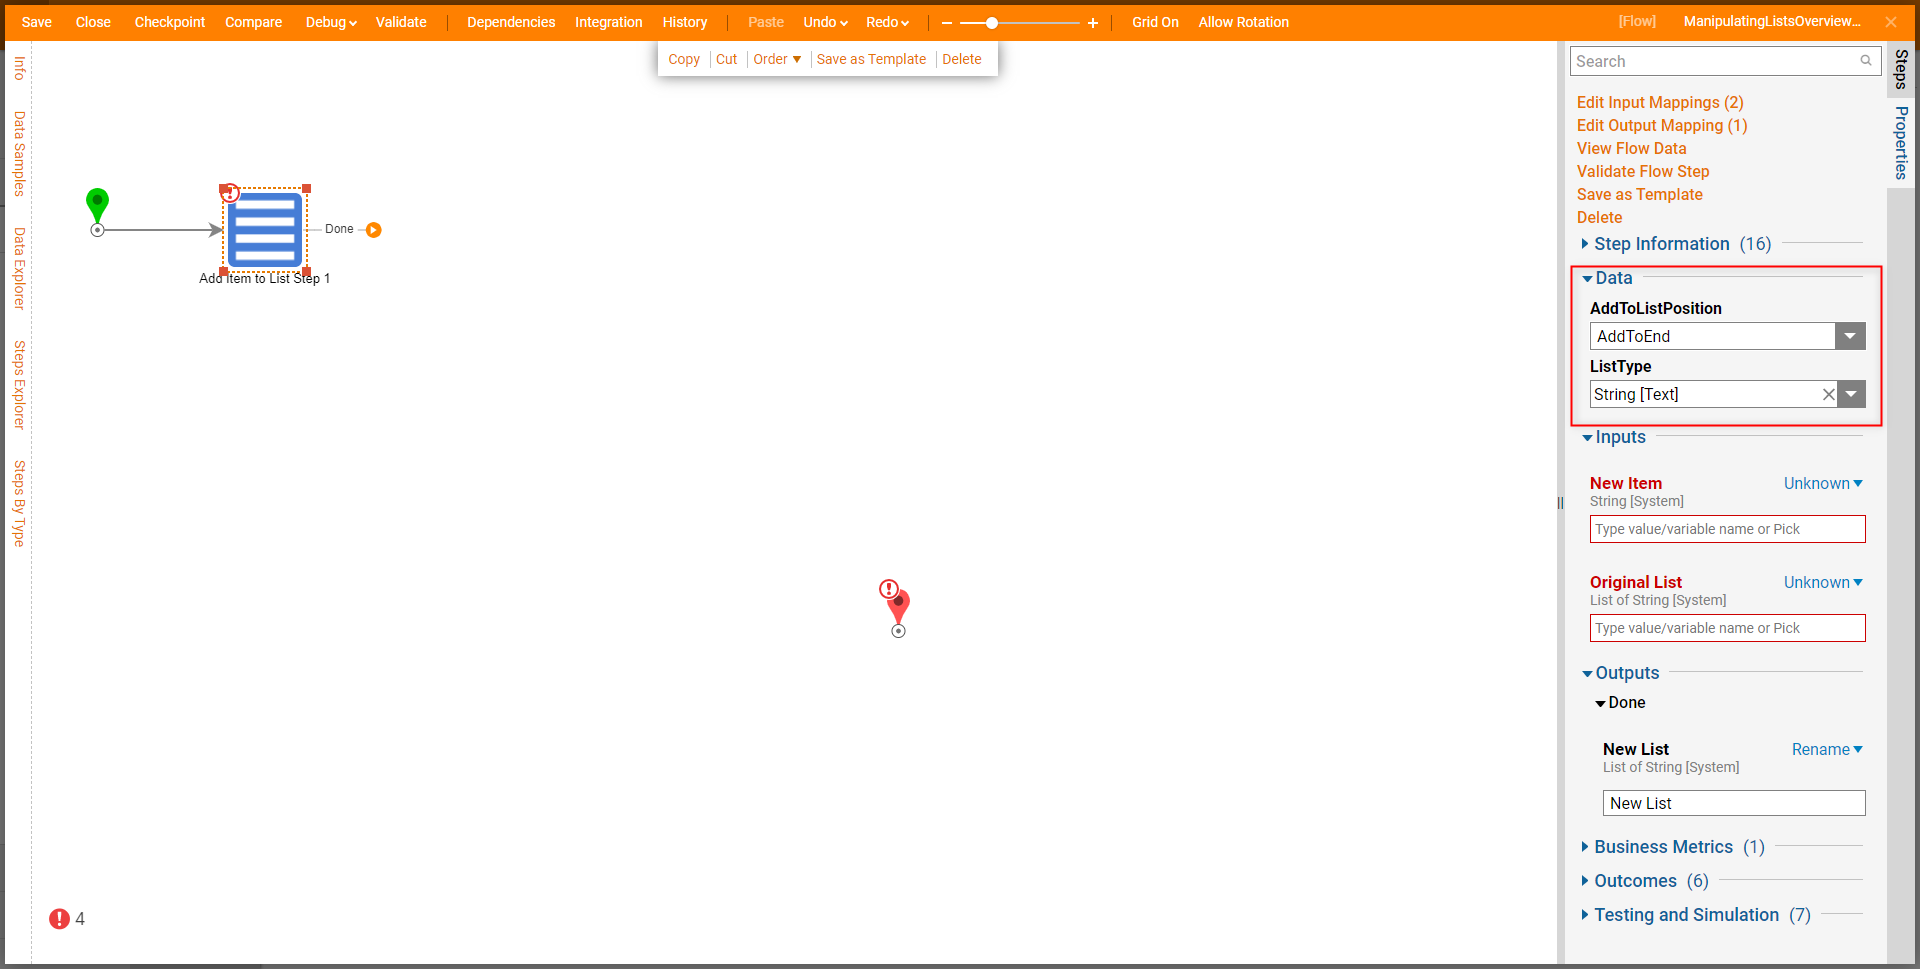
- From the Data section of the Add Item to List Step's Properties, select the desired AddToListPosition. Then select the corresponding ListType. About Data OptionsThe AddToListPosition Property allows users to dictate where the new value is placed in the List. Users have the option to either AddToBeginning or AddToEnd.
 ListType is used to select the compatible Data Type value of the List being added to. For this example, leave ListType set to String [Text].
Under Properties > Inputs, Select From Flow map the previously created Input Data to Original List. Then Constant map a New Item.
Additional Information on InputsThe Original List Input is the List that is being appended by the Add Item to List Step.
New Item is the Item being added to the Original List.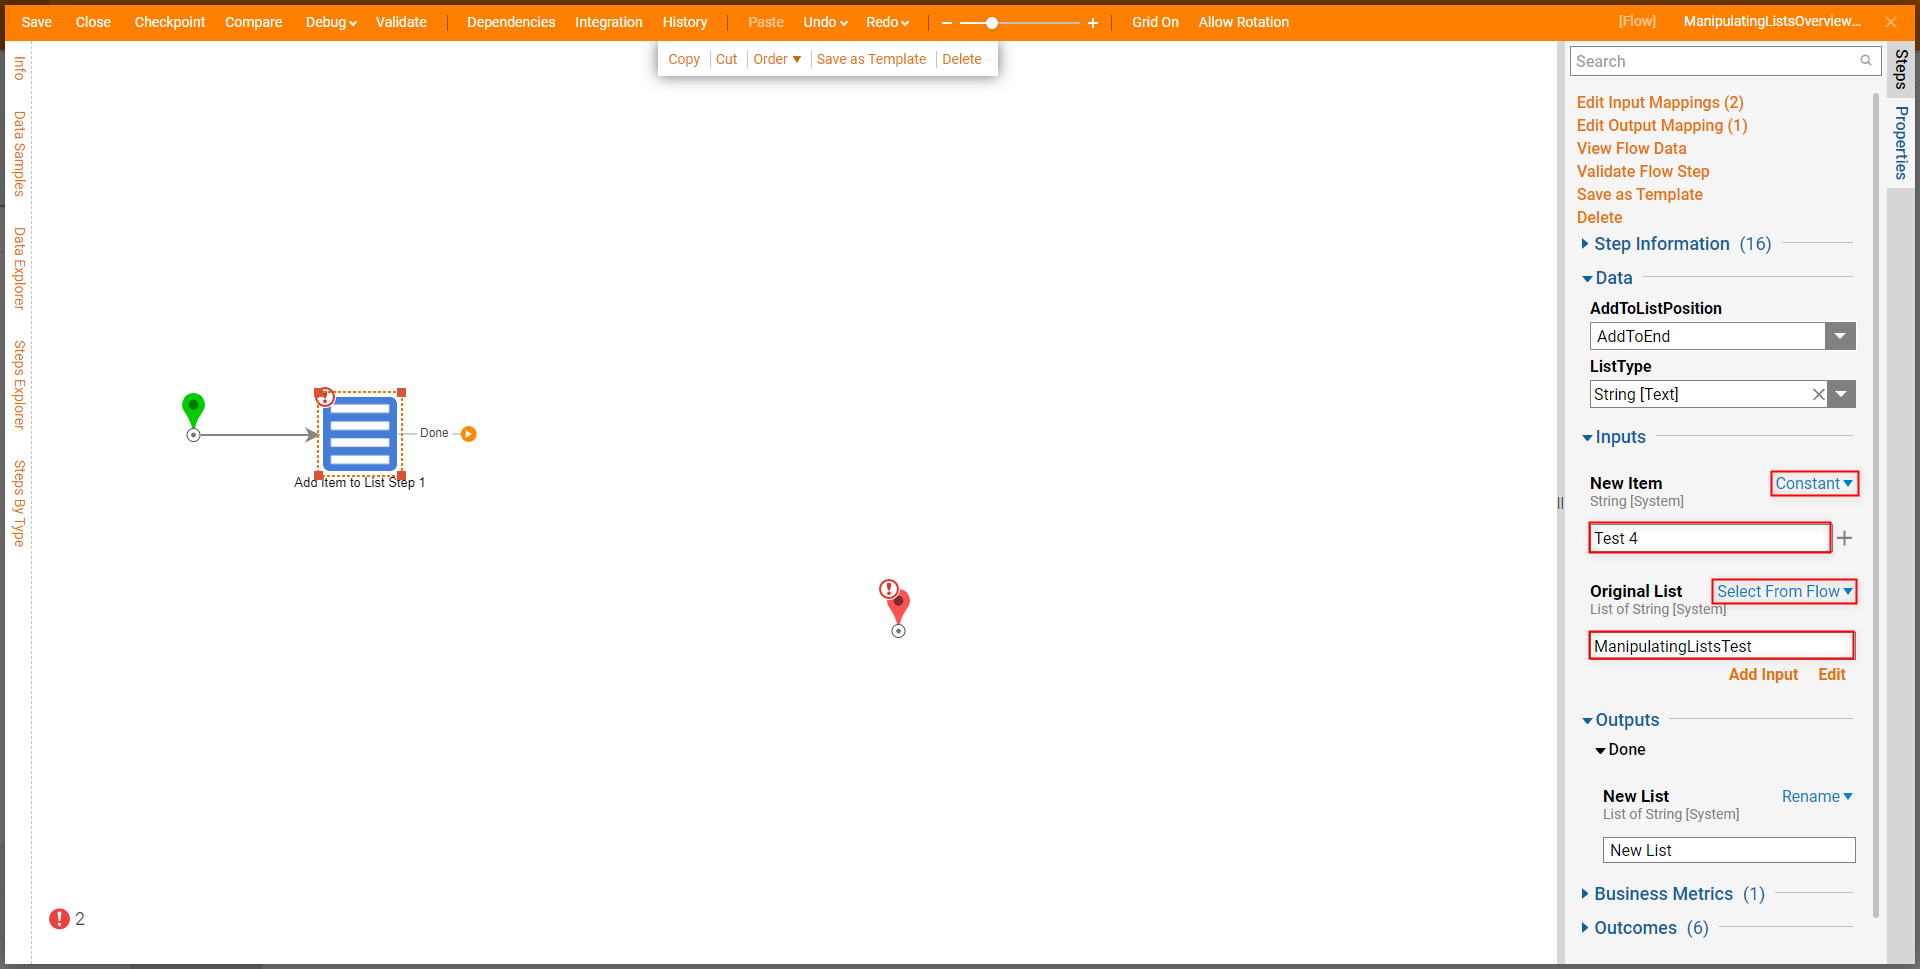
Add Items to List Step
Similar to the Add Item to List Step, the Add Items to List step is used to append a List by adding an Item to a List. The Add Items to List Step differs from the Add Item to List Step in that it is used to map multiple objects to the List, rather than just one.
These objects may be mapped in a similar manner to how a List is initially defined on the Input Data of a Flow. 
Example B: Get Item By Index by Index
To configure a Get Item by Index step:
- From the Flow Designer, navigate to Data > List and attach a Get Item by Index step to the Add Item to List Step.
- From the Properties tab of the Get Item by Index step, under Inputs, Select From Flow map the Output from the Add Item to List Step (New List) to the List Input.
- Under Item Index, Constant map the desired Int32 numerical value.Additional InformationThe List Input is used to map the desired List the Item will be pulled from. The Item Index Input represents the Item's placement in the list starting from 0 (this represents the first value) up to the number of Items in the List.
The ListType Input represents the Data Type of the involved List. If a List is dynamically mapped to the List Input, this value should adjust to its expected Data Type.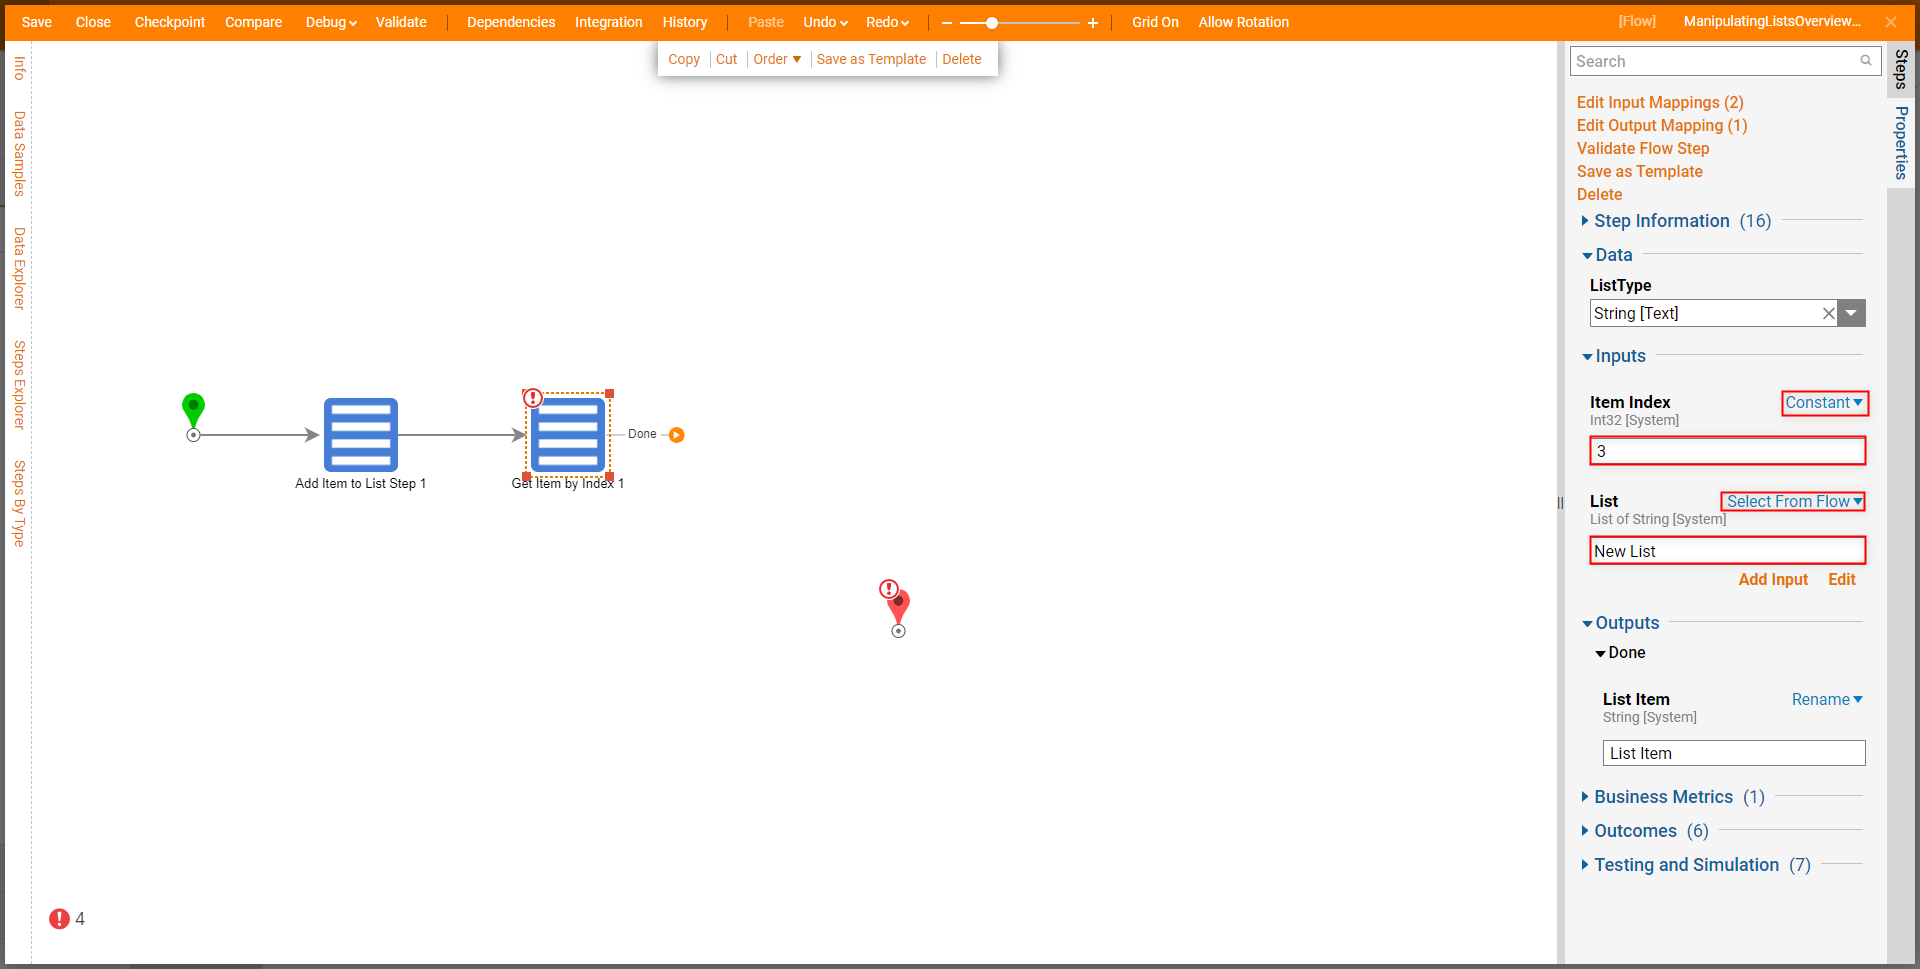
Example C: Remove Item From List
To map a Remove From List step:
- From the Flow Designer, navigate to Steps > Data > List, and attach a Remove Item from List step to the Get Item by Index step as well as the End step.
- From the Properties tab of the Remove Item from List step, Select From Flow map New List to the List Input.
- Map List Item to Properties > Inputs > Item to Remove.
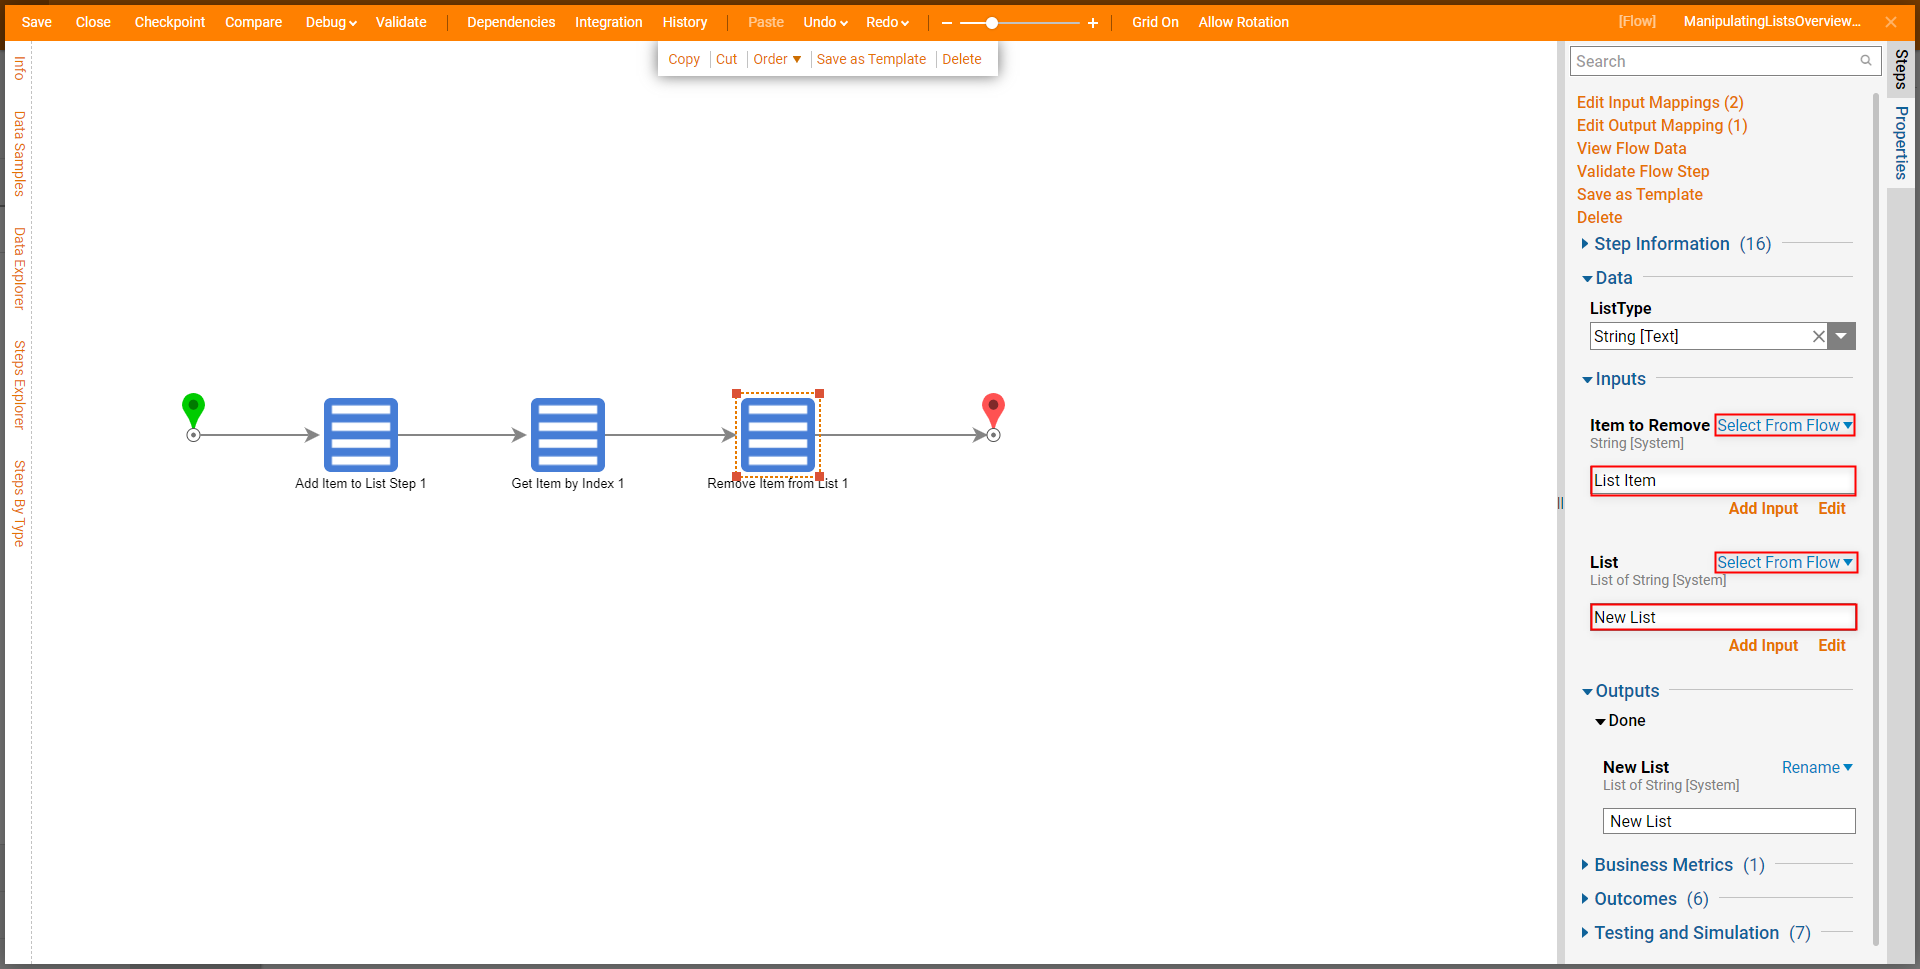
- Save the Flow, then if desired Close the Flow Designer.
Debug
- From the Flow Designer, select the Debug link from the top Action bar.
- Click Run Capturing All.
- After the Flow runs select Add Item to List Step 1 > Execution 1 > View Input/Output Data; verify that the step has added the New Item to the Original List.
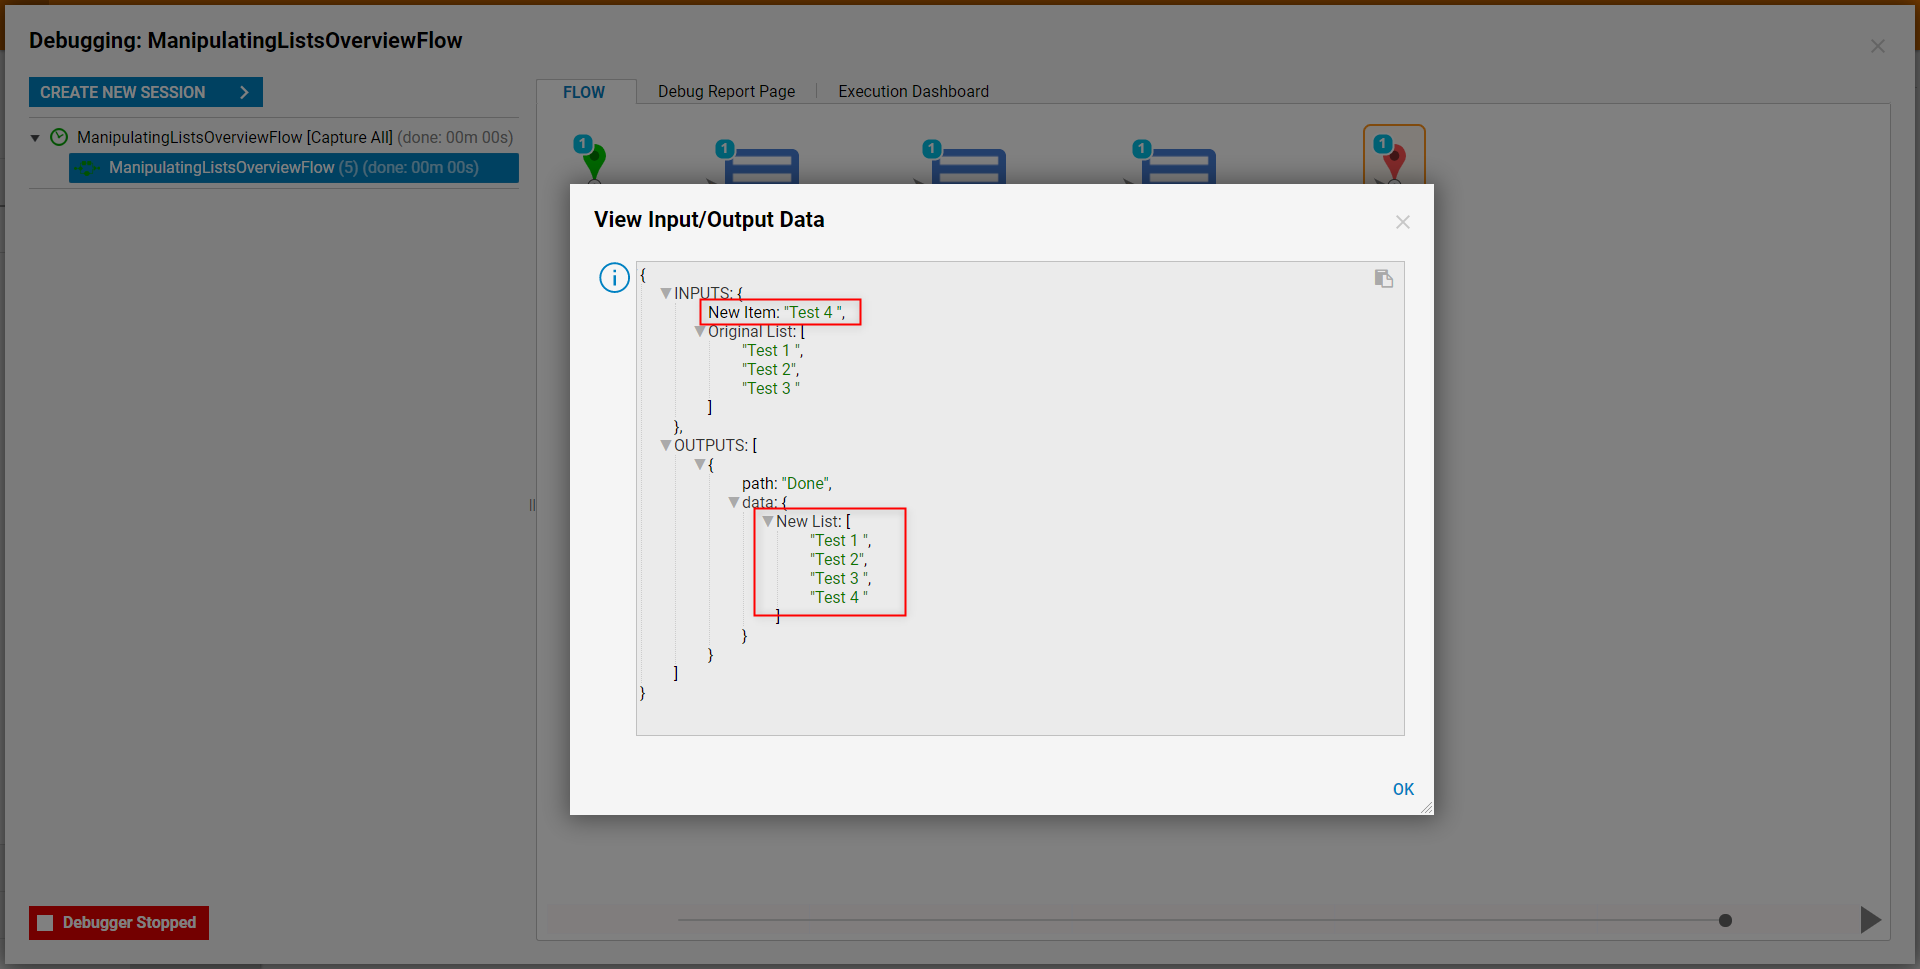
- Exit the View Input/Output Data window, then select Get Item by Index 1 > Execution 1 > View Input/Output Data.
Verify that the step OUTPUTS the proper List Item via the provided Item Index.
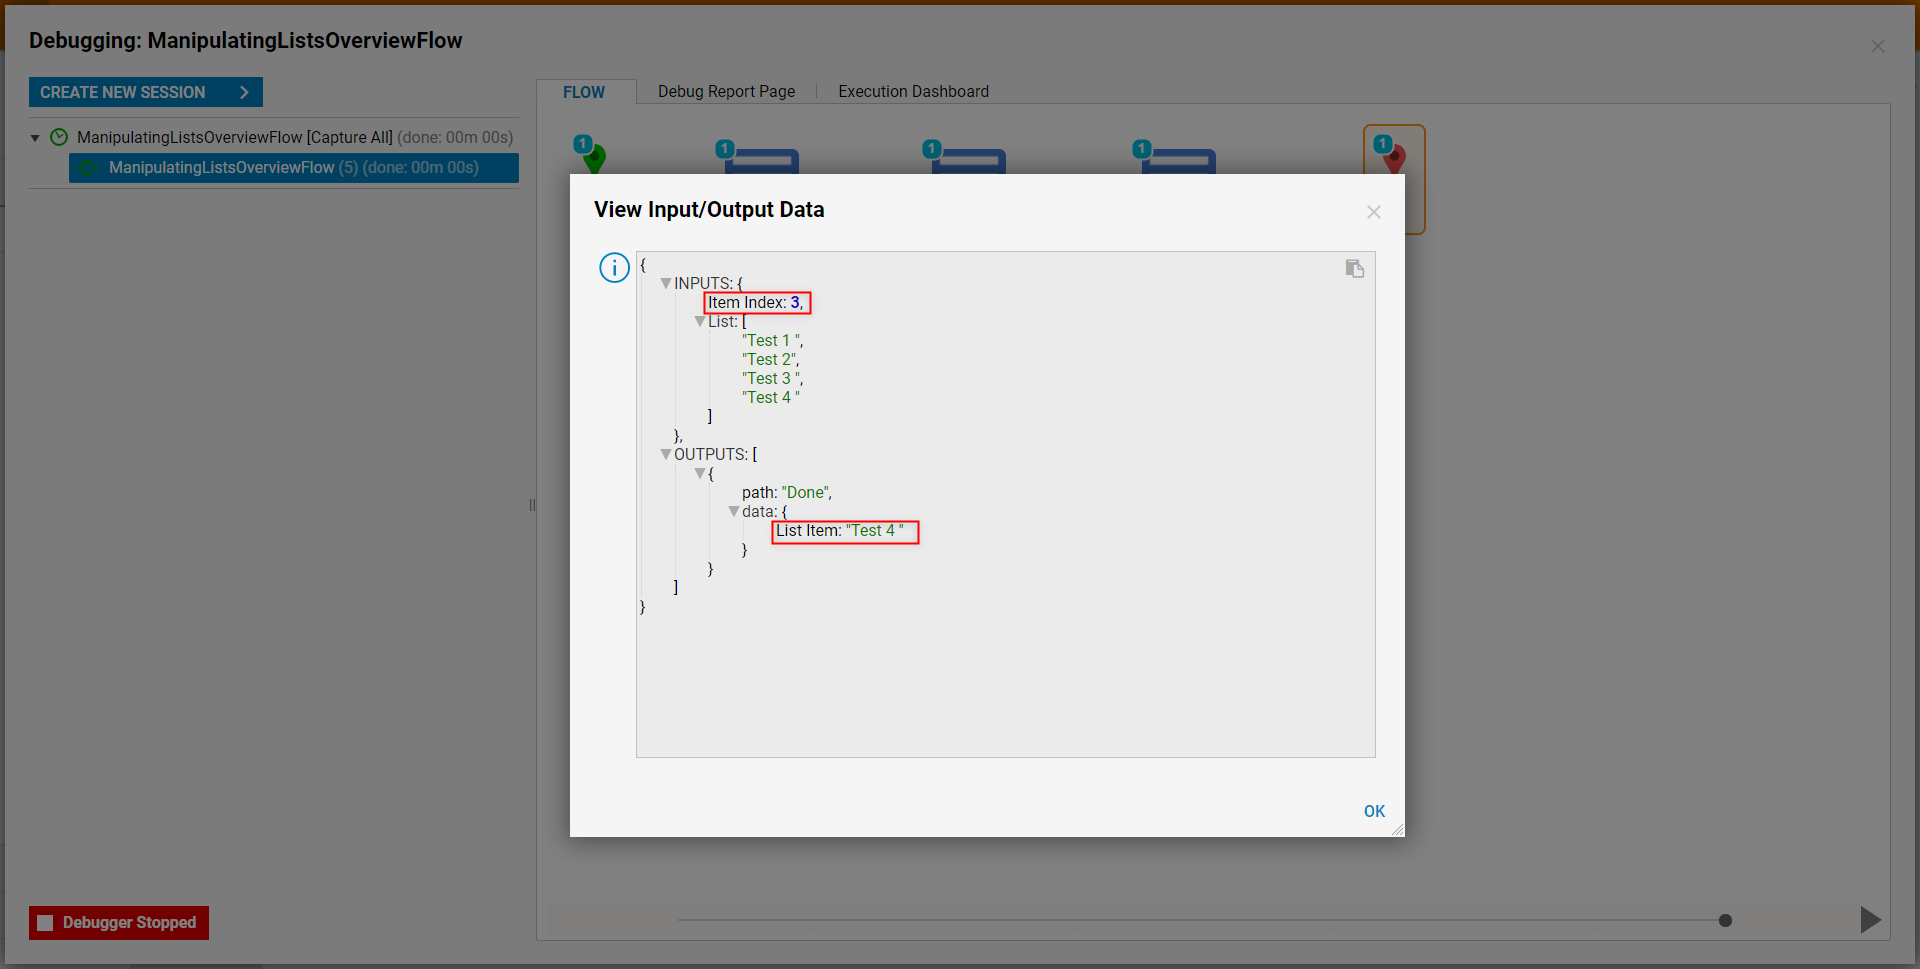
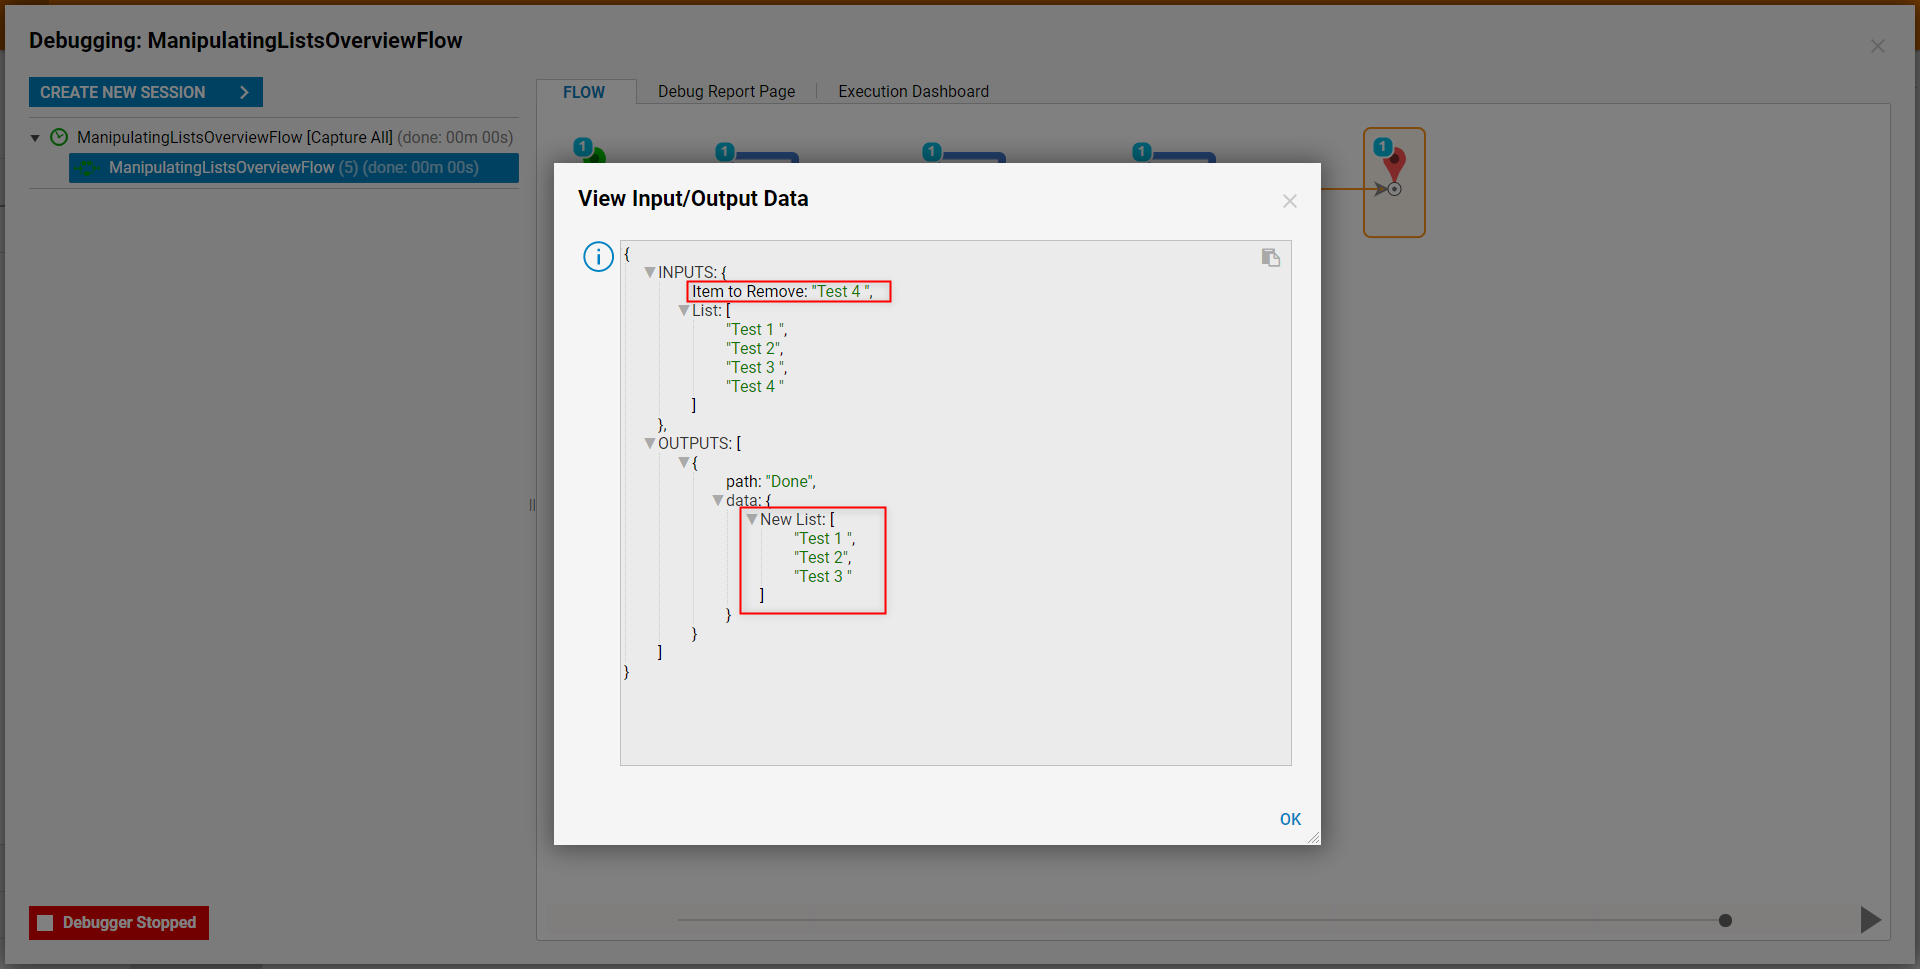
Exit this Input/Output Data window, then navigate to Remove Item from List 1 > Execution 1 > View Input/Output Data.
Verify that the step has removed the designated Item to Remove and has Output the New List with the properly updated values.


 ListType is used to select the compatible Data Type value of the List being added to. For this example, leave ListType set to String [Text].


