Overview
Using the Get Email component, a Flow can retrieve messages from a mail server. The Flow can display the messages in a list on a form or use them in other ways.
To enable a Flow to download emails from an IMAP mail server, in the Steps panel, in the category Communication > IMAP, drag a Get Email component to the workspace and configure its properties in the Properties panel.
Example
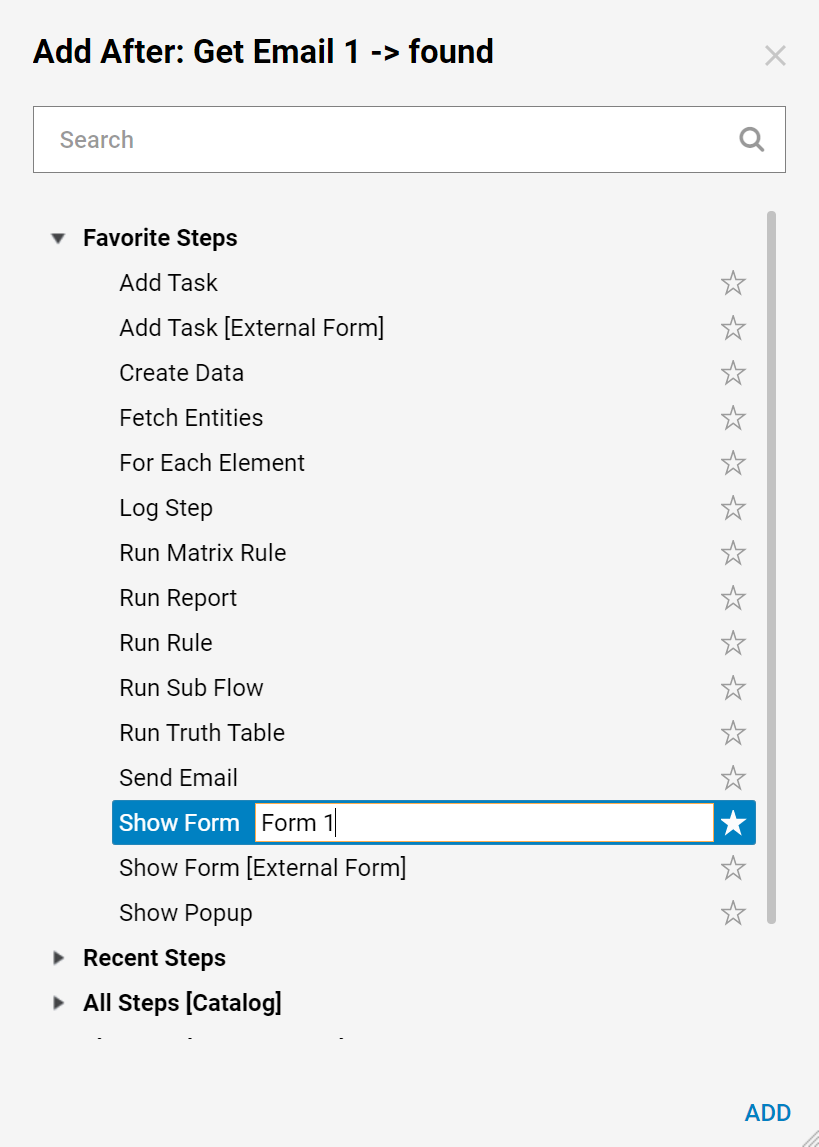
The example Flow will retrieve messages from the Gmail account and display the list in a form. A Form to display the email, Form 1, has already been created for this example.
Begin by navigating to a project folder and clicking the Create Flow button. Give the Flow a name and select CREATE to open it in the Flow Designer.
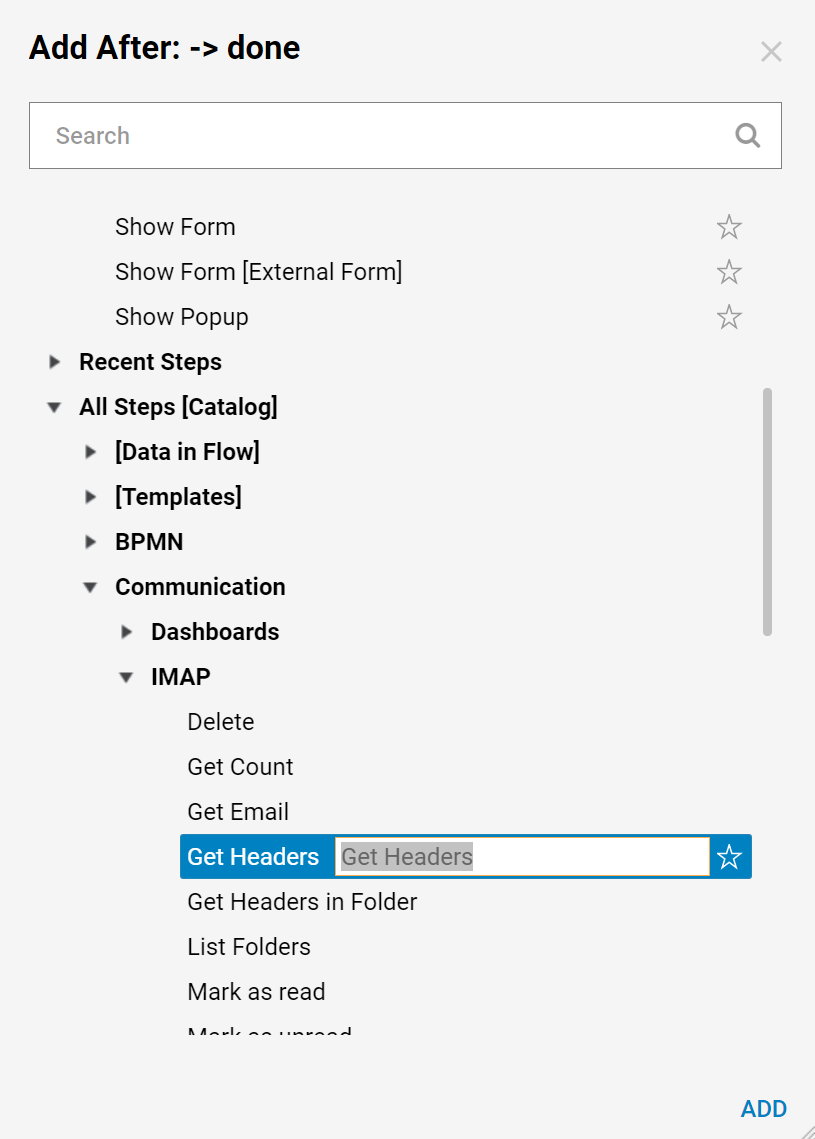
The first step to add to the Flow will retrieve a message header. In the Flow Designer's startup window, under the category, All Steps [Catalog] > Communication > IMAP, select a Get Headers component and select Add to add it to the workspace.
To retrieve message headers, the Get Headers step must be configured with the appropriate settings for the Gmail server. Most of the following settings are specific to the IMAP protocol. To download messages from a mail server via POP, refer to the article on Downloading Email From a Mail Server [POP].
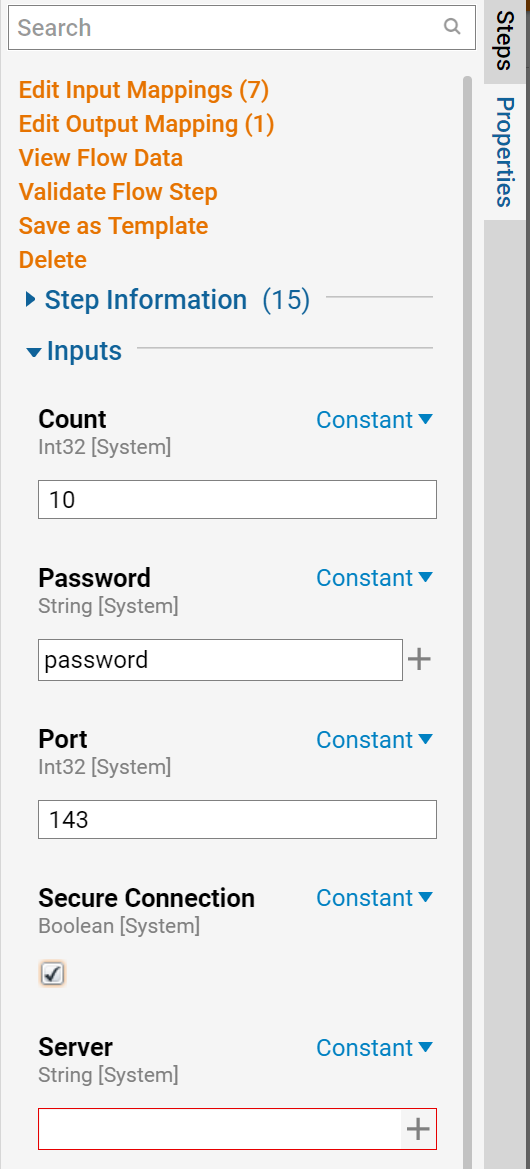
Configure the Get Headers step settings in the Properties panel, in the Inputs section.
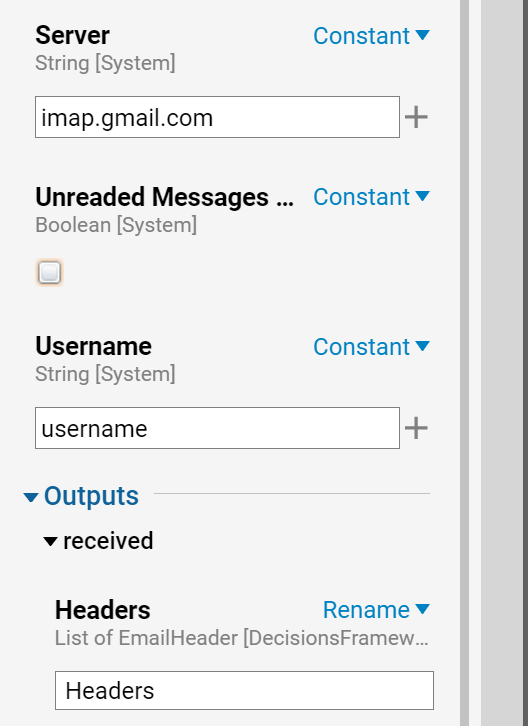
To authenticate the connection, enter the password for the email account in the Value fields in the sections Password. To make the connection itself, in the Server section, enter "imap.gmail.com" in the Value field. In the Port section, in the Value field, enter "993". To ensure that the authentication details are kept secure. In the Secure Connection section, select the Value checkbox.
To authenticate the connection, enter the username for the email account in the Value fields in the sections Username.
This is formatted as [USEREMAIL]\[ALIAS]
For additional information on how interacting with a shared mailbox and how to configure connection settings, see IMAP Settings for a Shared Mailbox.
Once the Flow has retrieved a message header, the Get Email component uses the header to retrieve the full message.
In the Steps panel, under Communication > IMAP, drag a Get Email component to the workspace.
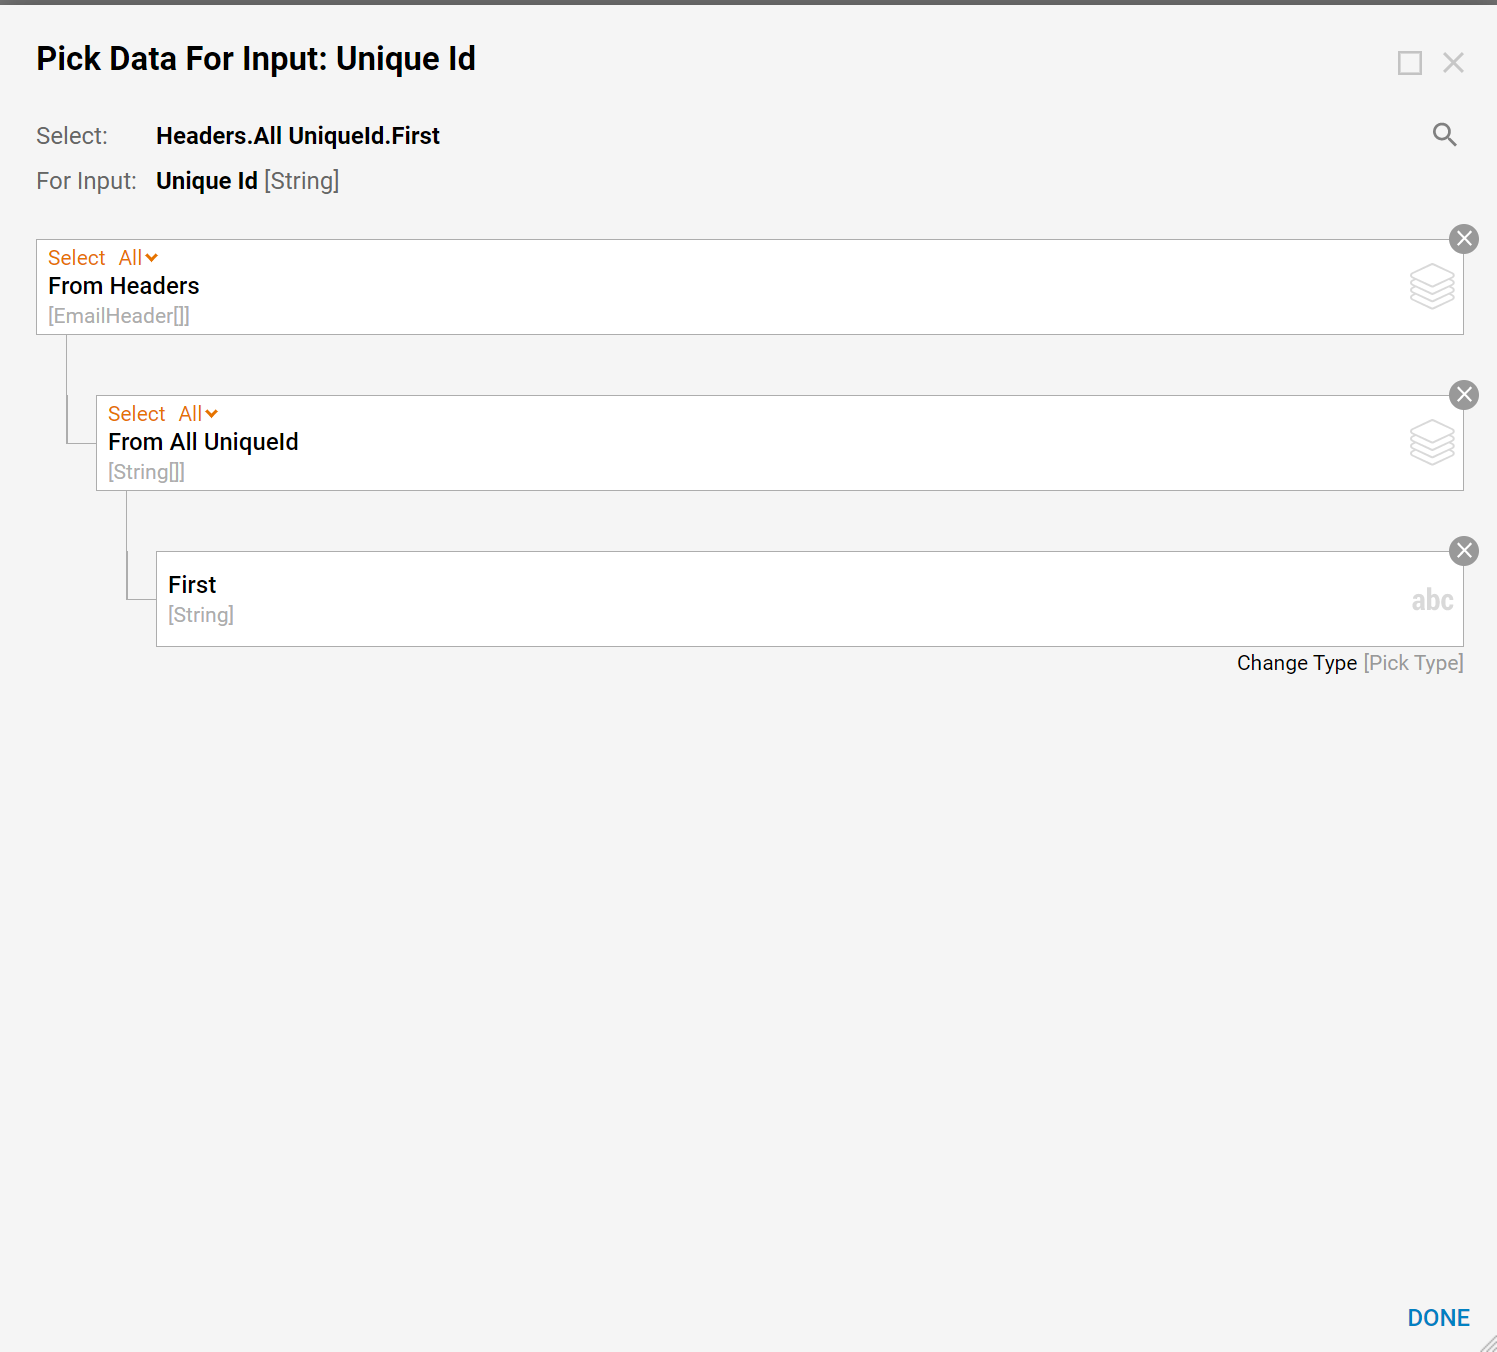
The Get Email step also uses a Unique ID. This field works on the assumption that previous steps may output more than one message header, to get a certain category of message. In the Unique ID section, select a category by selecting Select Value in the Mapping type drop-down list. To set the path, click the Path selector.
In the resulting pop-up, select the path: GetHeaders1_Headers > All UniqueId > First. This path will select the header associated with the first (and, in this example, only) header outputted by Get Headers 1, when all messages are sorted by their unique identifiers.
Once the Flow has retrieved a message, it needs to display that message in a Form, which was already designed.
In the Steps panel, under the category Forms [Interaction] > [Current Folder], drag a Form 1 component to the workspace.
Next, map the outcomes of the Flow steps. The Get Email step offers two possible outcomes, Found and Not Found. In the event that the email account contains no messages, there will be no point in displaying the Form, so direct the Flow to the End Step. If there is an email message, display it in the form. The Form also contains a Done button, and when the user clicks it, the Flow will be directed to the End Step. In either circumstance, the user's travel through the Flow will be completed.
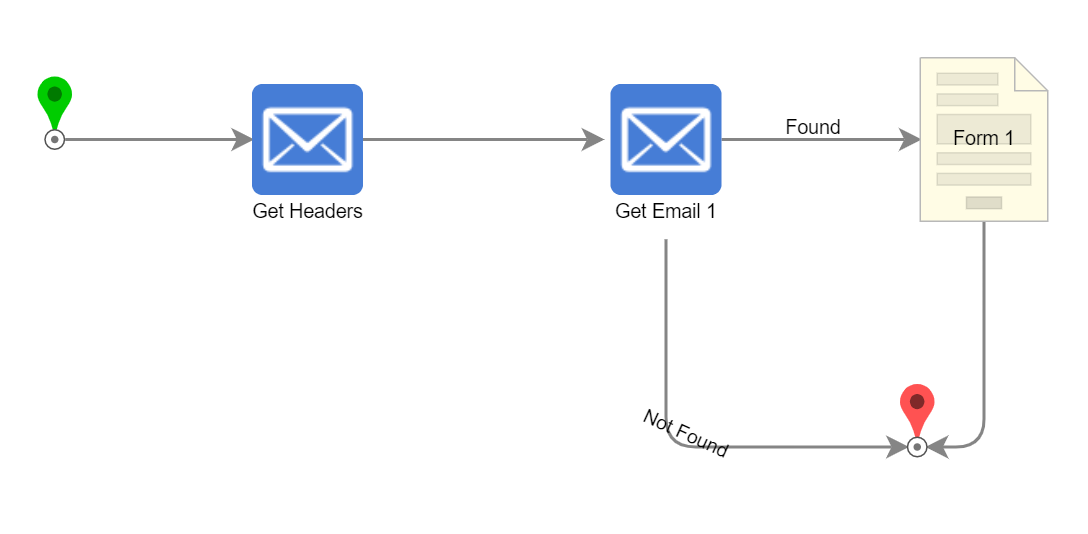
The [Form] Form 1 step displays next to an exclamation mark in a red box indicating an error, as it requires a list of email objects to input.
Select the [Form] Form 1 step and click the Show Mapping Editor link at the top of the Properties panel.
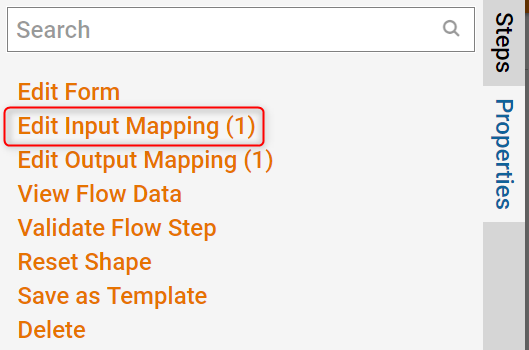
The mapping consists of a single item, Headers, mapped to the input EmailHeader. Now select OK to close the Mapping Editor. This completes the Flow.

Debug
Select Debug in the top action panel of the Flow Designer

Because the Flow interacts with external systems, see the lag time between the Flow and Gmail's servers reflected in real-time in the debugger's events and on the Diagram tab. A form displays the details of a single message downloaded from the Gmail account.