Overview
The List to CSV Mapping step can be used to populate a CSV or Excel File with data from a list. In the following example, a Flow will be created that fetches a list of Accounts and creates a CSV File that will record the accounts.
Example
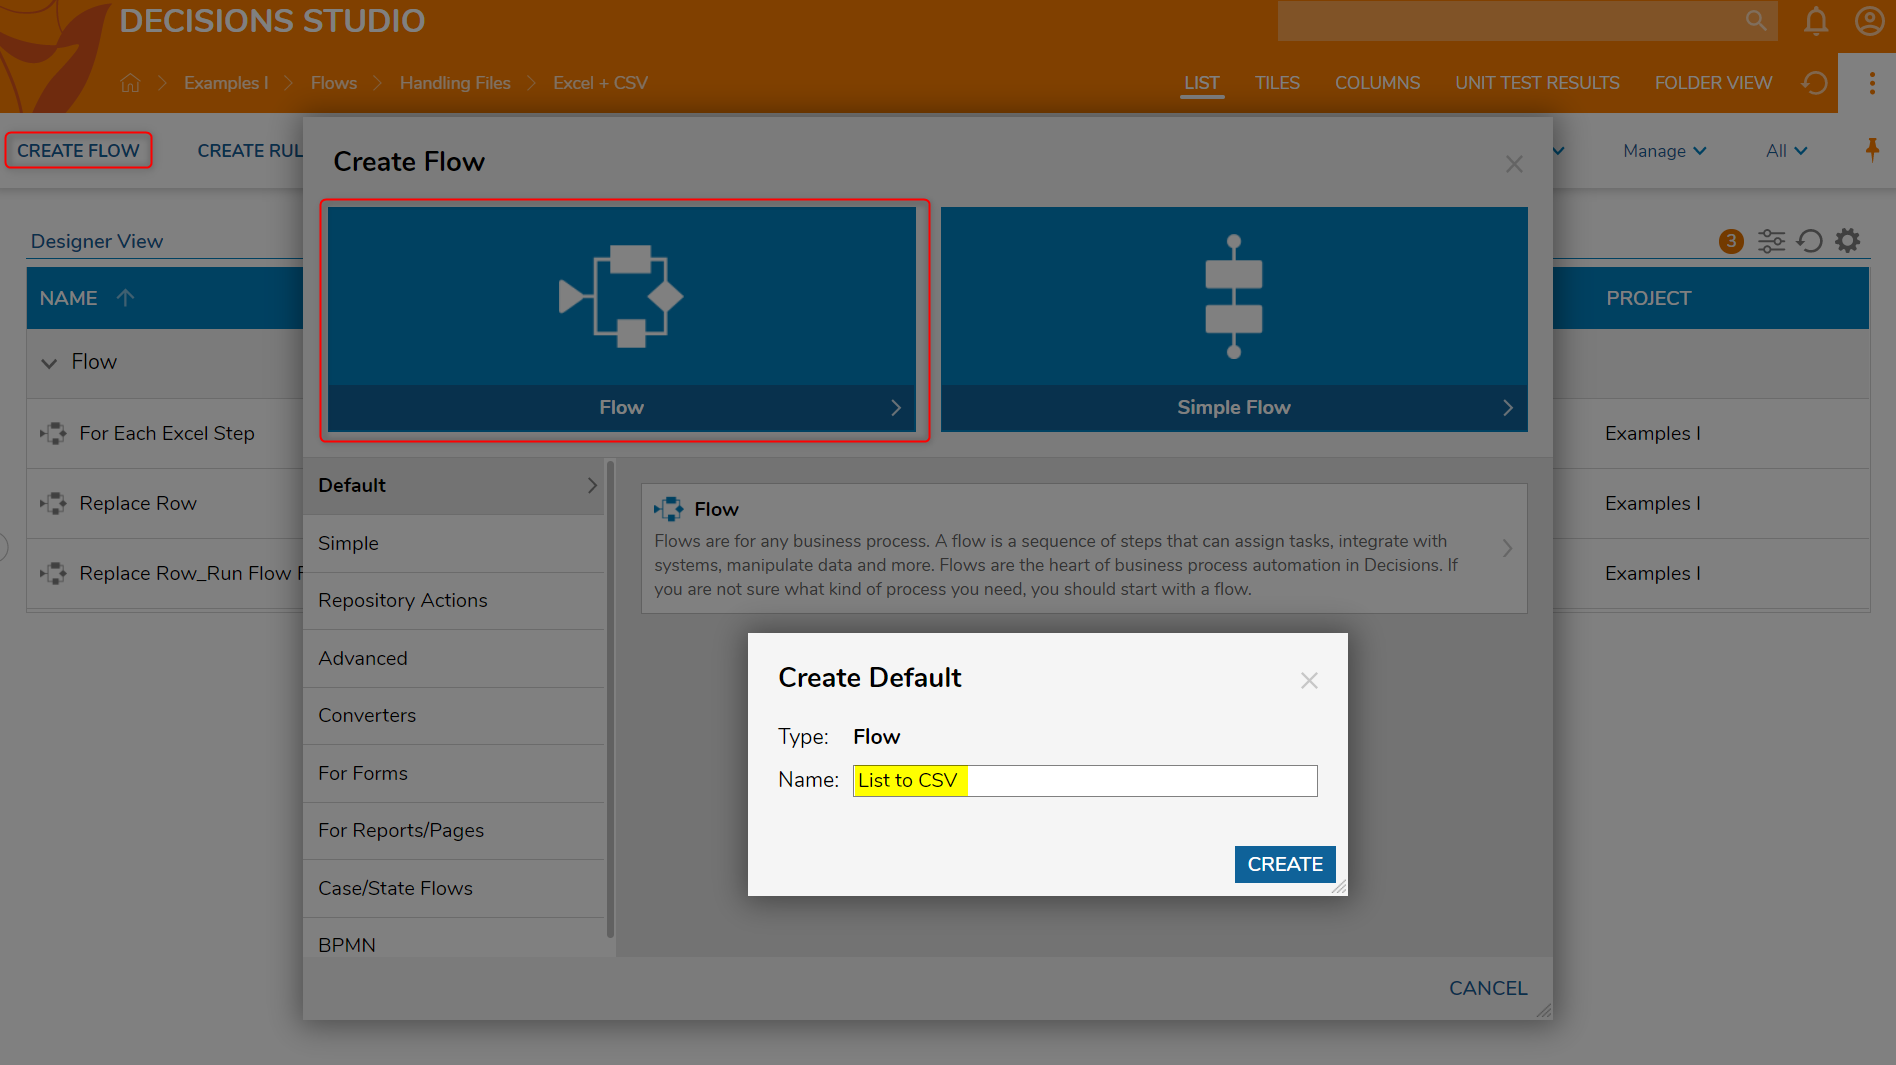
- Begin in a Designer Folder, navigate to the Global Action Bar and select CREATE FLOW.
- In the Create Flow dialog, select the default Flow, name it List to CSV, and click CREATE to enter the Flow Designer.
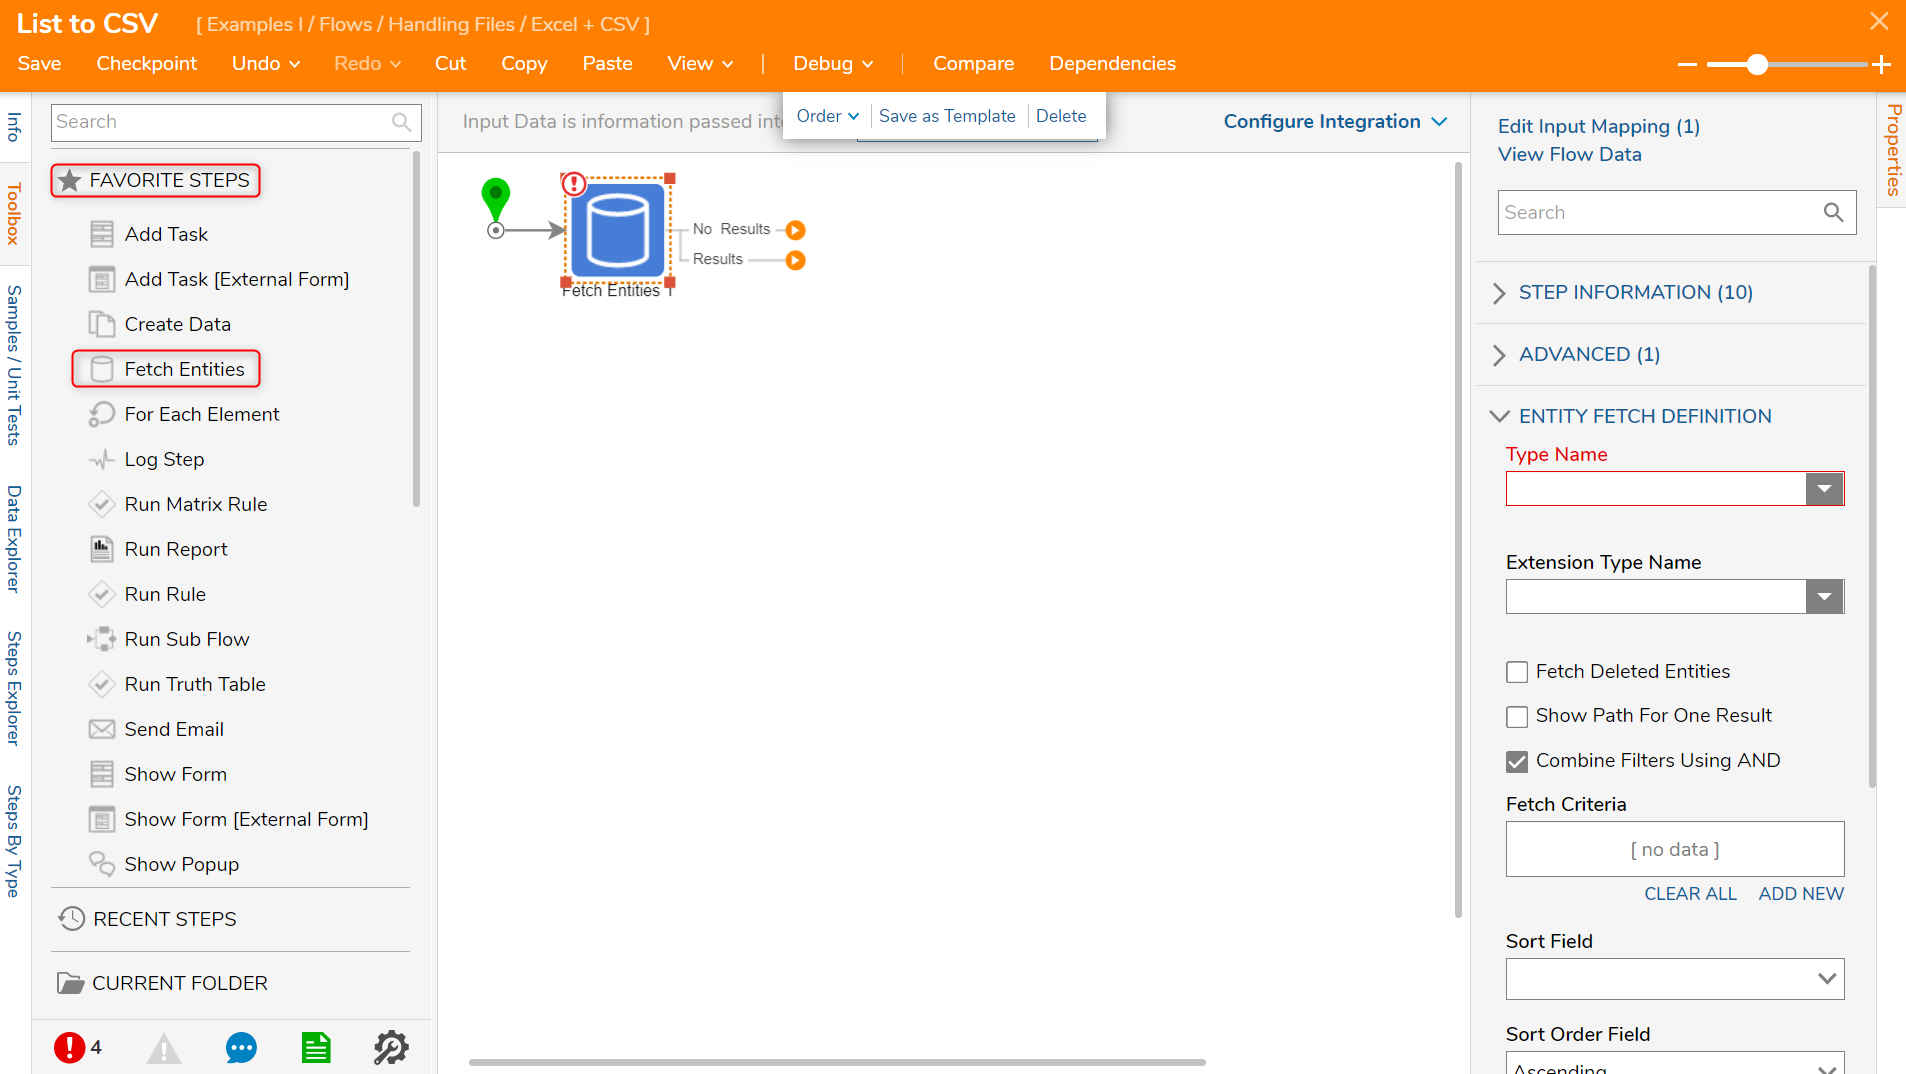
- From the Toolbox > FAVORITE STEPS section, drag a Fetch Entities step into the workspace and connect it to the Start step.
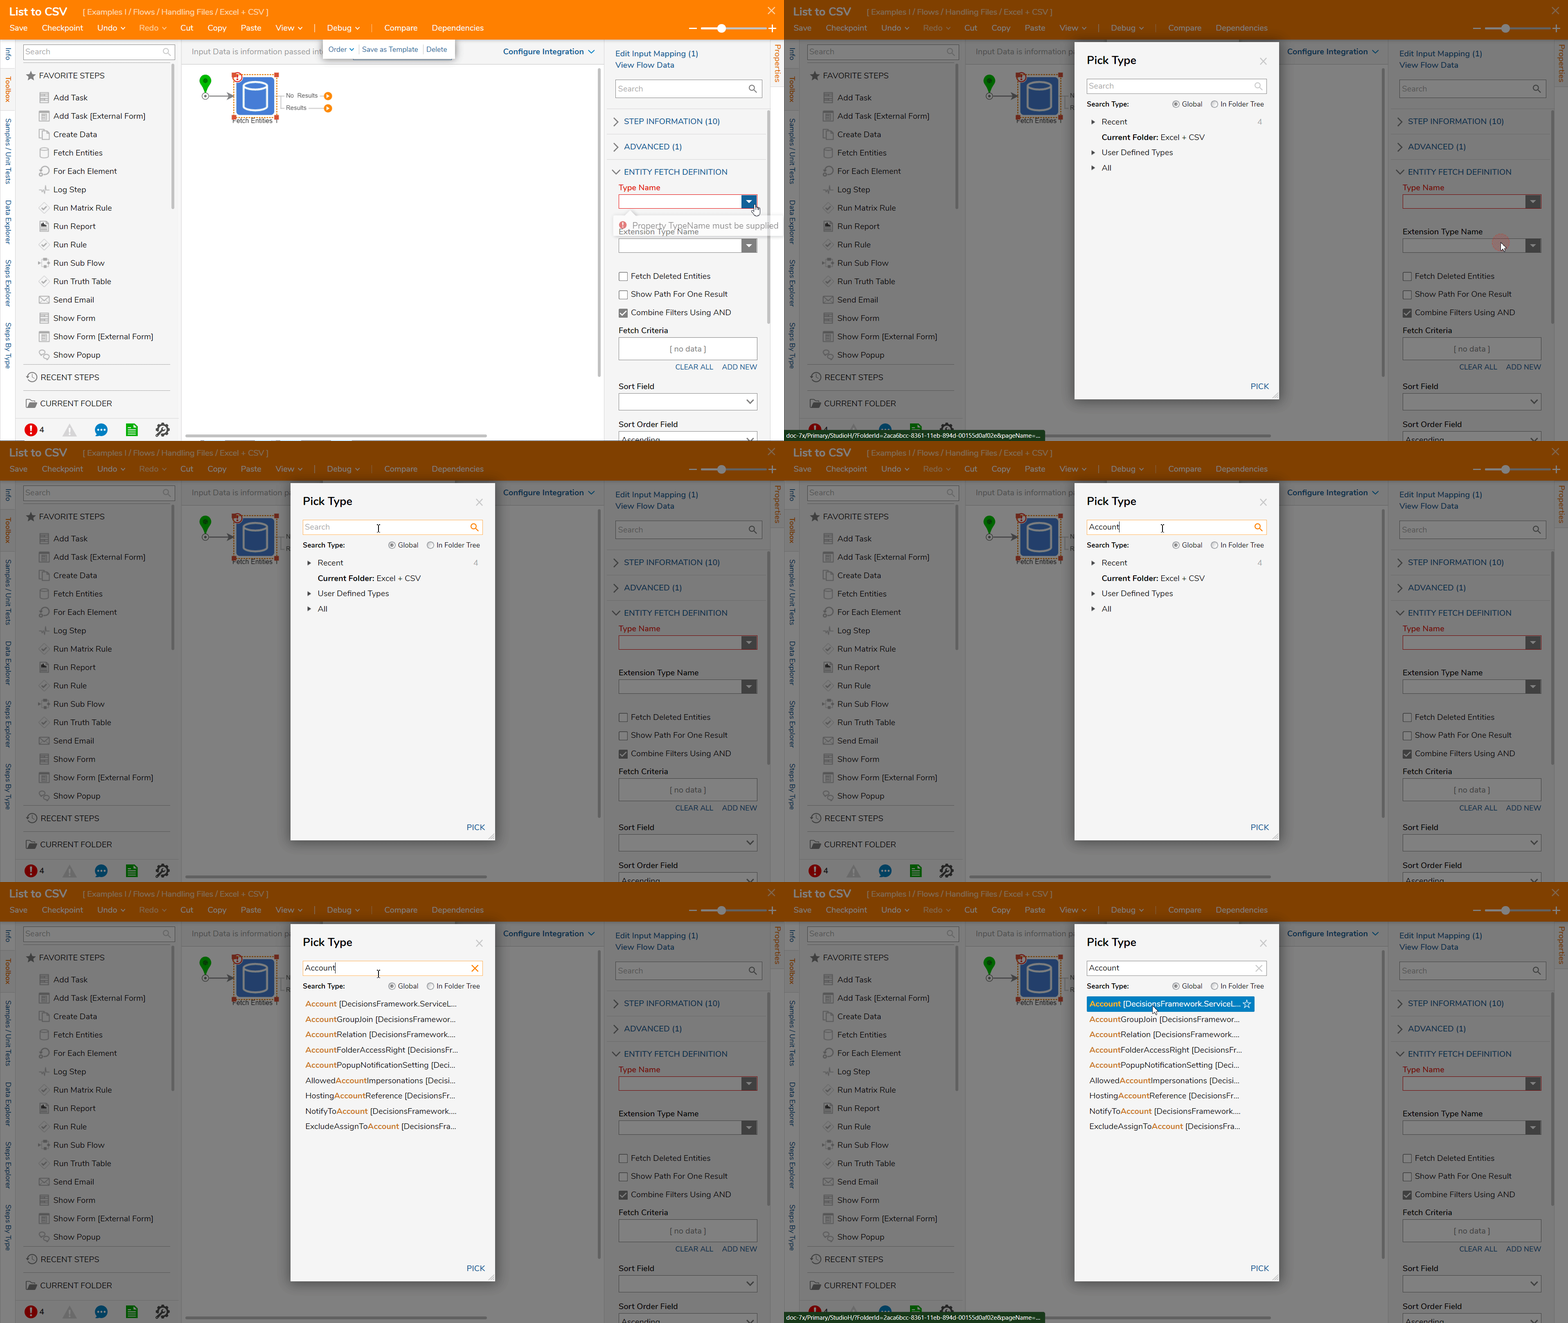
- In the Properties panel, within the ENTITY FETCH DEFINITION > Type Name drop-down list, select All/Search... and search for Account.
- Select Account [DecisionsFramework.ServiceLayer.Services.Accounts]. Click PICK.
- In the Toolbox > DATA > EXCEL & CSV category, drag a List to CSV Mapping step to the workspace and connect it to the Results outcome of the Fetch Entities step.
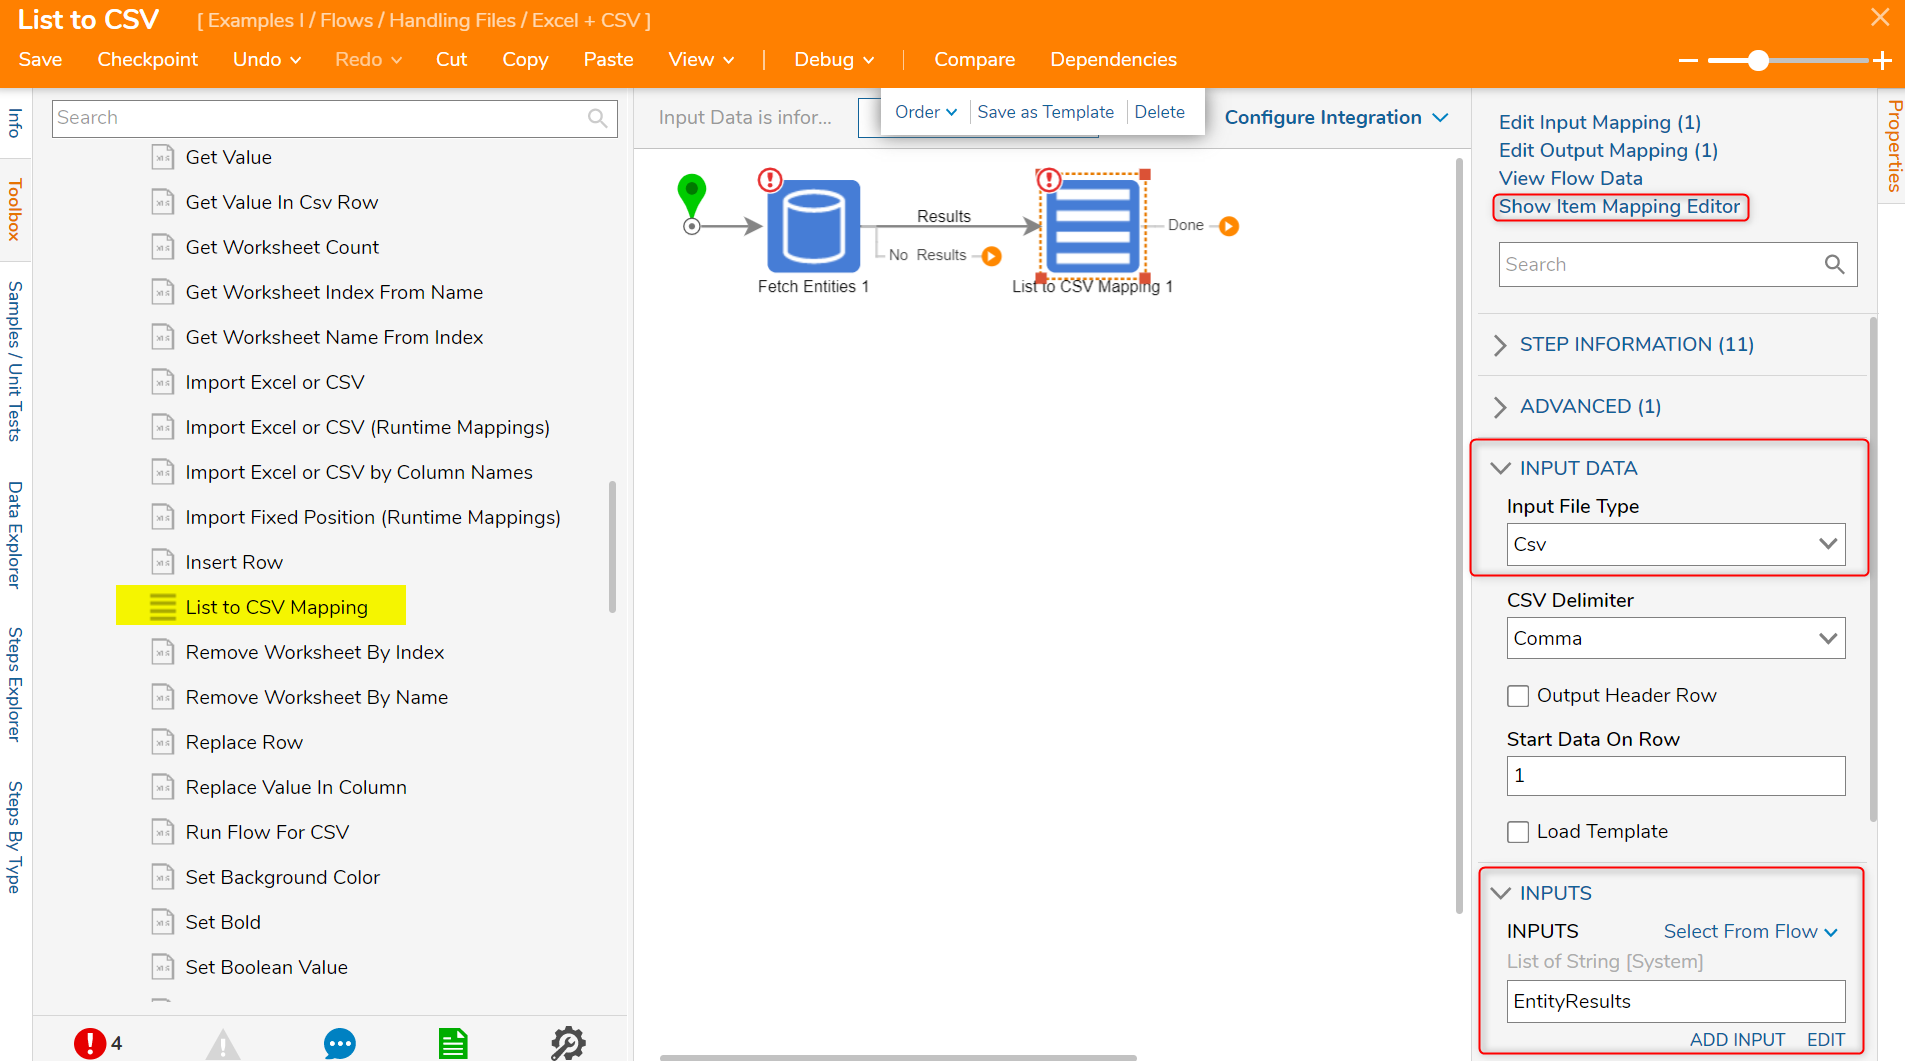
- With the List to CSV Mapping step selected, navigate to its Properties panel and within the INPUT DATA > Input File Type drop down list, select CSV.
- Next, navigate to INPUTS > INPUTS, change the input mapping from Unknown to Select From Flow.
- Select the output from the Fetch Entities step EntityResults.
- In the top right of the Properties panel, select Show Item Mapping Editor.
- In the Mapping Editor window, navigate to Inputs > ITEM on the right side and change the input mapping to Build Data.
- As it connects to Properties on the left side, click on the three dots and select Field01, Field02, and Field03 from the Edit > SelectedProperties window.
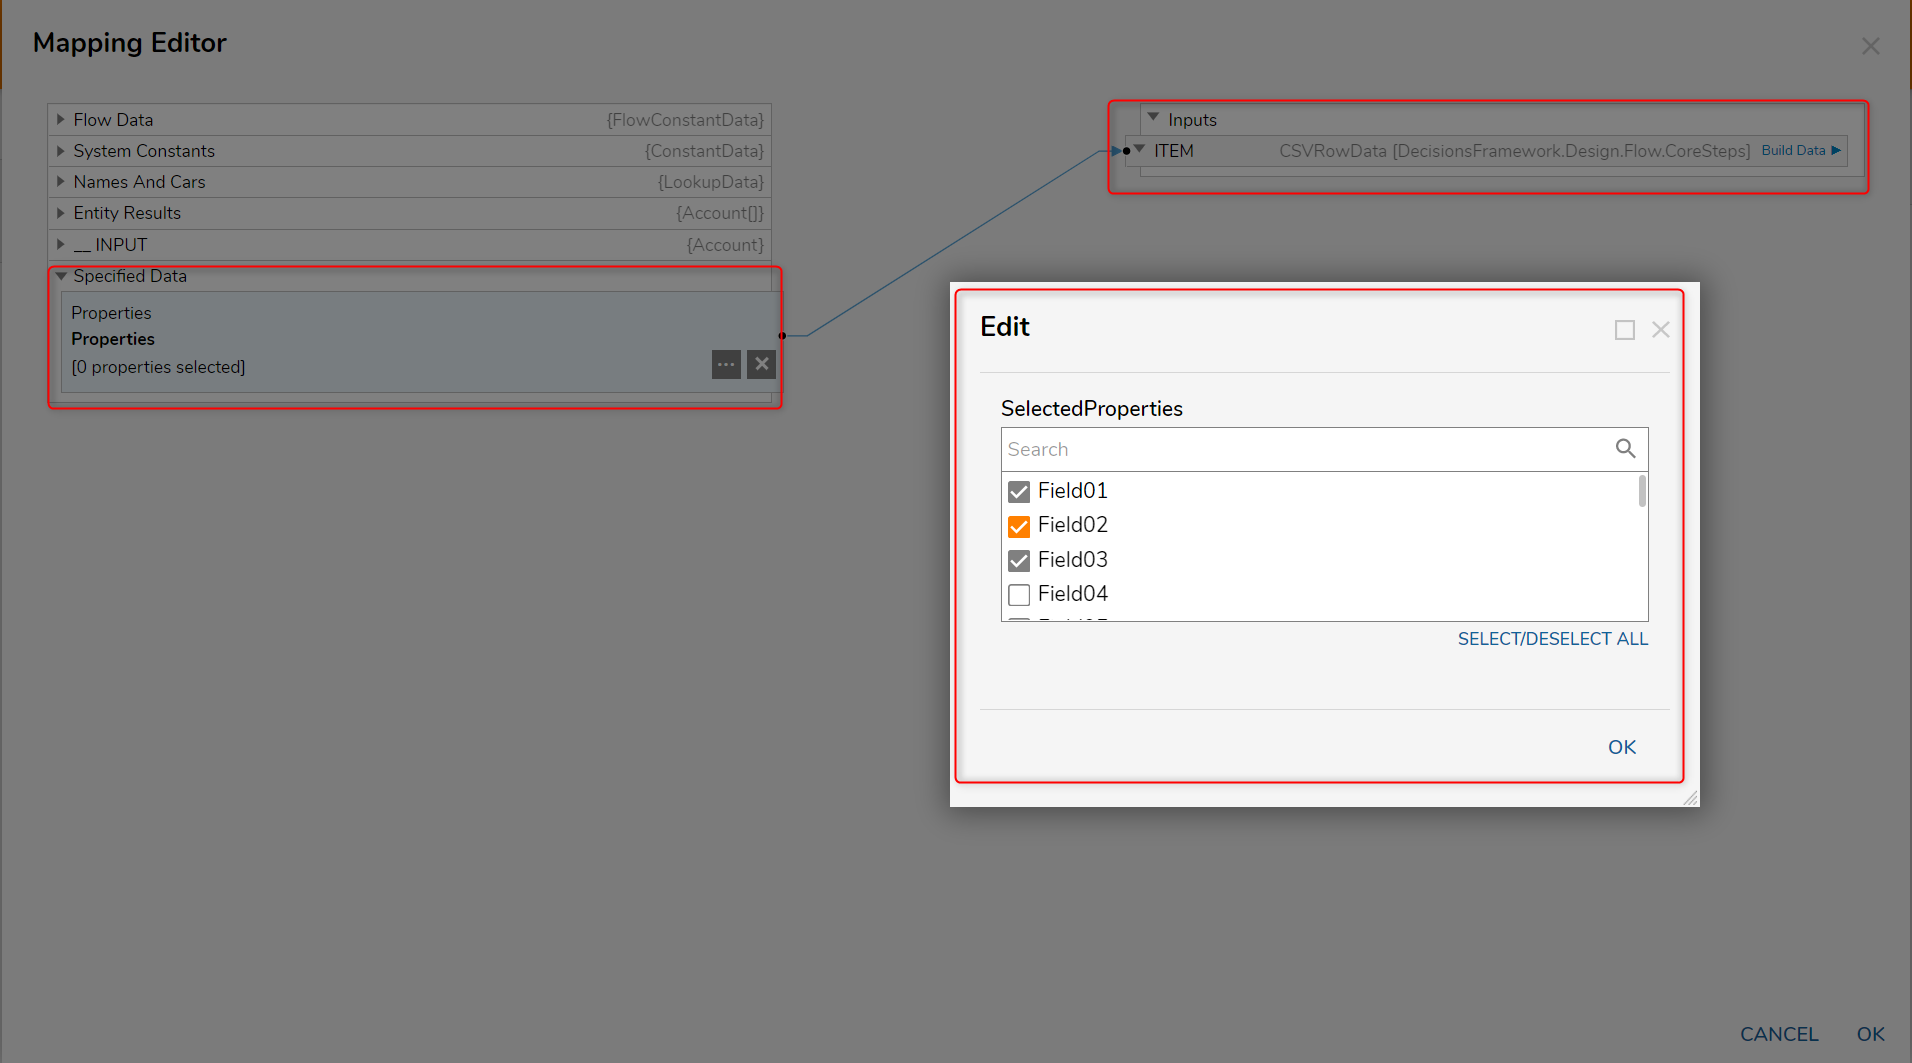
- As it connects to Properties on the left side, click on the three dots and select Field01, Field02, and Field03 from the Edit > SelectedProperties window.
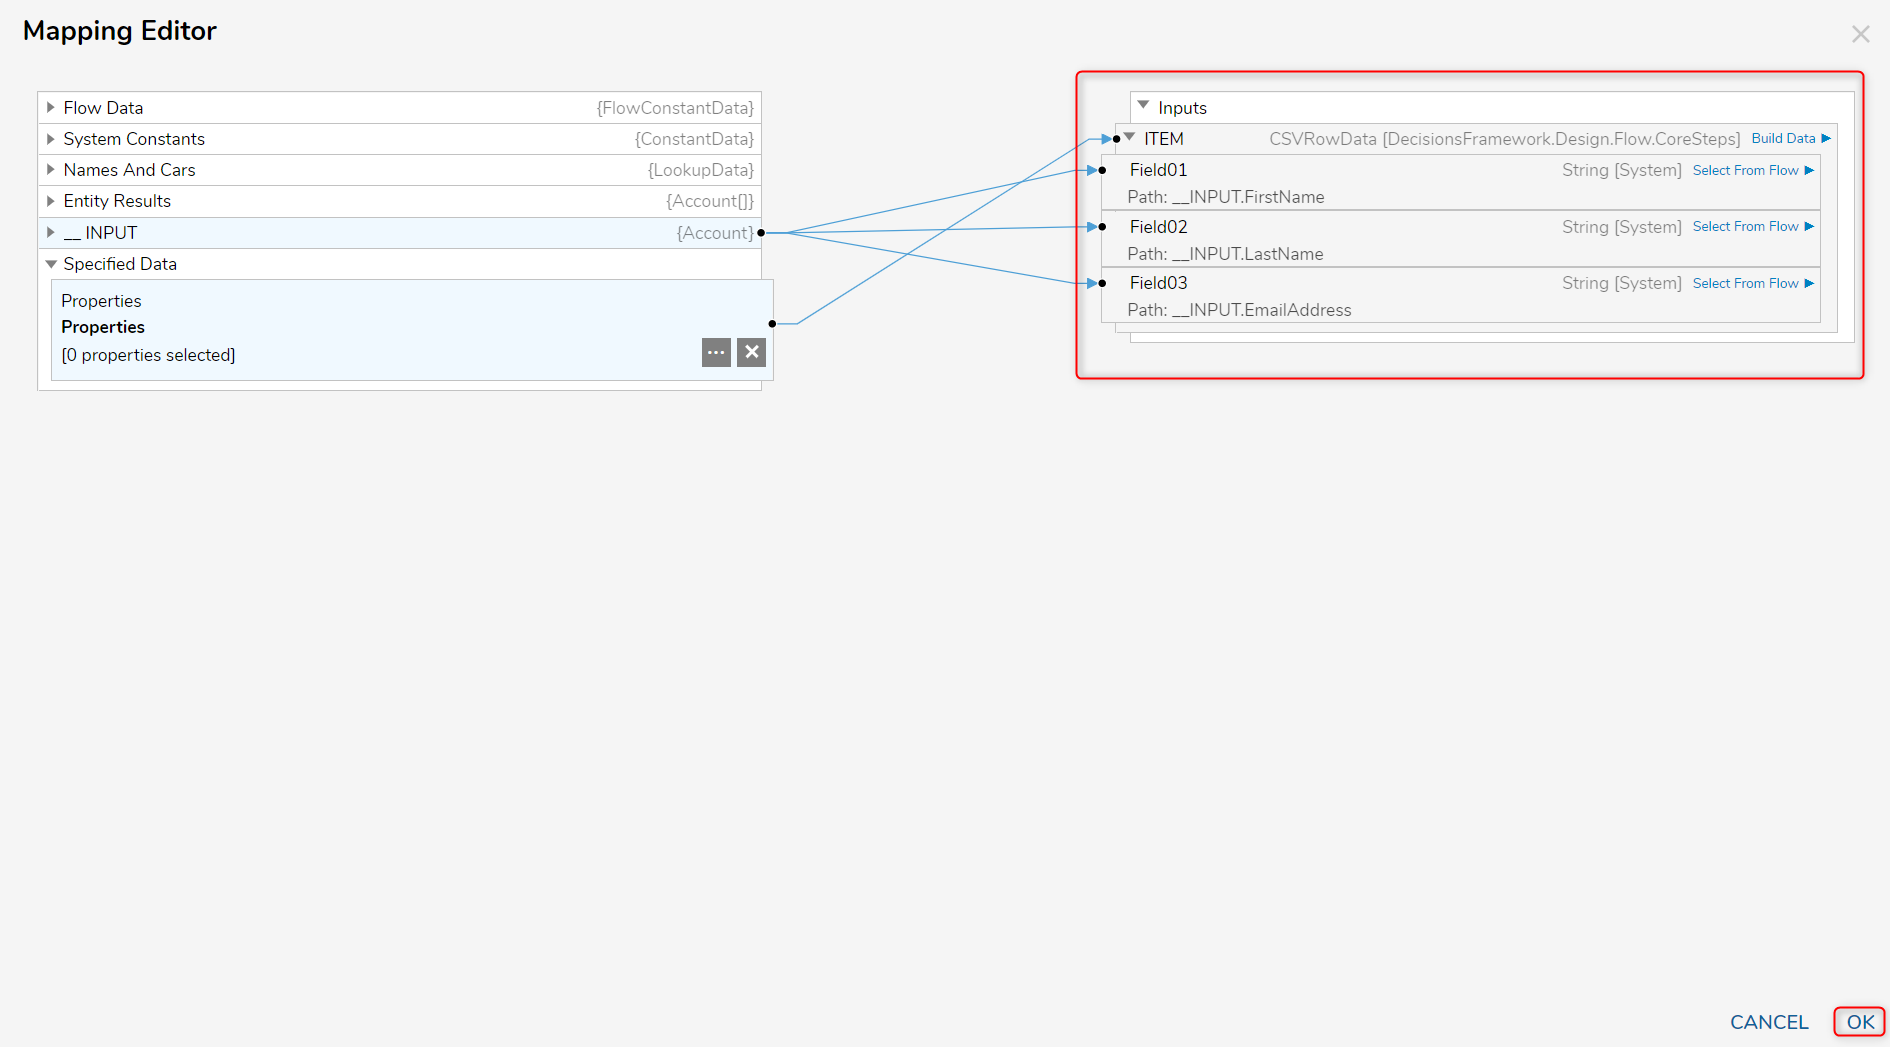
- Next, navigate to __INPUT on the left side and expand its list.
- Connect __INPUT.FirstName, __INPUT.LastName, and __INPUT.EmailAddress to Field 01, Field 02, and Field 03, respectively.
- Select OK to save item mappings.
- Back in the Properties of the List to CSV Mapping step, if desired, check the Output Header Row. Then provide the desired Header Row Number. About Output Header RowThe Output Header Row Property is used to add Headers to the CSV File that is Output by the List to CSV Mapping step. Enabling this Property provides users with access to the Header Row Number and Fields Inputs.
Header Row Number allows the user to define which Row they want the Header to appear on; this number starts from the Index of "1".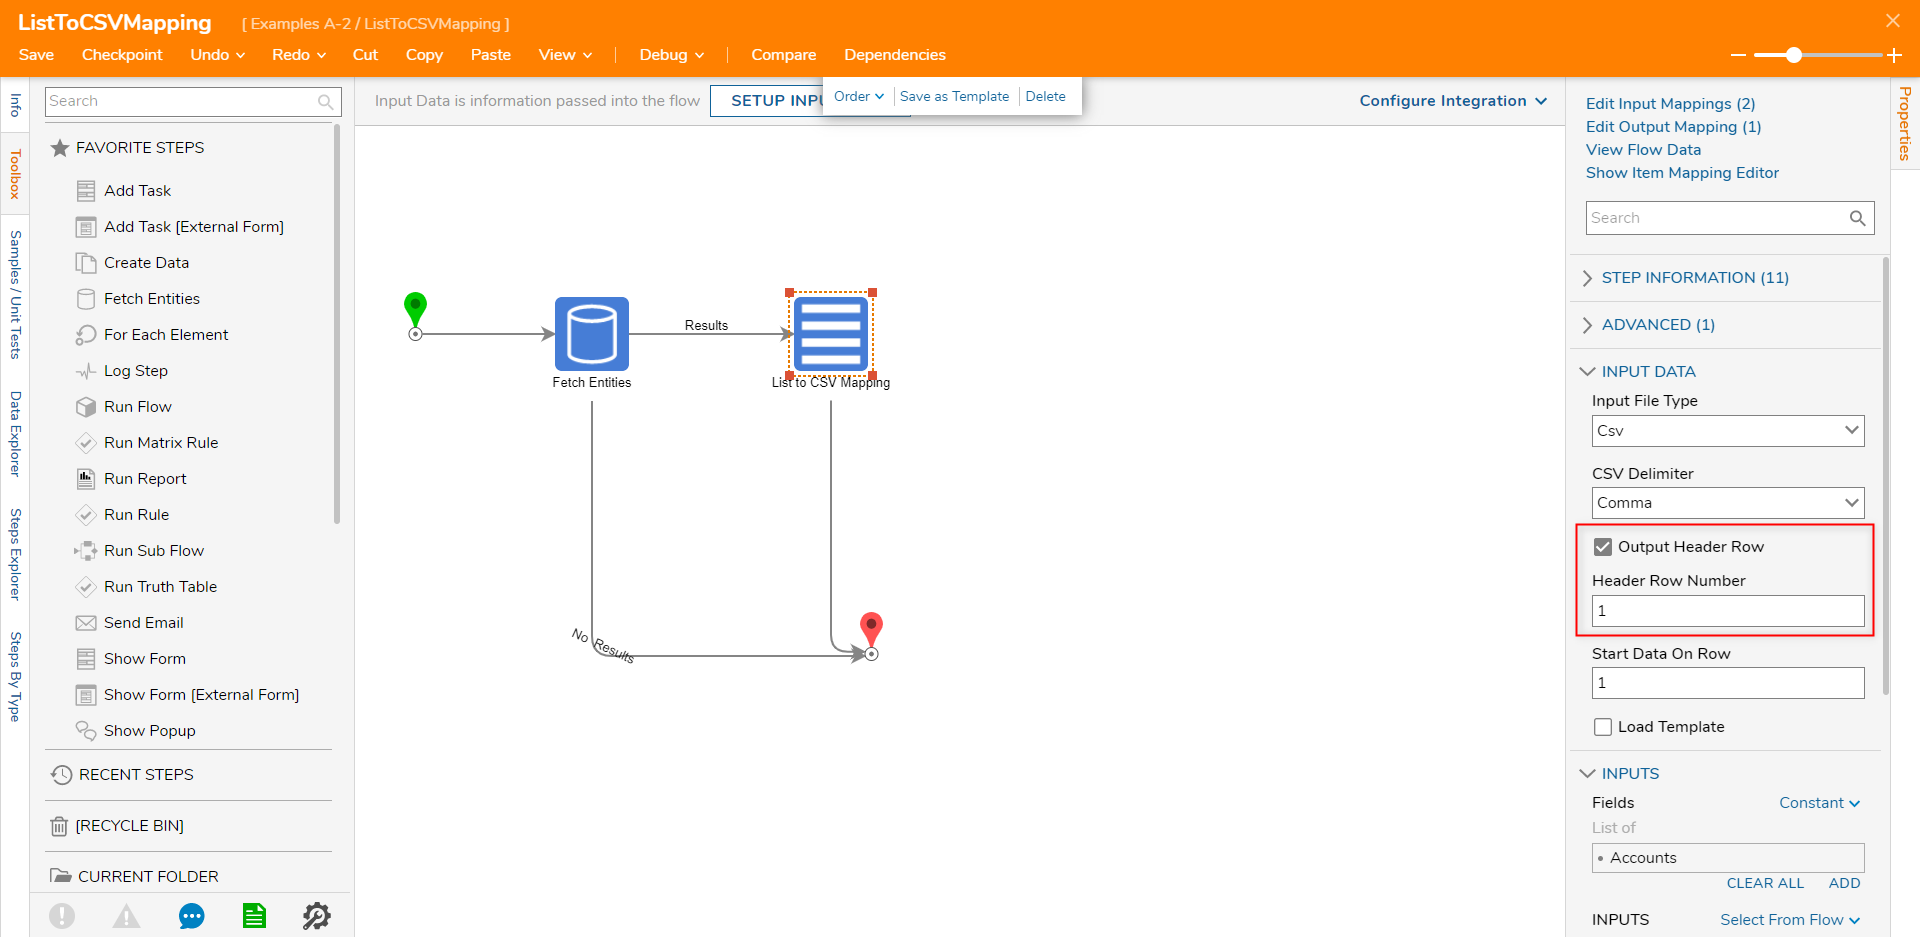
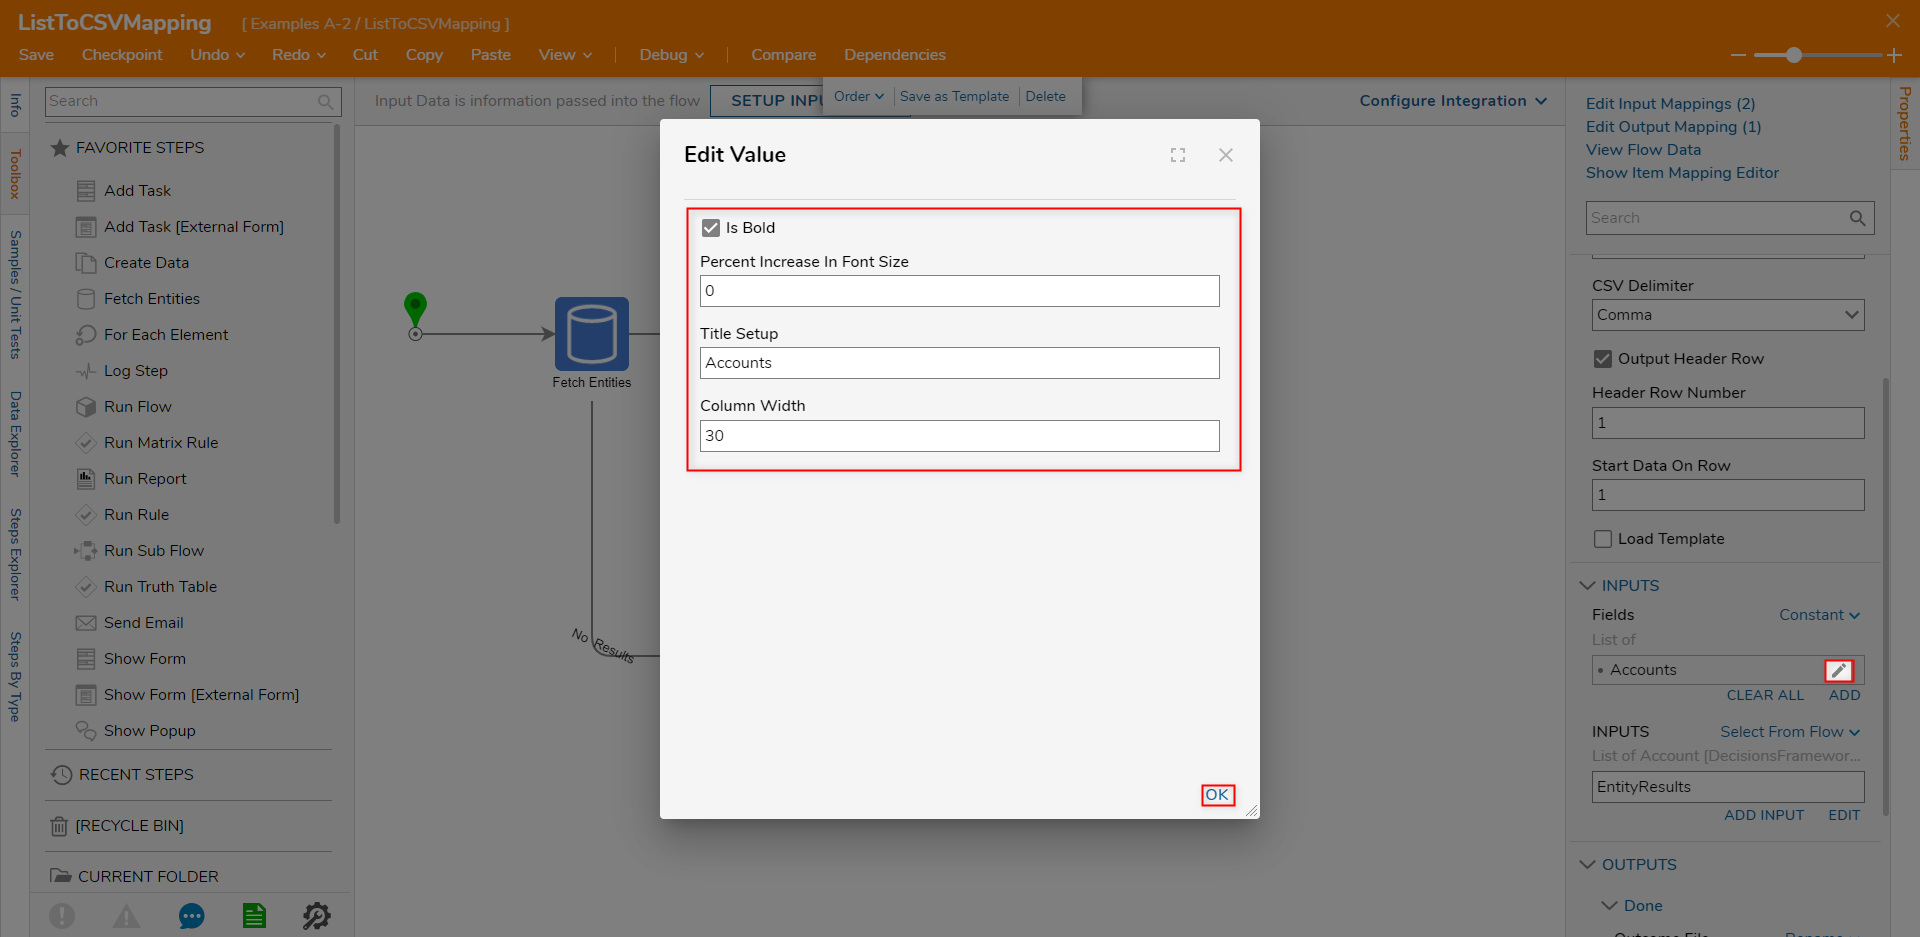
Under INPUTS > Fields, select the Edit icon (pencil) beside the Accounts Input, define the Header as desired, then click OK.
About Fields InputThe Fields Input allows users to define how the Header Row appears in the CSV File.- Is Bold: Bolds the text in the Header Row cells.
- Percent Increase In Font Size: Increases the size of the Header text.
- Title Setup: Dictates what text appears in the Header Row.
- Column Width: Defines the width of the Column containing the Header Row.
- Connect the Done outcome of the List to CSV Mapping step to the End step.
- Connect the No Results outcome of the Fetch Entities step to the End step.
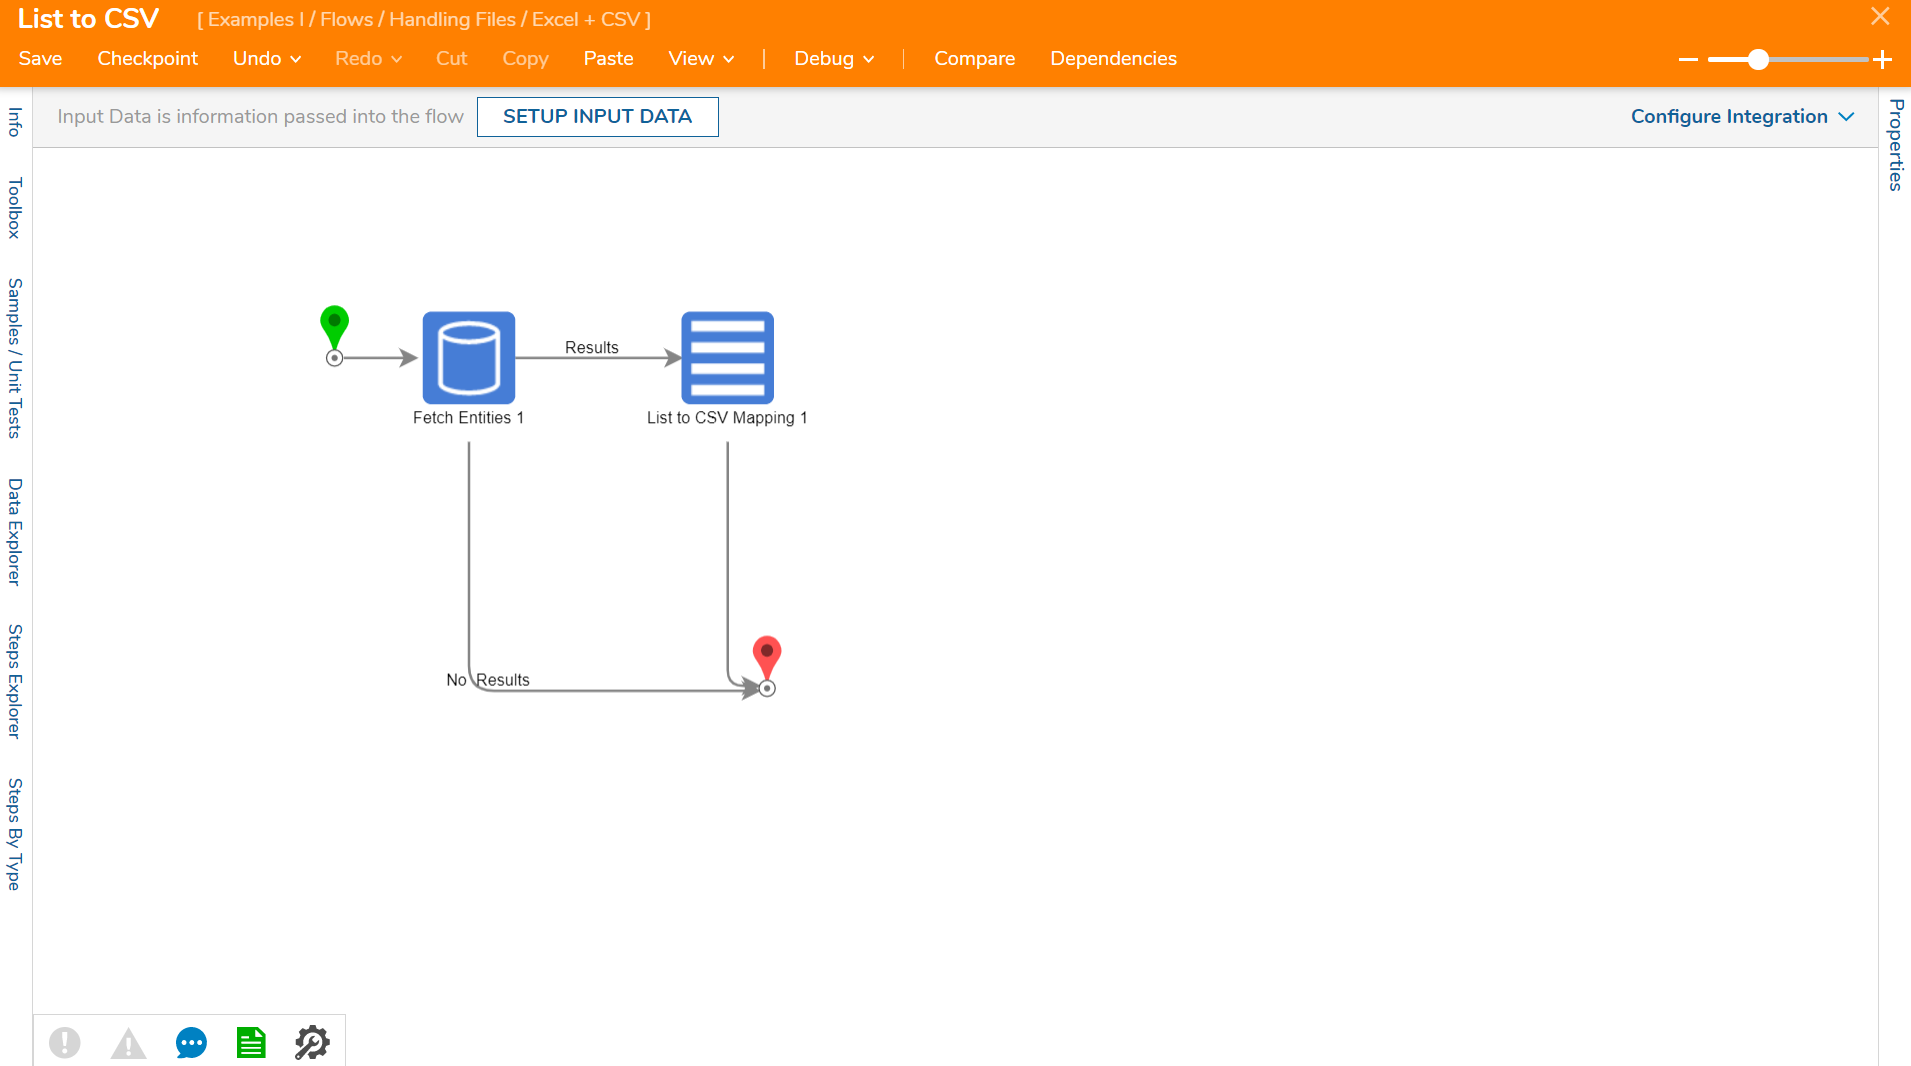
- Save the Flow.
Debug
- Select Debug from the Top Action Bar.
- Click START DEBUGGING.
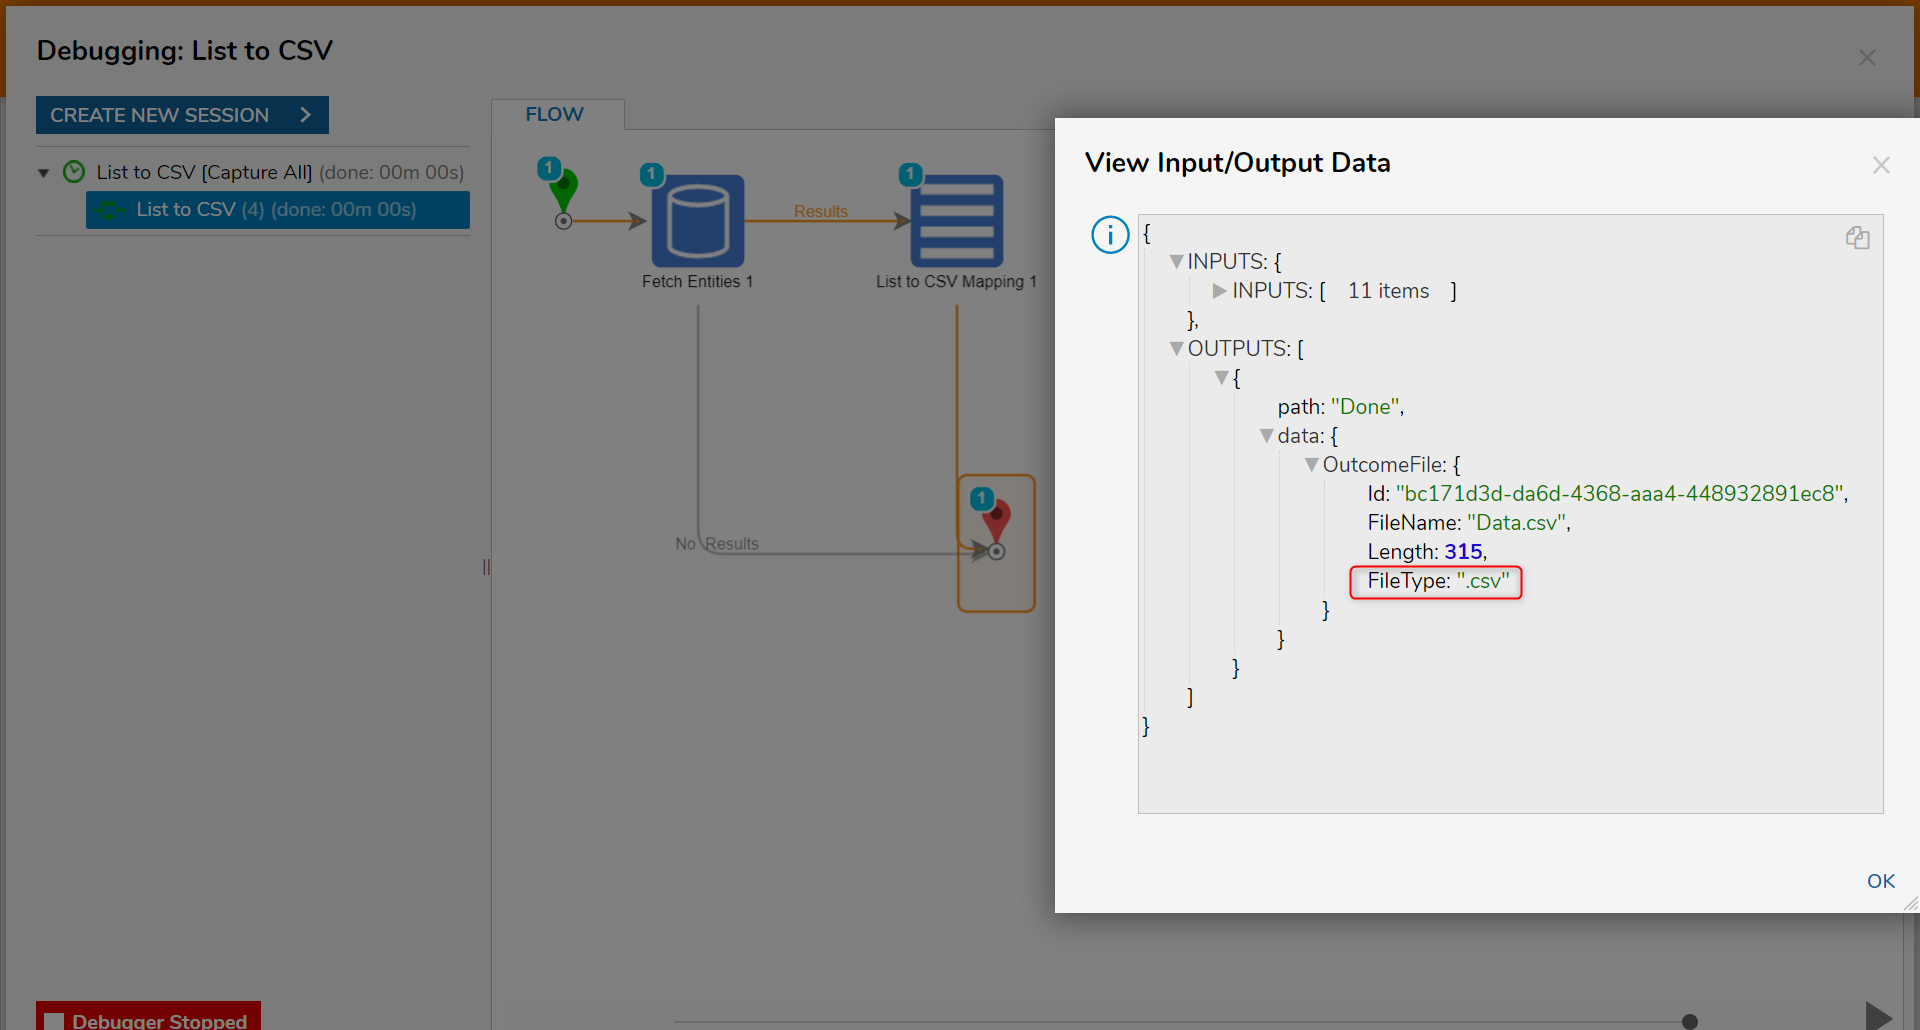
- Right-click the List to CSV Mapping step and select View Input/Output Data. Notice the output is a CSV file.
