Overview
This document reviews how to integrate a Twitter account with an existing Decisions instance. This will be accomplished by:
- creating an OAuth Provider
- creating an OAuth Token
- adding a REST service
- creating a Flow and Test Connection

Creating OAuth Provider
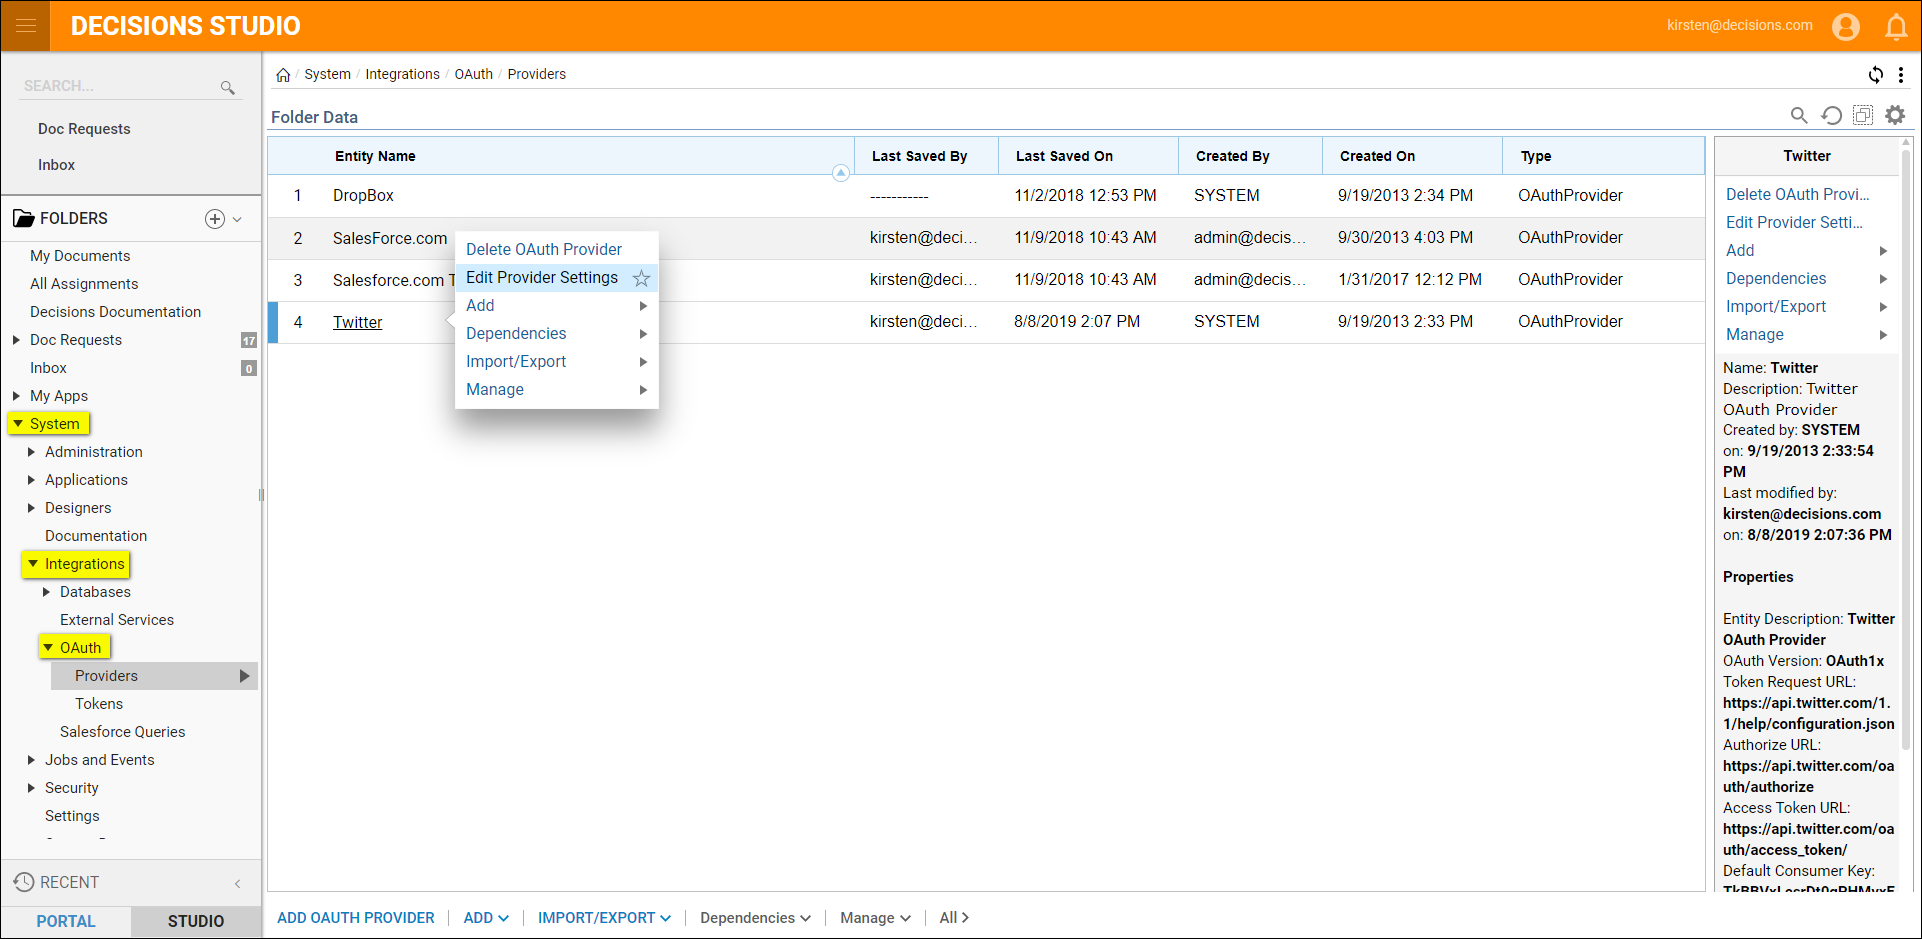
Once the Consumer API keys are known, login to the Decisions Studio. Navigate to System > Integrations > OAuth > Providers, click Twitter, then select Edit Provider Settings.
In the Edit OAuth Provider form, add the consumer and consumer secret API keys.
Select Save.

Creating OAuth Token
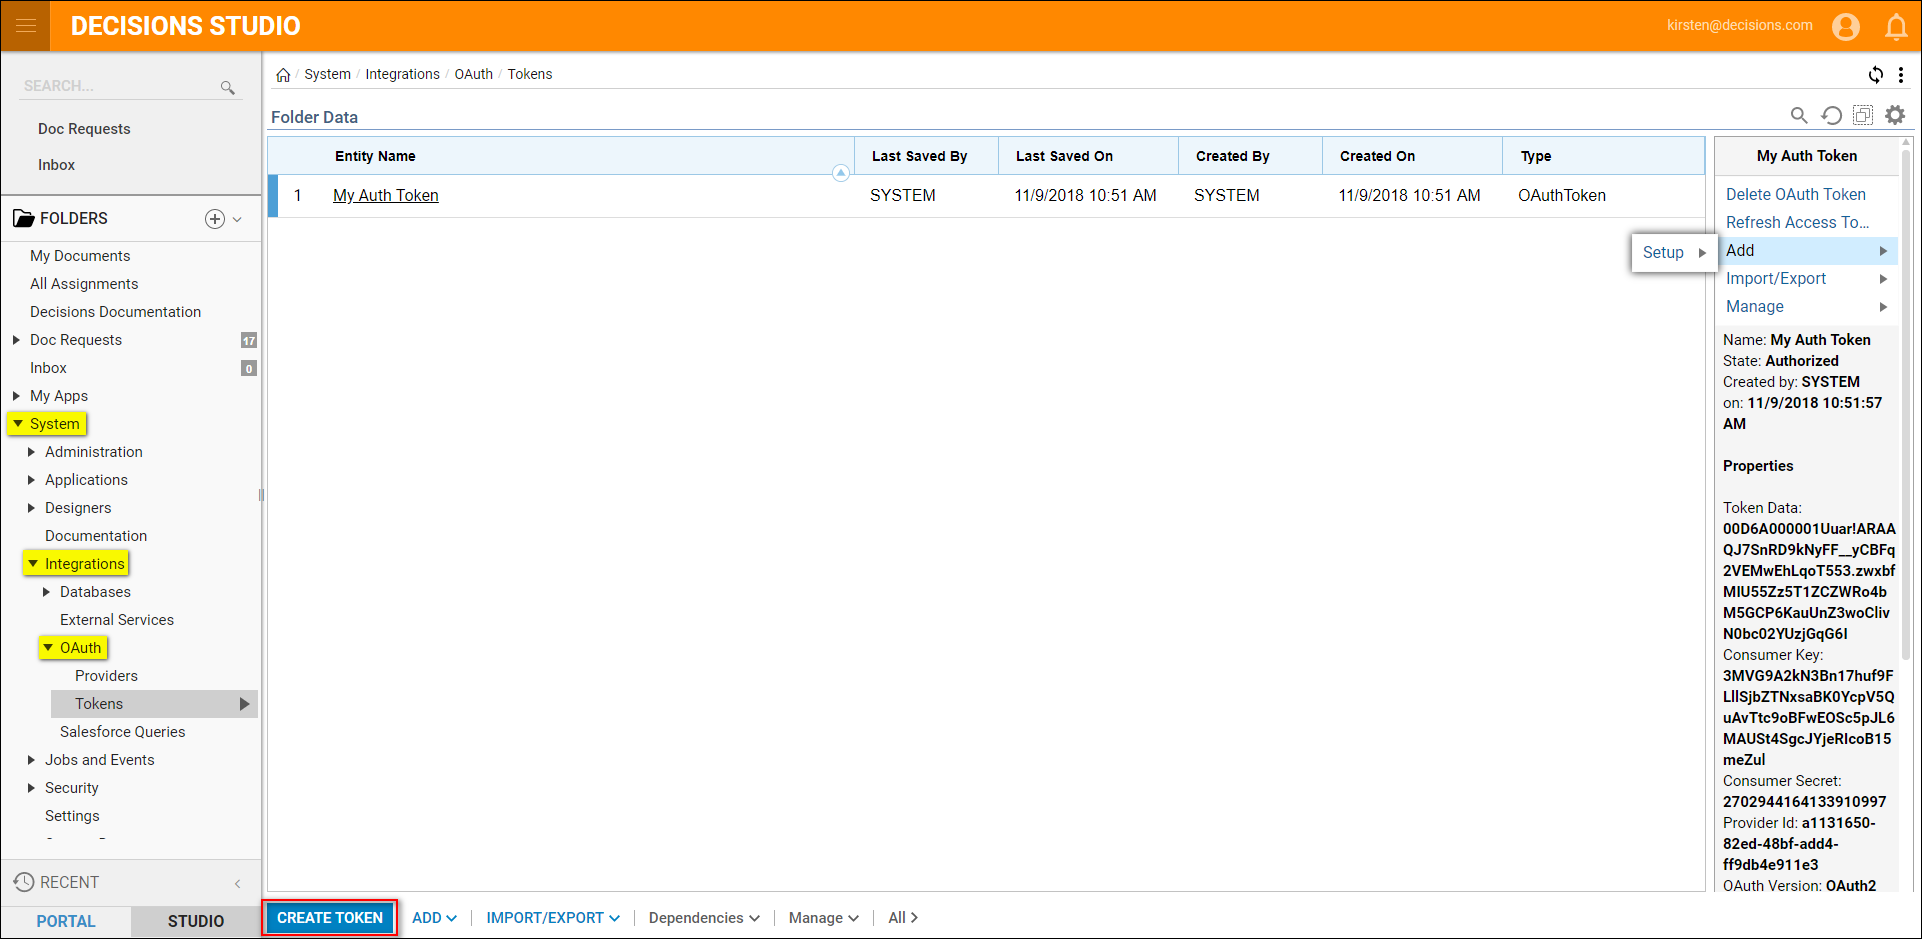
Navigate to System > Integrations > OAuth > Token. Select Create Token.
Name the Token and leave the Use Default Keys box checked. If this box is unchecked it a new consumer API and Consumer secret API key will need to be added. Select Ok.

Add REST Service
Next set up a Twitter API integration in Decisions.
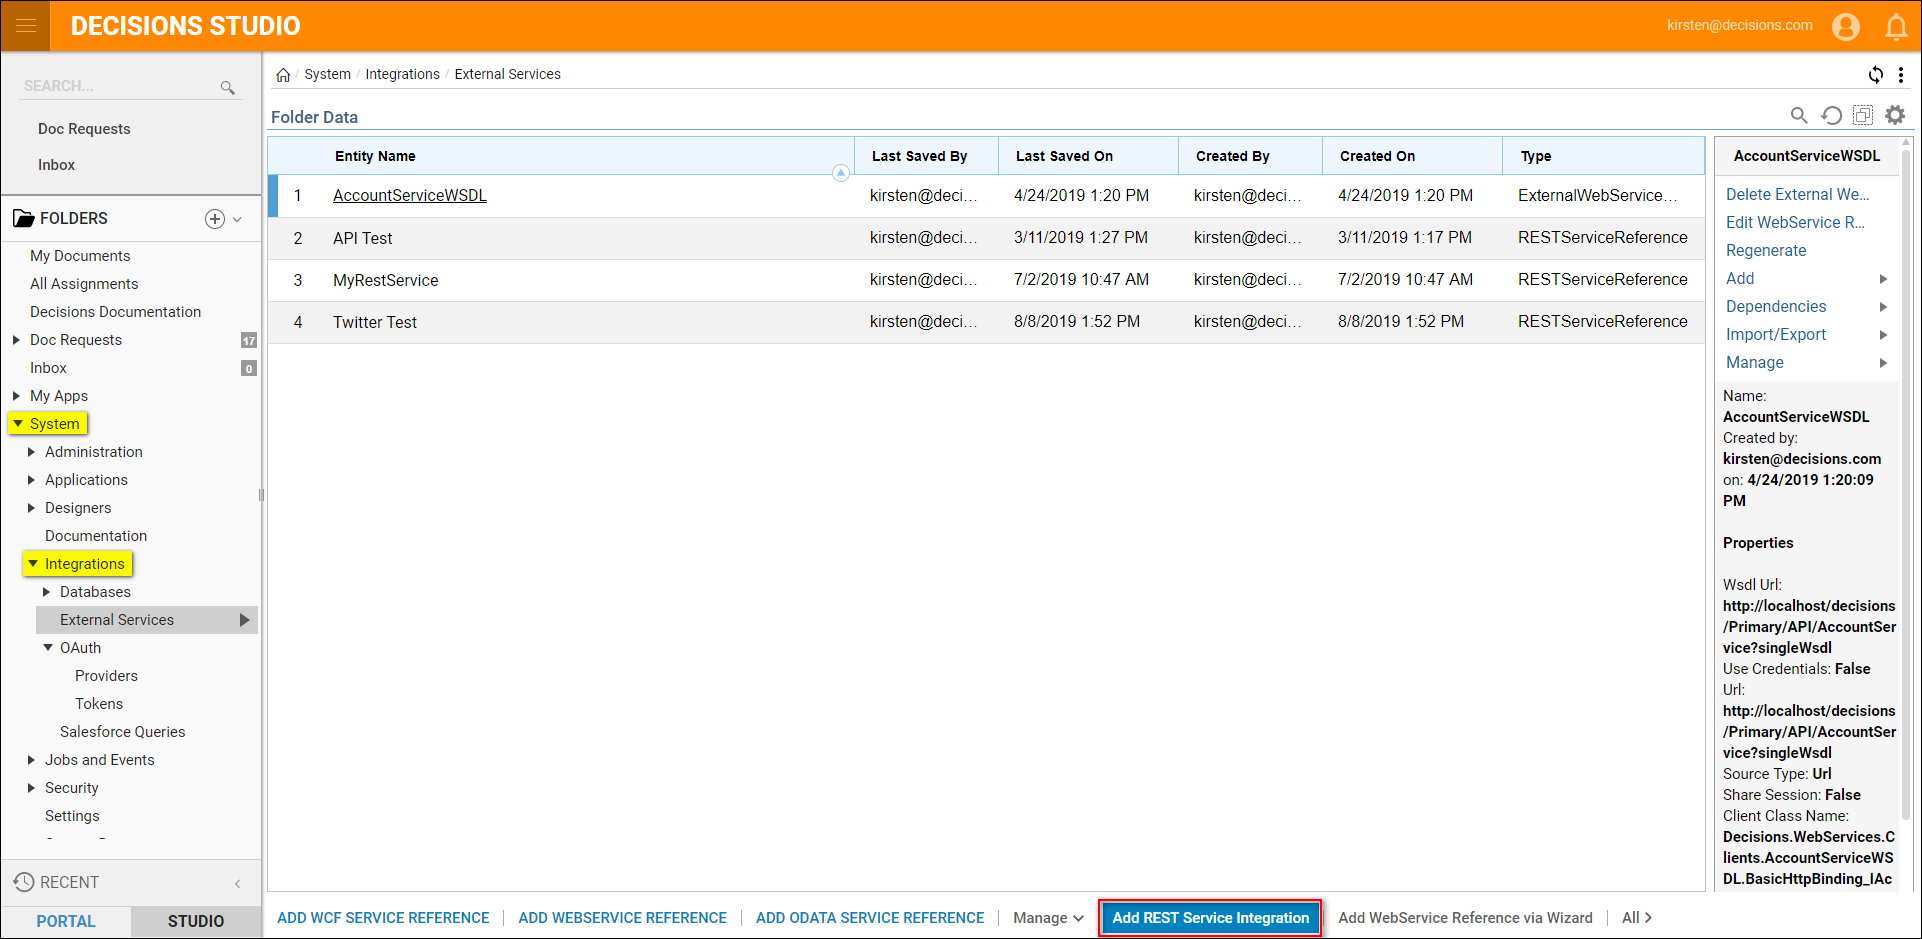
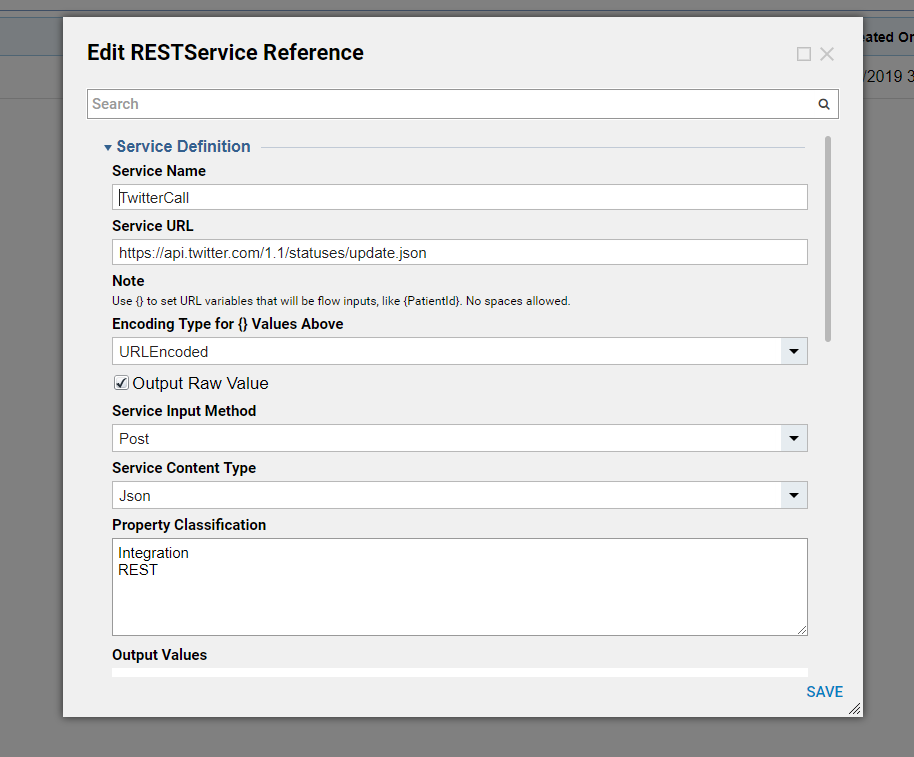
Navigate to System > Integrations > External Services and select Add REST Service Integration.
Give the service a name and set the service URL is set to https://api.twitter.com/1.1/statuses/update.json and type is JSON.
Create a Flow and Test Connection
In a Designer Folder select Create Flow. Name the flow and select Create. In the steps panel expand Integration > REST Services, drag a TwitterCall step into the workspace.

Configure the REST step by selecting the name of the new token (TwitterToken in our example).
Complete the Body text with the tweet structure shown under the Inputs screenshot. Run the Flow.

"created_at": "Thu Apr 06 15:24:15 +0000 2017",
  "id_str": "850006245121695744",
  "text": "1\/ Today we\u2019re sharing our vision for the future of the Twitter API platform!\nhttps:\/\/t.co\/XweGngmxlP",
  "user": {
    "id": 2244994945,
    "name": "Twitter Dev",
    "screen_name": "TwitterDev",
    "location": "Internet",
    "url": "https:\/\/dev.twitter.com\/",
    "description": "Your official source for Twitter Platform news, updates & events. Need technical help? Visit https:\/\/twittercommunity.com\/ \u2328\ufe0f #TapIntoTwitter"
  },
  "place": {
  },
  "entities": {
    "hashtags": [
    ],
    "urls": [
      {
        "url": "https:\/\/t.co\/XweGngmxlP",
        "unwound": {
          "url": "https:\/\/cards.twitter.com\/cards\/18ce53wgo4h\/3xo1c",
          "title": "Building the Future of the Twitter API Platform"
        }
      }
    ],
    "user_mentions": [
    ]
  }
}
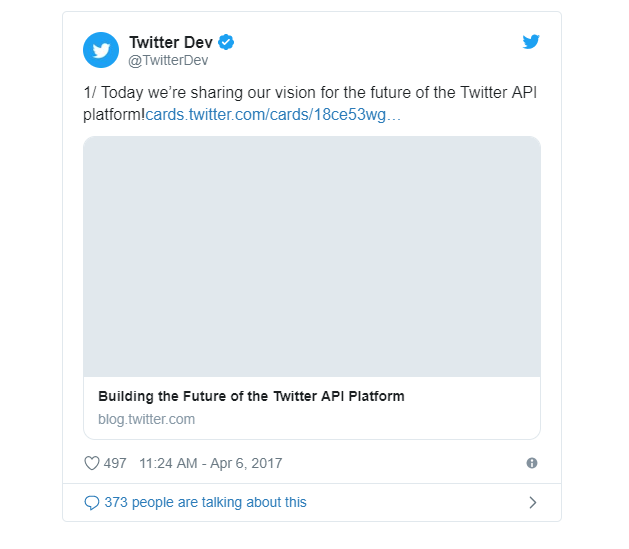
This is the result of the tweet created by the example tweet structure.
