Overview
The Horizontal and Vertical Stack Layouts dynamically resize its and its child controls within upon expanding/shrinking a child control. Each added control automatically resizes to the height of the workspace; however, the width measurement of a child control can be manually adjusted.
A recommended best practice involves populating a Stack Layout with a Grid Layout and then to populate the Grid with the desired controls. With the nested Grid Layout, its columns and rows help uniformly organize controls. Remember to rename the Stack, Grid, and any child controls for best organization practices.
A limitation of Stacks Layouts; however, is that it cannot dynamically resize the Form: stacks will not grow or shrink the whole Form's size.
This document will demonstrate how to use the Horizontal Stack Layout, but similar configurations are applicable to the Vertical Stack Layout.
Configuration
Besides naming the Stack, the Children Size Mode setting determines how its child controls are sized within the Stack. By default, this is set to Scroll.
| Children Size Mode Option | Description |
|---|---|
| Scroll | Allows total size of child controls to extend beyond that of the Stack's dimensions by including a horizontal/vertical scrollbar to navigate |
| ExpandChildrenThenScroll | Allows child controls to expand increasing their size in the Stack. This can also extend beyond the Stack's dimensions thus supports a scrollbar. |
| FitChildren | Allows child controls to resize according to the size of Stack. Since this setting is constrained by the Stack's dimensions, no scrollbar is supported. |
Example
In combination with a visibility Active Form Flow, the Horizontal Stack allows users to hide Form controls within its layout. It then brings the visible controls to the forefront of the Form by sliding the controls from right to left. The Vertical Stack Layout performs the same function but instead operates from bottom to top.
- In a Designer Project Folder, create a Flow.
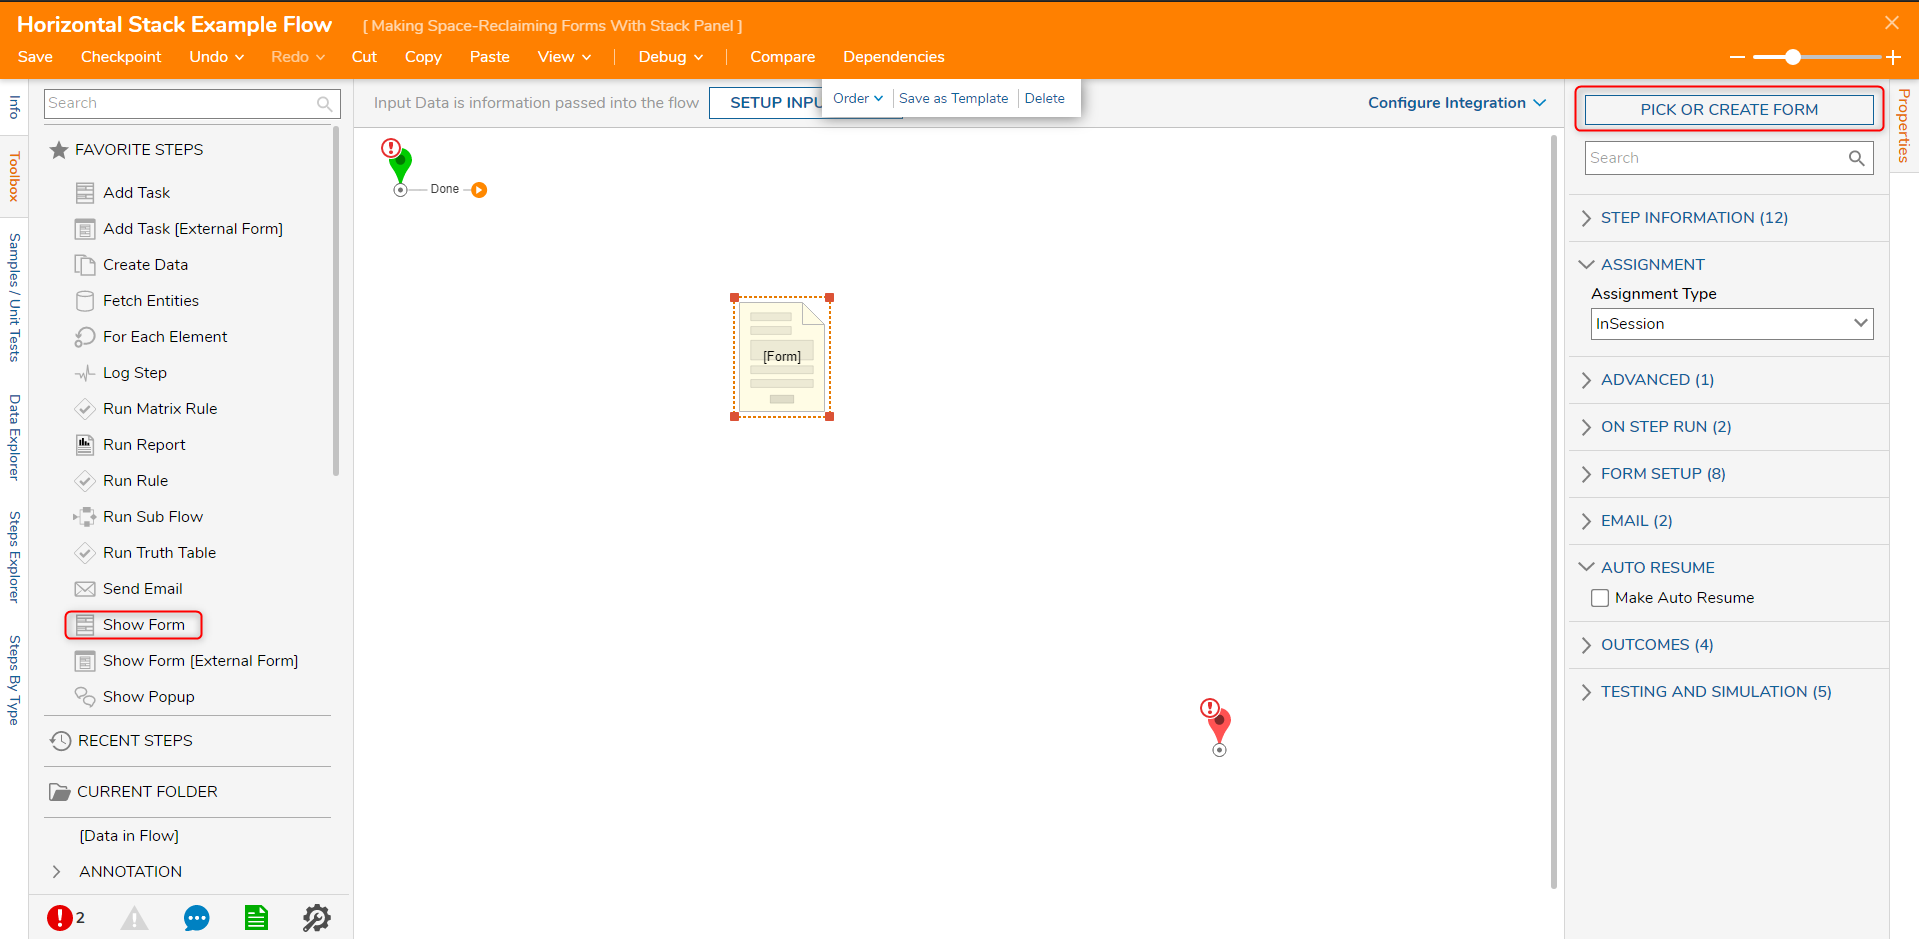
- In the Flow Designer, drag over the 'Show Form' step and create a new Form.
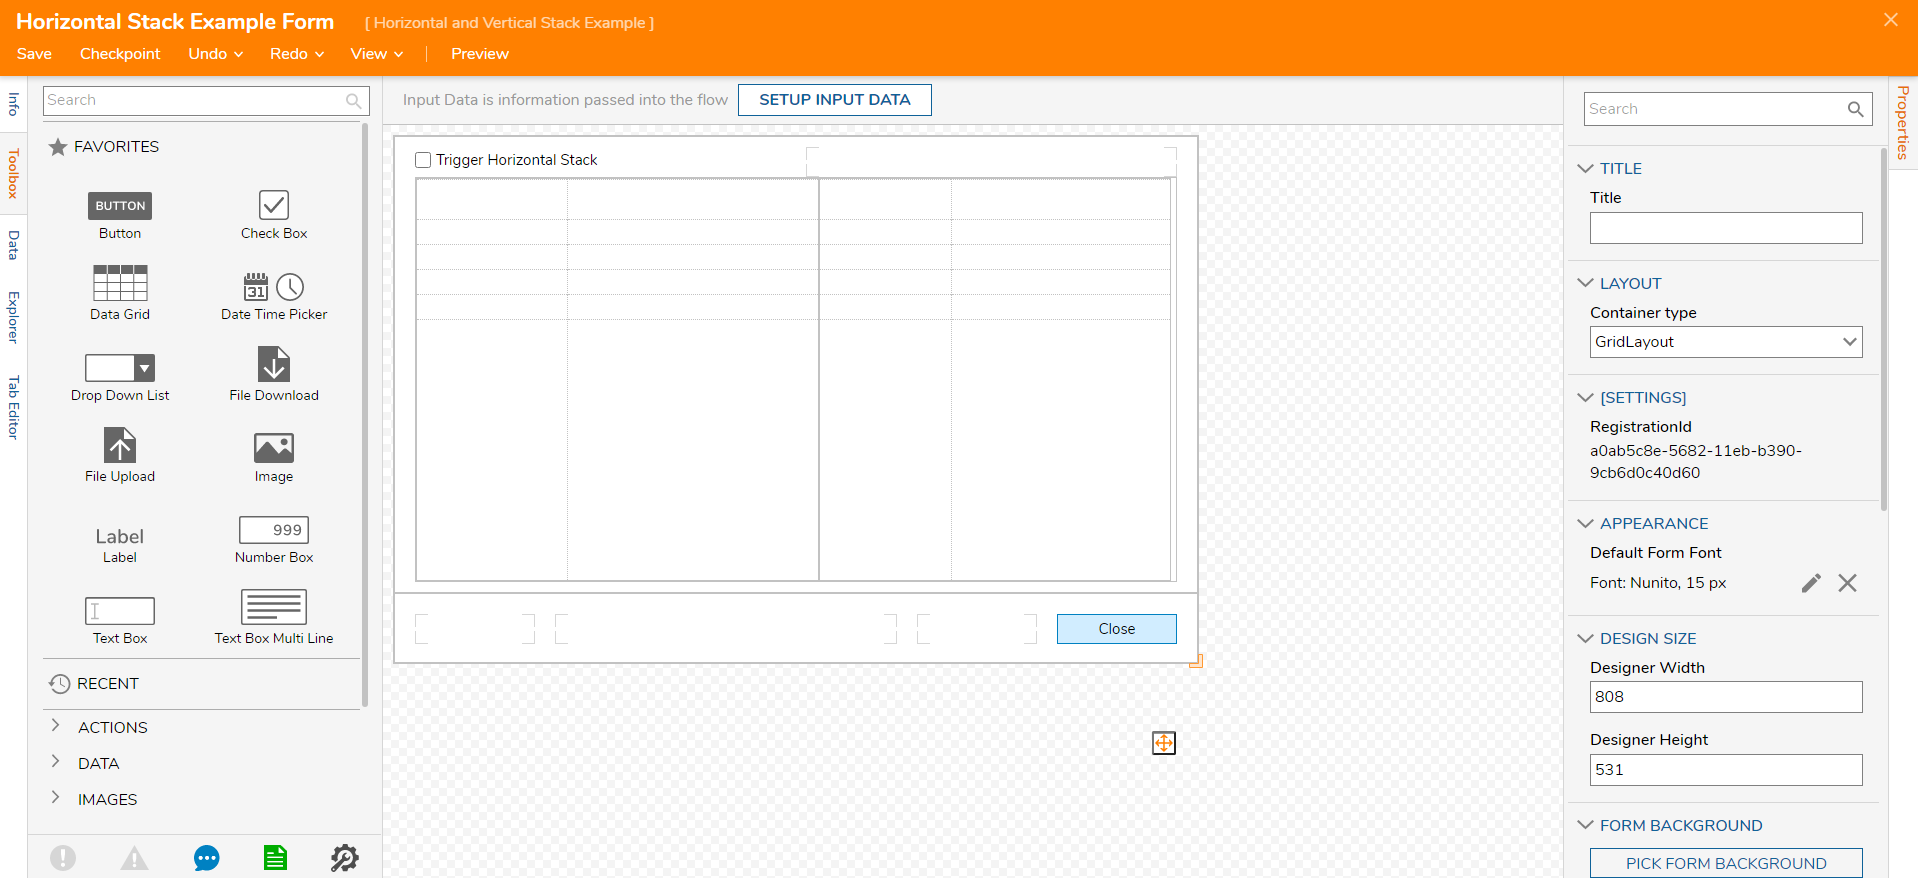
In the Form Designer, drag over a Button, a Horizontal Stack Layout, and place two Grid controls inside of the Horizontal Stack. Change the default names on the Grid Layouts so they can be easily differentiated.
Add a Checkbox to the top left of the Form.
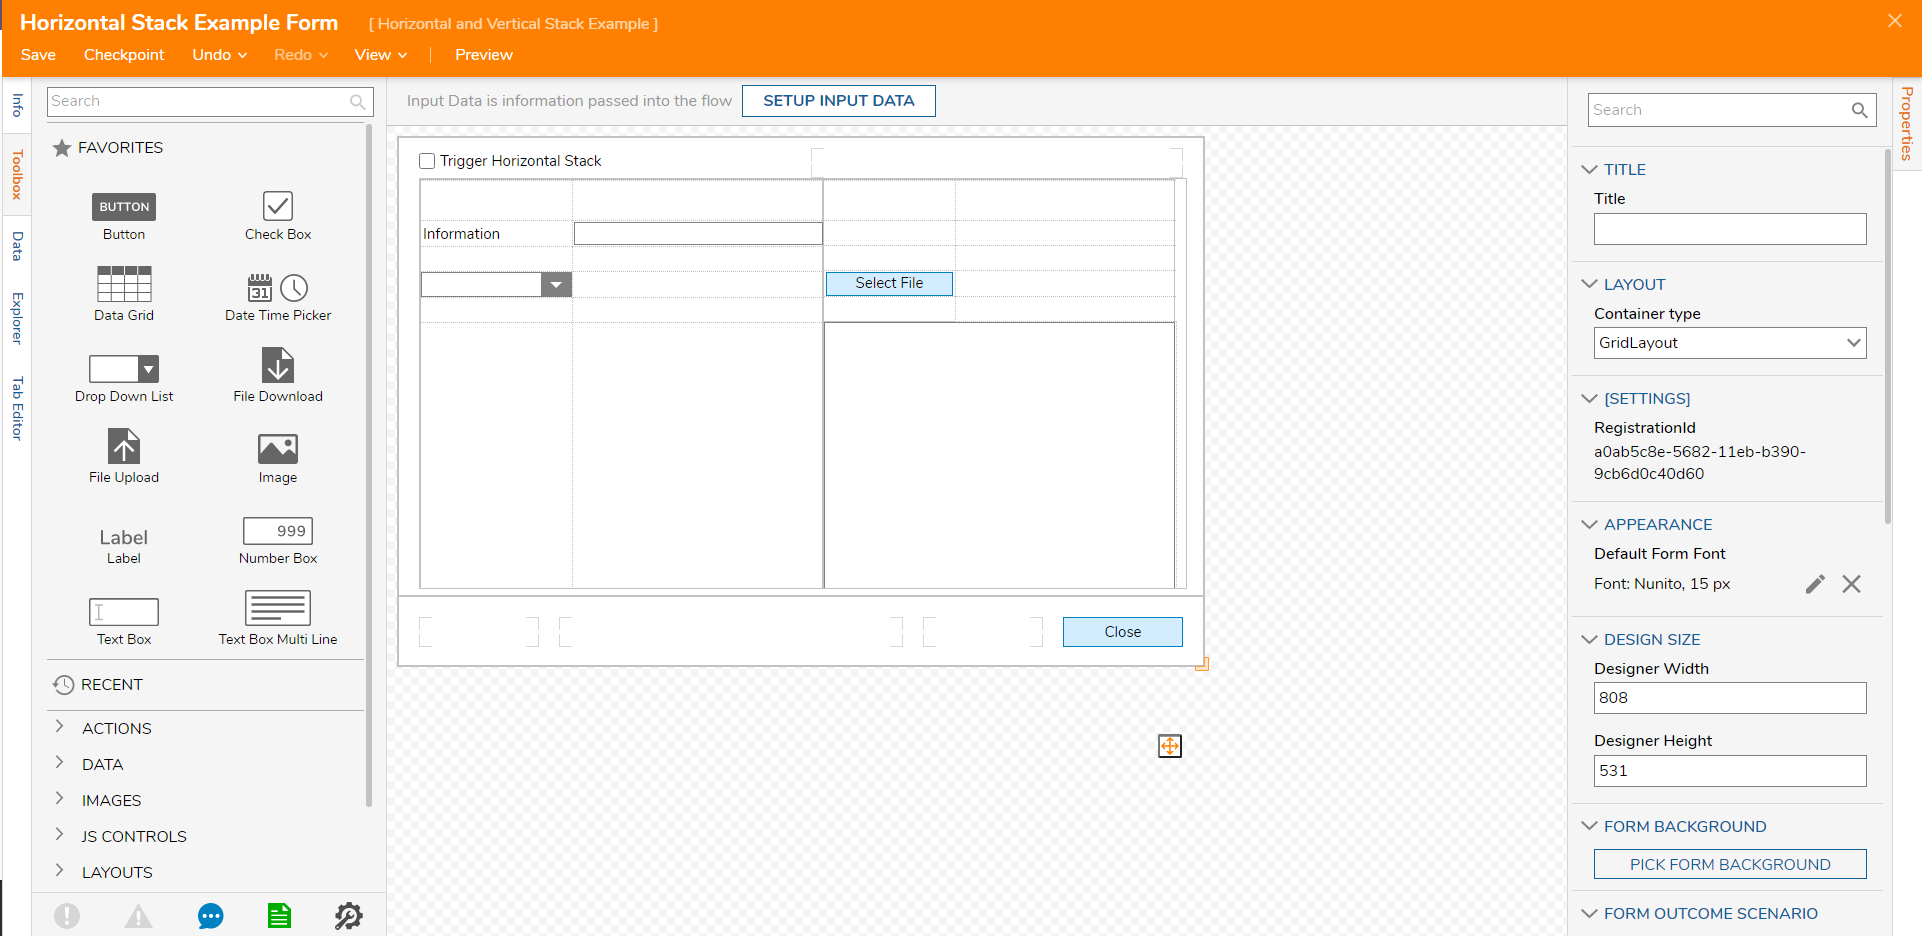
On the left Grid, drag a Label, a Textbox, and a Drop-down List.
On the Right Grid, drag a File Upload and a Text Box Multi Line.
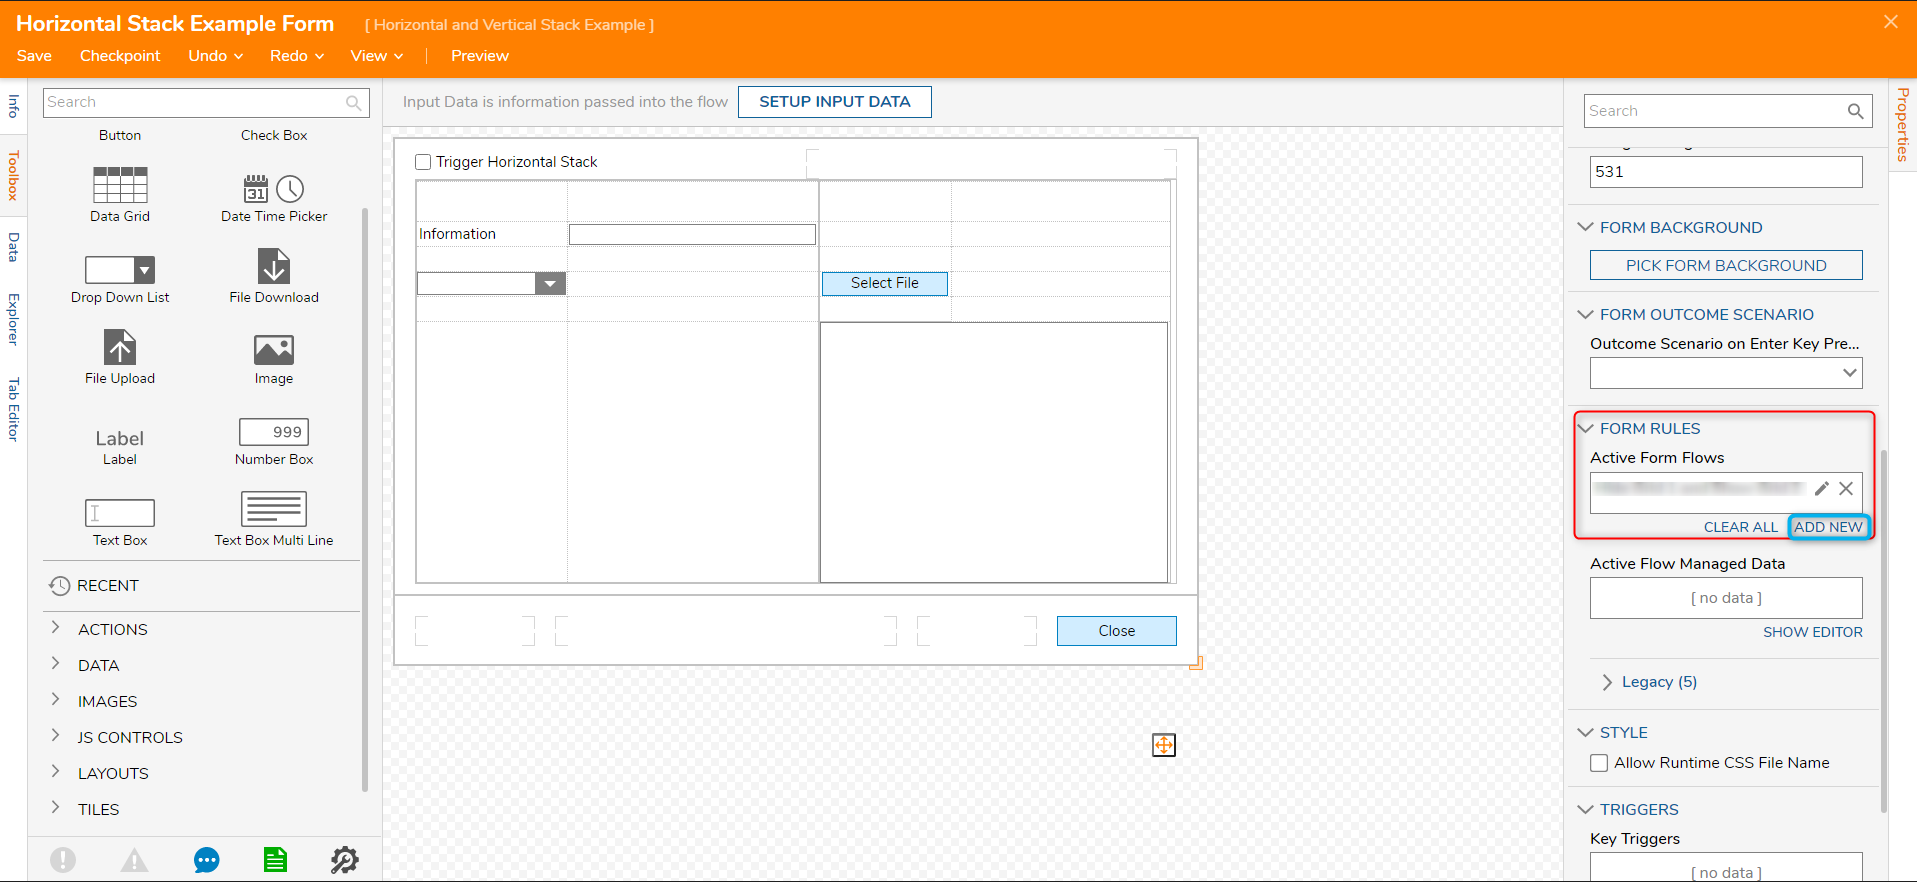
Configure the right grid set the check box to uncheck the 'Initially Visible' parameter.
After setting up those controls, click 'ADD NEW' to create an 'Active Form Flows'.
In the Active Form Flows menu, give it a name and set the Checkbox to be the trigger.
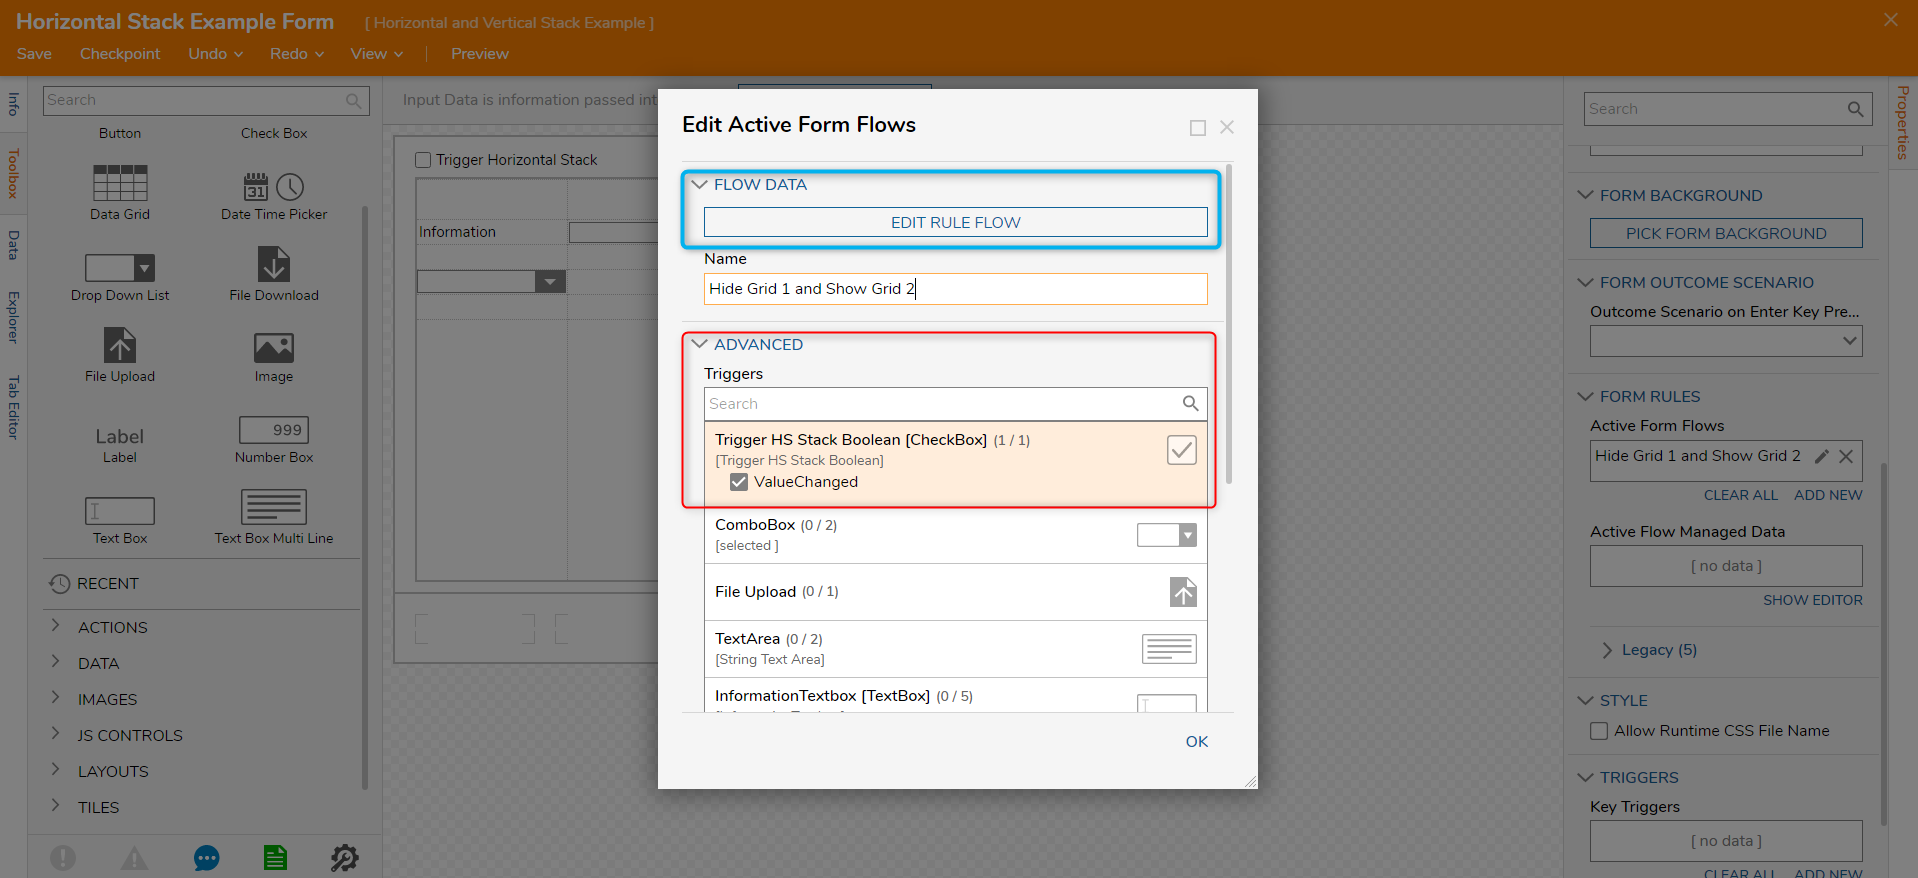
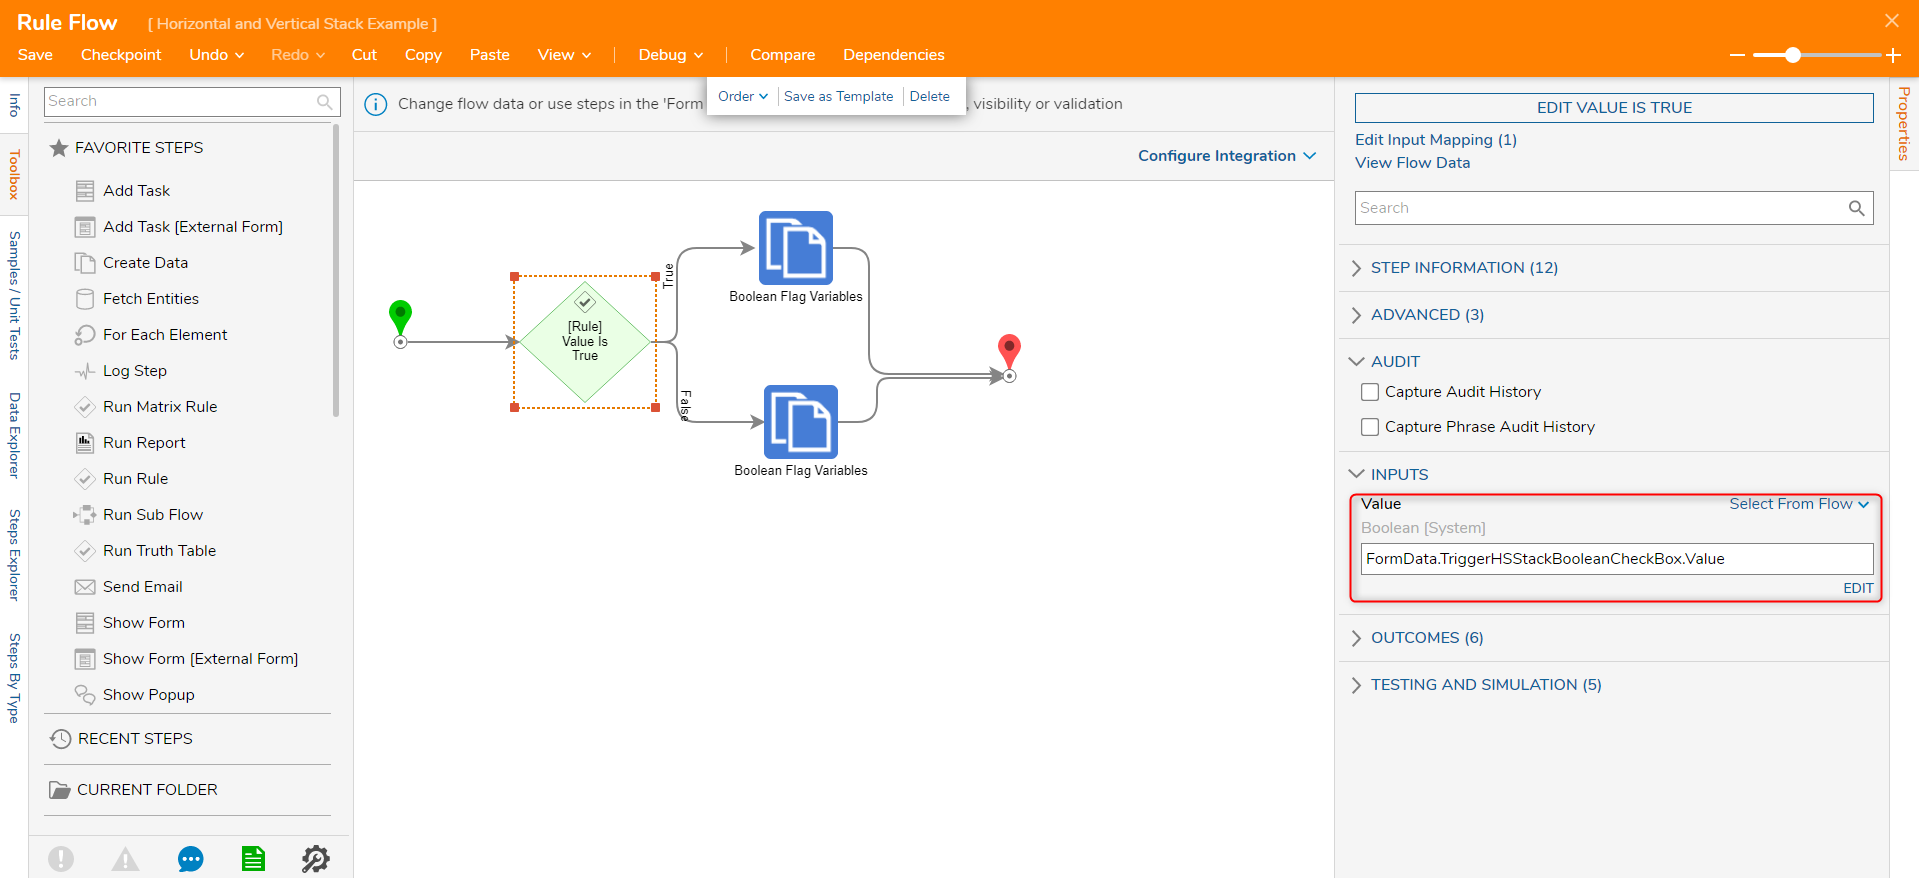
In the Active Form Flow Designer, drag a 'Value Is true' rule and two 'Create Data' steps.
On the 'Value Is True' rule, map in the Checkbox found in the FormData input.
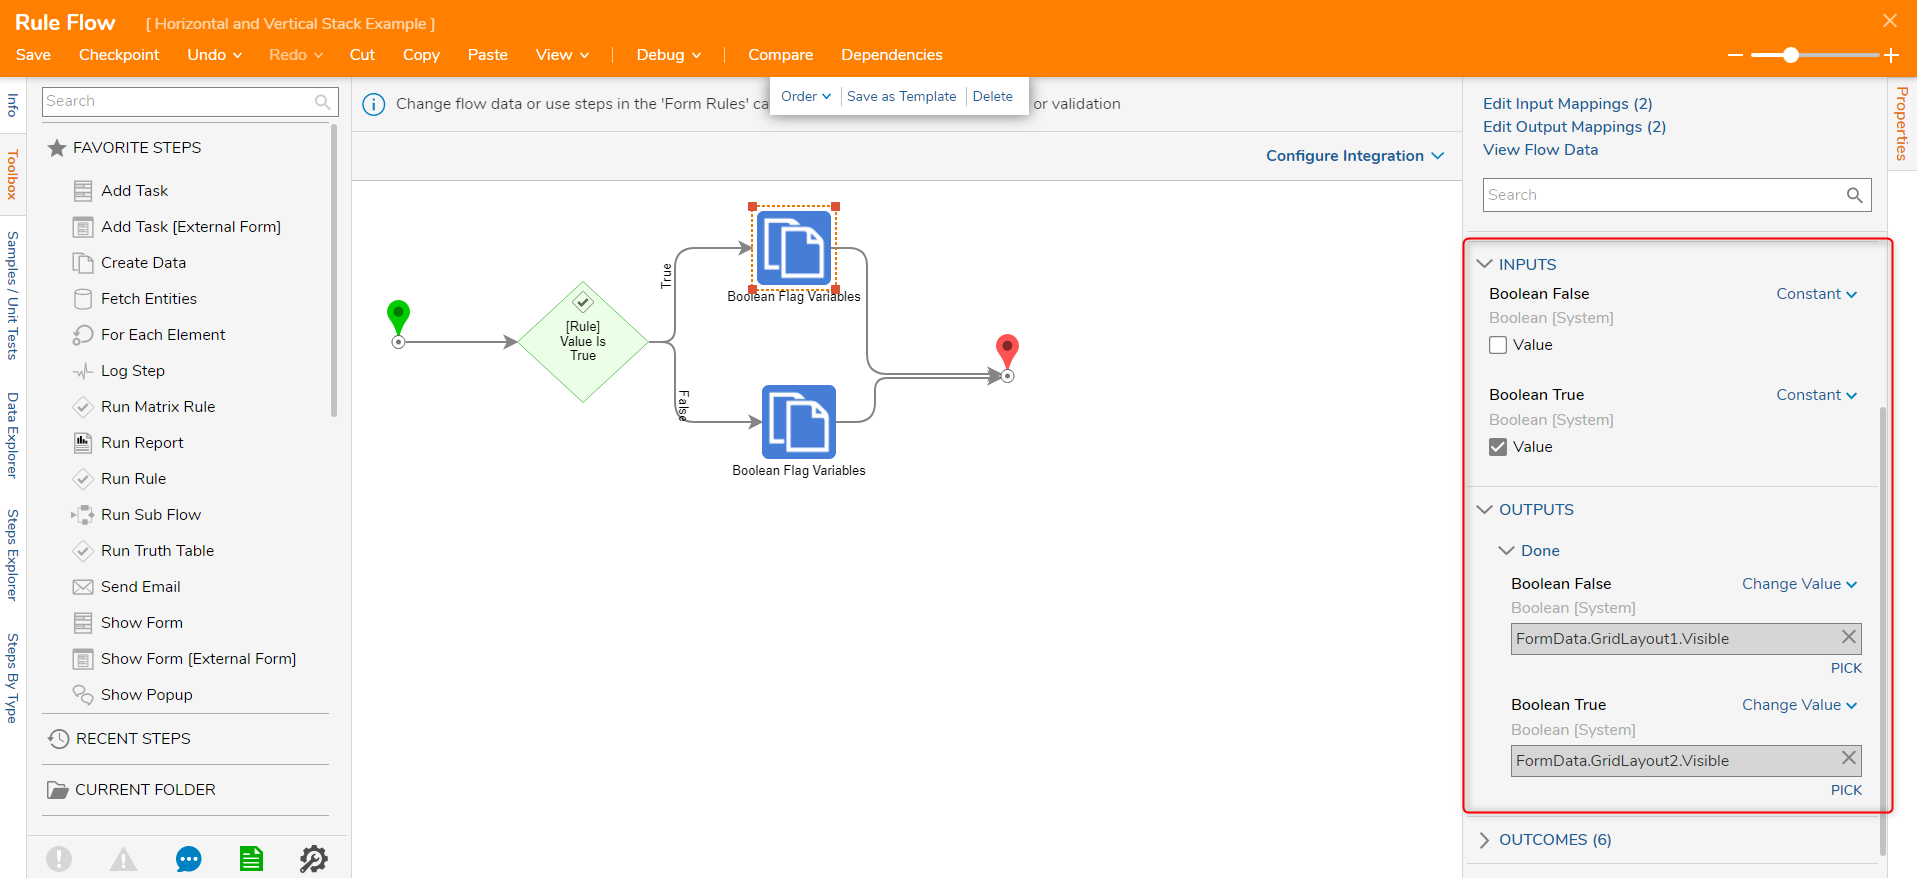
On the 'Create Data' steps, create two Boolean variables. One for False and one for True.
Then set the output mapping to change value, and map those variables into the 'Visible' Boolean field.
After configuring this Flow, save and close. Then save and close the Form Designer
Debug
In the Flow Designer, click debug and click on the check box to trigger the Hide and Show behavior of the Horizontal Stack Grid.
.gif)