Overview
The following document demonstrates how to use Flow Step Trigger Flow Behavior. This Flow Behavior is commonly used for Flow Debugging purposes. A Flow is created using one of these behaviors (After, Before, or Error) and applied to specified steps in another Flow.
Flow Step Trigger can be triggered Before/After step execution or if the step throws an Error.
The following example walks through the process of creating a Step Trigger Flow that is applied to a step in a different Flow.
Example
- From a Designer Project, select CREATE FLOW from the Global Action Bar.
- Select Flow, provide a Name, and click CREATE.
- Connect the Start step to the End step.
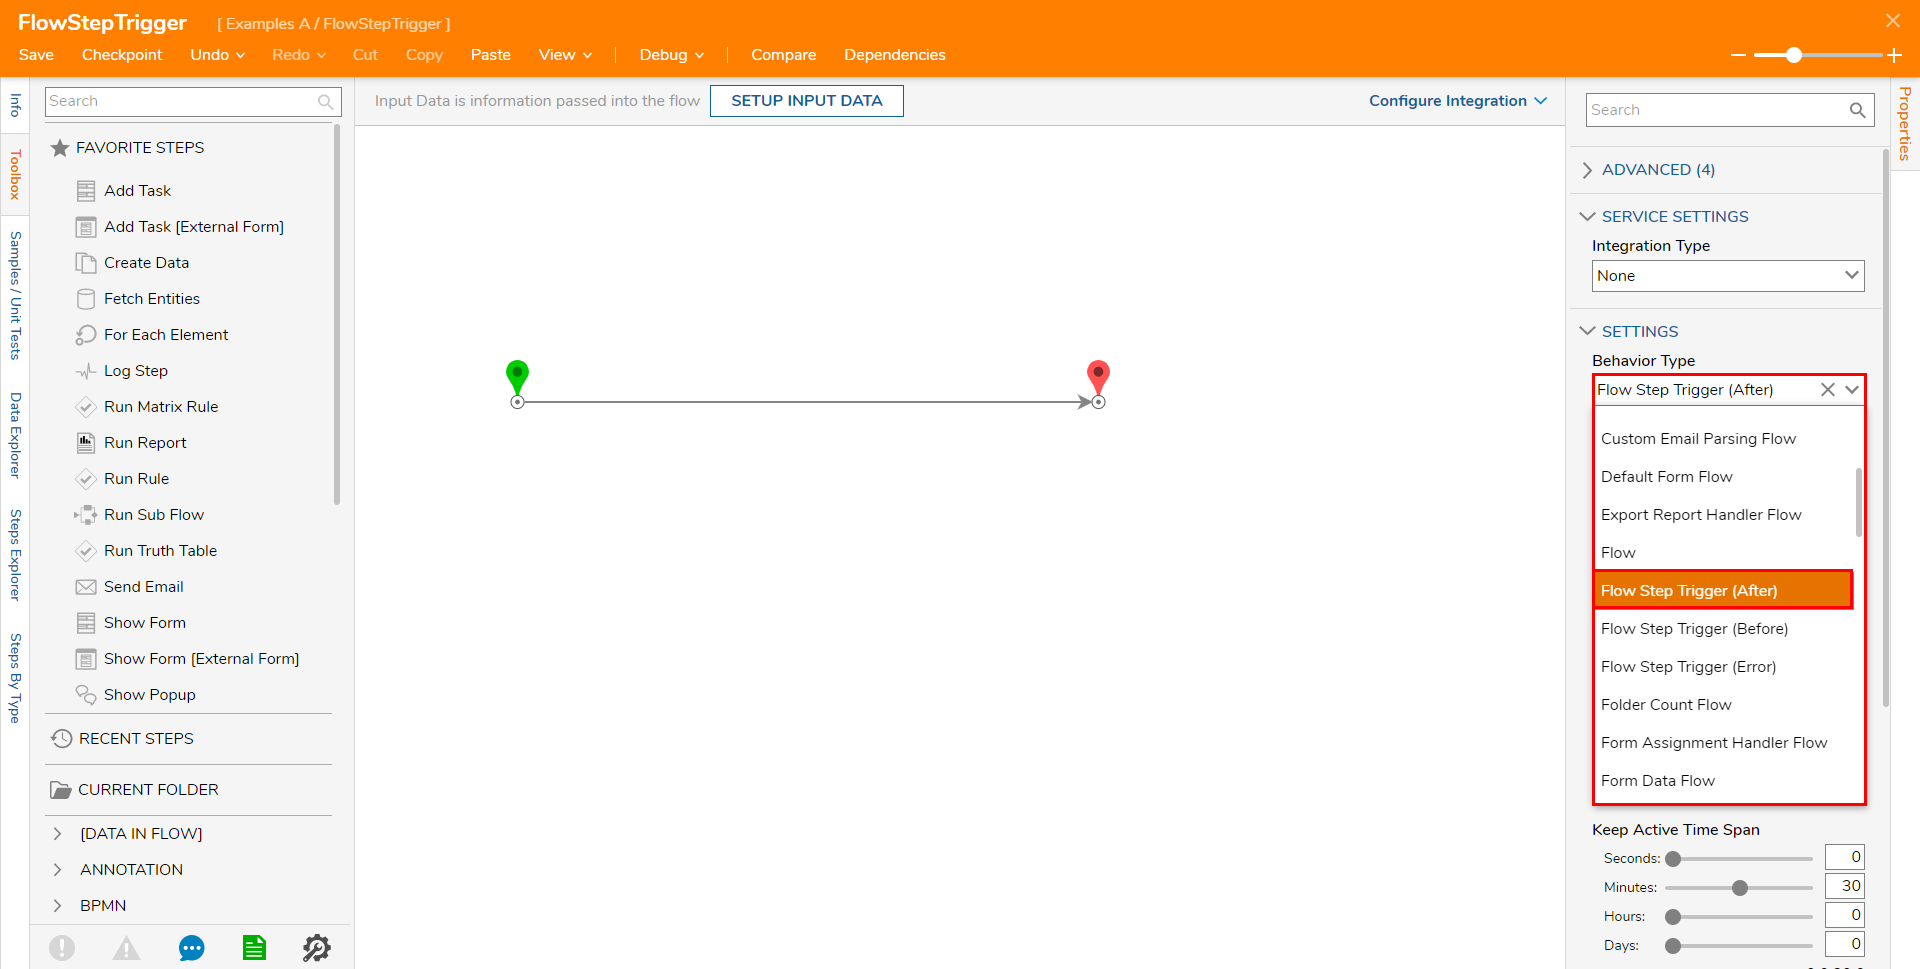
- Navigate to the Properties tab on the right; under SETTINGS > Behavior Type, select Flow Step Trigger (After).
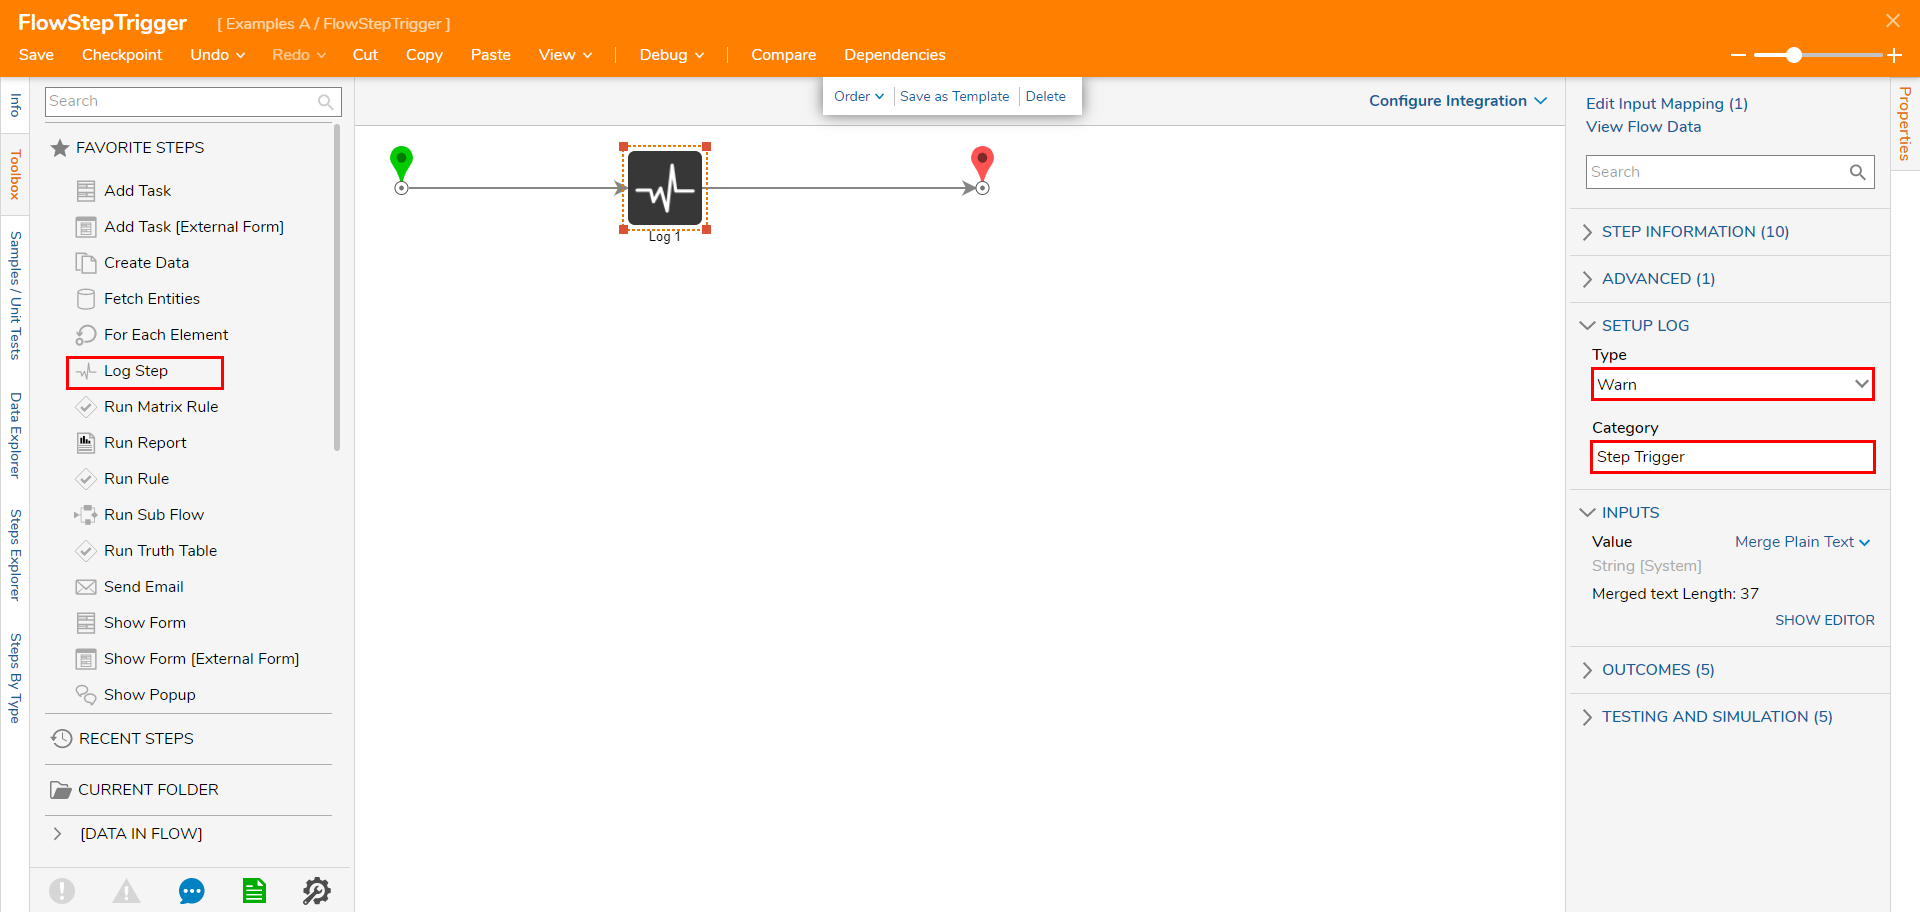
- From the FAVORITE STEPS category of the Toolbox tab, add a Log Step between the Start and End steps.
- Select the Log Step to navigate to Properties > Setup Log > Type, select Warn from the dropdown, then change the Category to "Step Trigger".
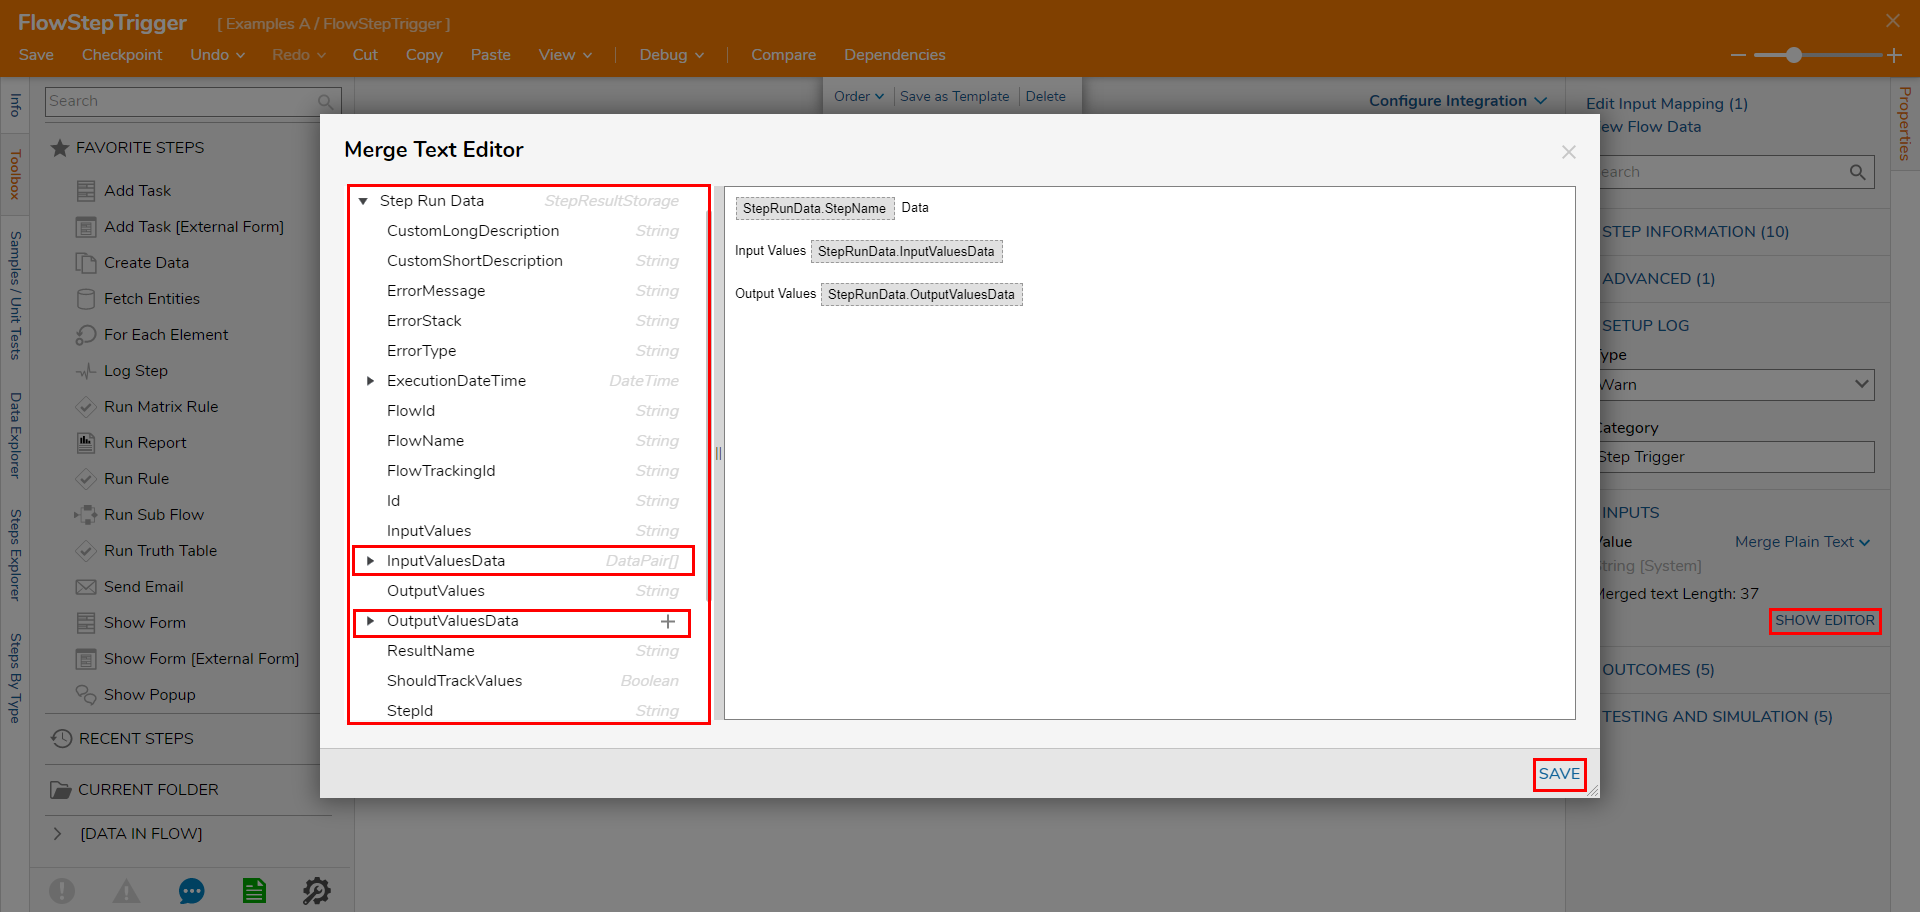
- Under INPUTS > Value, click SHOW EDITOR. Configure the Merge Text Editor value by combining test input with Data in the tree on the left. Then, click SAVE. Configure the Value as:
[StepRunData.StepName] Data
Input Values [StepRunData.InputValuesData]
Output Values [StepRunData.OutputValuesData]
- Under INPUTS > Value, click SHOW EDITOR. Configure the Merge Text Editor value by combining test input with Data in the tree on the left. Then, click SAVE.
- Save the Flow, then close via the X at the top right.
- From the Designer Project, CREATE another Flow.
- From the Flow Designer, attach a Create Data step from Toolbox > FAVORITE STEPS, to the Start and End steps.
- Navigate to the Create Data step's Properties; under DATA > Data To Create, click SHOW EDITOR.
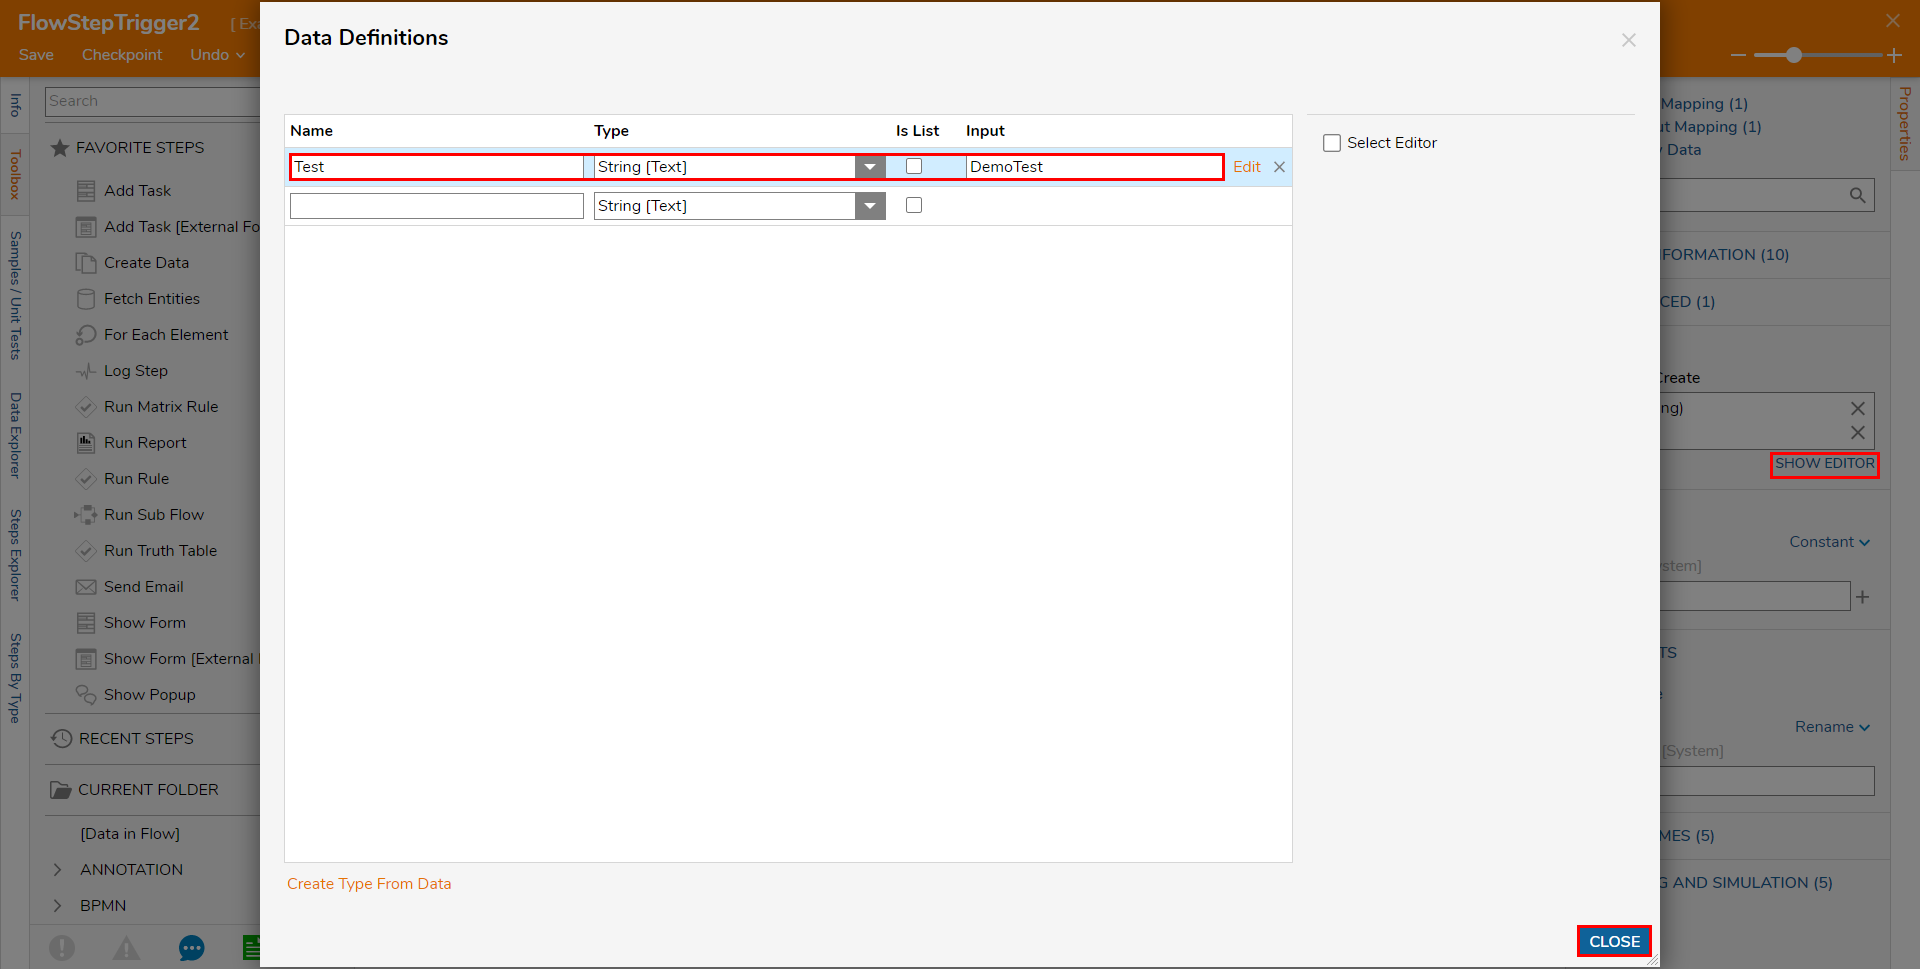
- Define a String [Text] type with Name "Test". Then, Constant map the Input as "DemoTest." Click CLOSE.
- Still from the Create Data step's Properties, expand TESTING AND SIMULATION, then expand Triggers.
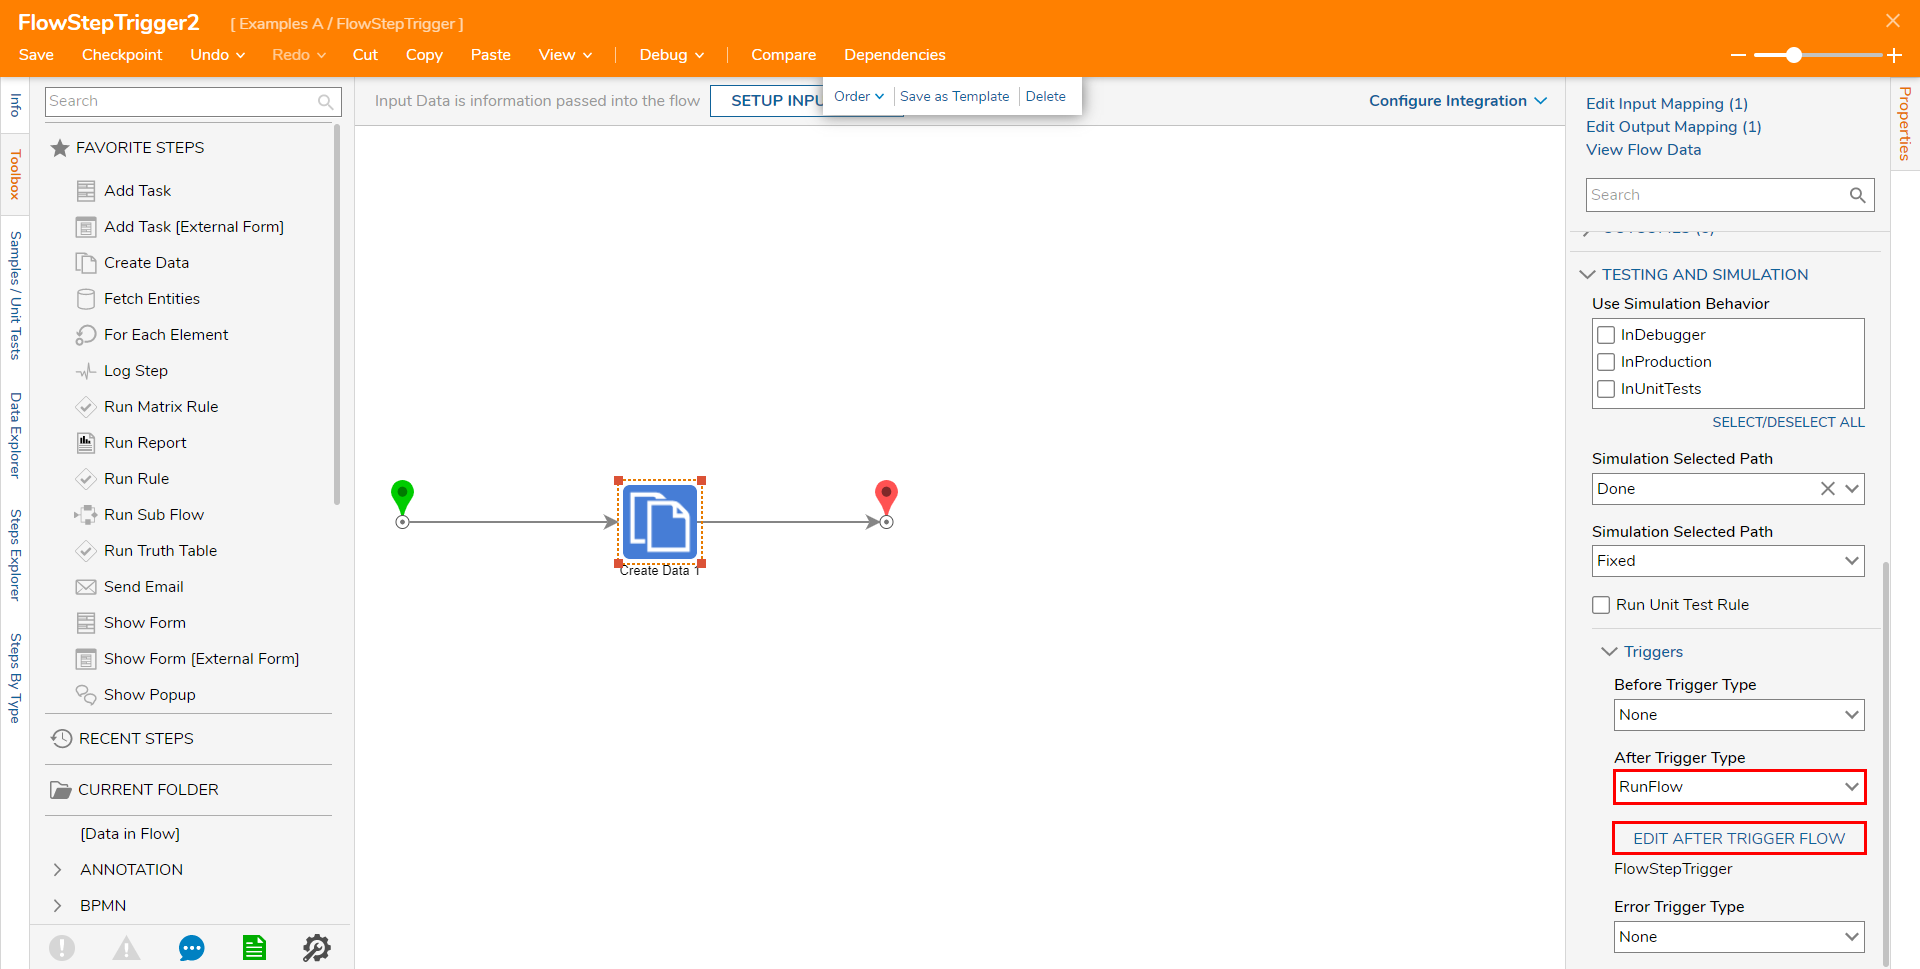
- Under Triggers > After Trigger Type, select RunFlow from the dropdown. Using the Store option in the Before/After/Error dropdown list saves the step execution details.
- PICK the Trigger Flow that was created earlier in the example.
- Save and close the Flow.
Debug
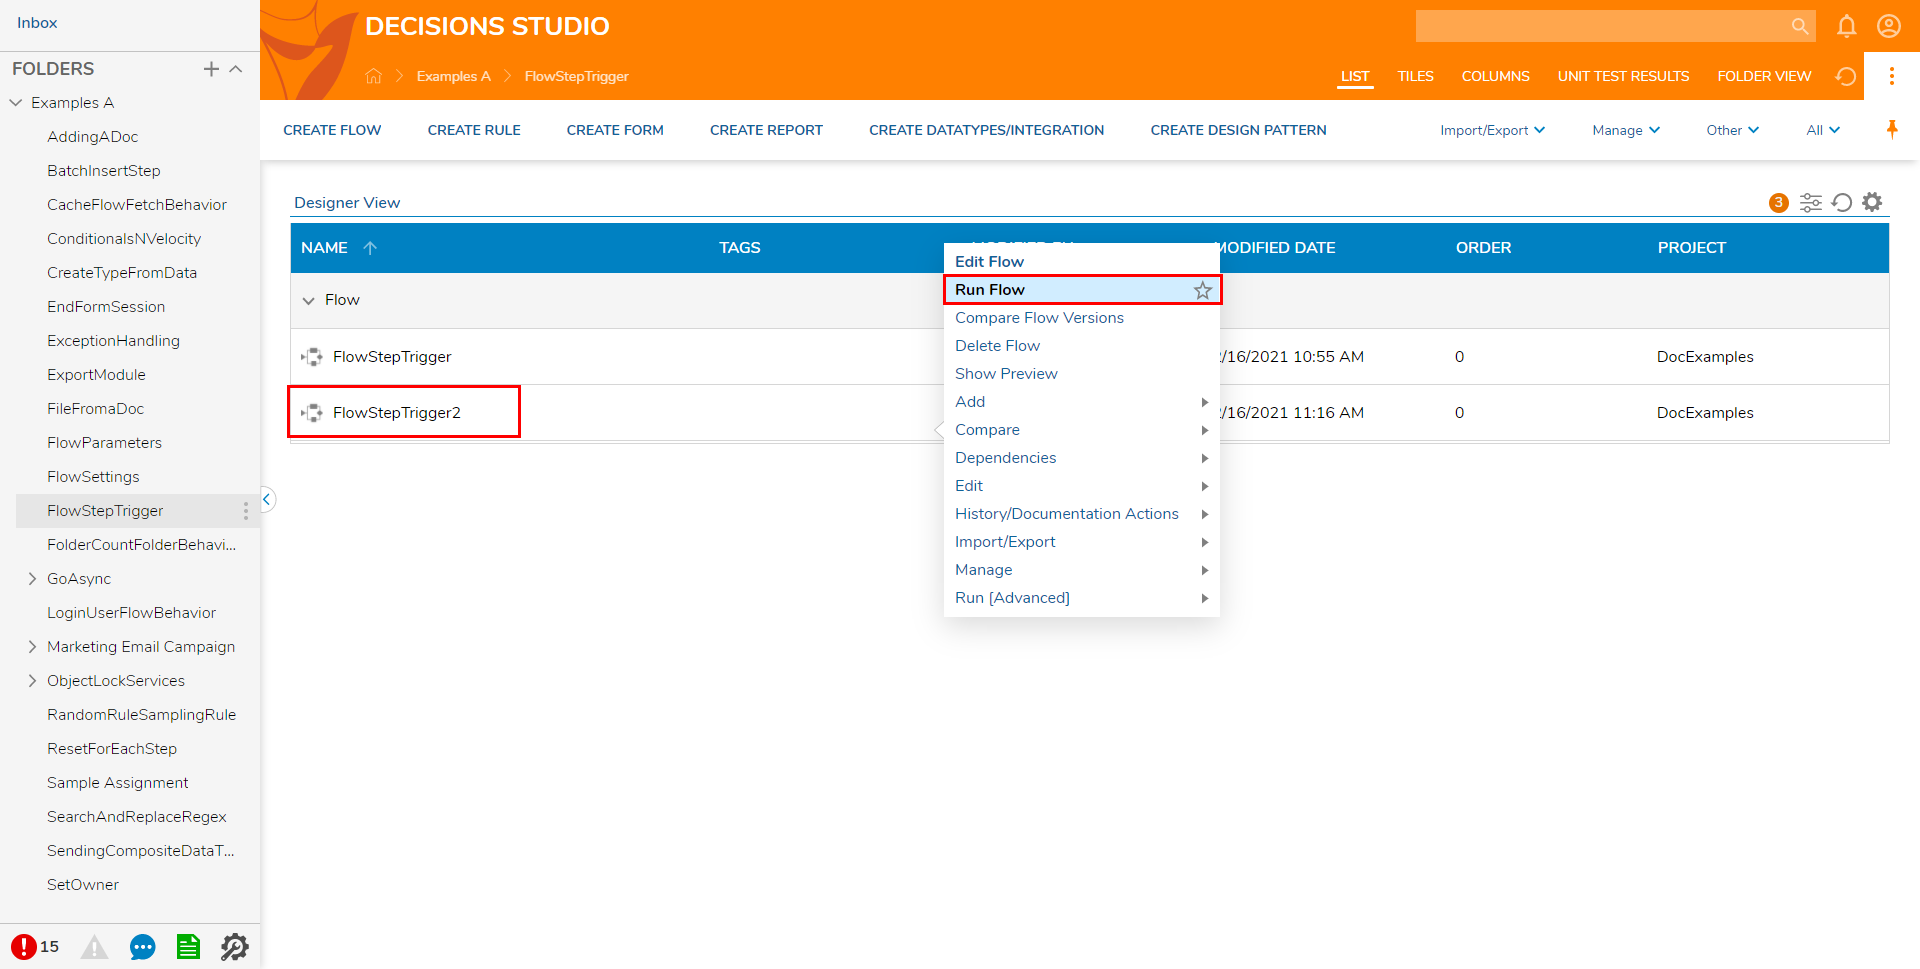
- From the Designer Project, right-click the Main Flow that has the Flow Trigger assigned to it.
- Click Run Flow.
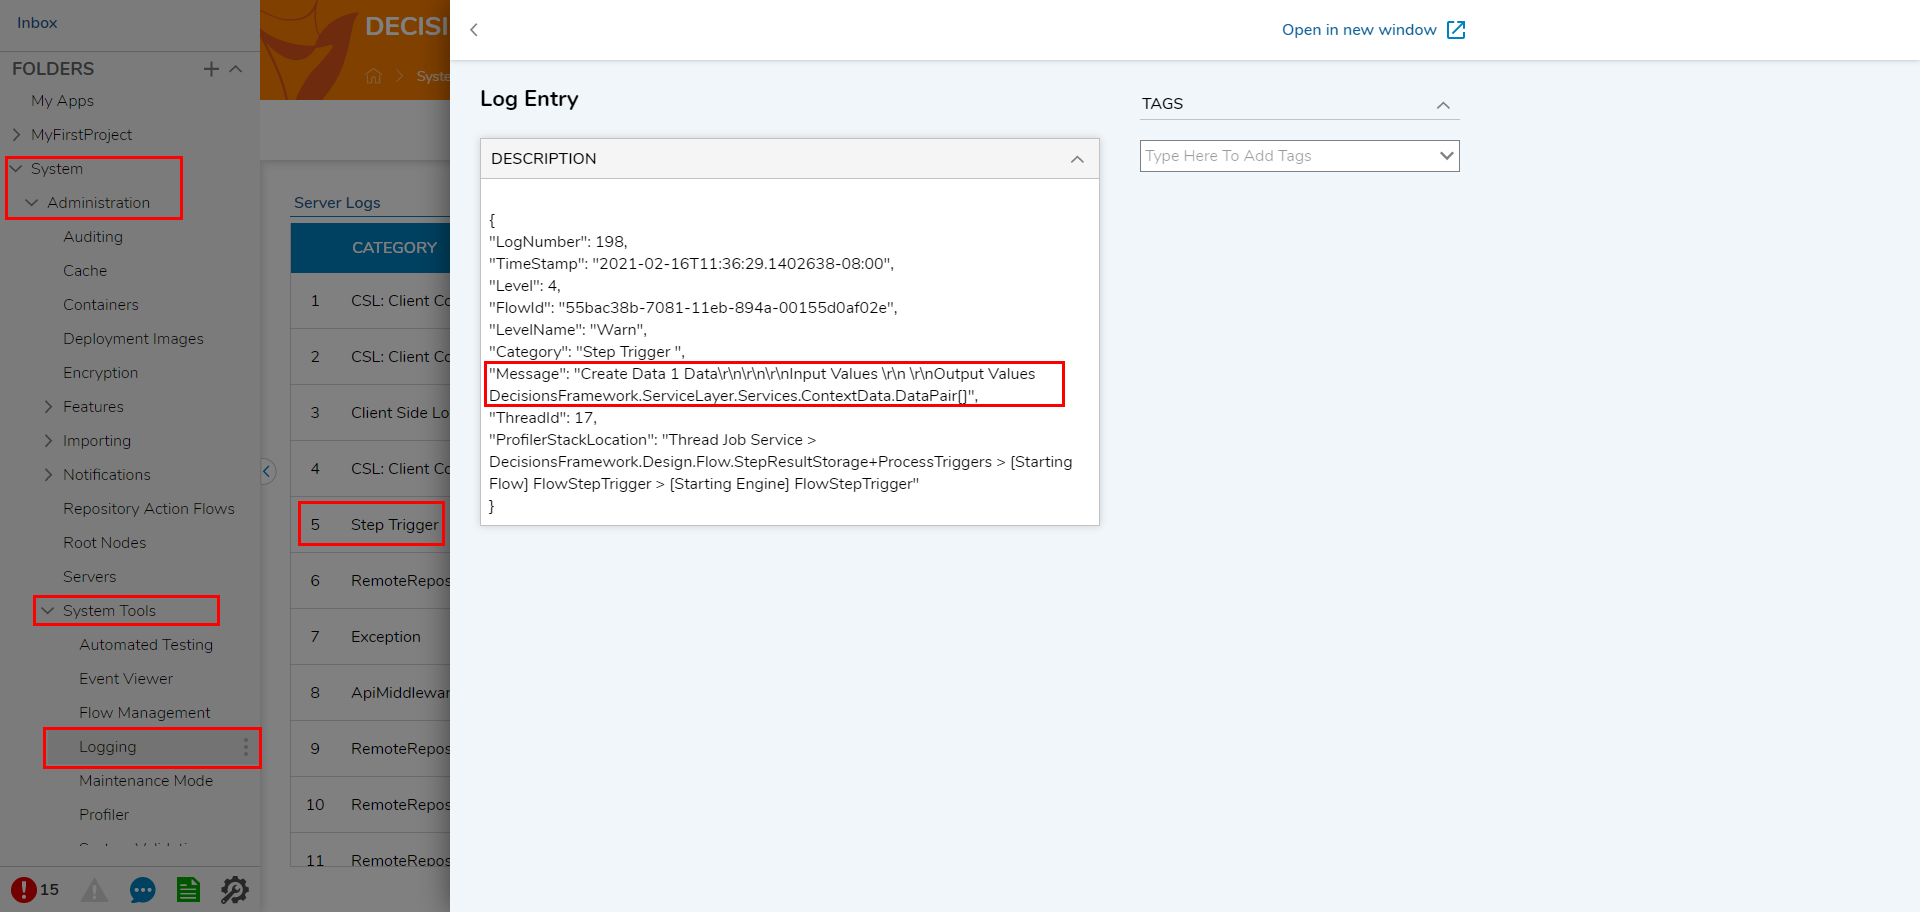
- Navigate to System > Administration > System Tools > Logging.
- Select the line item that corresponds to the Flow Step Trigger Flow to view the full Log Message.
