Overview
A Flow Run Part is a Page component that allows the user to run a Flow from within the allotted Page space. This feature has a large scope of function since it can execute the logic of a Flow on a Page at runtime. The most common use case for a Flow Run Part component is to present something visual from the Flow that still needs logic to operate in the background. This example uses the component to show a "Request Info Form" on the Page. In the properties of this component, a Flow is created that shows the Form and then clears the Form after submission. This operation happens on the back-end of the Page at runtime using the Flow Run Part.
If a front-end component of the Flow (like a Form) is not used, the Flow Run Part will still execute the Flow logic, but it will appear as a load wheel on the Page. This should be avoided to prevent unexpected Flows from running in the environment.
Example
- From a Designer Folder, select CREATE FORM in the bottom action panel.
- In the Create Form window, select and name the default Form. Click CREATE.
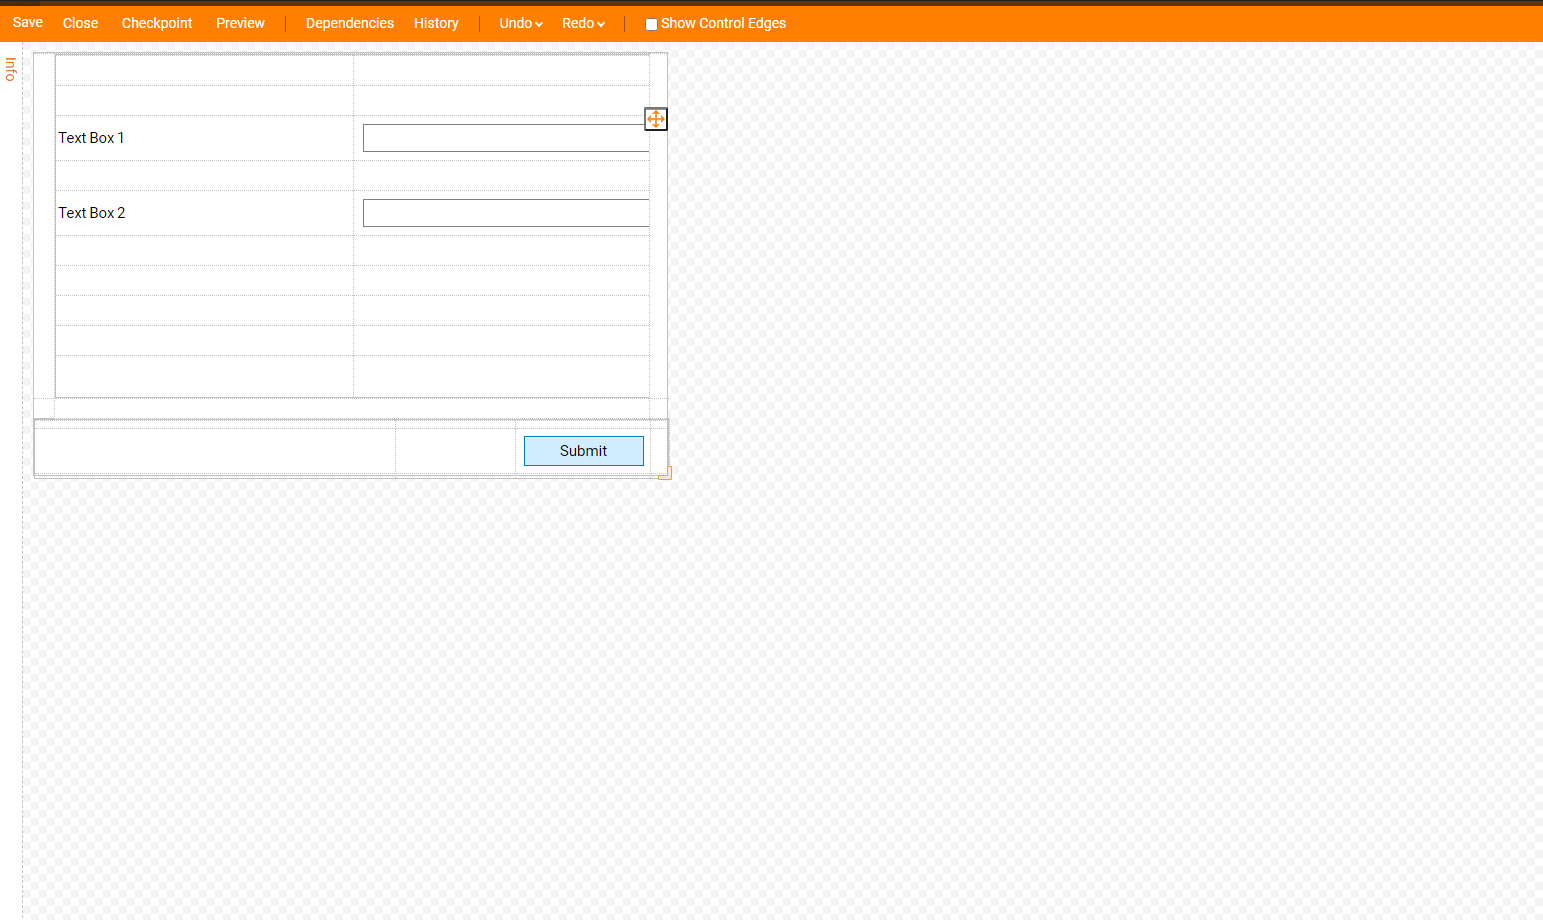
- In the Form Designer, from the Form Controls > Favorite Components section, configure the Form with two Labels [Text Box 1, Text Box 2], two Text Boxes, and a Button [Submit] component.
- Save and Close the Form Designer.

- Next, in a Designer Folder, select CREATE FORM again and navigate to the Page/Dashboard section and select and name the default Page.
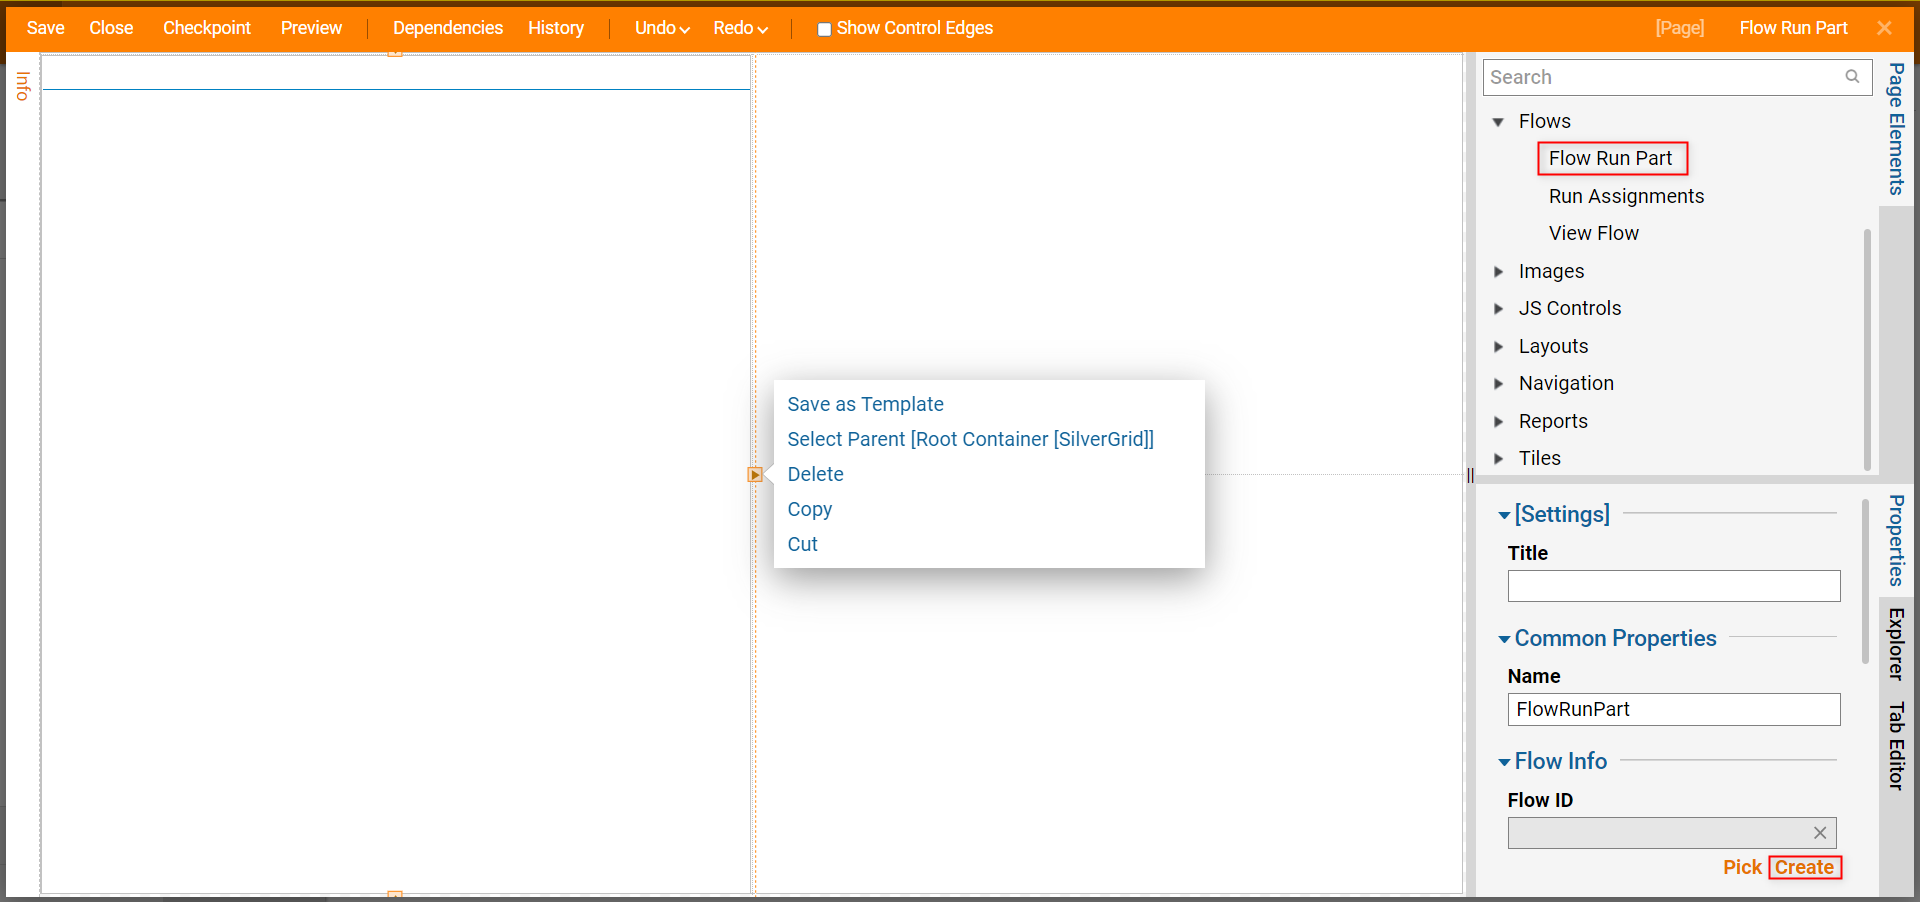
- In the Page Designer, drag and drop a Flow Run Part component from the Page Elements > Flows category.
- Then, in the Properties panel of the Flow Run Part, locate Flow Info > Flow ID and select Create.

- In the resulting window, name the Flow under Create New, then click CREATE.
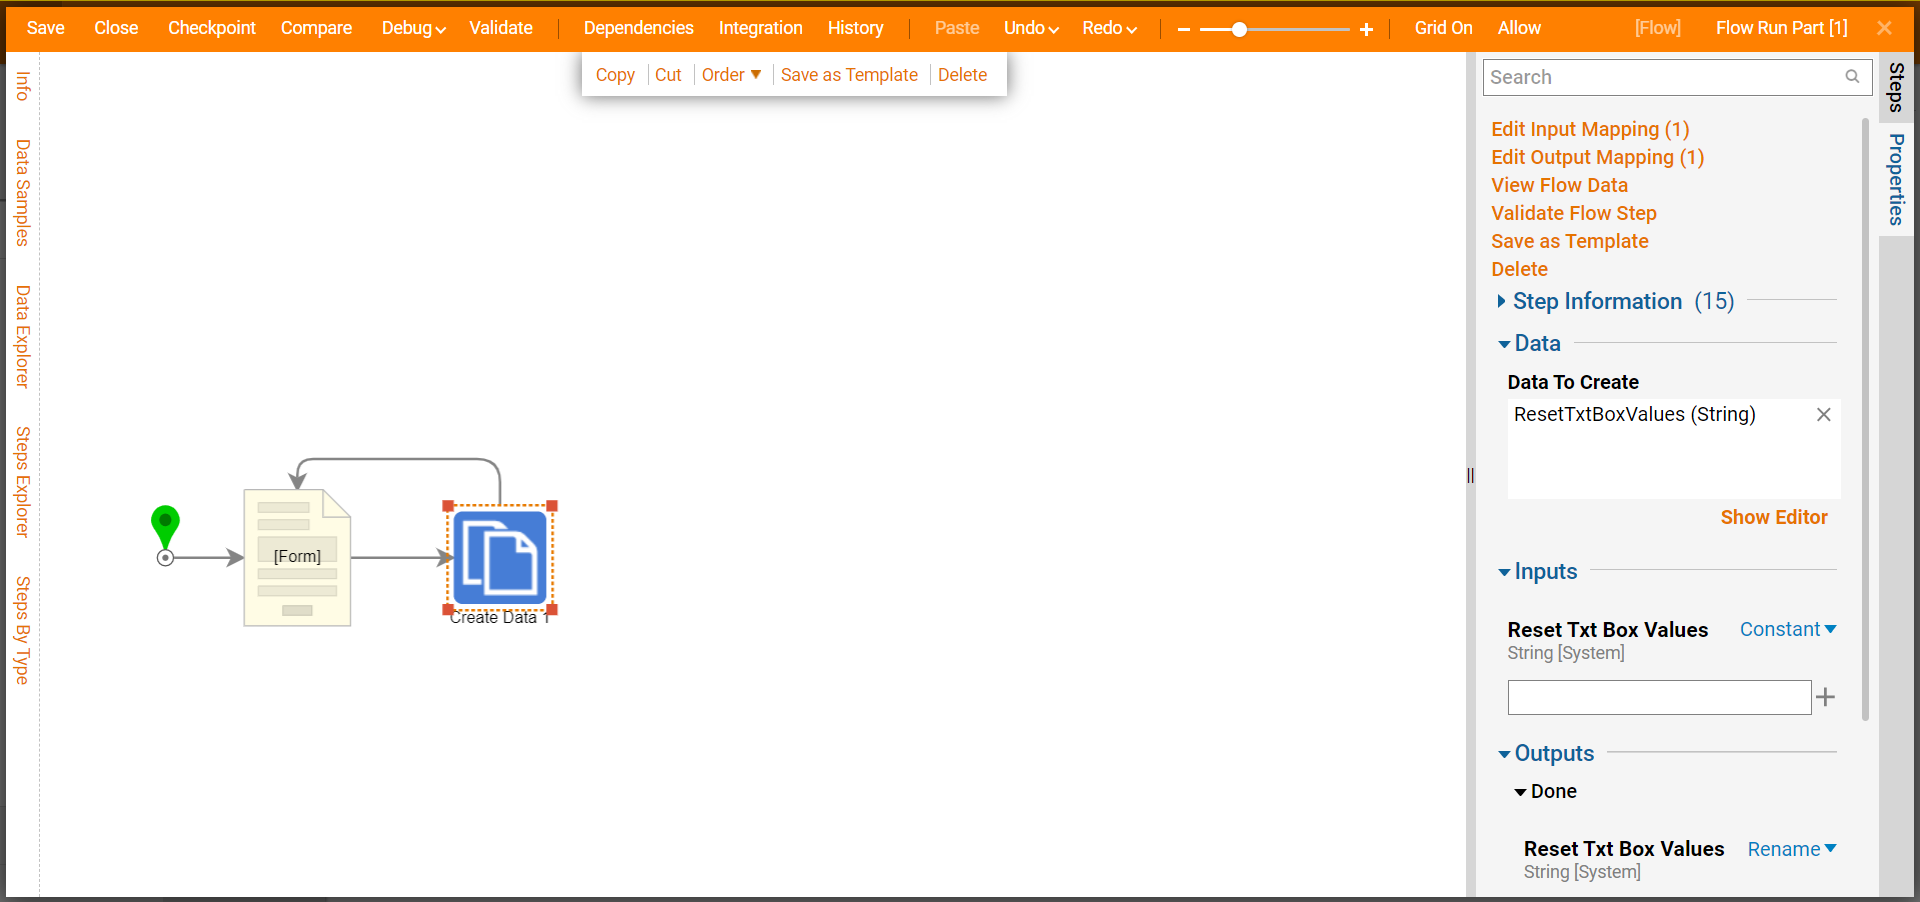
- In the Flow Designer, drag and drop a Show Form step and a Create Data step from the Steps > Favorite Steps section.
- Connect the Show Form step to the Start step.
- With the Show Form step selected, navigate to the Properties panel and select Pick or Create Form.
- In the resulting window, pick the Form created earlier in the example.
- Connect the Form outcome to the Create Data step.
- In the properties of the Create Data step navigate to Data > Data To Create and click Show Editor. Add ResetTxtBoxValues (String).
- Connect the Create Data outcome to the Show Form step. Delete the End step. In this Flow, notice that the steps do not connect to the End step but reconnect back to the Form; this allows for the execution of the Flow to continue to run on the Page even after the Form is completed.

- Save and close the Flow Designer.
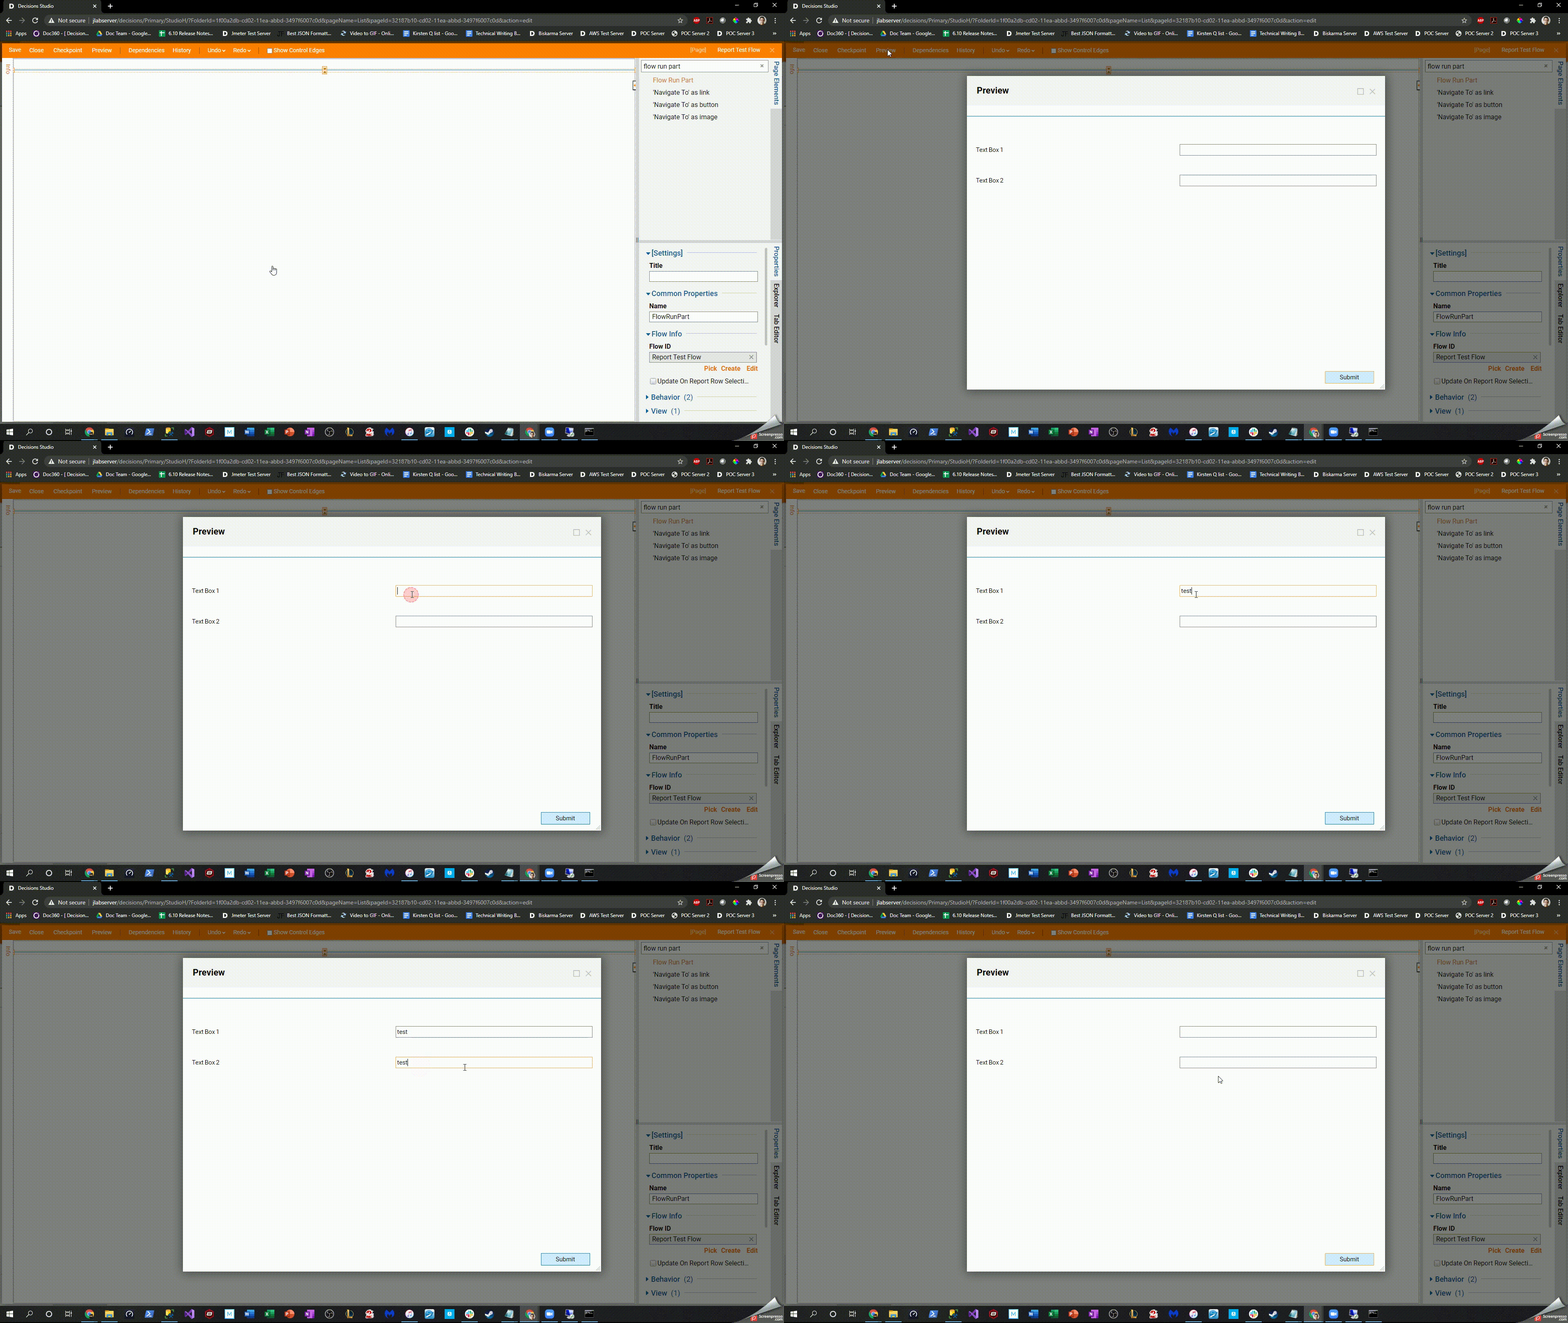
- In the Page Designer, click the Preview button from the top bar.
