Overview
Flows are one of many Designer Elements in Decisions; they are responsible for providing the logic to most of the components used when building an application in Decisions.
To build Flows, users are provided the Flow Designer. The Flow Designer is one of many Designer Studios throughout Decisions that is used to create Designer Element respective to its name (in this case, Flows).
From the Flow Designer, the user can connect and configure visual steps that receive, manipulate, and move data in order to execute a specified process. Additionally, users can create Sample Data, Unit Tests, and Debug the Flow to ensure that it works as intended.
The following document provides insight into some of the panels and basics of the Flow Designer.
Designer Default View
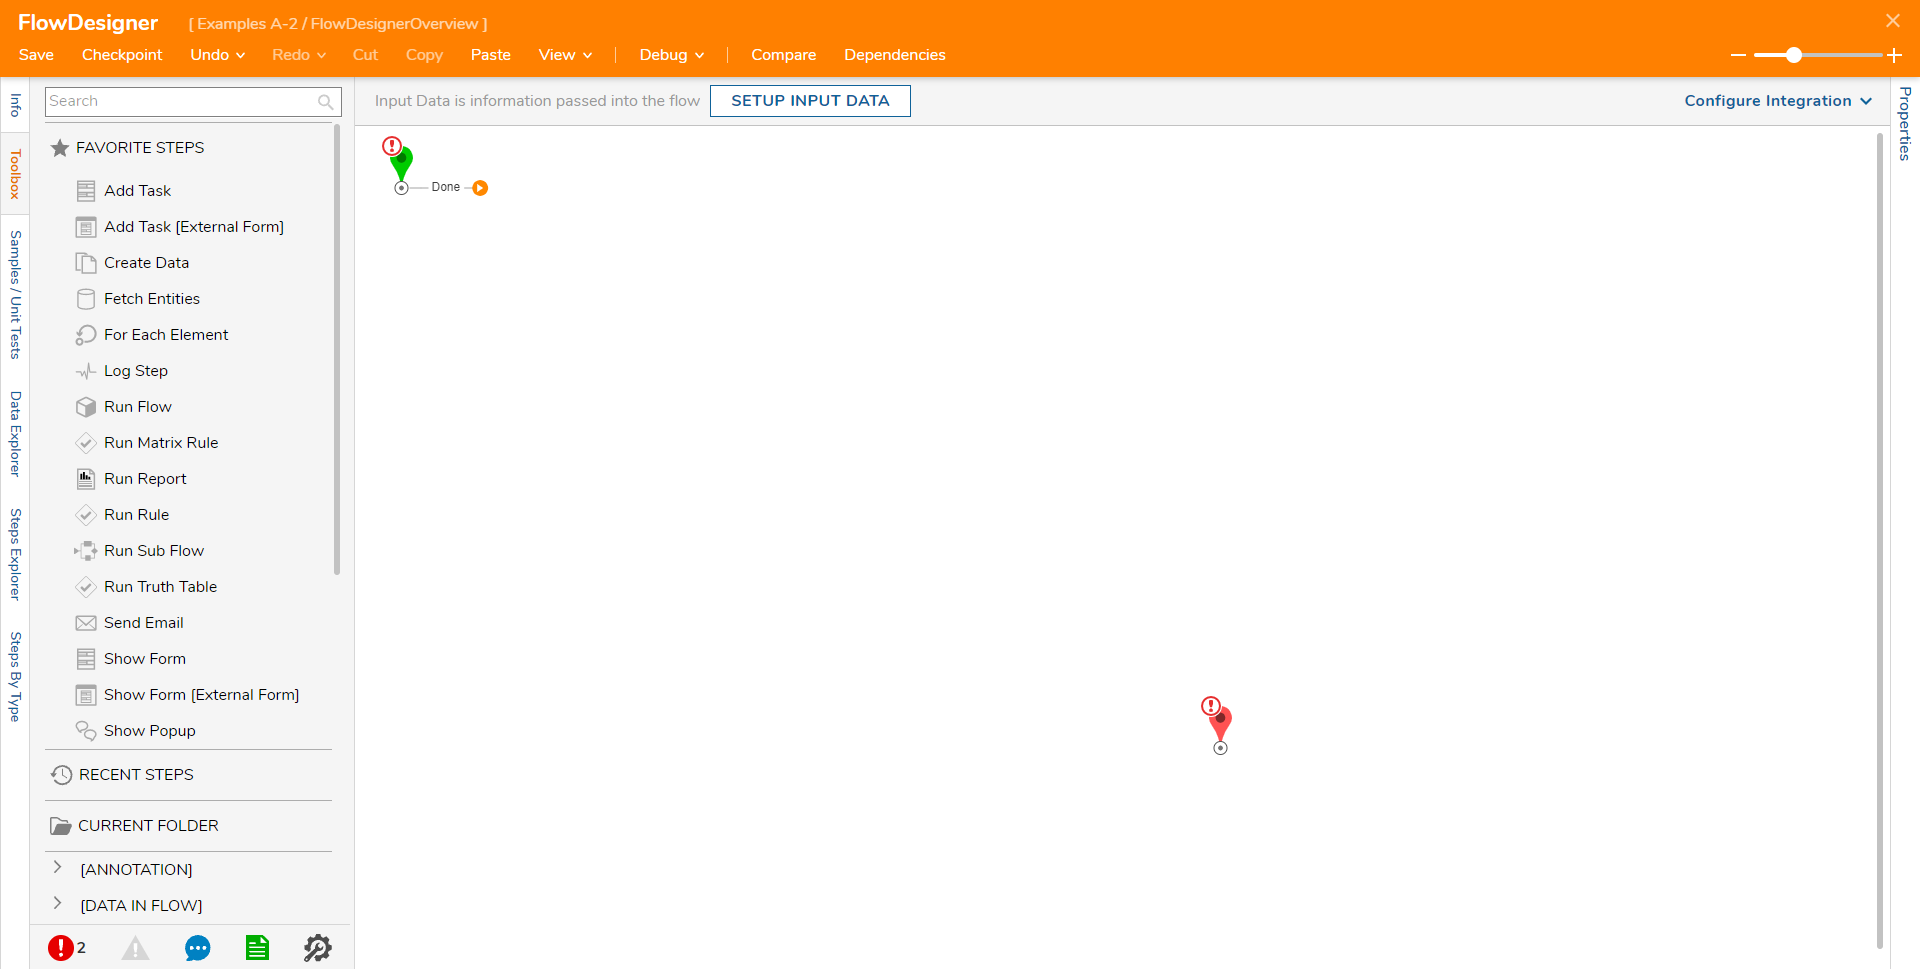
When the Flow Designer is first launched, the Toolbox tab is populated with available Flow steps on the left, and the Start/End steps (disconnected) in the workspace. The base Flow properties can be accessed by selecting the Properties tab located on the far right of the screen.
Step Properties can be accessed by selecting a step icon in the workspace, the Properties will then populate on the right based on the selection.
Users may define Input Data or provide an action to hide the banner via the SETUP INPUT DATA button.

There are five icons that consistently appear on the left side of the screen while one of these tabs are open. These icons provide useful information about Flow functionality and other resources. From left to right they are as follows:
| Icon | Function |
|---|---|
| Errors | This icon shows the number of errors and exceptions currently in the Flow. This refers to the issues that prevent the Flow from executing. These exceptions can be resolved by visiting the steps in the workspace that have an exception badge (denoted by an exclamation point) or by selecting the Errors icon and using the Go To link on a line item. |
| Validation Warnings | This icon will show the number of validation warnings currently in the Flow, which are issues that do not prevent the Flow from running but could cause issues. These warnings should be made aware of and corrected if possible before using the Flow at runtime. |
| Support Chart | This icon allows the user to access a chat with the Support Team via a popup window in the Decisions environment. |
| Documentation | This icon will open the Decisions Documentation site in another tab of the browser. |
| Global Debugger | This introduces a new feature with Decisions version 7. The Global Debugger is a debugging interface that can see any Designer Element running in Decisions, all while the system is moving. |

Additional Tabs
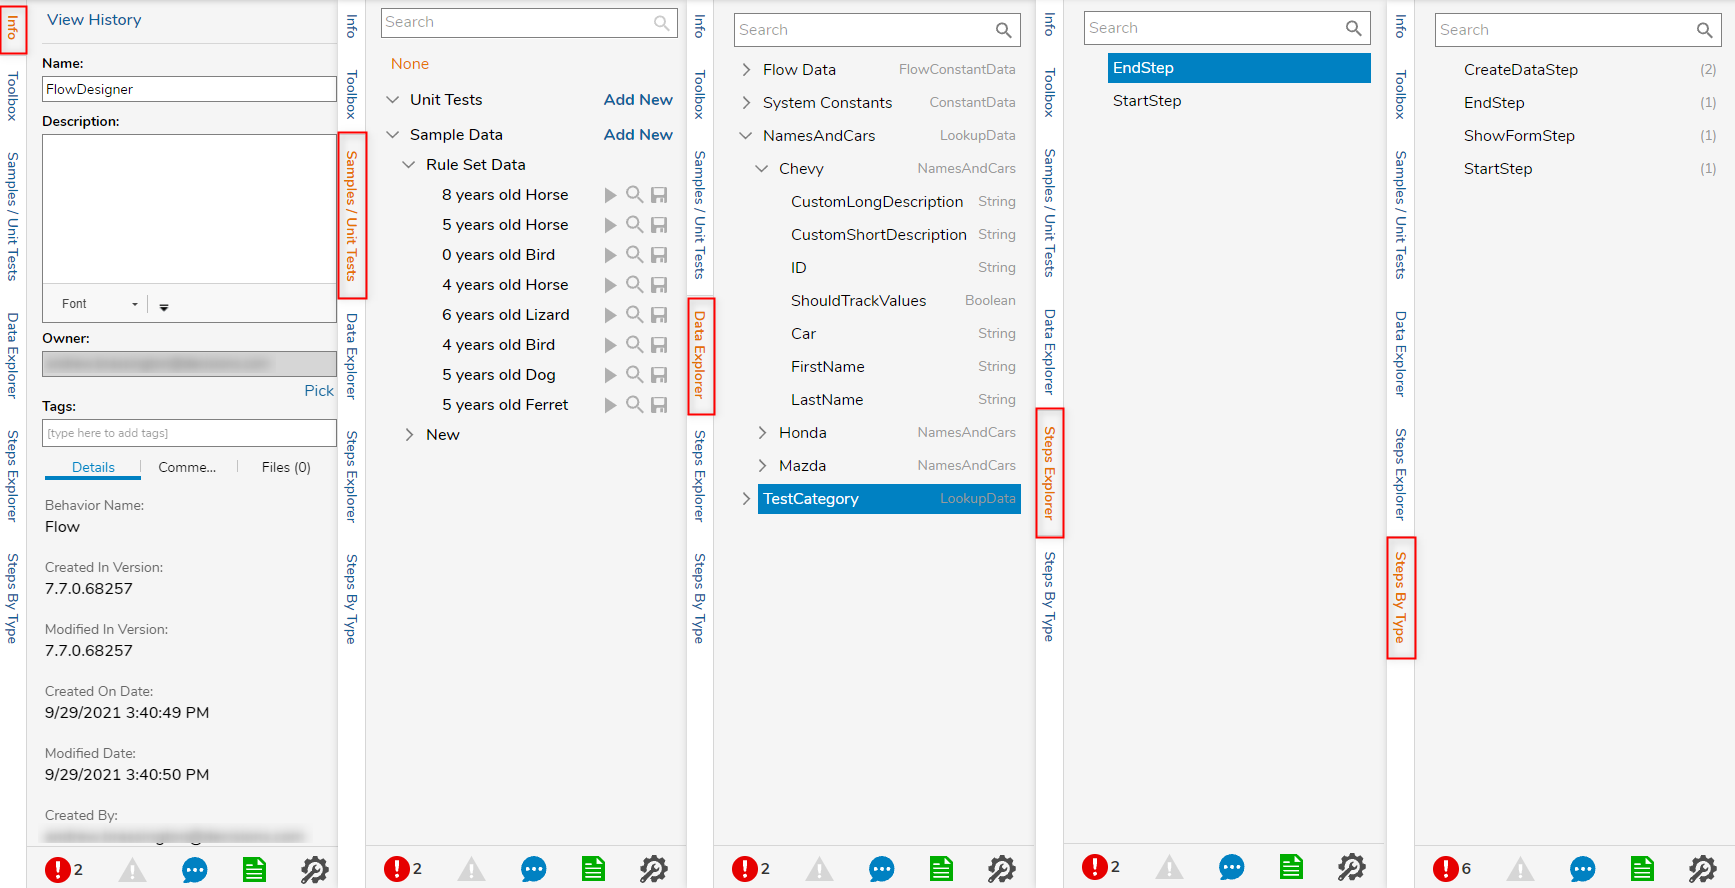
In addition to a Toolbox and Properties tab, the Designer offers five additional tabs. These are as follows:
| Tab | Function |
|---|---|
| Info | This tab allows the user to rename the Flow, provide a Description, or view some general information about the Flow. If Tags are configured in the Decisions environment, they can be applied within this tab, or a new Tag may be added. Comments, Files, and ownership assignments can be changed from this tab as well. |
| Samples/Unit Tests | This tab contains sections for the user to add new Sample Data and Unit Tests. Here, Sample Data can be defined for testing purposes. Test configurations can be saved as Unit Tests for use later on. For more information about Unit Tests, please visit the About Unit Testing & Debugging article. |
| Data Explorer | This tab lists all of the data available within the Flow. By default, Flow Data and System Constants will always appear here. These sections can be expanded to access specific pieces of data that are typically always accessible for use with input definition. As data is introduced to the Flow, the structures will appear in this list with expandable properties. |
| Steps Explorer | This tab lists all of the steps that are currently in the Flow by name. If there are multiples of the same step, this list will show the steps listed out with the same name and a differentiating number. For example, if two Create Data steps are used in the Flow, it would list them as ‘Create Data’ and ‘Create Data 1’. |
| Steps By Type | This tab lists all of the steps that are currently in the Flow by the type of step that it is. For example, if two Create Data steps were used in the Flow then it would list them as ‘Create Data (2)’, indicating that there are two of them. Selecting the step highlights it with a box in the workspace. |

Top Action Bar
The top action bar is available in all of the Designers and contains core actions that can be used in the Designers. Furthermore, keyboard shortcuts may quickly operate these actions. All available actions are listed in detail below.
.png)
| Action | Function |
|---|---|
| Save | Saves the Flow without closing the Designer. This action includes a window to write notes for the current save if needed. |
| Close (X) | Closes the Flow Designer and offers the option to save the Flow with notes before doing so. The close action will always lead to the save action before exiting the Designer. |
| Checkpoint | Creates a Backup of the Flow at the particular place where the checkpoint is saved, then stores it in the history folder. This is useful when making drastic changes that could affect Flow functionality. For more information, please visit the Creating Checkpoints article. |
| Compare | Compare different Flow versions that are created on each checkpoint save. |
| Debug | Redirects to the Debugger window, which opens a range of different testing options to check Flow logic. |
| Validate | Checks for any validation warnings in the Flow. |
| Dependencies | Offers a breakdown of which elements this Flow depends on, as well as which elements depend on the Flow, in a Simple Flow visual view. For more information on Dependencies see |
| Integrations | This button is not available by default in version 7 but can be enabled to appear. For the Integrations actions to appear, the Integration Type must be defined in the Flow properties by navigating to Settings > Service Settings. Once the Type is specified, the Integrations button will appear and when clicked, will show the integration details for use with REST API calls. For more information on integrations in Decisions, please visit the View Integration Details article. |
| History | A Report view of every saved version of the Flow. |
| Paste (CTRL + V) | Pastes any copied steps or templates. |
| Undo (CTRL + Z) | Reverses the last design change. |
| Redo | Reapplies the last design change. |
| Cut (CTRL + X) | Copies the selected step with its Properties, and removes it from the workspace. |
| Copy (CTRL + C) | Copies the selected step with its Properties. |
| -/+ (CTRL + -/+) | A toggle for zooming in and out of the workspace in the Flow Designer. |