Using the Import Excel or CSV Step
- 14 Dec 2021
- 2 Minutes to read
- Print
- DarkLight
This documentation version is deprecated, please click here for the latest version.
Using the Import Excel or CSV Step
- Updated on 14 Dec 2021
- 2 Minutes to read
- Print
- DarkLight
Article summary
Did you find this summary helpful?
Thank you for your feedback!
Overview
The Import Excel or CSV Flow step retrieves data from an Excel or CSV spreadsheet used to define data members and values of a data type in Decisions. For this to happen, a data type must be created in Decisions using data members that correspond with the column headers in the spreadsheet. For example, a spreadsheet with "First Name" and "Last Name" columns would import to an existing data type in Decisions that have "First Name" and "Last Name" as data members. This is how external data can be integrated into the workflow process.
Extract, TransForm, and Load (ETL)
This Flow step can be used for creating ETL processes.
Example
This example will create a Flow Structure named "CorpLocations", then import an Excel file and map the rows/columns to the Corporate Locations Flow Structure's proper data members.
The spreadsheet used in this example:
- In a Designer Folder, select CREATE DATATYPES/INTEGRATIONS in the Global Action Bar. Choose the Flow Structure option, then select CREATE.
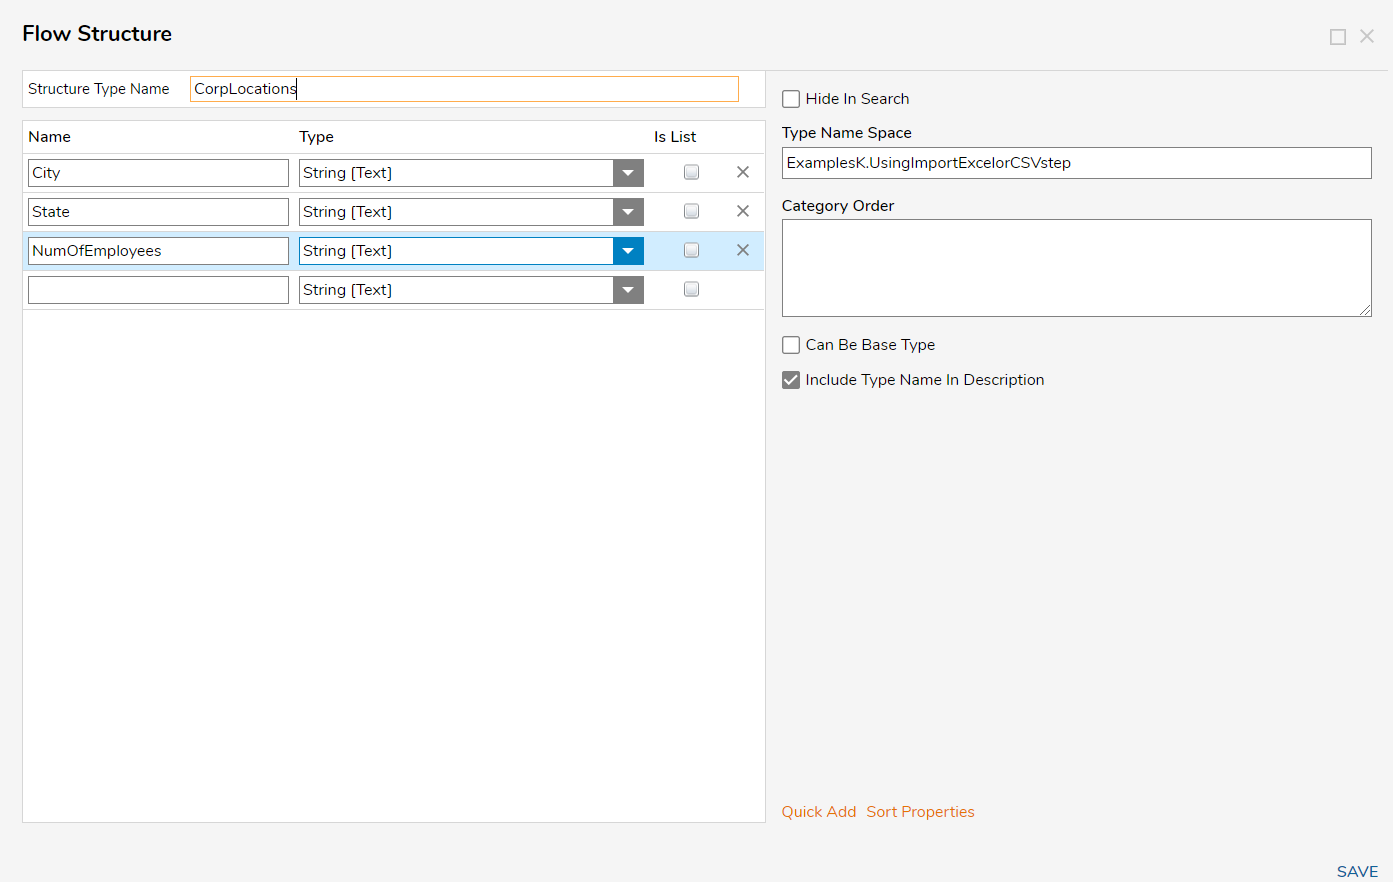
- Name the structure "CorpLocations" and give it the following data members: City (String), State (String), NumOfEmployees (String).
- Back in the Designer Folder, select CREATE FLOW from the Global Action Bar. Name the Flow and select CREATE to open it in the Flow Designer.
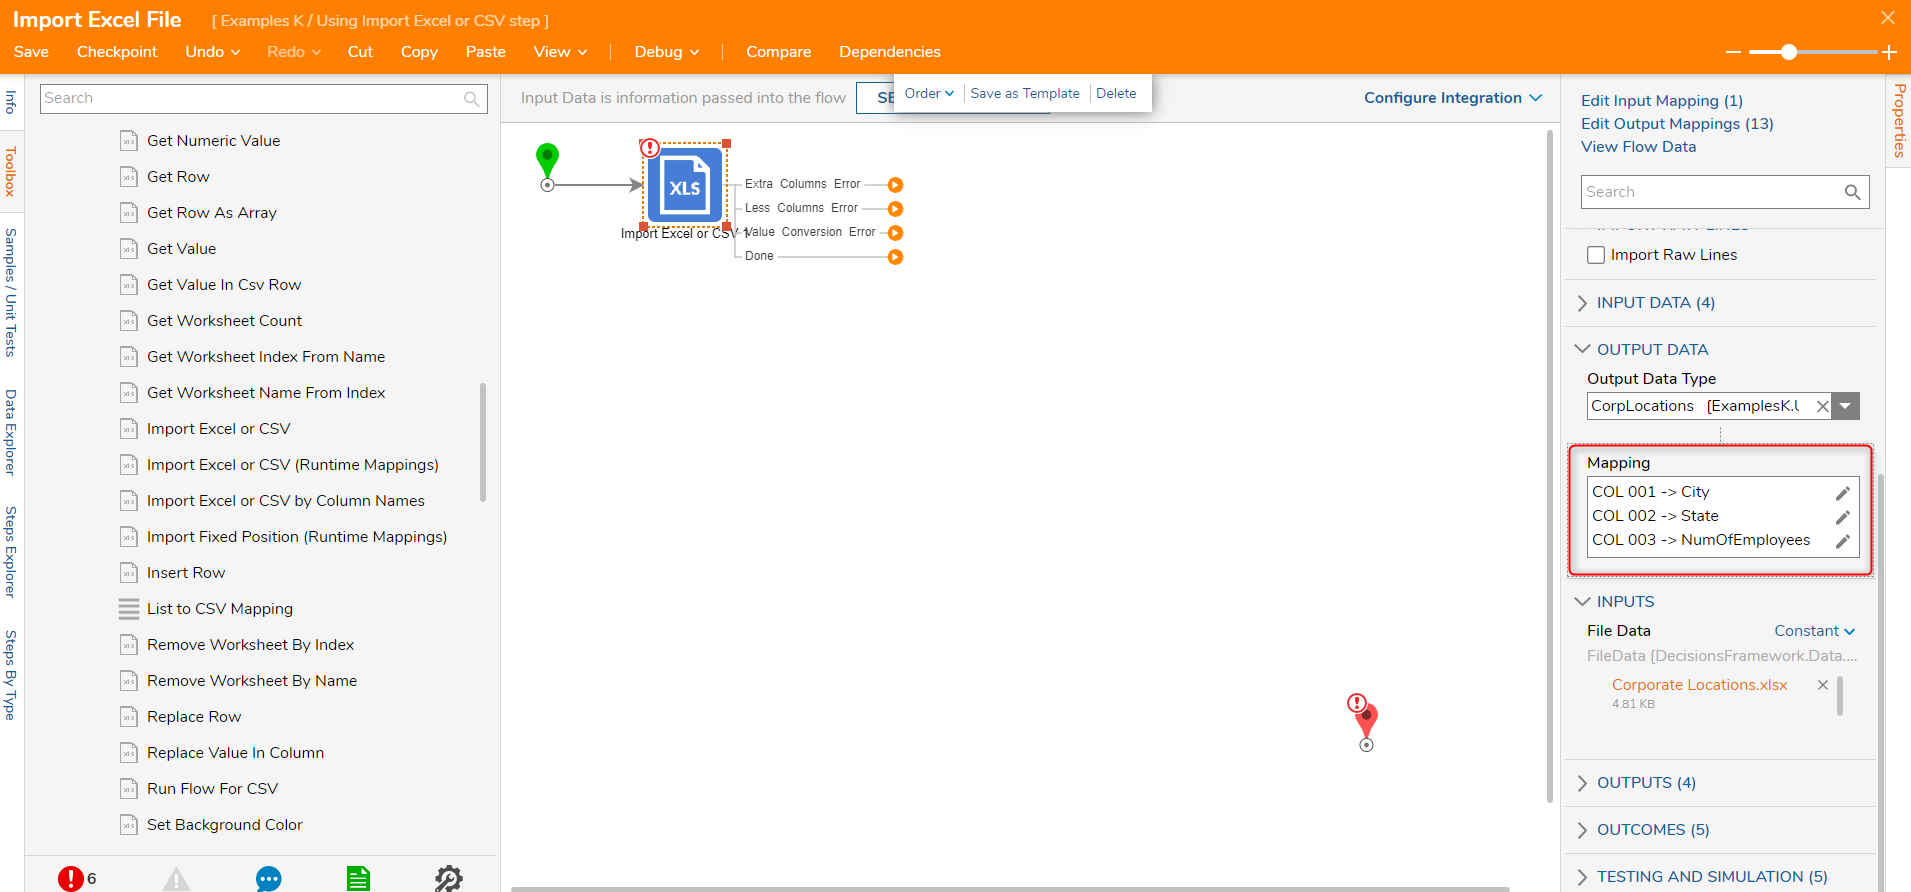
- In the Flow Designer, off of the Start steps 'Done' path, add an Import Excel or CSV from the Data > Excel and CSV category.

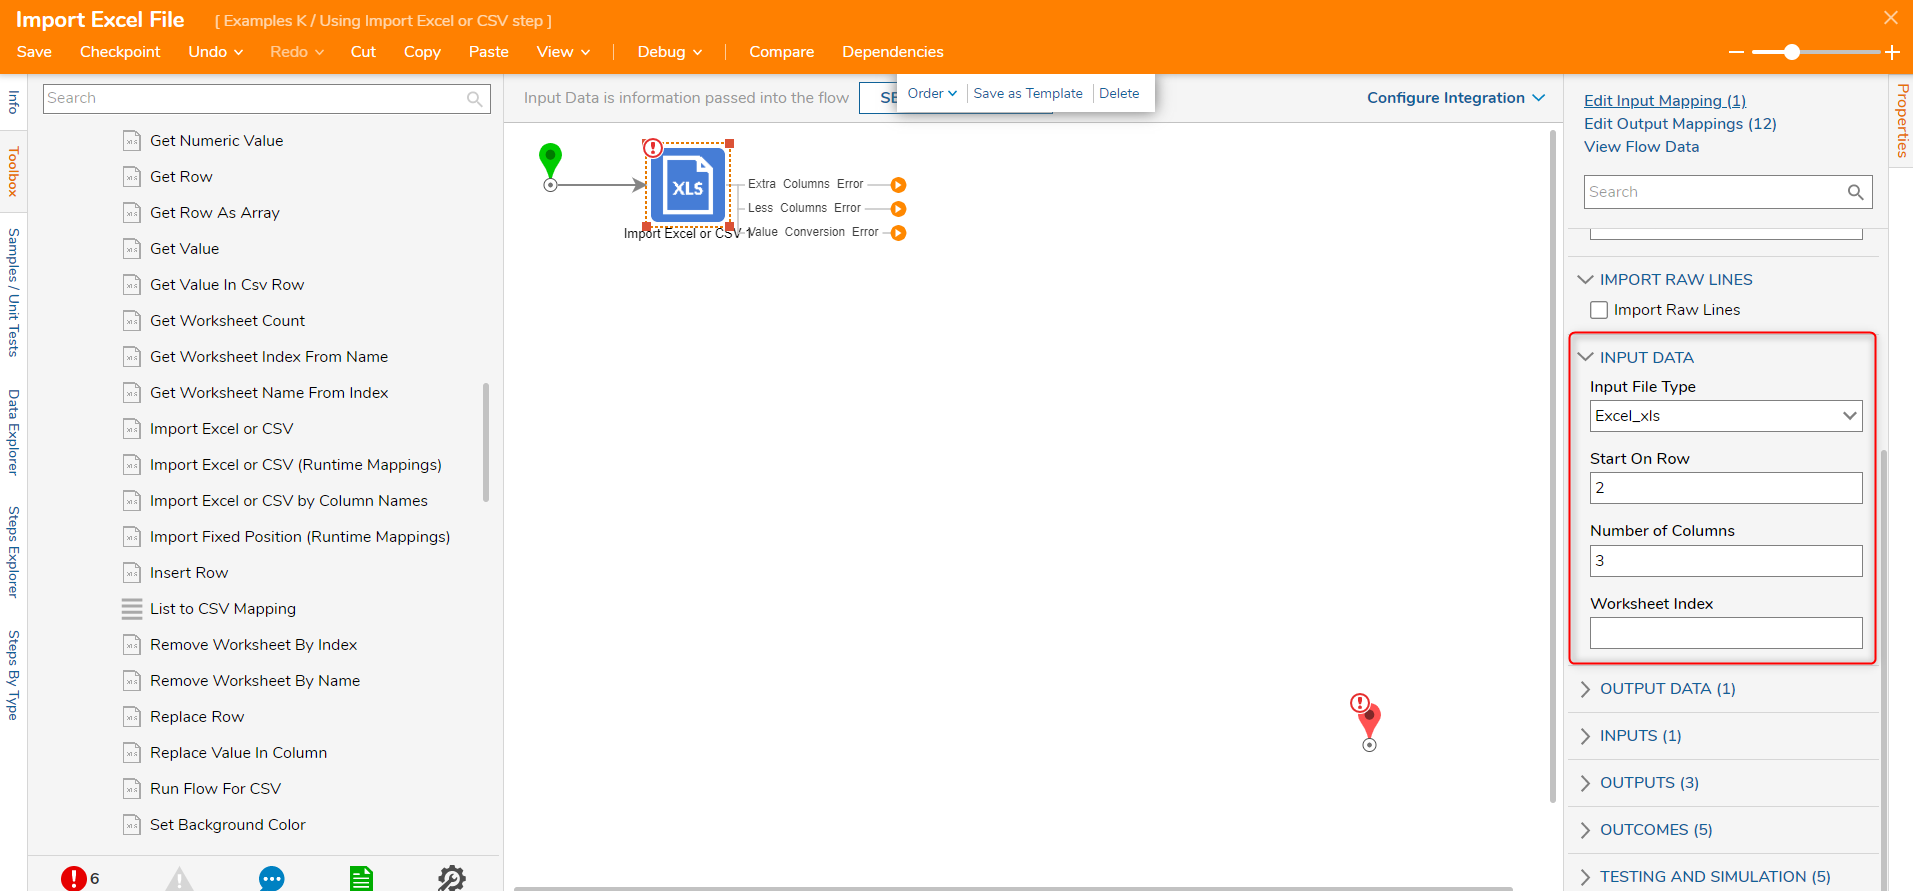
- Configure the Input Data in the Properties panel.
- Choose Excel_xlsx in the Input File type drop-down.
- The first row of the file is a header; start the data collection on the second row by typing "2" in the Start On Row field.
- Import the first 3 columns of data from the file, so type "3" in the Number of Columns field.
- Leave Worksheet Index blank as the file being used only has one worksheet.
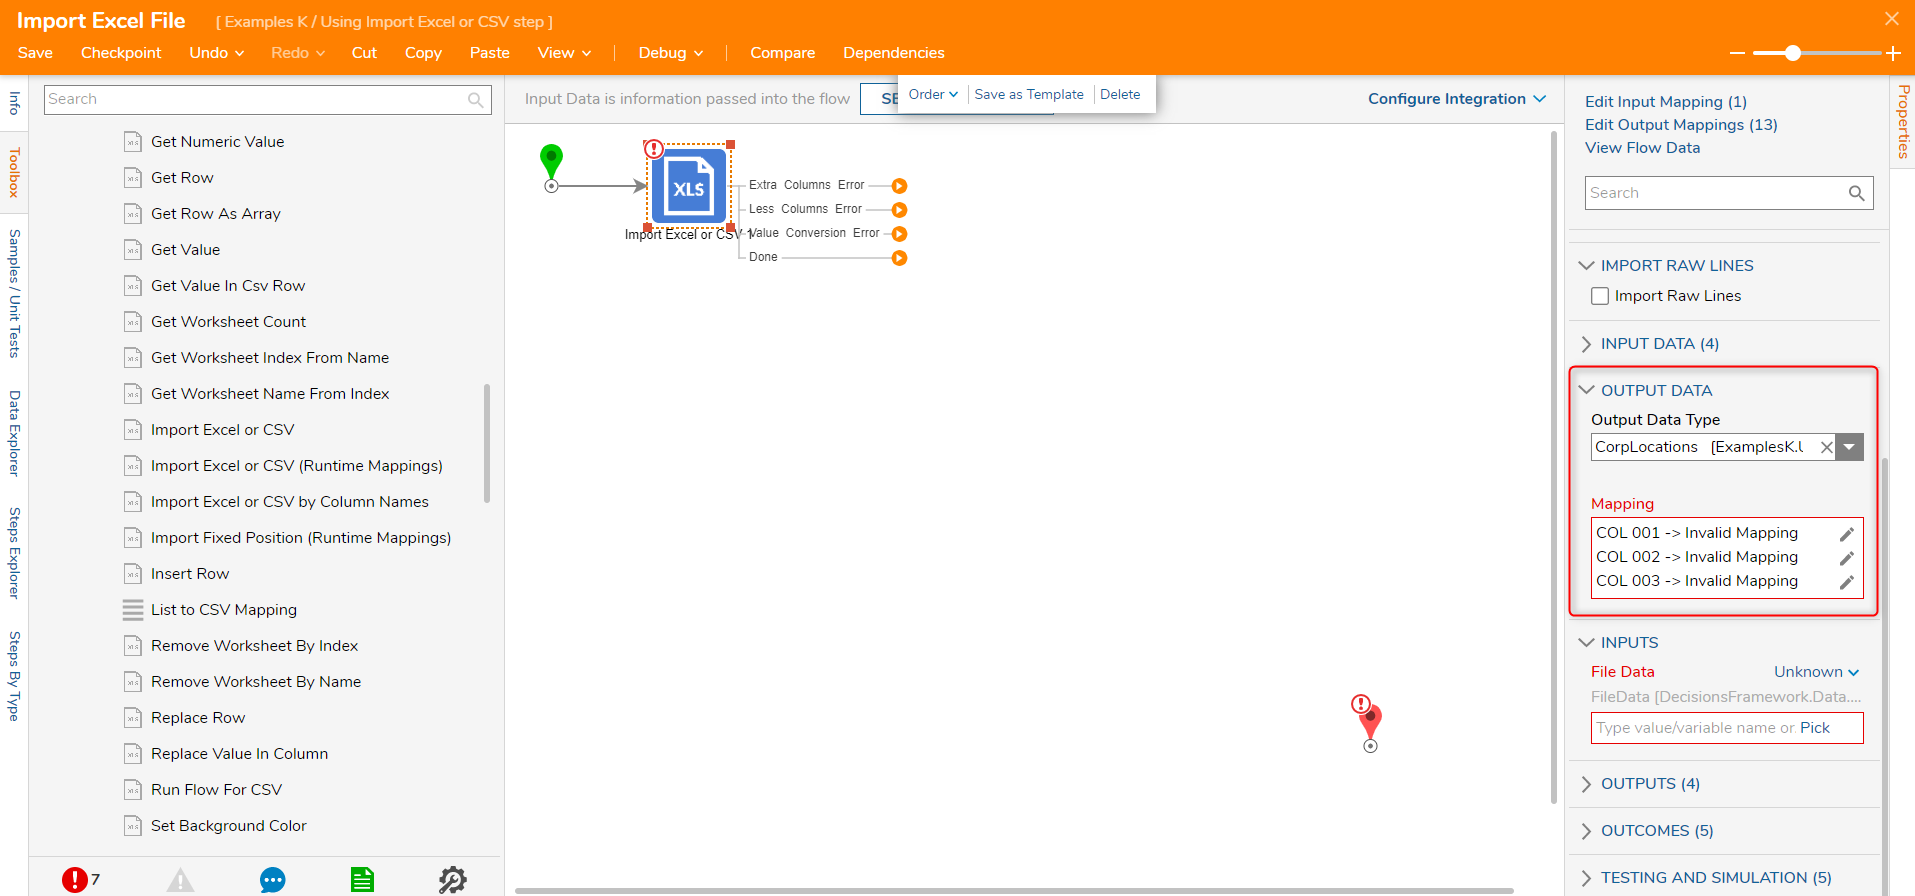
- In the Output Data section, type and then select "CorpLocations in the Output DataType drop-down.
- A new sub-section called Mapping appears within the Output Data section. Due to "3" being typed in the Number of Columns input, three invalid columns appear.
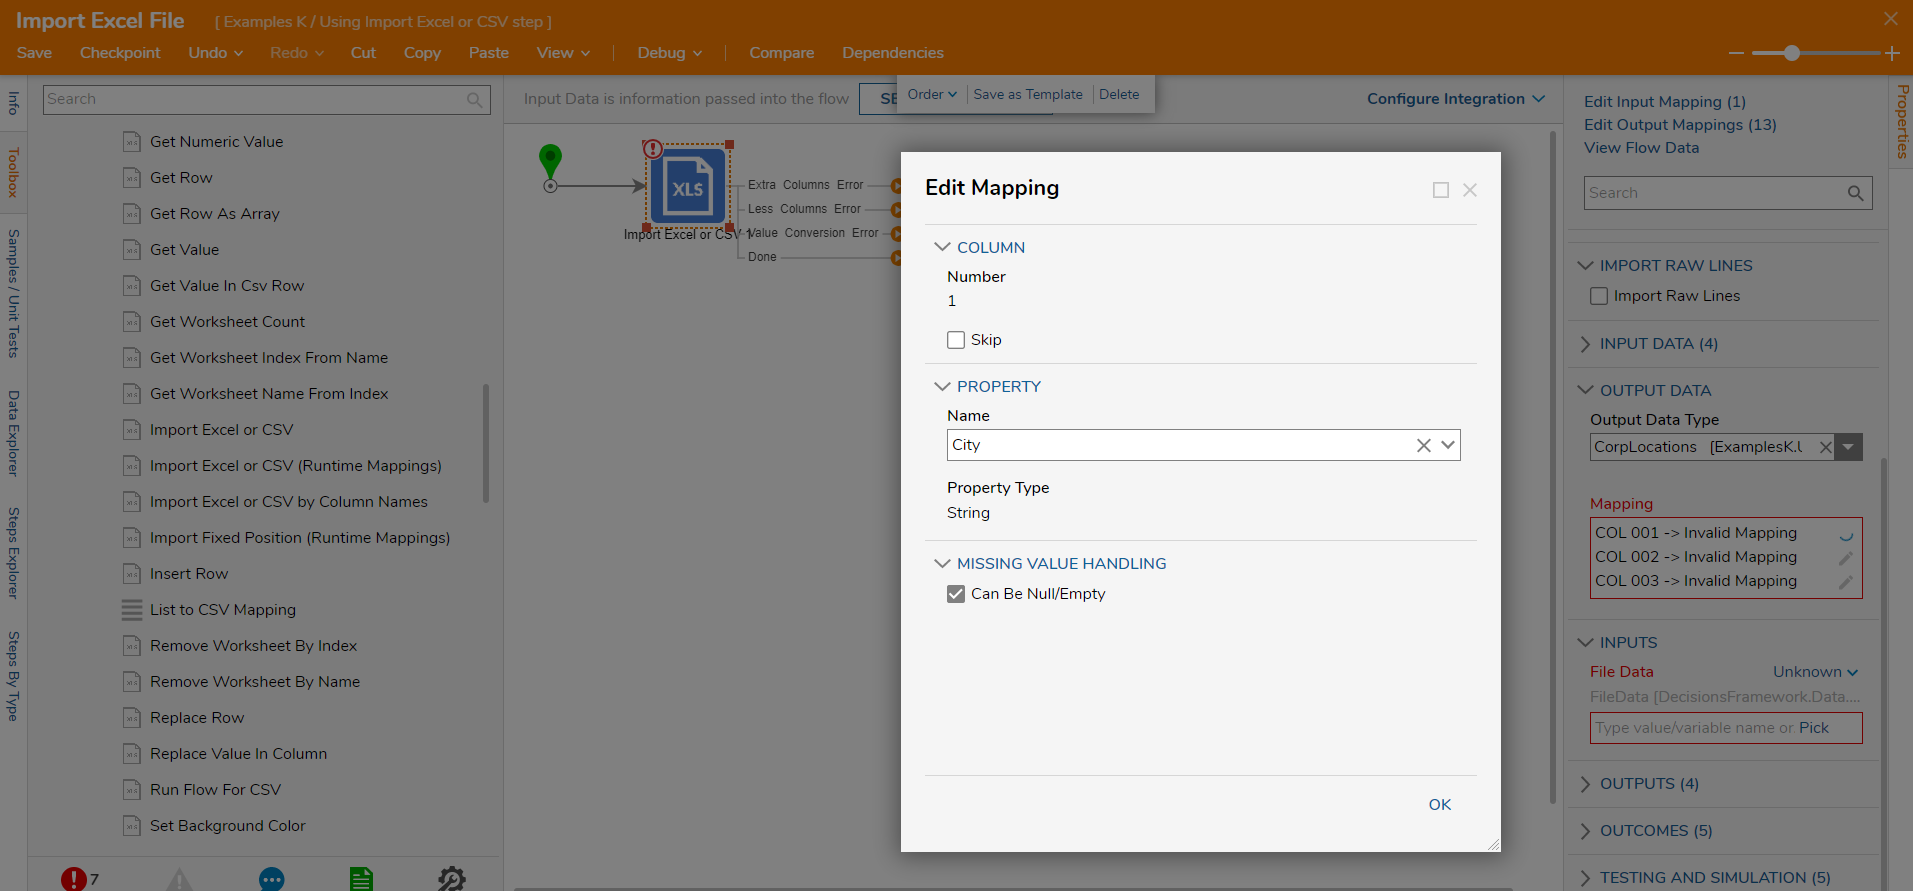
- Select the 'Edit' icon for the first column. In the resulting Edit Mapping dialog, under Property, select City in the Name drop-down menu. Select 'OK' to close the Edit Mapping dialog.
- Configure the two remaining columns, State and NumOfEmployees.
- In the Inputs > File Data section, select Constant as the mapping type. Browse to the desired file and select 'Open' to load the file as input.
- Connect the outcome paths of the Flow. In a production scenario, connect the exception paths to exception handling steps. For example purposes, connect all outcome paths to the End Step to complete the Flow.
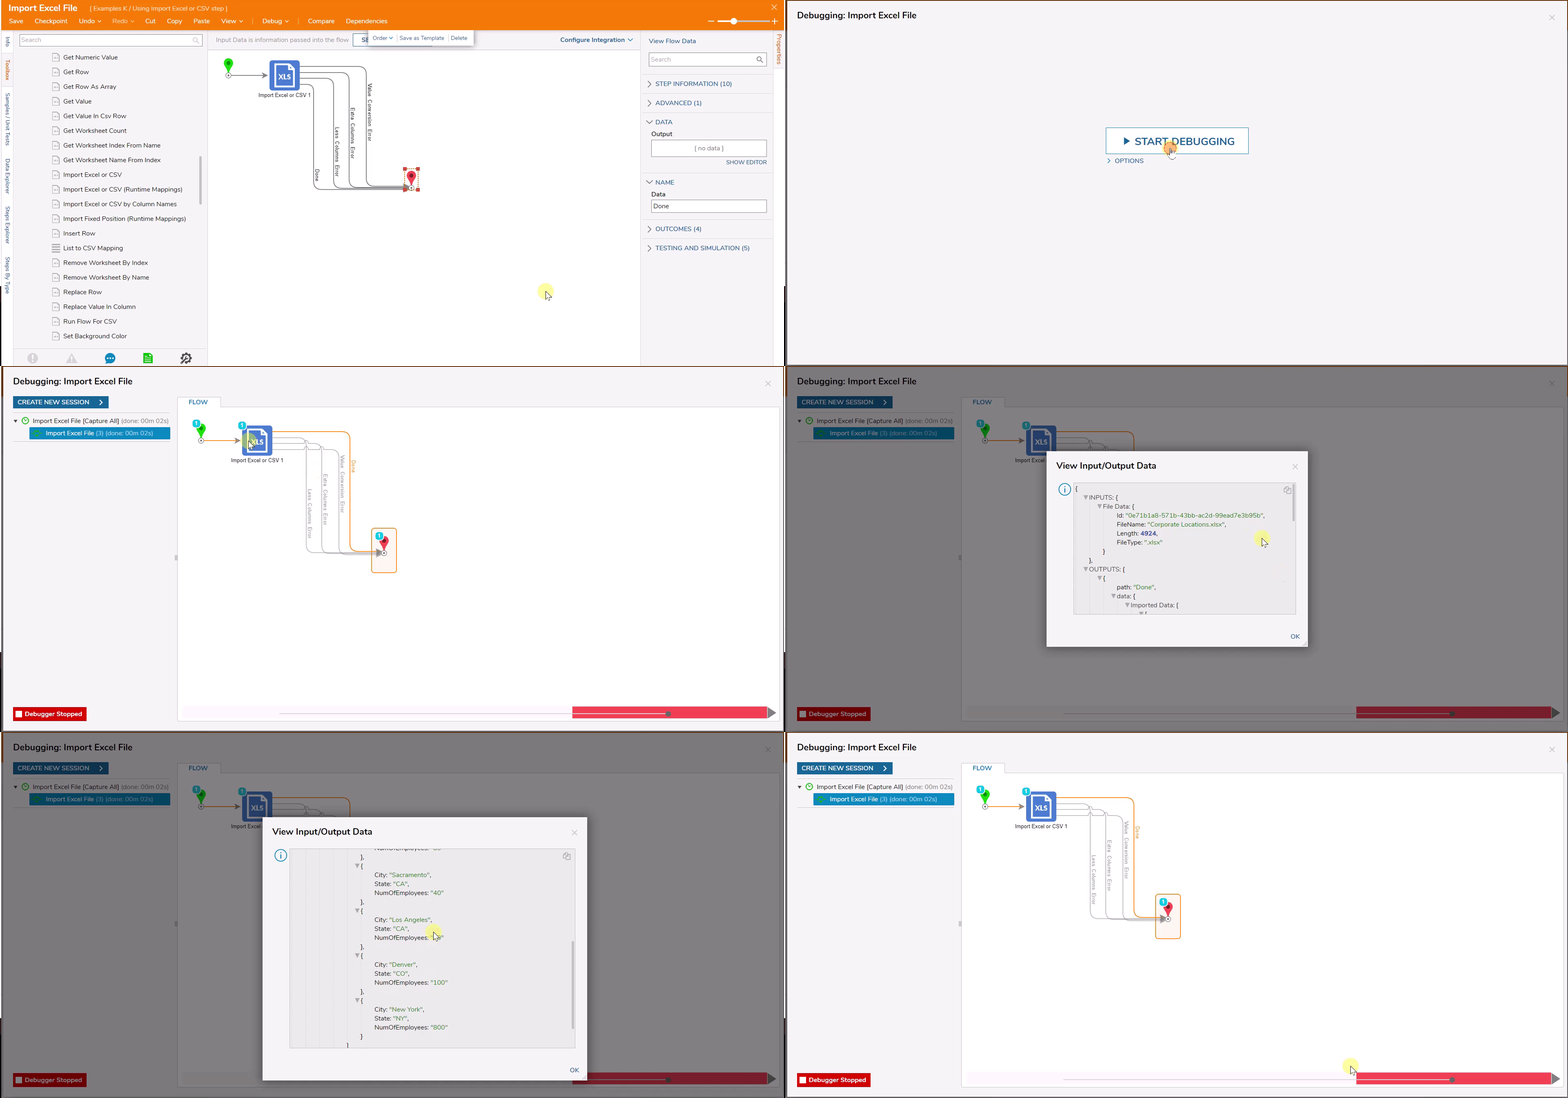
Debug
- Select Debug in the top action panel of the Flow Designer.
- Run the Flow, then select 'View Input/Output Data'. In the resulting dialog, notice that the Excel file's data was mapped to the proper Flow Structure properties.
Was this article helpful?


