Overview
Data Extensions are used to add Fields to a Data Structure. The fields are defined using a Flow and passed as output data, which automatically adds the field to the database or Data Structure specified in the Data Extension Flow. The Data Extension function can have a variety of benefits, like quickly adding custom fields sourced by different data fields that can be referenced without running a Flow each time.
Example
This example will showcase how to create a Data Extension of the built-in data structure called Account. The Data Extension is created using Flow logic to combine the First Name and Last Name fields of the Account Data Structure and use it to define a new field called Full Name. Then, a Flow will be created with a basic use-case of how to reference the Data Extension in order to populate a pop up with the Full Name.
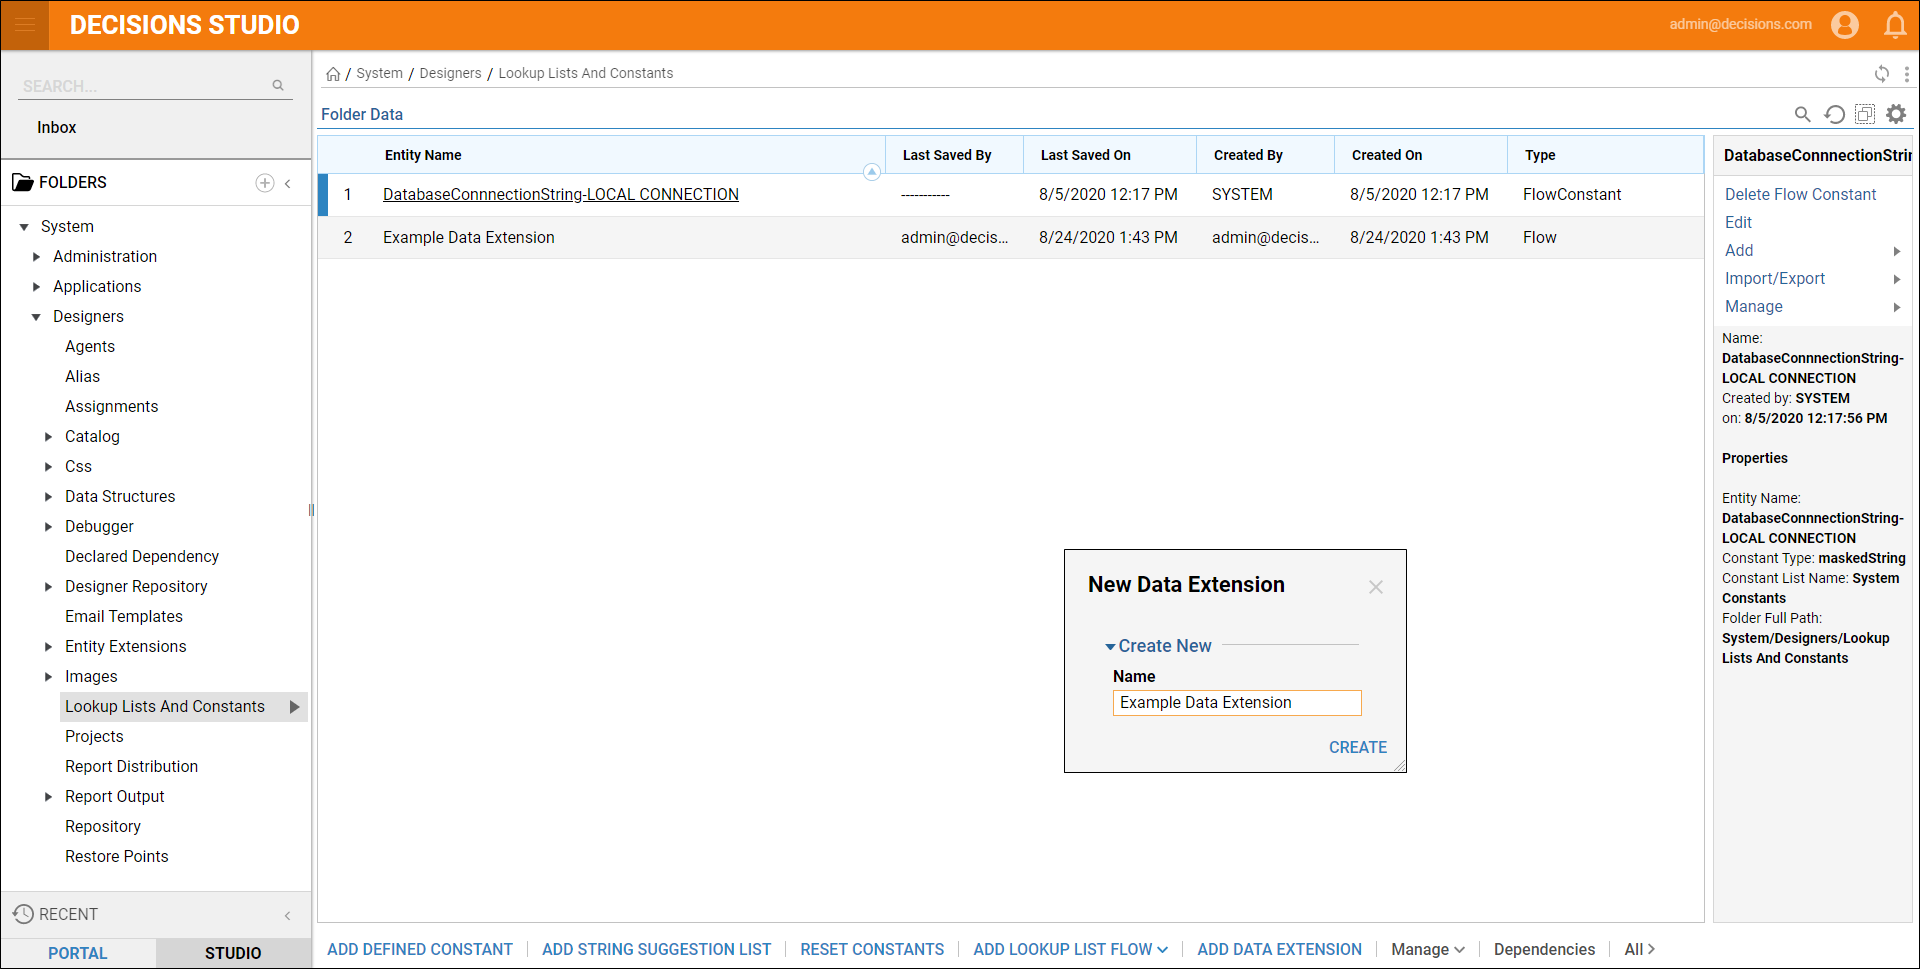
- In the Studio, navigate to System > Designers > Lookup Lists and Constants.
- Select the Add Data Extension button from the bottom action bar in this Folder.
- When the window appears, provide a name for this Data Extension and select CREATE.
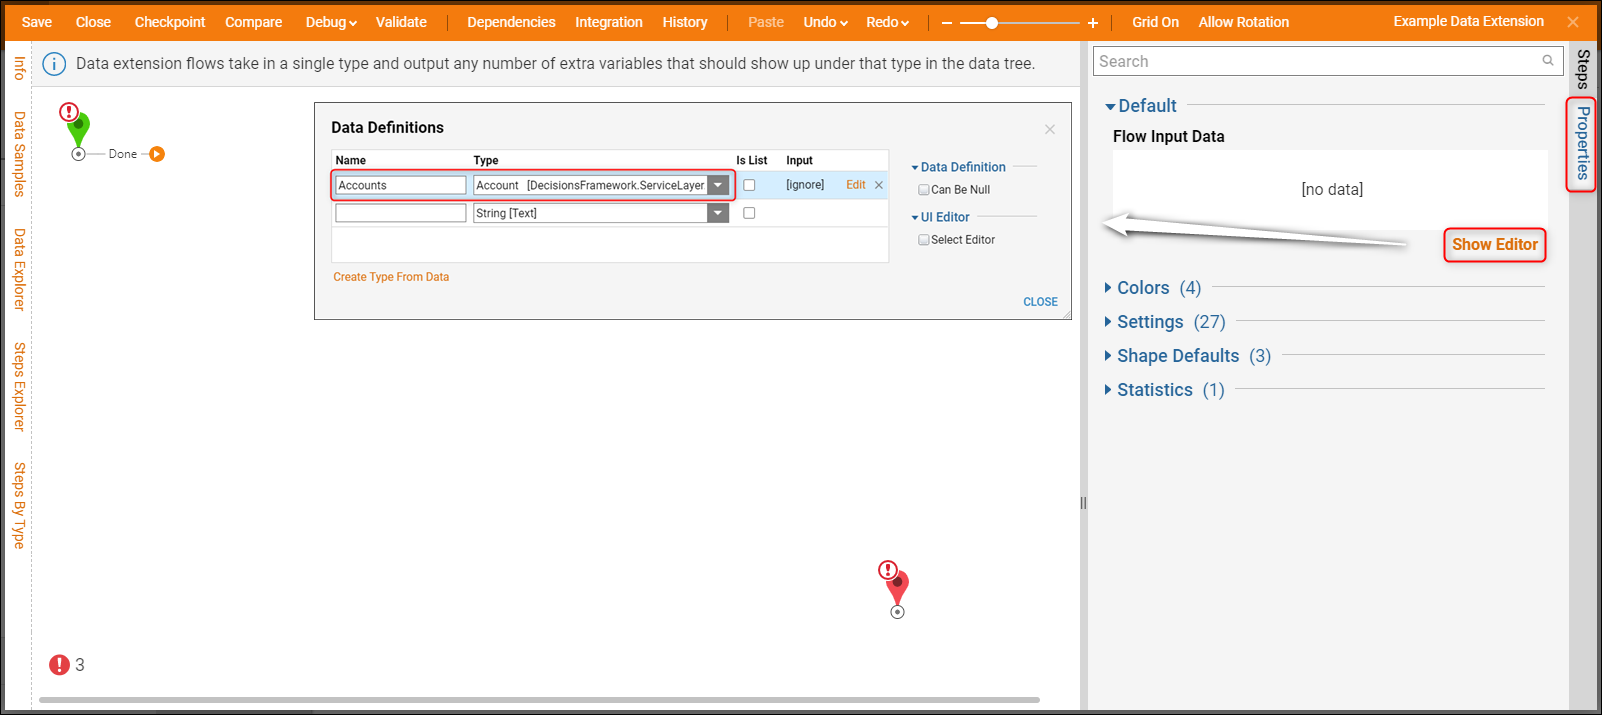
- In the Flow Designer, select the Properties tab on the right before selecting a step.
- In the Flow properties, select the Show Editor button under Default > Flow Input Data.
- When the Data Definitions window appears, add Accounts for the name and use the All/Search option of the Type drop down to select the Account Data Structure. This pulls the entire Account structure into the Flow.
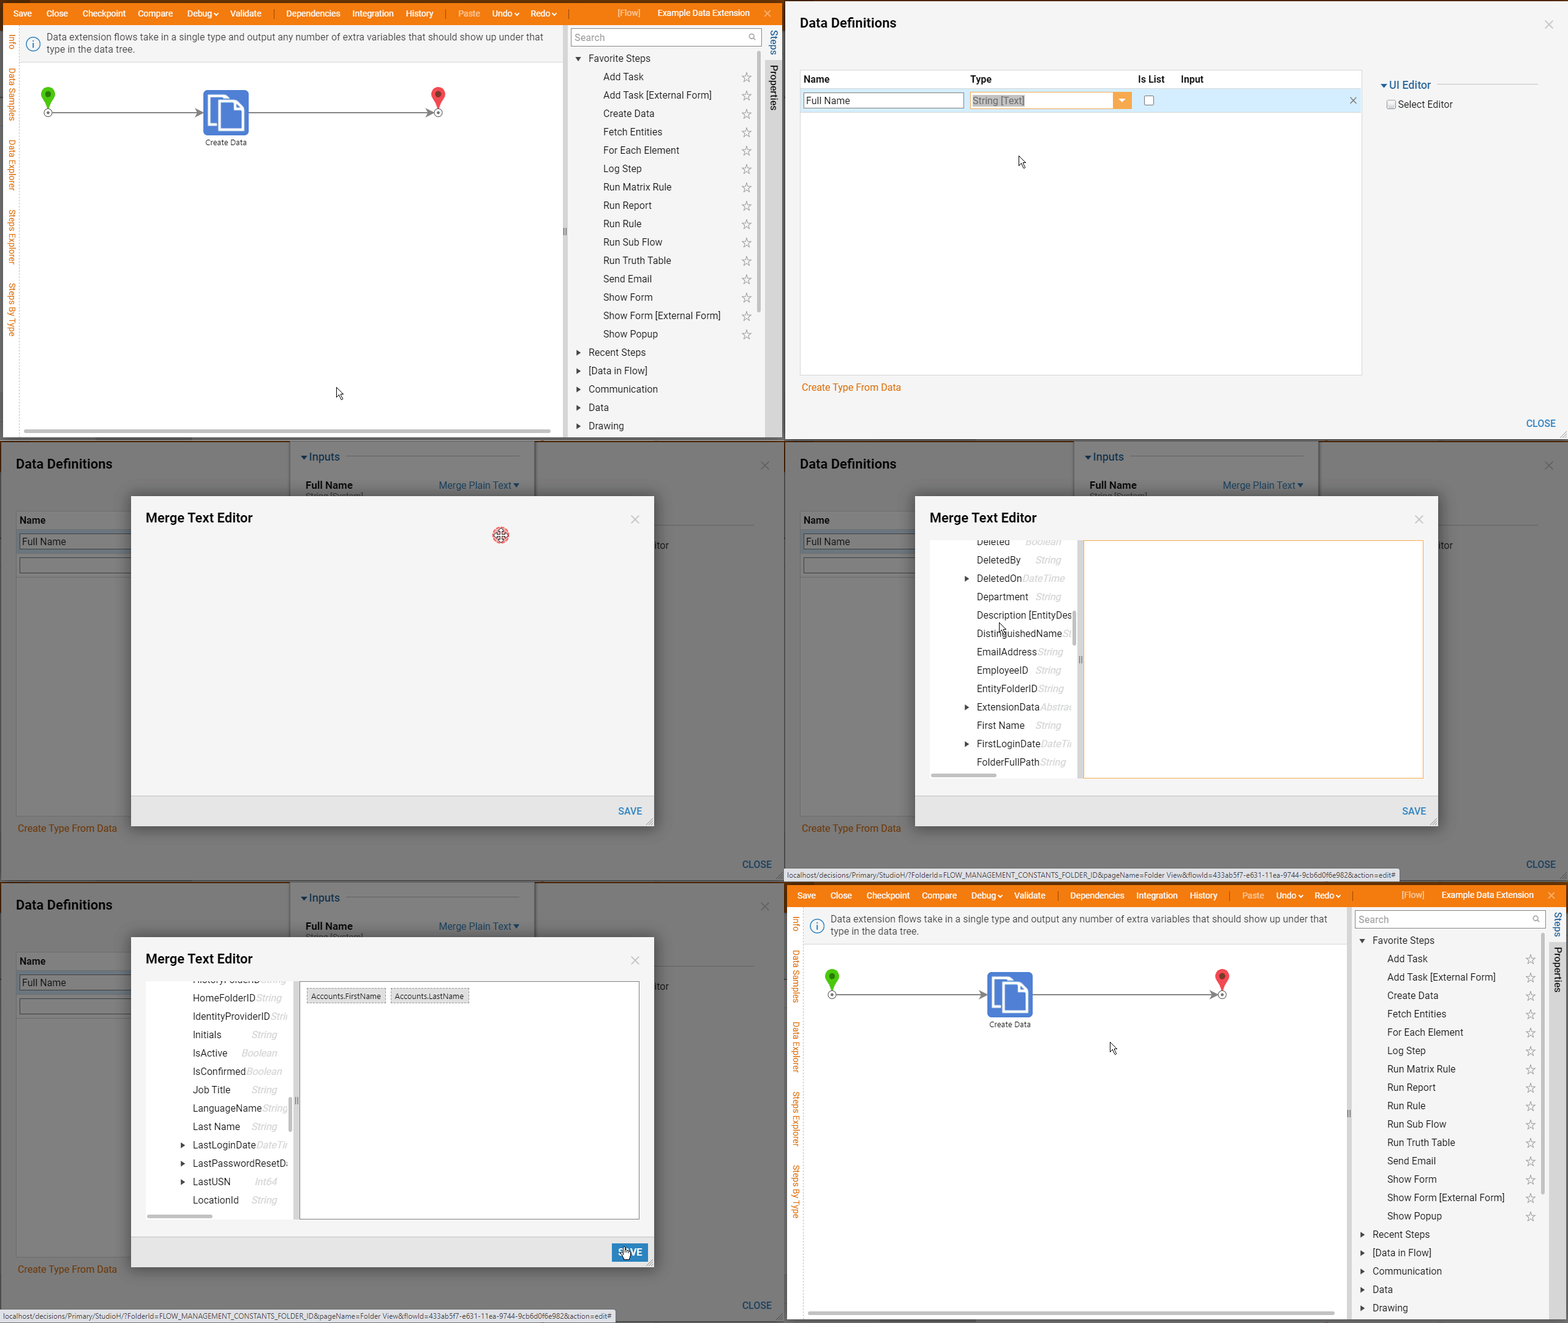
- Select the Steps tab on the right, then drag a Create Data step from the Favorite Steps section into the Flow.
- Connect the Start outcome path to the step, then the step outcome path to the End.
- Select the Create Data step so that the properties populate on the right, then select the Show Editor button under Data > Data To Create.
- When the Data Definitions window appears, enter the Full Name for the name and String for the type.
- Select the Edit button under the Input column and change the mapping type to Merge Plain Text, then select Show Editor.
- Expand the Accounts section on the left side of the Merge Text Editor window.
- Hover over First Name and Last Name, then use the plus icon to add them to the editor. Make sure to separate these two data fields with space in between.
- Close all windows and the Flow Designer once complete.
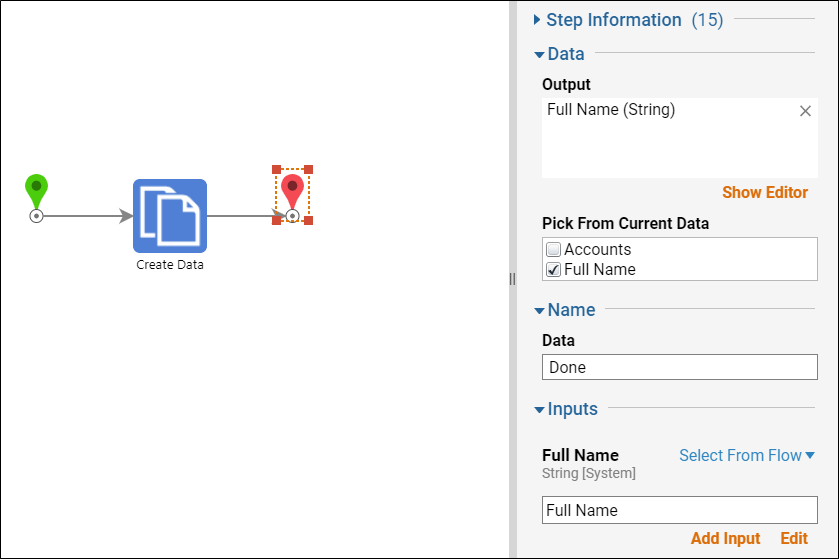
- Select the End step and check the Full Name box under the Pick From Current Data section. Doing this will automatically add the data as output data to the Flow. If the same naming conventions were used, the Create Data step should automatically map as the input definition for the Flow output data.
- Once complete, save and close the new Data Definition Flow.
New Flow
Now that the Data Extension for Account has been created which produces a new field called Full Name (First+Last Name of Account), a new Flow will be created that references the Account Data Structure in order to populate a pop up with the Full Name based on Account selection.
- Leave the Lookup Lists And Constants settings and navigate to a Designer Folder.
- Select the button to Create Flow from the bottom action bar and choose the default Flow template, then click CREATE.
- Provide a name for the Flow, then click CREATE again.
- In the Flow Designer, navigate to the Favorite Steps section of the Steps tab and add a Fetch Entities step after the Start step.
- Connect the No Results path to the End step.
- Add a Show Form step to the end of the Results path and leave it unconfigured for now.
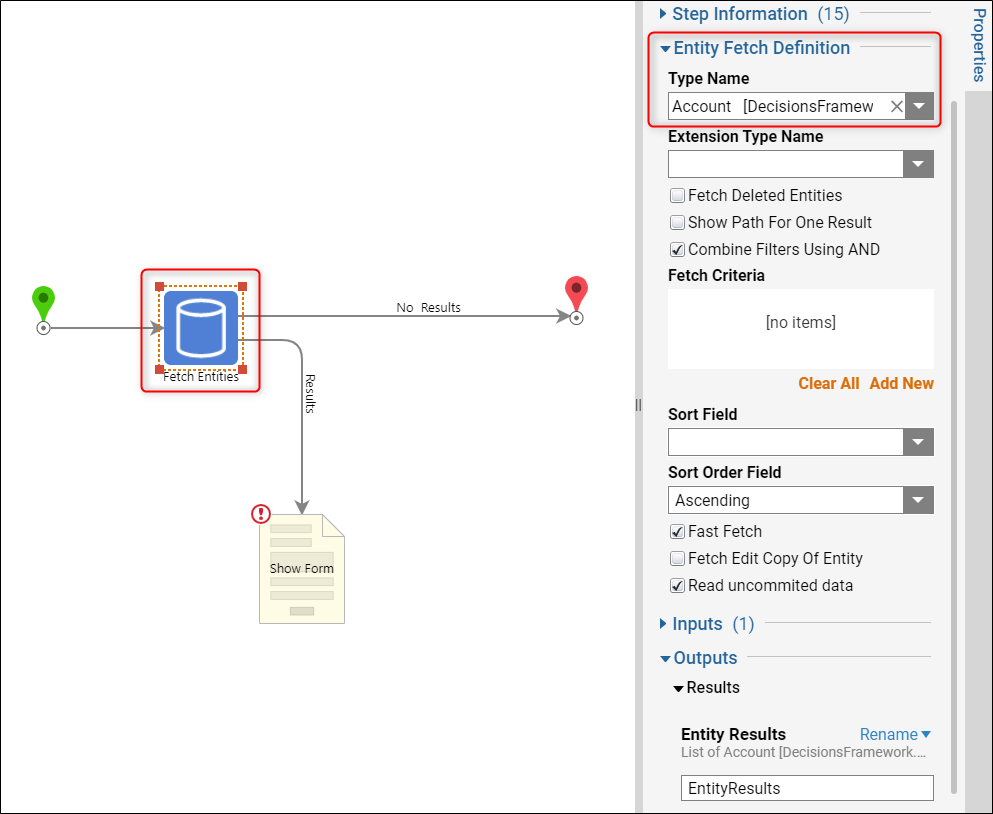
- Select the Fetch Entities step so that the properties populate, then select the Account structure from the drop down list under Entity Fetch Definition > Type Name.
- Select the Show Form step icon so that the properties populate, then select the Pick or Create Form button at the top of the properties.
- Use the left side of the window to provide a name for a new Form, then select CREATE.
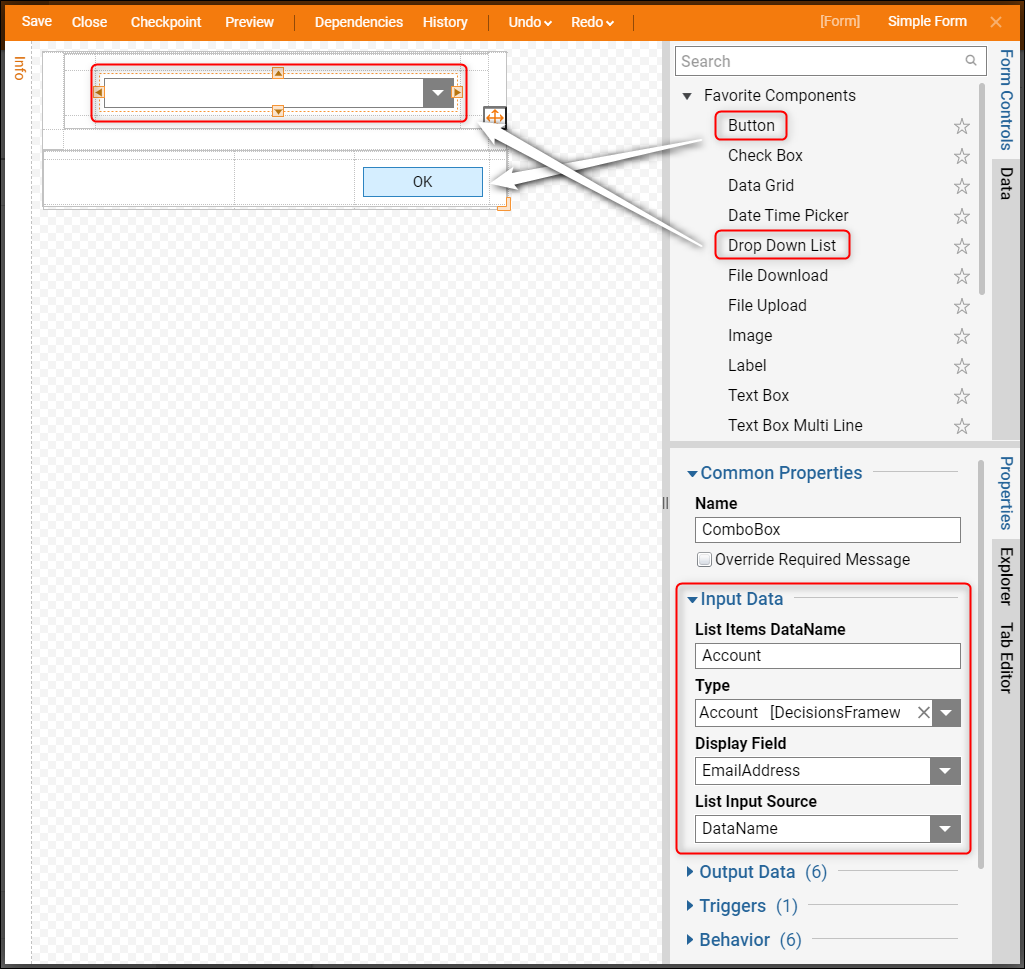
- In the Form Designer, drag a Button from the Favorite Components section and add it to the Form, then enter OK for the outcome name.
- Drag a Drop Down List from the Favorite Components section and add it to the Form, then enter Account for the data name.
- Select the Drop Down List component so that the properties populate, then choose Account from the Type list.
- Select EmailAddress for the Display Field and DataName for the List Input Source. When the List Items DataName text box appears, enter Account.
- Save and close the Form once complete.
Now the Form has been created to show the end-user a list of accounts in the drop down, then upon selection and submission of the Form, the Full Name will be referenced in a popup that appears based on the account chosen.
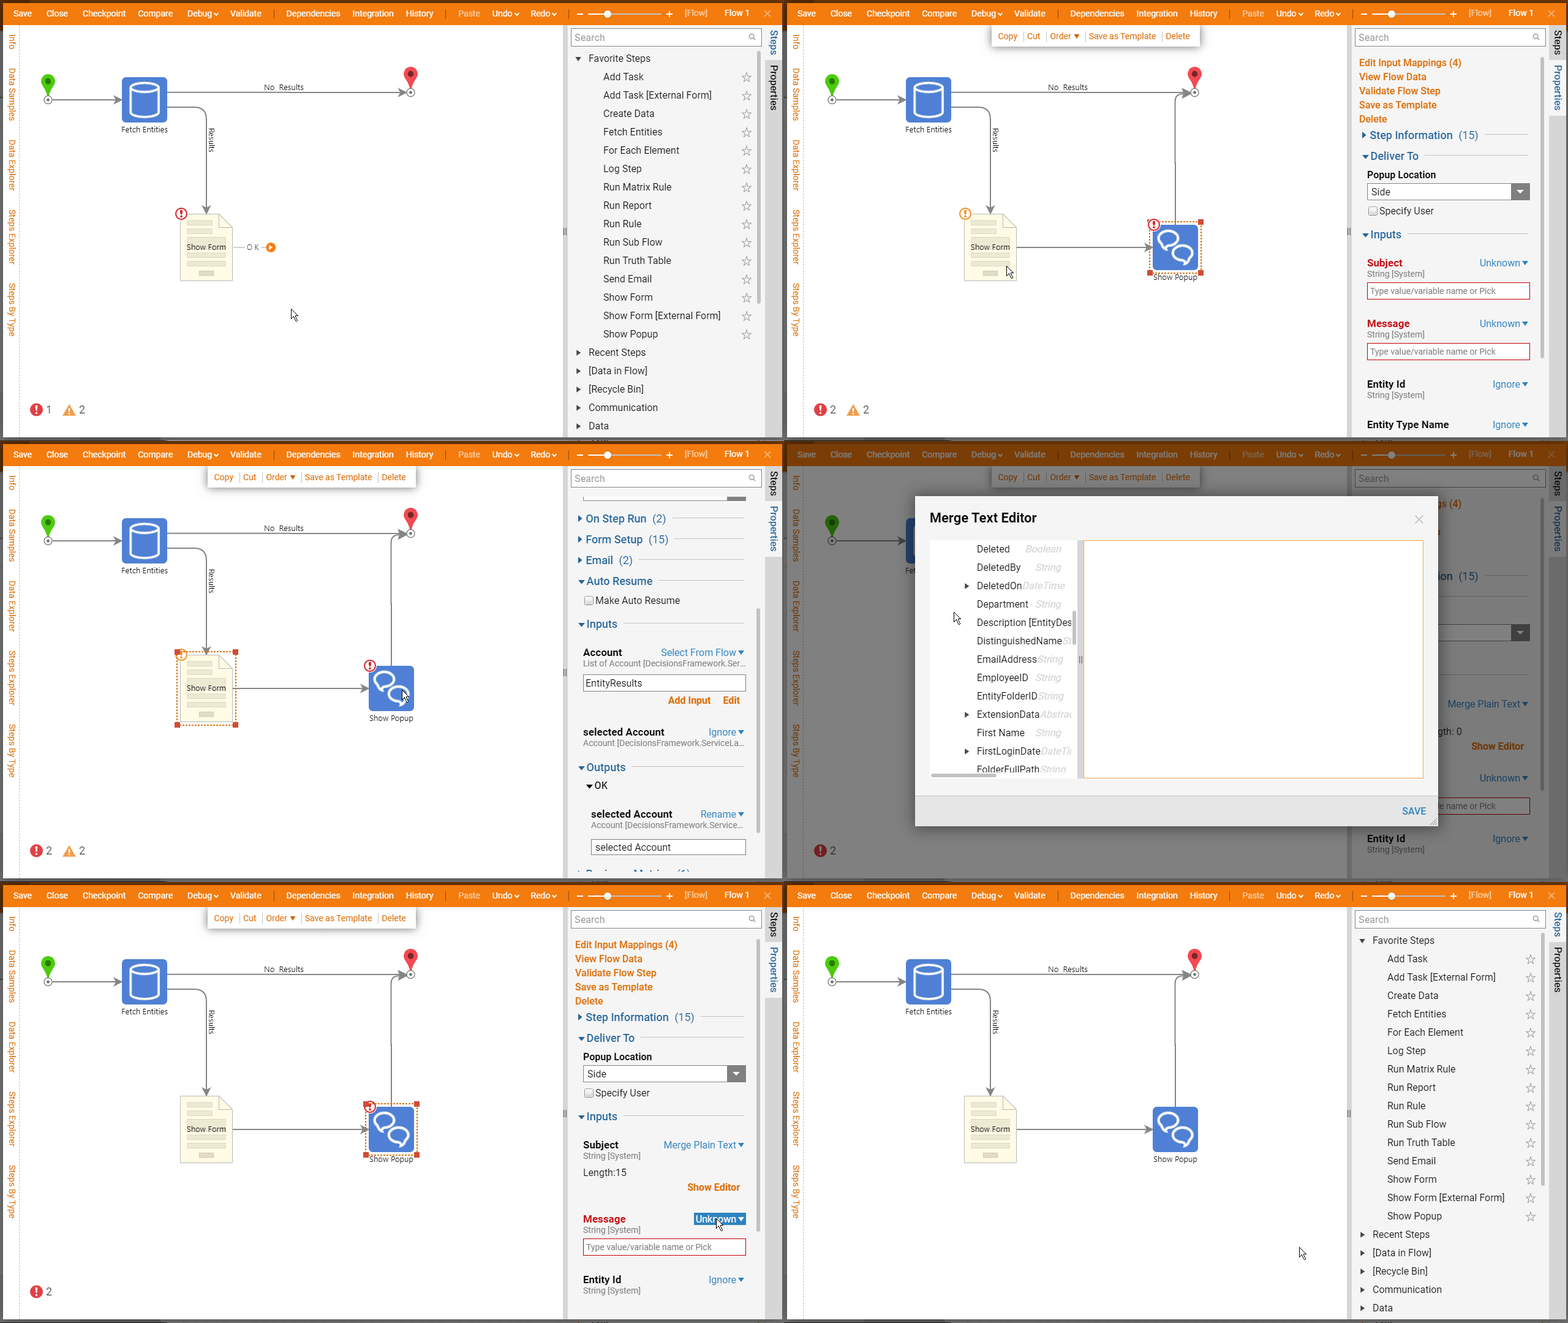
- Drag the orange arrow from the Show Form step into some blank space, then select a Show Popup step from the Favorite Steps section and click ADD.
- Connect the outcome path of the Show Popup step to the End step.
- Select the Show Form step so the properties populate, then navigate to the Inputs section.
- Use the Select From Flow mapping type for Account and choose the EntityResults to define this input, bypass the available properties, and select DONE.
- Use the Ignore mapping type for selected Account.
- Select the Show Popup step so the properties populate, then navigate to the Inputs section.
- Use the Merge Plain Text mapping type for Subject and select the Show Editor button.
- Expand the selected Account properties on the left and hover over EmailAddress, then select the plus icon.
- In the text editor immediately after the EmailAddress box, add some language indicating that the Full Name of the selected account will be revealed.
- Use the Select From Flow mapping type for Message and choose selected Accounts, choose Full Name from the available properties list, then select DONE.
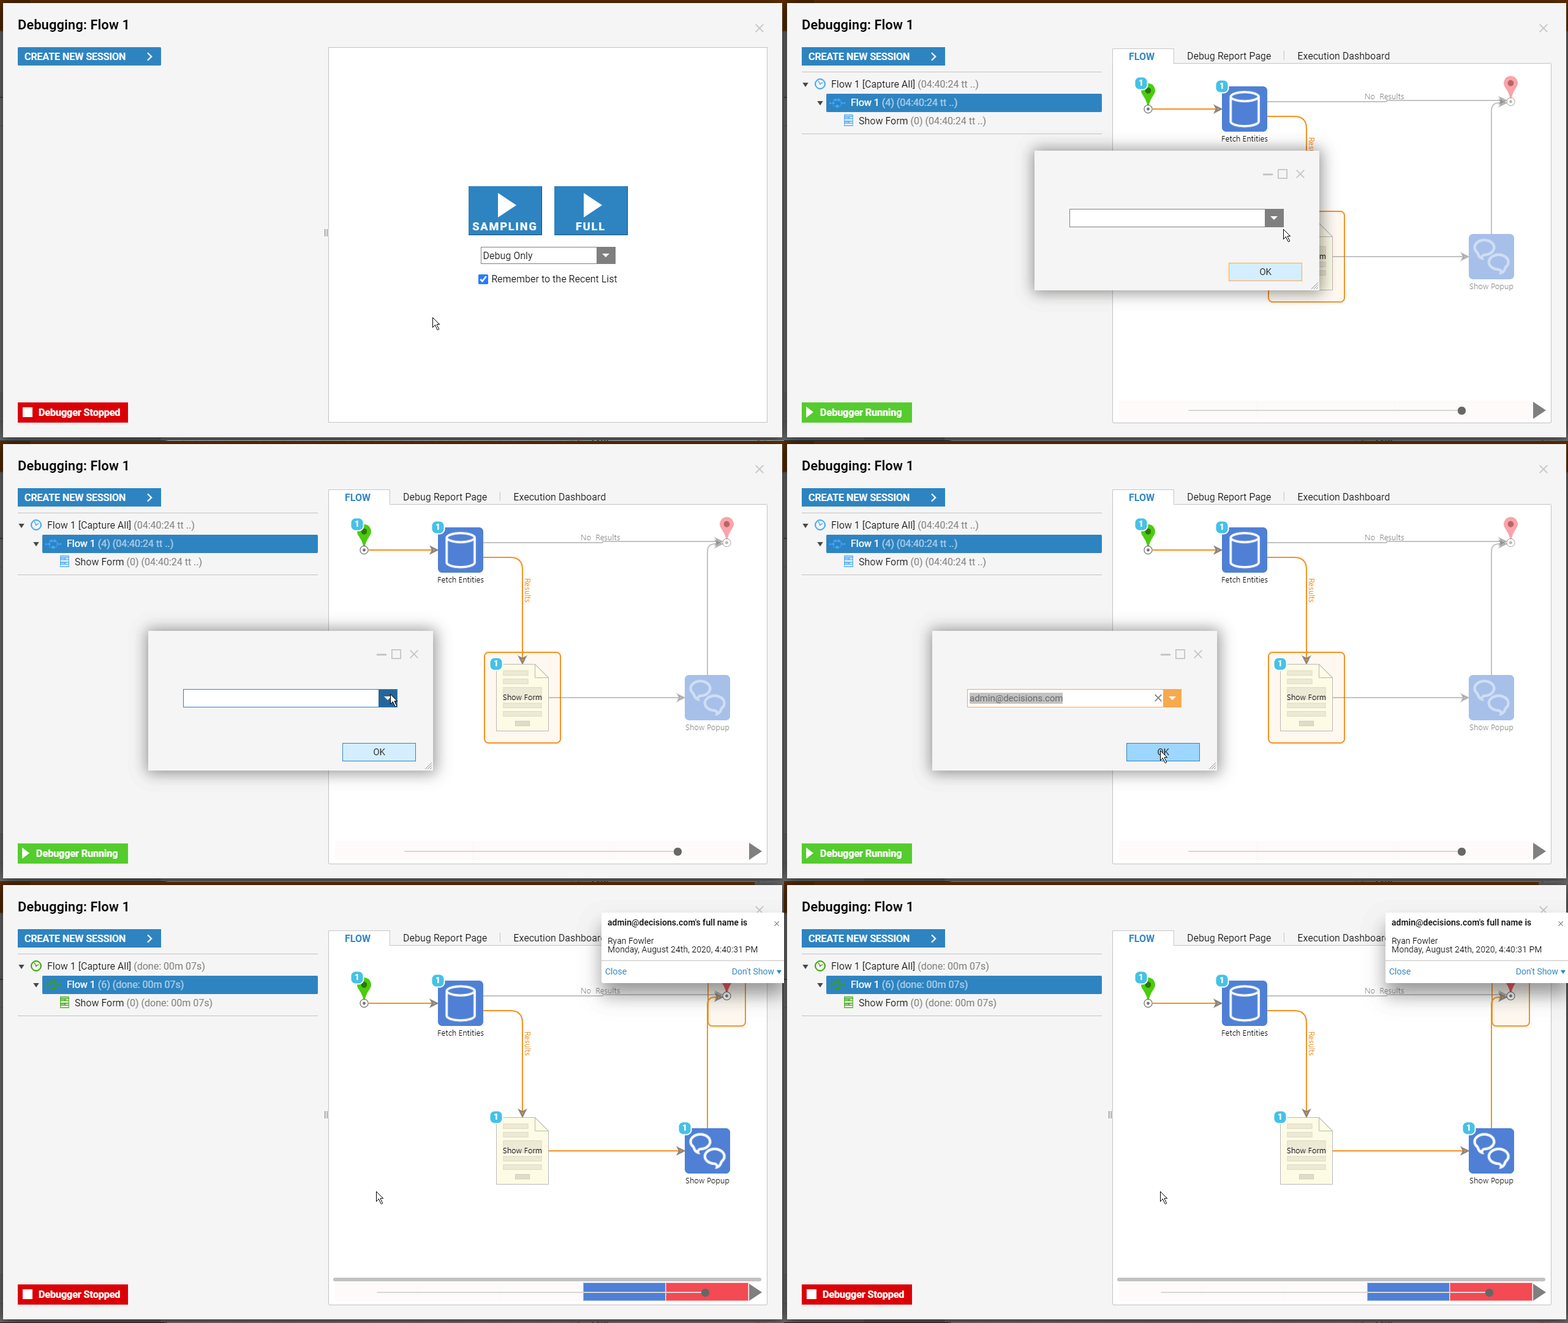
- Select the Debug button from the top action bar in the Flow Designer, then select the FULL button.
- When the Form appears, select an Account that had first/last name data to combine, then select the Form button.
- The pop up will appear with the email address of the account, then the message will showcase the Full Name (as defined by the combined first/last name).
Now an entirely new field has been added to the Account structure, which can be referenced through a variety of different use-cases.
