Creating Leased Entities
- 03 Jun 2022
- 4 Minutes to read
- Print
- DarkLight
This documentation version is deprecated, please click here for the latest version.
Creating Leased Entities
- Updated on 03 Jun 2022
- 4 Minutes to read
- Print
- DarkLight
Article summary
Did you find this summary helpful?
Thank you for your feedback!
Overview
| Data Structure Quick Summary | ||||||
|---|---|---|---|---|---|---|
| Complexity? | Performance Impact? | Saves to Database? | Configuration Folder? | Entity Framework? | Folder Behavior? | Process Tracking? |
| Medium | Low | Yes | Yes, but not by default | Yes | No | No |
Leased Entities are used for batch processing large sets of data and include special properties that allow them to be fetched out of the database and locked. These properties allow multiple threads to operate on the same table simultaneously with no danger of pulling and operating on the same record. Leased Entities are designed for batch processing and then deleted. They are not recommended for the long-term storage of data.
Default Text Length
The default setting for all text stored in the database is 255 characters, however, this can be modified by the Designer using our Changing Default Text Length Settings article.
Creating a Leased Entities Database Structure
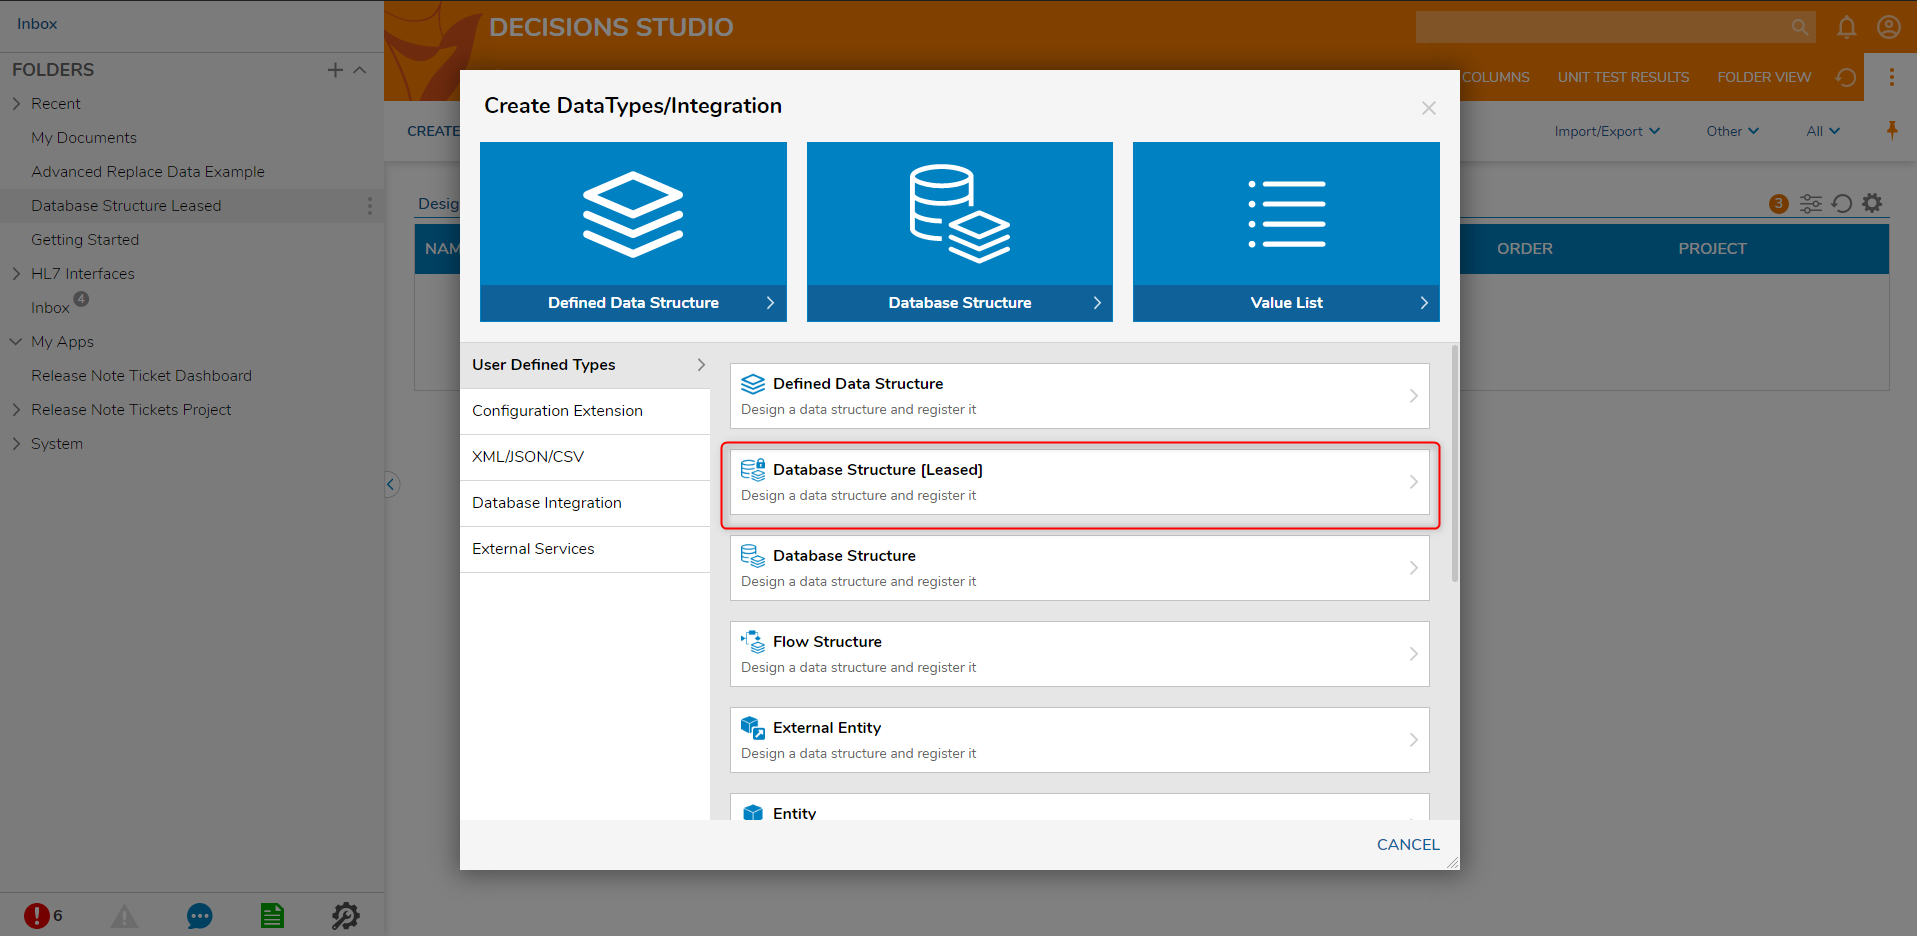
- Create a Database Structure [Leased] by clicking Datatypes/Database > User-Defined Types > Database Structure [Leased] on the Folder Actions Panel.
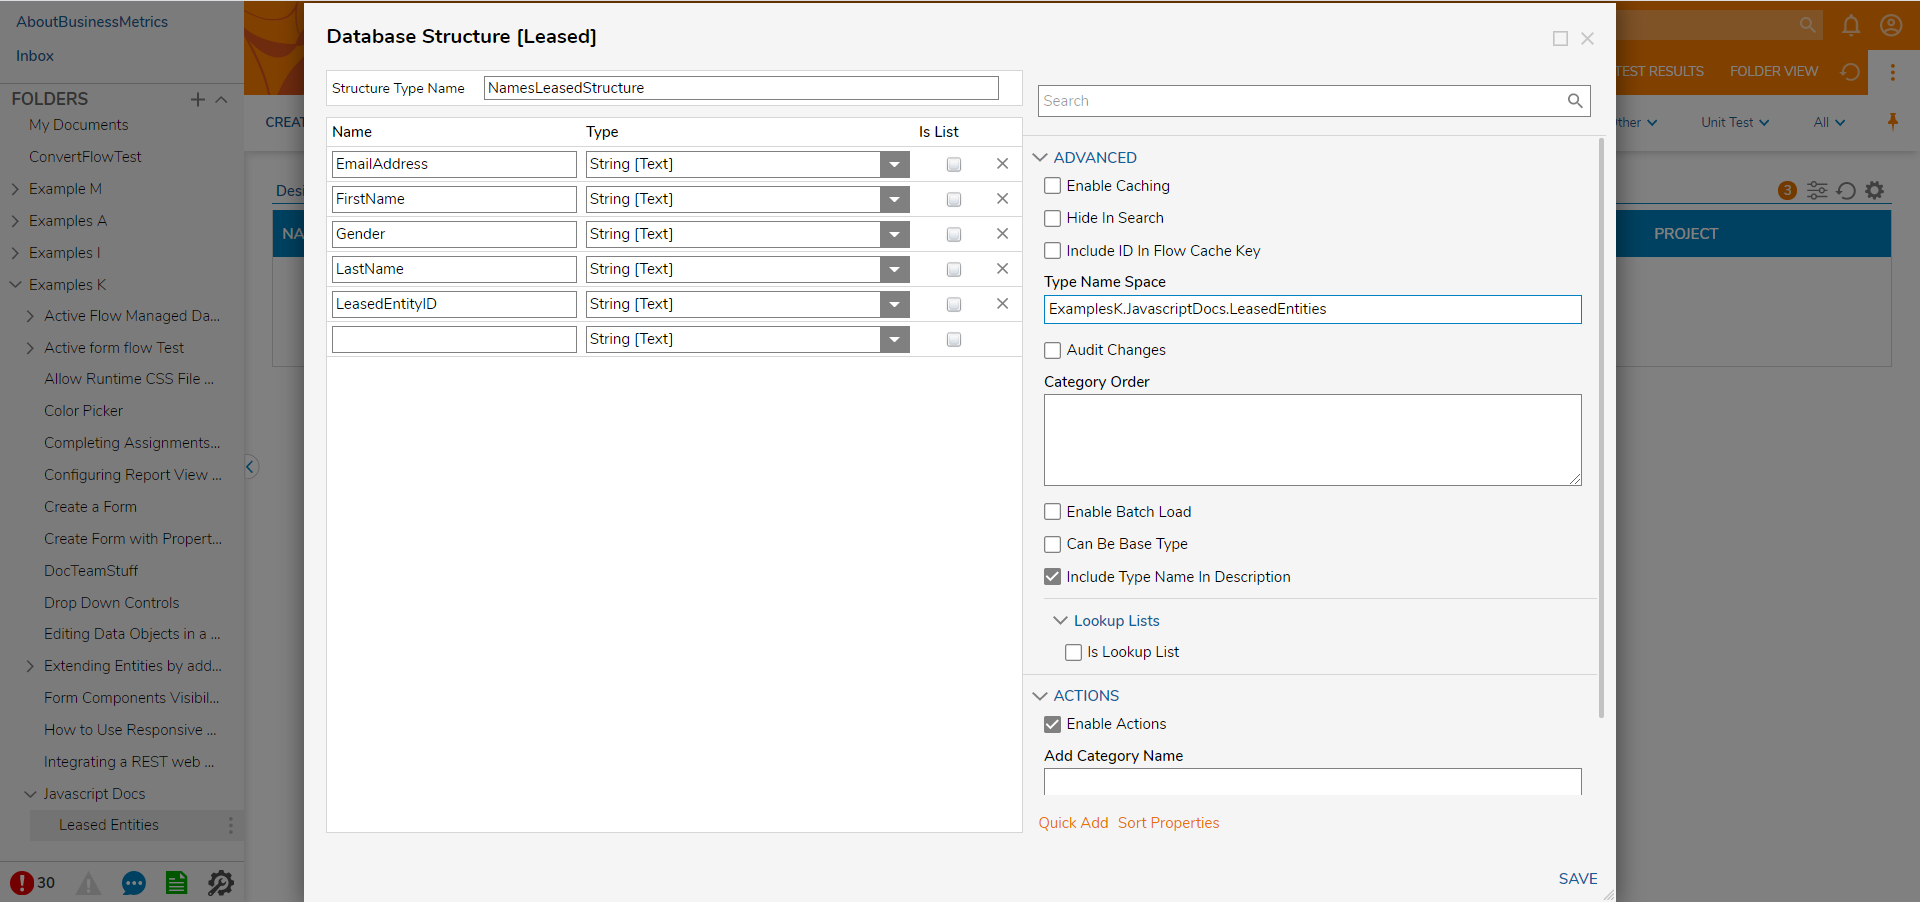
- In the Add Leased Data Structure dialog, define the Structure similarly as one would define Database Structure by: naming the Structure, using the Add button to create Fields for the Structure, and finally checking the Enable Actions check-box to create Actions for this Structure.
- Select SAVE.
- Create a Flow that will create Entities of the Lease Data Structure type.
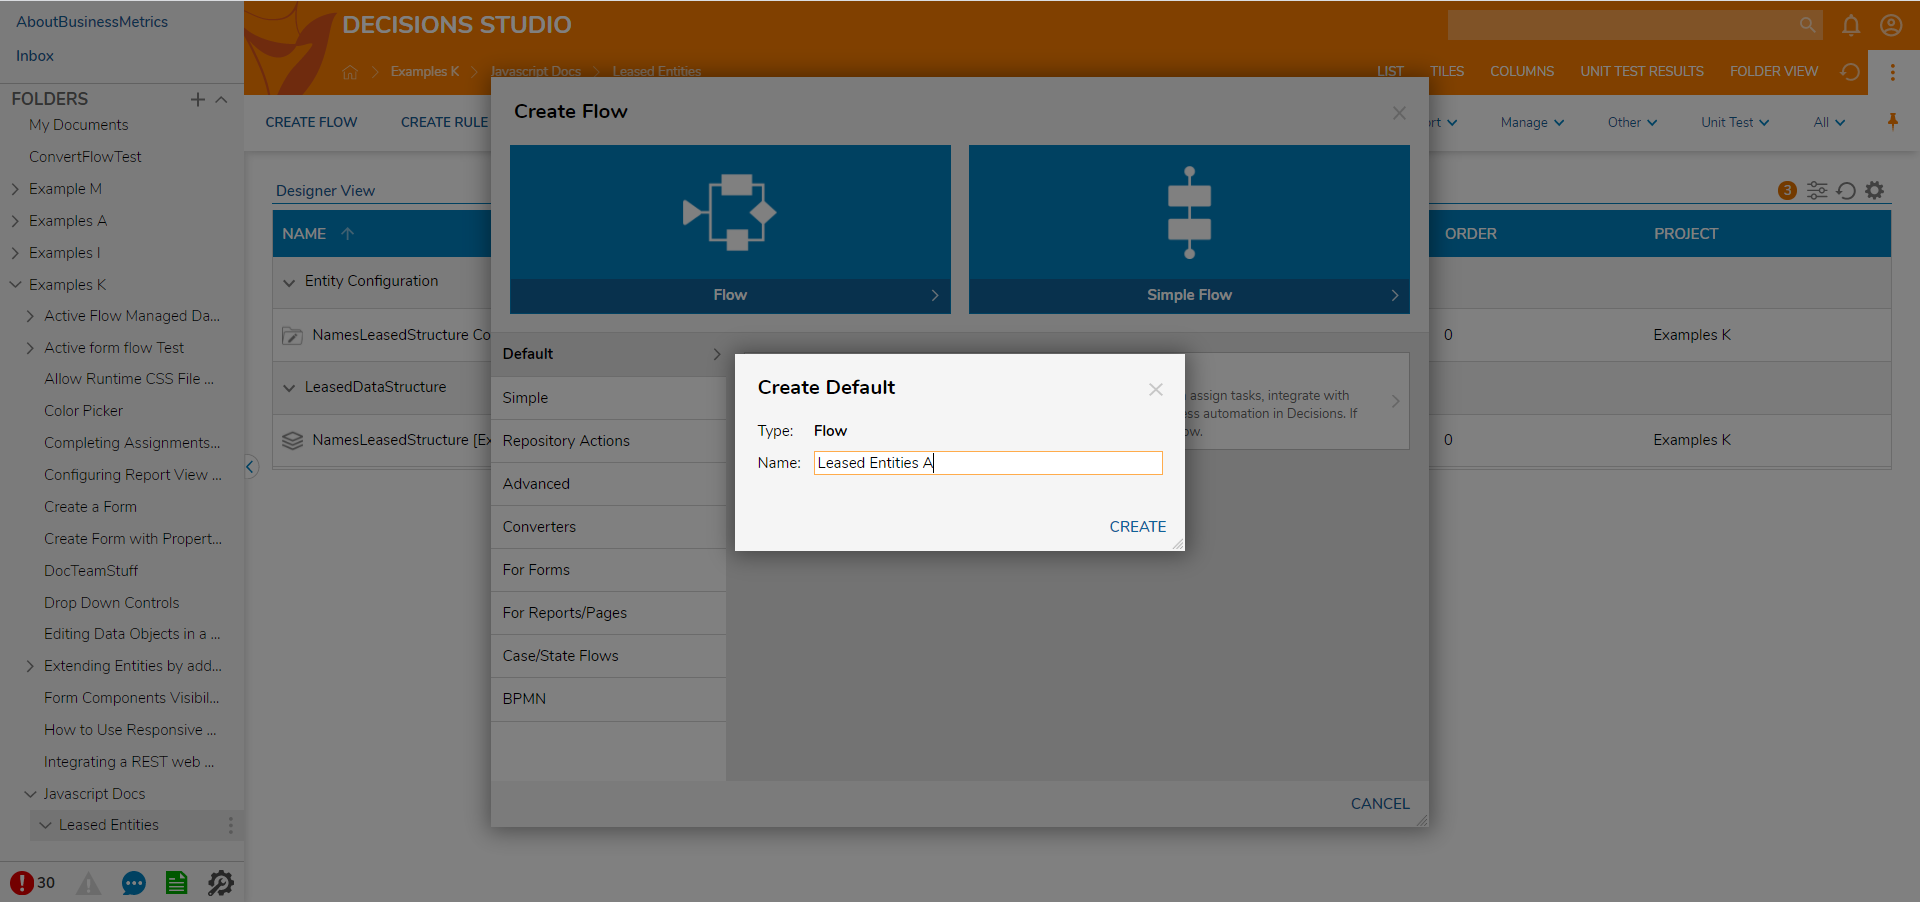
- In the Designer Folder, select Create Flow on the Folder Actions Panel.
- In the resulting window, name the Flow and click CREATE to proceed to the Flow Designer.
- To create Entities in this Flow, use a CSV file with 1000 records of randomly generated data.
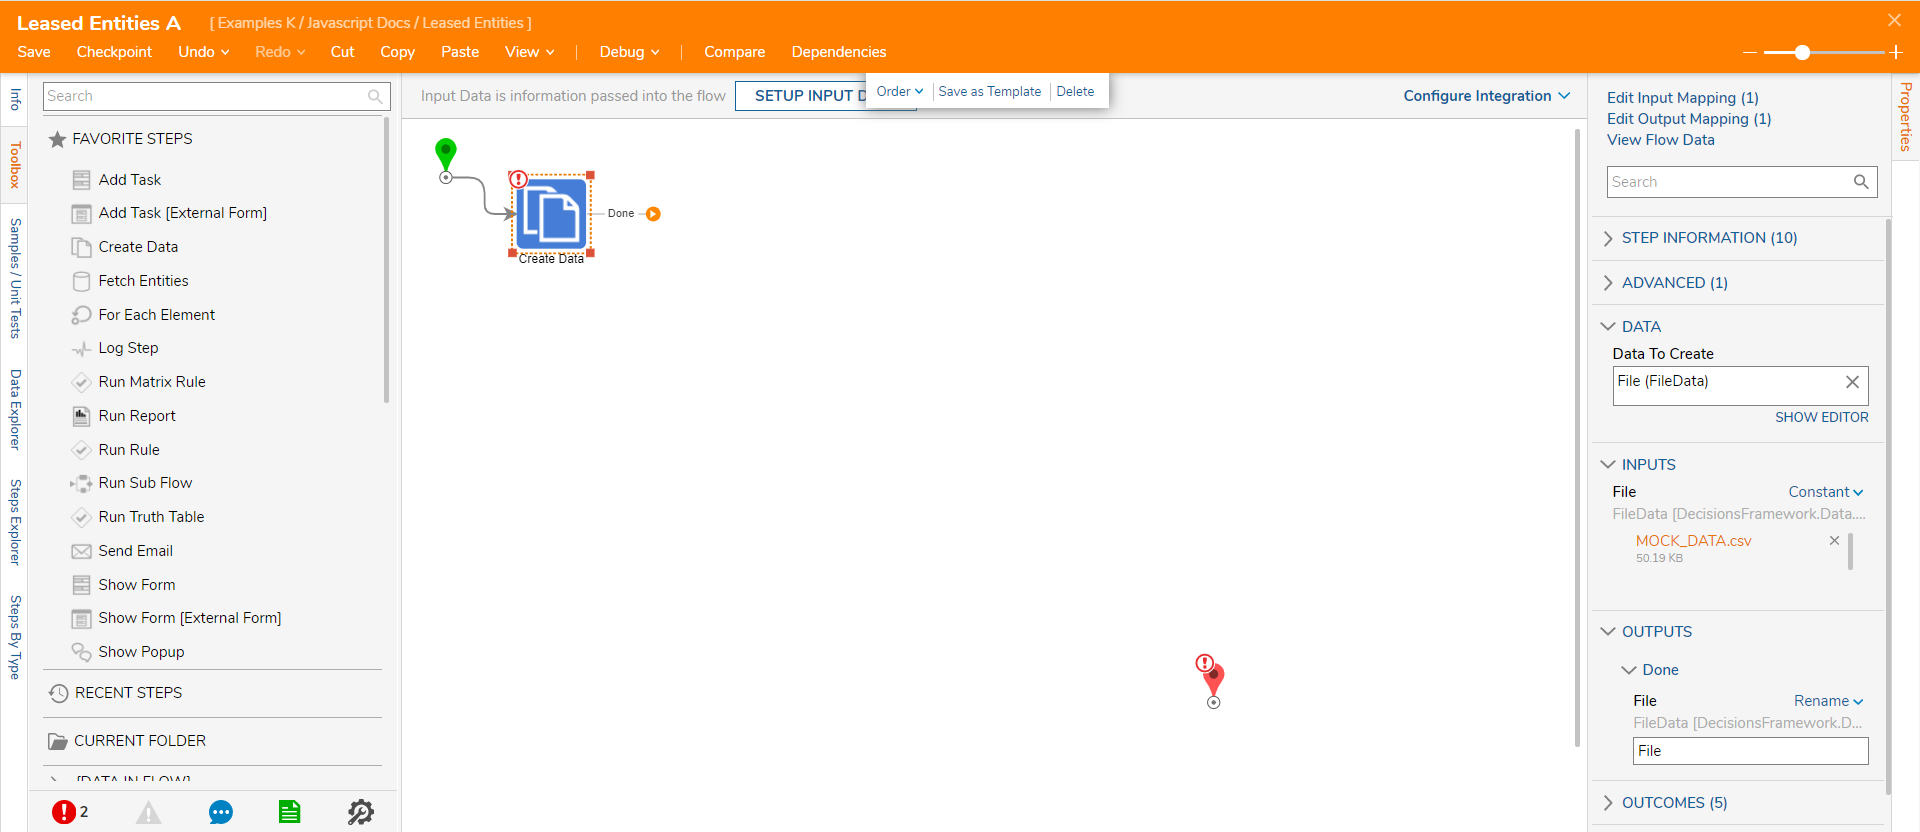
- In the Flow Designer, add Create Data step from the Favorite Steps category.
- Select the Create Data step and click Show Editor under Data to Create, name the Data, and define its type FileData. Select PICK to save and continue.
- Define a Constant CSV File for the file Input.
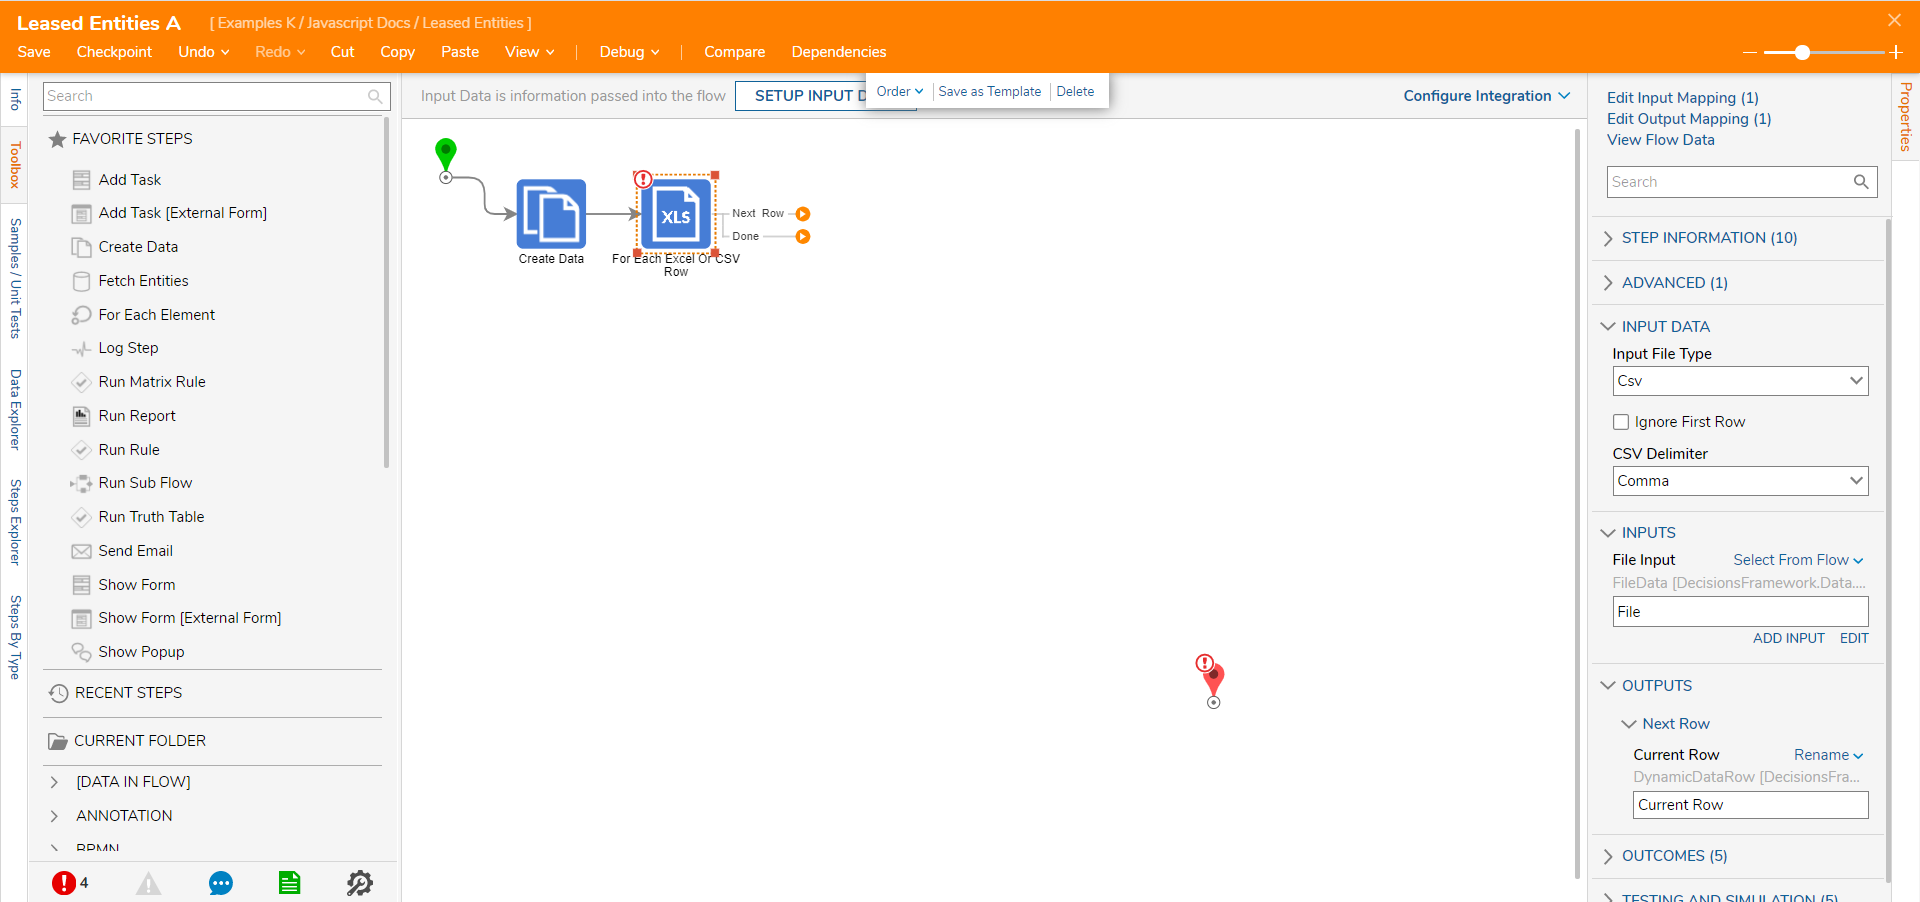
- Add a For Each Excel or CSV Row step from All Steps [Catalog] > Data > List > Excel and CSV category.
- Select For Each Excel or CSV Row step on the workspace to set it up.
- In the Input Data section, set Input File Type - CSV, Ignore First Row – true, CSV Delimiter – Comma.
- In the Inputs section for File Input, choose Select Value of the file that was defined in Create Data step.
- Connect Done outcome from For Each Excel or CSV Row step to the End Step in the Flow.
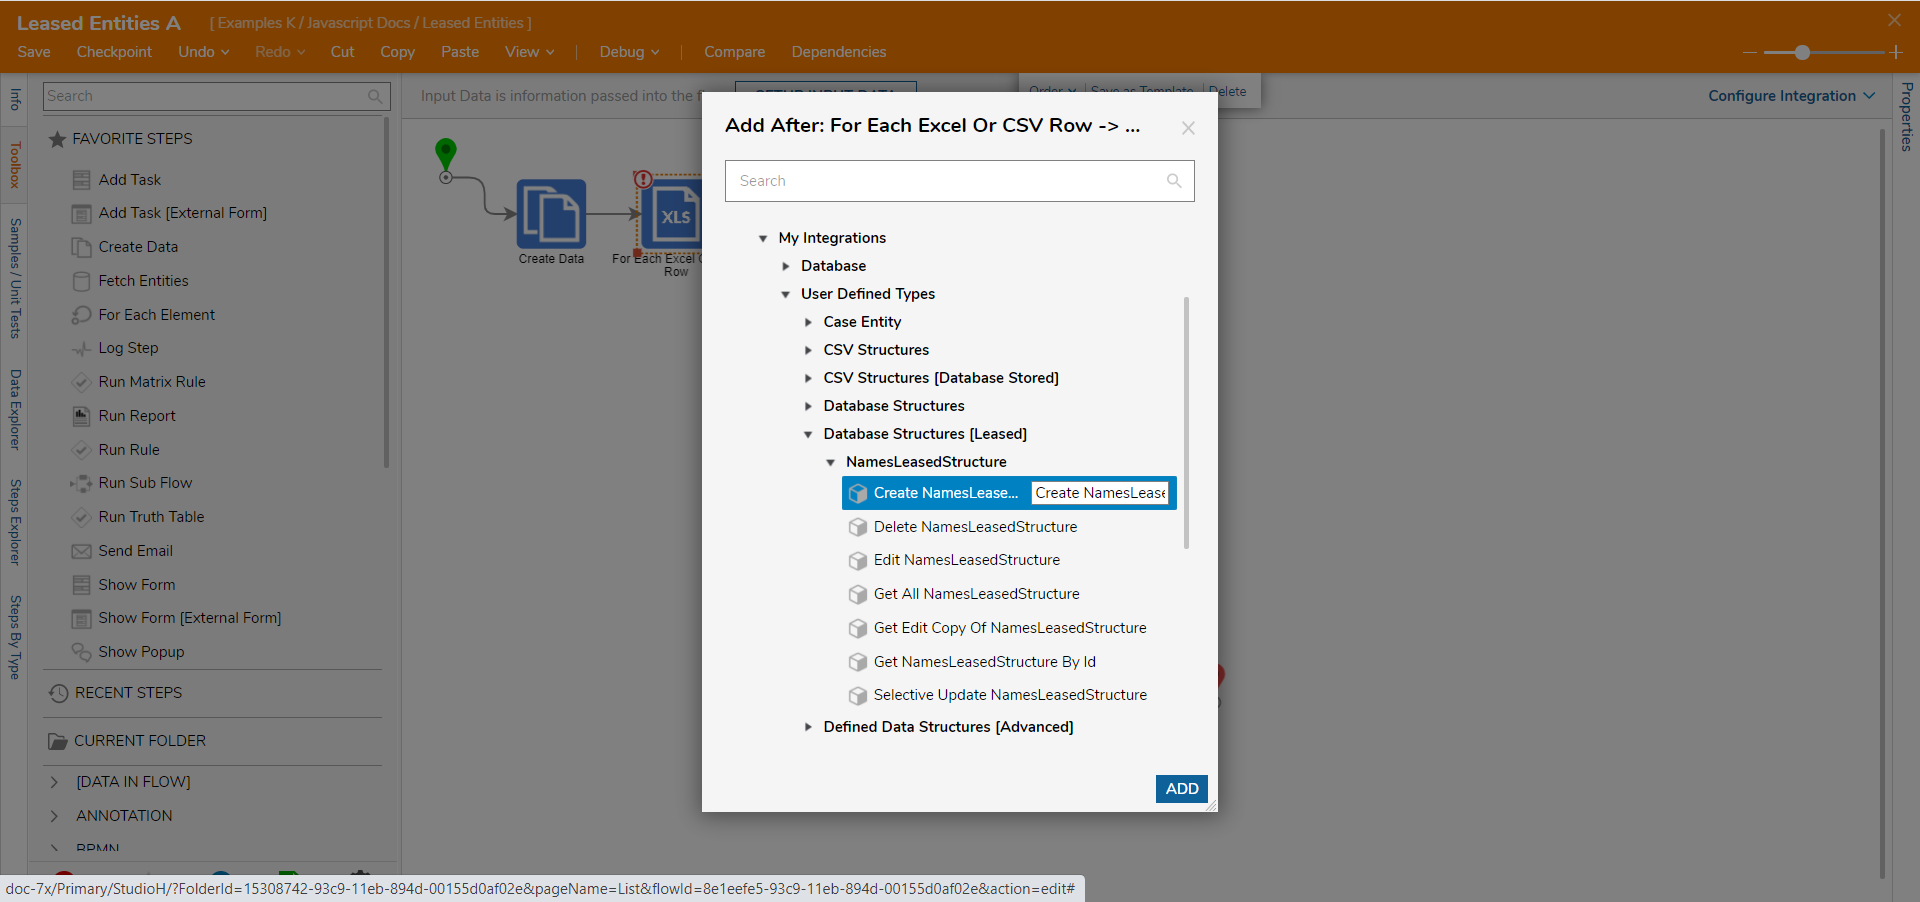
- On the Next Row outcome from the For Each Excel or CSV Row step, add Create NameLeasedStructure (generated by the System for our Leased Database Structure) from Integrations > My Integrations > User Defined Types > Database Structures [Leased] > NameLeasedStructure category.
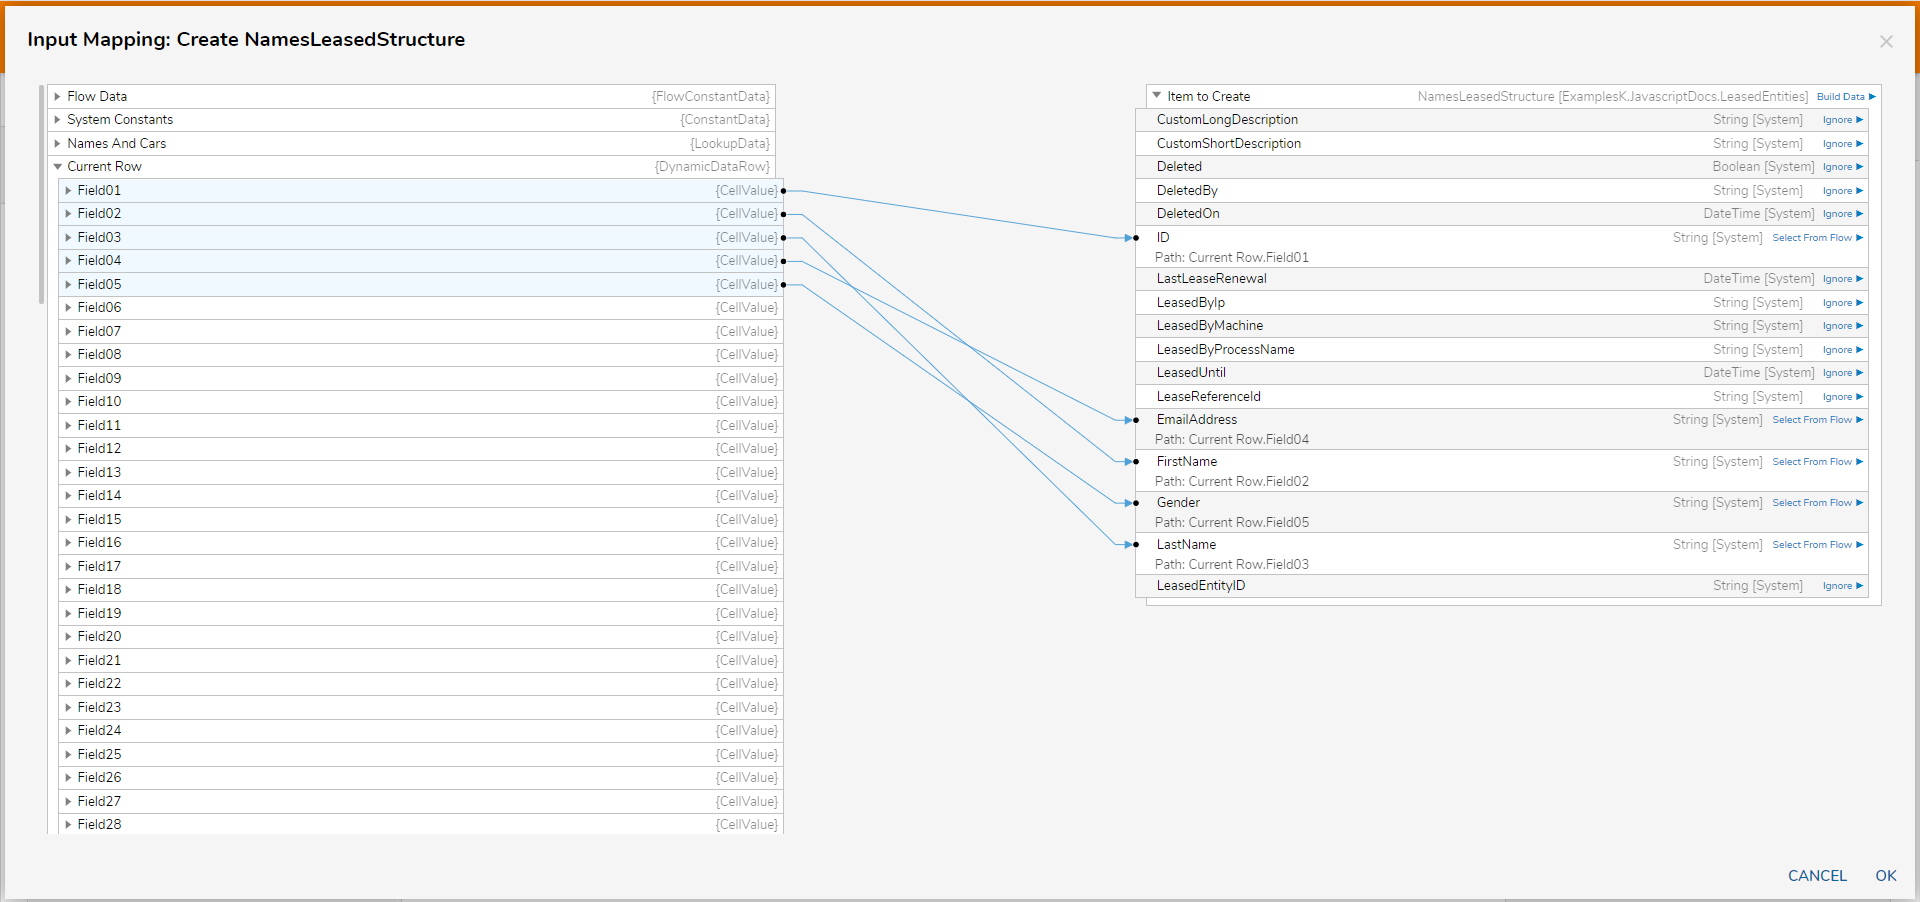
- Select Show MappingEditor for Create NameLeasedStructure step.
- In the Mapping Editor, choose Build Data for Item to Create.
- Map the data of Fields.Text Value from the CSV Row to the properties of the NameLeasedStructure object. When finished, save and close Mapping Editor.
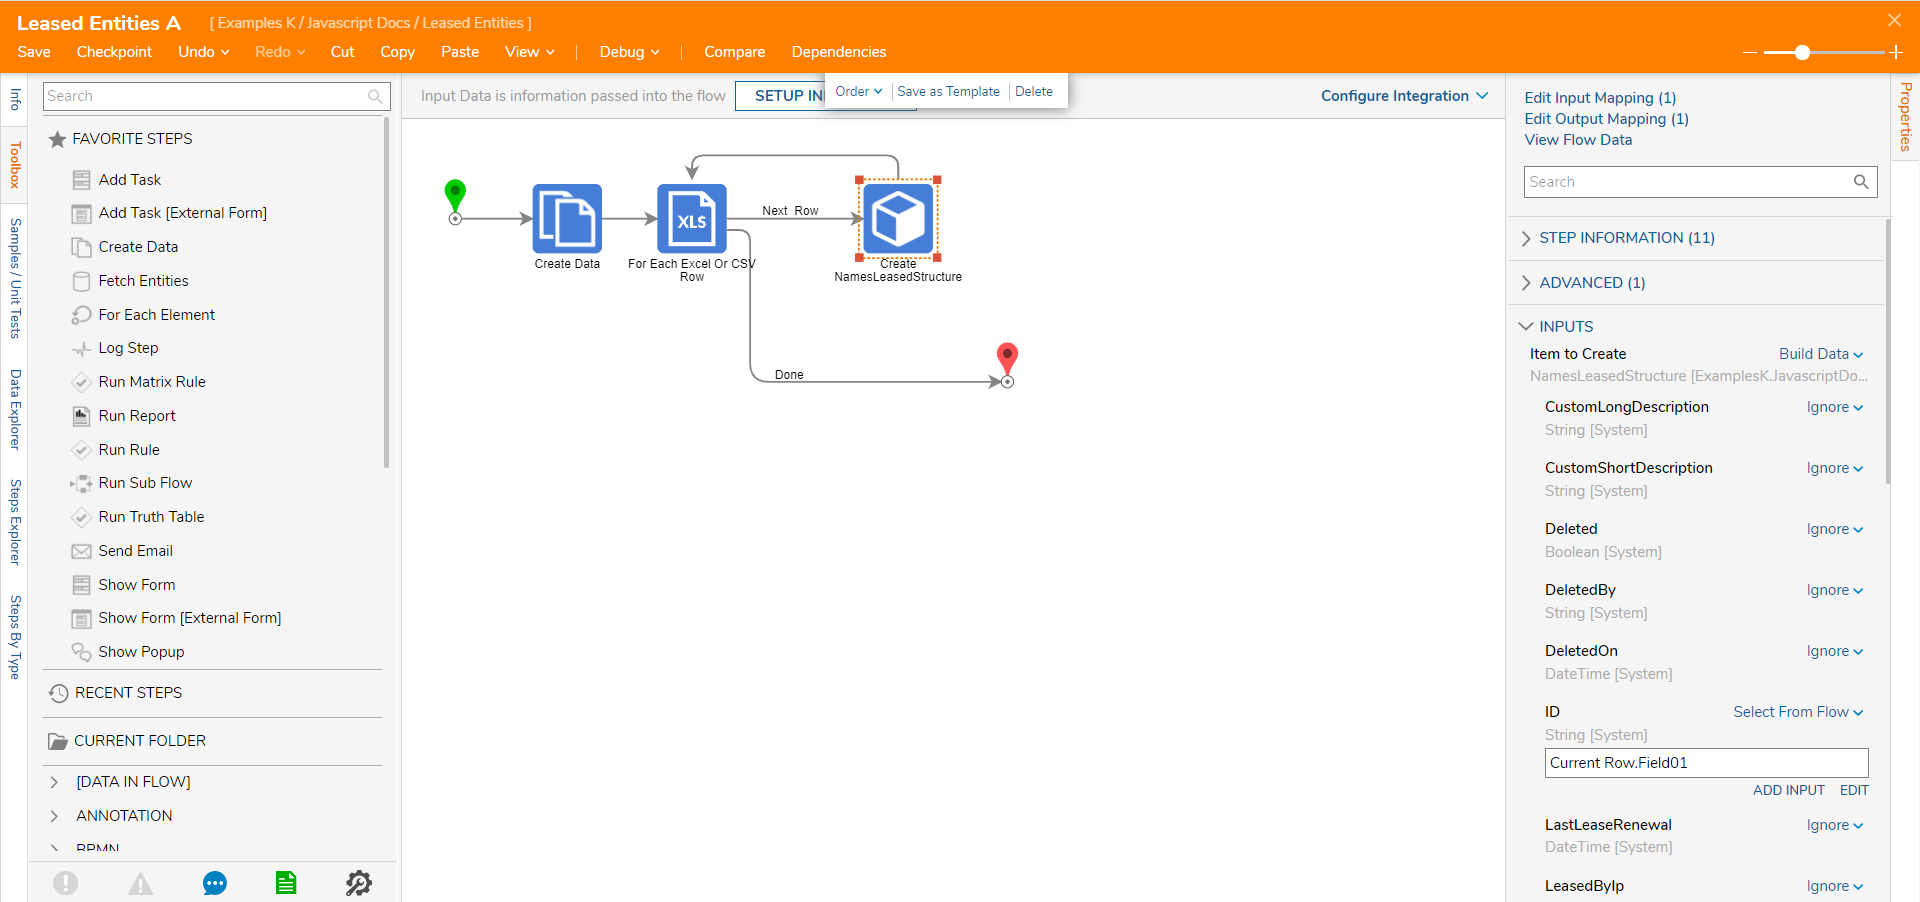
- In the Flow Designer connect Done outcome from Create NameLeasedStructure step back to For Each Excel or CSV Row step.
- This completes the Flow, save and close the Flow Designer.
Leased Entities in the Workflow Process
Next, this example will demonstrate how to use Leased Entities in the Workflow process.
- In the Designer Folder, create another Flow. Name the Flow and click CREATE to proceed to the Flow Designer.
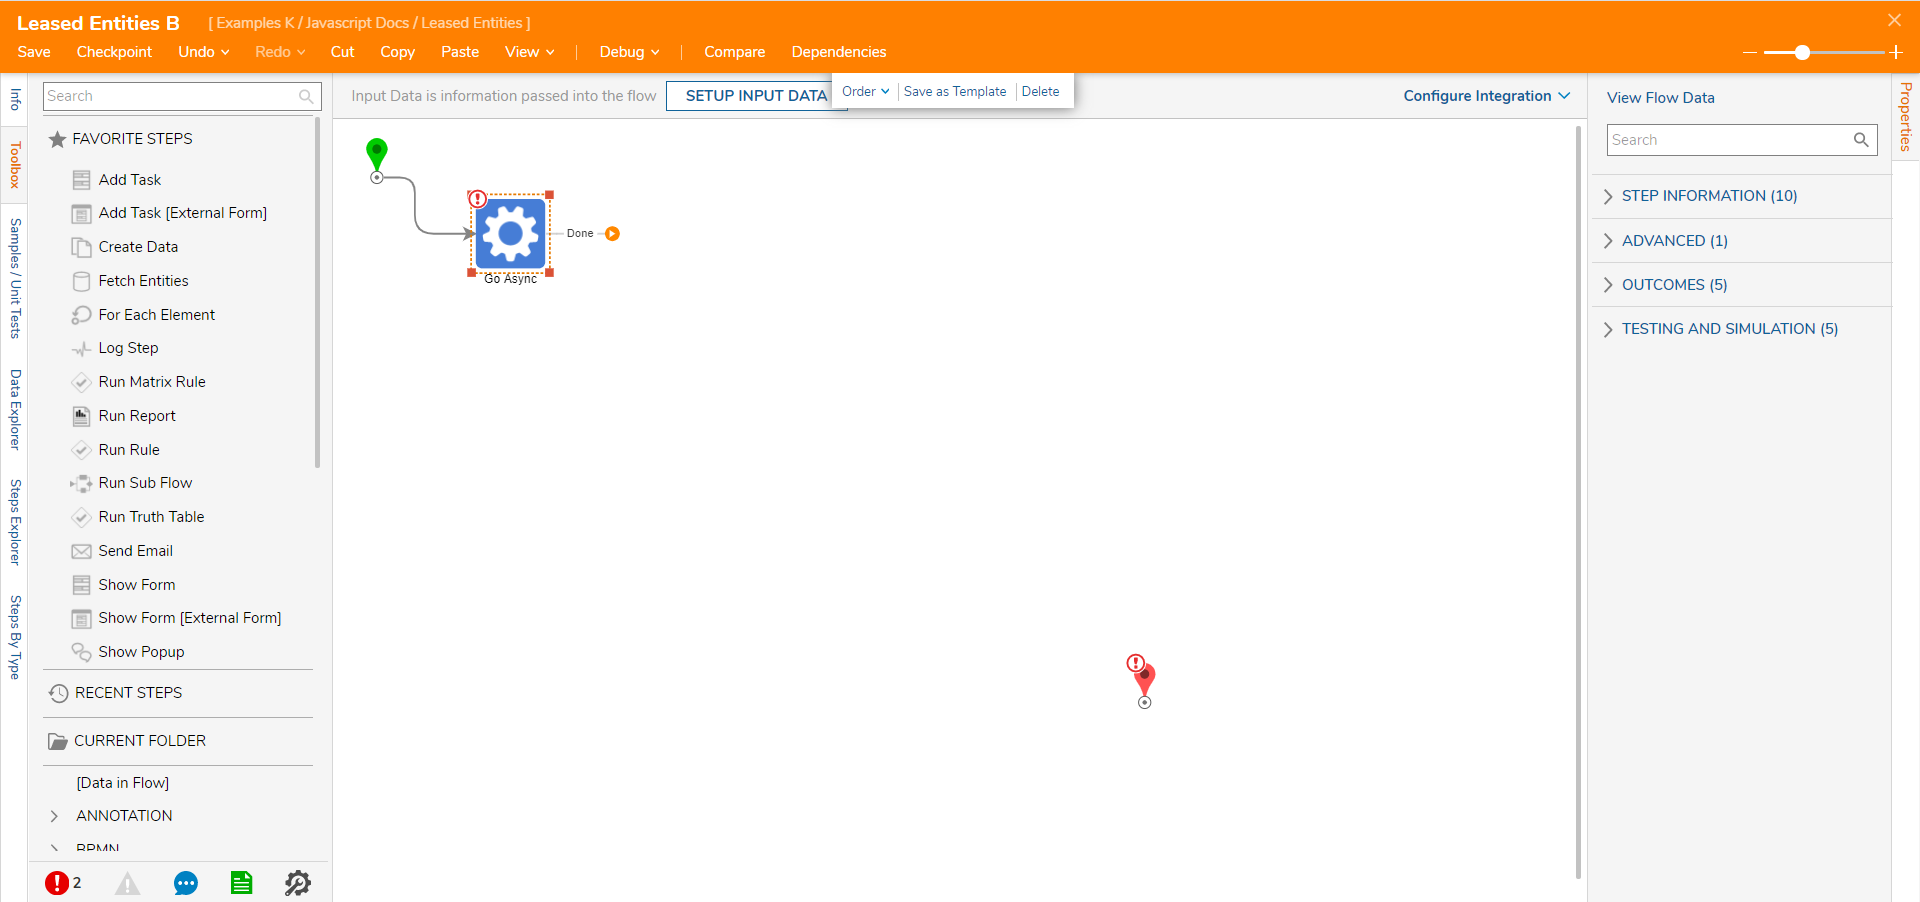
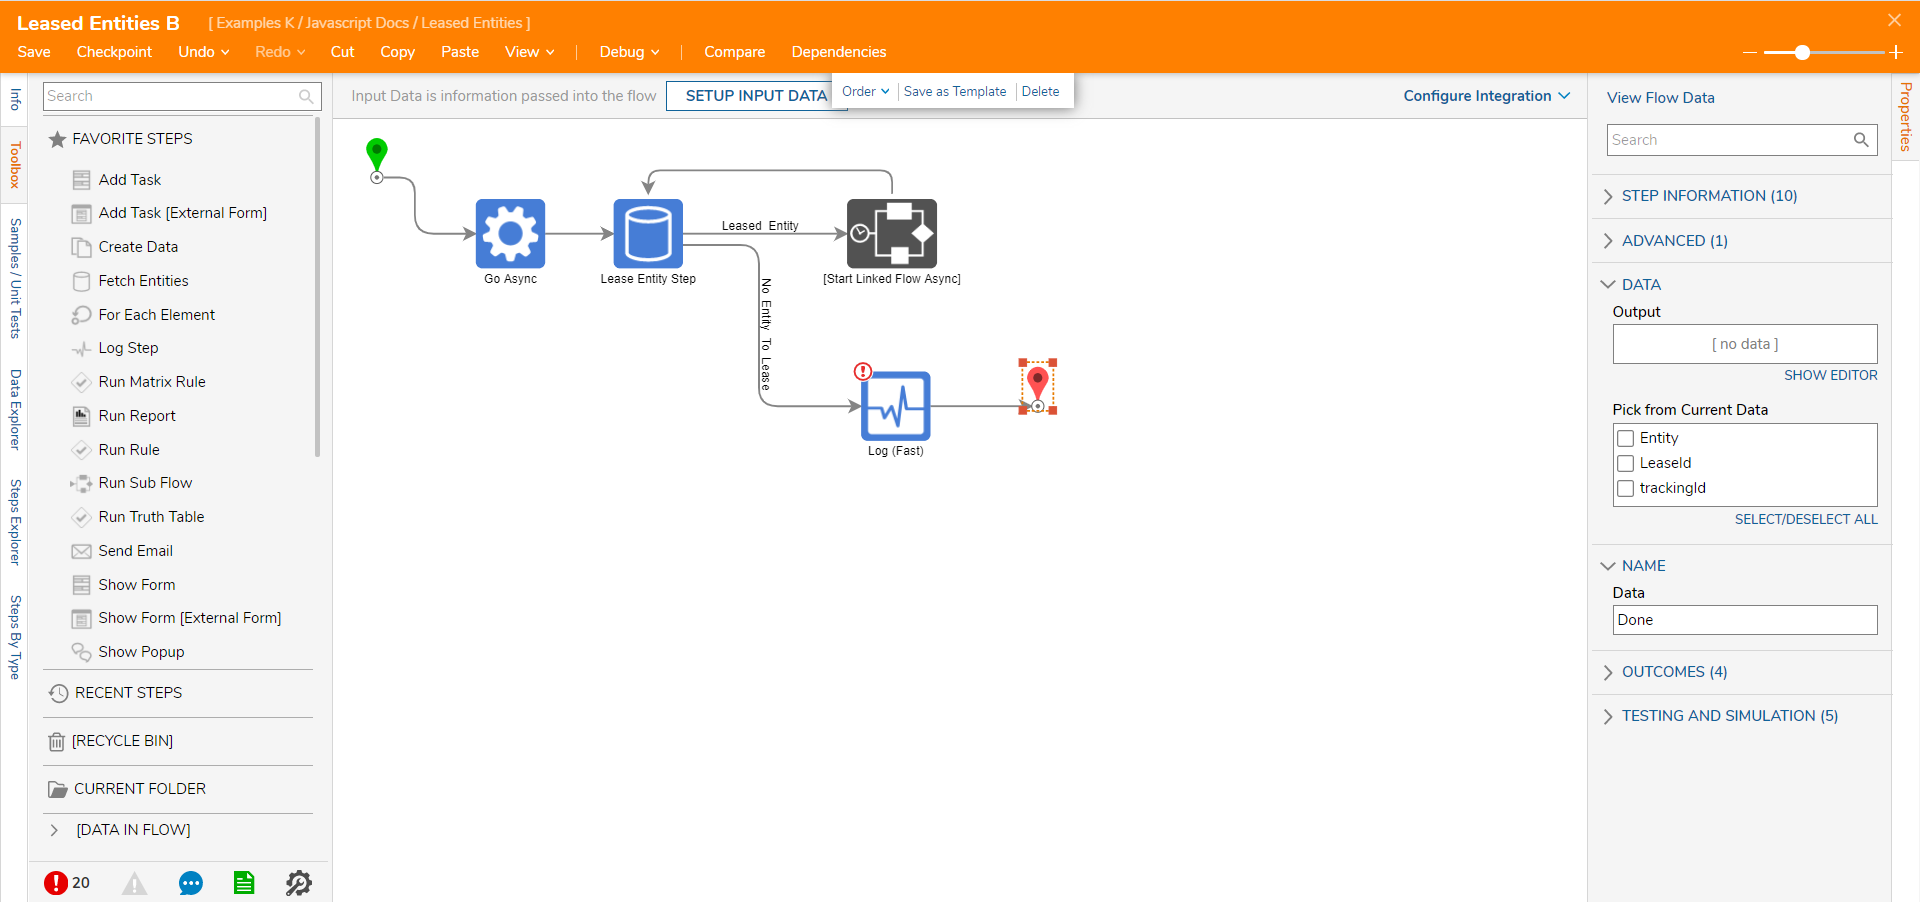
- In the Flow Designer add a Go Async [Queue] step from All Steps [Catalog] > Flow Management category. Use this step to run the Flow Asynchronously on the Work Queue.
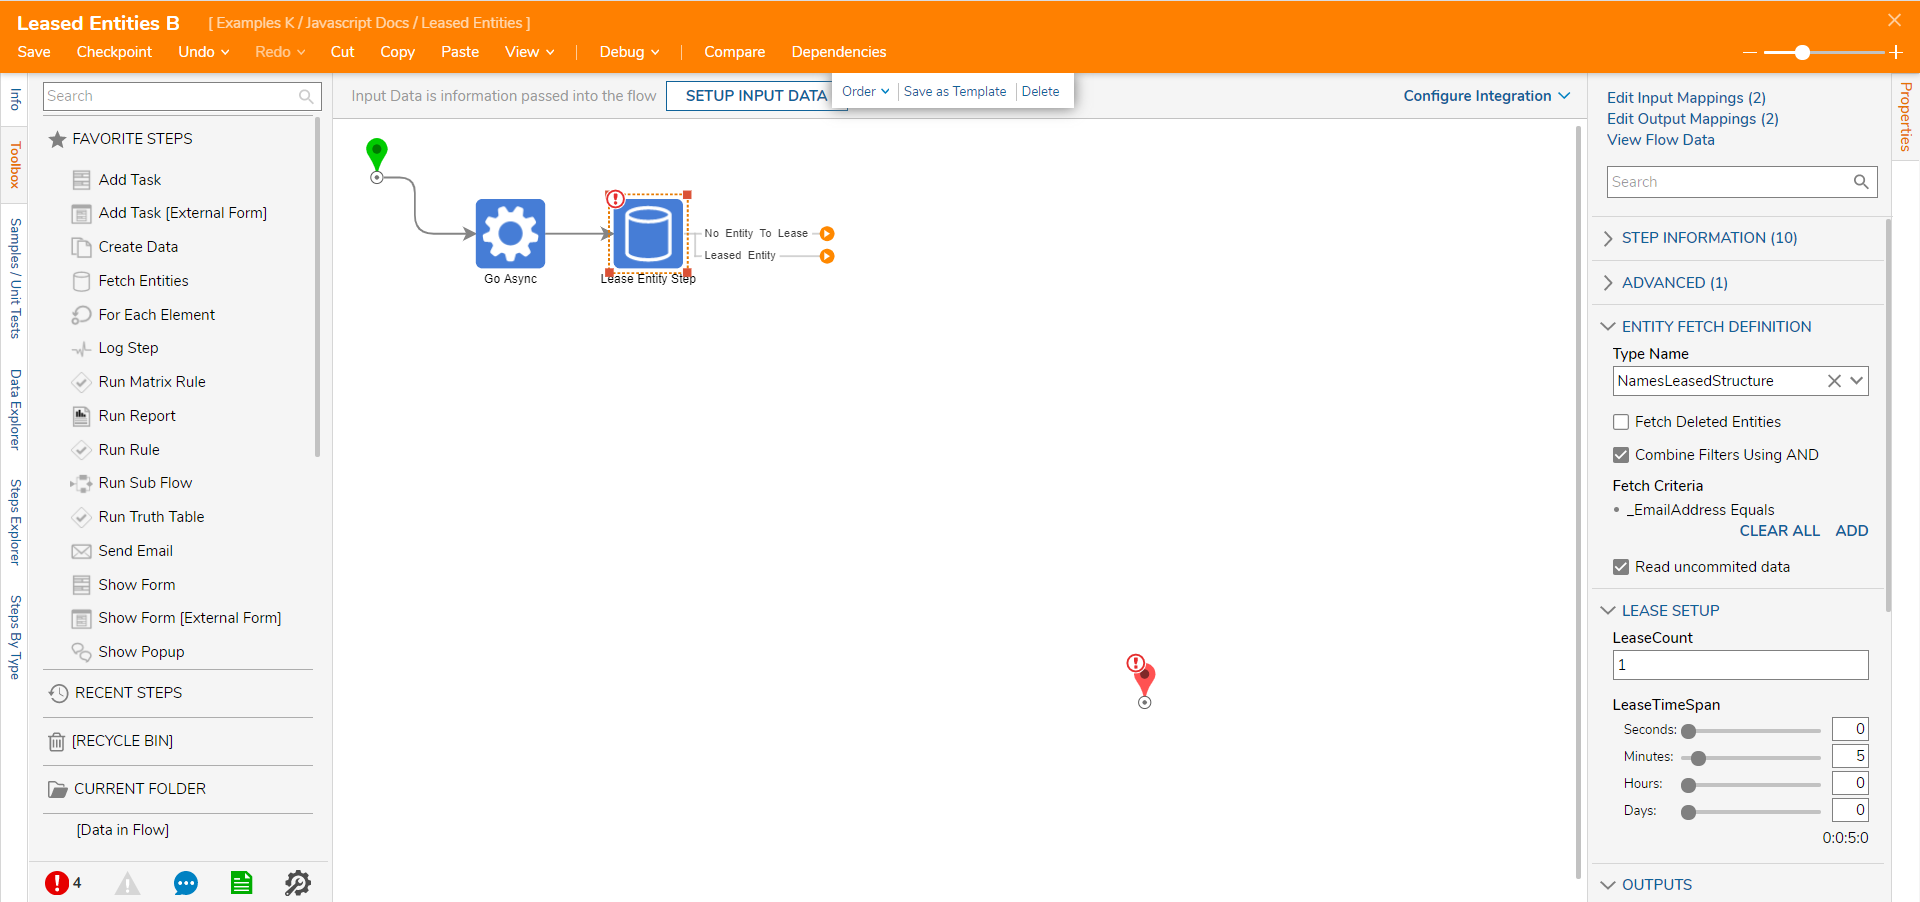
- Add Lease Entity Step from Integrations > All Integrations > Entity Framework > Leasing category.
- In the Entity Fetch Definition section select the Leased Entity Structure as Type Name.
- Pick a Field to Fetch On and Condition. Note, the field to Fetch on is not recommended to be Entity ID.
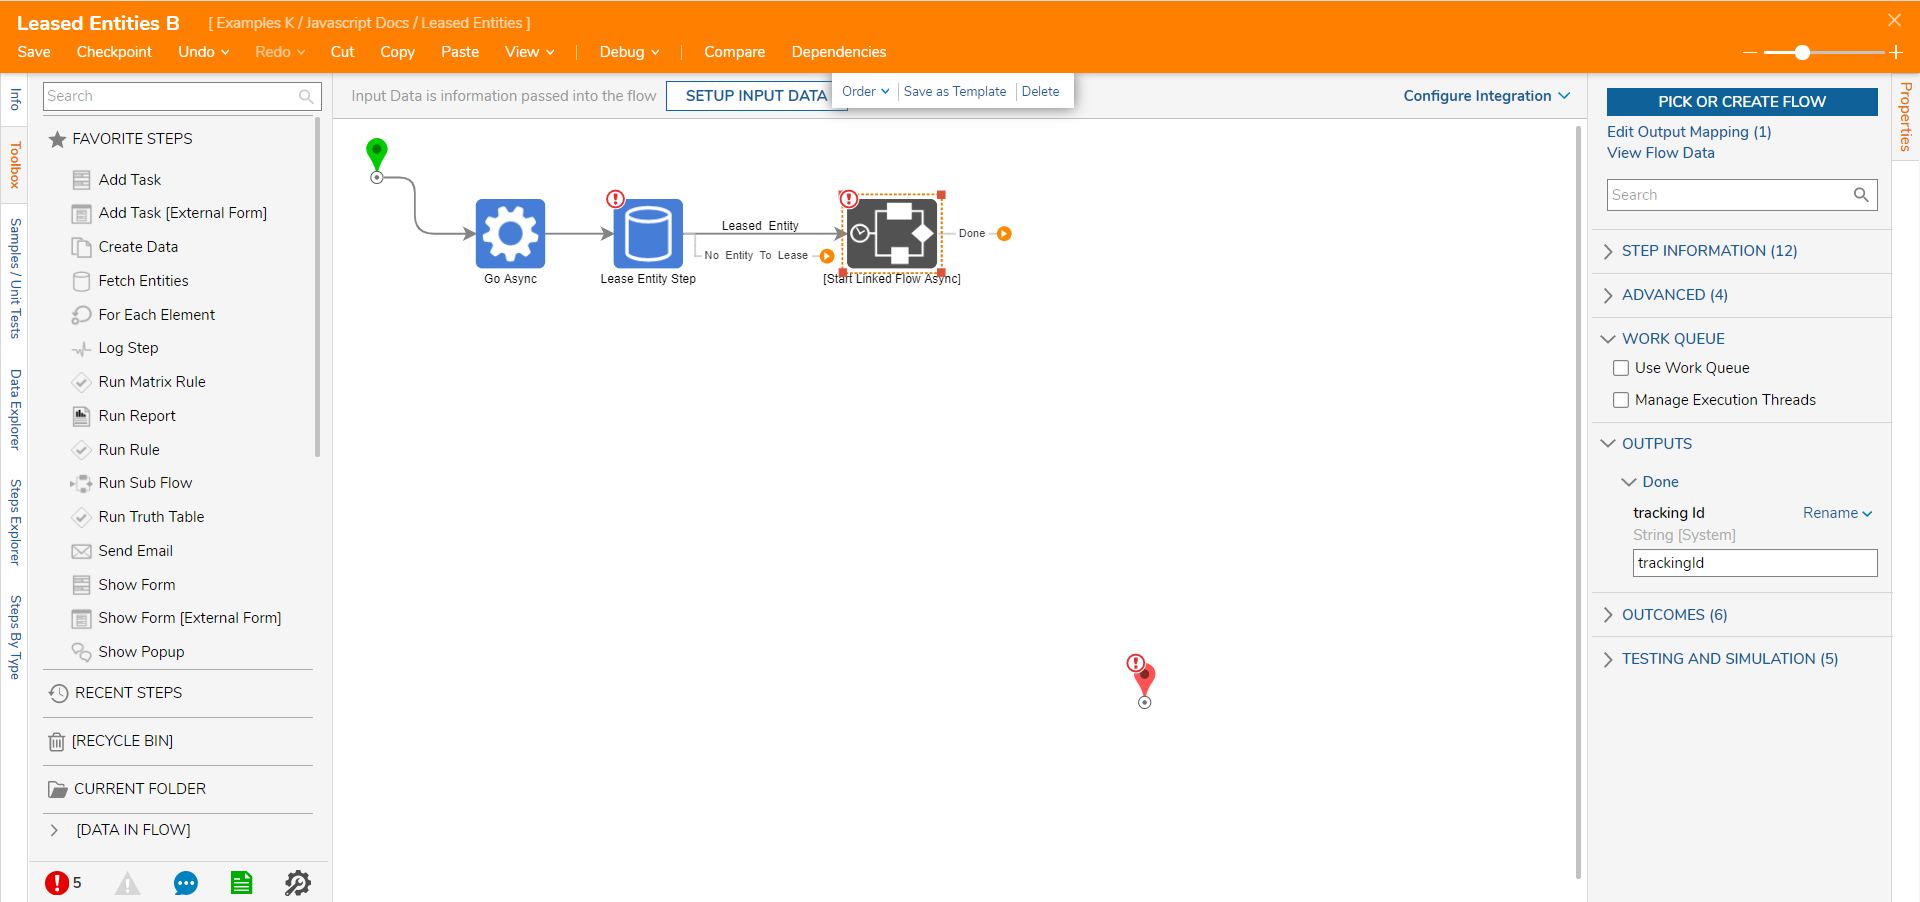
- Next, on Leased Entity outcome from Lease Entity Step, add [Start Linked Flow Async] step from Flows, Rules, Forms, and Reports > Flows category.
- Then, on the [Start Linked Flow Async] Step select Pick or Create Flow.
- On the resulting window, name the Flow and select Create to proceed to the Flow Designer.
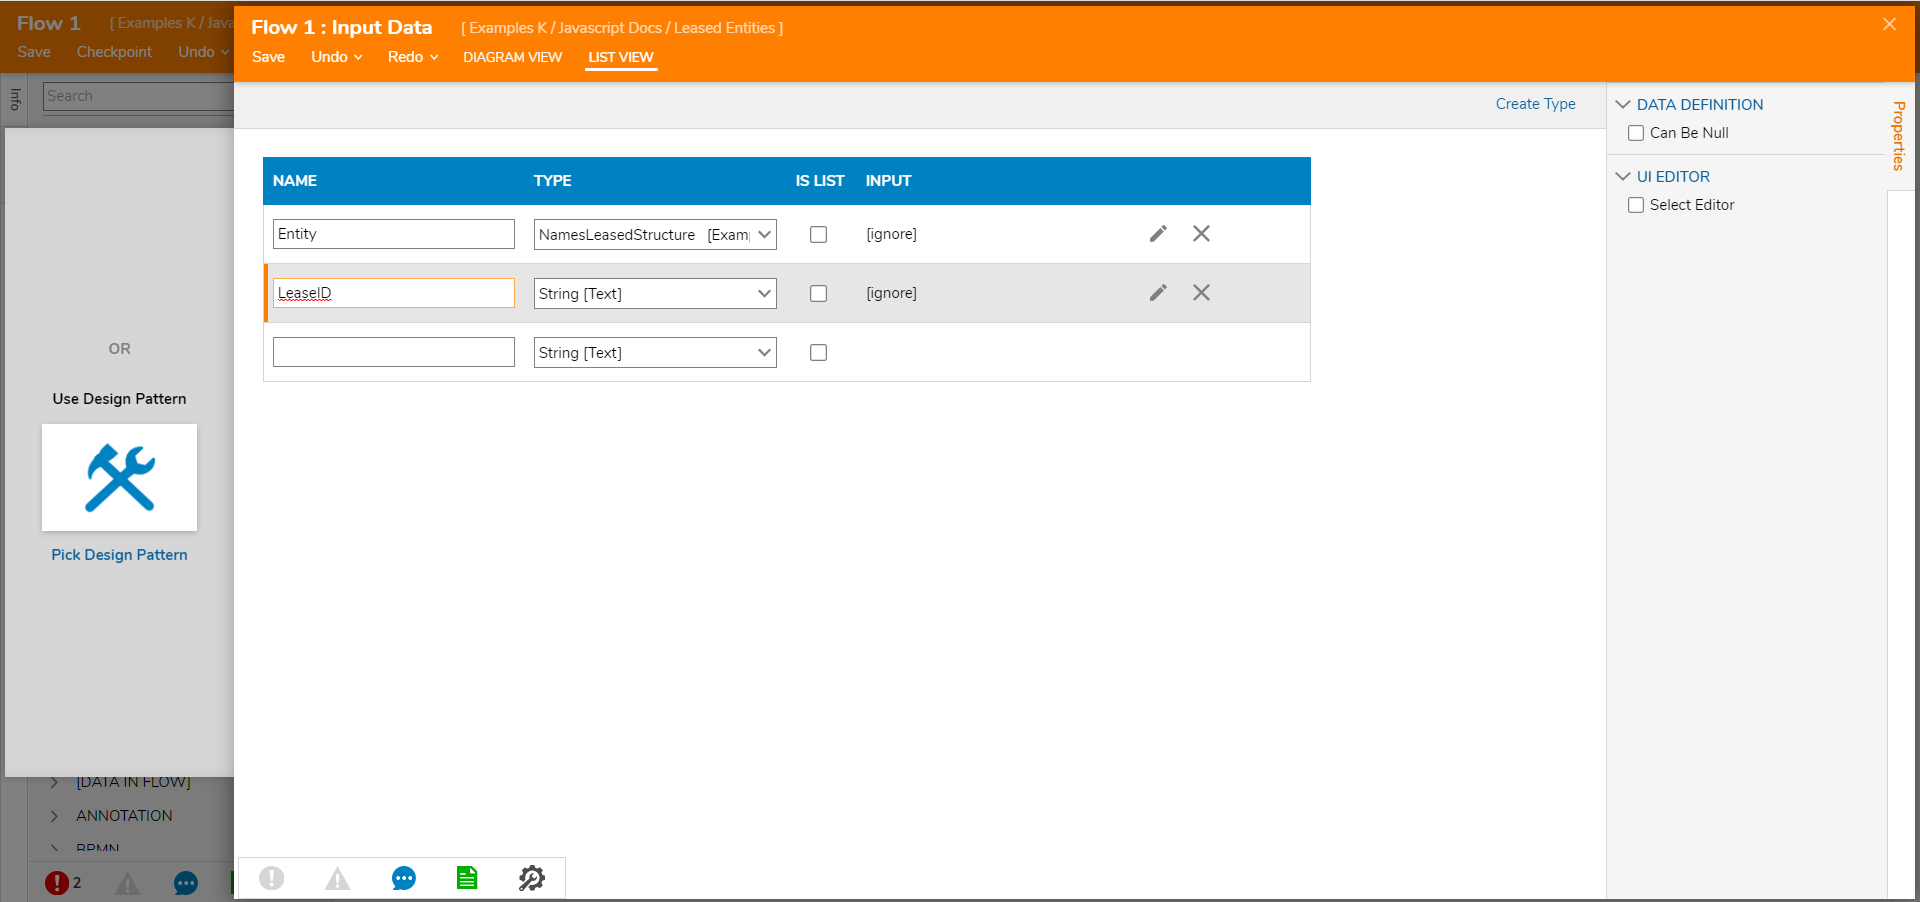
- In the Flow Designer, select Start Step on the workspace. Then, an Input of the Leased Entity Structure Type.
- Add String Input data to be LeaseID for the Leased Entity.
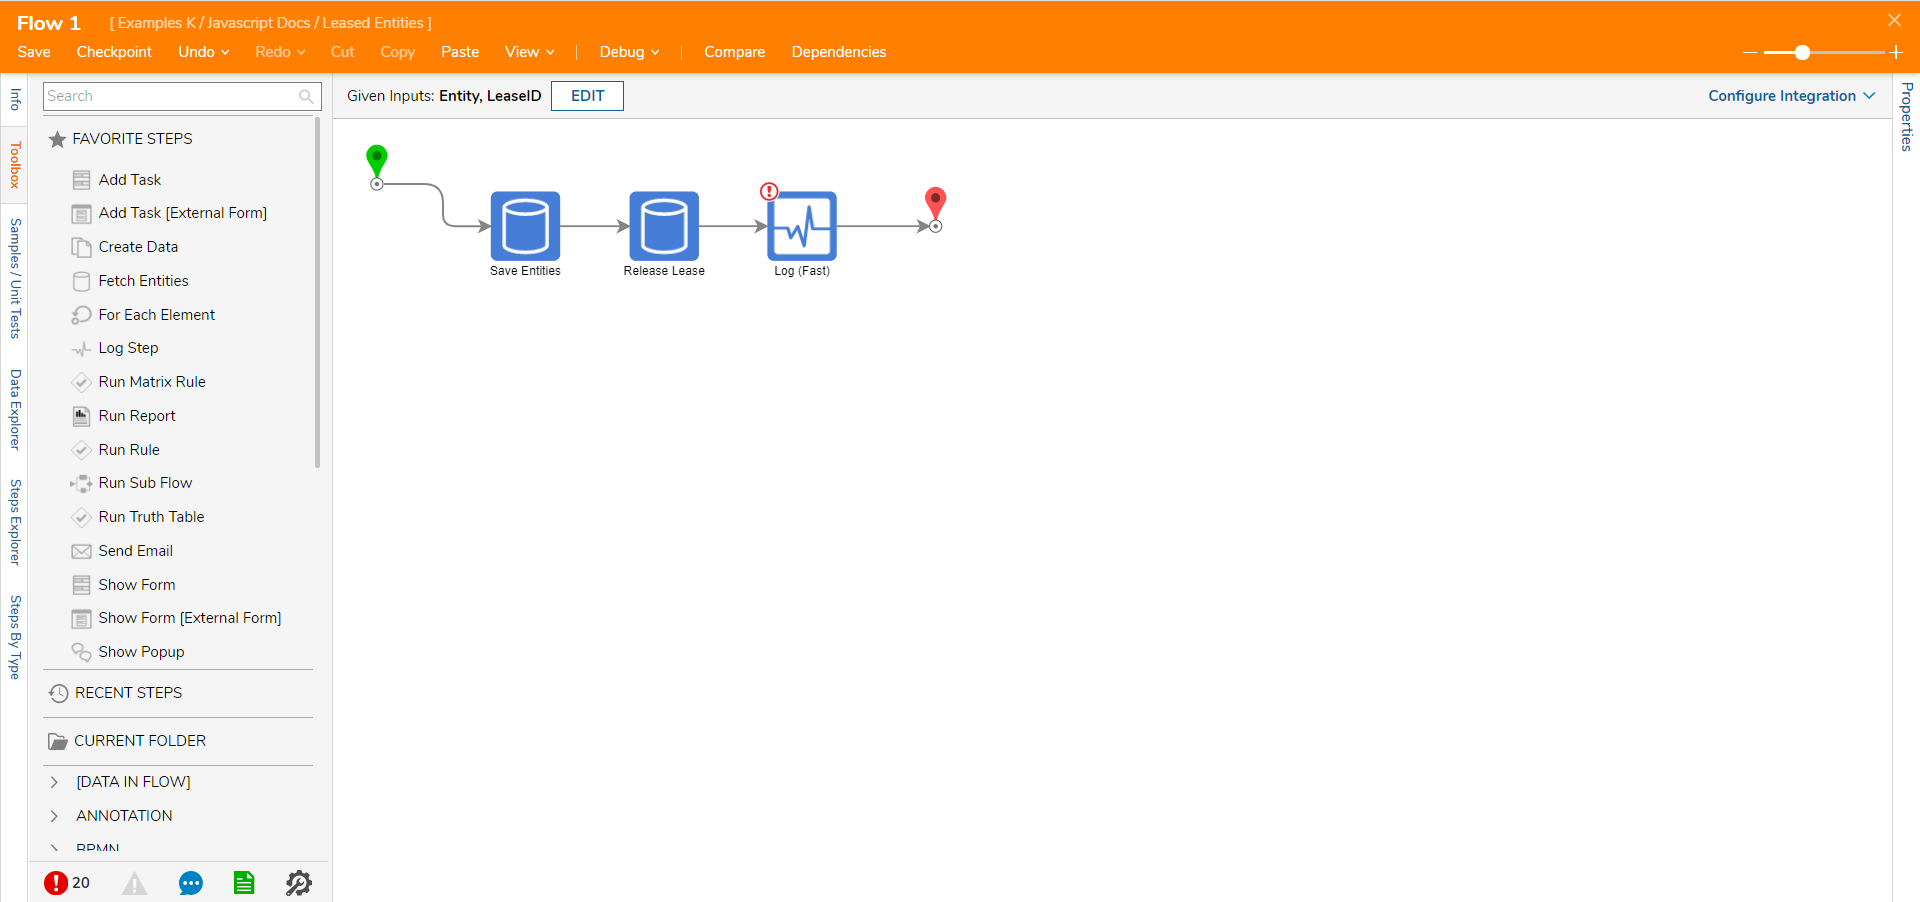
- Add a Save Entities step from Integration > All Integrations > Entity Framework category after Start Step in the Flow.
- Select the Save Entities Step and pick the Leased Entity Structure as a Type for Entity Save Definition.
- Select Show Mapping Editor for the Save Entities Step. In the Mapping Editor, Build Data for Entity to Save.
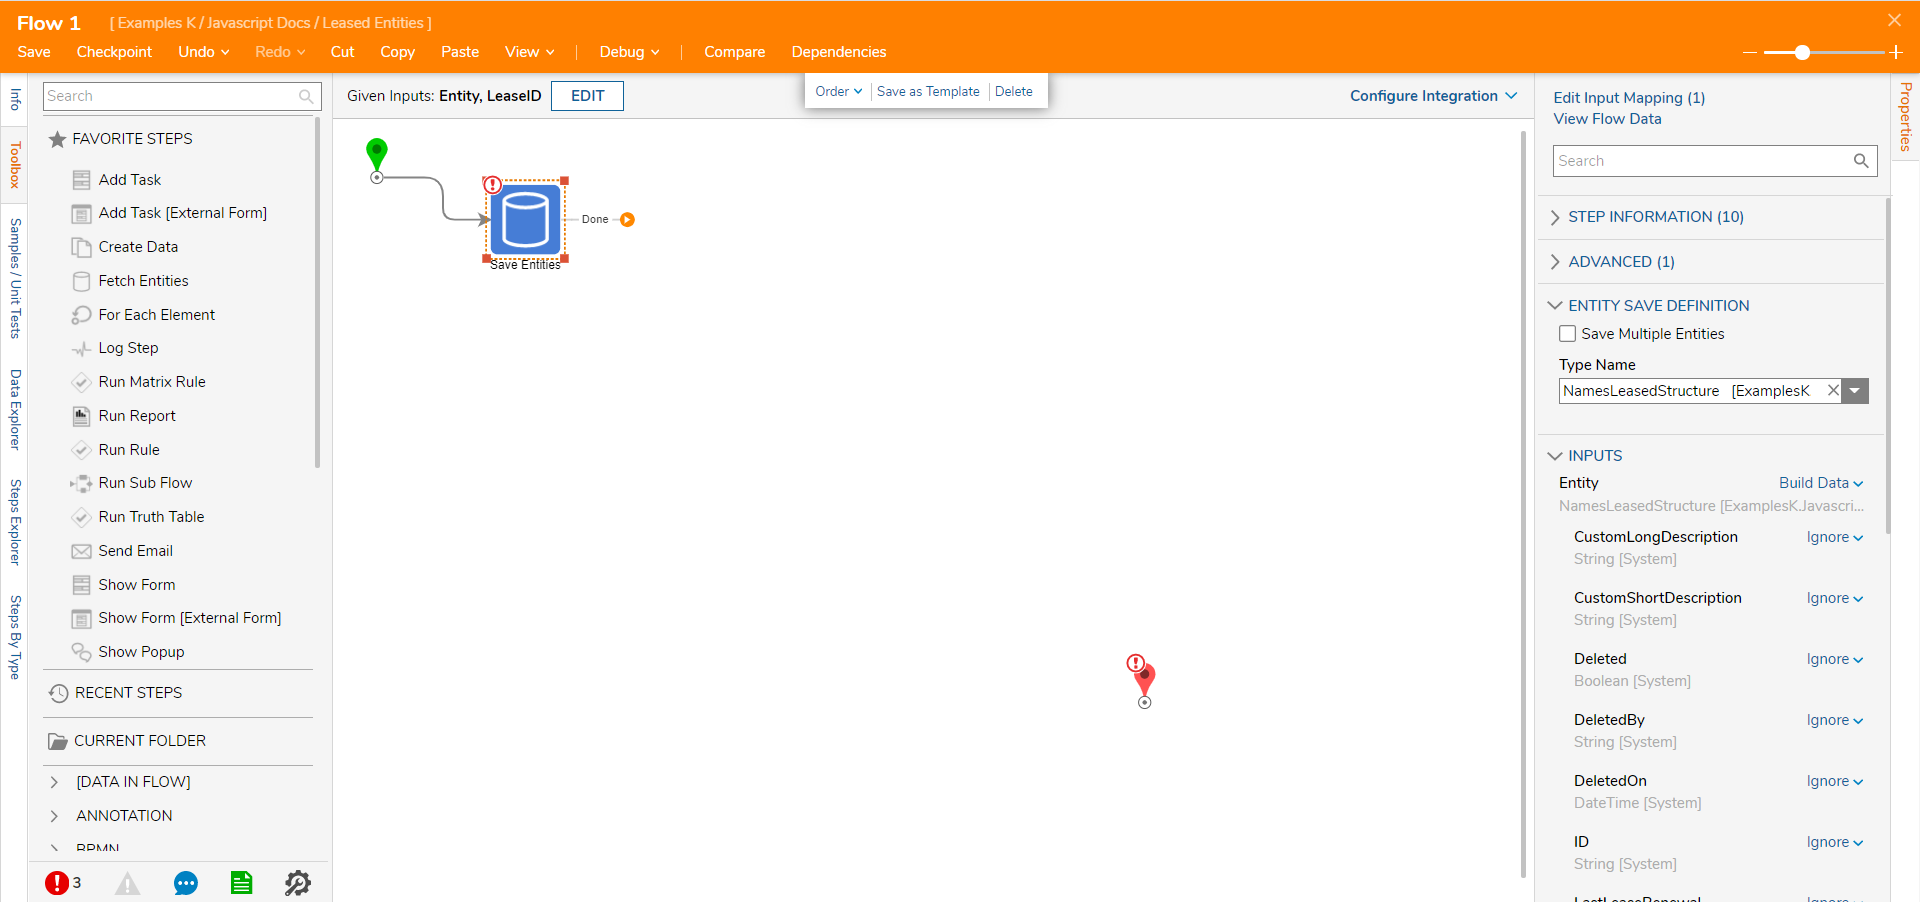
- Map all fields from Entity Flow Input to Entity to Save except ID. For the ID field, use Text Merge.Plain Mapping Type and click Show Editor.
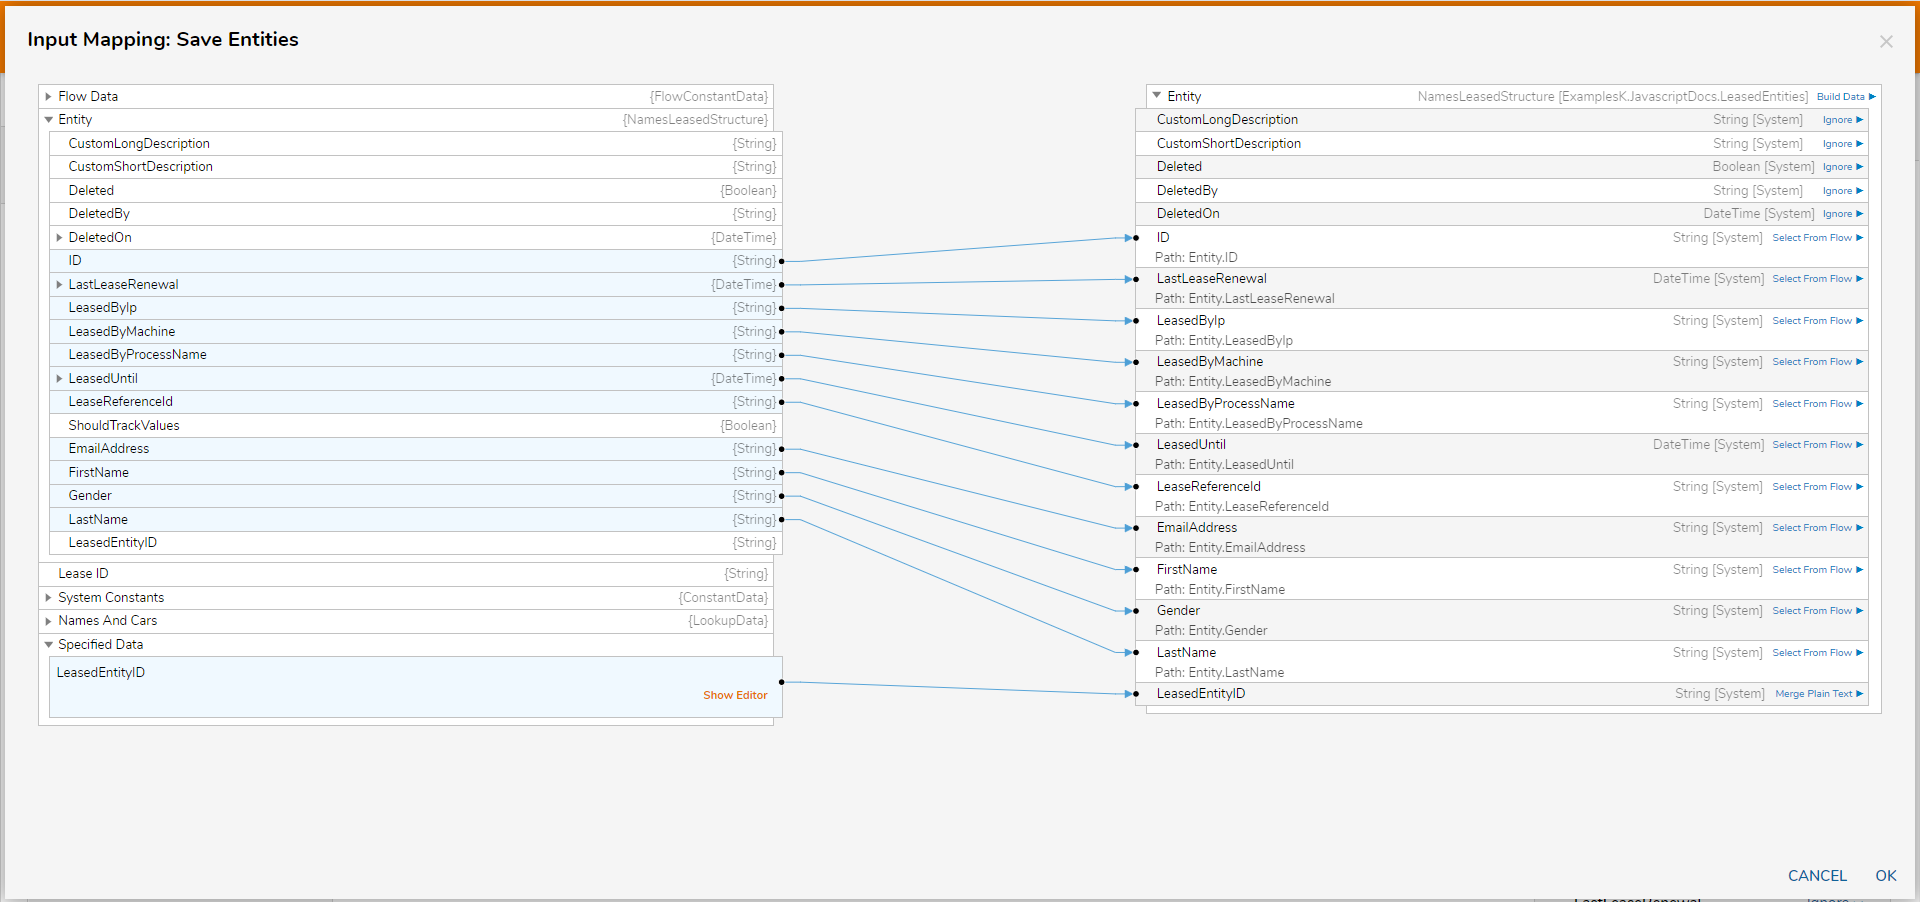
- In the Merge Text Editor, use the Entity ID field along with Flow Data Start Time to modify Entity ID. Click SAVE.
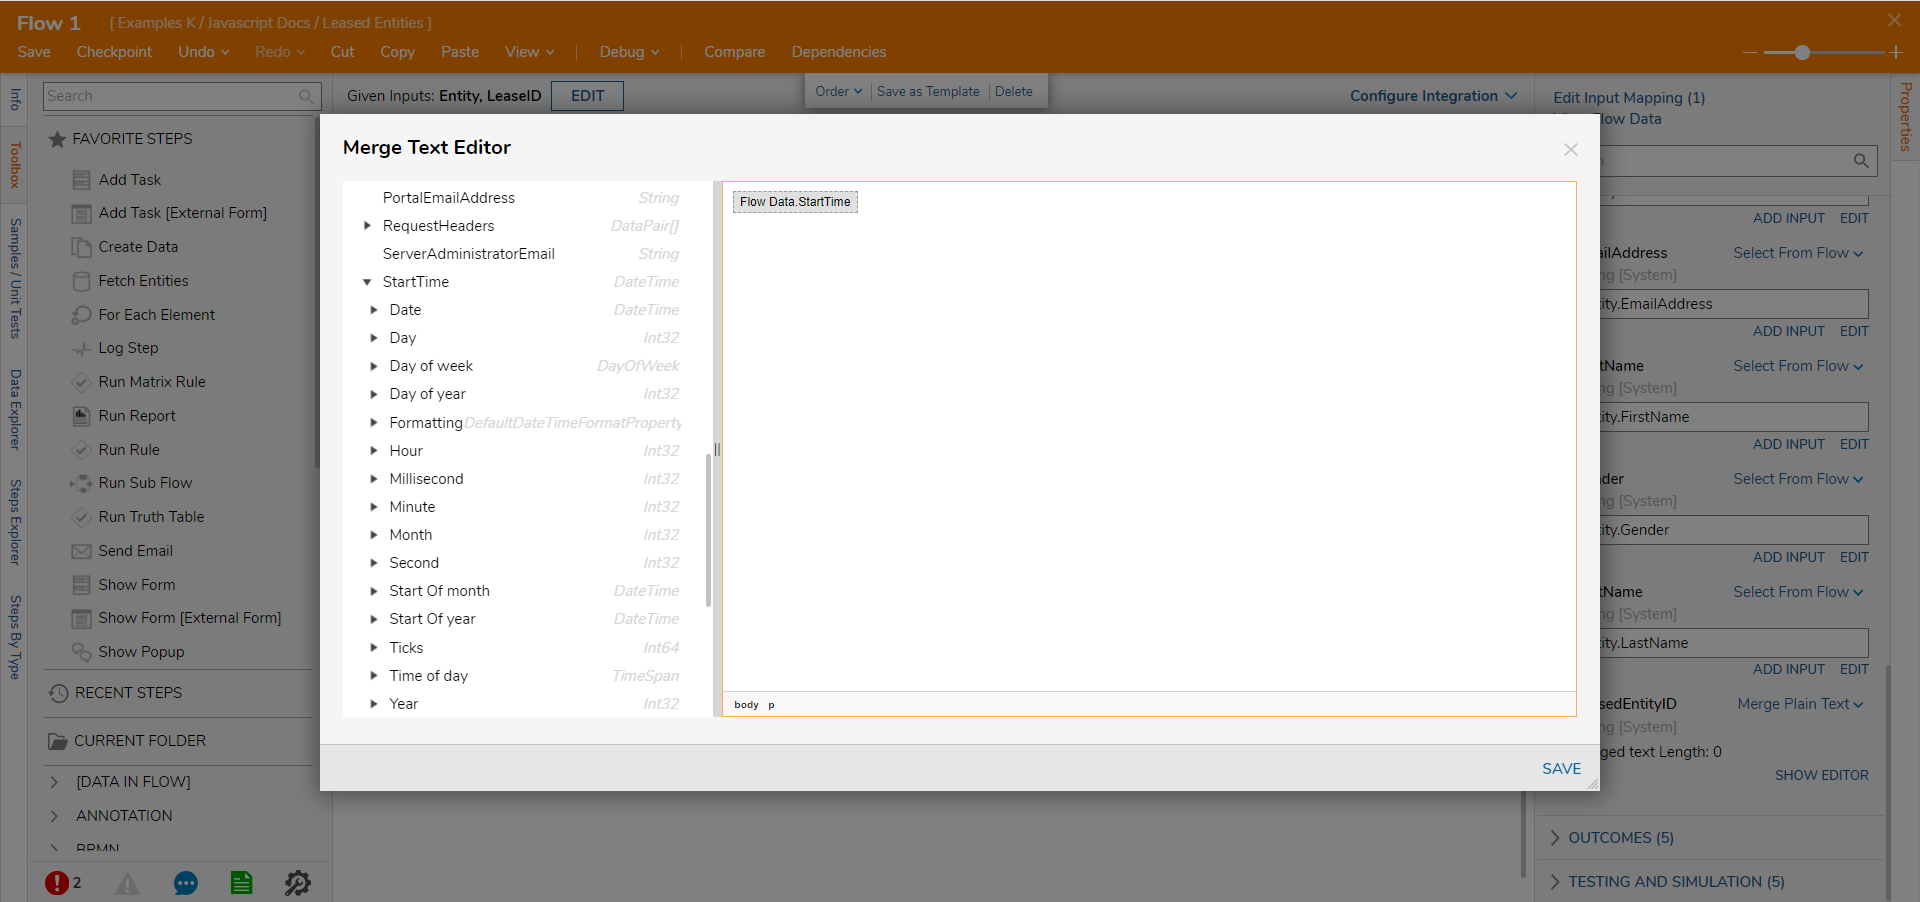
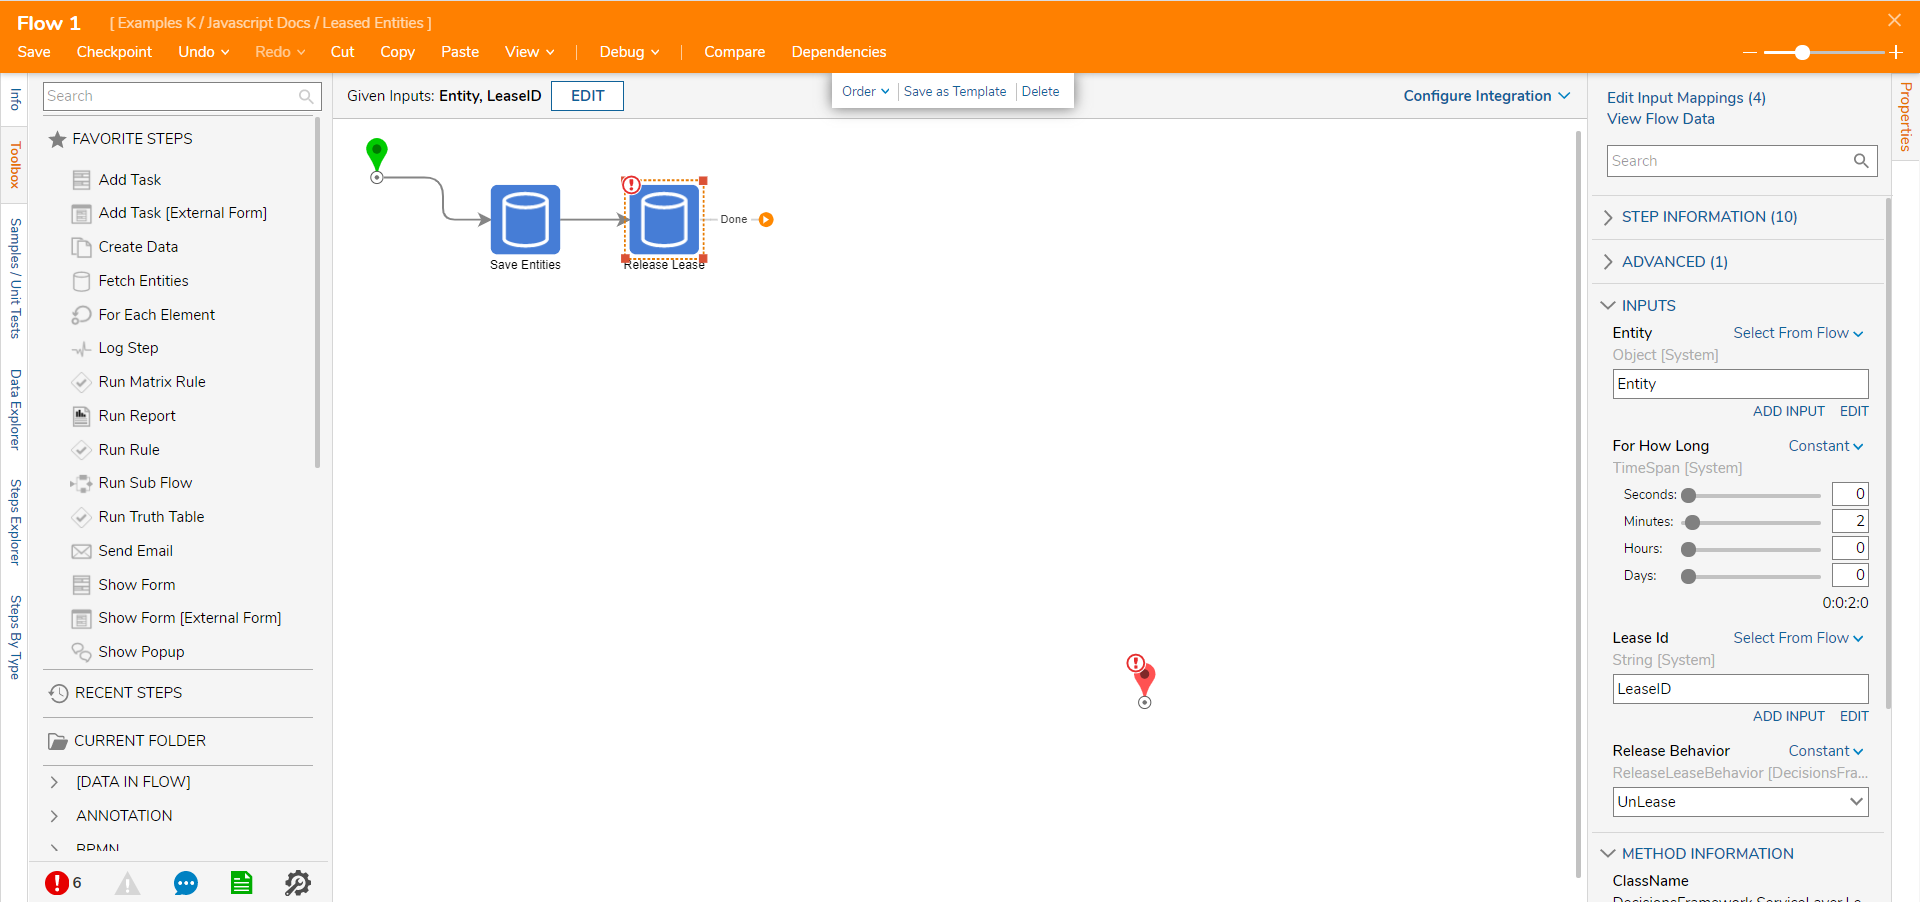
- Add Release Lease Step from Integration > All Integrations > Entity Framework > Leasing category.
- Map Entity Flow Input Data to entity field, LeasedID Flow Input Data to leasedId field, and set up Constant time For How Long field.
- Add Log (Fast) step from All Steps [Catalog] > Flow Management category.
- Select Show Mapping Editor for Log (Fast) step.
- In the Mapping Editor, select ConstantWarn level for Log, Ignore all Logs except log01. For log01 we pick Text Merge.Plain Mapping type and click Show Editor.
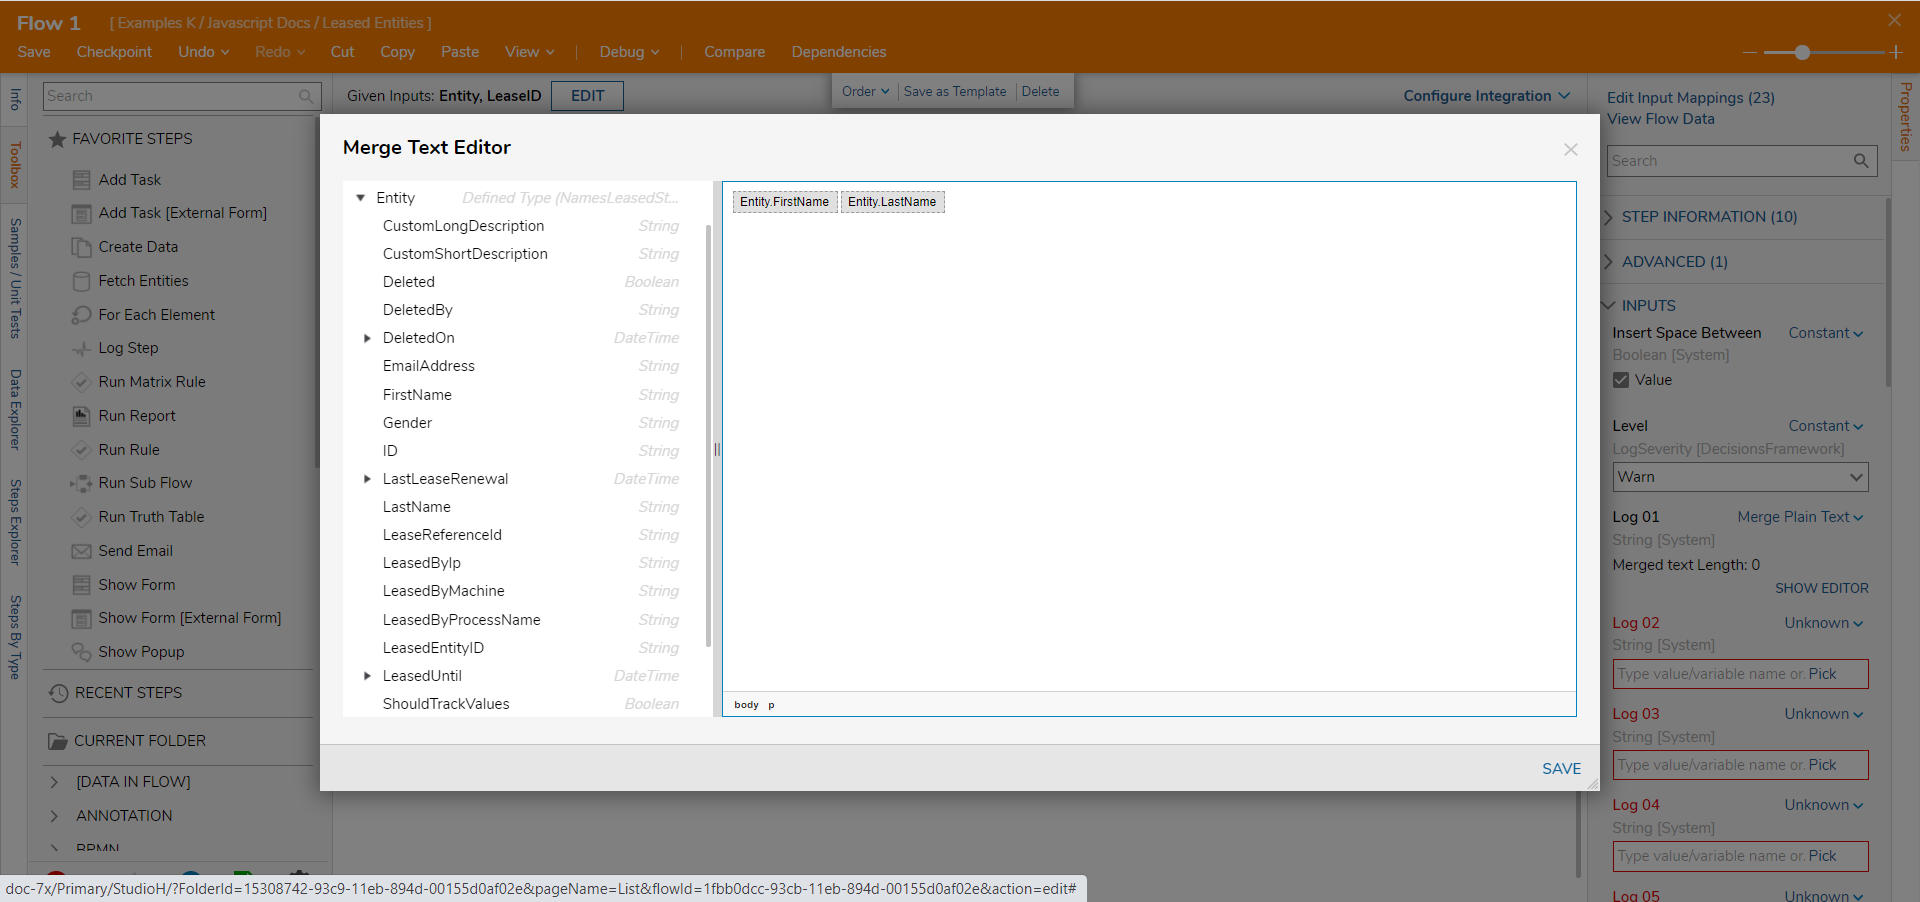
- In the Merge Text Editor, use the Entity’s fields to write to the Log. Select SAVE.
- Back in the Flow Designer, connect Done outcome from Log (Fast) step to the End Step. This completes the Linked Flow.
- Save and close the Flow Designer.
- Back in the Main Flow on the No Entity to Lease outcome from Lease Entity Step, add the Log (Fast) Step from All Steps [Catalog] > Flow Management category.
- Connect the Done outcome from Log (Fast) step to the End Step in the Flow and Show Mapping Editor for Log (Fast) Step.
- In the Mapping Editor, pick Constant Warn Log level, Ignore all Logs except log01, and for log01 define Constant String saying that ‘There are No Entities to Lease’.
- Save and close Mapping Editor.
- This completes the Main Flow. Save and close Flow Designer.
Debug
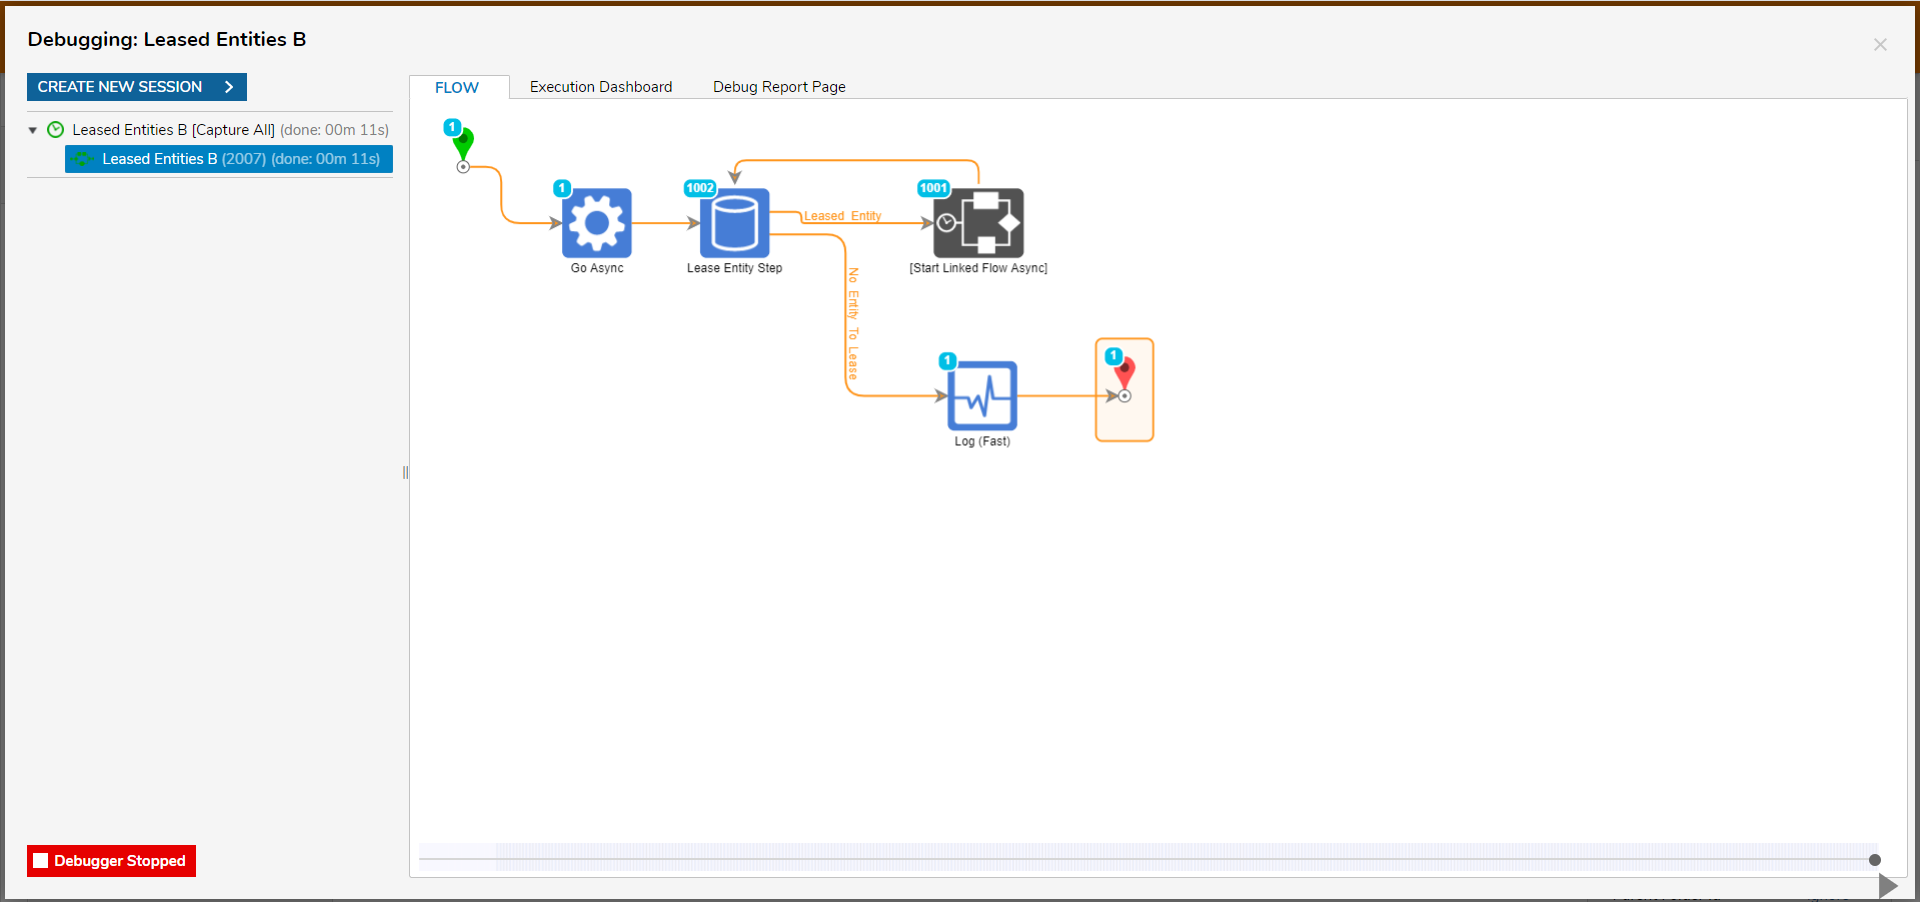
- Select Debug in the top action panel of the Flow Designer.
Was this article helpful?


