Overview
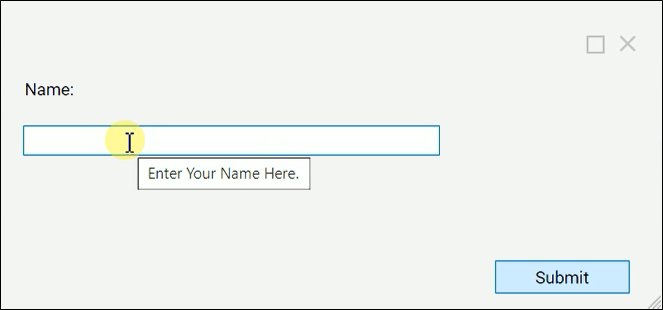
Help Messages appear as a tooltip on Form Controls where the Help Message is set. A common example would be when a user hovers their cursor over a text box on a Form and a tooltip appears instructing the user what the specified box is for.
Example
This example will walk through creating a Help Message that will be applied to a Form Control in a simple Form.
- In the Designer Studio, navigate to System > System Data > Help, then click the arrow next to Help and select Add Help Key.
- The Key is equivalent to the Name used to identify the Help Message when applying it later on.
- For this example, enter Enter Your Name into the Key text box.
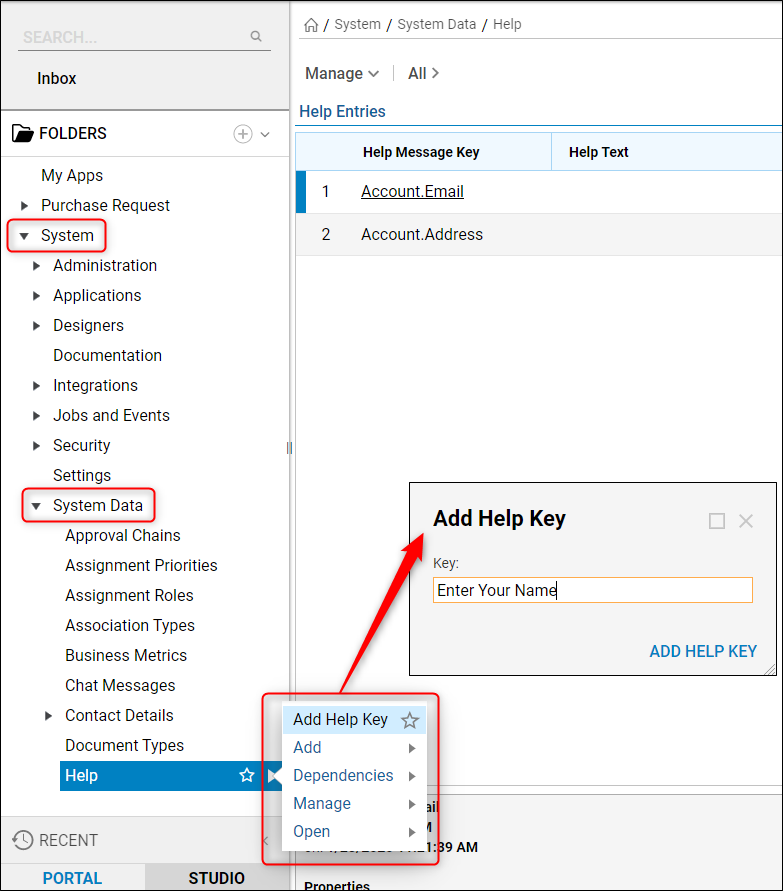
- For this example, enter Enter Your Name into the Key text box.
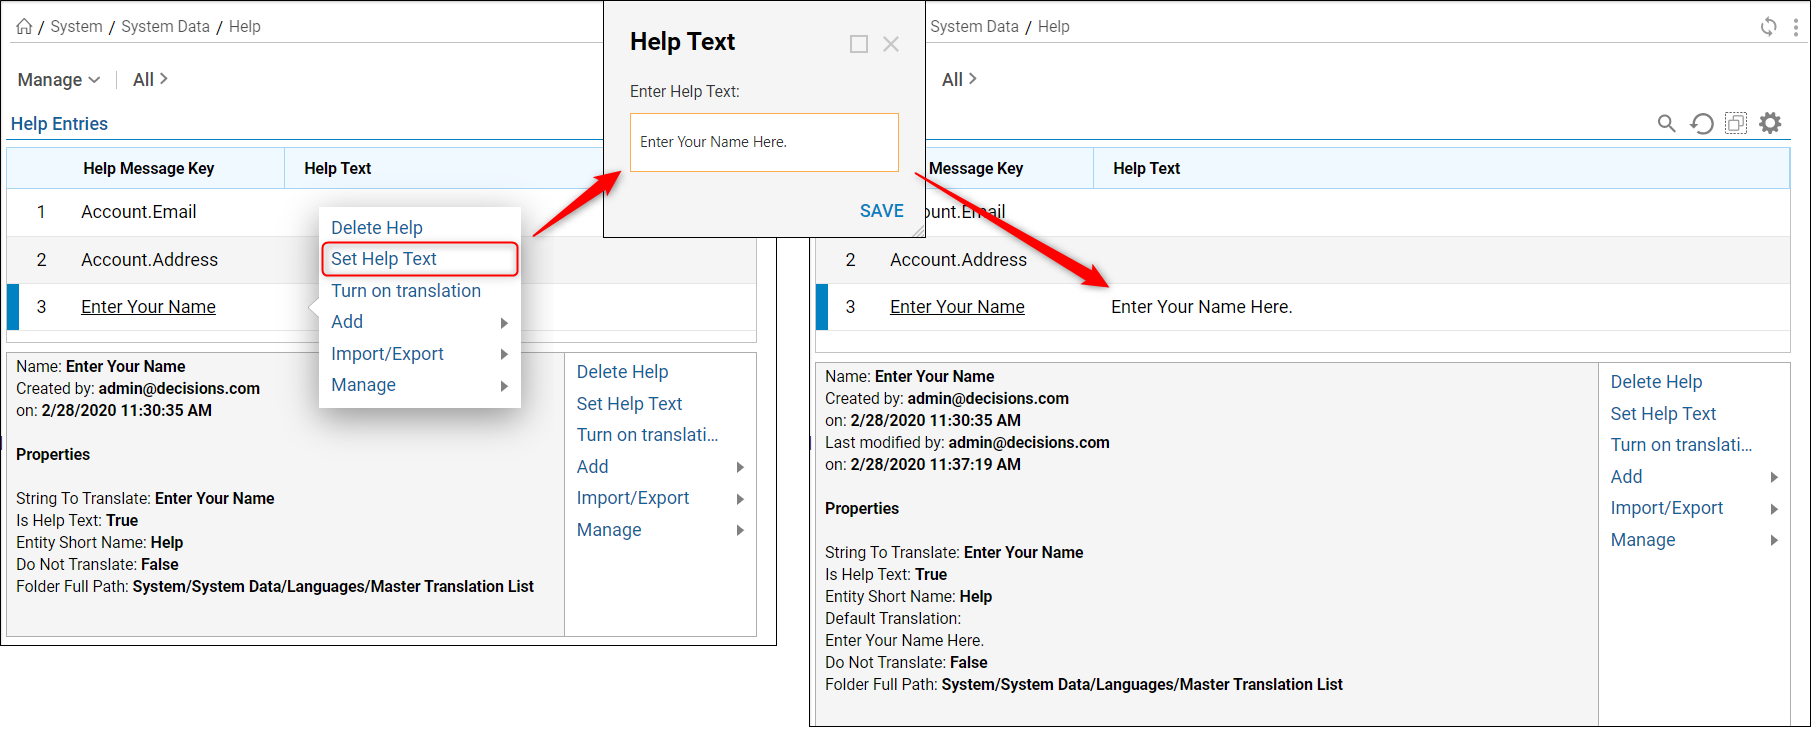
- Once the Help Key has been added, it will appear in the Help Entries list that is displayed.
- Selecting the message that was just created will show some details about the item in the panel below.
- Right-click this message and select the option to Set Help Text from the Action Menu.
- When the Help Text window appears, enter the desired message into this text box that will be shown in the tooltip on the applied Form Control.
- Now that the message is created, it needs to be applied to a Form Control in a Form.
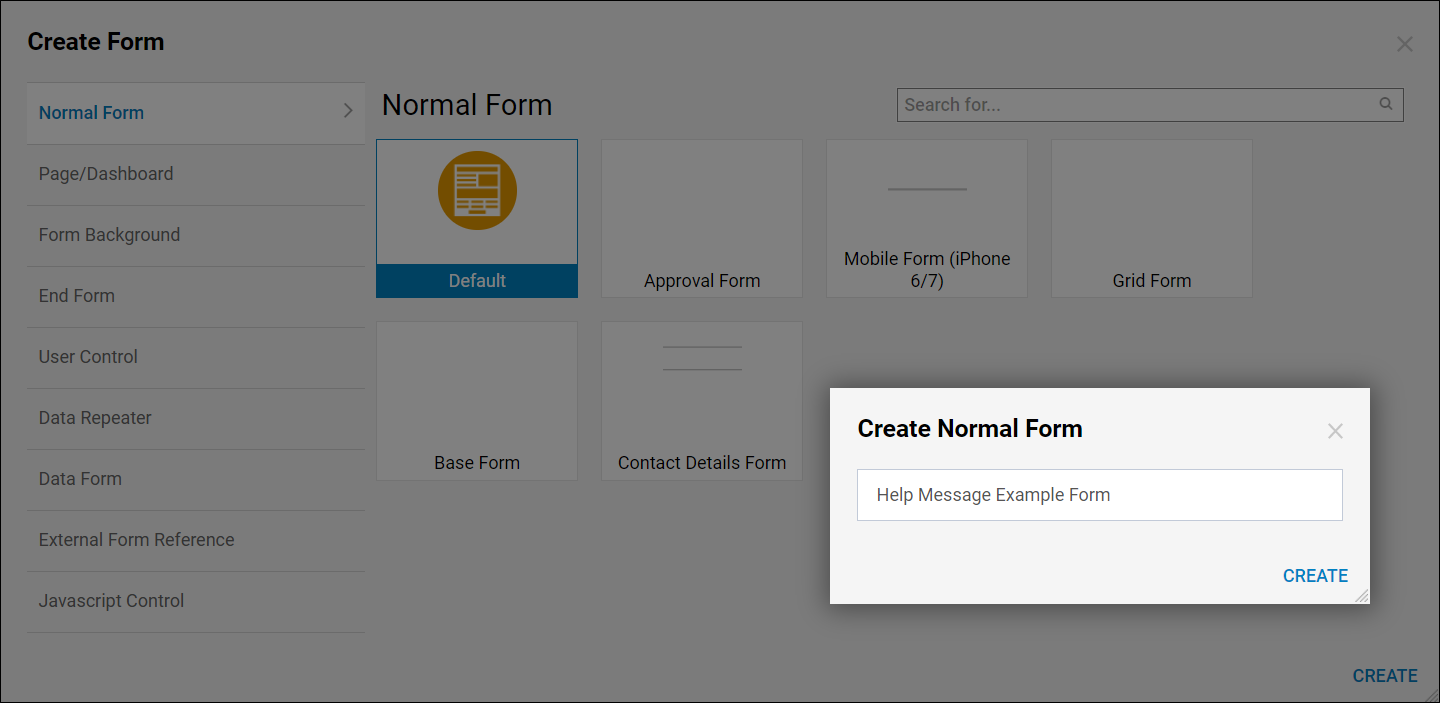
- In a Designer Folder, select the option to Create Form from the bottom Action Bar.
- Select the Default template and enter a name for the Form, then click Create.
- Drag a Text Box into the Form from the Favorites section of the Form Controls panel on the right side.
- When the Set Data Name box appears, enter Name: and press Shift + Enter to automatically add a Label above the Text Box.
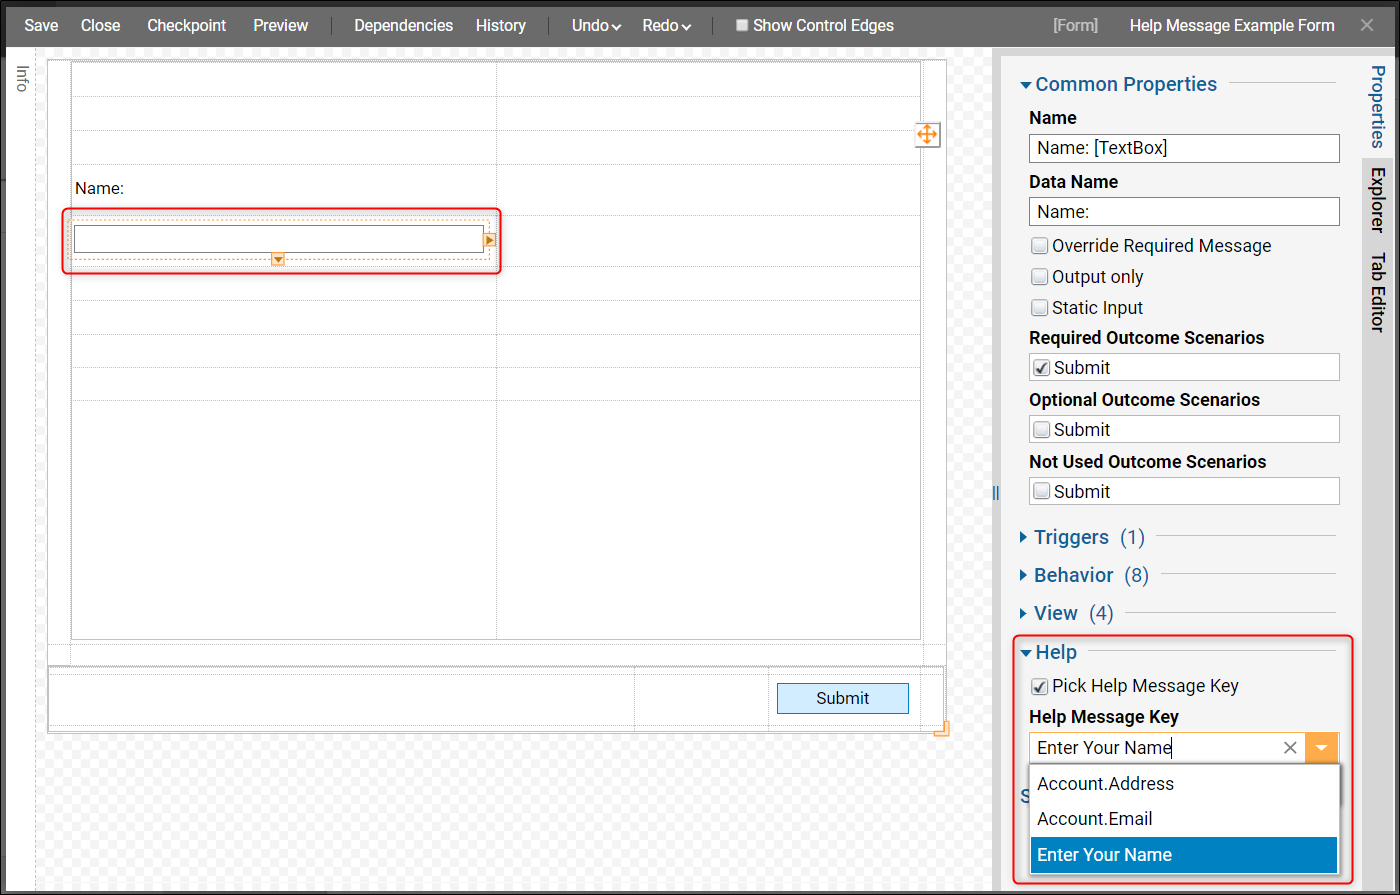
- Drag a Button into the Form from the Favorites section of the Form Controls panel and name it Submit. Reference the Form to the screenshot below.
- Click on the Text Box Form Control to select it, then locate the Help section of the Properties for this Form Control on the right side.
- Check the box to Pick Help Message Key, then select the created Enter Your Name Help Message from the dropdown list.
- Save and close the Form upon completion.
- Now that the Help Message has been applied to a Form Control in a Form, the Form must be added to a Flow so that it can run.
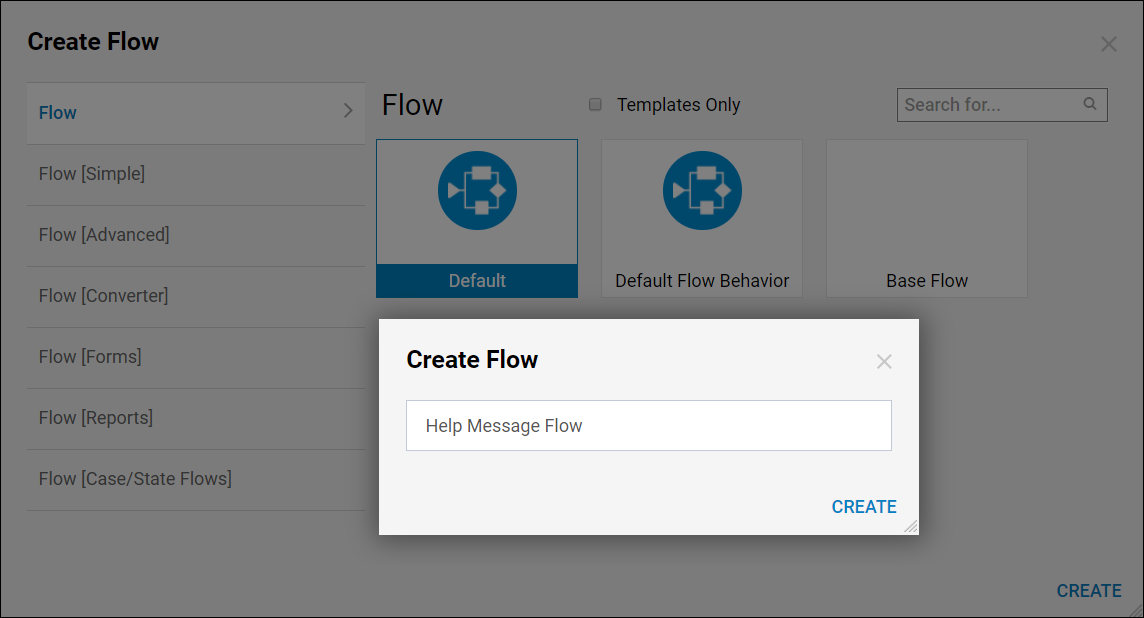
- Back in the Designer Folder, select the option to Create Flow from the bottom Action Bar. Select the Default template and enter a name for the Flow, then click Create.
- Click the orange arrow that appears at the end of the Done path coming from the Start step.
- When the Flow Steps window appears, select the Show Form step and click Add.
- Select the Help Message Example Form that was created earlier, then select Pick.

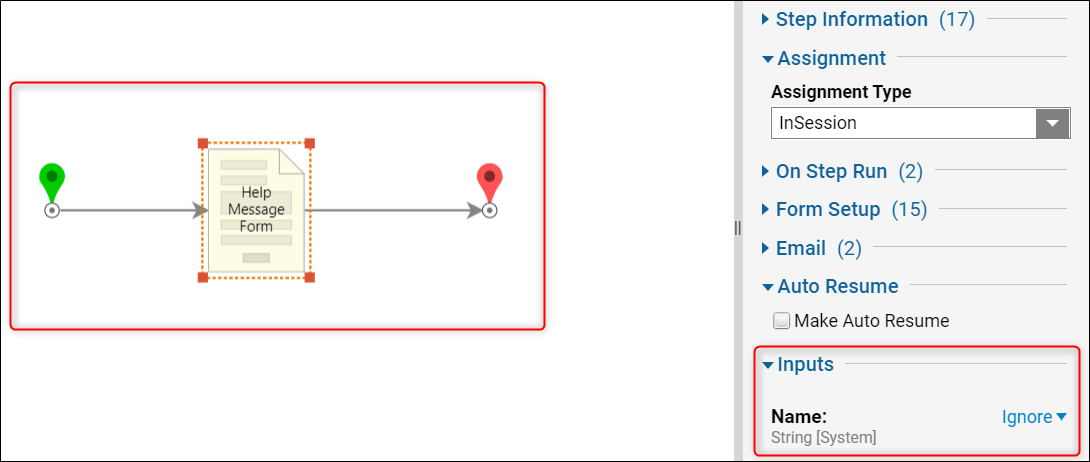
- Connect the Submit path from the Show Form step to the End step.
- The Show Form step will show a validation warning since it pulls the input from the Form.
- The input for the Form can be optionally mapped to Ignore from the Properties panel, but it will function the same either way.
- Save and close the Flow once complete.
- Back in the Designer Folder, right-click the Help Message Flow and select Run Flow from the Action Menu.
- When the Form appears, hover the cursor over the text box to show the configured Help Message tooltip.
