Overview
In a Form, drop-down list options can be created from several sources. These sources include populated data from workflows, specifying a static list directly in the Form Designer, or running a workflow to populate a list of choices. The following example will show how to configure drop-down options from a Flow to output the required information for the drop-down options.
Example
The example Flow will display a Form containing a drop-down list and a button. In the drop-down list, users will be able to select from a list of all available accounts. A Flow will populate this drop-down list. Another Flow will be created to display the Form.
Begin the example by creating the Flow, which will retrieve a list of system accounts.
- In the Designer Project, select the Create Flow button.
- Select Flow, name the Flow, then select CREATE
- Select the Done outcome path of the Start step.
- In the Add After dialog, expand Integrations > All Integrations > Internal Services > Account Service, select the GetAll step.
- Select ADD.
- Select ADD.
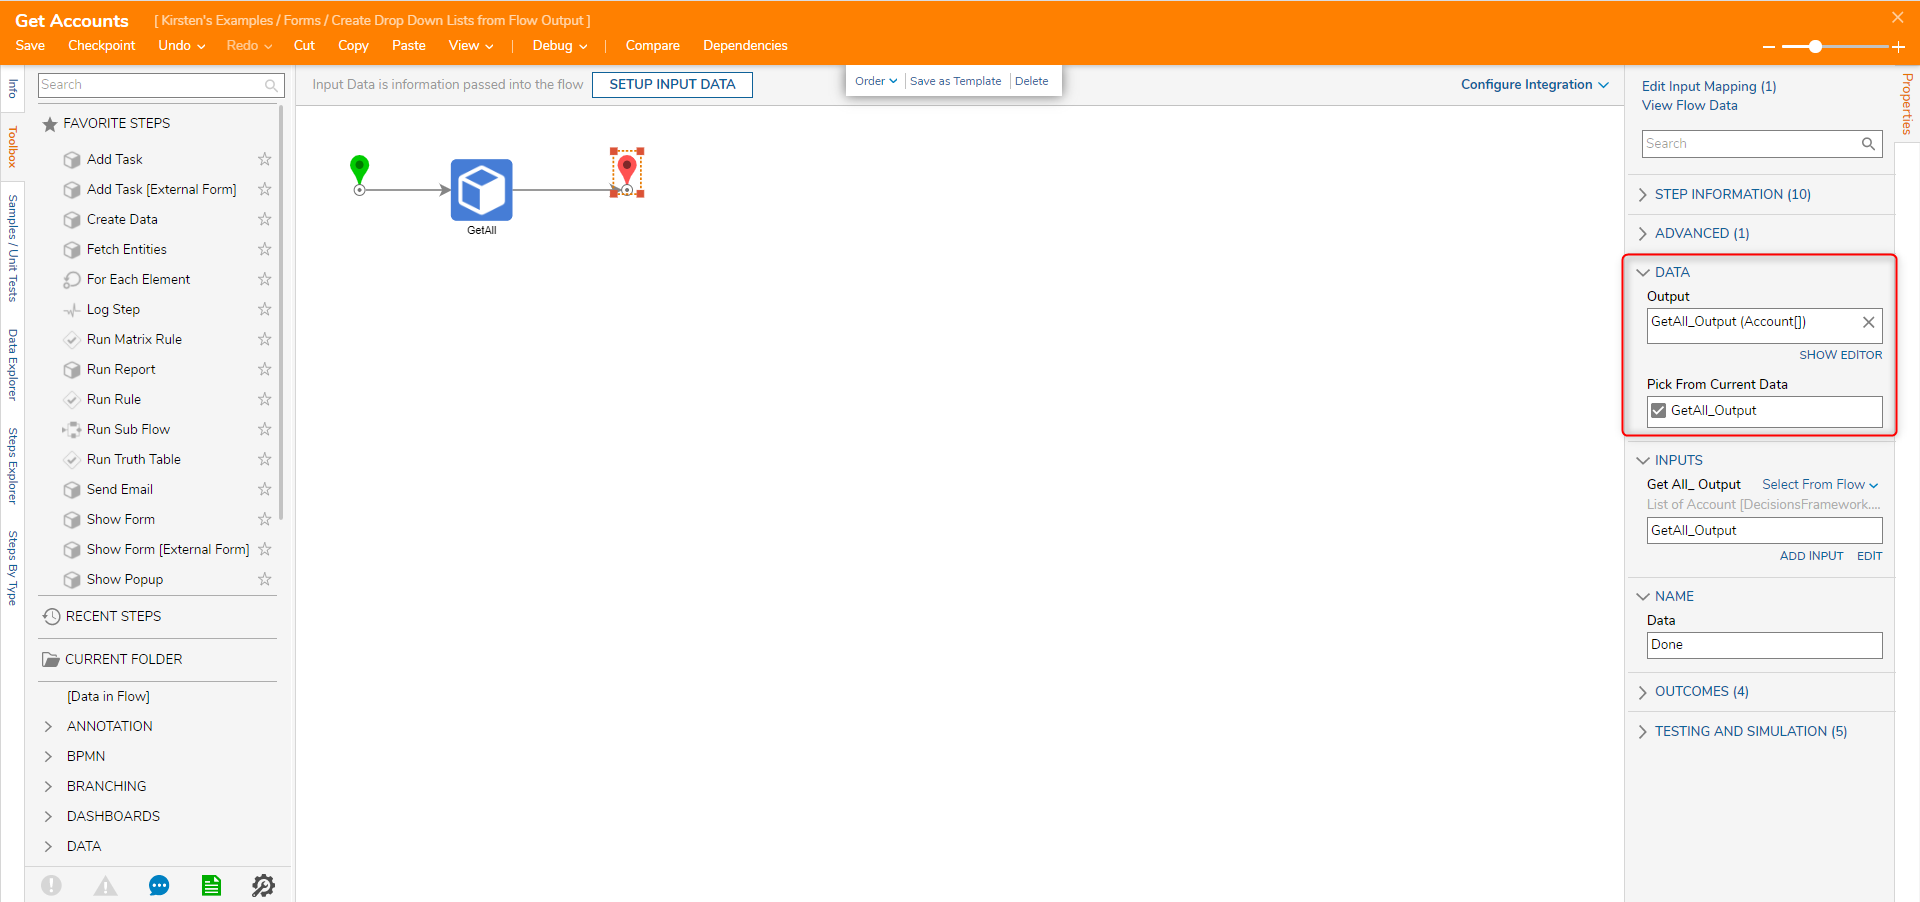
- Connect the GetAll step to the End step.
- Select the End step. In the Properties panel, under Data > Pick From Current Data, select GetAll_Output.
- This completes the first Flow, save and close the Flow Designer.
Build the Main Flow
- In the Designer Folder, select the Create Flow button.
- Select Flow, name the Flow, then select CREATE
- Select the Done outcome path of the Start step.
- In the Add After dialog, select the Show Form step in the Favorite Steps category.
- Select ADD.
- With the Show Form step selected, in the Properties panel, select PICK OR CREATE FORM.
- Select CREATE under Create New.
- Choose Form.
- Name the Form.
- Select CREATE.
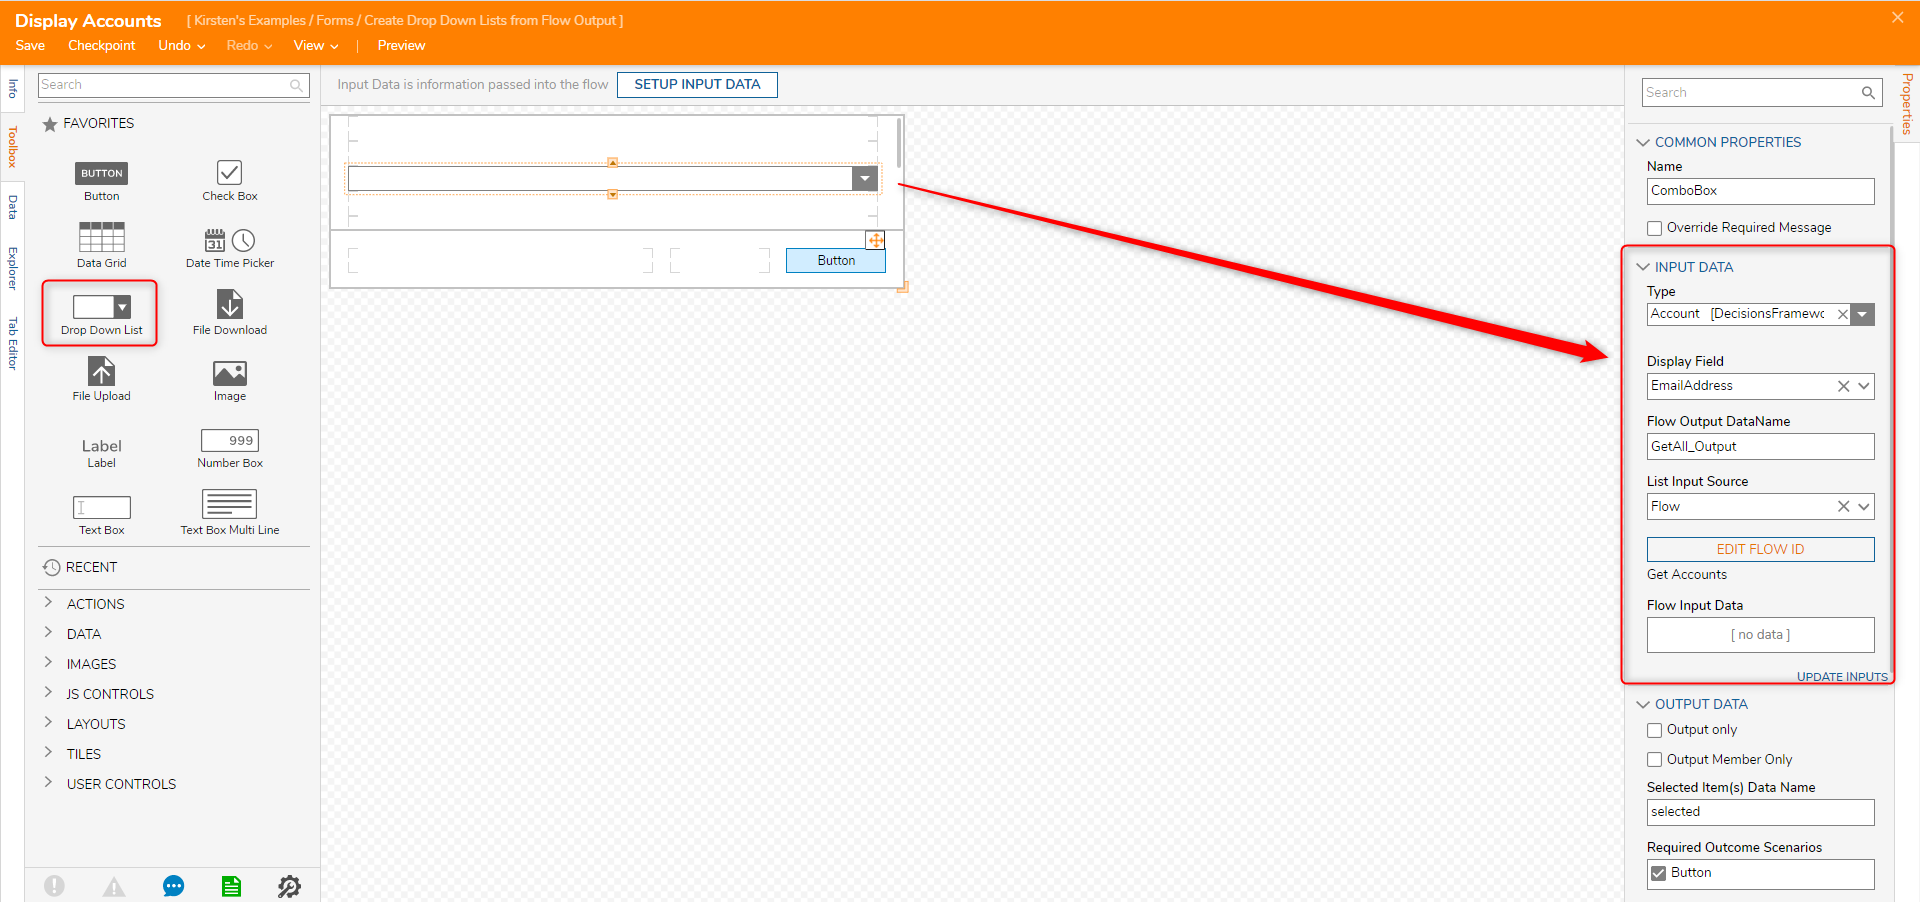
- In the Form Designer, drag and drop a Button and the Drop Down List onto the Form.
- Select the Drop-Down List, in the Properties > Input Data section, under the Type selector—search for and select Account.
- Under Display Field, specify EmailAddress.
- Change the List Input Source to Flow.
- Select PICK FLOW ID
- In the Create or Pick Flow dialog, select PICK under Pick Existing.
- Choose the Get Accounts Flow, then select PICK.
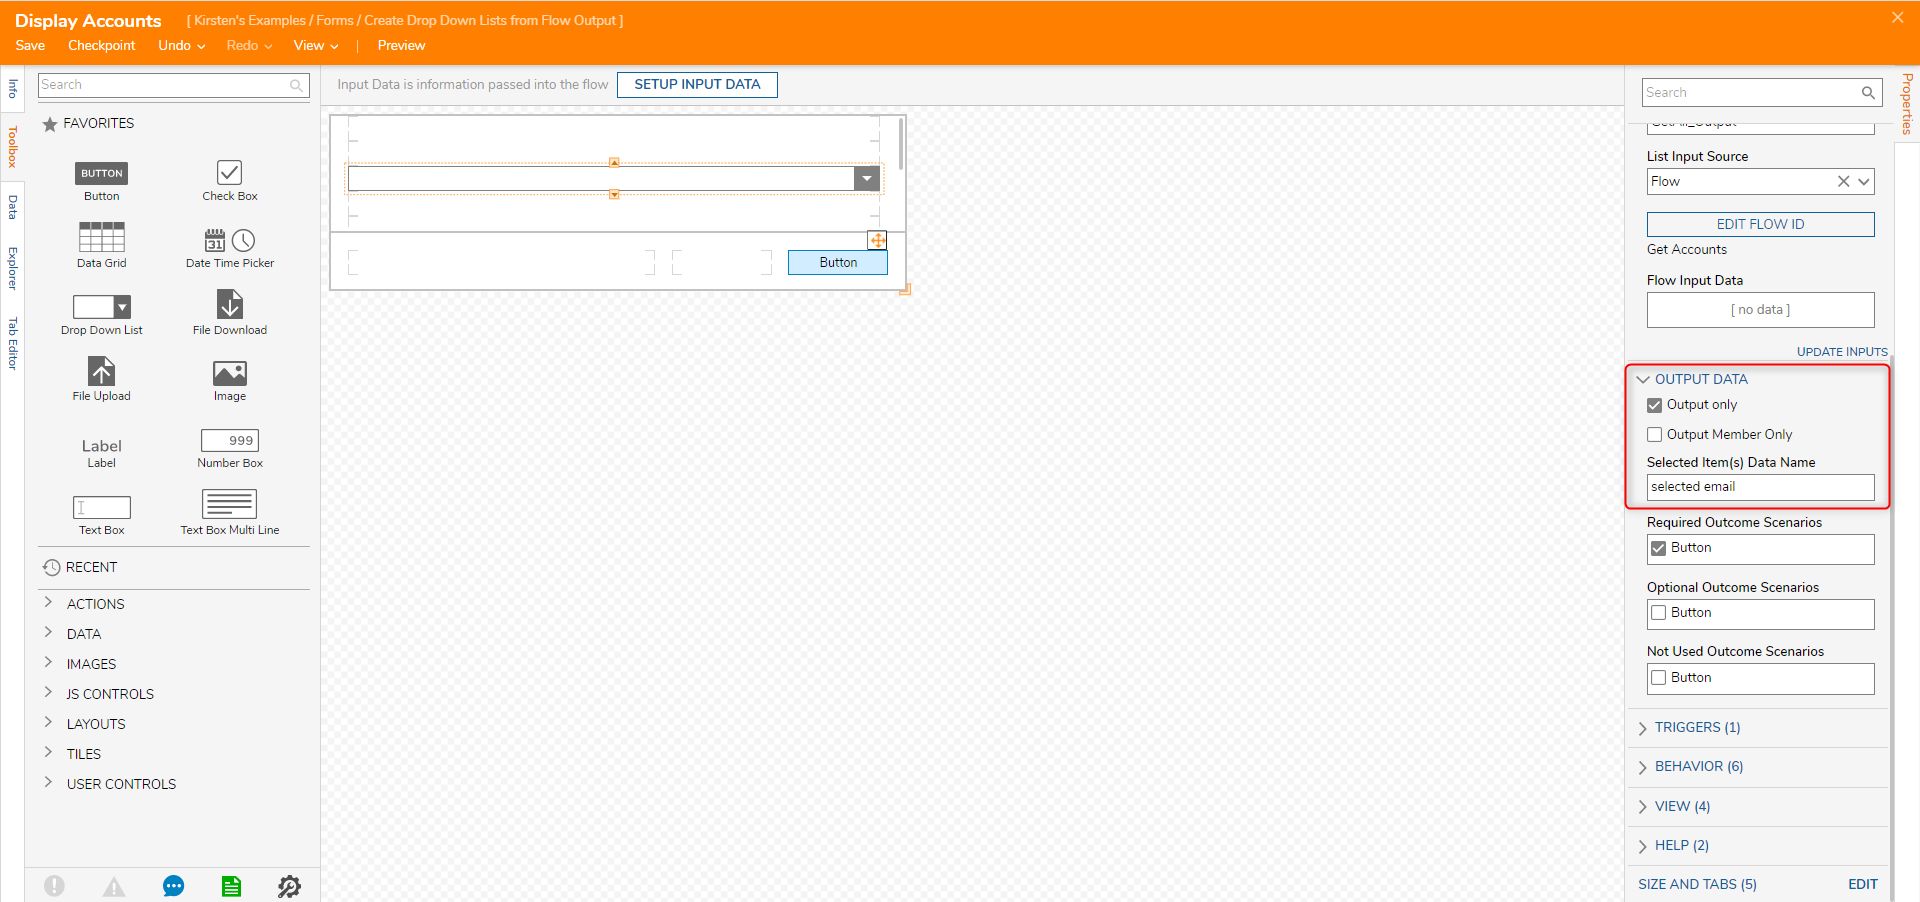
- In the Output Data section, select Output only.
- Rename Selected Item(s) Data Name to "Selected Email".
- Save and Close the Form Designer.
- Select the Done outcome path of the Show Form step.
- In the Add After dialog, select the Show Popup step in the Favorite Steps category.
- Select ADD.
- This is to show the selected item from the drop-down menu is available to use in the Flow.
- Navigate to the Show Popup step Properties
- Under Inputs > Subject, change the mapping type to Constant and type "Selected Email".
- Under Inputs > Message, select Pick, and choose Selected Email from the Pick Data For Input dialog.
- Connect the Done path to the End step.
Debug
- Select the Debug link located in the top toolbar.
- Select Start Debugging.
- The Form that holds the Drop Down List is displayed.
- Select an account email and click the Button to apply the changes.
- The Popup will display in the upper right corner, showing which account was chosen.
This is just an example of creating a drop-down list and showing that the selected data is available to use in the flow. Please use this information to help create business logic that fits your needs.