Overview
WebHooks give developers the option to implement custom logic that can communicate with other web applications in two ways:
- Outbound: An event happens externally, such as on Facebook Messenger (e.g. message arrived) > WebHook > Run Decisions Flow.
- Inbound: An event happens in Decisions (e.g. assignment complete) > WebHook > External HTTP request.
WebHooks are unlike API calls in the manner that API calls are request-based output mechanisms while WebHooks are event-based.
Example
- Navigate to System > Integrations > WebHooks.
There are a few webhooks that have been pre-loaded for users and trigger automatically when the proper event happens.
- Assignment Created
- Assignment Complete
- Select CREATE WEBHOOK.
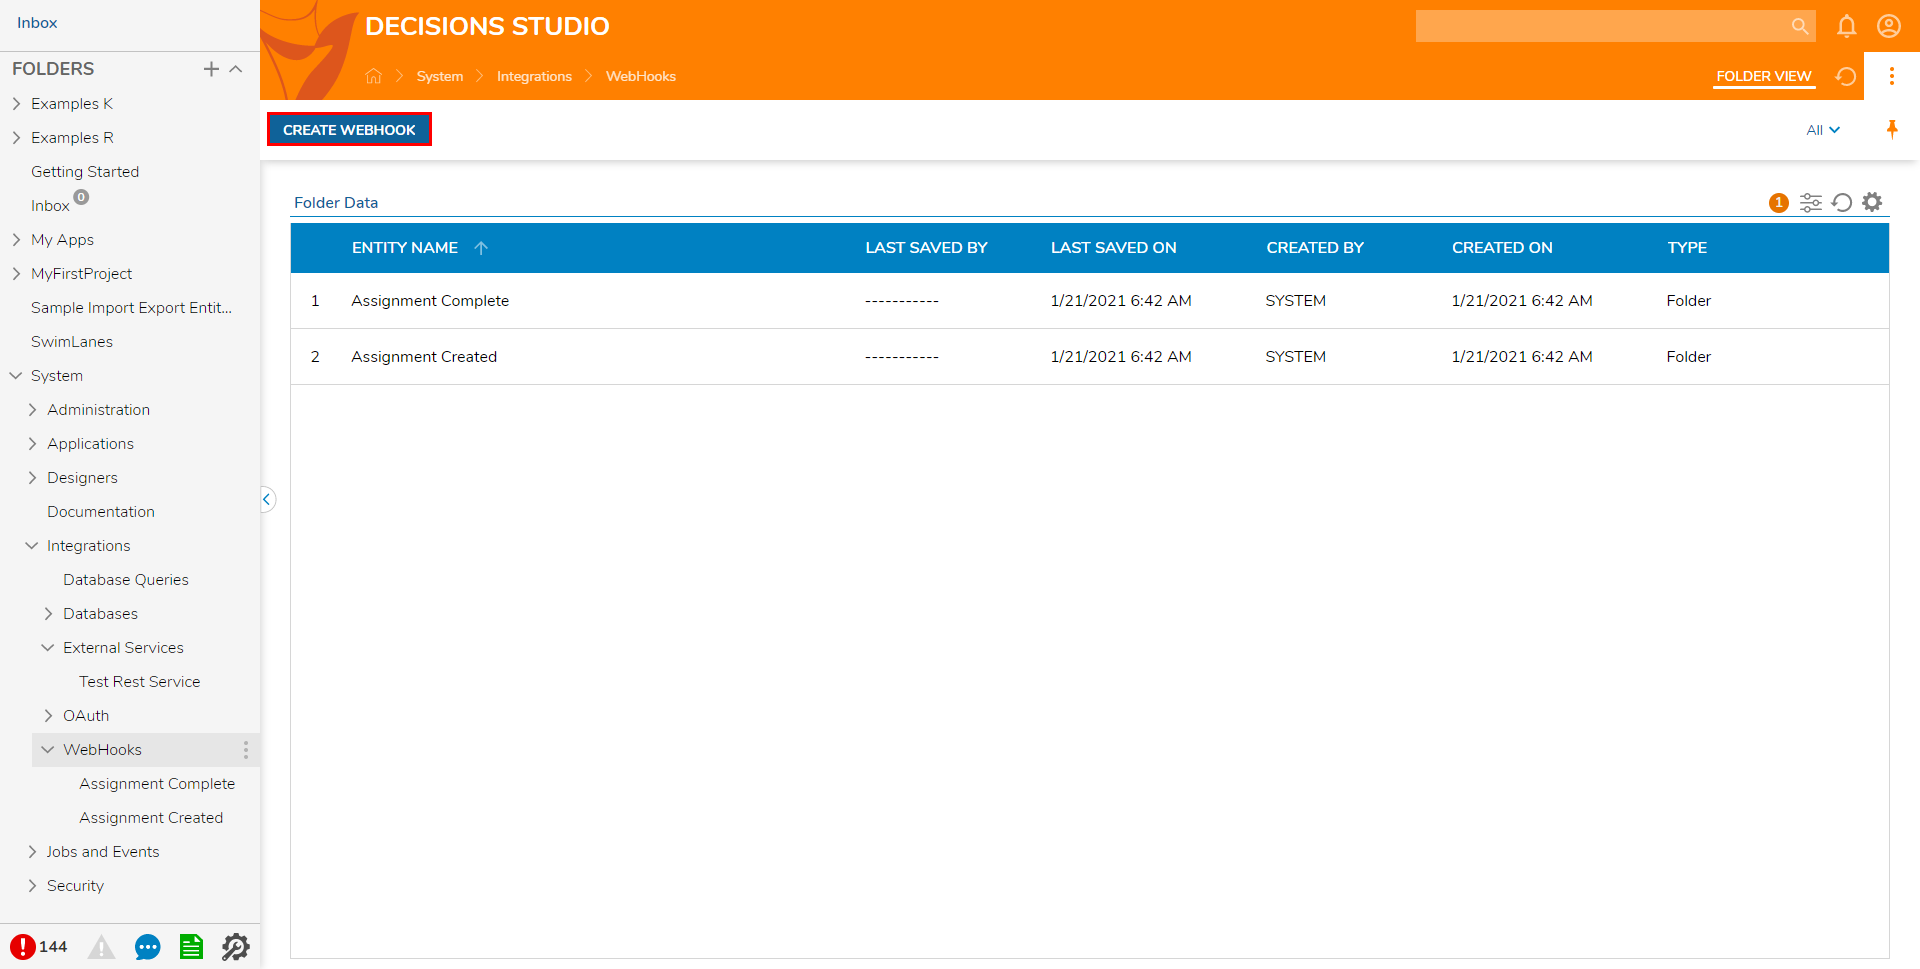
- Provide a Name, then click ADD NEW to add Data Definitions.
- Add an Int32 Type with the Name "Count", a DateTime Type called "Date", and a String Type called "Name". These Definitions will act as the Inputs for the WebHook step within the Flow Designer.
Click SAVE.
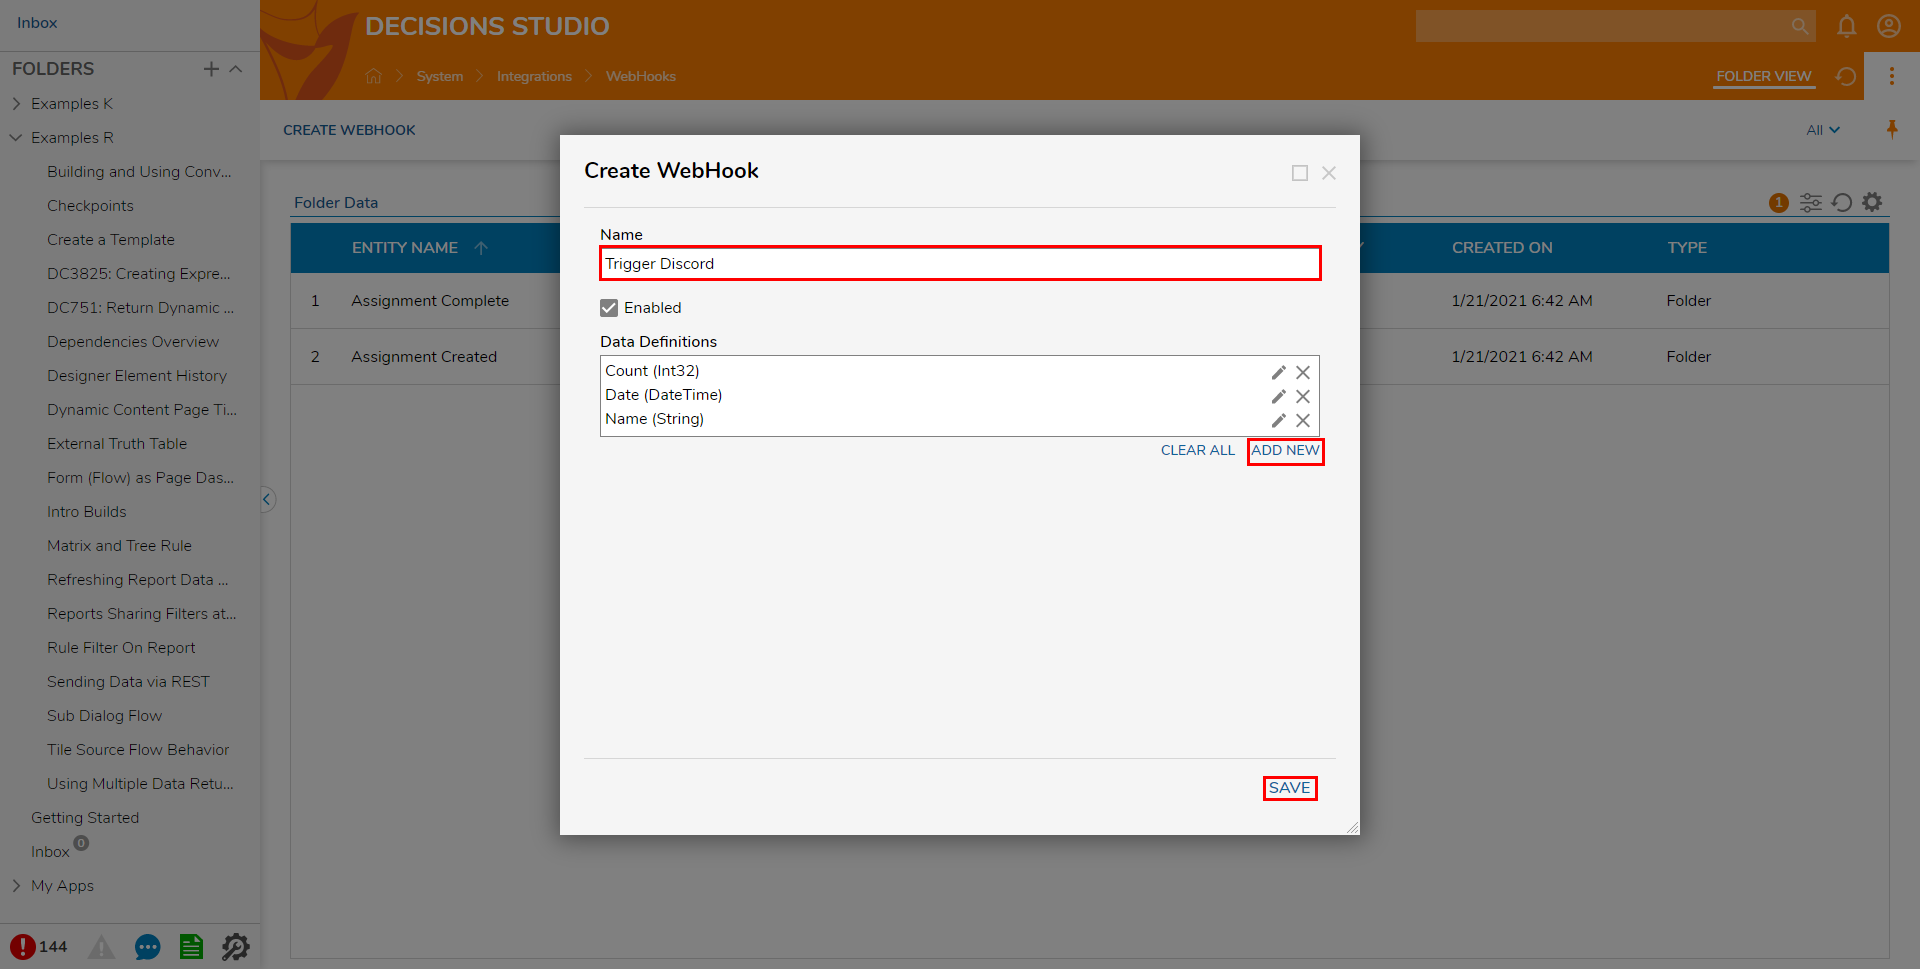
- Add an Int32 Type with the Name "Count", a DateTime Type called "Date", and a String Type called "Name".
After creating the WebHook, right-click the WebHook and open the Action menu; select View Request Data.
The View Request data window shows the Data Definitions that were created while creating the WebHook in addition to the Event Name and the Date it was created on.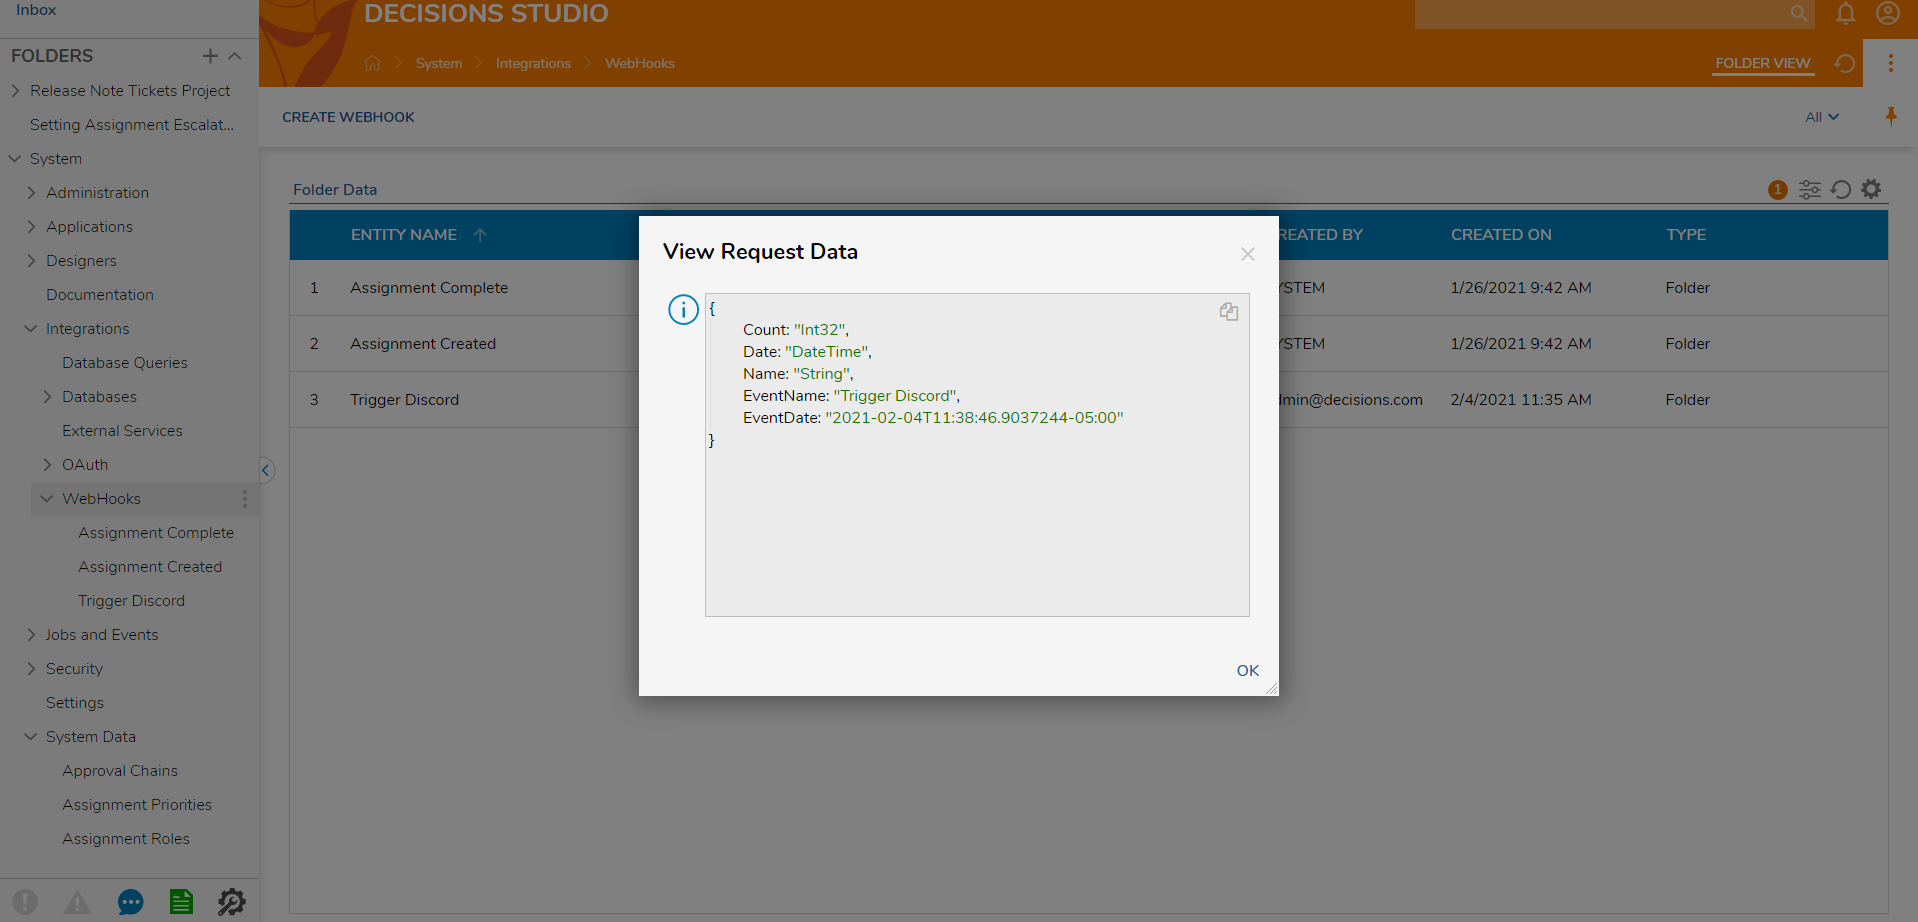
Create WebHook Action
The URL for this example was generated using a WebHook test site.
- From System > Integrations > WebHook, right-click the WebHook to open the Action menu, then select Create WebHook Action.
- Define the WebHook Action by providing a Name and URL.
- Select a Request Typevia the dropdown menu. For this example, leave the Request Type set to Post.
Note: Content-Type for POST is application/JSON format. - Provide any Headers or Additional Data by clicking ADD NEW under each section.
.png)
- Click SAVE.
Back in the WebHook Folder, right-click the WebHook Action, then select Test.
If desired, users may also Edit or Delete the WebHook Action, or View its Request Data.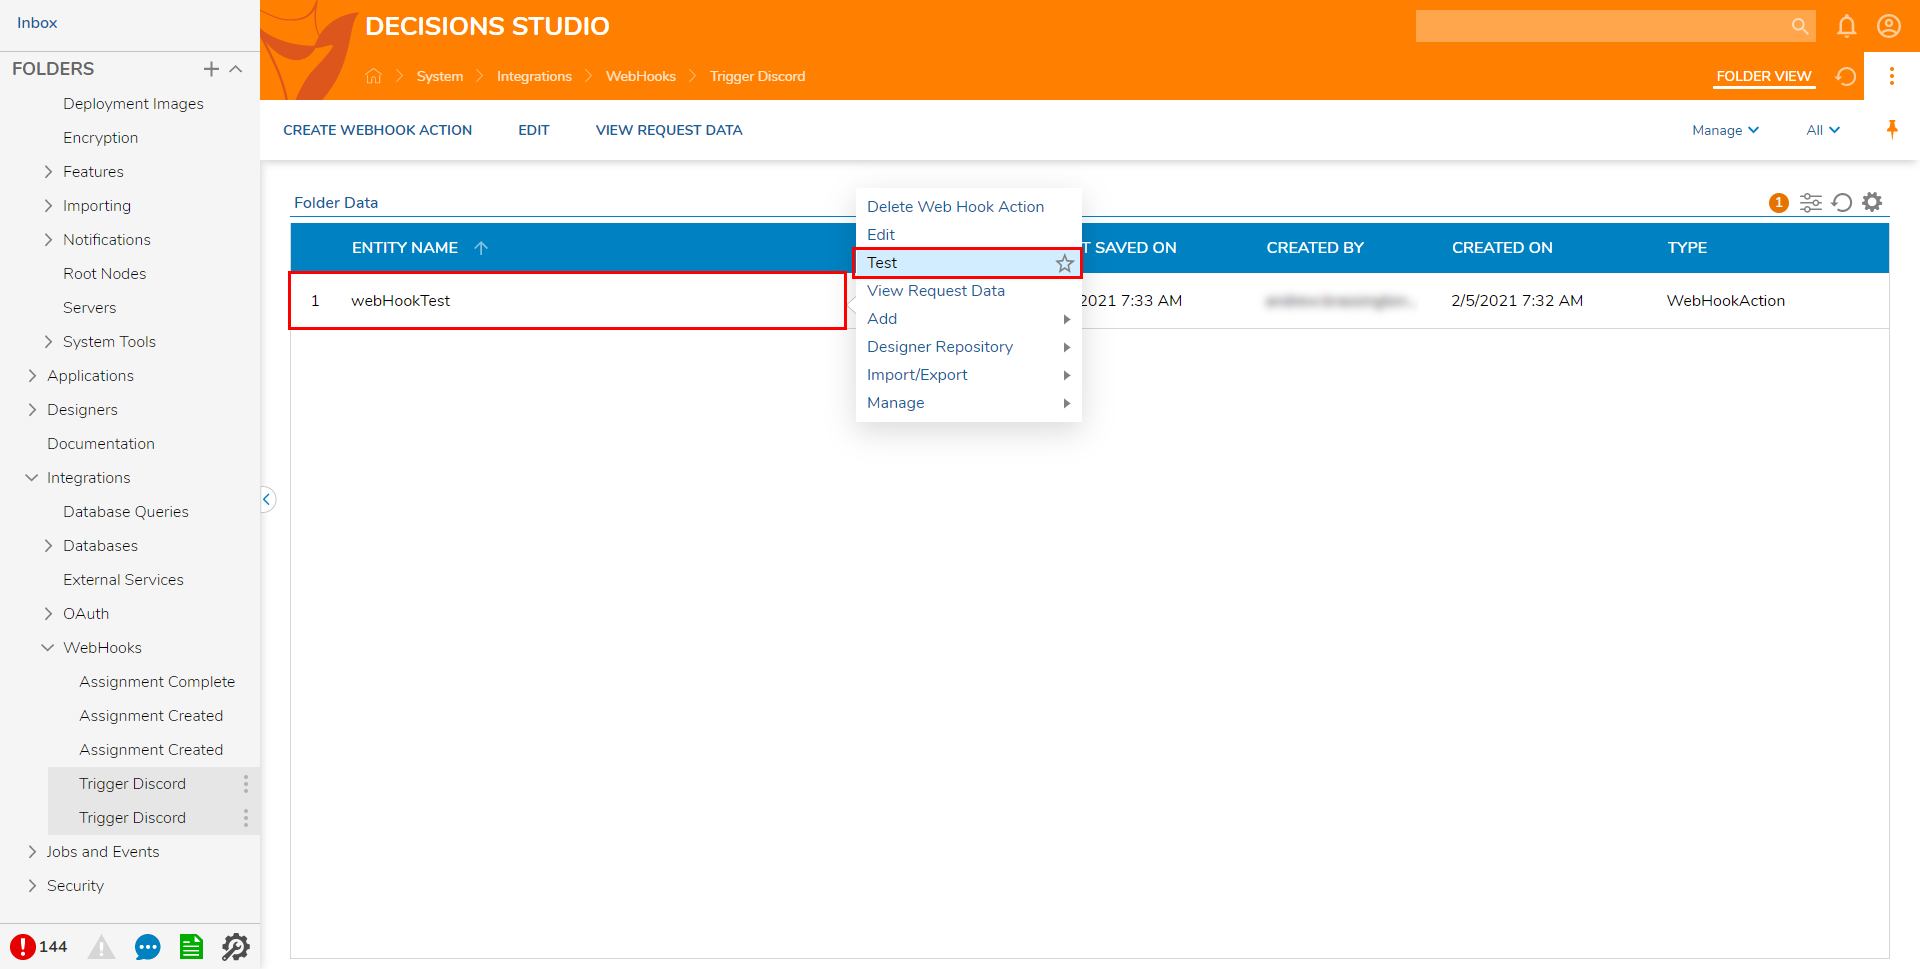
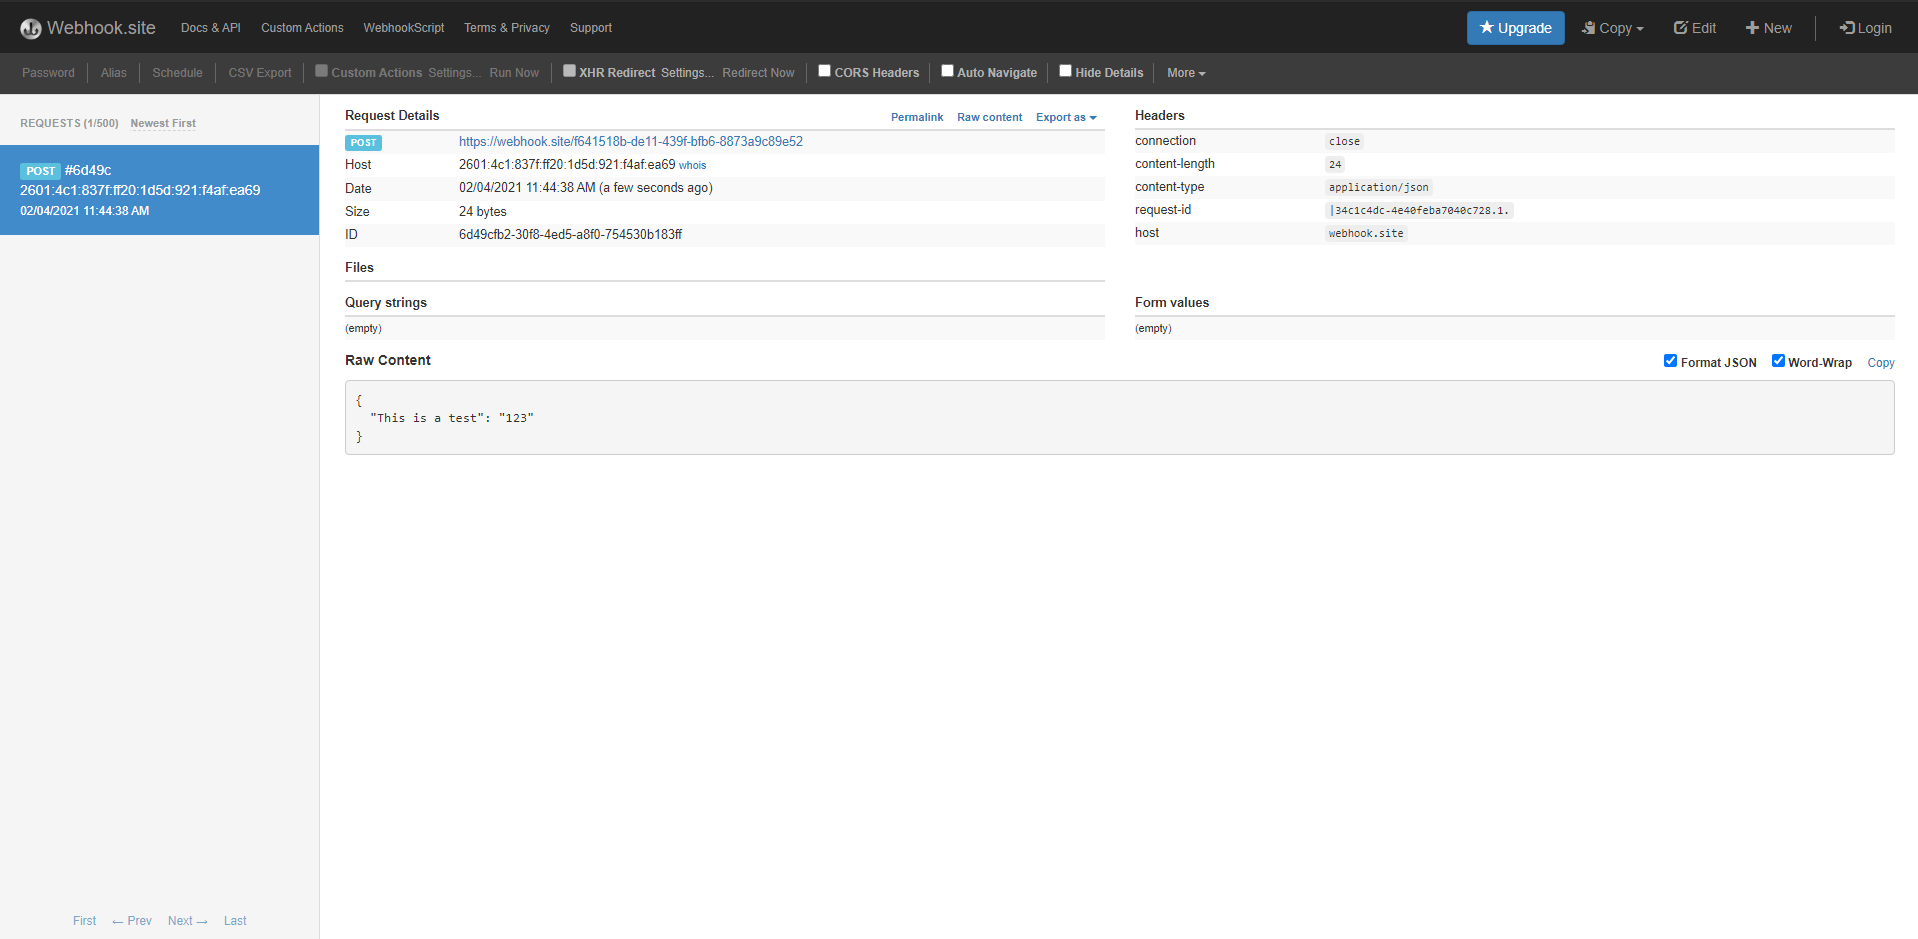
Navigate to the WebHook Test Site and view the updated resulting request details.
Run WebHook by Flow Step
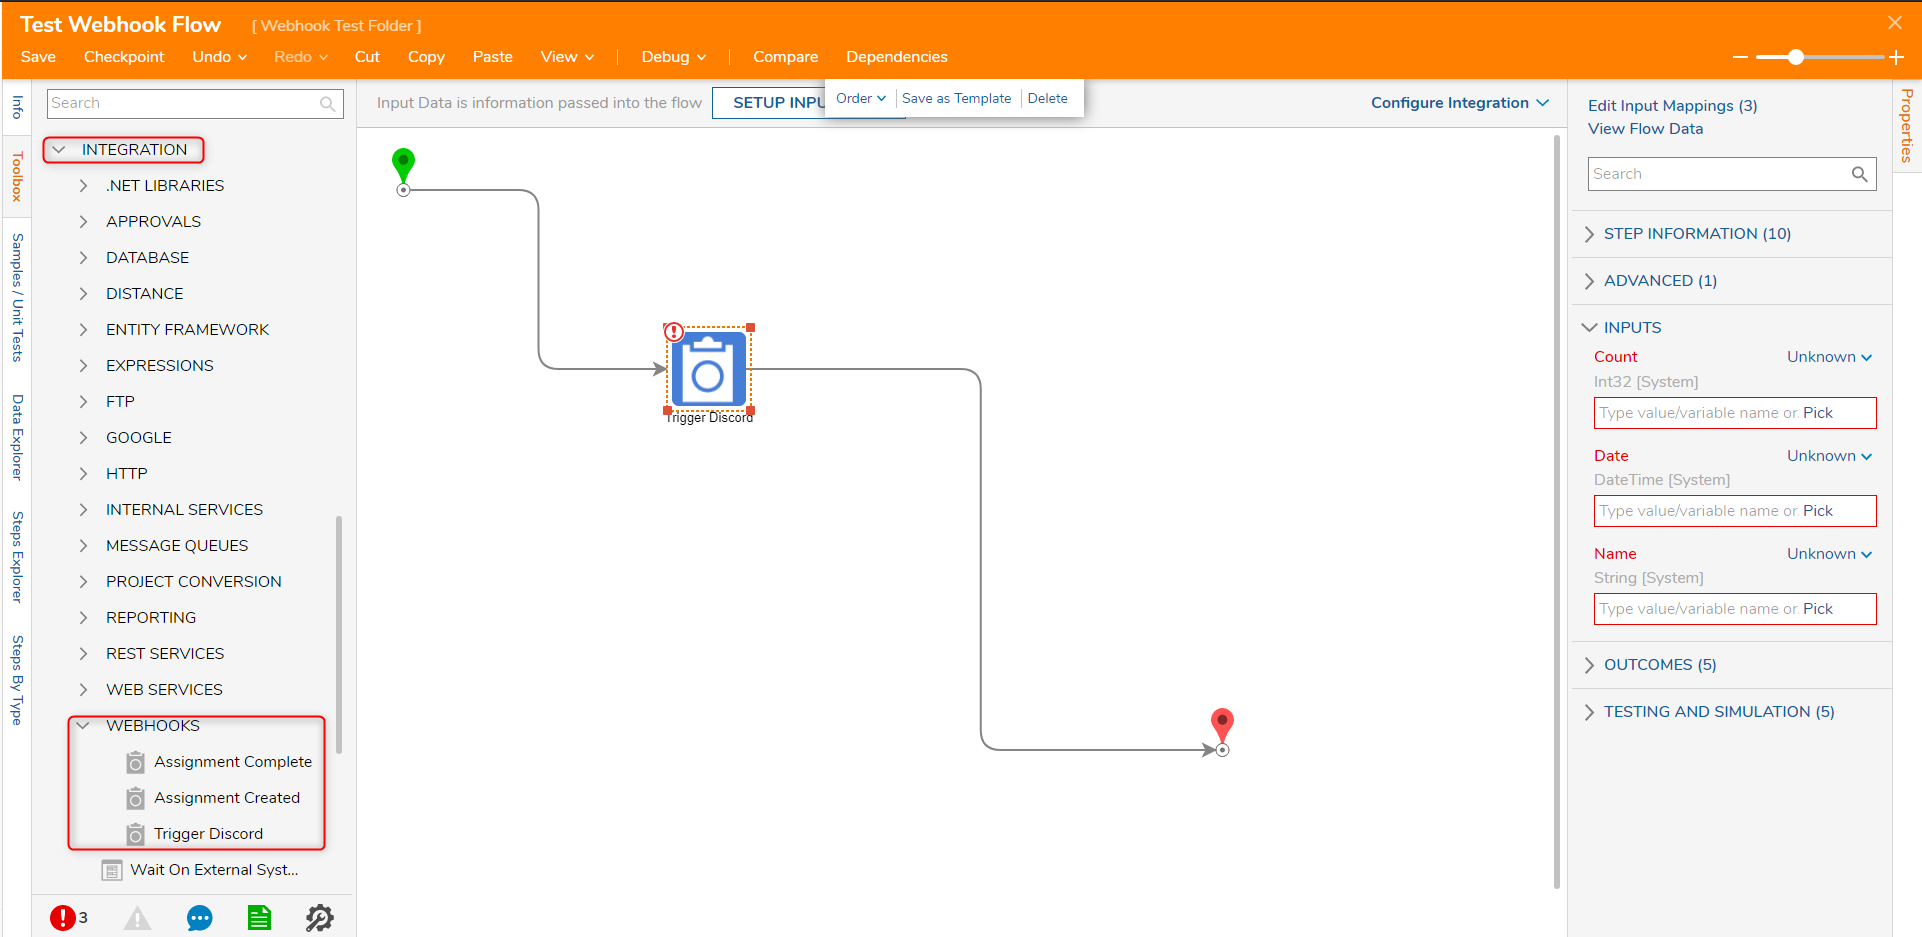
WebHooks are registered as Flow steps under Integration > WebHooks to allow them to be triggered in a Flow. See that the Data Definitions defined earlier are available on this step.
Integration Activity
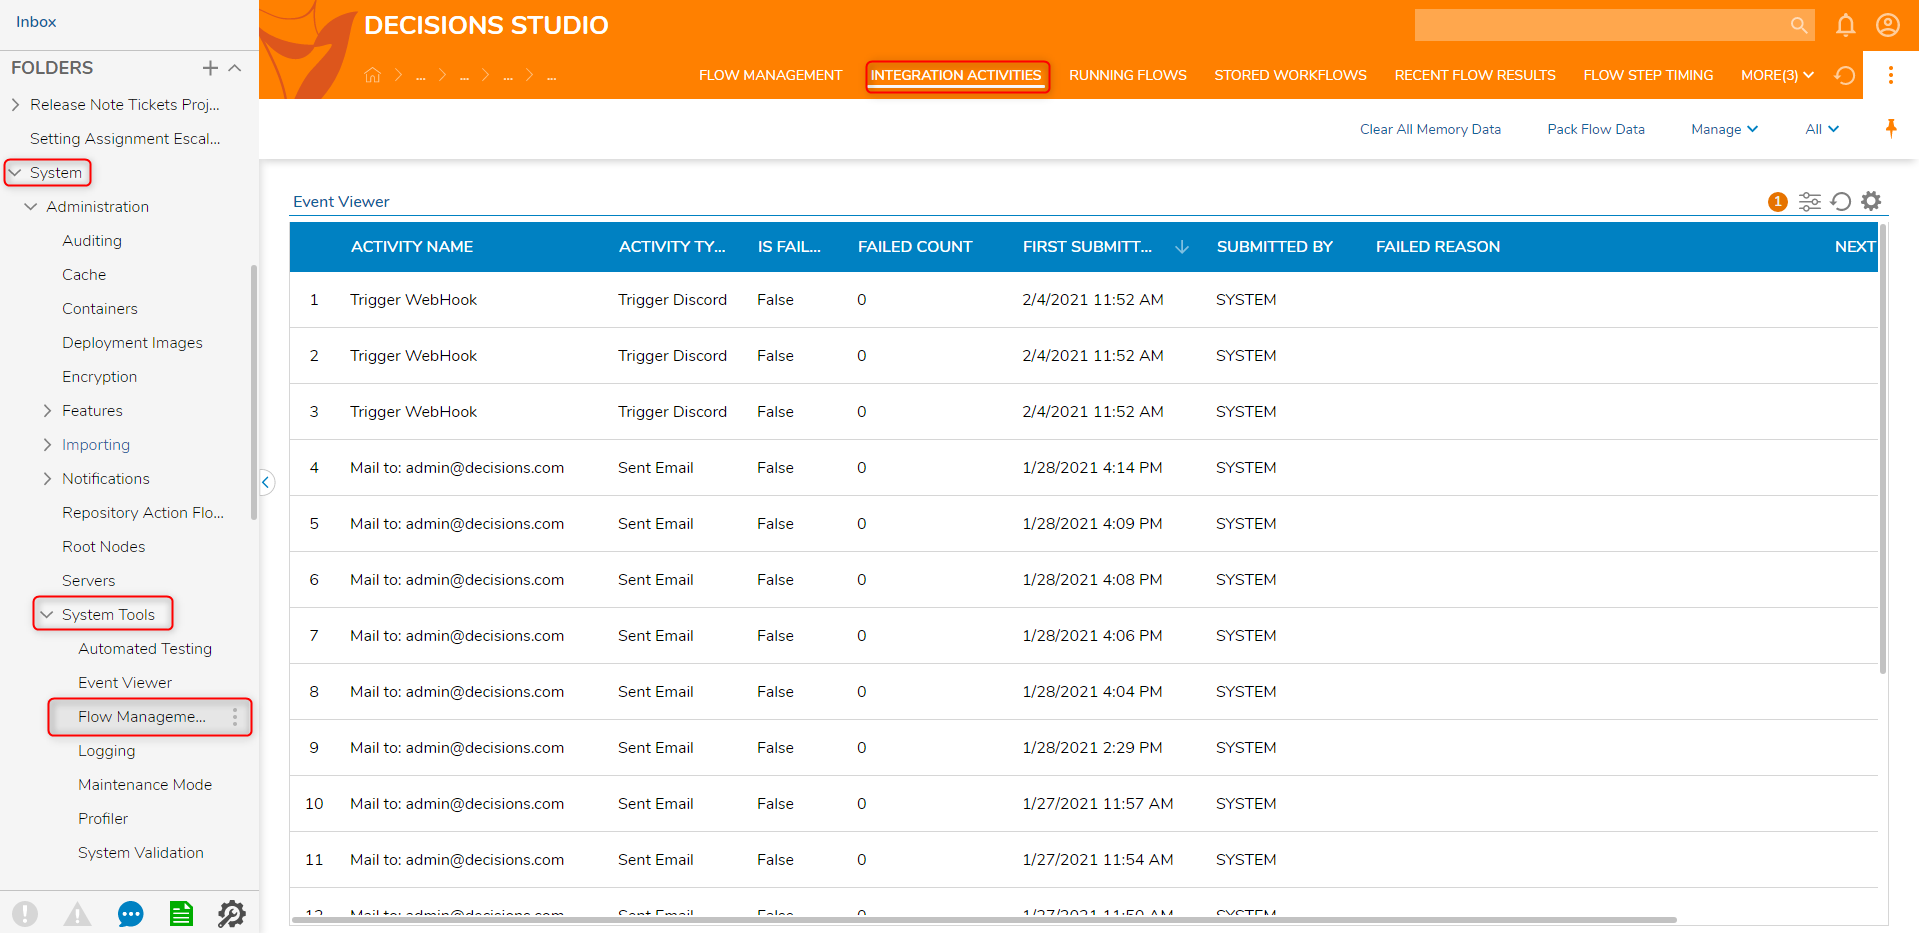
Outbound WebHook activity can be viewed on the Integration Activities Report found under System > Administration > System Tools > Flow Management.
Expose Flow as a WebHook
Flows can be exposed as WebHooks. Select Configure in the Flow Designer to see the information on how a Flow can be triggered.
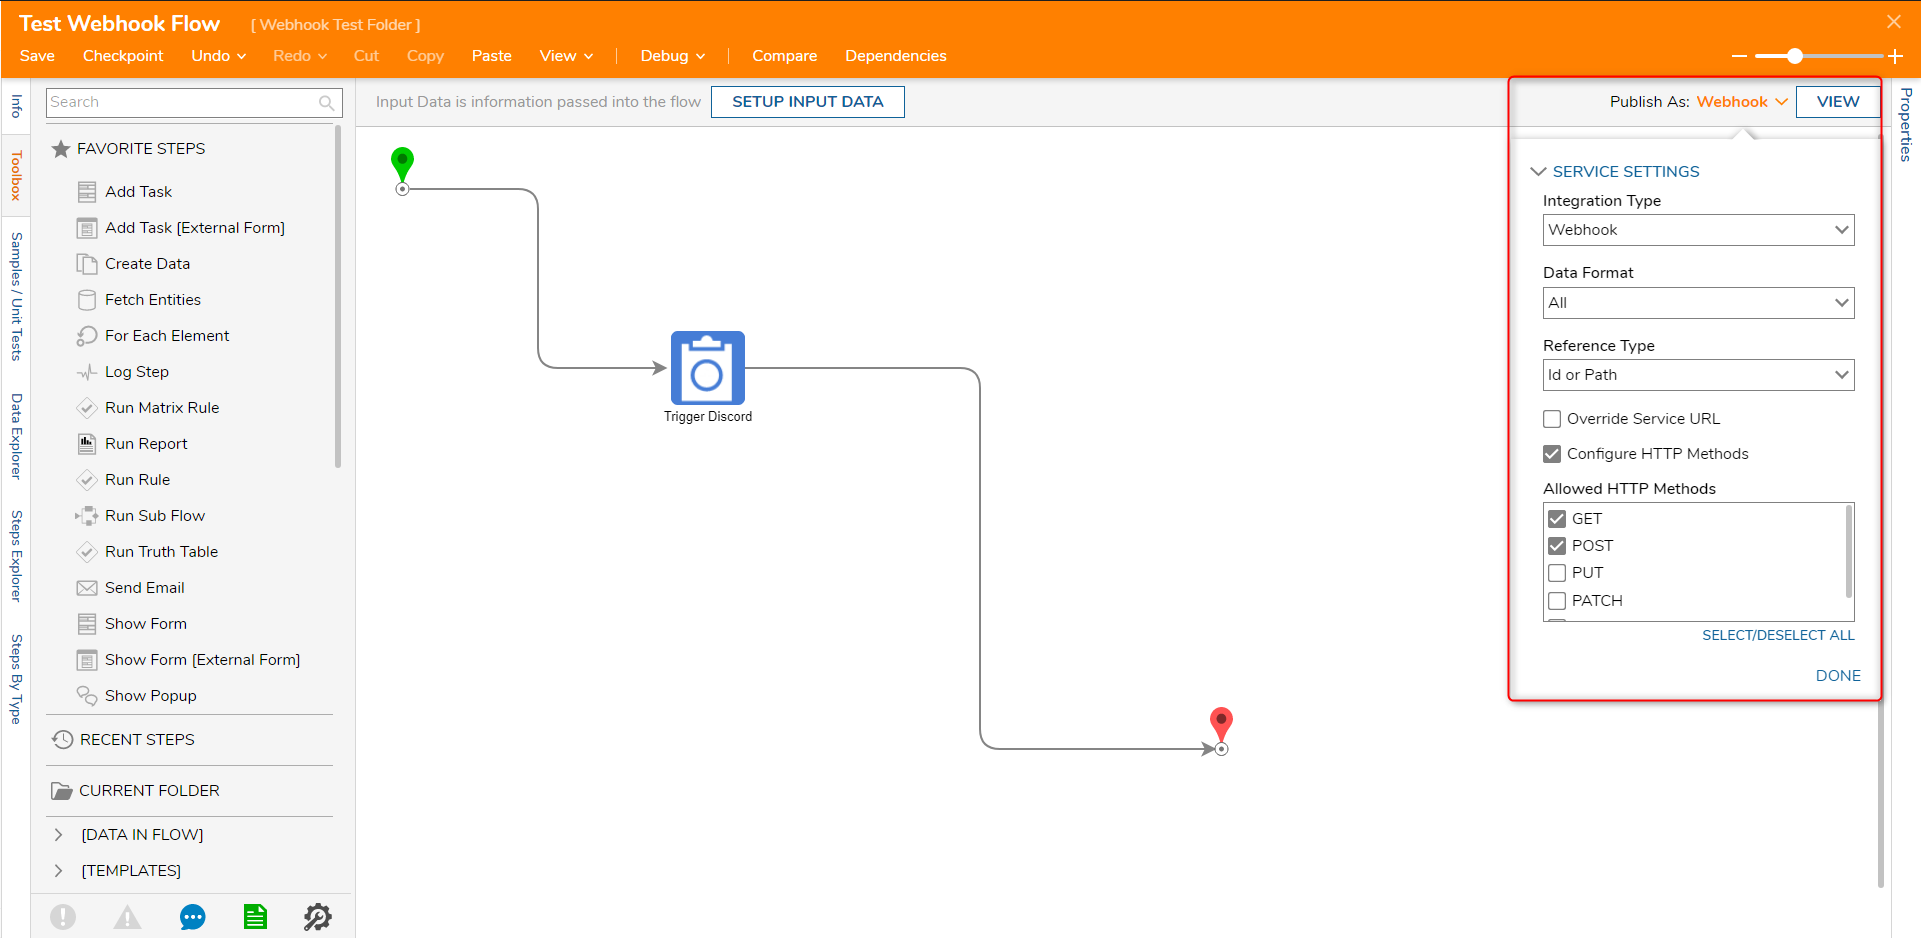
For this example, Postman was used to trigger the WebHook.
.png)