Overview
Dropdown controls can source and narrow their available options based on a variety of outputs. One common requirement is to display options in a drop-down list dependent on options previously selected in another drop-down list.
Example
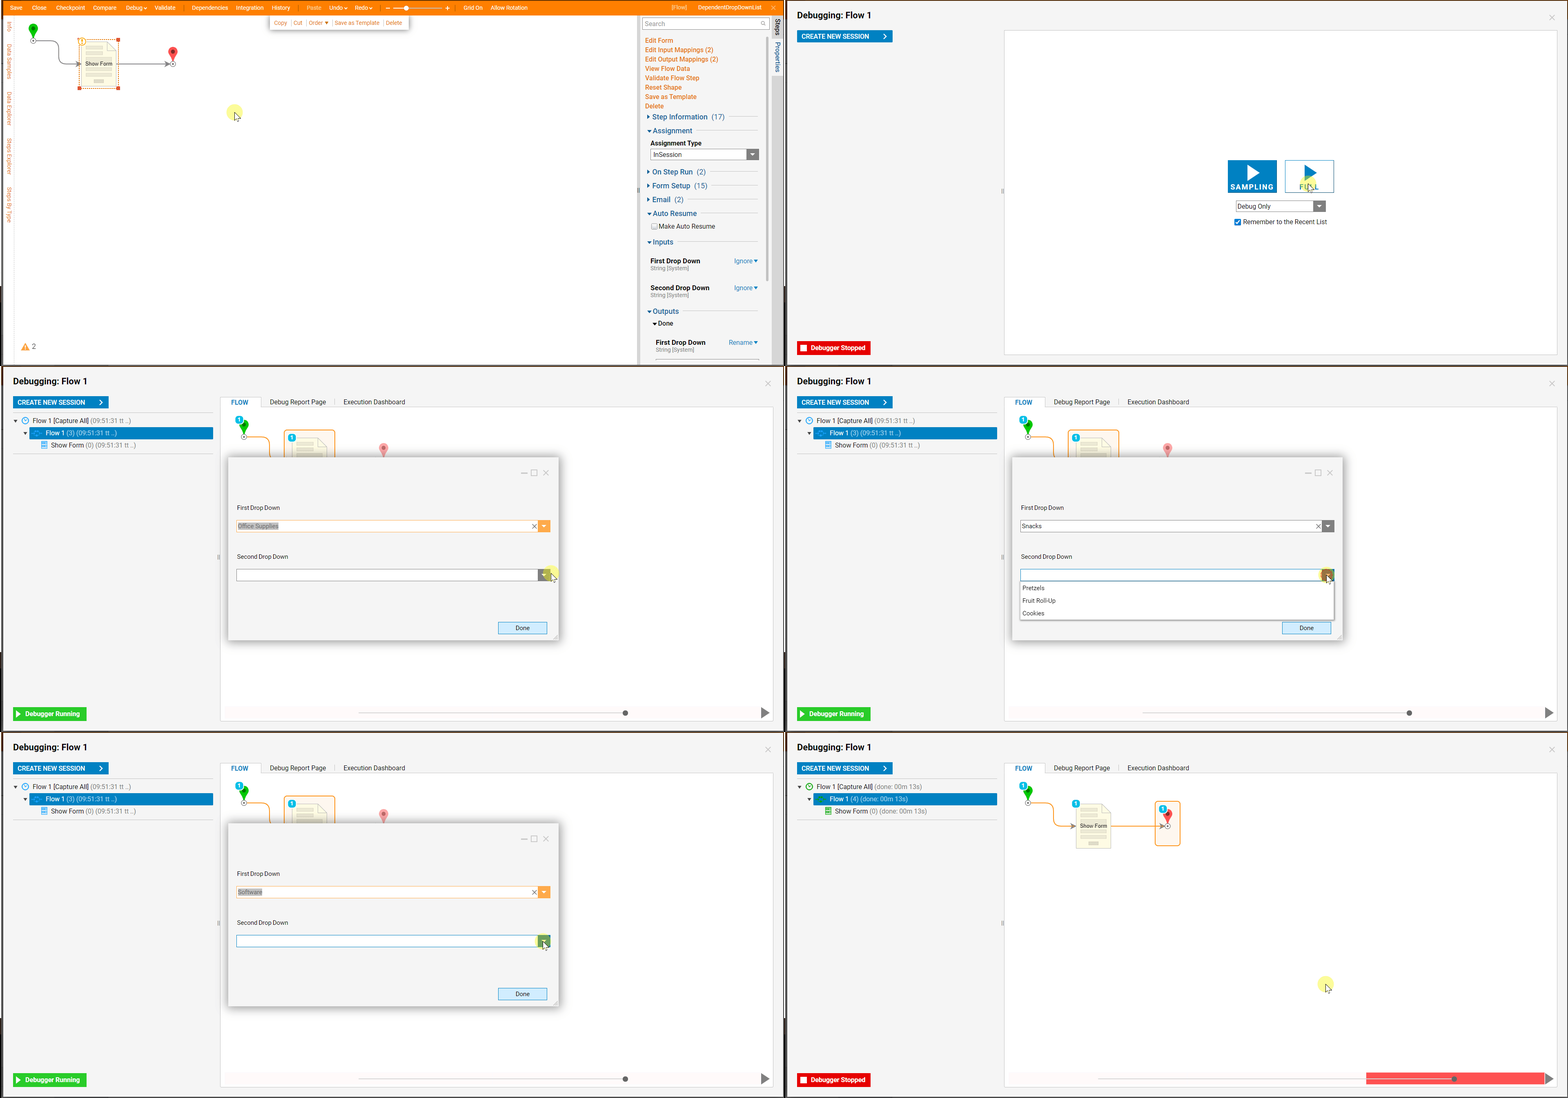
The example flow will display a form containing two drop-down lists. In the first drop-down list, users will be able to select from a list of items. From the second drop-down list, users will select from a list of all the entities inside the items selected in the first drop-down list.
- In the Flow Designer, add a Show Form step to the workspace.
- With the Show Form step selected, in the Properties panel, select Pick or Create Form.
- Under Create New. Name the Form, select CREATE.
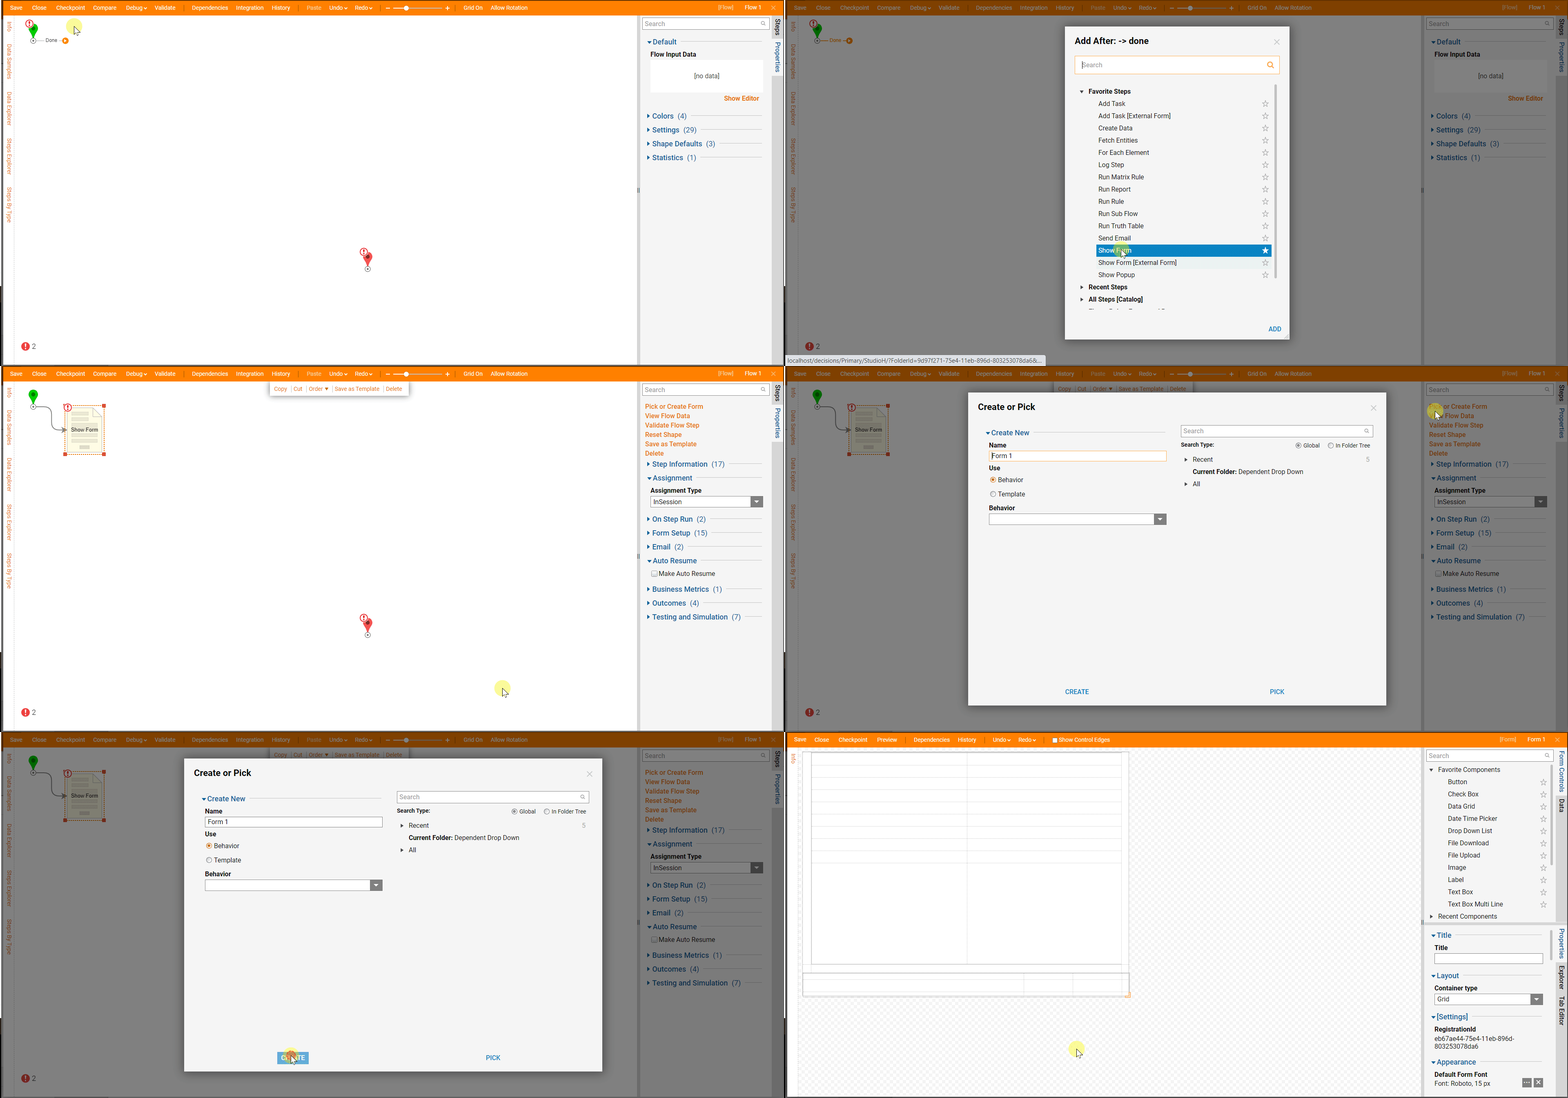
- Add two Drop Down Lists from the Favorites category in the Form Controls panel.
- Independent Drop Down (First Drop Down)
- Dependent Drop Down (Second Drop Down)
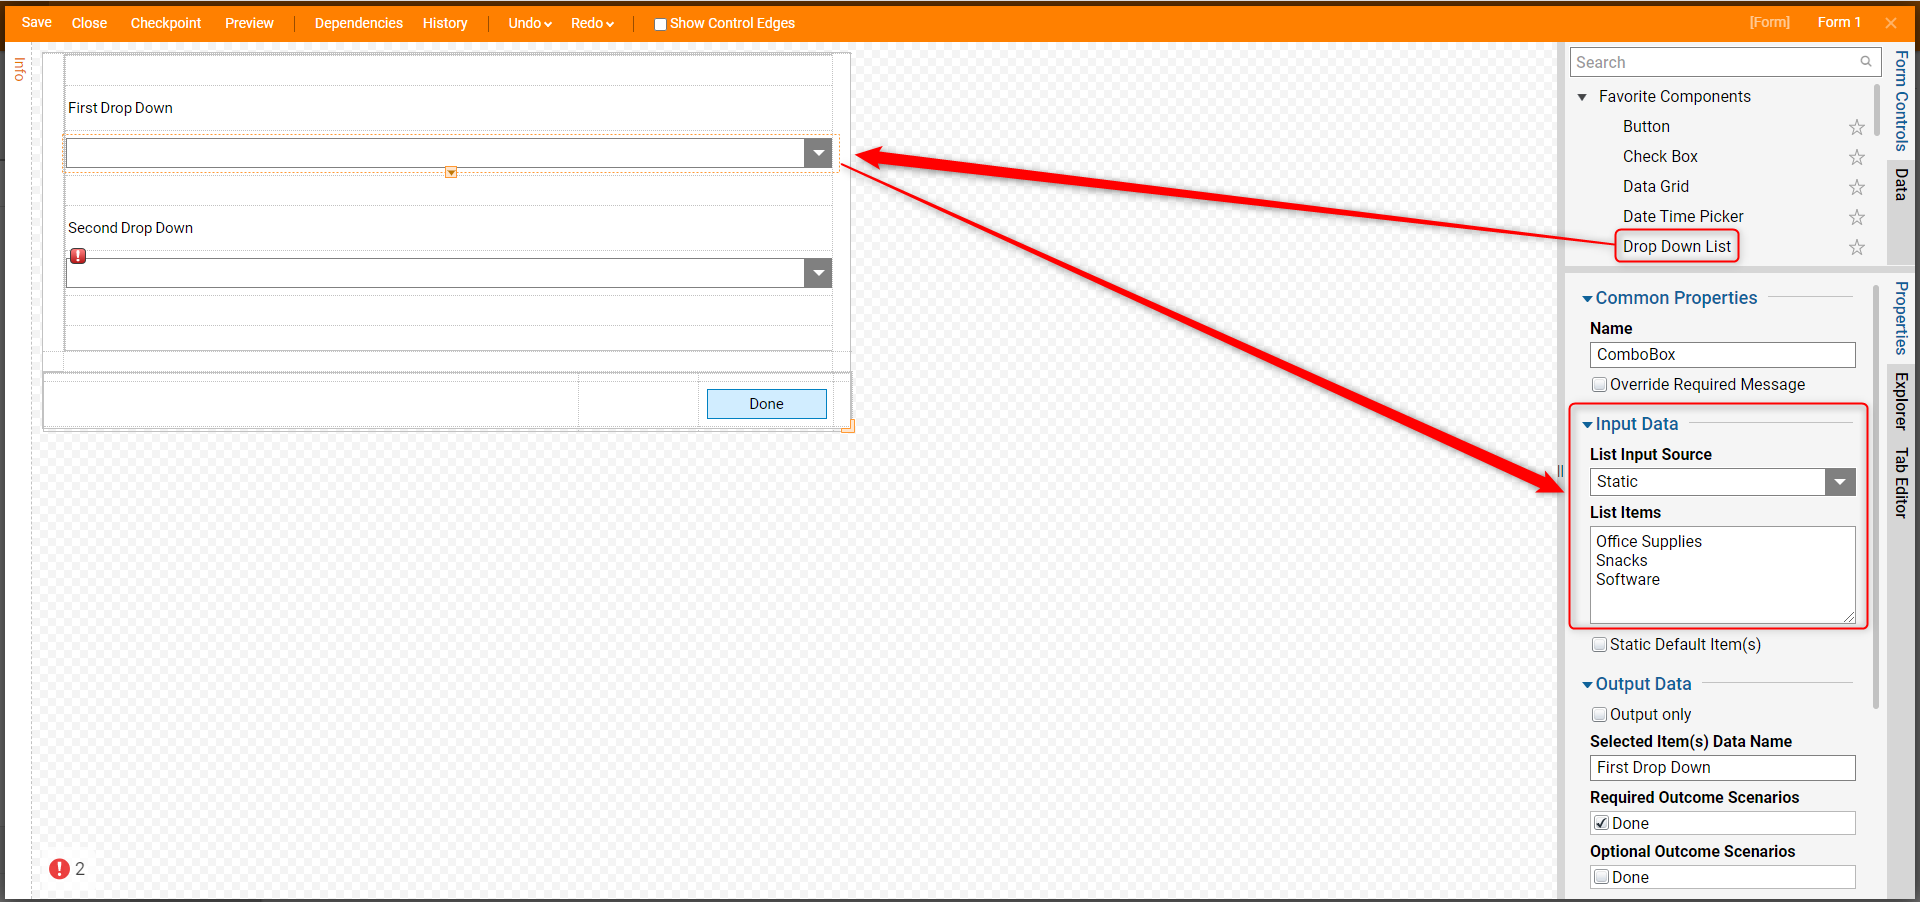
- Select the First Drop Down List.
- In the Properties panel, select Static under List Input Source.
- Under List Items, type in selections for the First Drop Down List, separate items by pressing [ENTER]. The following items are the List Items used in this example.
- Office Supplies
- Snacks
- Software
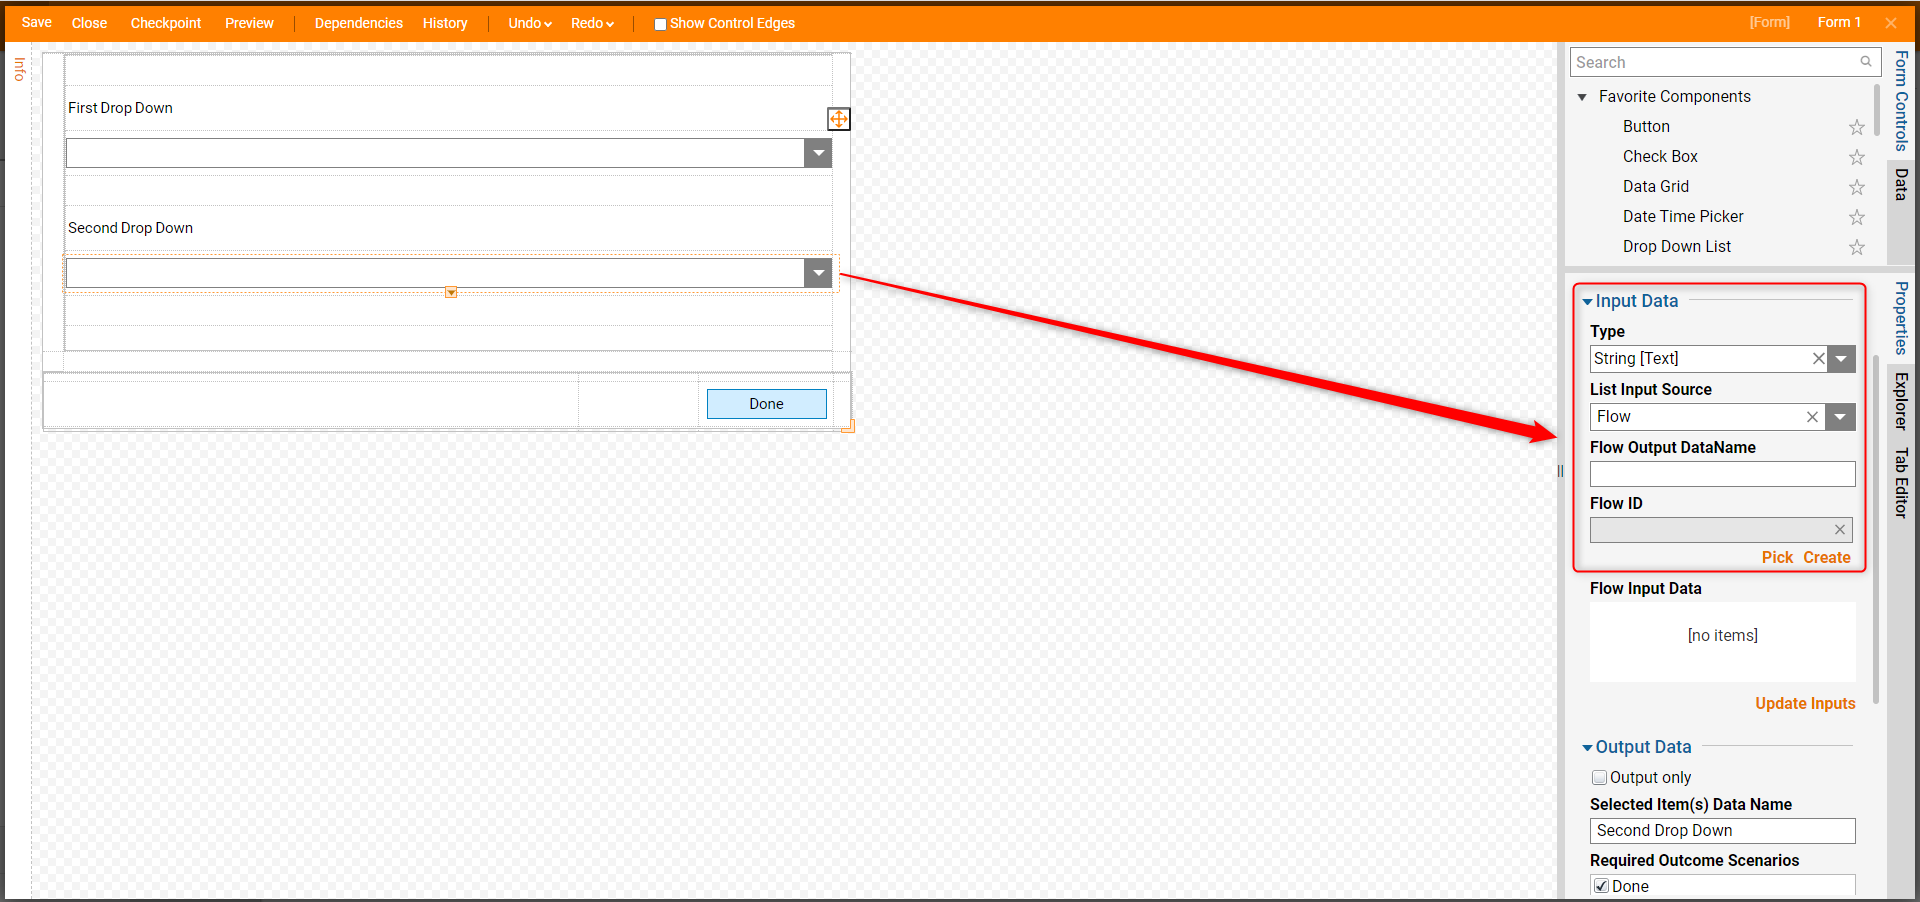
- Select the Second Drop Down List.
- In the Properties Panel, change the List Input Source to Flow.
- Under Flow ID select Create.
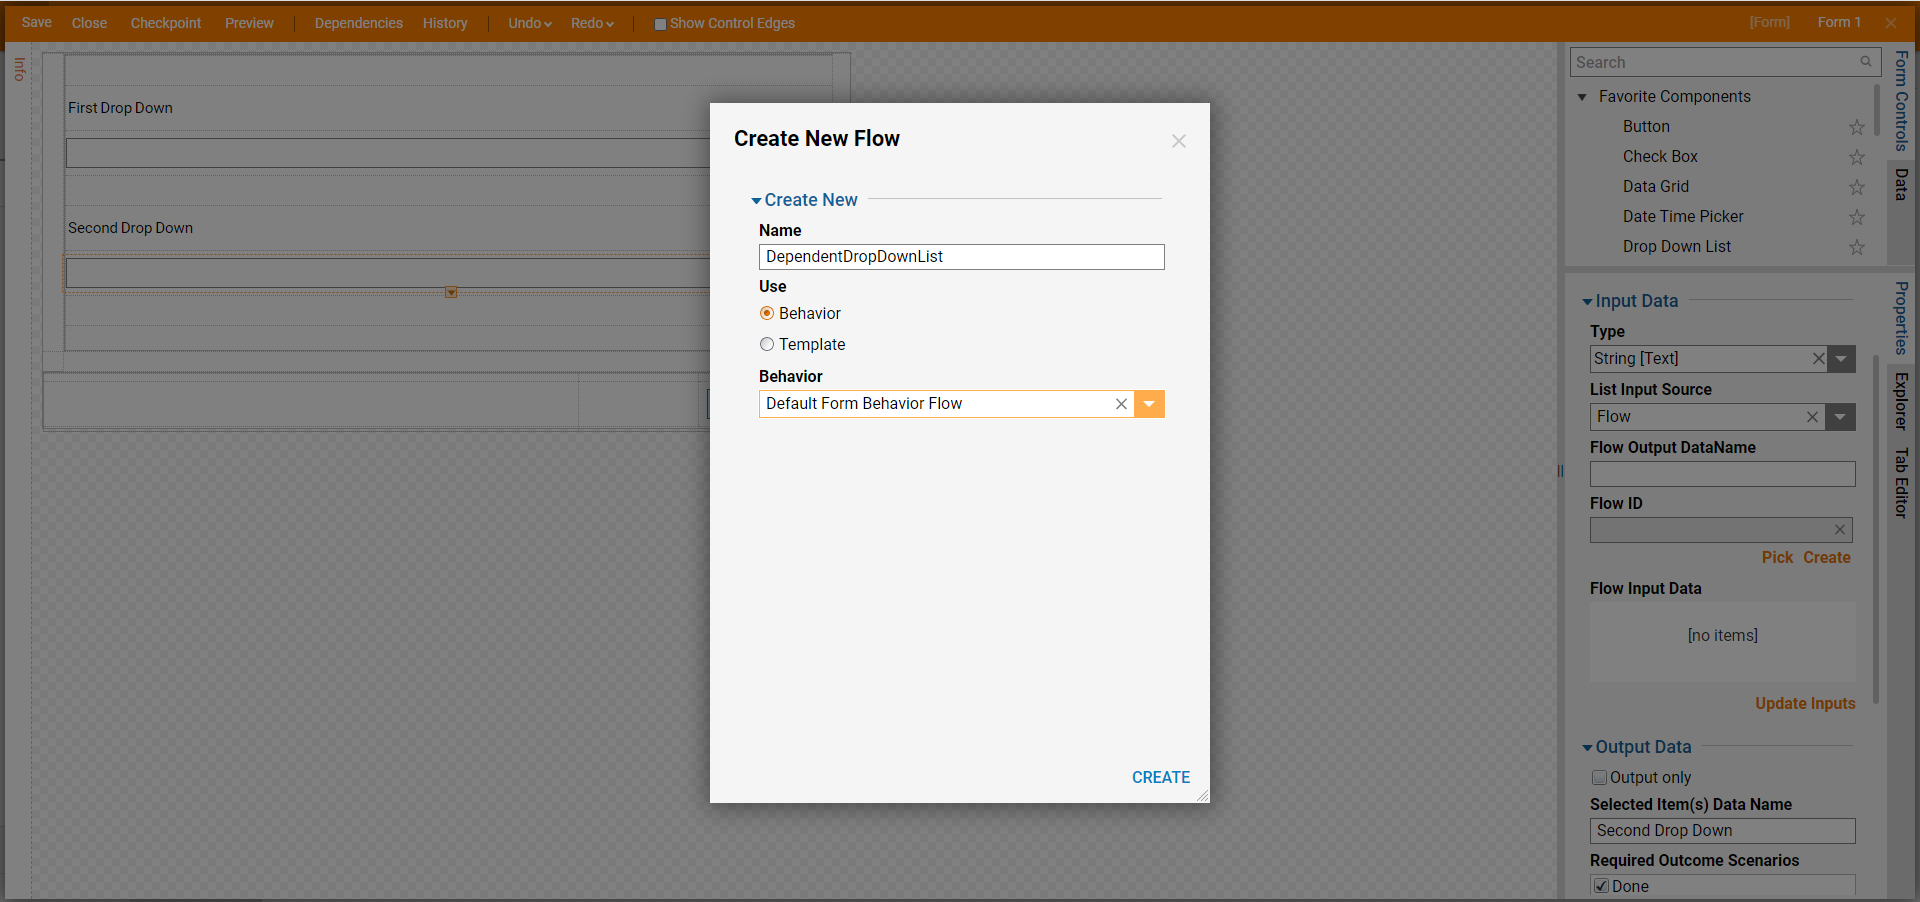
- In the Create New Flow dialog, name the Flow and change the Behavior to Default Form Behavior Flow.
- Select CREATE.
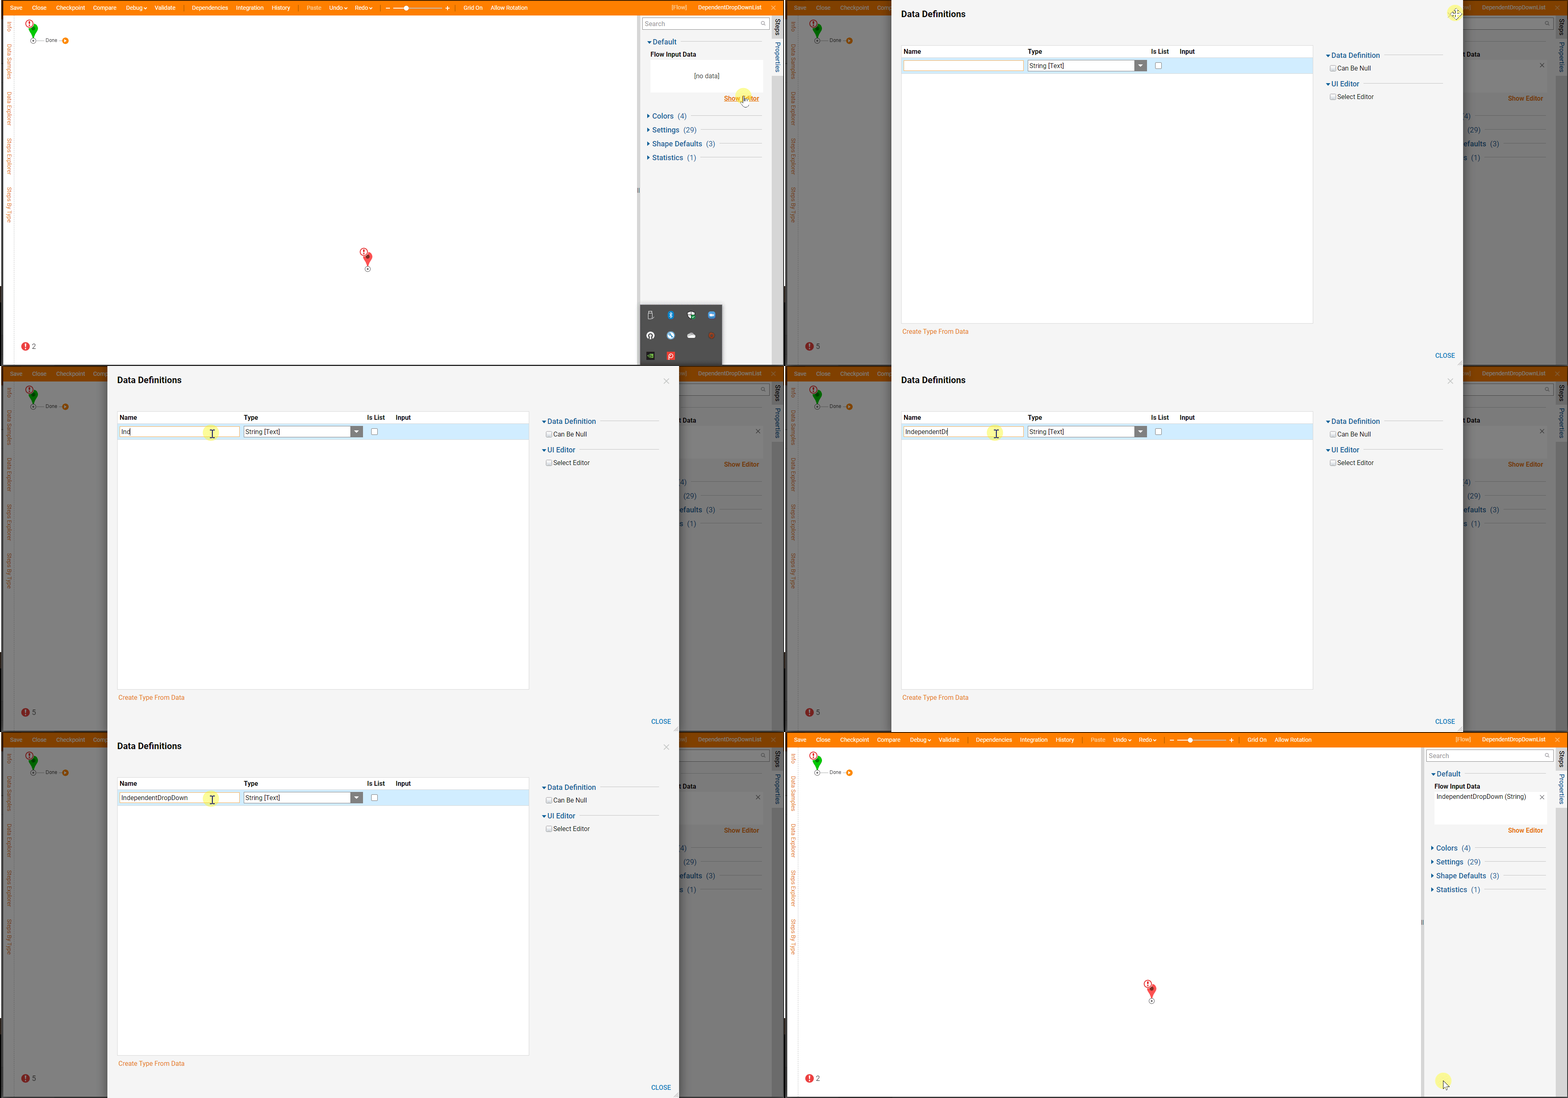
- In the Flow Properties panel, under Flow Input Data, select Show Editor.
- In the Data Definitions dialog, under Name type "Independent Drop Down". Under Type, choose String. Select CLOSE to save and close the dialog.
- Select the Done outcome path of the Start step.
- In the Add After dialog, select the Run Truth Table step in the Favorite Steps category.
- Select ADD.
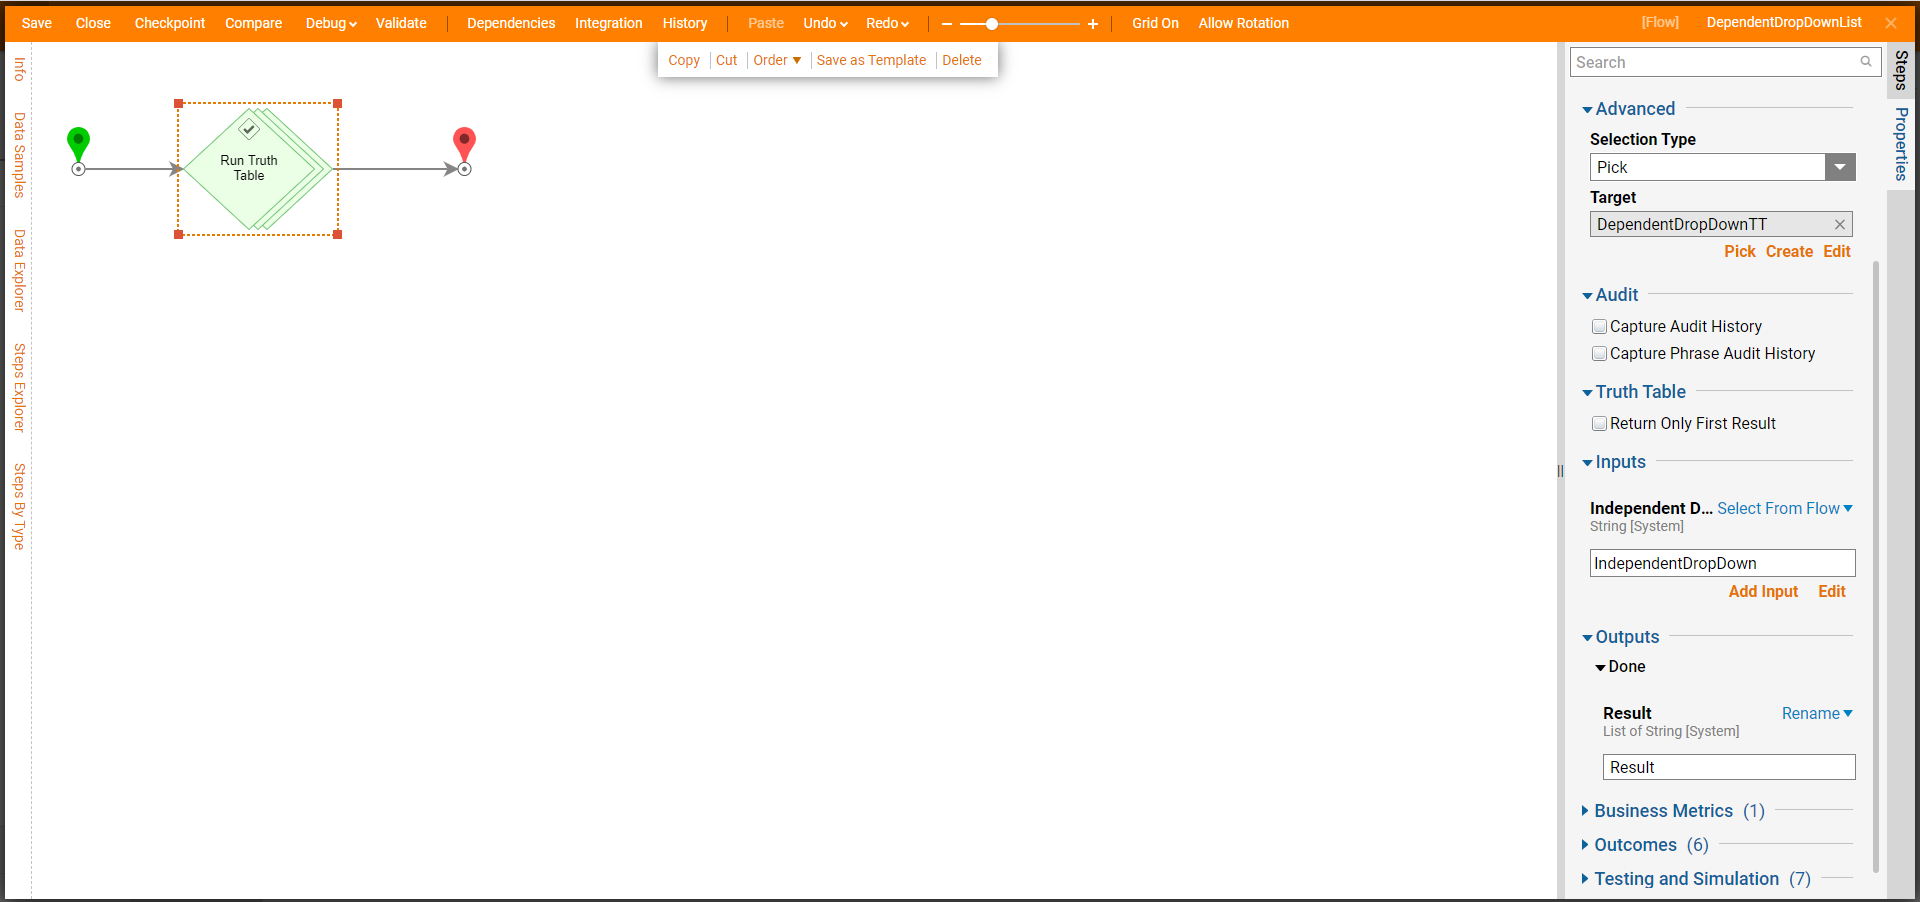
- With the Run Truth Table step selected, in the Properties panel, select Pick or Create Truth Table.
- Under Create New. Name the Truth Table. Select CREATE.
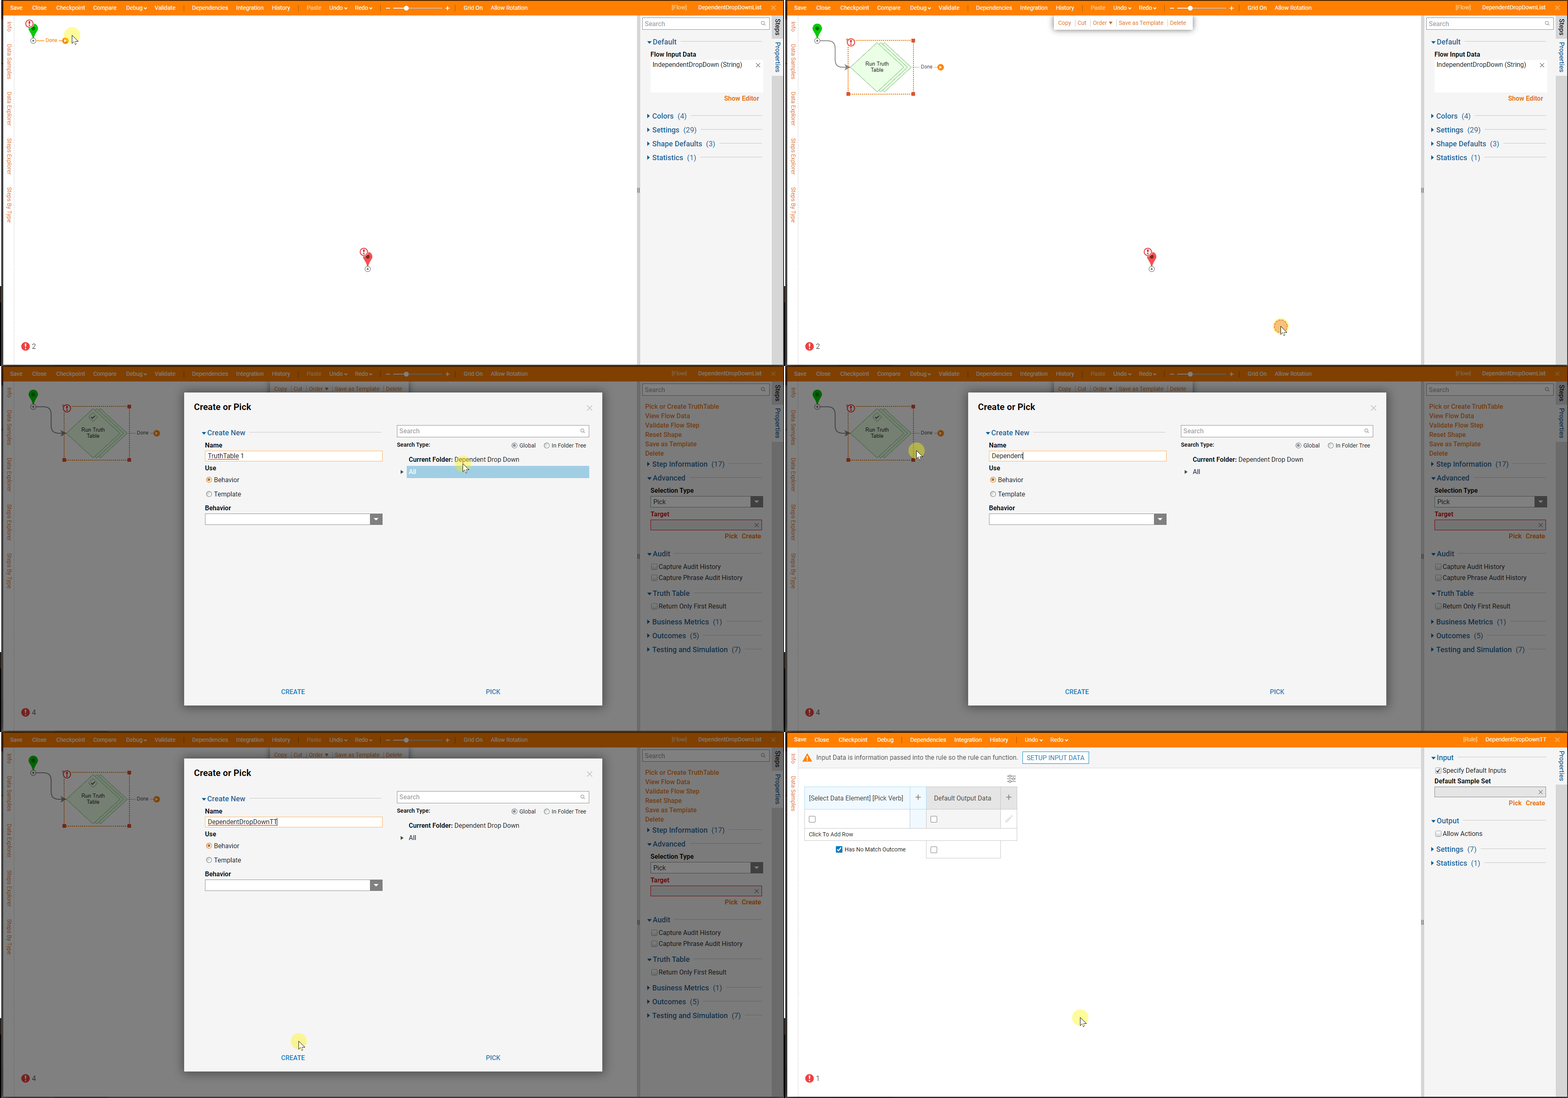
- Under Create New. Name the Truth Table. Select CREATE.
- Select SETUP INPUT DATA
- Under Name type "Independent Drop Down".
- Under Type, choose String.
- Save and Close the Data Designer.
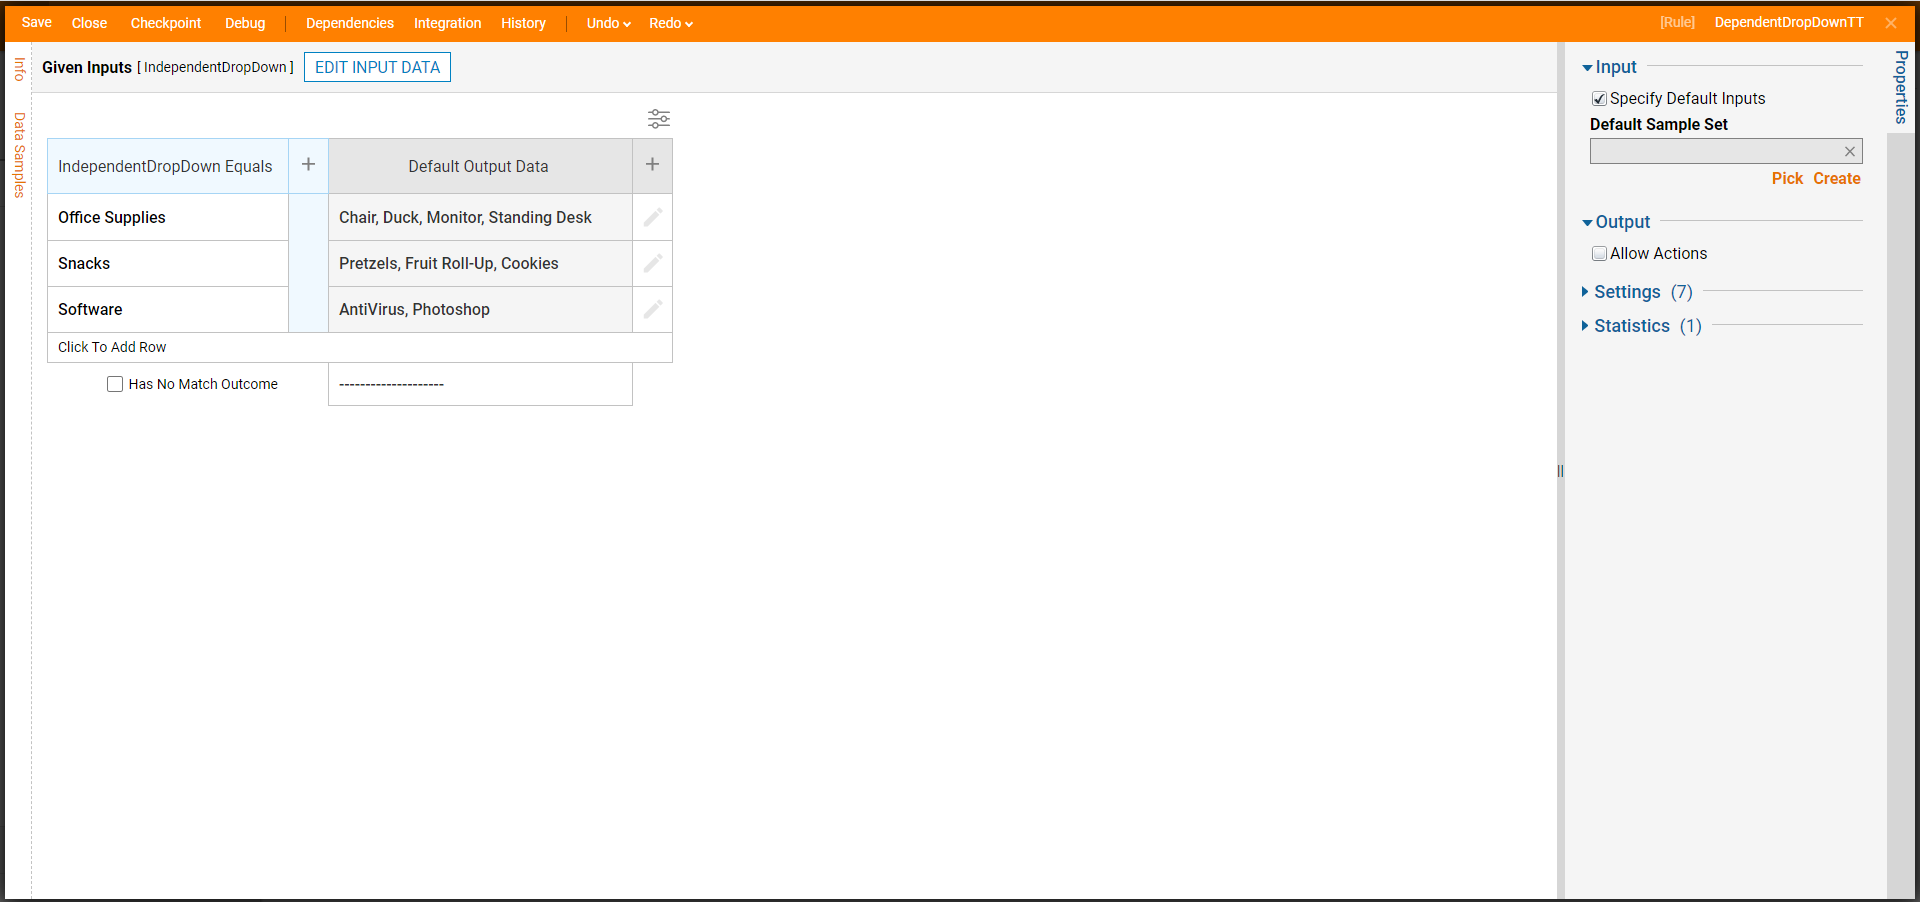
- Configure the Truth Table as follows. Navigate to the Create a Truth Table article to learn more.
Independent Drop Down Equals Default Output Data Office Supplies Chair, Duck, Standing Desk Snacks Pretzels, Fruit Roll-Ups, Cookies Software AntiVirus, Photoshop - Save and close the Truth Table.
- Select the Run Truth Table step.
- Under Inputs > Independent Drop Down, select Pick, choose Independent Drop Down.
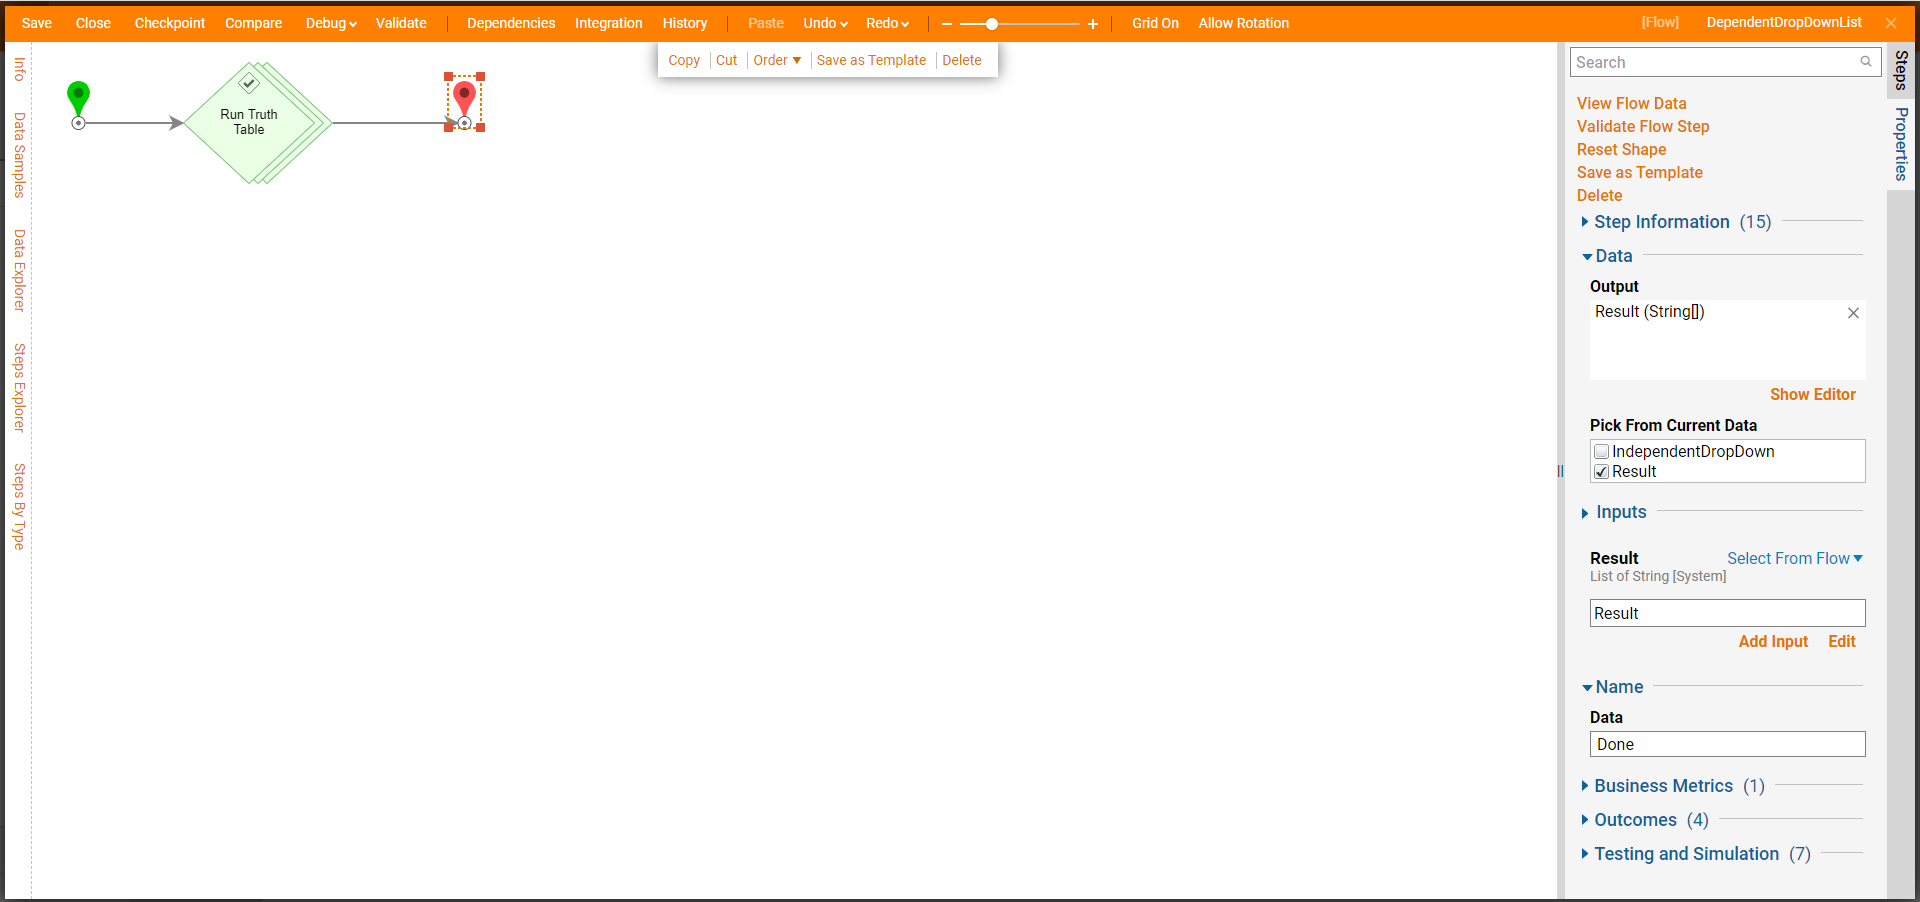
 Select the End Step. Under Data > Pick From Current Data, select Result.
- Save and close.
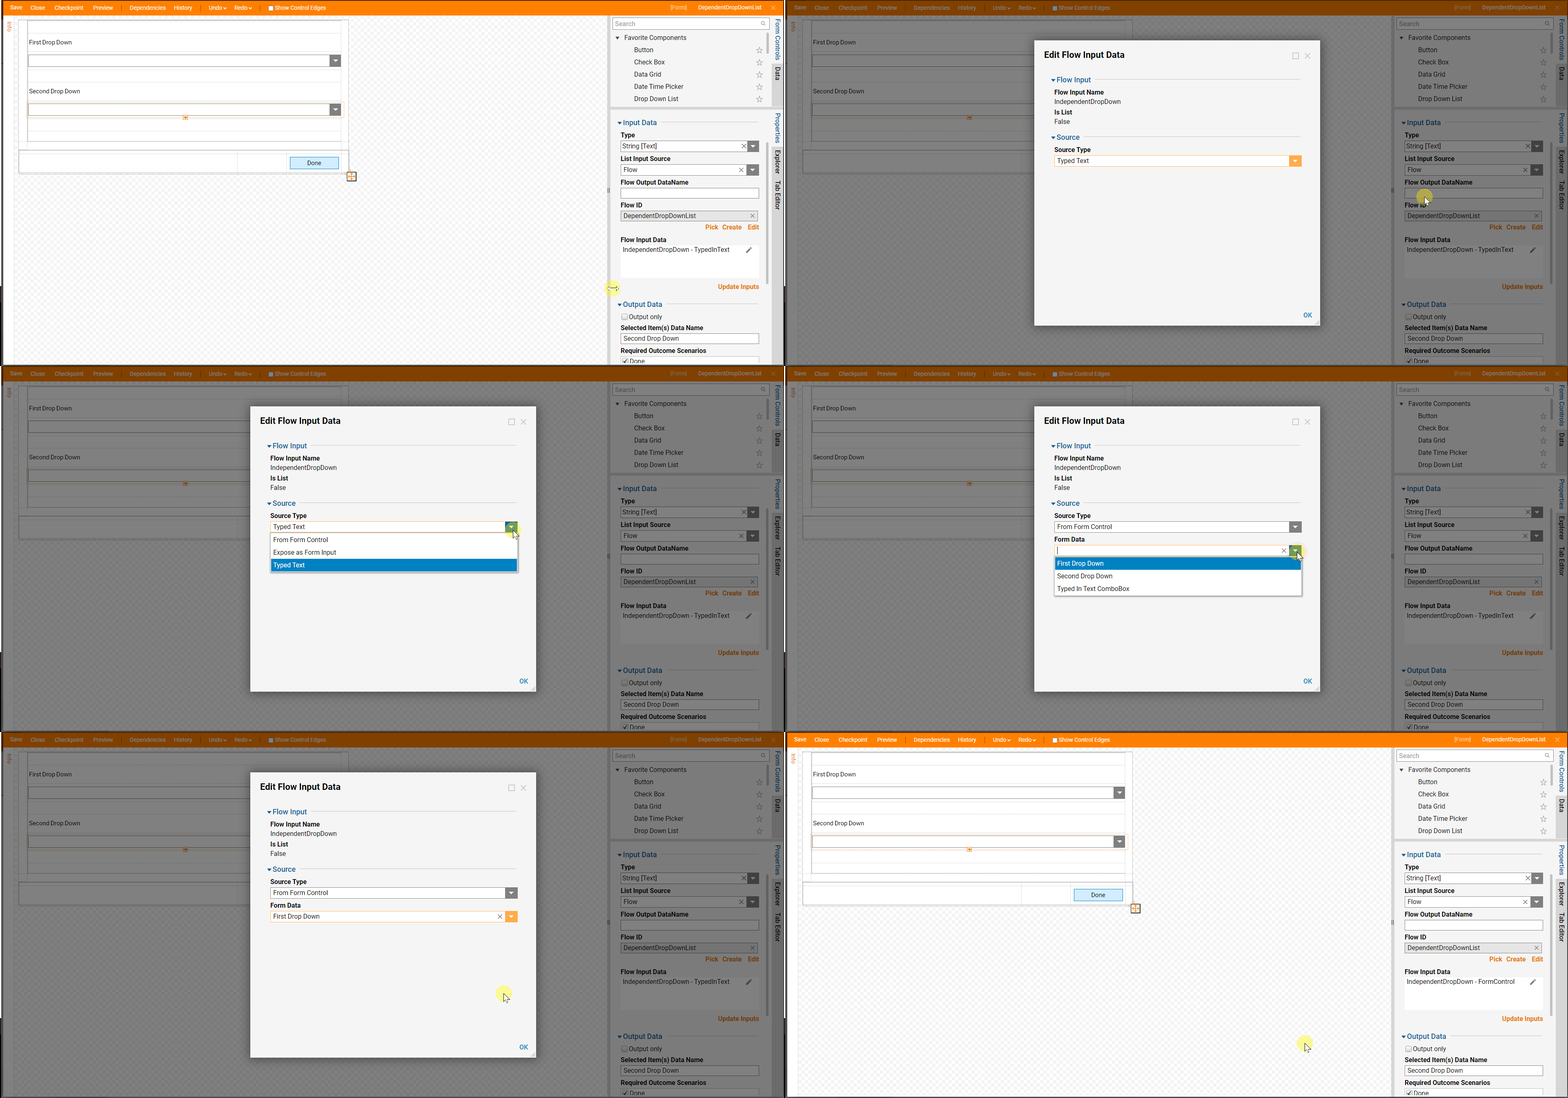
- In the Form Designer, under Input Data, select Update Inputs.
- Select the pencil icon next to Independent Drop Down.
- In the Edit Flow Input Data dialog, change the Source Type to From Form Control.
- In the Form Data drop down, select First From Down.
- Select OK to save and close.
Debug
- In the Flow Designer, select Debug in the top action panel.
- Select Full.
- Select one of the static items from the Independent Drop Down List.
- Notice the Dependent Drop Down List changes to show what the Truth Table valued as True.
- Change the independent Drop Down List and see the change of the dependent Drop Down List.
