Overview
This article describes how the Flow Designer helps to simplify Flow Design process. This article briefly covers using a GoTo step to jump between Flow Steps and a Catch Exception Step to catch exceptions in the Flow and provide the user with error information, instead of crashing the Flow if the exception occurs.
Example
Begin in a Designer Folder and click the Create Flow button located on the Action Bar at the bottom of the screen.

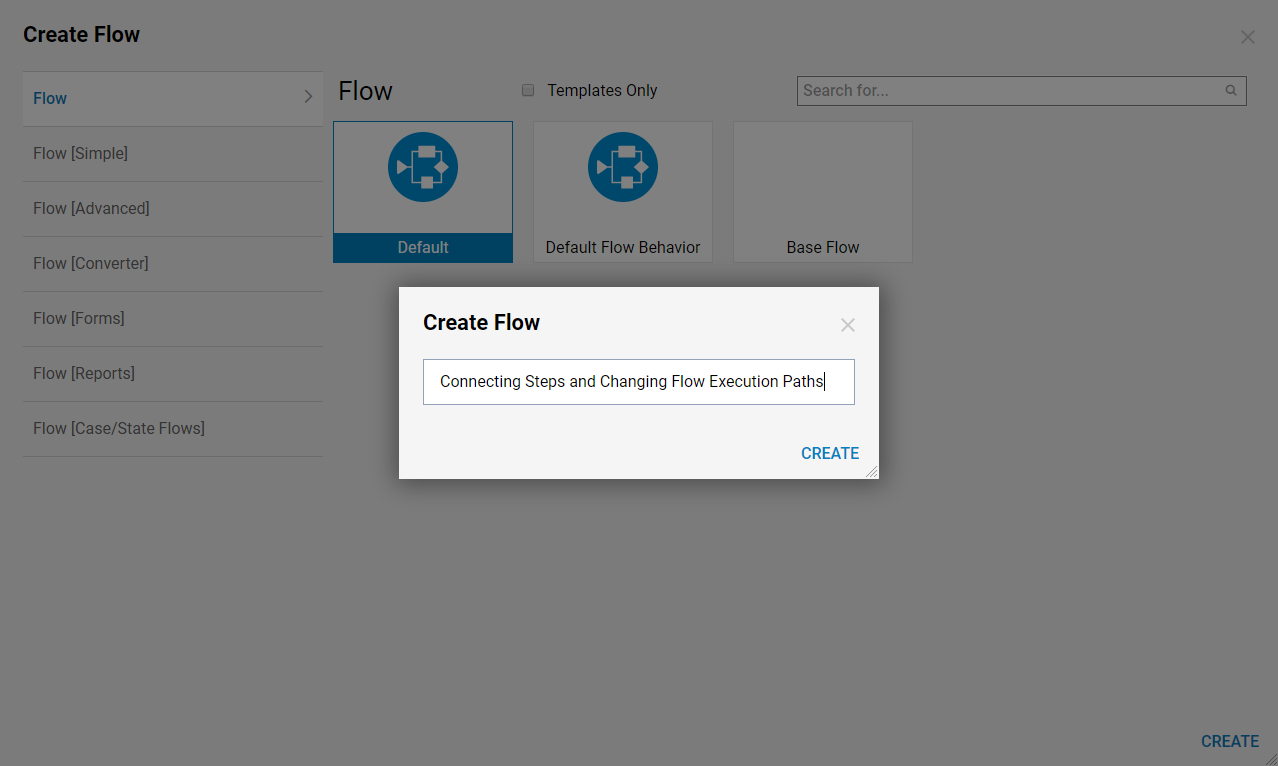
Select 'CREATE' for the default Flow template, name the Flow on the next screen, then select 'CREATE' again. Decisions will now redirect to the Flow Designer.
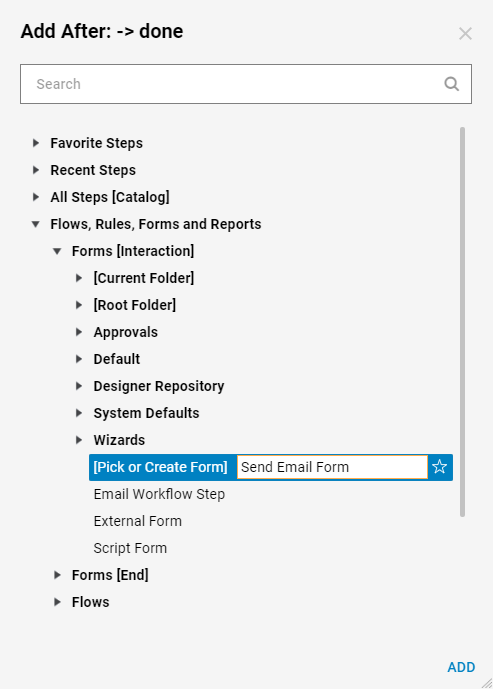
In the Flow Designer, click the orange arrow on the 'Done' path coming from the Start Step. When the Add After window appears, navigate to Flows, Rules, Forms and Reports > Forms[Interaction] and select the [Pick or Create Form] Step. Before clicking 'ADD', make sure to provide a new name for the Step in the text box that appears immediately after selecting it. For this example, the Step will be named 'Send Email Form'.
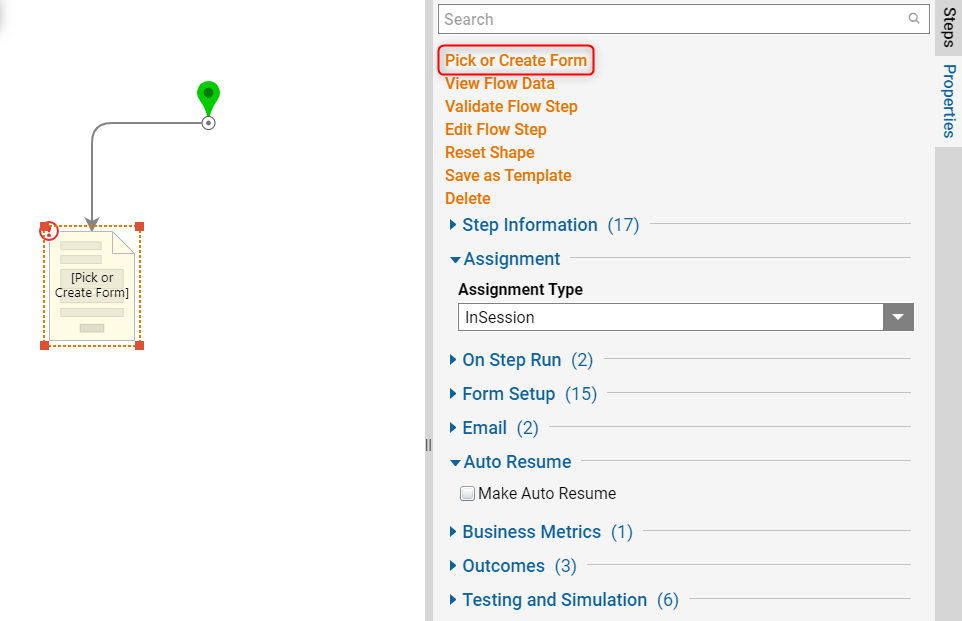
After this Step is added to the Flow, the properties will appear for it on the right side. At the top of the properties tab for this step, click the Pick or Create Form button. In the Create or Pick window that has appeared, use the left side panel to name a new Form as the 'Send Email Form', then click 'CREATE' at the bottom.
In the Form Designer, please design a Form to reflect a similar build as the screenshot below. This Form uses four labels, four text boxes, and a button, which are all Form Controls from the Form Controls Tab on the right side of the Designer.
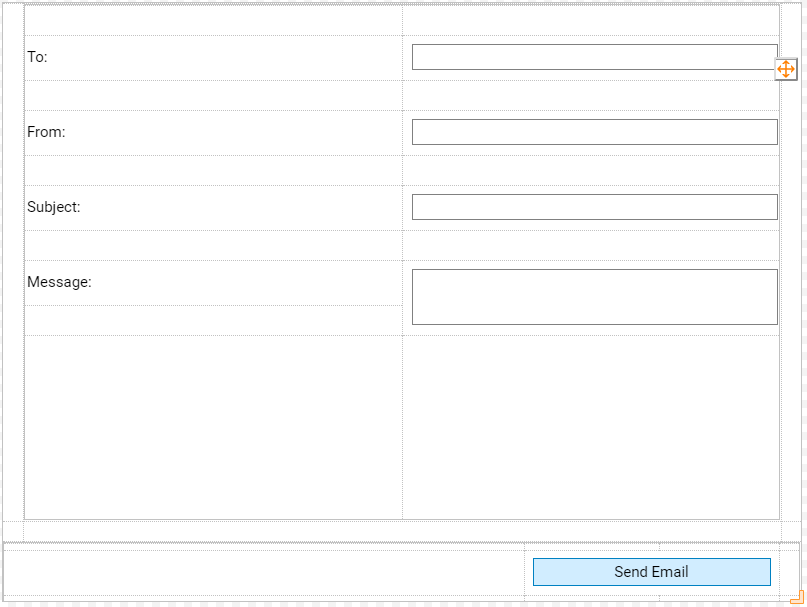
Click the 'Close' button in the top left corner of the Form Designer, click 'SAVE' when the Save Form window appears.
In the properties for the Send Email Form Step on the right side, navigate to the Inputs section, expand the Unknown drop-down for each input and select Ignore for all of them.
Click the orange arrow on the 'Send Email' path coming from the Send Email Form Step. When the 'Add After' window appears, navigate to All Steps[Catalog] > Communication and select the Send Email Step, then click 'ADD'.

Click the 'Send Email' Step icon and navigate to the properties for this Step that appear on the right side, then click Edit Input Mappings at the top. Change the input mappings to reflect the screenshot below, then click 'OK' to close this window.

Back in the Flow Designer, click the orange arrow on the 'Sent' path coming from the Send Email Step. When the Add After window appears, navigate to Flows, Rules, Forms and Reports > Forms[Interaction] and select the [Pick or Create Form] Step. Before clicking 'ADD', make sure to provide a new name for the Step in the text box that appears immediately after selecting it. For this example, the Step will be named 'Another Task Form'.
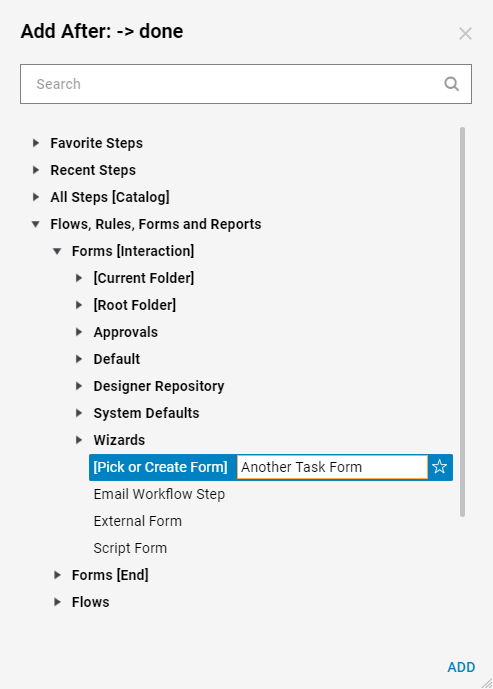
After this Step is added to the Flow, the properties will appear for it on the right side. At the top of the properties tab for this step, click the Pick or Create Form button. In the Create or Pick window that has appeared, use the left side panel to set the name for the new Form as 'Another Task Form', then click 'CREATE' at the bottom.
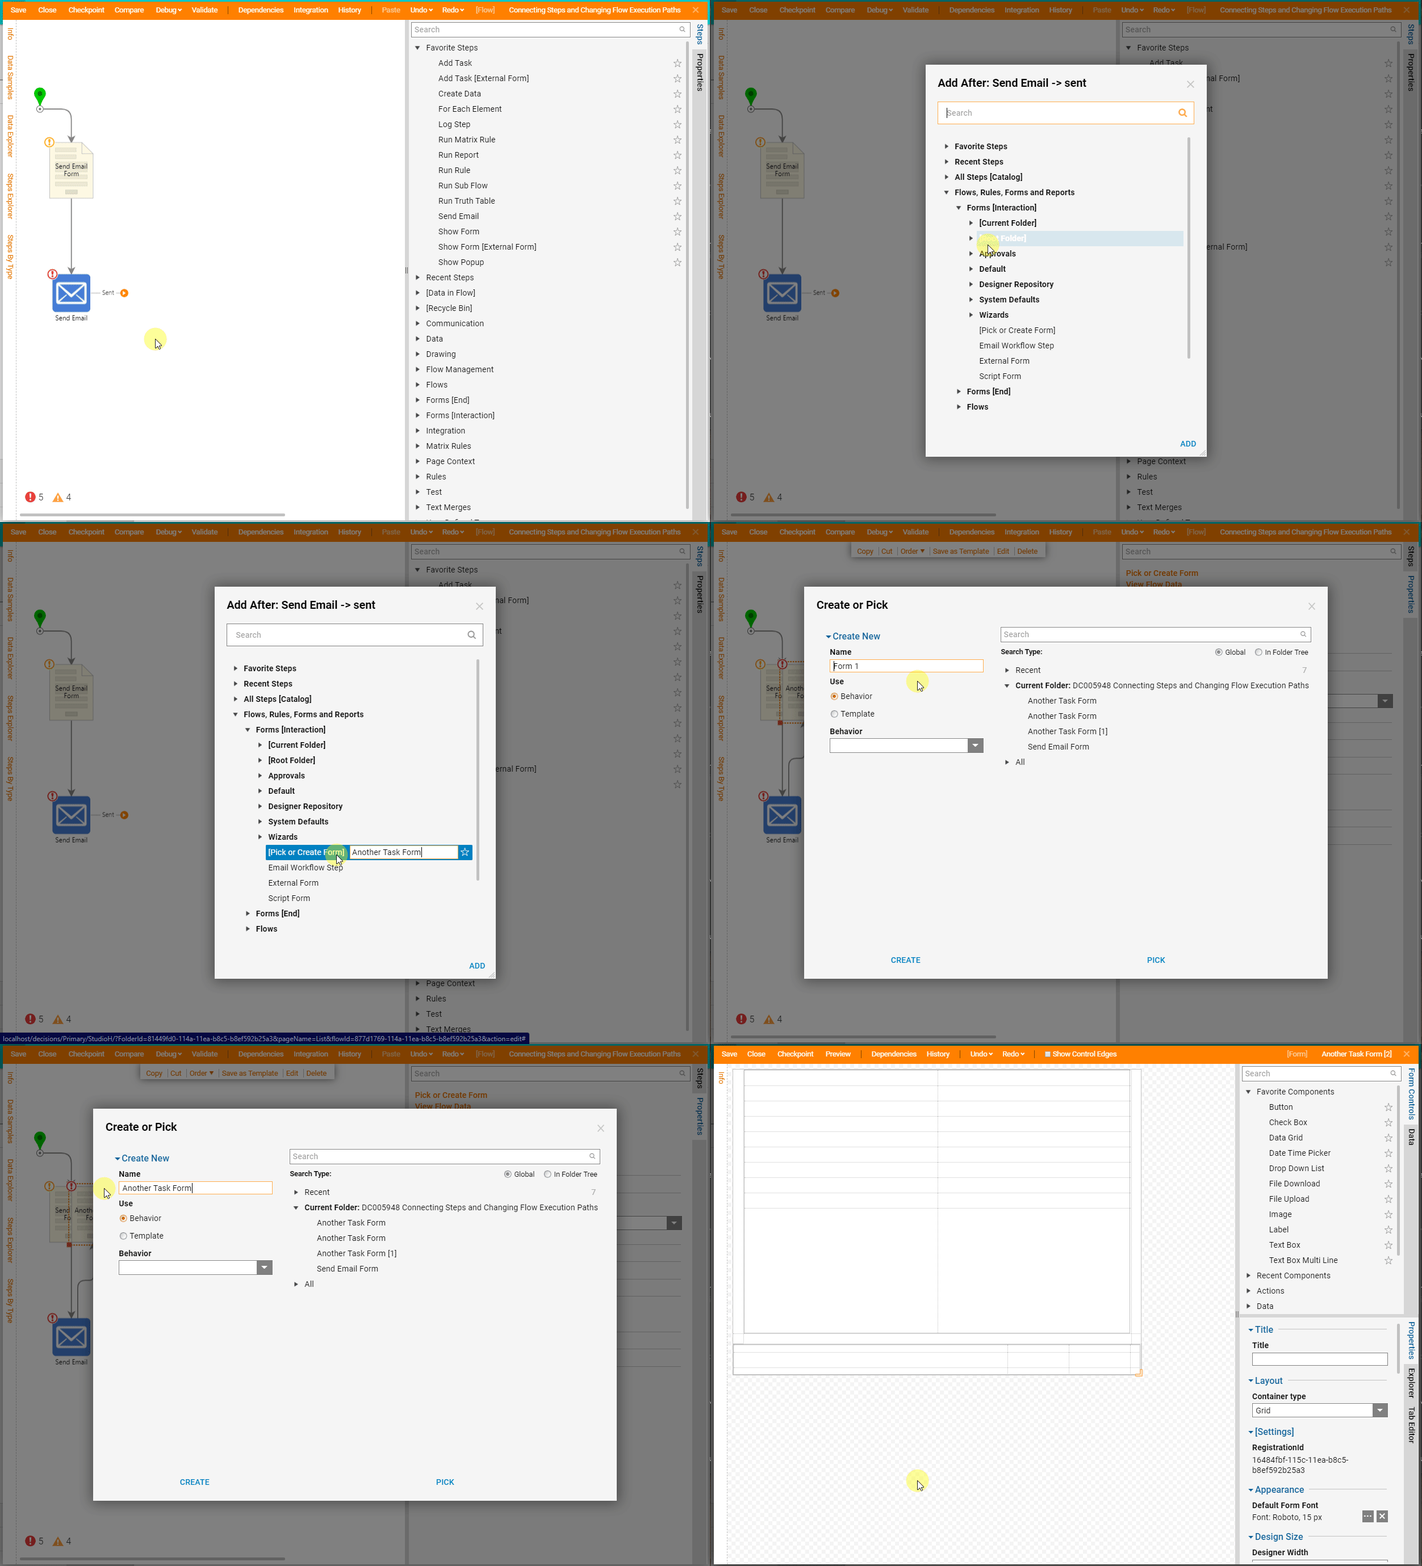
In the Form Designer, please design a Form to reflect a similar build as the screenshot below. This Form uses two 'Button' Form Controls from the Form Controls Tab on the right side of the Designer. This Form is designed to provide the user with control over the Flow. Click the 'Close' button in the top left corner of the Form Designer, click 'SAVE' when the Save Form window appears.
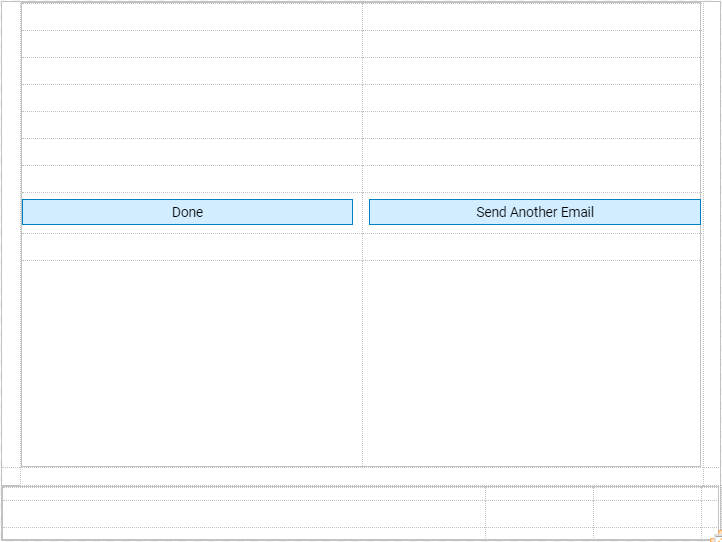
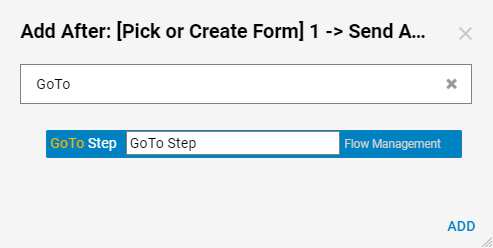
Back in the Flow Designer, click the orange arrow on the 'Send Another Email' path coming from the Another Task Form Step. When the Add After window appears, navigate to the search bar and type GoTo, then hit Enter. Select the GoTo Step and click 'ADD'.
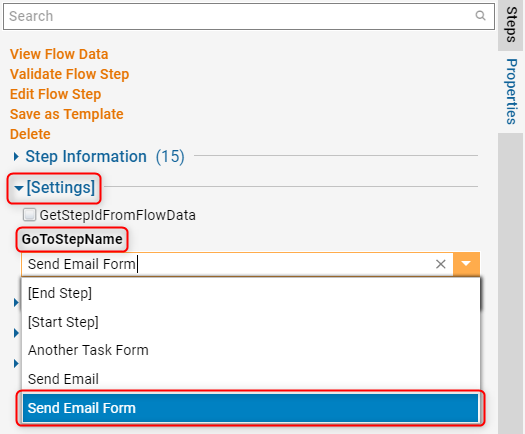
After this Step is added to the Flow, the properties will appear for it on the right side. Navigate to the [Settings] section and expand the GoToStepName drop-down, then select Send Email Form from the list. The drop-down list provides all of the available Flow Steps that the GoTo Step can jump to. This configuration ensures that the end-user will be redirected back to the 'Send Email Form' to send another email.
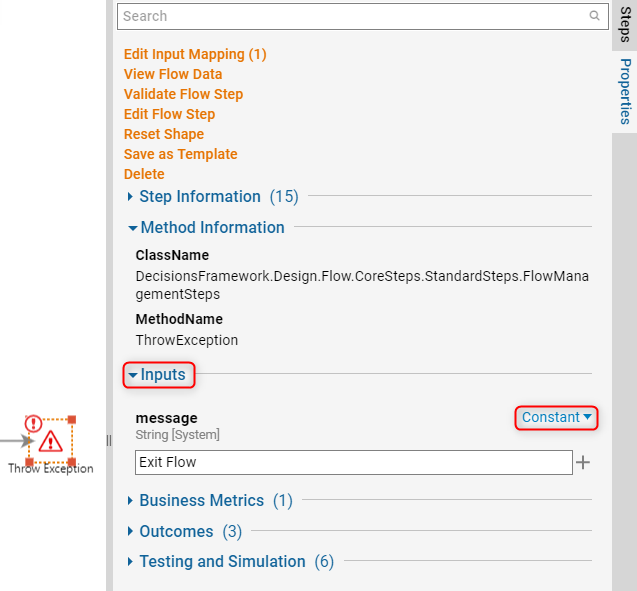
Click the orange arrow on the 'Done' path coming from the Another Task Form Step. When the Add After window appears, navigate to the search bar and type Throw Exception then hit Enter. Select the Throw Exception Step and click 'ADD'. For this example, the 'Done' path is going to be used to throw an exception in the Flow. After this Step is added to the Flow, the properties will appear for it on the right side. Navigate to the Inputs section and expand the Unknown drop-down, then select Constant from the list and enter 'Exit Flow' in the text box that appears.
Notice that the Throw Exception Step does not have an outcome path, meaning there is nothing connected to the End Step just yet. Click into the blank canvas in the Flow Designer, then locate the Steps tab on the right side. Use the search bar and type Catch Exception, then hit Enter. Click and drag the Catch Exception Step into the Flow.
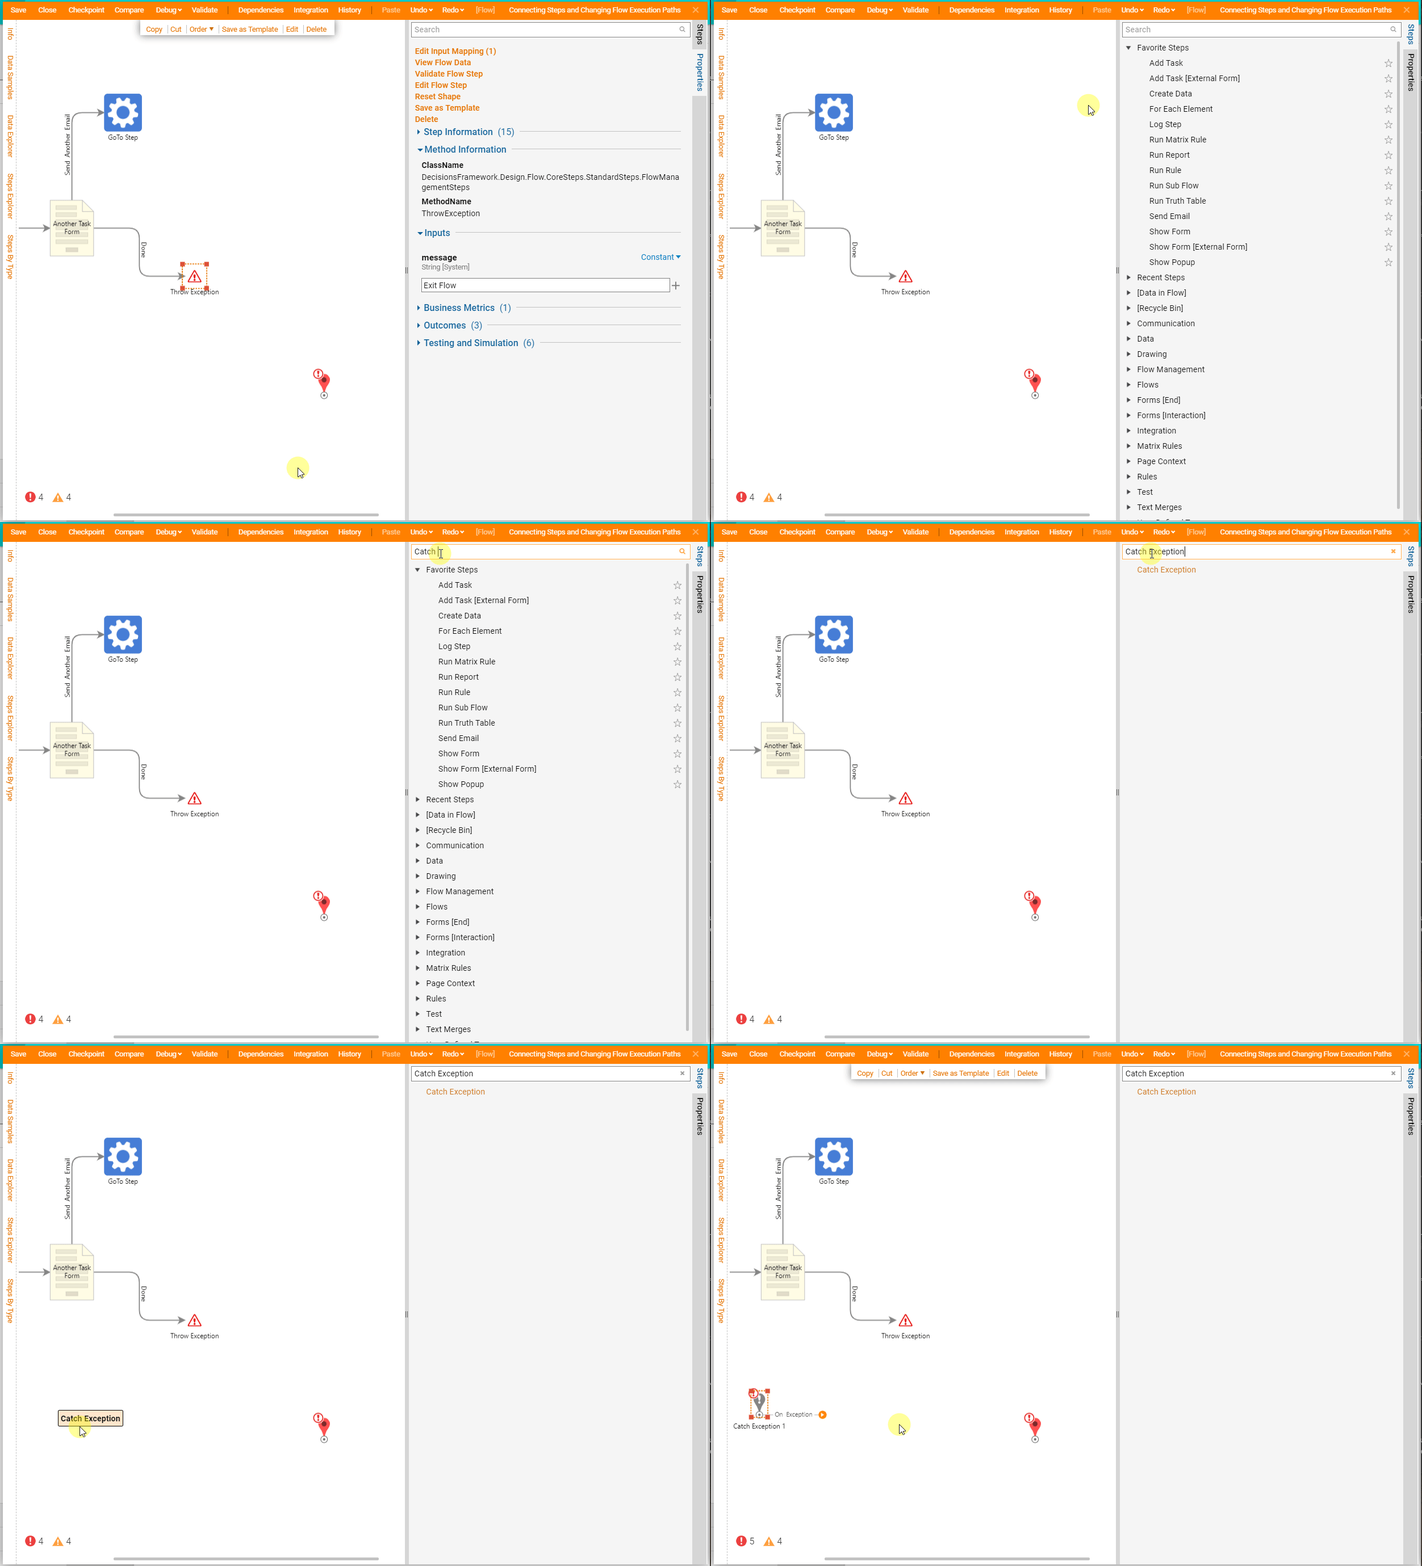
Click the orange arrow on the 'On Exception' path coming from the Catch Exception Step. When the Add After window appears, navigate to Flows, Rules, Forms and Reports > Forms[Interaction] and select the [Pick or Create Form] Step. Before clicking 'ADD', make sure to name the Step in the text box that appears immediately after selecting it.
In the Form Designer, please design a Form to reflect a similar build as the screenshot below. This Form uses a Label to show the message and two Textboxes to show 'Yes' and 'No'.
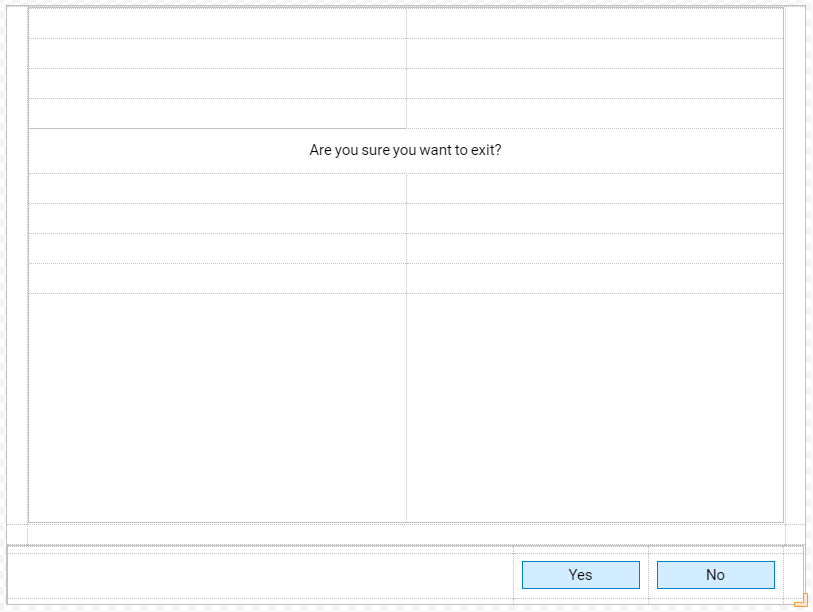
Drag the 'Yes' path coming from the Exception Message Step to the End Step. Click the orange arrow on the 'No' path coming from the Exception Message Step. When the Add After window appears, navigate to the search bar and type GoTo, then hit Enter. Select the GoTo Step and click 'ADD'.
Navigate to the [Settings] section of the Step properties and expand the GoToStepName drop-down, then select Another Task Form from the list.
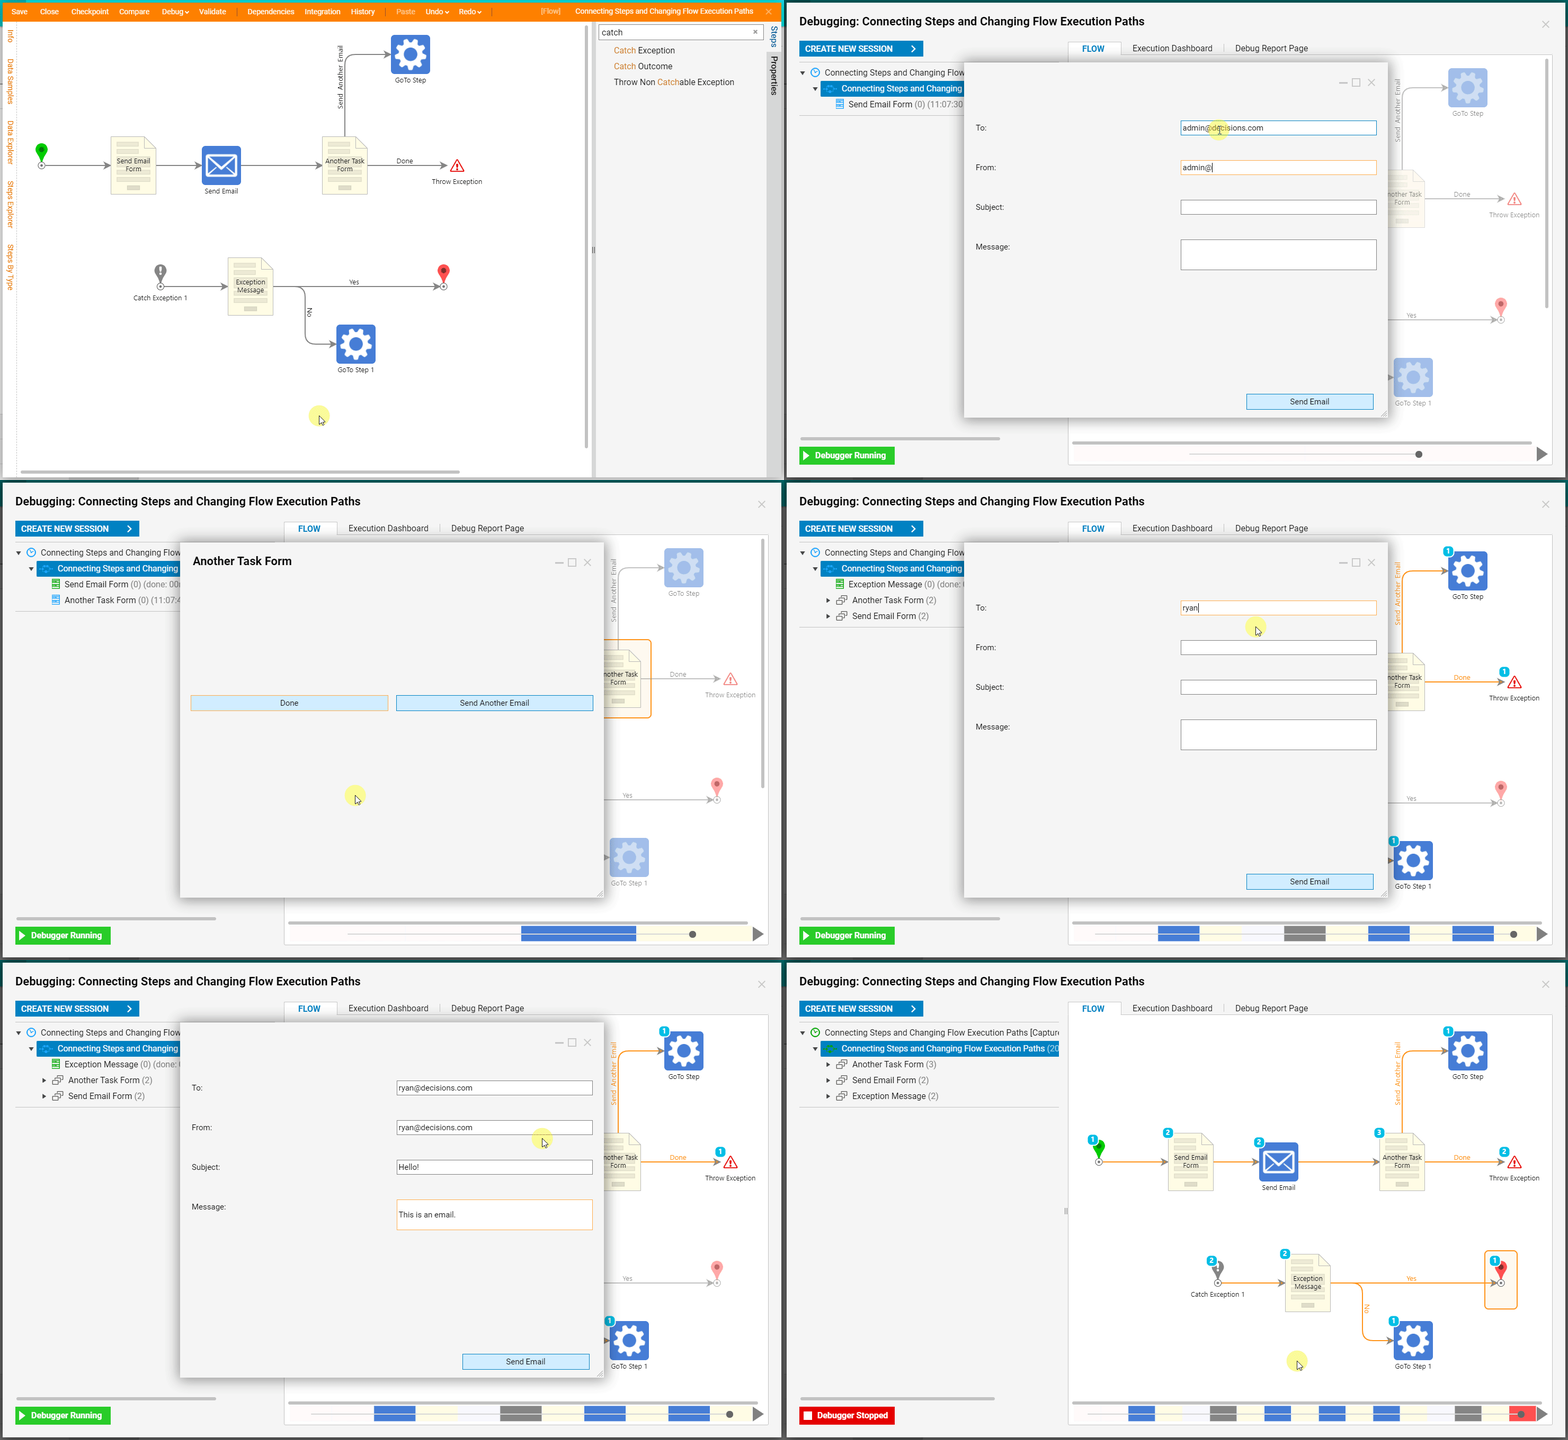
The Flow is now complete and can be debugged using the Debug option at the top of the Flow Designer. Please confirm that the Flow is similar to the one below, if it is not, please revisit the steps above.
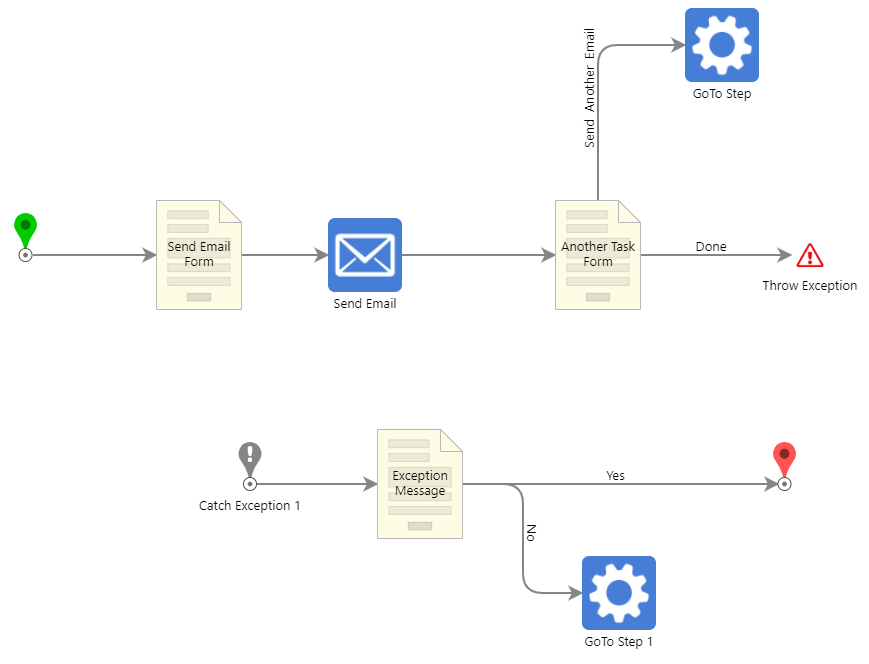
While running the Flow in the debugger, the 'Send Email Form' will appear first. Once that is completed, the Form communicates the data entered to the Send Email Step. After the Send Email Step, the 'Another Task Form' appears and if 'Done' is selected, the Flow will throw an exception as designed.
The exception being thrown will kick off the Catch Exception Step, which then leads to the Exception Message. If the 'No' button is selected, the GoTo Step redirects to the 'Another Task Form'. If 'Send Another Email' is selected, the GoTo Step redirects to the 'Send Email Form'. If 'Yes' is selected on the Exception Message, the Flow will end.
