Overview
Through its use of Modules, Decisions provides the capability to integrate with many different Container and Docker based systems. One such common containerized service integration is integration with Amazon Web Services (AWS).
Integrating with AWS gives users the ability to leverage Container Orchestration Architecture; this in turn allows users to scale and descale implementations rapidly, allowing for better performance, cost, and efficiency. The following document demonstrates how to configure a Decisions image on an AWS Container.
Example
- EC2 instances in AWS with their associated RDS instances; the EC2 instances must be a current Windows OS and the RDS instance is required for SQL Express
- Decisions installation on the EC2 instances. (For more info see Installing on AWS)
- .NET SDK installed on the Decisions instance
- The current version of .NET SDK can be confirmed by running the following CMD: "dotnet --list-sdks"
- To download the Windows Installer for .NET SDK 2.2, see Download .Net Core 2.2.
Versions 7.0.1 - 7.1 require .NET Core 3.1
Versions 7.2 - 7.9 require .NET 5
Versions 7.10+ require .NET 6
Impact on Upgrades:
- ALL custom libraries will need to be recompiled for the new .NET architecture.
- Custom assemblies will need to be re-written.
- Modules may require reinstallation or design refactoring.
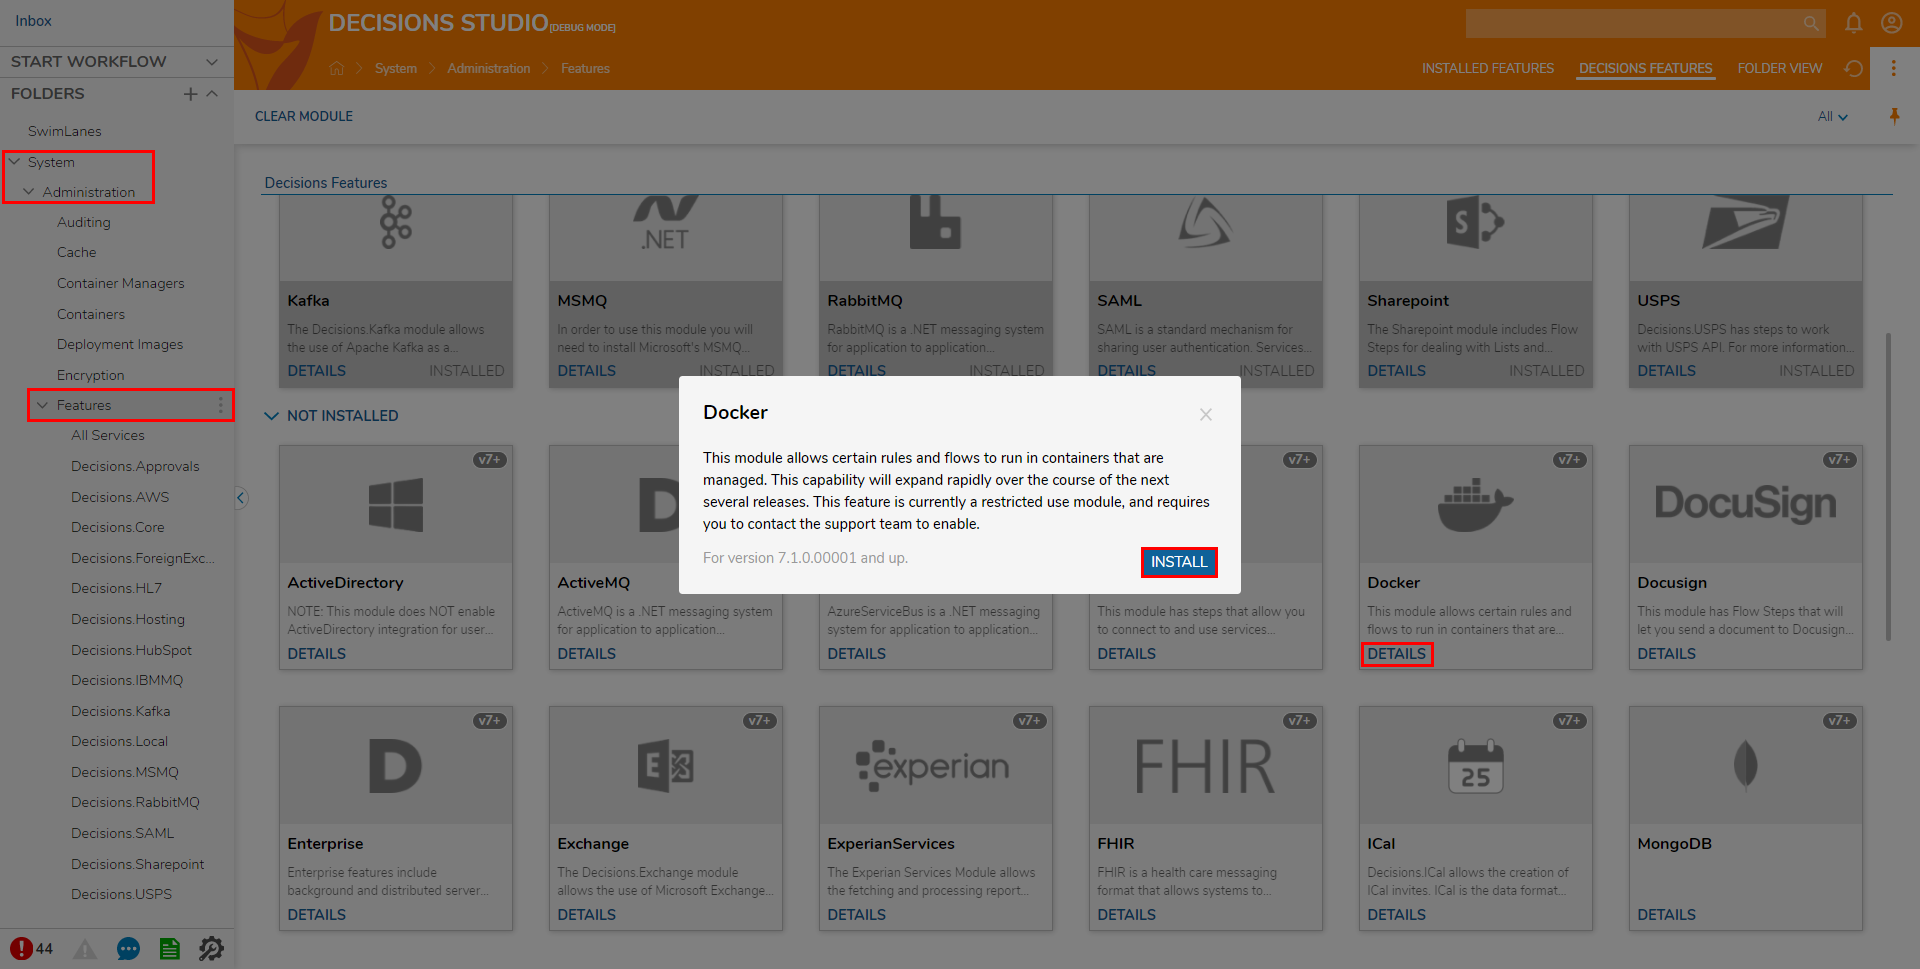
- After installing Decisions, navigate to System > Administration > Features.
- Locate the Docker Module, then click DETAILS and then INSTALL.
- After the Module installs, open DecisionsServerIntaller.exe and select RESTART SERVICE.
.png)
- Back in Decisions Studio, navigate to System > Security > Accounts, select CREATE ACCOUNT, and create a new User Account; for this example, provide the Username "docker@decisions.com" and the Password "docker". Default Docker AccountThis Docker Account is the Default Account that is used to talk with the EC2 instance; this can be changed in AWS if the default Account is not desired.
.png)
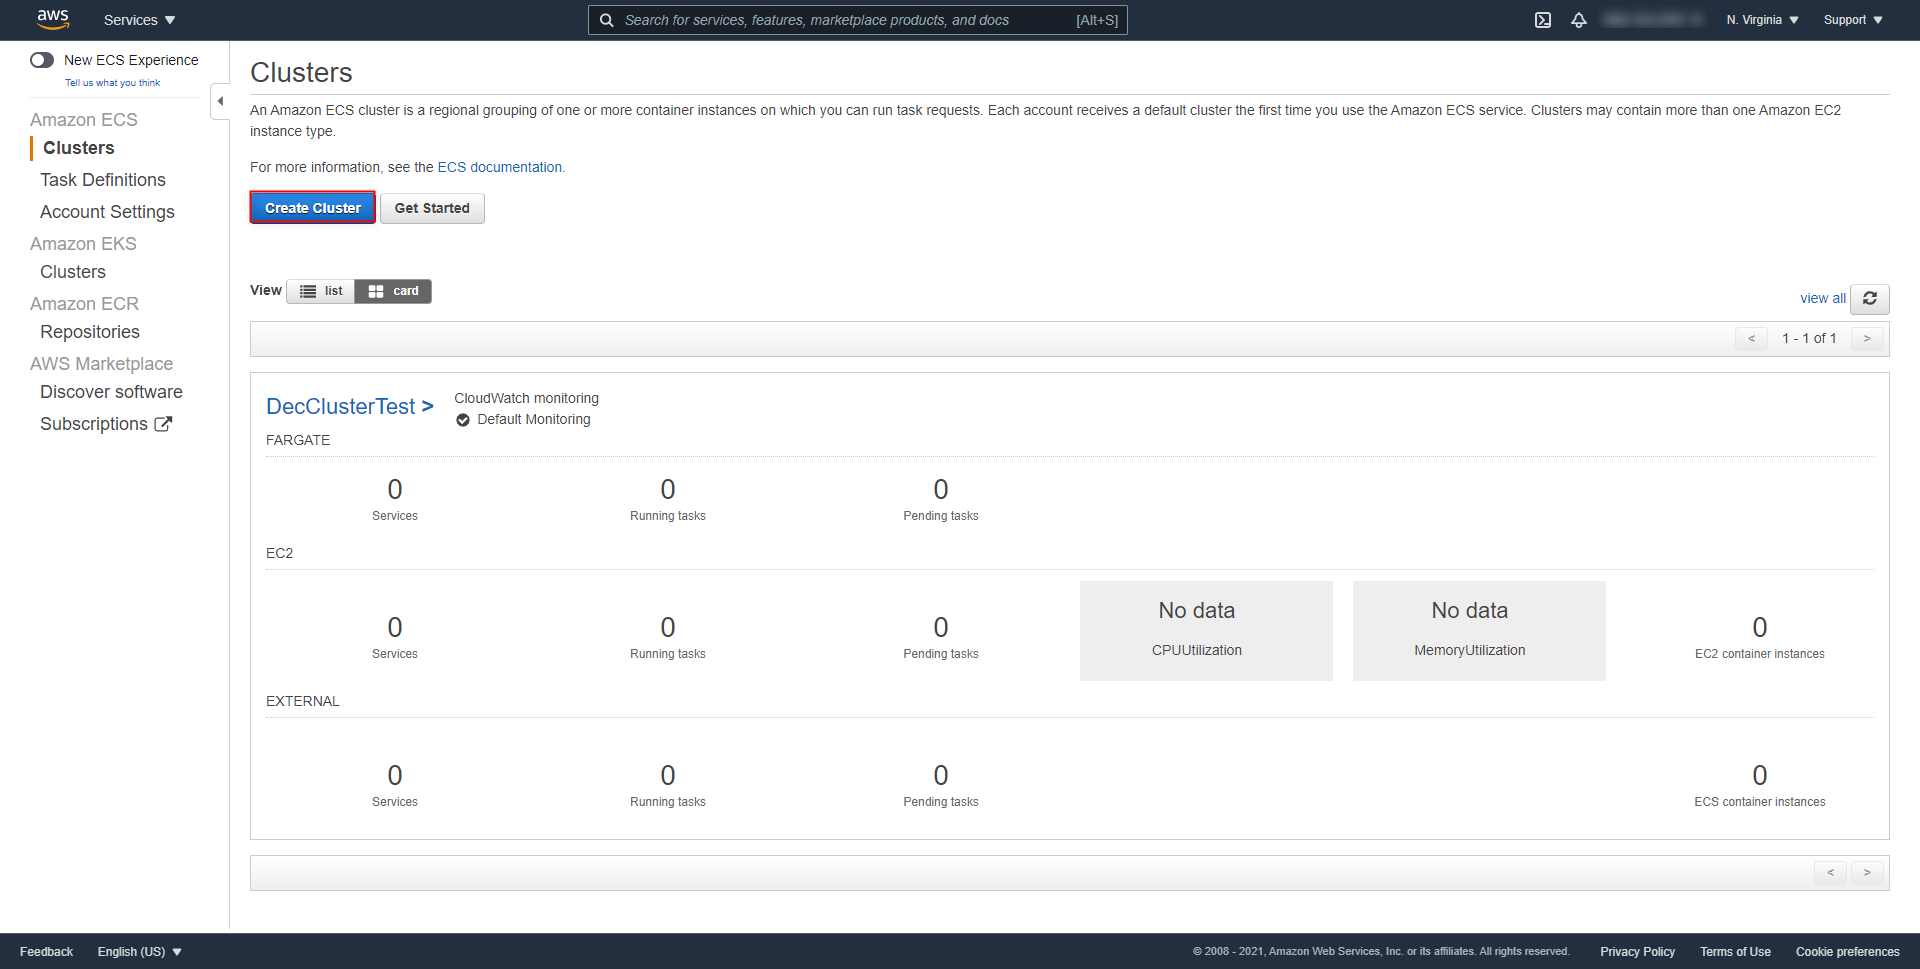
After creating the Account, create an AWS Cluster with the default configurations by navigating to All Services > Containers > Elastic Container Serivcer > Clusters and selecting Create Cluster.
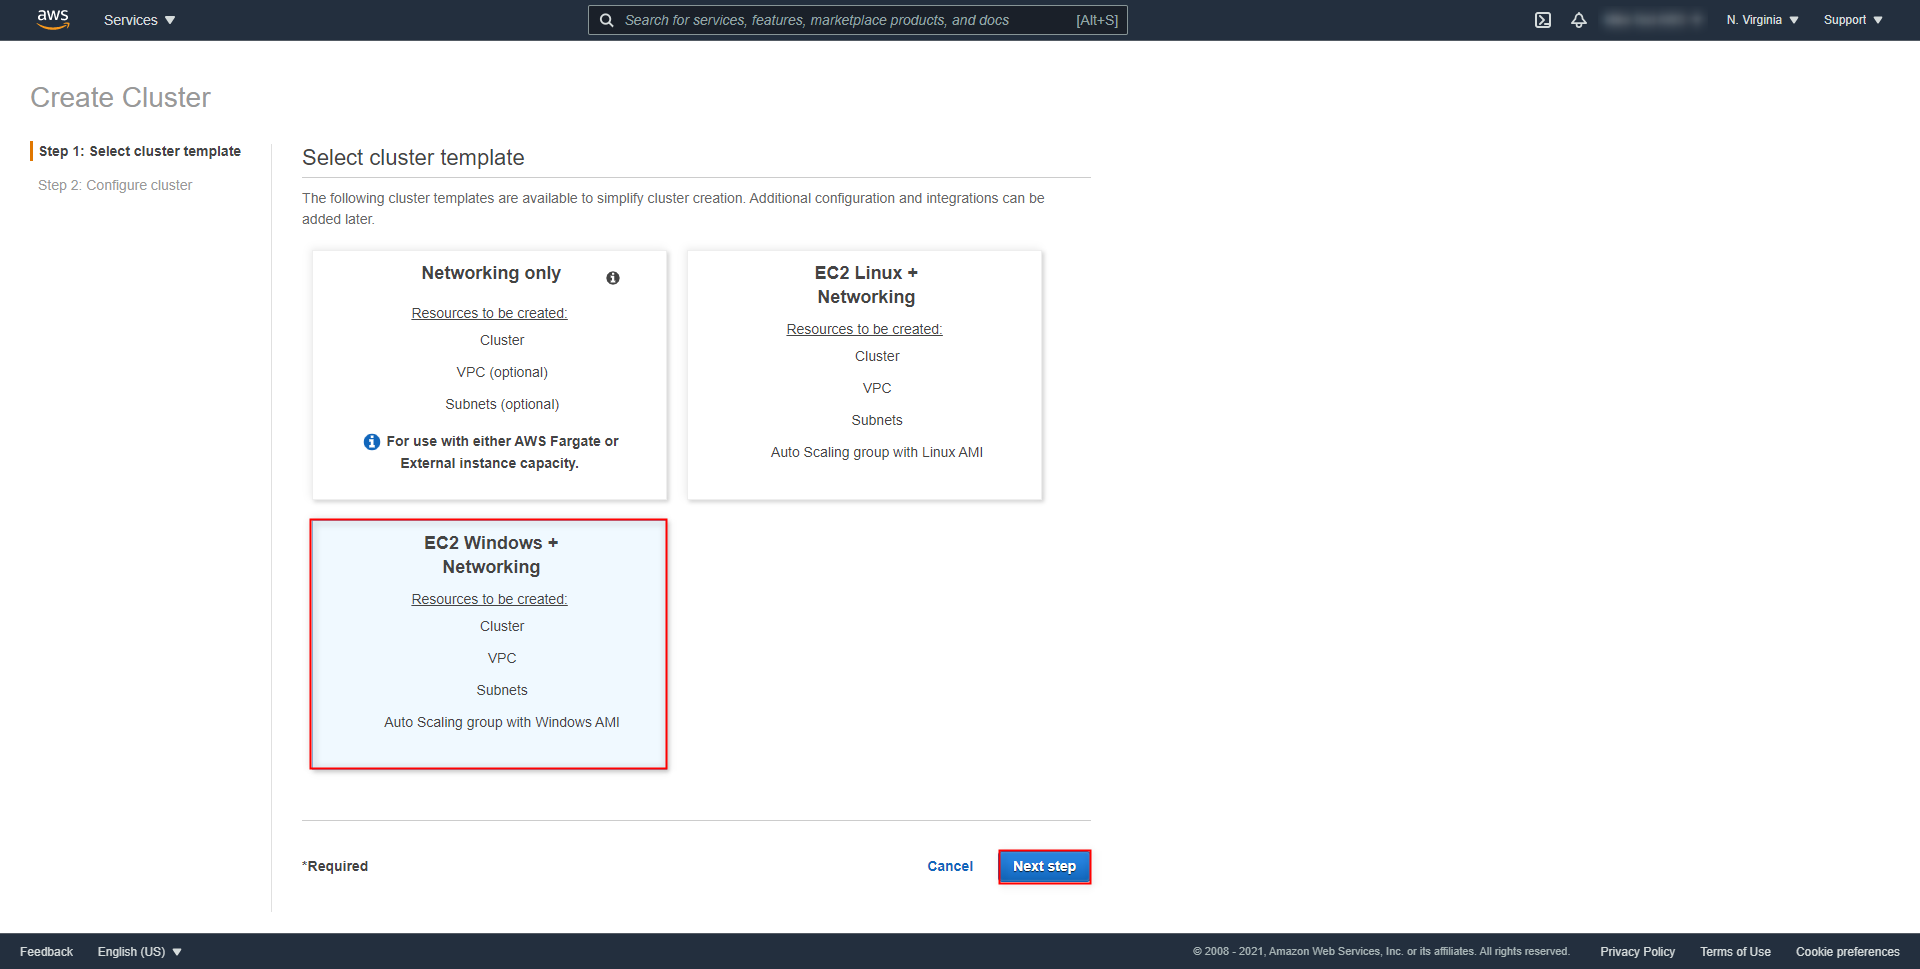
From the Select cluster template panel of the Create Cluster window, select EC2 Windows + Networking, then click Next step.
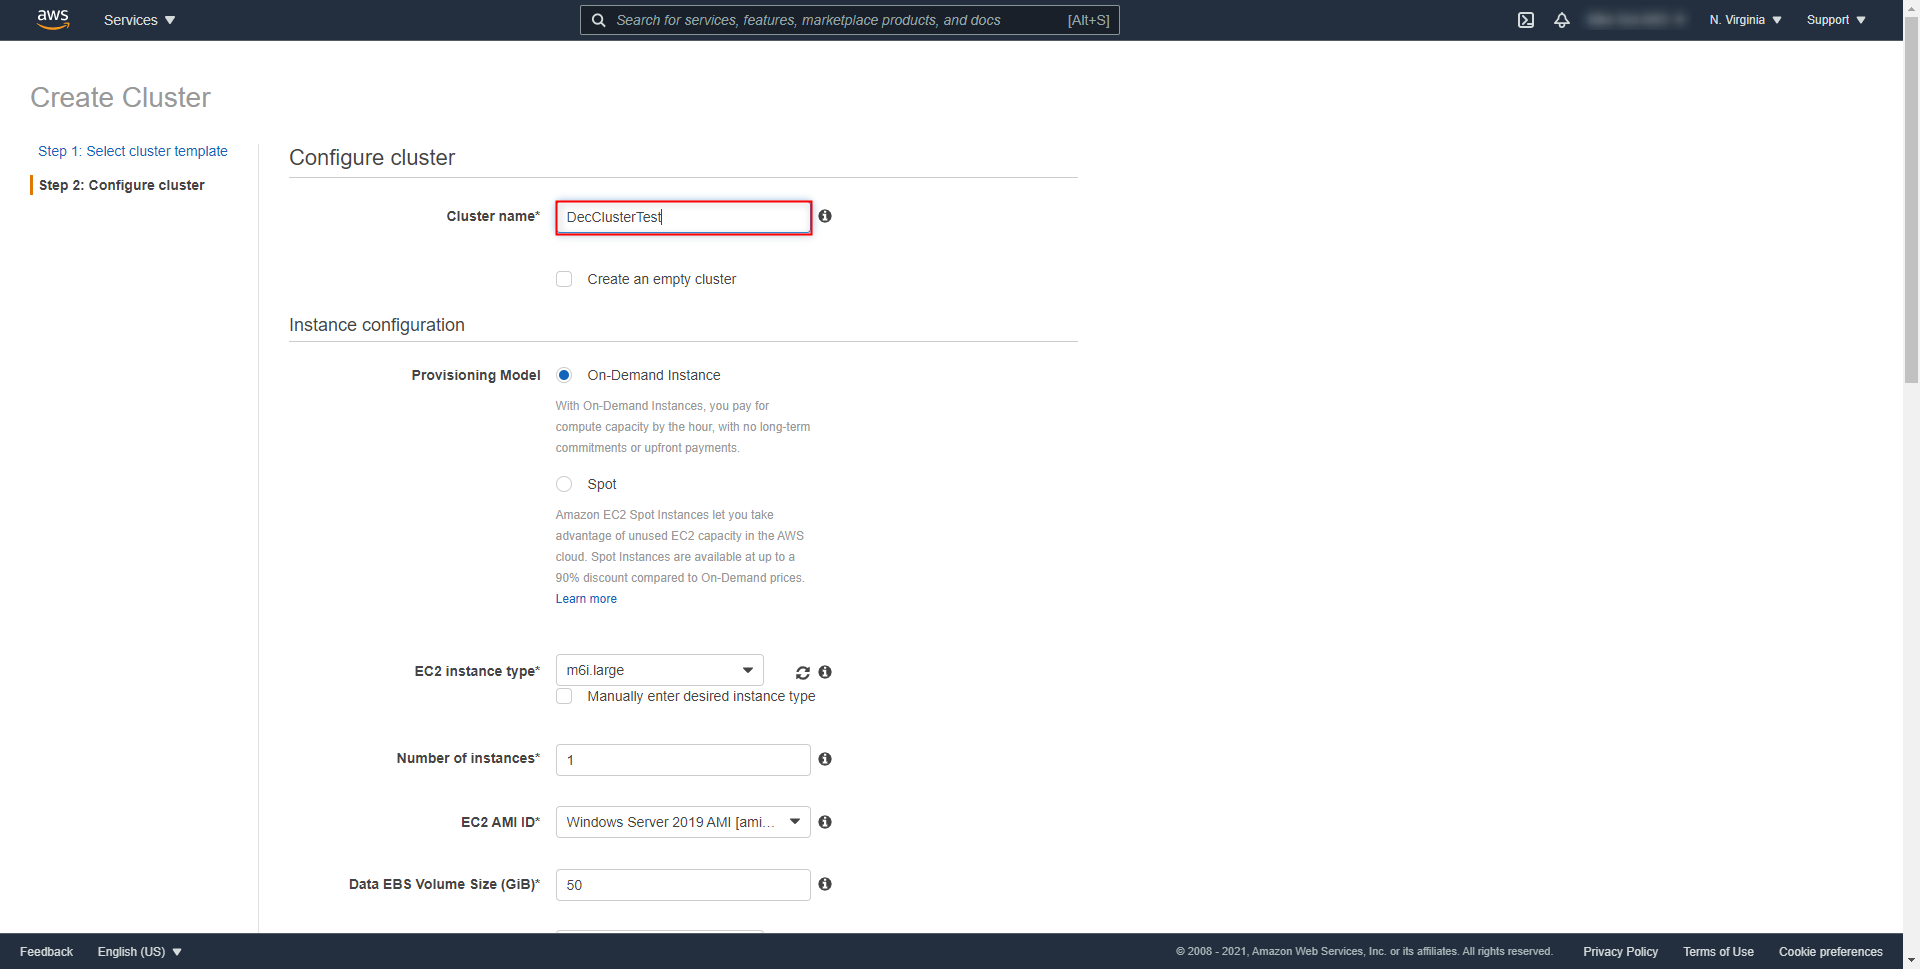
From the Configure cluster panel, provide the desired Cluster name. Then, leave the rest of the values set to their default options, and click Create.
Afterward, navigate to All Services > Containers > Elastic Container Serivcer > Task Definitions and click Create new Task Definition.
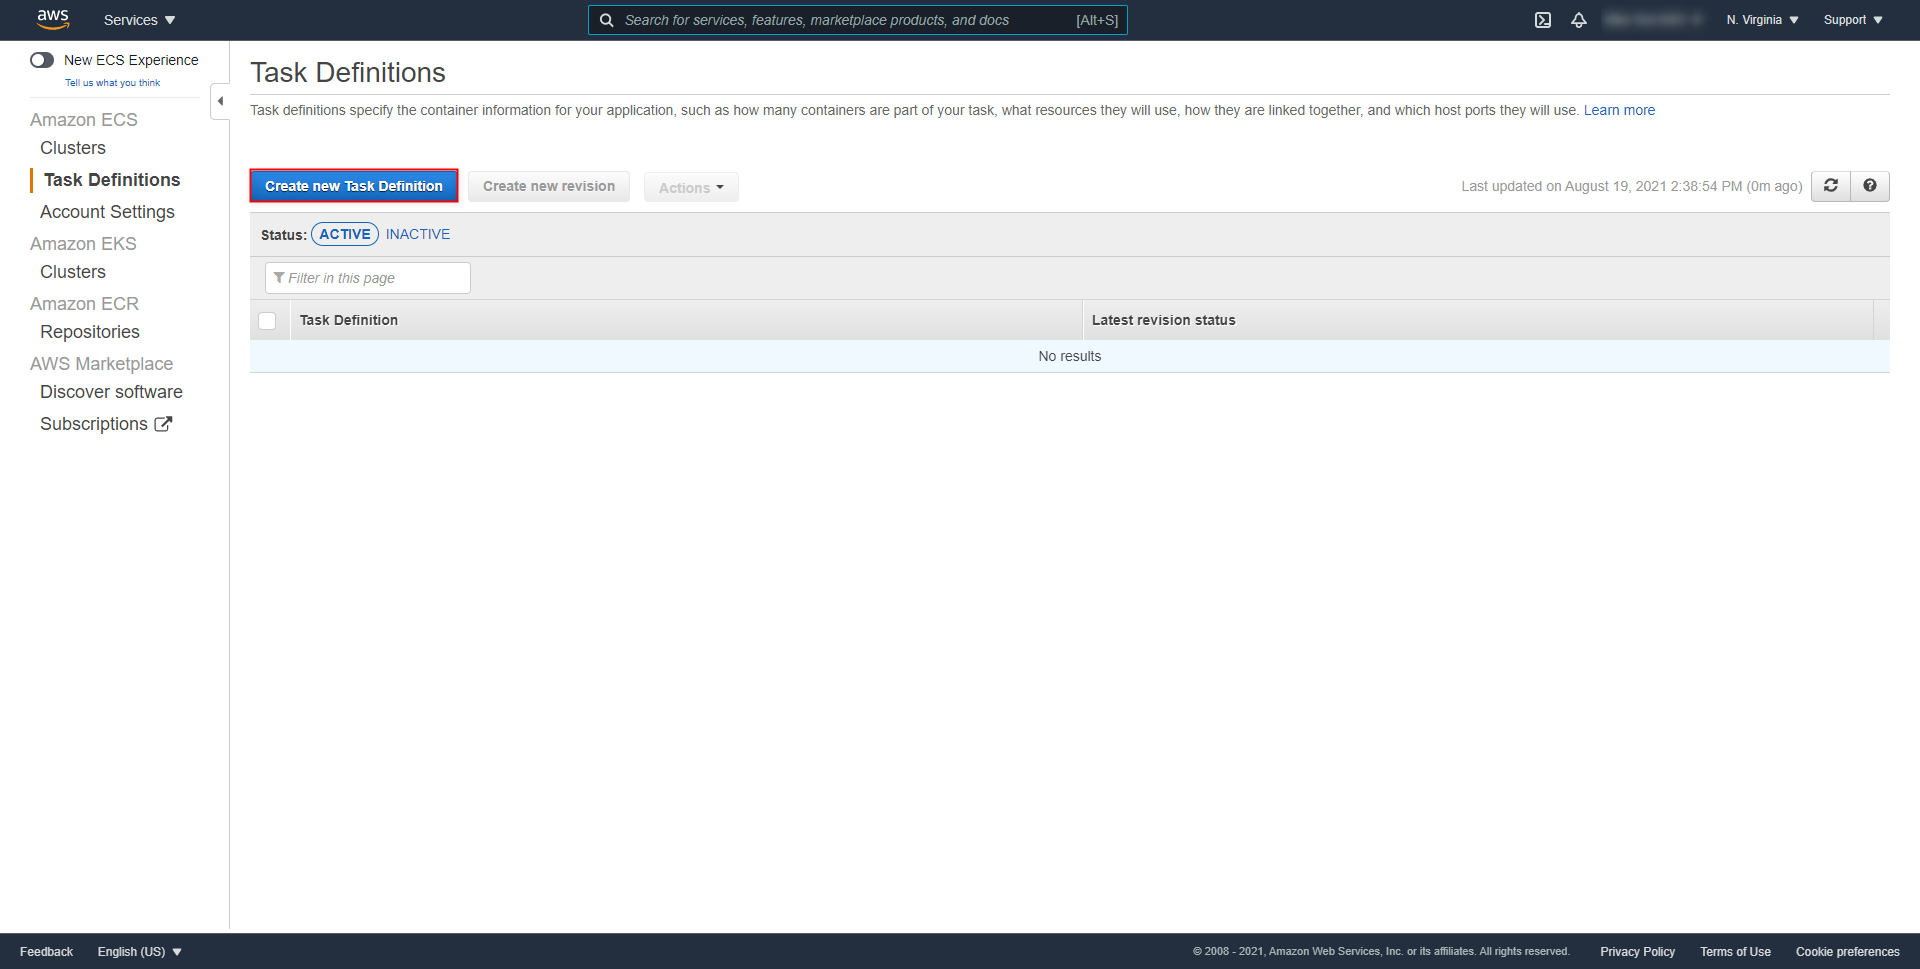
Select EC2, then click Next step.
While maintaining the default configurations for this example set up, declare a Task Definition Name then set the Task memory and Task CPU values.
Task Size FlexibilityNote that the Task Size settings can be adapted at the user's discretion for their environment. This example uses 1VCPU for Task CPU and 1GB for Task memory respectively.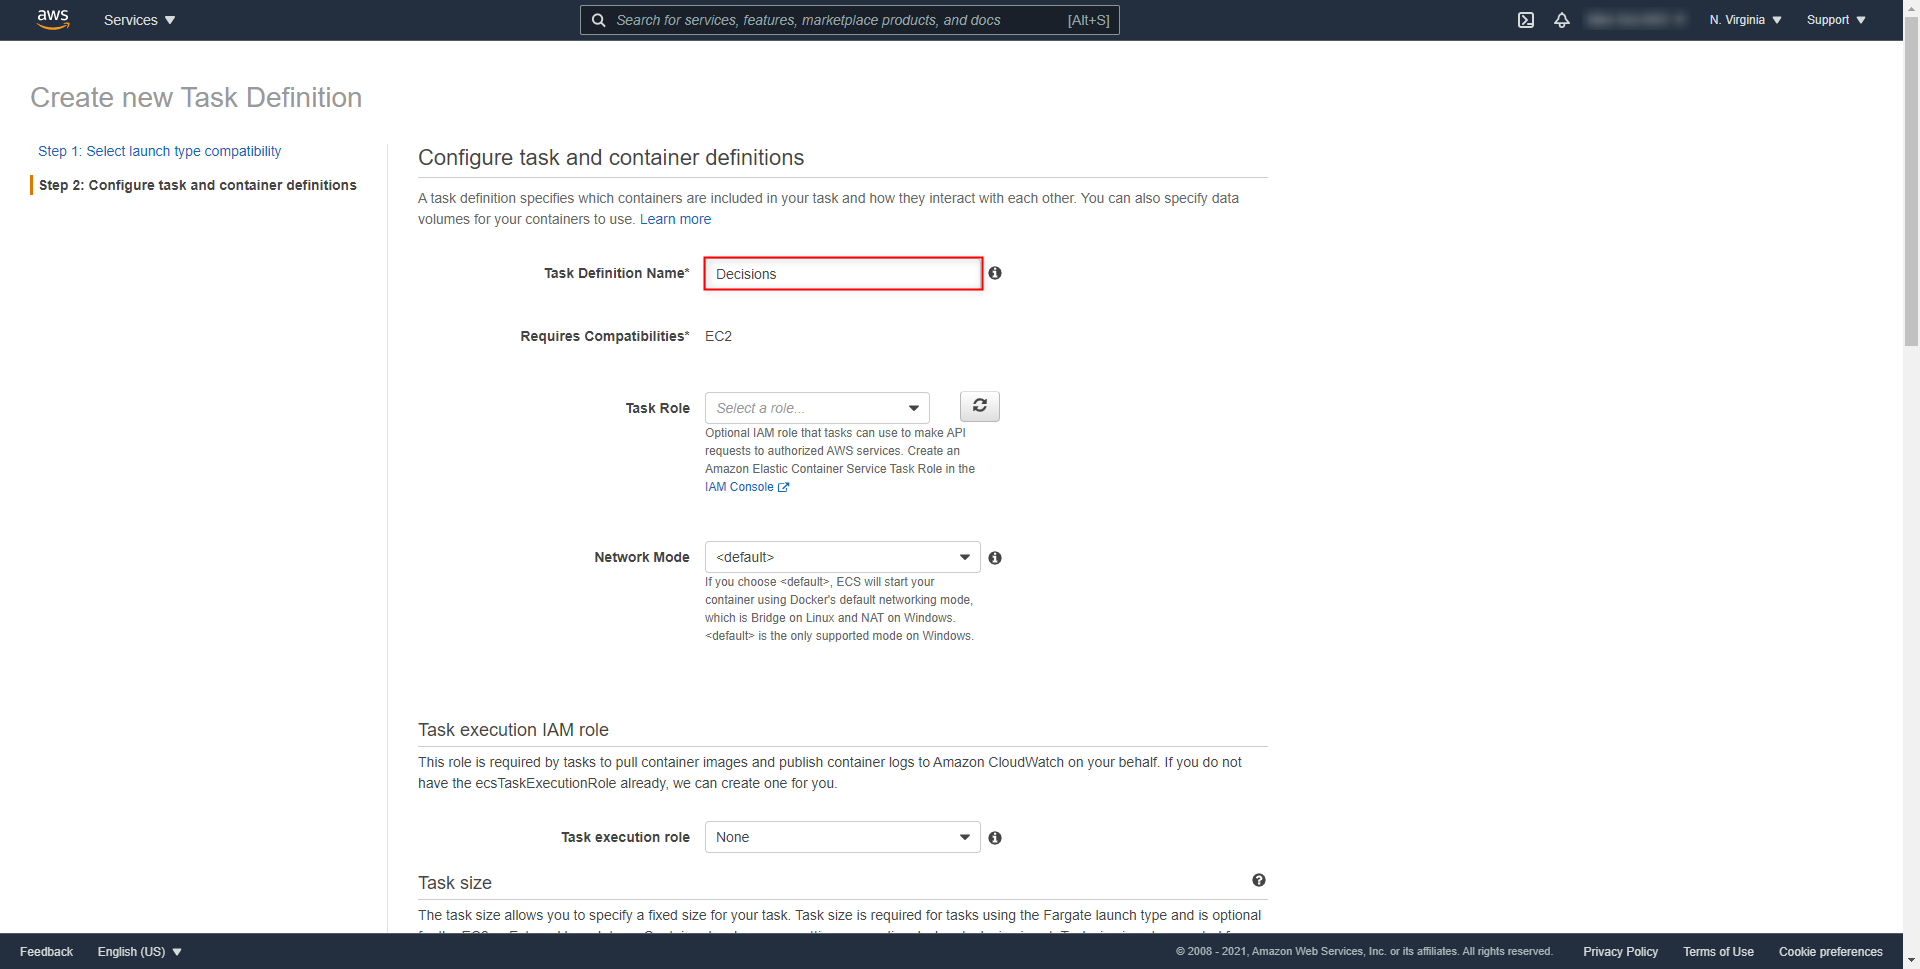
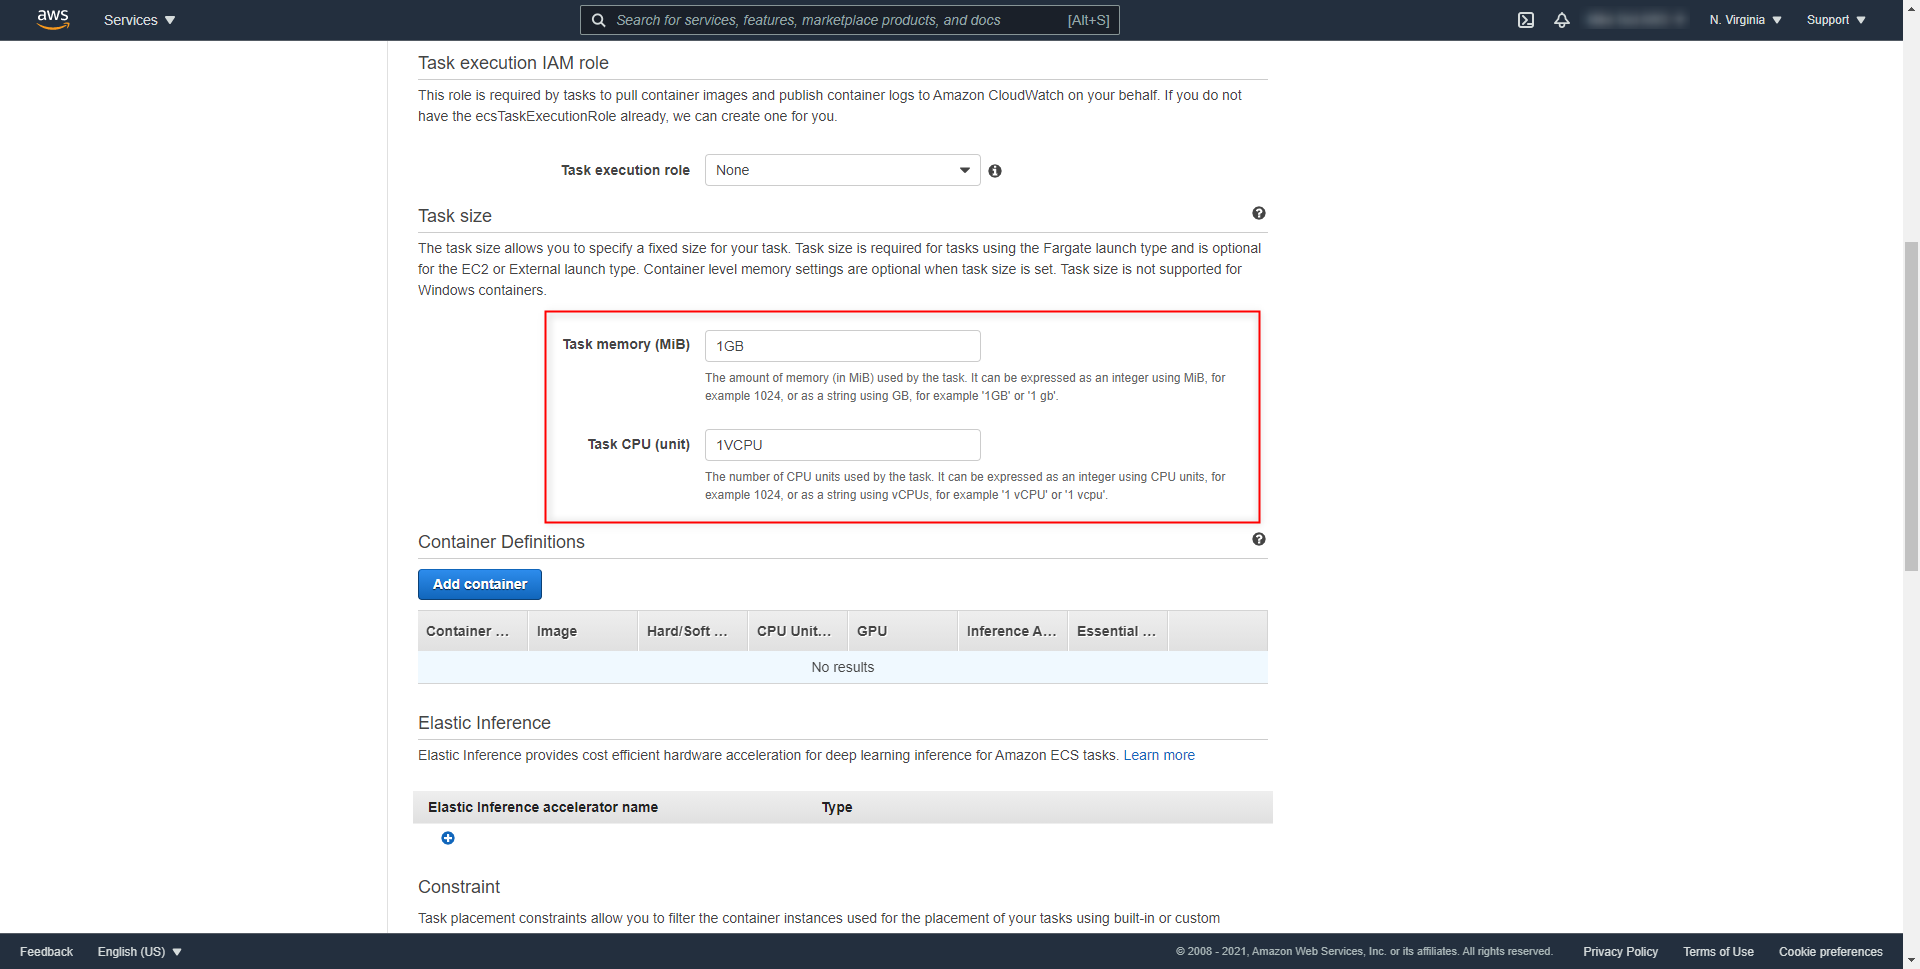
Scroll down to Container Definitions, then click Add Container.
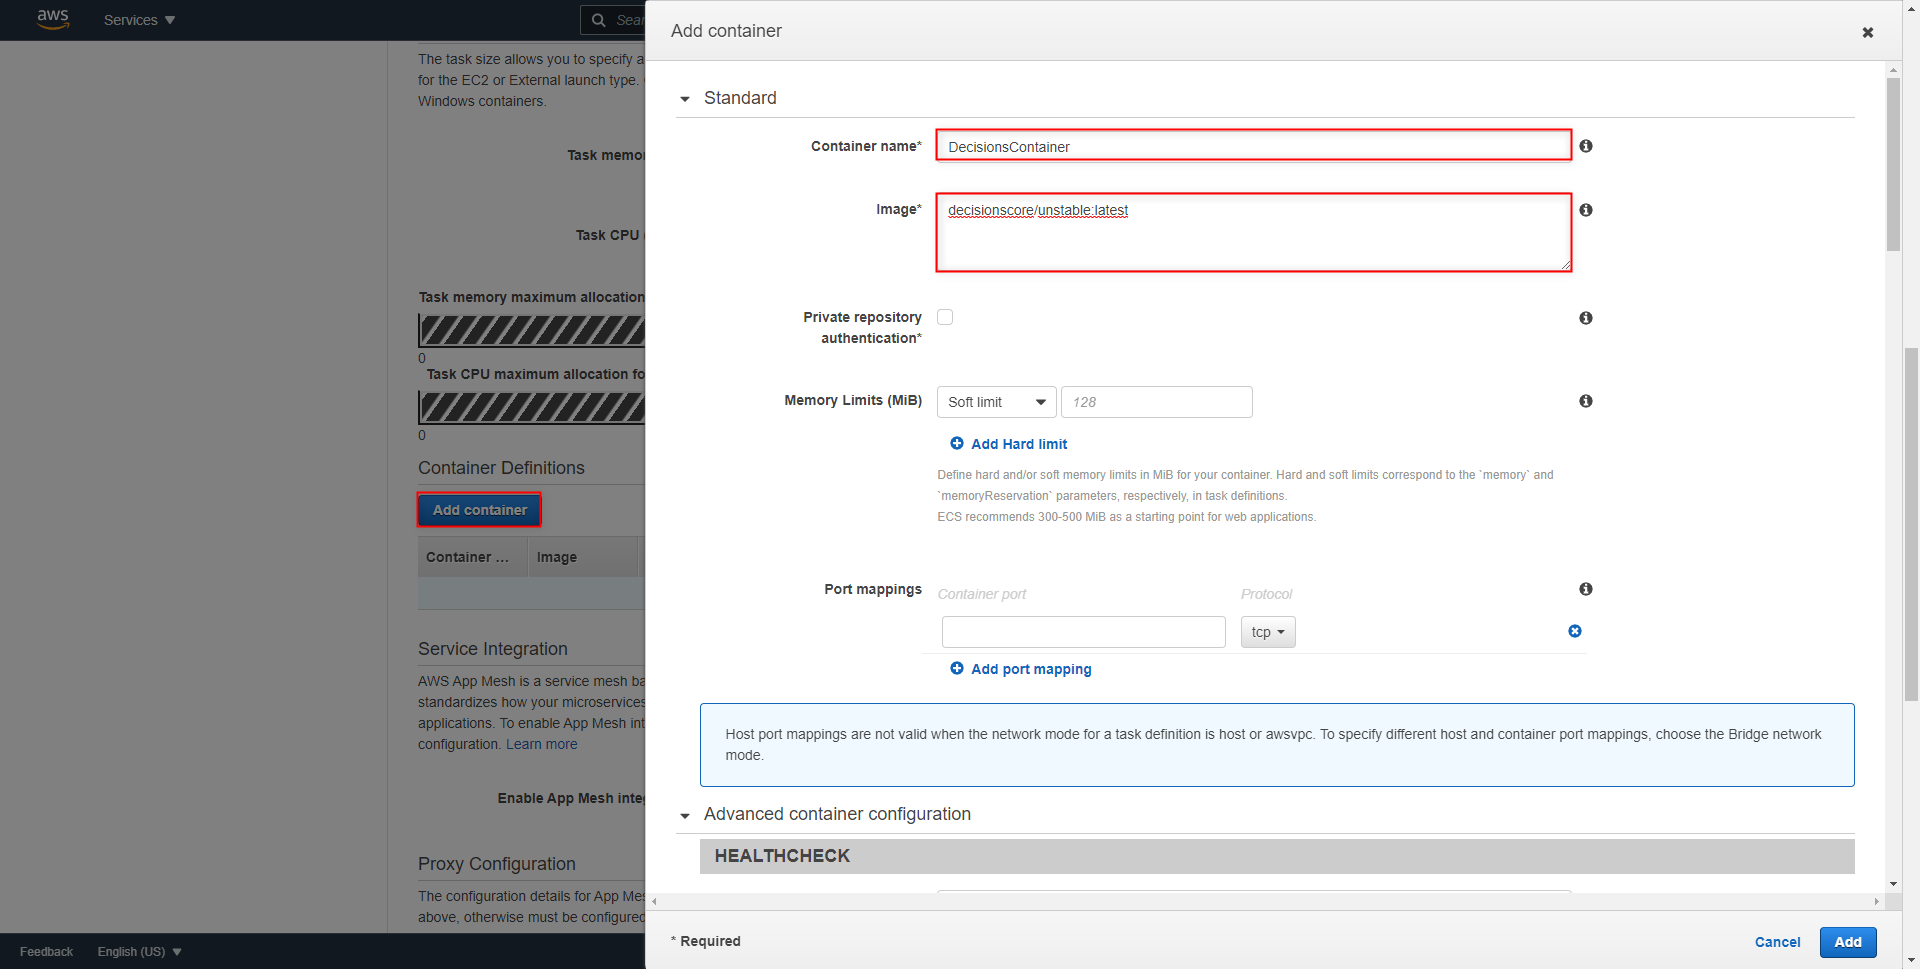
Give the Container a Name, add the Docker Image "decisionscore/unstable:latest" in the Image box.
Under Environmental Variables, provide the Keys and Values listed on the chart below, then click Add.
Default Username and Password Keys/ValuesBoth SETTING_USERNAME and SETTING_PASSWORD keys and their respective Values are optional.
If these values are not used in the configuration, Decisions and the EC2 instance will use the default values of the used Account.Key Value SETTING_DATABASE_CONNECTION RDSConnectionString SETTING_PORTAL_BASE_URL http://decisionsIPorDNSname/decisions SETTING_SHM_BASE_URL http://decisionsIPorDNSname/decisions/Primary/REST SETTING_USERNAME AdminEmail SETTING_PASSWORD AdminPassword SETTING_TAKE_REQUESTS true 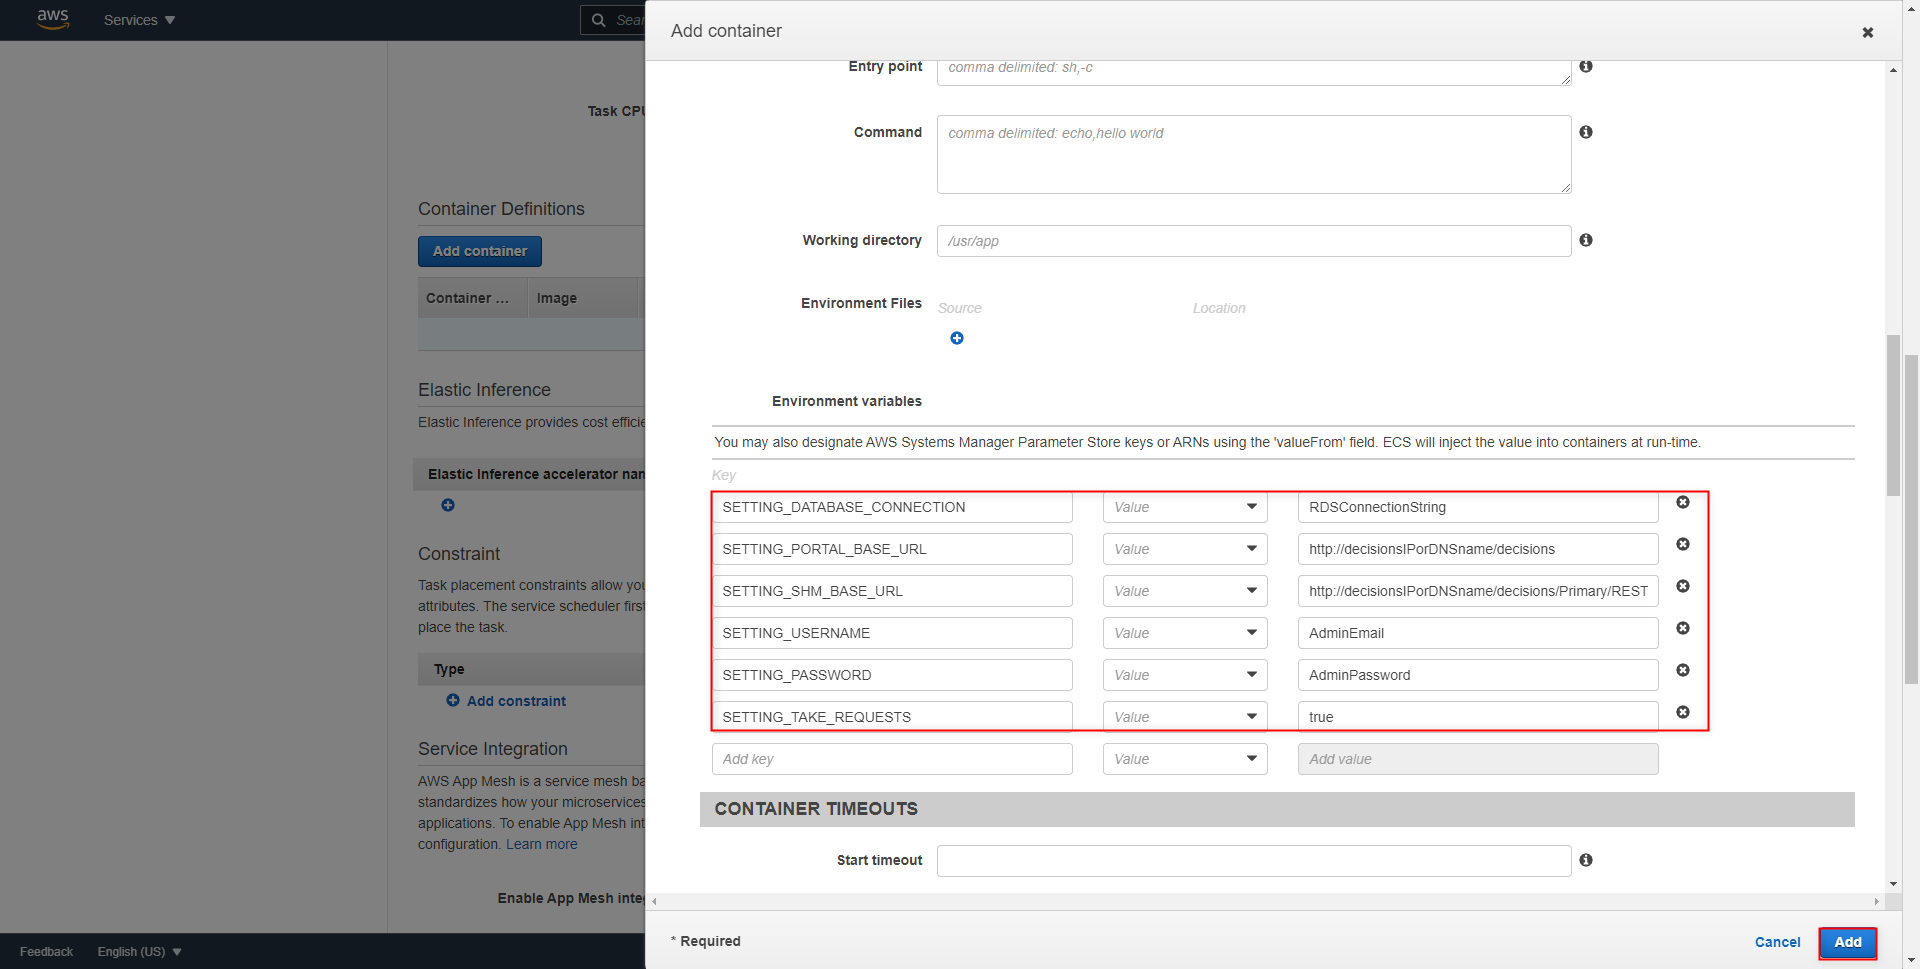
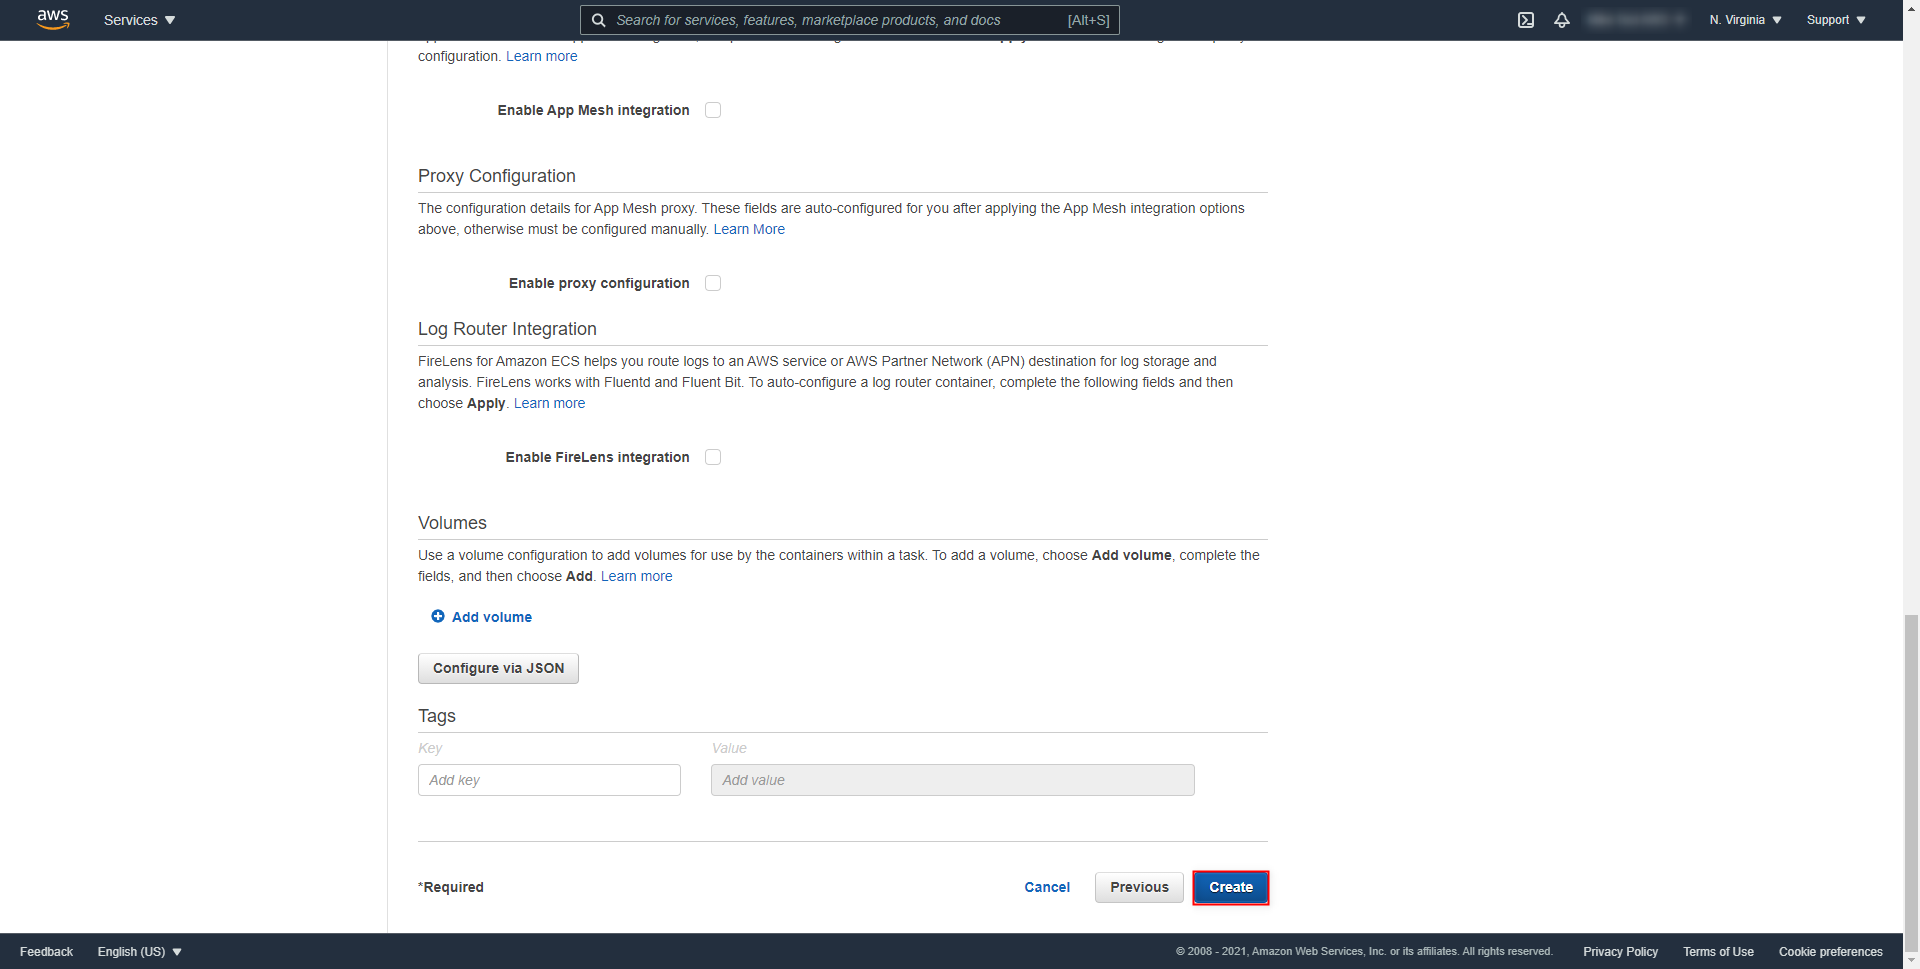
After the Container has been added, scroll to the bottom of the page and click Create.
Navigate back to the Clusters window, select the previously created Cluster.
Under the Tasks tab, select Run new Task.
.png)
From the Run Task window select the Task from the Task Definition > Family dropdown.
Under VPC and security groups, select the desired Subnet, then scroll to the bottom of the page and select Run Task.
.png)
Navigate to the Logs tab by selecting the Task and clicking Logs; periodically click the Refresh button on the right-side of the page until the Logs populate with the Container Status.
Log Population BehaviorDepending on the type of EC2 instance created, it may take a bit for the Logs to populate with the Container Status.
The population of these Logs is an indication that the application has started..png)
Once the Task begins to run, ensure that the EC2 Instance is active and that the Container is displayed under System > Administration > Containers in the Decisions Studio.
(1).png)
Access the Docker Image by inputting the URL at Internal IP Swagger.
.png)