Overview
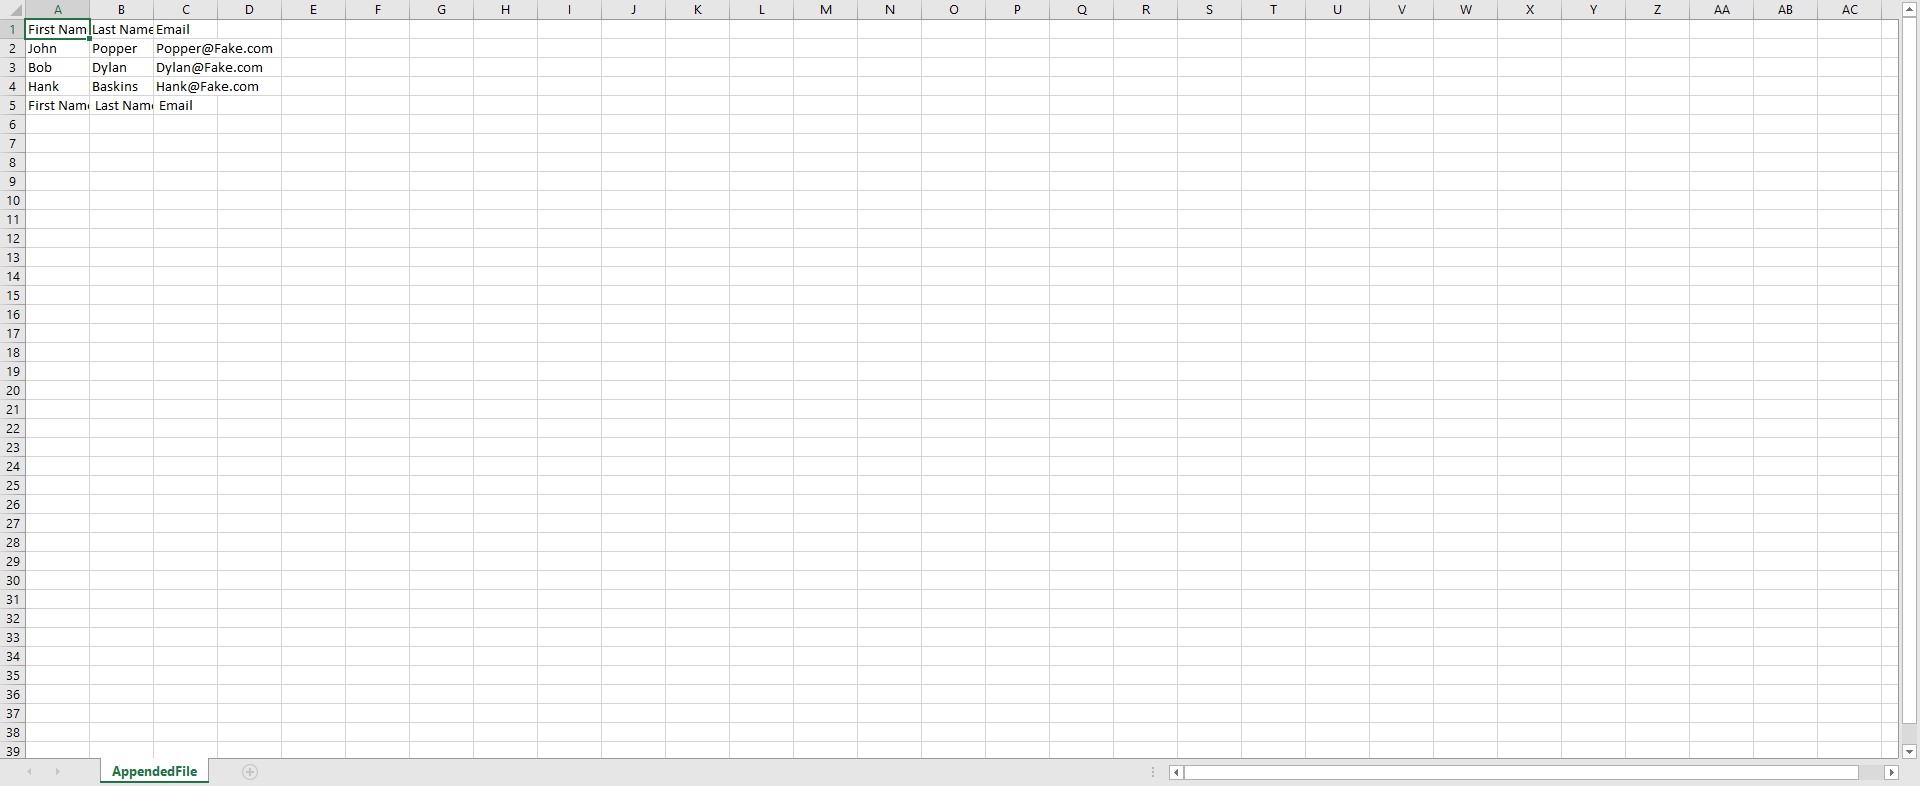
Appending CSV Files into Text using a Flow requires a few steps to get the data from the File and then create the required information. These steps, known as String Builder steps, are found within the host of TEXT steps within the Decisions Toolbox.
Example
- From a Designer Project, click the CREATE FLOW button on the Global Action Bar; then, select Flow, provide a Name, and click CREATE.
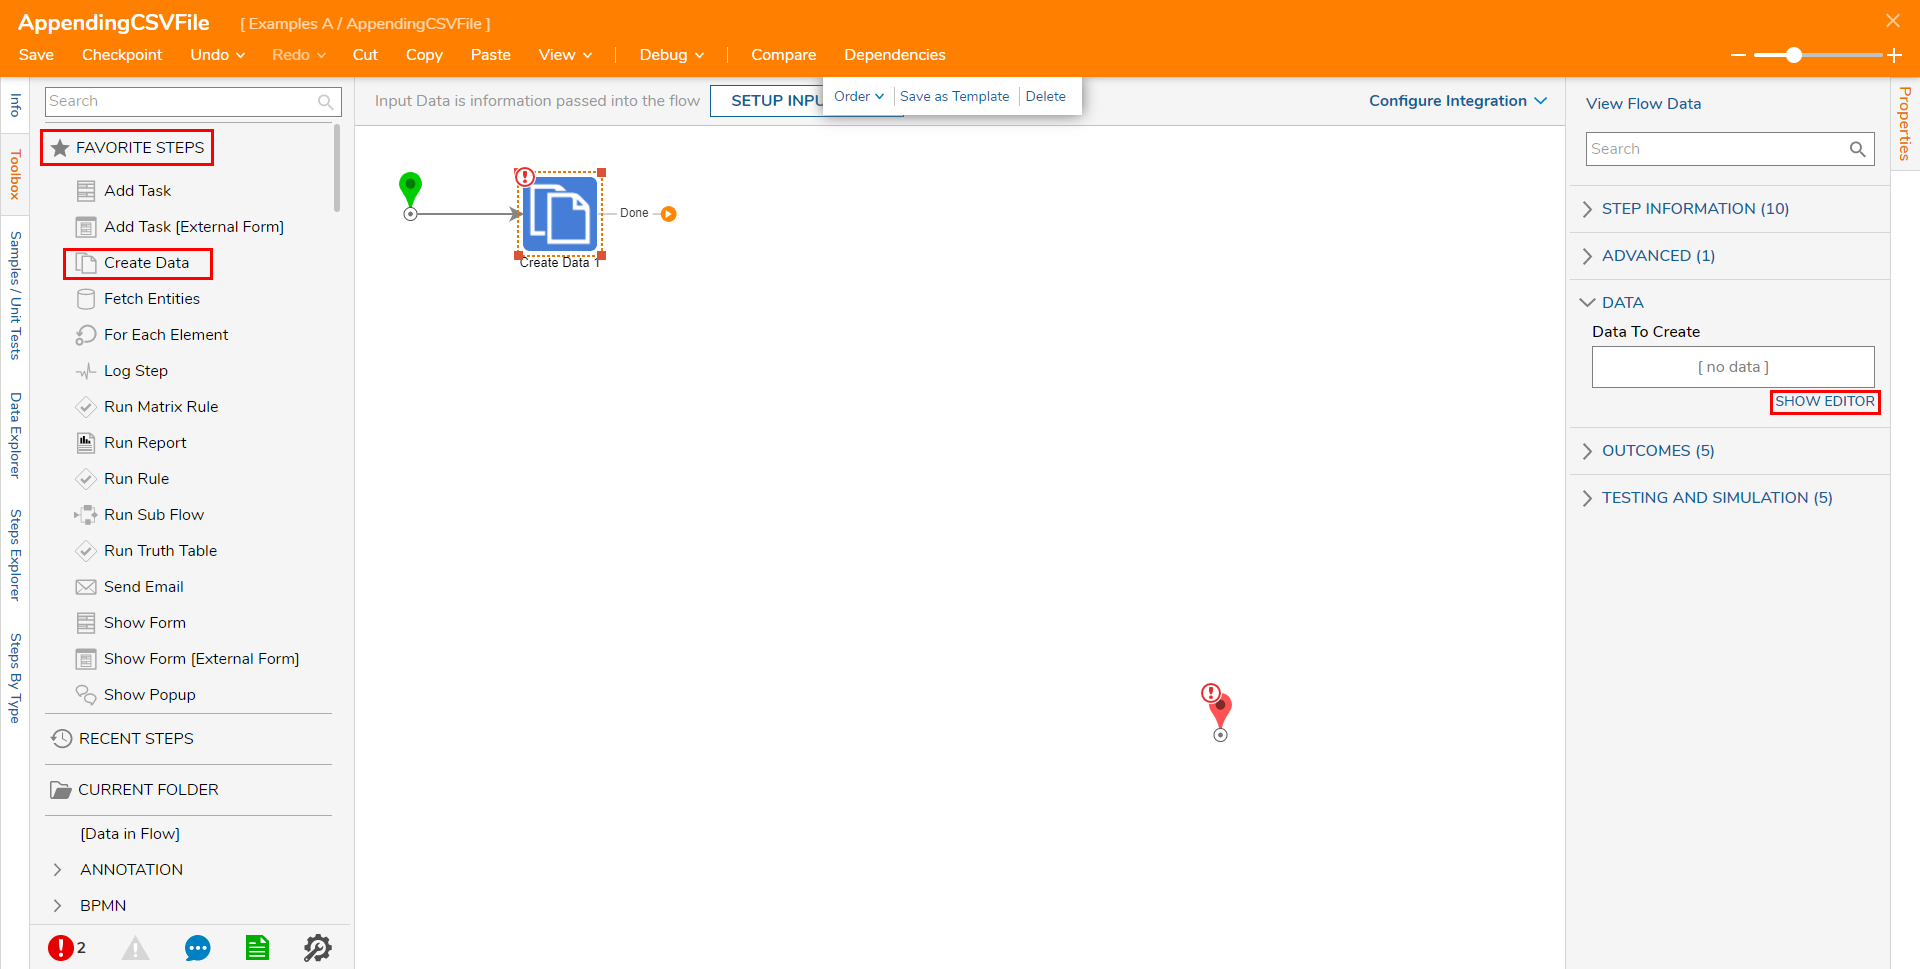
- From the Flow Designer, attach a Create Data step to the Start step, from the FAVORITE STEPS category of the Toolbox tab.
- Navigate to the Create Data step's Properties tab and under DATA > Data To Create, select SHOW EDITOR.
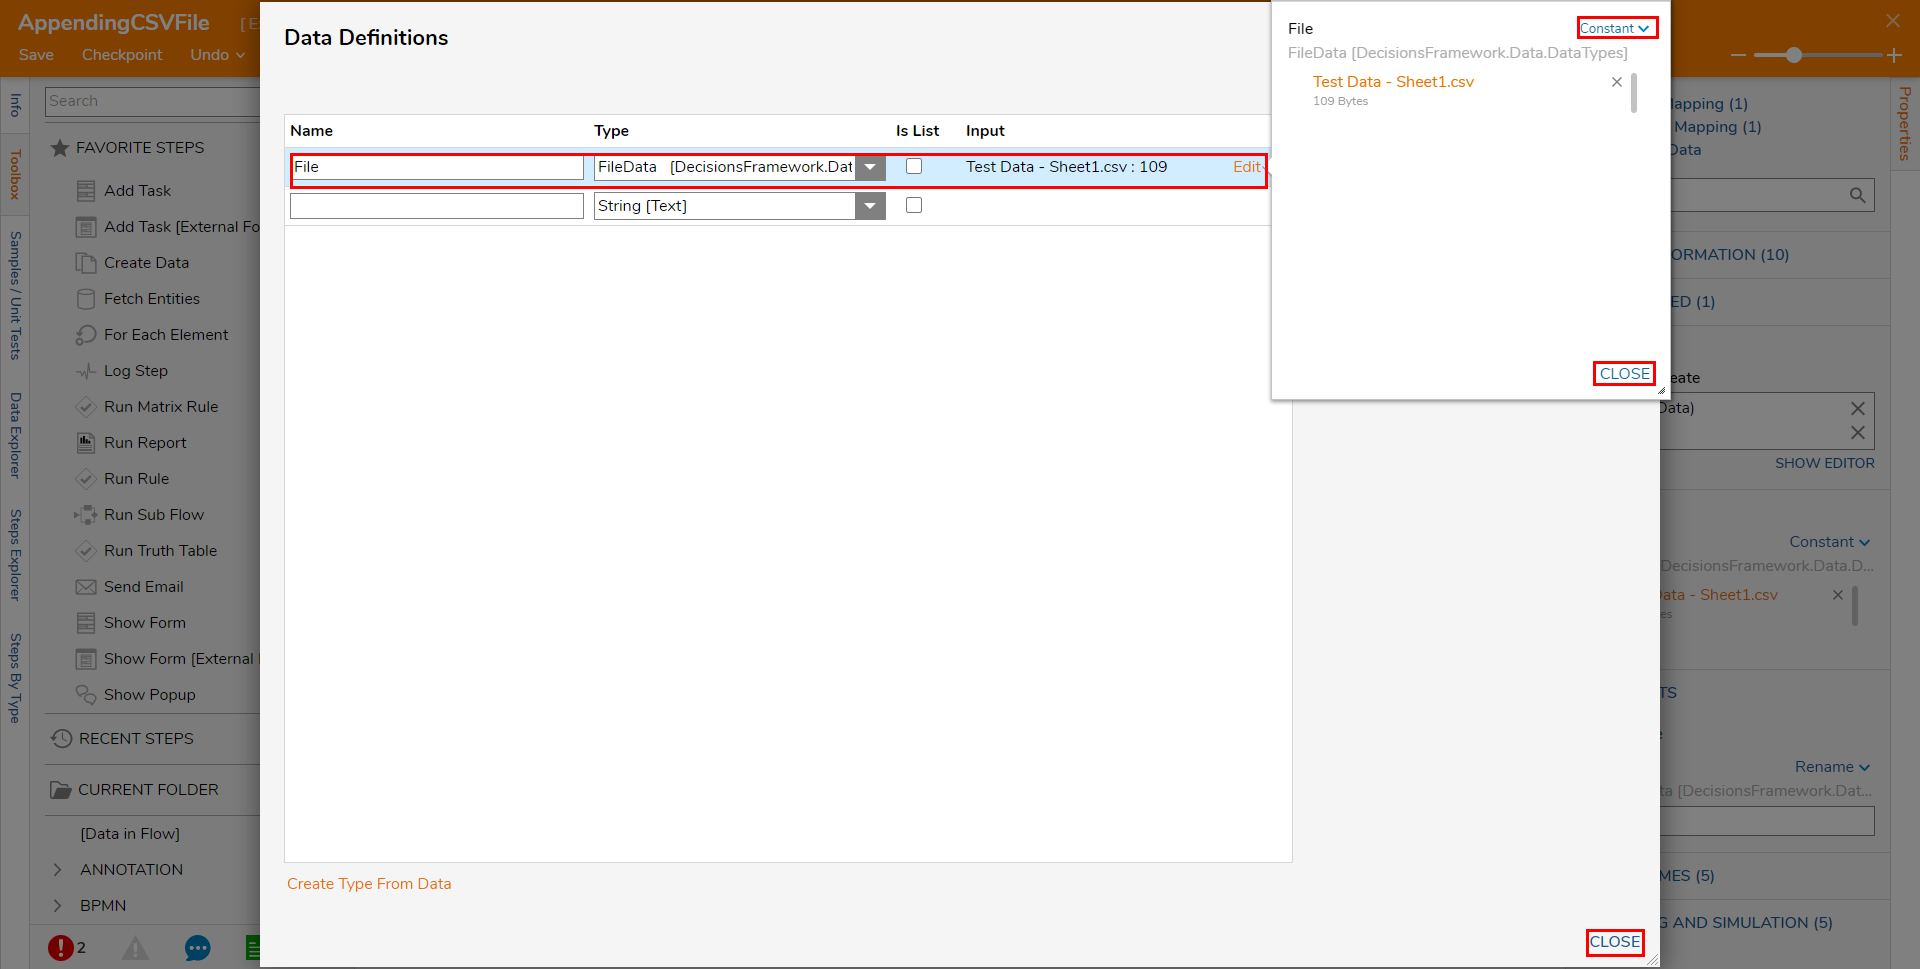
- From the Data Definitions window, Name the Data "File", then select FileData from the Type dropdown. Under Input, Constant map the desired CSV File, then click CLOSE.
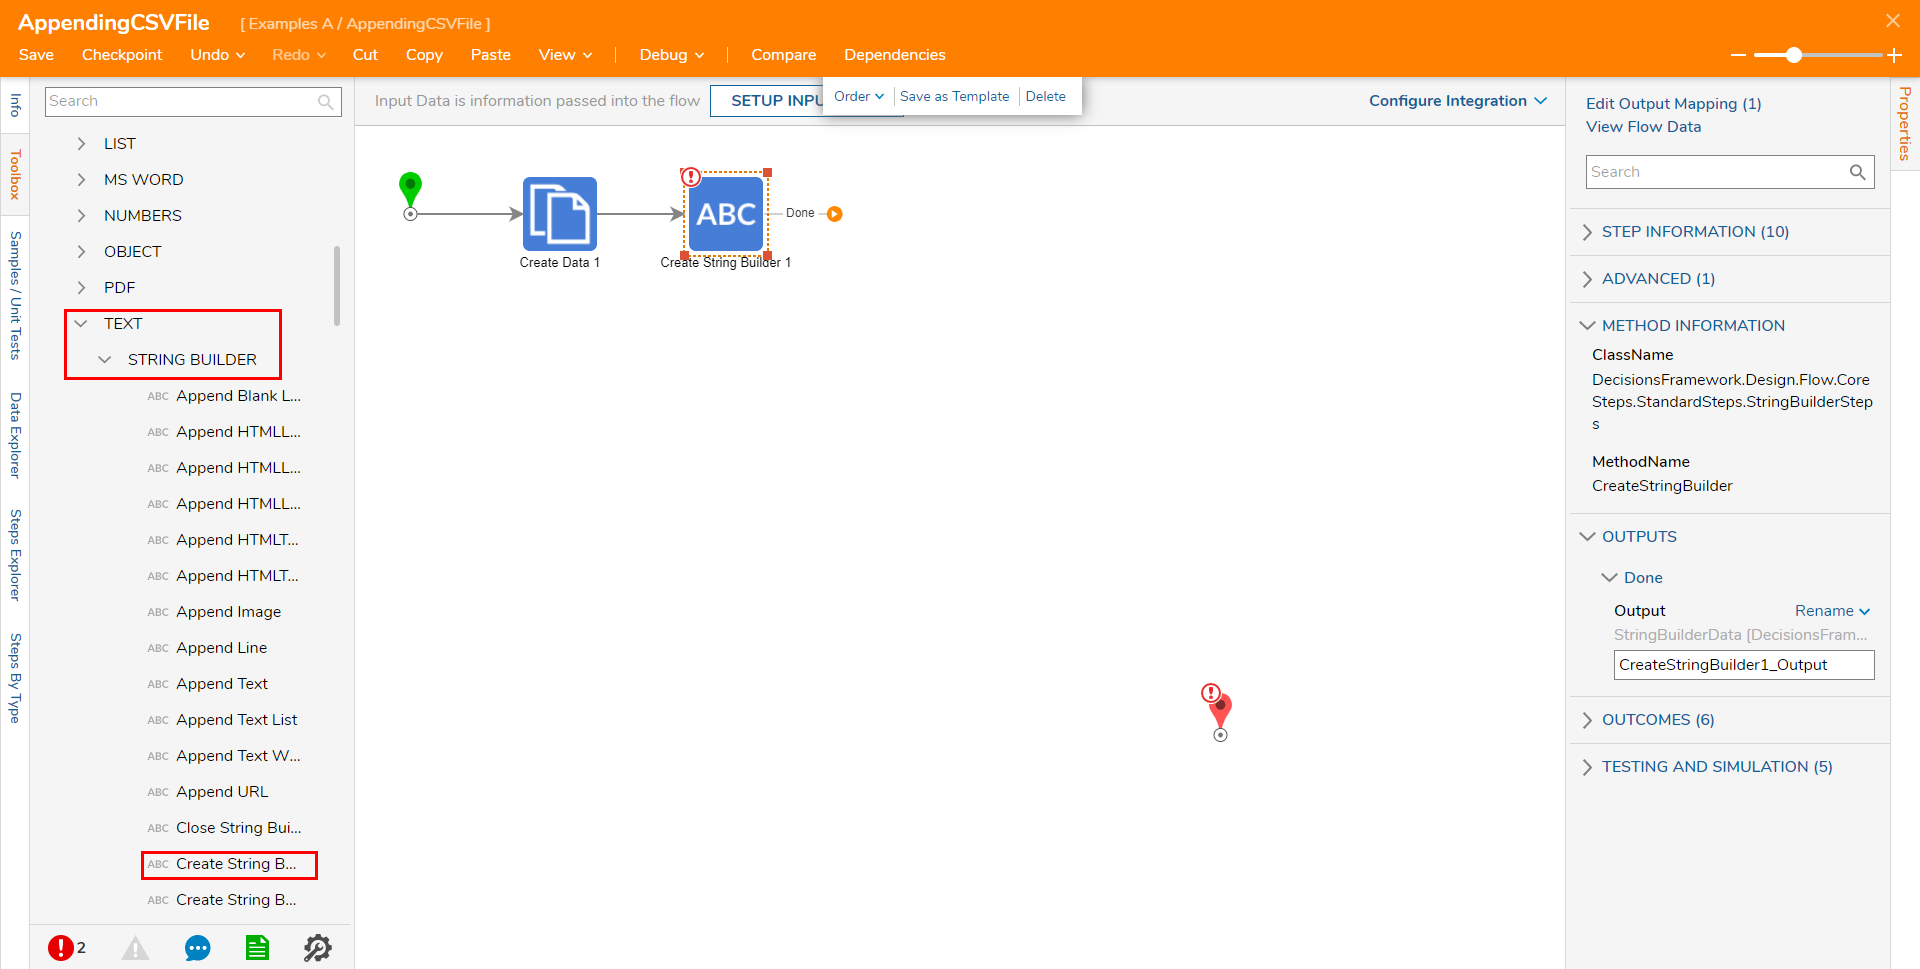
- Navigate to Toolbox > DATA > TEXT > STRING BUILDER and attach a Create String Builder step to the Create Data step.
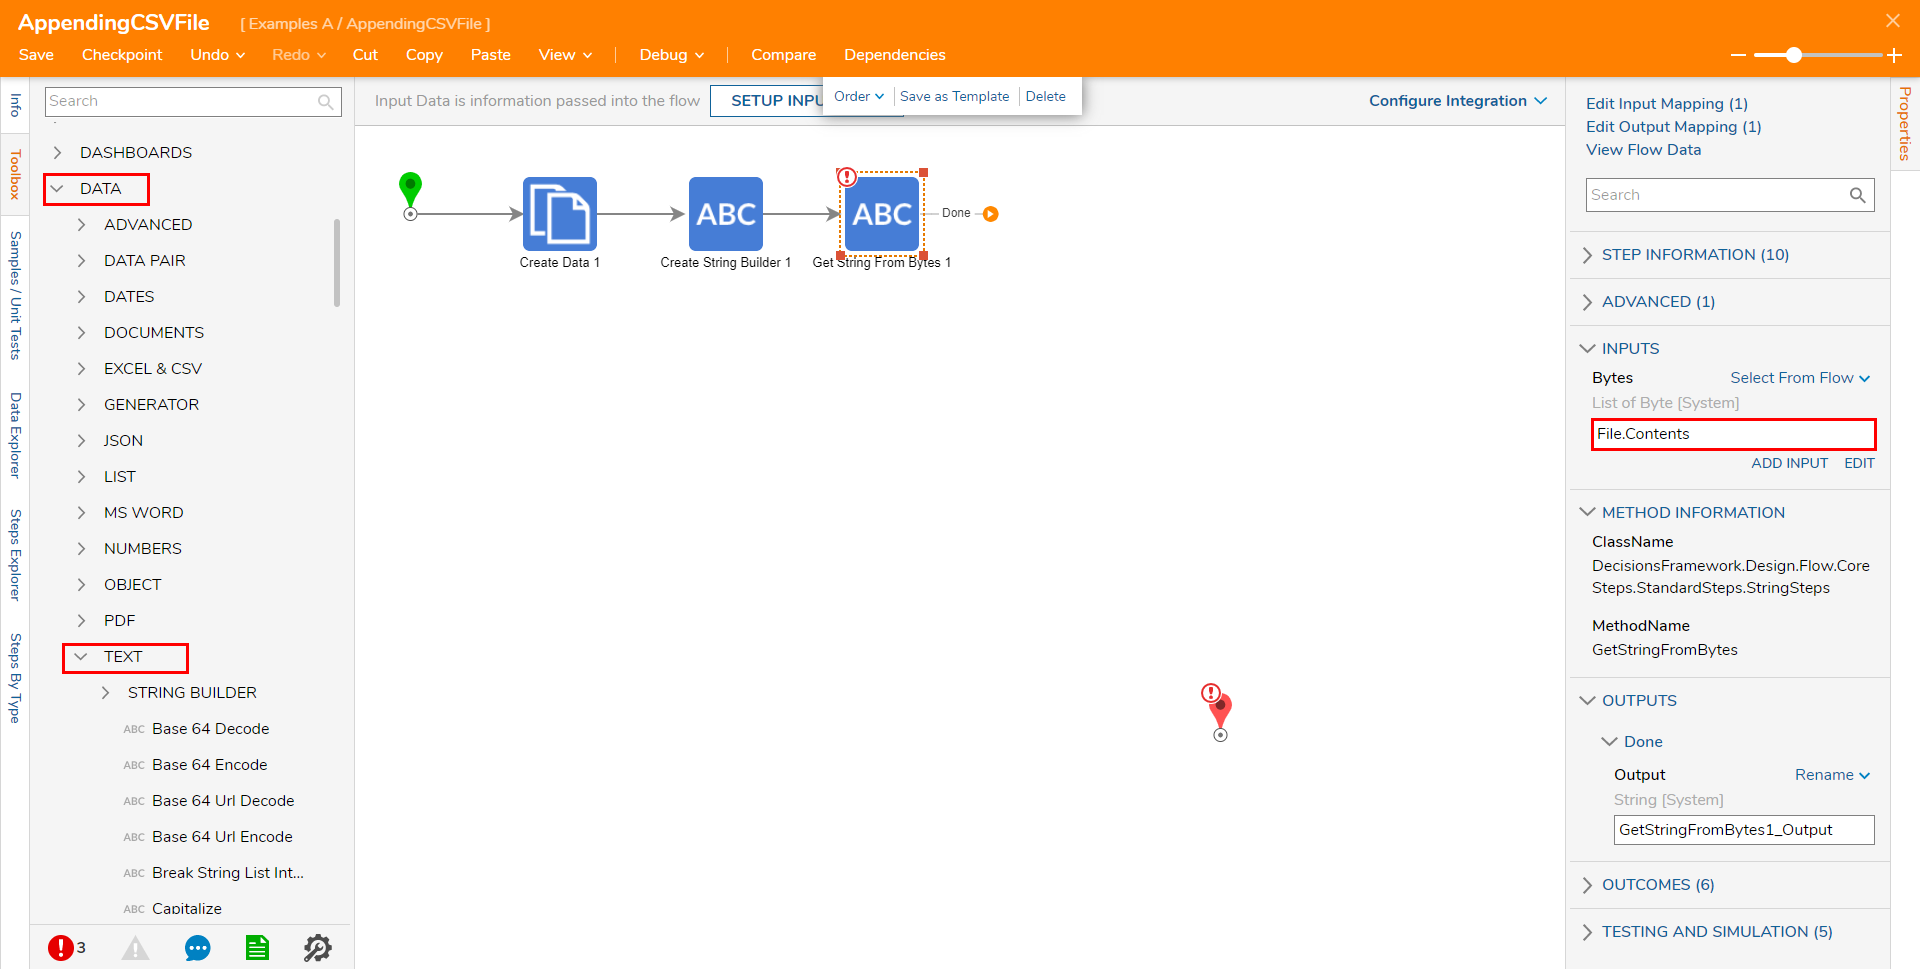
- From Toolbox > DATA > TEXT, attach a Get String From Bytes step to the Create String Builder step. Navigate to its Properties and map File.Contents to INPUTS > Bytes. This step is used to convert the CSV File's Contents into a String Output.
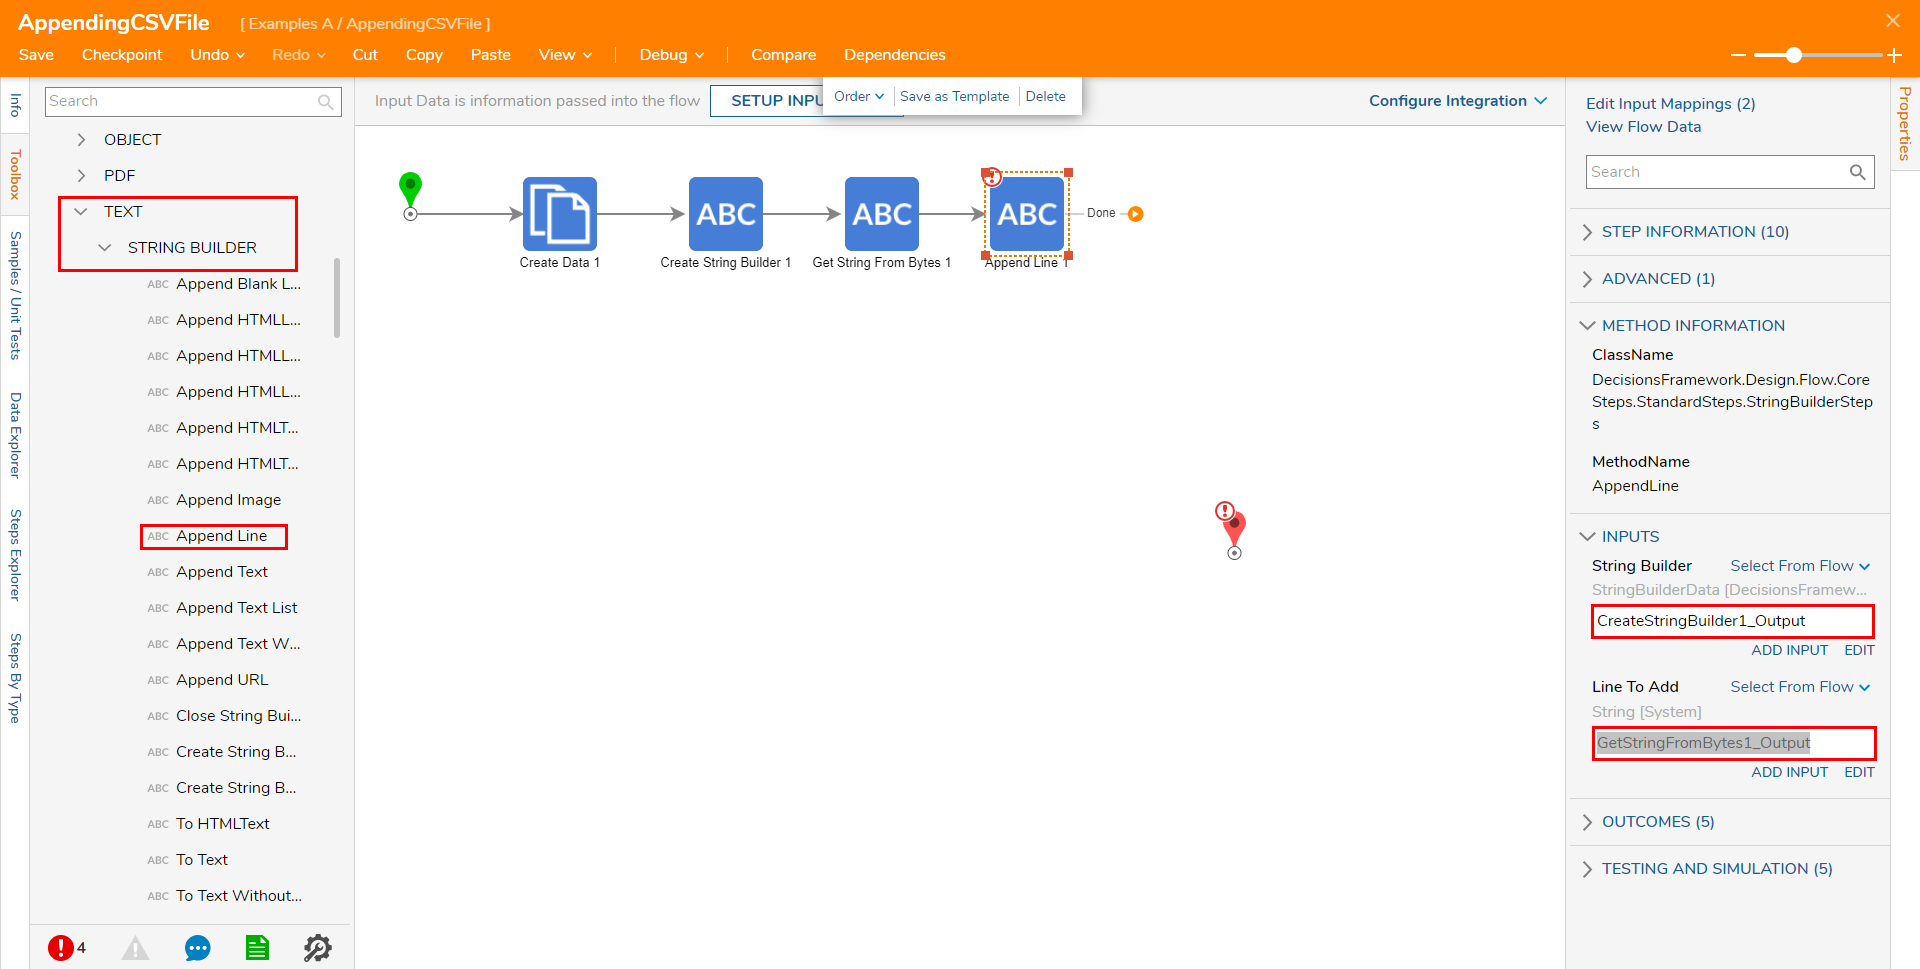
Navigate back to Toolbox > DATA > TEXT > STRING BUILDER, and attach an Append Line step to the Get String From Bytes step. Navigate to the step's Properties tab and under INPUTS, map CreateStringBuilder1_Output to String Builder, and GetStringFromBytes1_Output to Line To Add.
Attach a Show Form step from the FAVORITE STEPS category to the Append Line step; from the Show Form's Properties tab, select PICK OR CREATE FORM. Click CREATE, select Form, provide a Name, then click CREATE once more.

From the Form Designer, create a Form that contains a Text Box Multi Line component and a "Done" Button. Save and close the Form.
This Form will serve as an input for the new Text rows.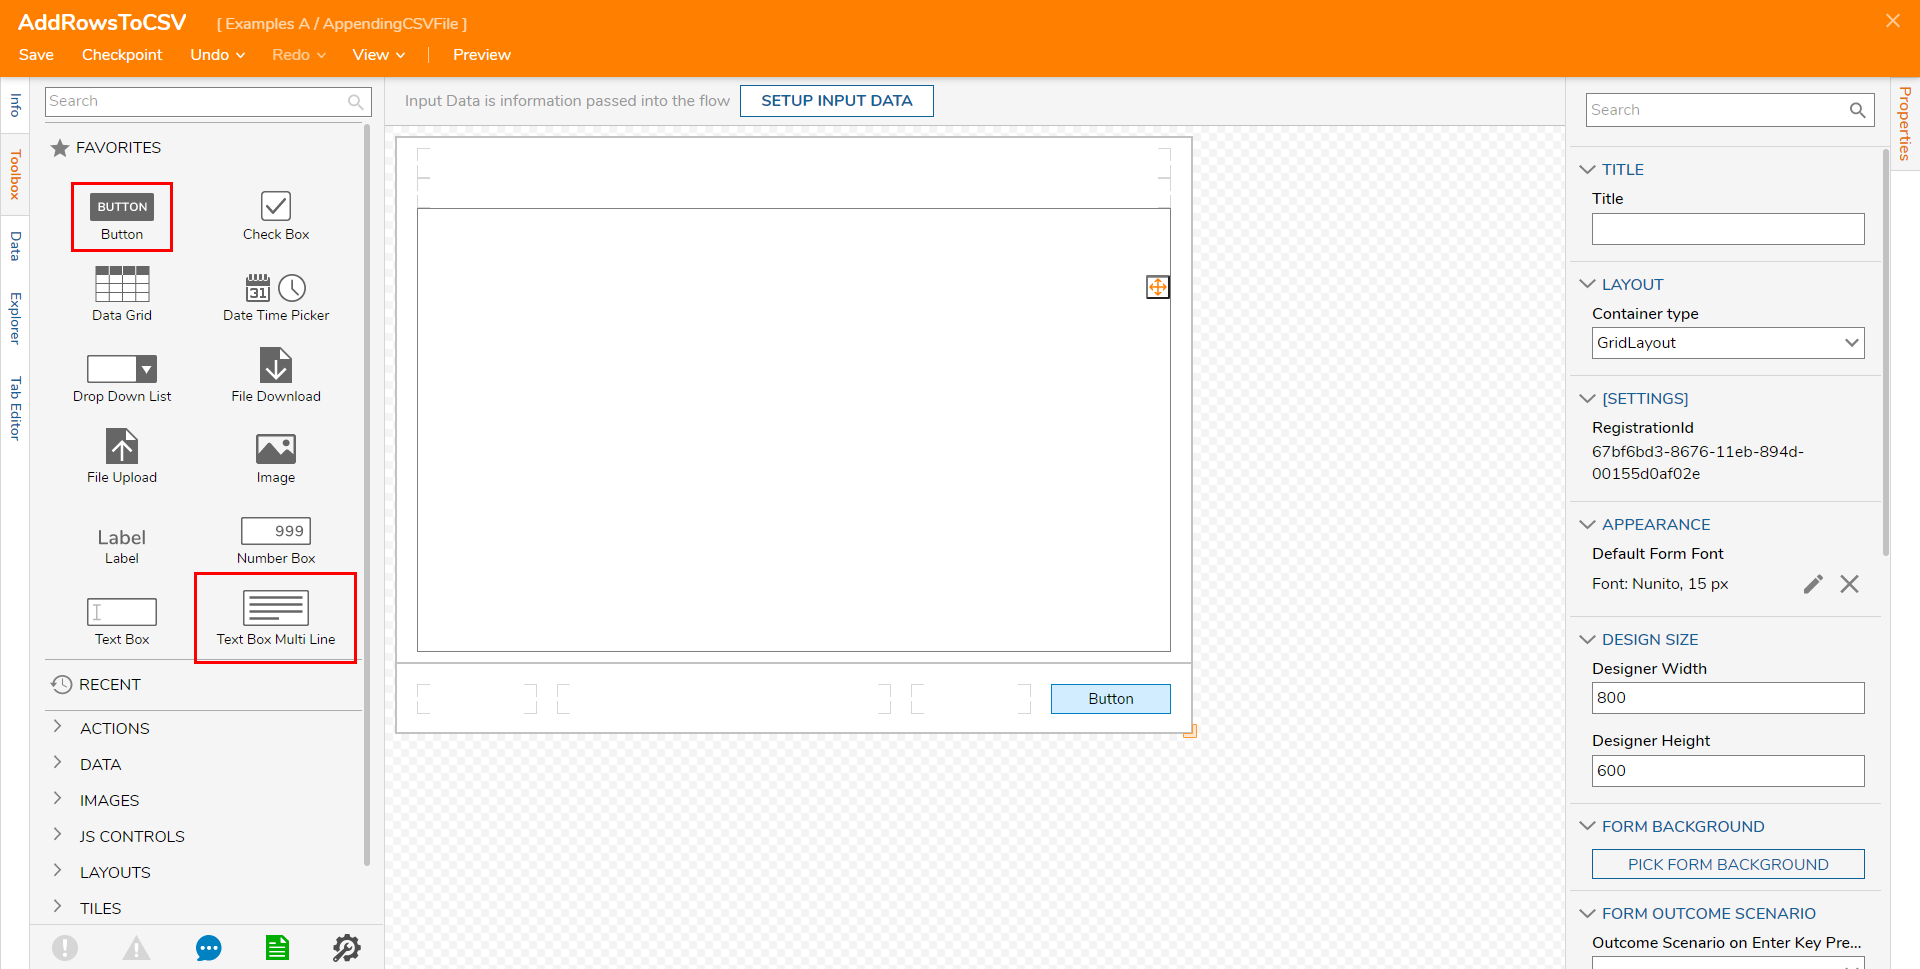
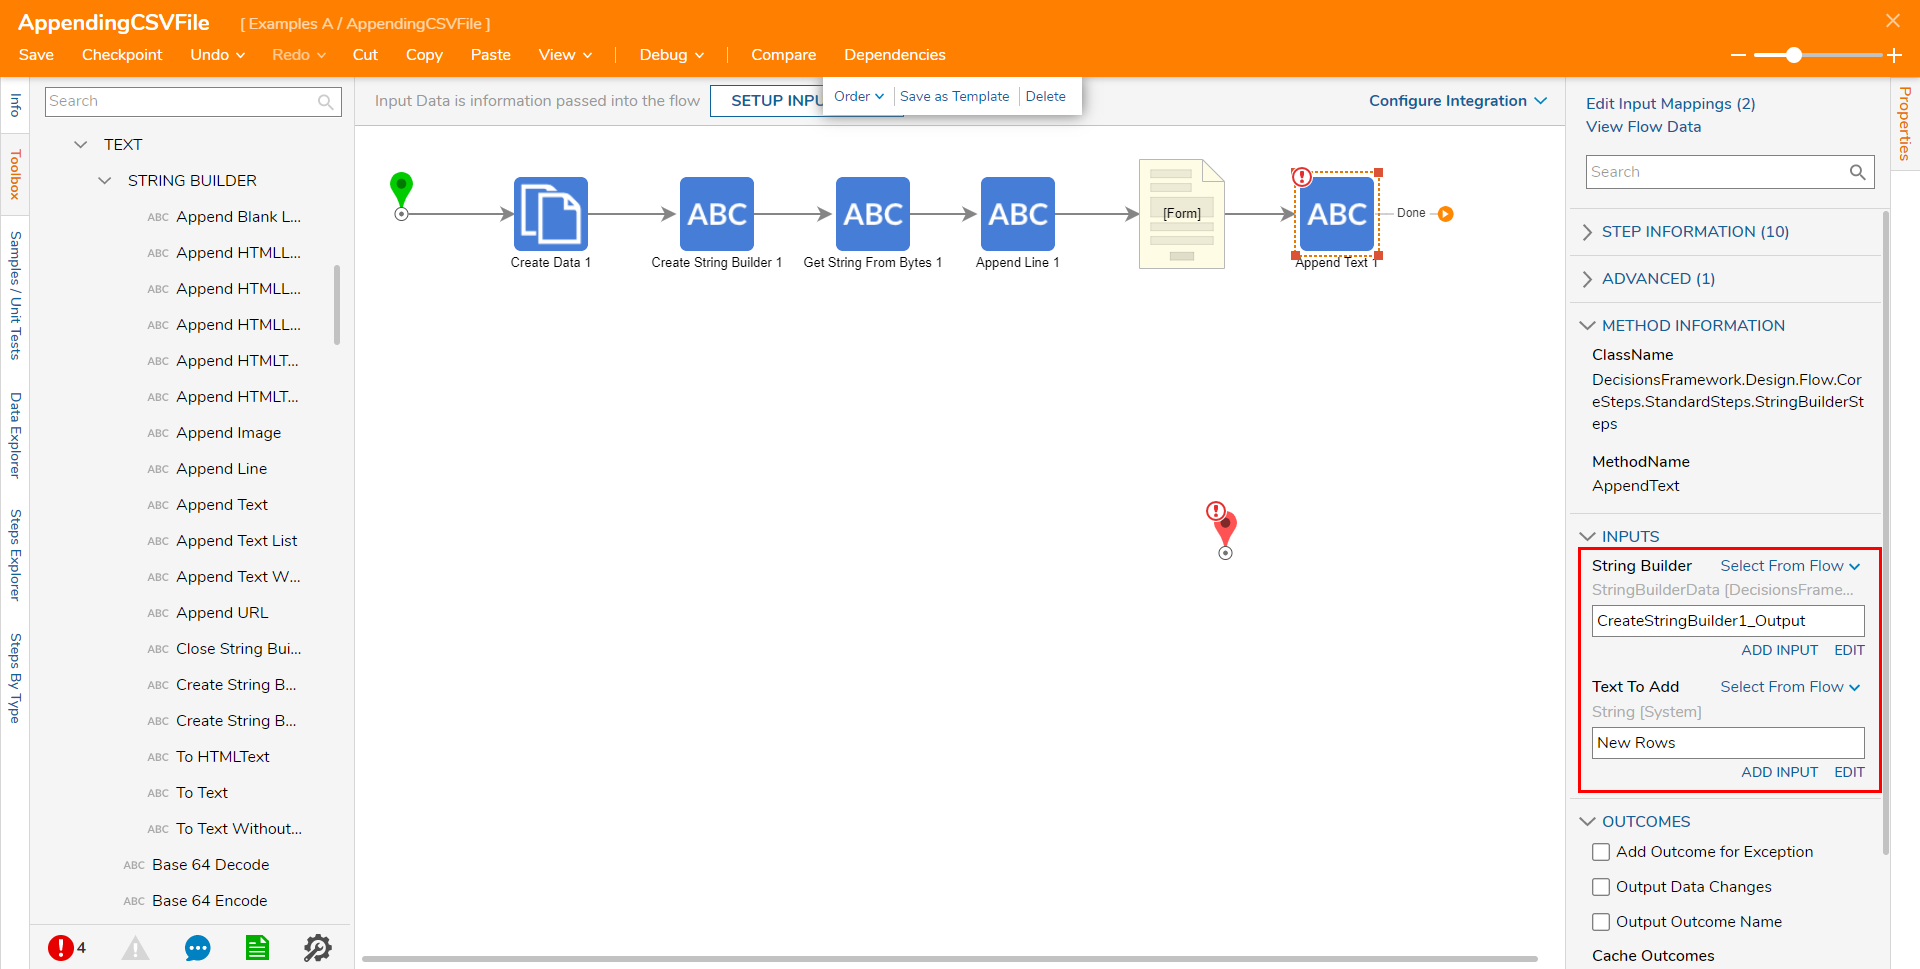
Back in Flow Designer, set the New Rows Input on the Form step to Ignore. Then, attach an Append Text step from Toolbox > DATA > TEXT > STRING BUILDER, to the Add Rows Form.
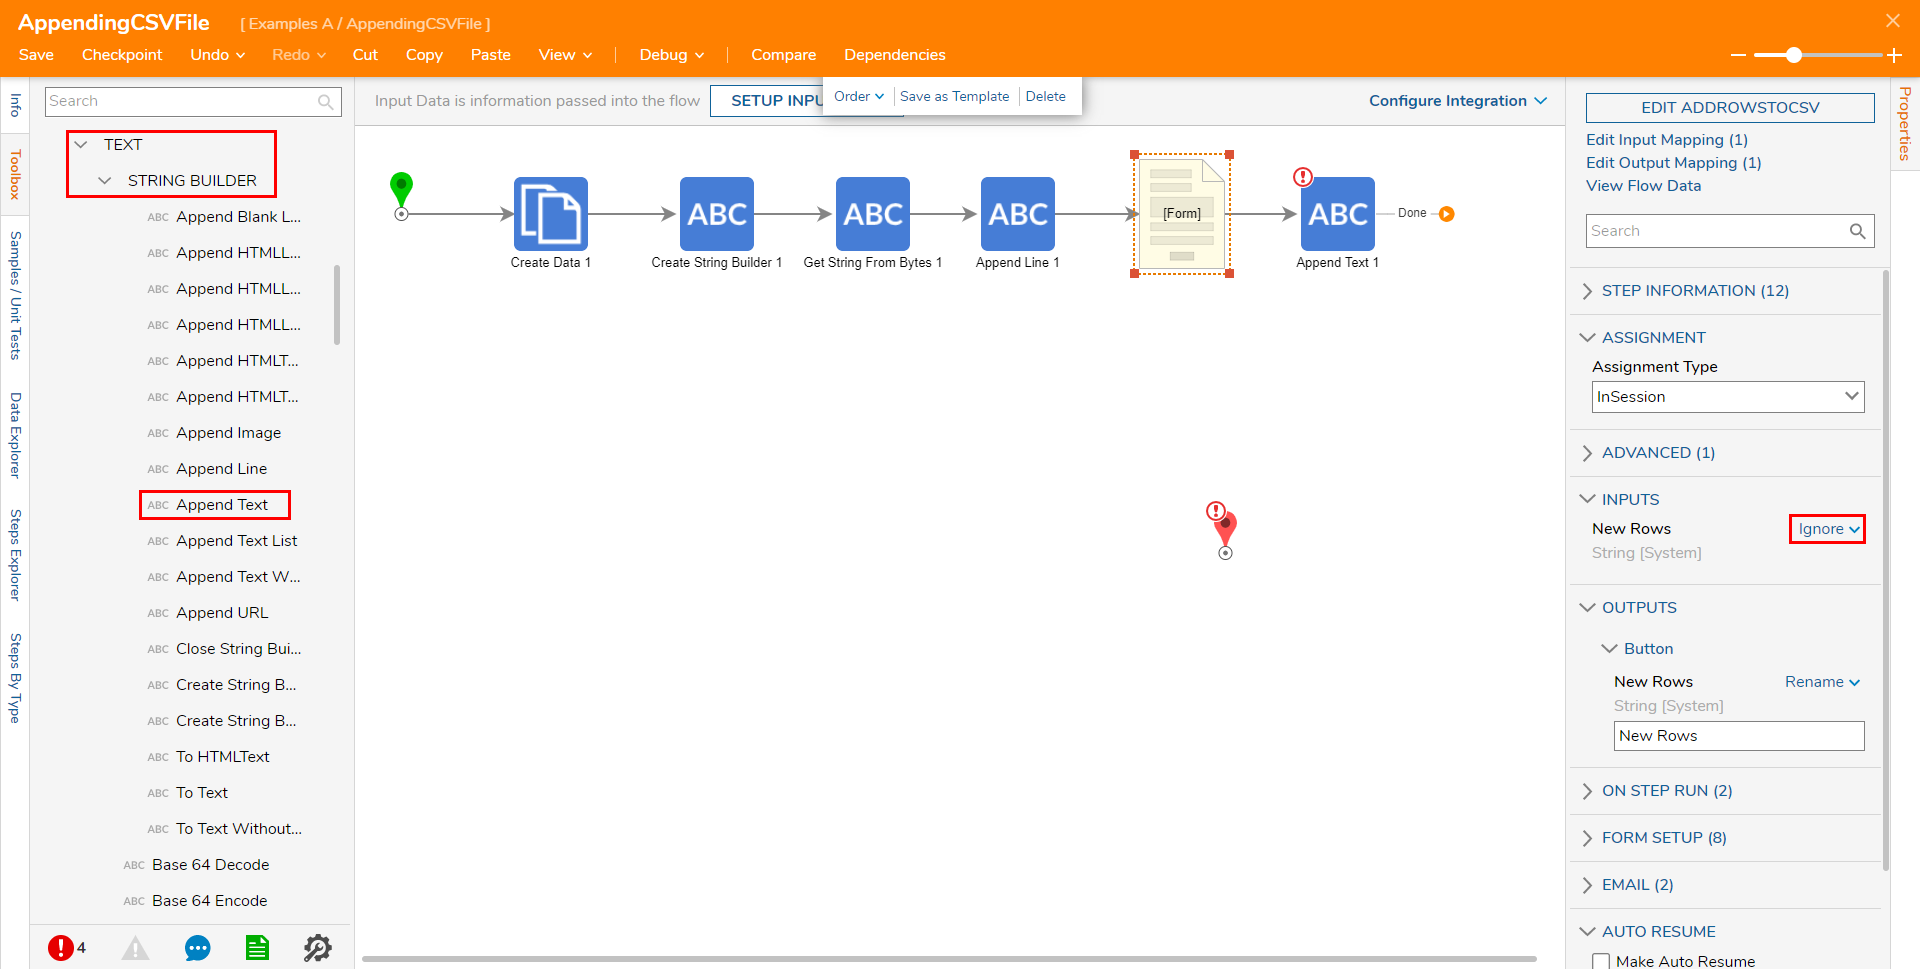
From the Properties tab of the Append Text step, map CreateStringBuilder1_Output to String Builder, and New Rows to Text To Add.
From the DATA > TEXT category of the Toolbox, attach a To Text step to the Append Text step. From the To Text step's Properties tab, map CreateStringBuilder1_Output to String Builder.
This step is used to retrieve data from the String Builder.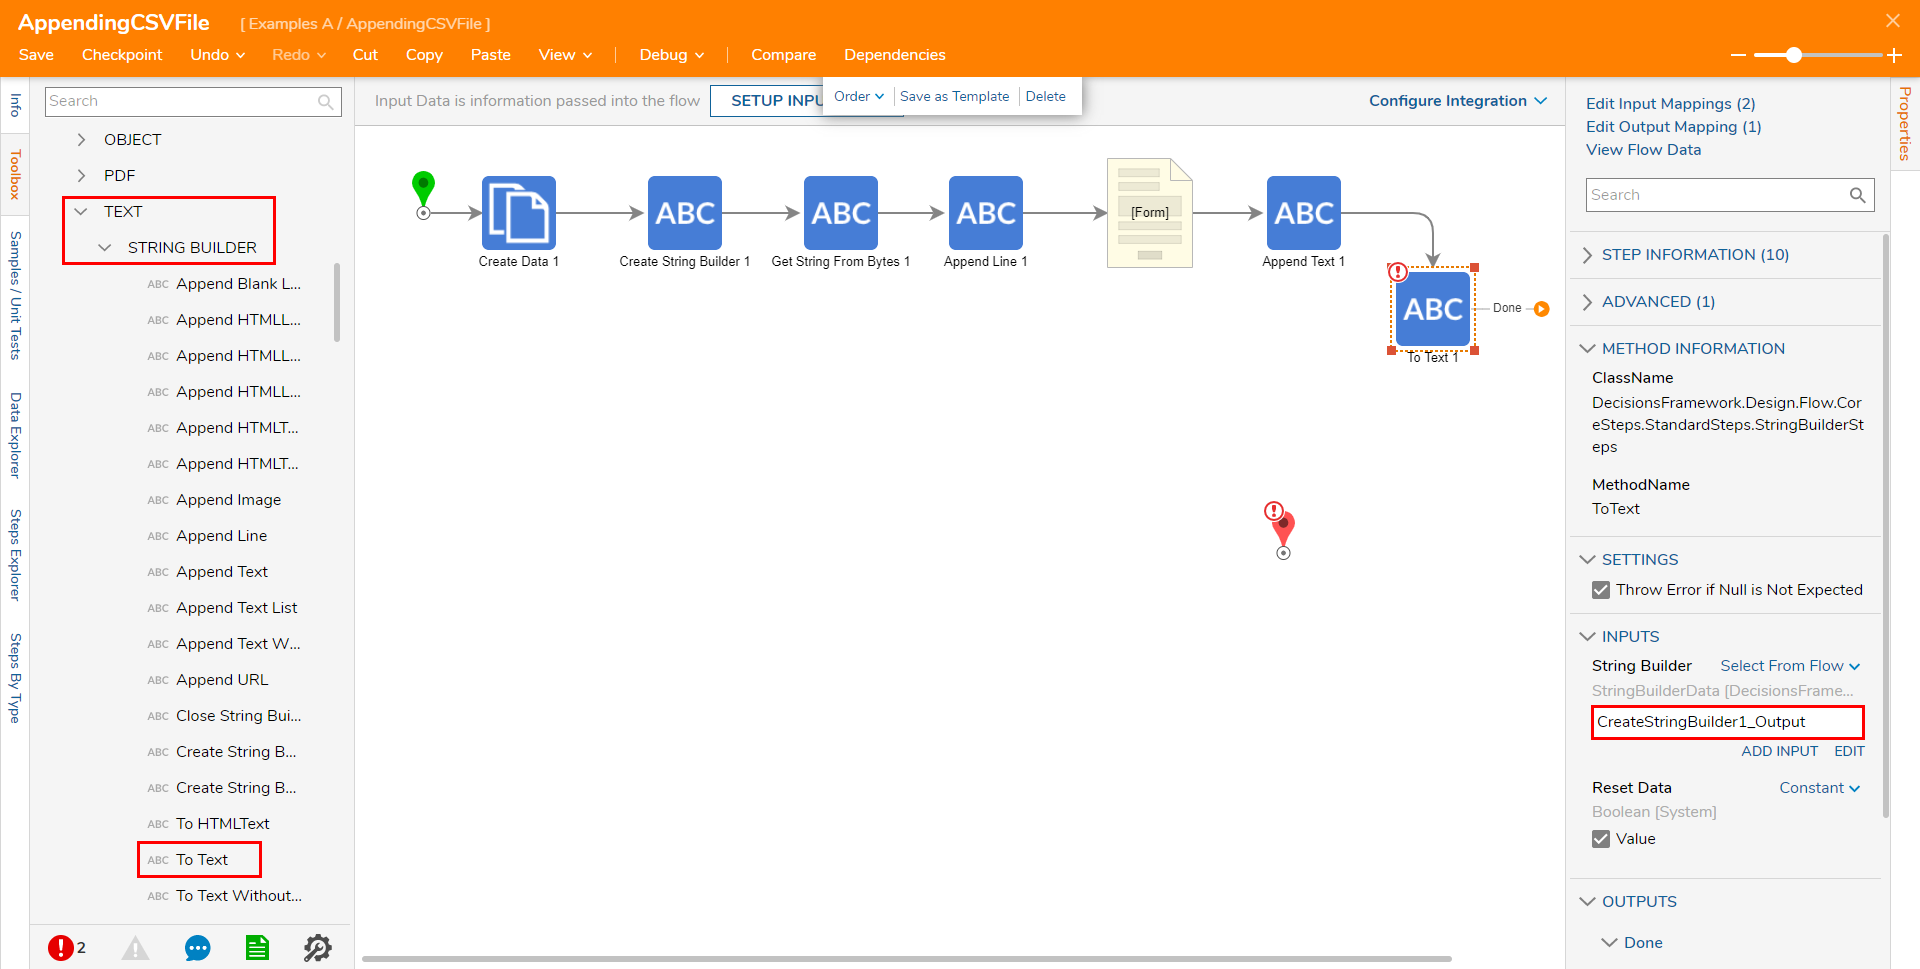
From the same category of the Toolbox tab, attach a Get Bytes From String step to the To Text step; map ToText1_Output to the Str Input.
The Get Bytes From String step is used to convert the To Text step's output into a Byte Array that may be used as contents for the appended CSV file.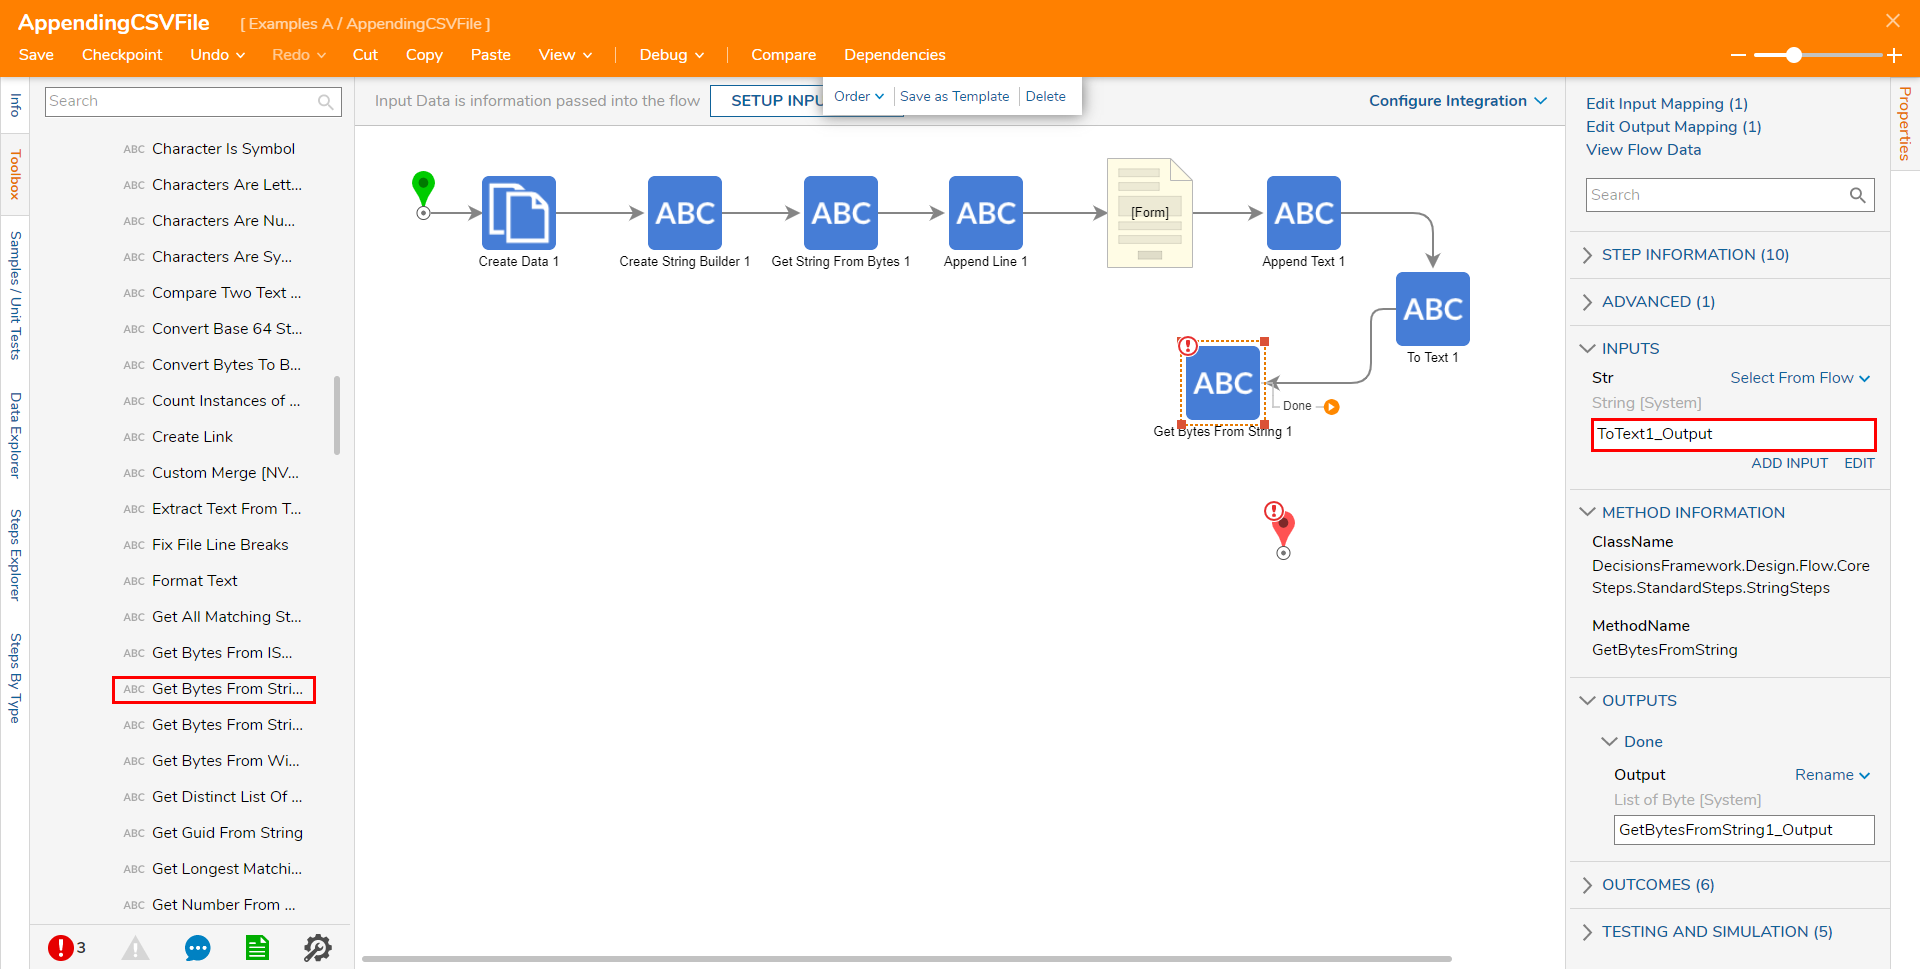
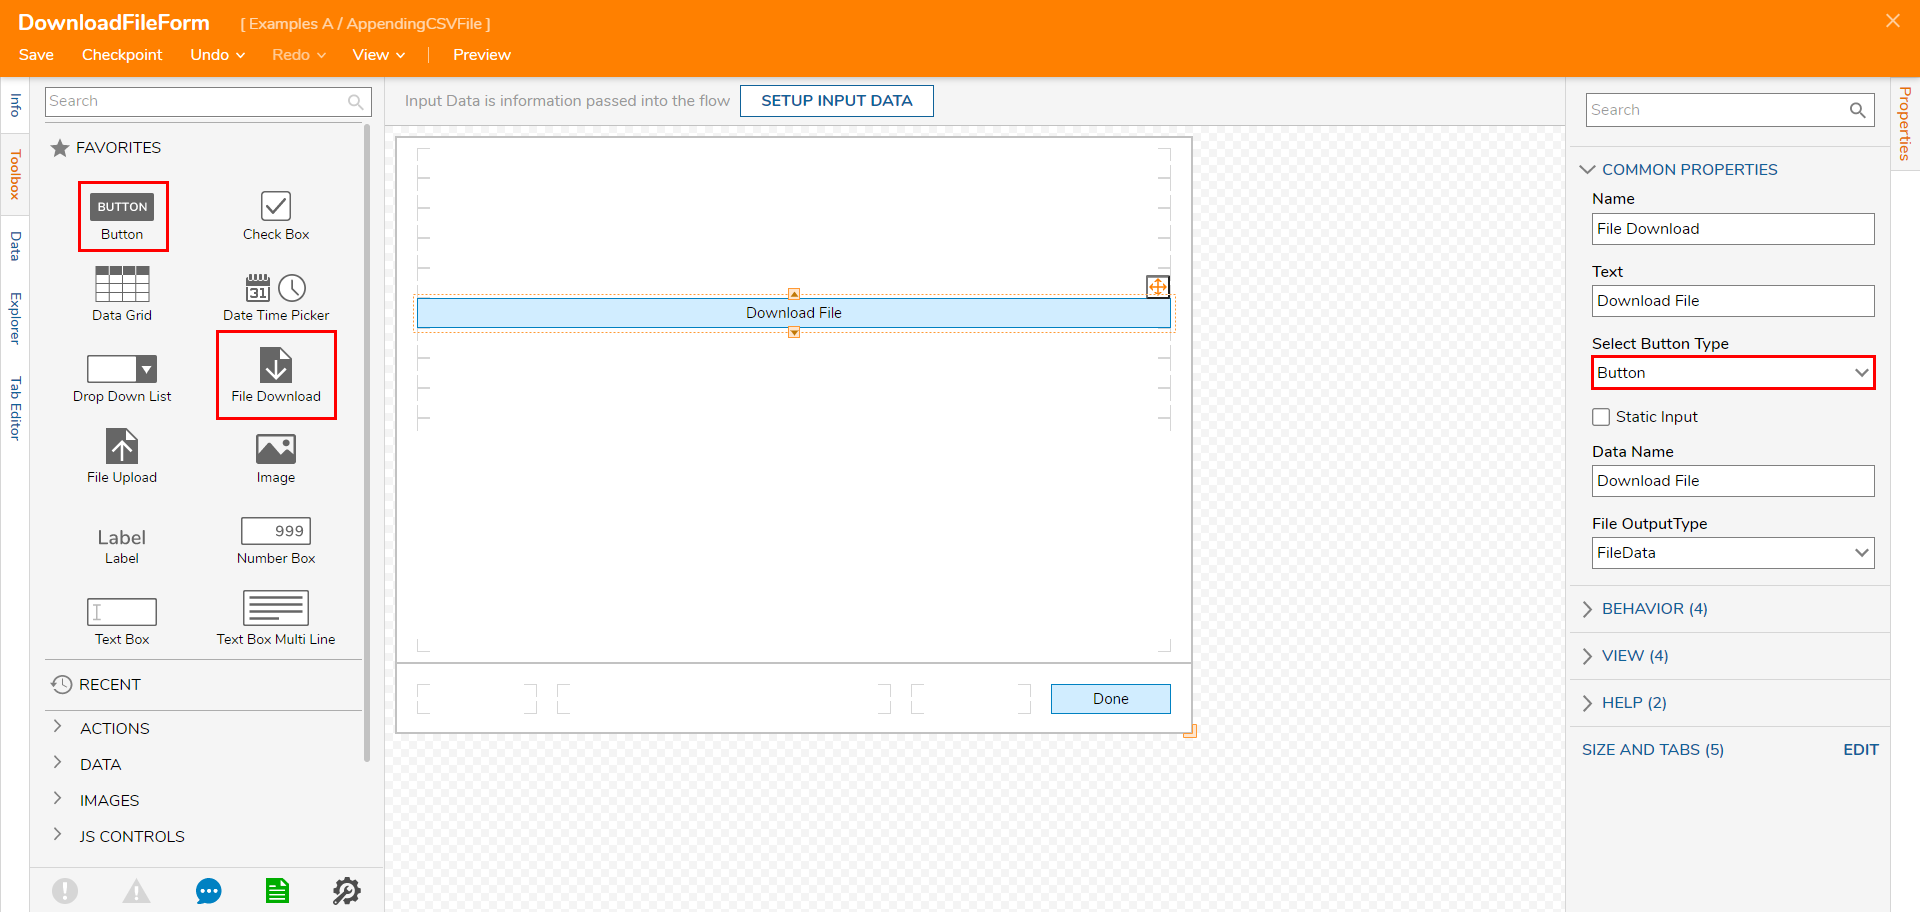
Attach another Show Form step to the Get Bytes From String step. From its Properties tab, select PICK OR CREATE FORM and CREATE a new Form.
Design a Form using a "Done" Button and a File Download component from Toolbox > FAVORITES. From the Properties tab for the File Download component, under COMMON PROPERTIES > Select Button Type, choose Button from the dropdown menu. Save and close the Form Designer.
Back in the Flow Designer, connect the Done path to the End step.
Select the Show Form step (for the Download Form) and under Properties > INPUTS > Download File, select Build Data for the mapping type; Constant map a FileName, and map GetBytesFromString1_Output to Contents.
Note that when defining the FileName, add .csv to the end to ensure that the File saves as a CSV file.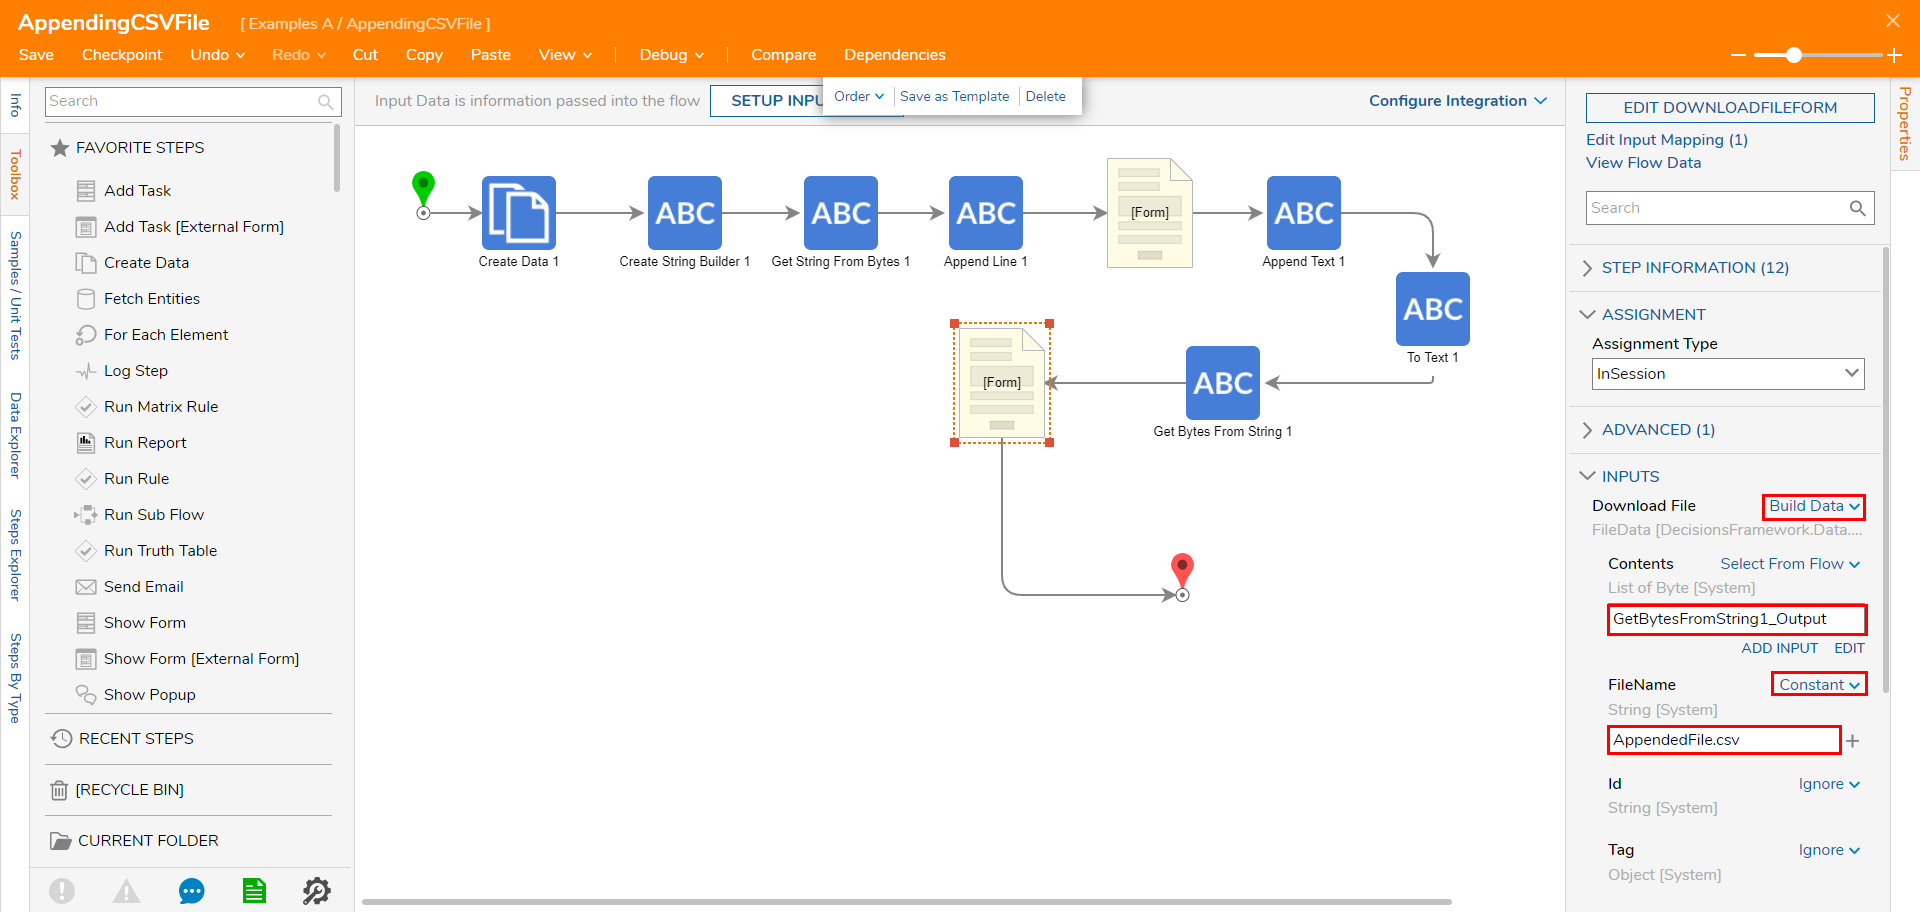
Save the Flow, then if desired, close via X.
Debug
- From the Flow Designer, select the Debug link from the top action bar.
- Click START DEBUGGING.
- When the Flow reaches the Form step, input new Rows of Text, separating each with commas, then click Done.Separating the Row by commas places each text value in a separate cell on the spreadsheet.
-
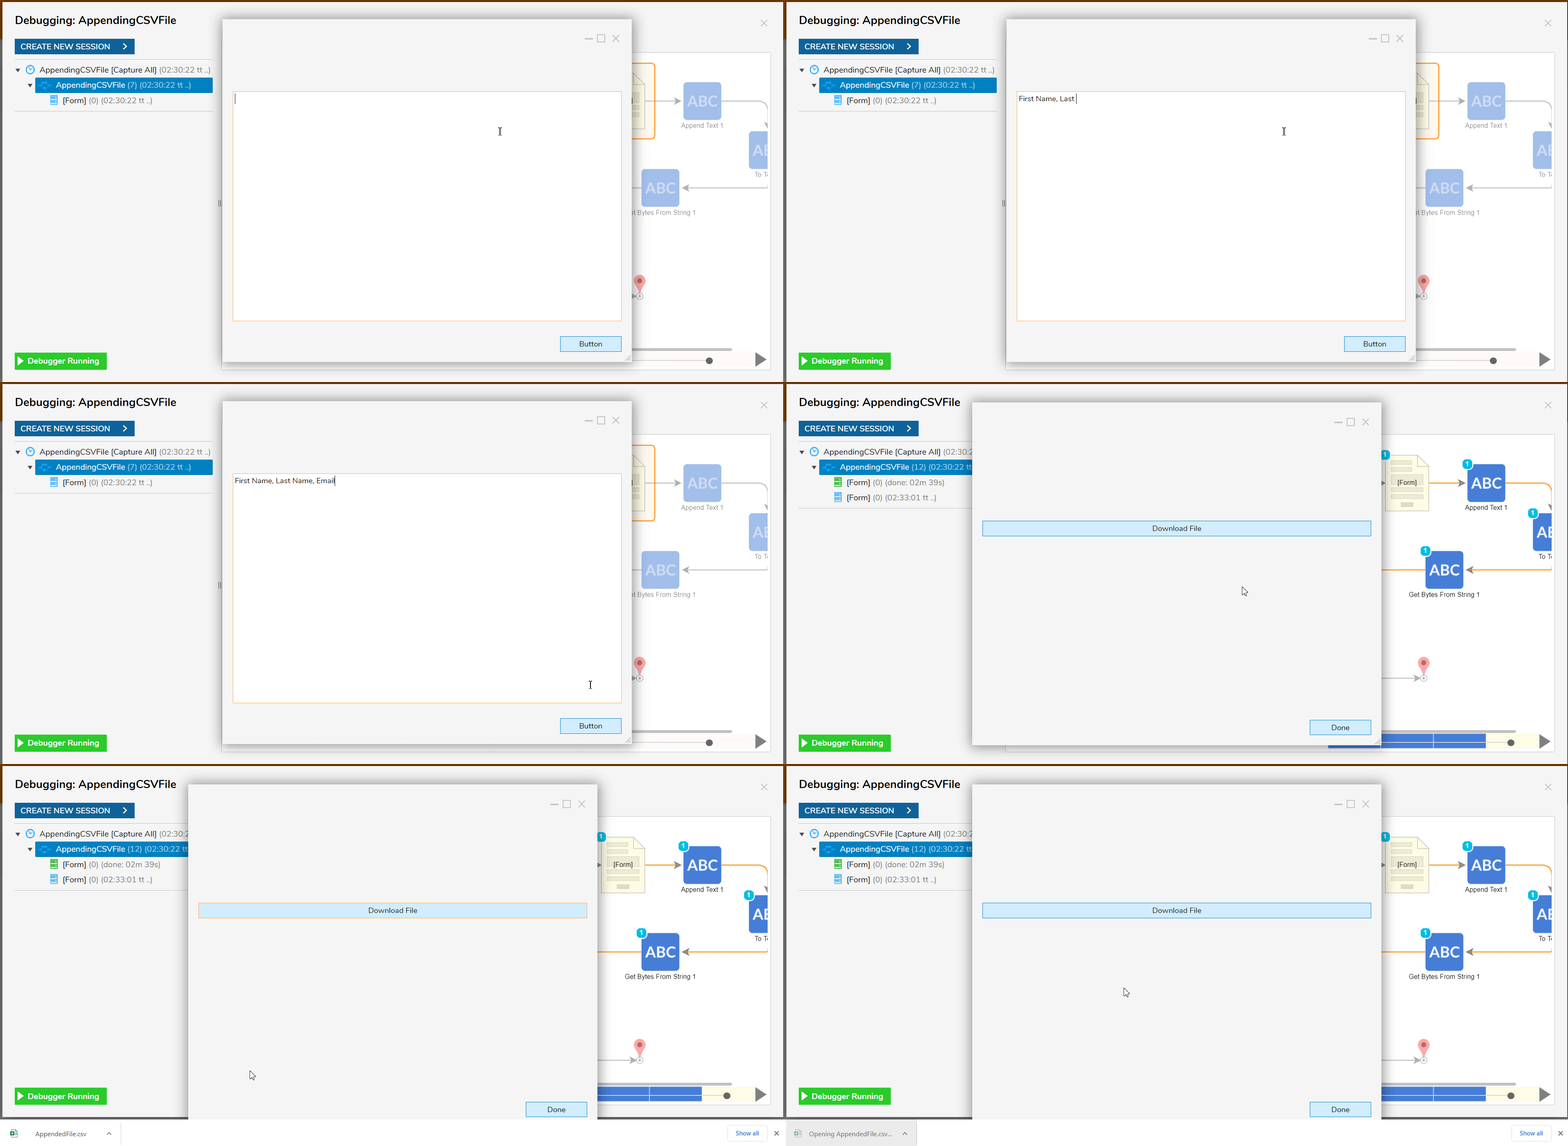
- Upon reaching the second Form, click the Download Button then open the CSV file to ensure that it contains the newly input Row of Text.
