Overview
The Guest Account is an optional User Account that can get non-Portal users, such as outside vendors, to engage with Designer Elements, such as a Flow, without using a specified Account.
If a Form is assigned to the Guest Account, no login Page will come up when the Assignee goes to process it. Typically, an email containing a link is sent to the user, allowing them to process a Task. The process will know that the task is associated with the Guest Account and automatically relies on that account's credential information. The following document allows the assignment of a Form to a Guest Account via Email.
Example
The following example is achieved through a two-step process:
- Creating an On Step Run Flow that defines the Assignment behavior of the Assigned Form
- Creating the Assigned Form Flow
On Step Run Flow
- From a Designer Project, CREATE a new Flow.
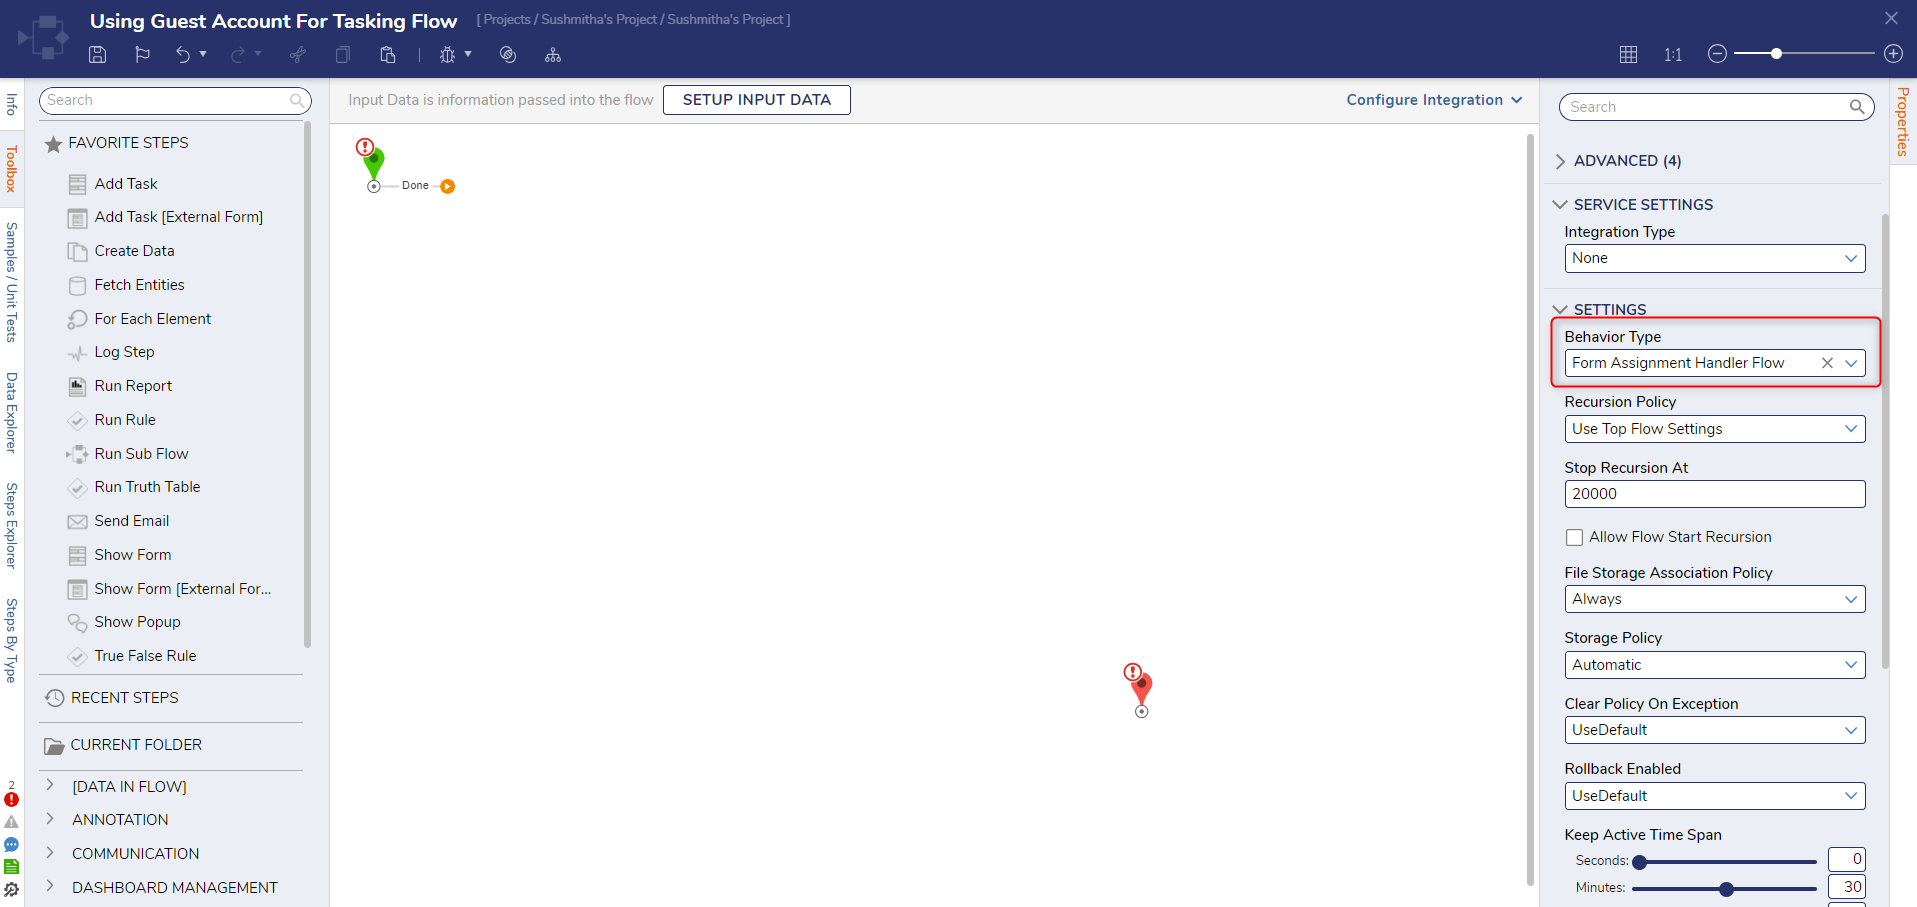
- From the Flow Designer, navigate to the Properties panel. Under SETTINGS > Behavior Type, select Form Assignment Handler Flow.
- From Toolbox > FAVORITE STEPS, attach a Send Email step to the Start and End steps. Provide a from, To, and Subject value from the Properties tab of the Send Email step.
Then, change the Body to Merge Plain Text, and click SHOW EDITOR.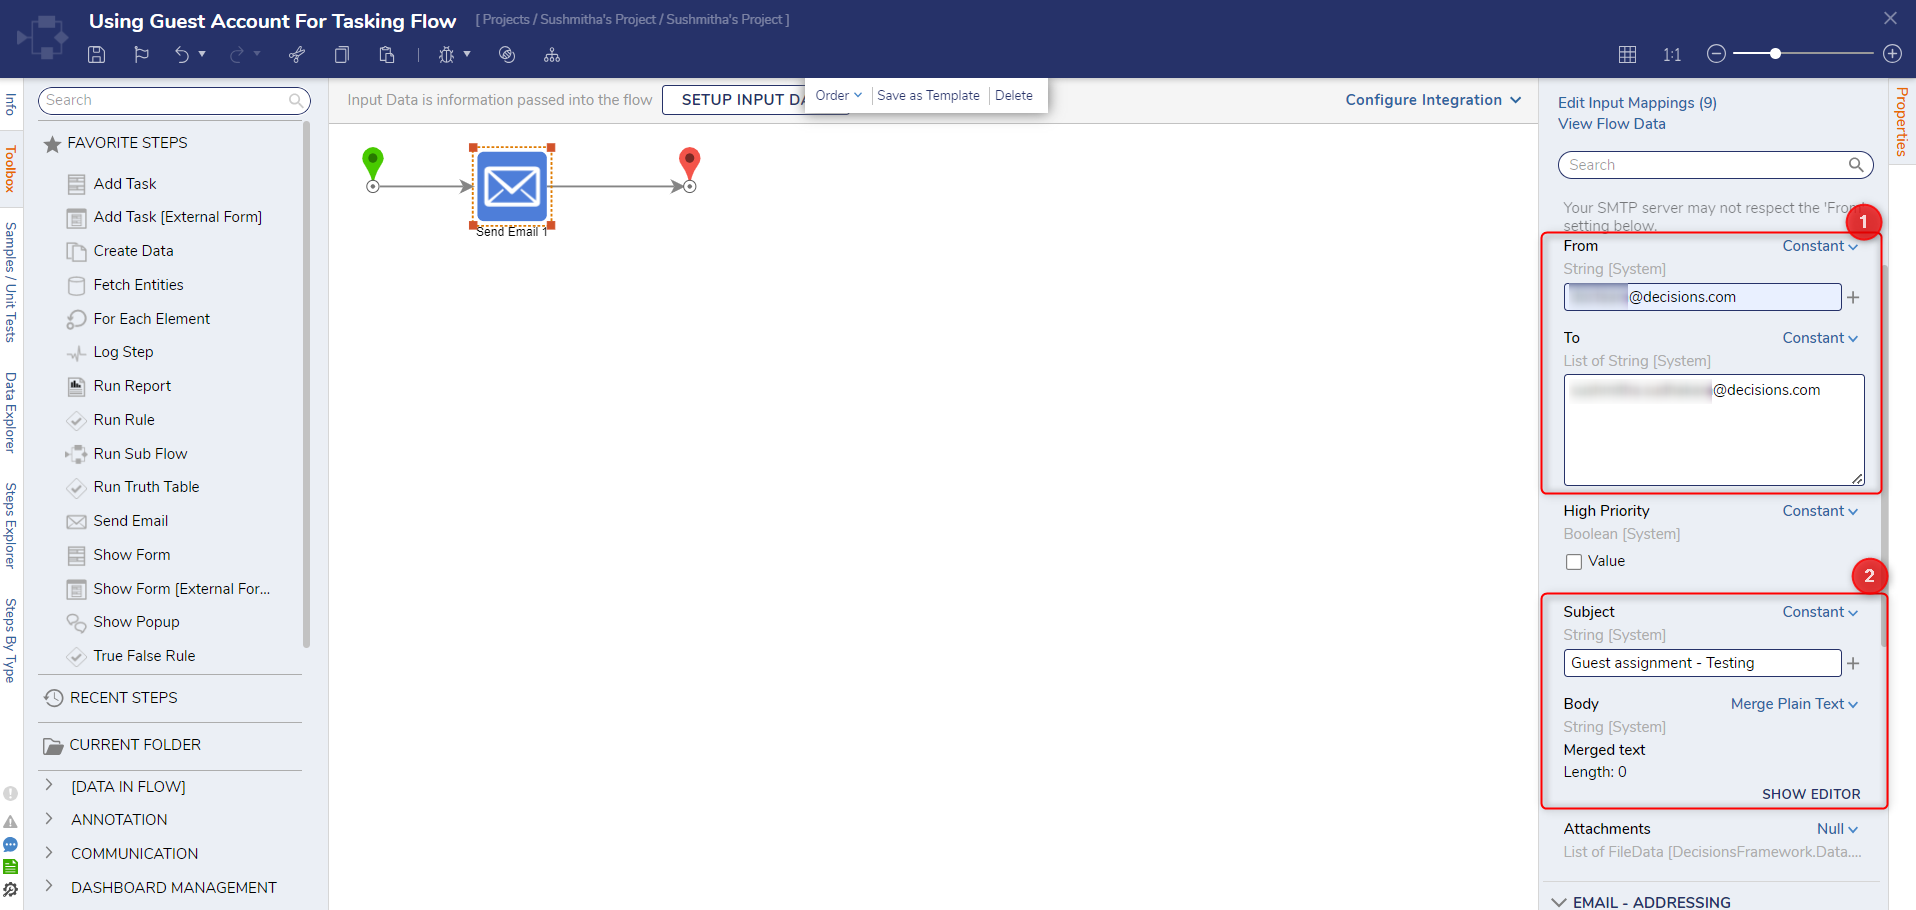
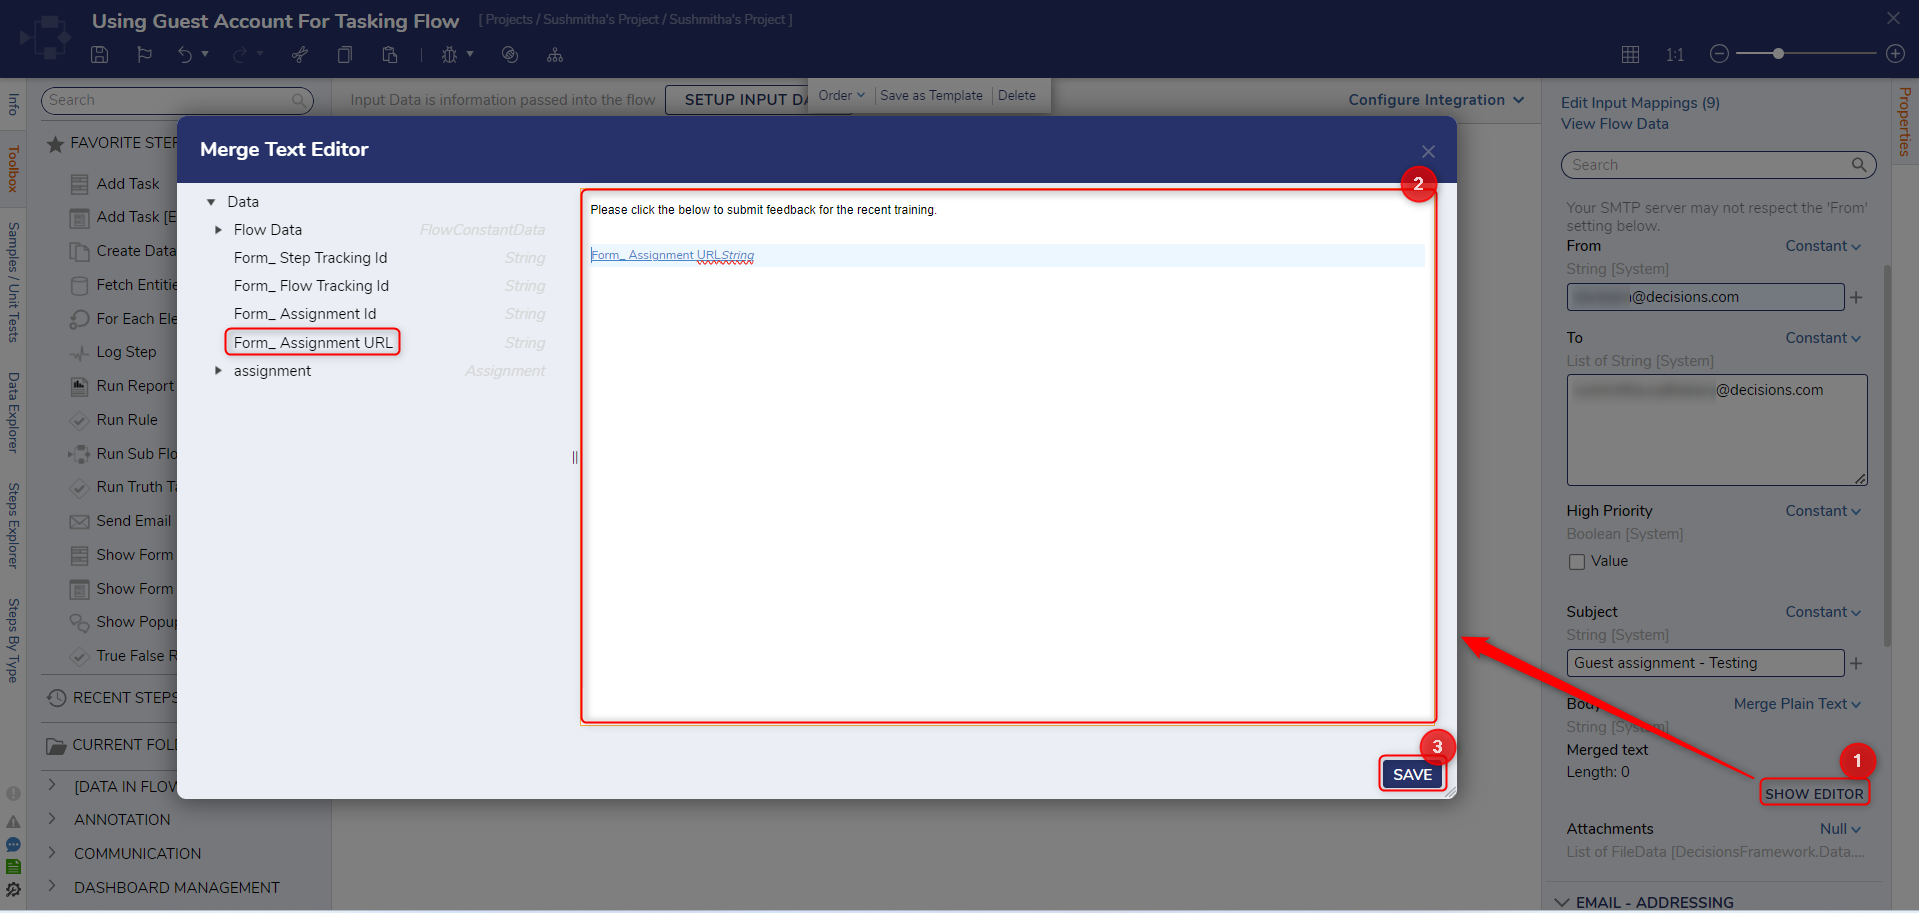
- From the Merge Text Editor, define the Body as desired and add the Form_AssignmentURL from the Data Tree on the left. Then, click SAVE.
- Save and close the Flow Designer.
Assigned Form Flow
- From a Designer Project, CREATE a new Flow.
- From the FAVORITE STEPS category of the Toolbox, attach a Show Form step to the Start step. From the Properties of the Show Form step, click PICK OR CREATE FORM, then CREATE a new Form.
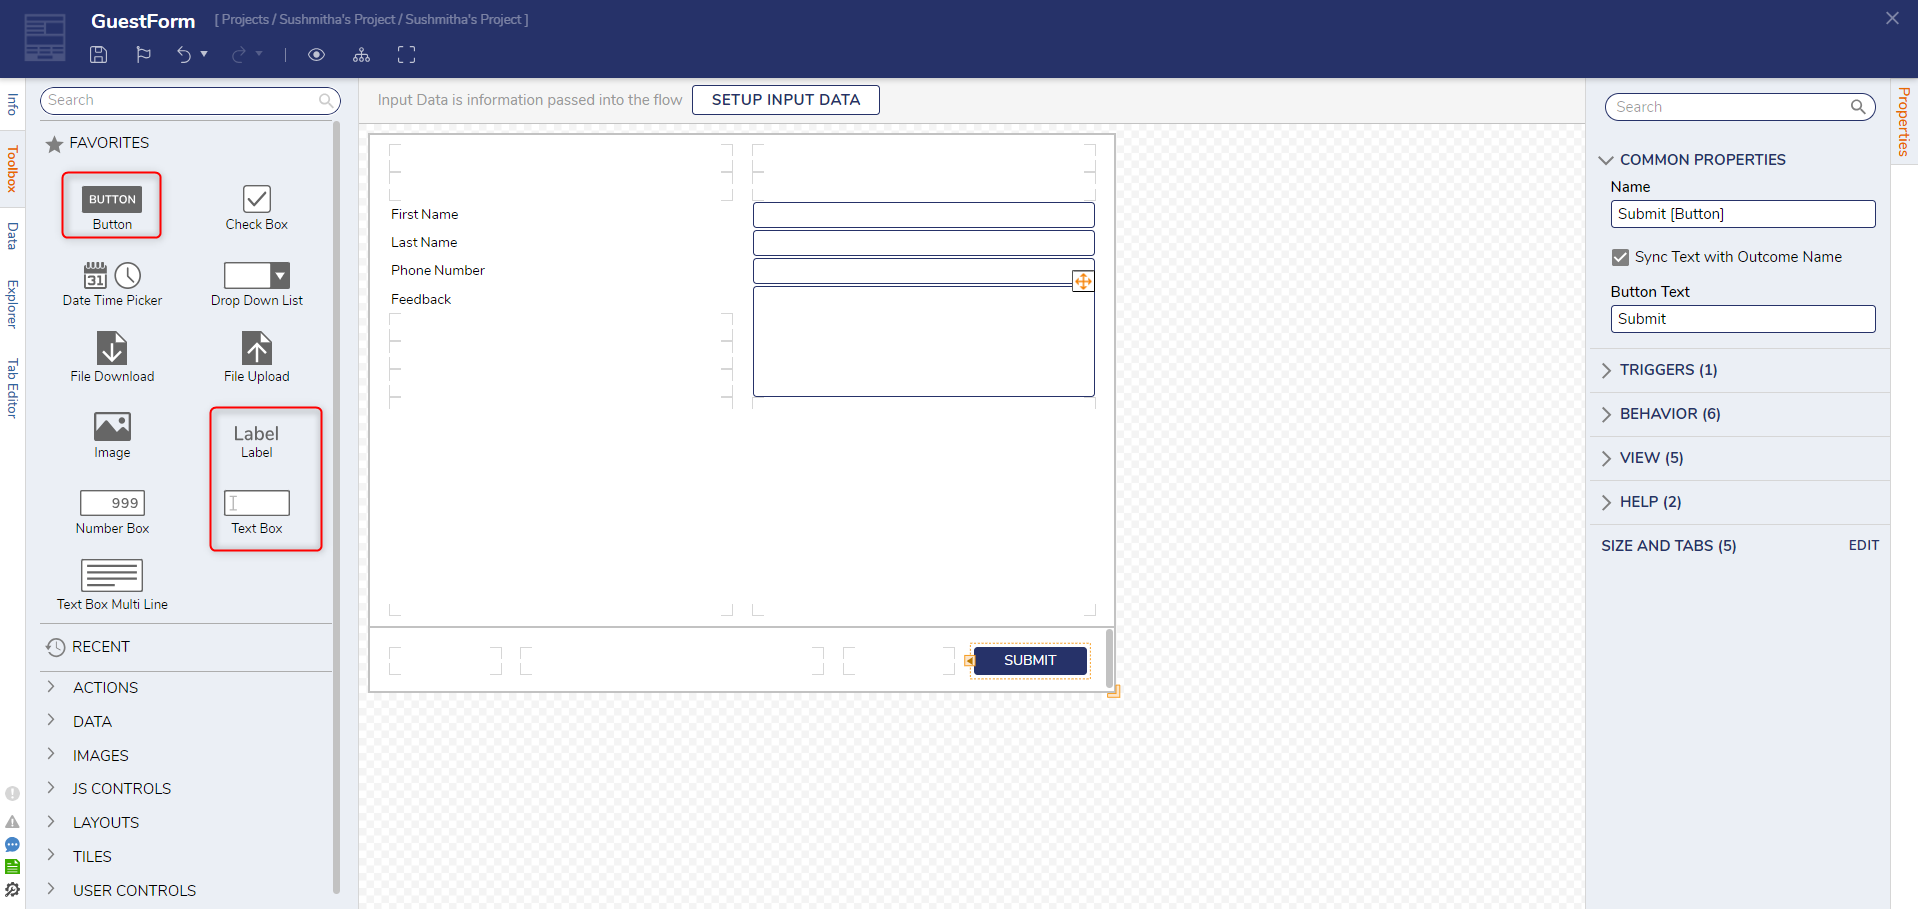
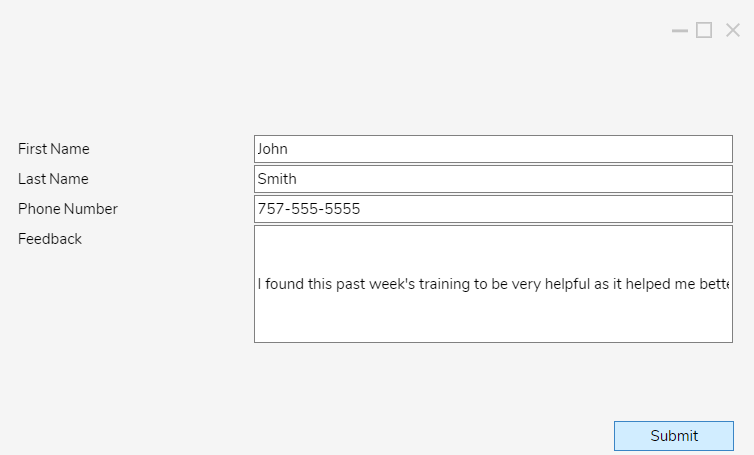
- From the Form Designer, design a Form consisting of four separate Text Boxes and corresponding Labels for a "First Name", "Last Name", "Phone Number", and "Feedback" value, respectively. Then, add a Button labeled "Submit".
- Back in the Flow Designer, navigate the Form's Properties tab; set each INPUTS to Ignore to allow user input.
- While still in the Properties tab, under ASSIGNMENT > Assignment Type, select AssignedToGuest from the drop-down. Then, Constant map an Assignment Name.
- Navigate to and expand ON STEP RUN. Under Step Start Flow Type, select SharedFlow. Then, select PICK OR CREATE FLOW TO RUN, and PICK the previously create Flow.
- Connect the Form step to the End step. Then, Save the Flow, and if desired, close the Flow Designer.

Debug
- Debug the Assigned Form Flow.
- From the Email Inbox of the Assignee, click the Form_AssignmentURL.

- From the resulting Assignment, fill out the Form and click Submit.
- Navigate back to the Debugger and verify that the Flow completes as expected.
For further information on Forms, visit the Decisions Forum.