Overview
For security considerations and for service accounts, users may run the platform as non-admin users (Standard users) in Windows.
This article explains how to configure and set up Standard Users to use the Decisions platform.
Configuring Installation
- Log in to a Windows device with an administrator account. Create a standard account, i.e., a user that is not a guest or an administrator. Refer to Microsoft's Create a local user or administrator account in Windows article for further instructions.
- Download the latest installer and run it as an Administrator. Refer to the Installation Guide for more information.
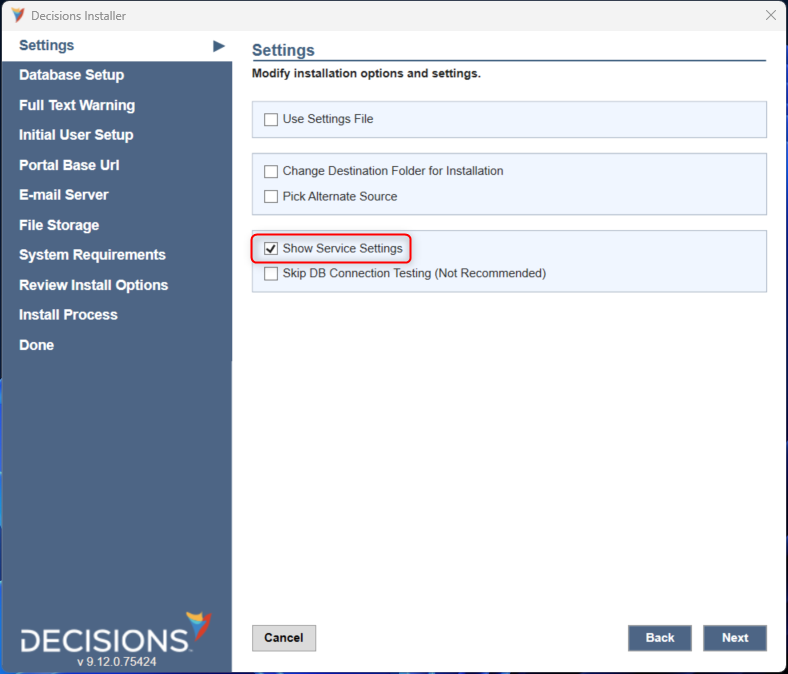
- After agreeing to the License Agreement, check the Show ServiceSettings in the Settings window. Then, hit NEXT.
- In the Service Settings window, select Specify Account and provide the credentials for the non-admin account. Enter the Username in the following format
.\[Username].
Upon selecting Next, the installer checks if the credentials are valid before continuing. Once correct, the installer will proceed.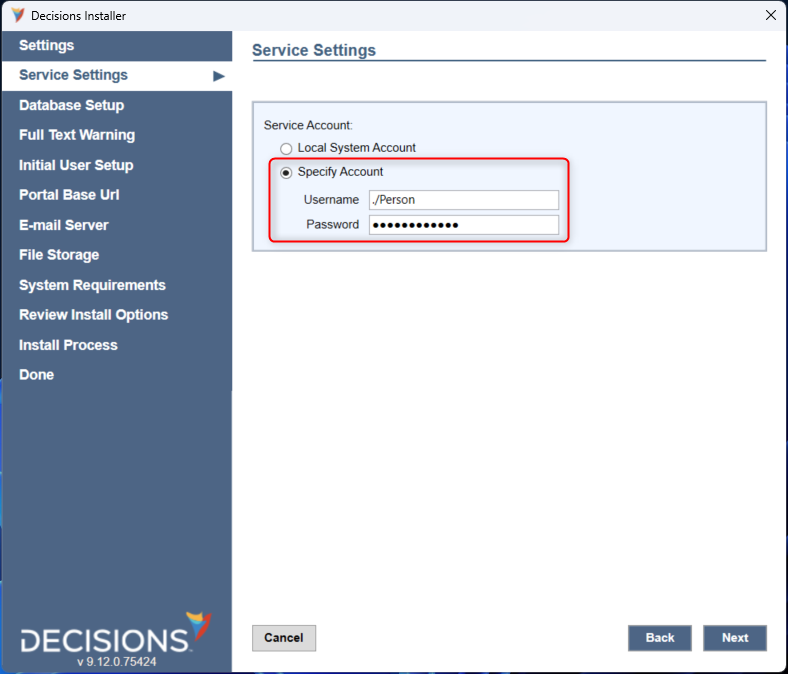
- Follow the Installation Guide to install the platform.
- Log in to the instance to confirm a successful installation. Proceed to the next section once done.
Configuring IIS
- Open the IIS Manager, expand the device's name in the left column menu, and then select Application Pools.
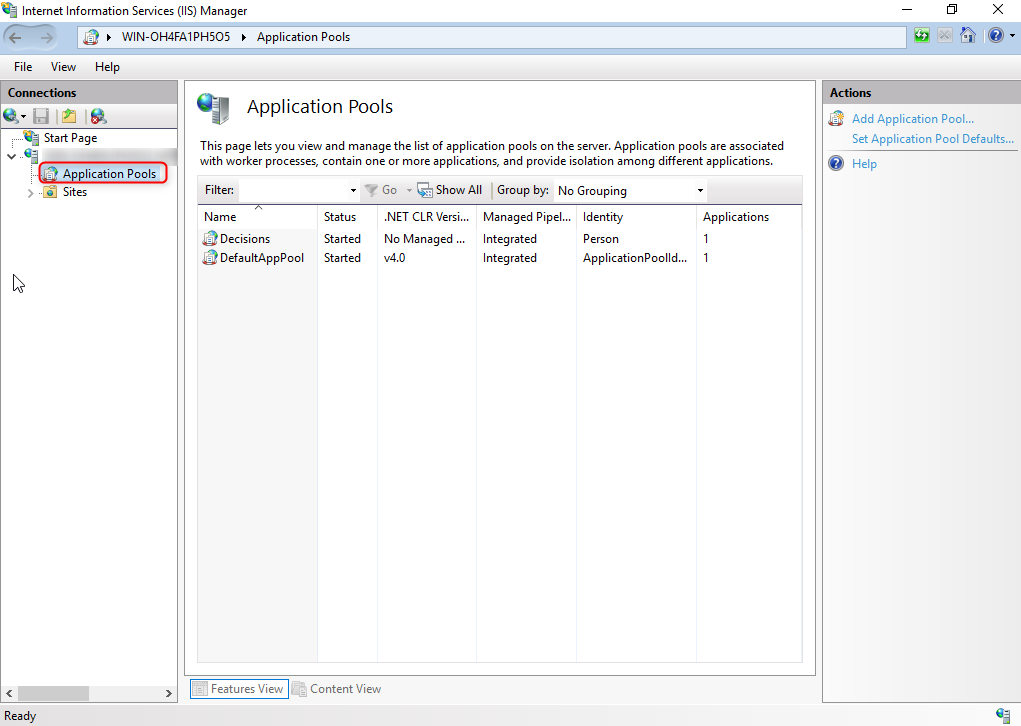
- Right-click on the Application Pool referenced during installation e.g. "Decisions" by default and then select Advanced Settings.
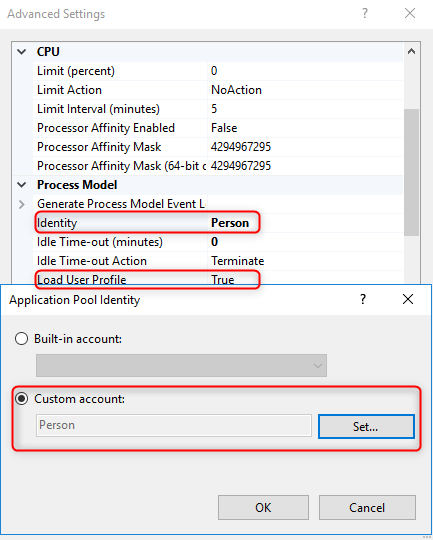
- In the Advanced Settings window, edit the Identity setting by selecting the ellipses. Select Custom account and specify the credentials of the standard user account. Select Ok to confirm.
- Back in the Advanced Setting window, toggle the Load User Profile setting to True. Select Ok to confirm and exit out of the IIS Manager.
Proceed to the next section once complete.
Granting Folder Permissions for Non-Admin User
To run the platform successfully, the standard user account needs Read & Execute, Write, and Modify folder permissions for both the Decisions folder and the FileStorage folder if it is stored outside of the Decisions folder.
Without these permissions, files will not appropriately write and will appear as NULL in the Portal. Other file actions like Delete or Move may also fail without these permissions.
Permissions must be applied to any System folder that the standard account needs to access.
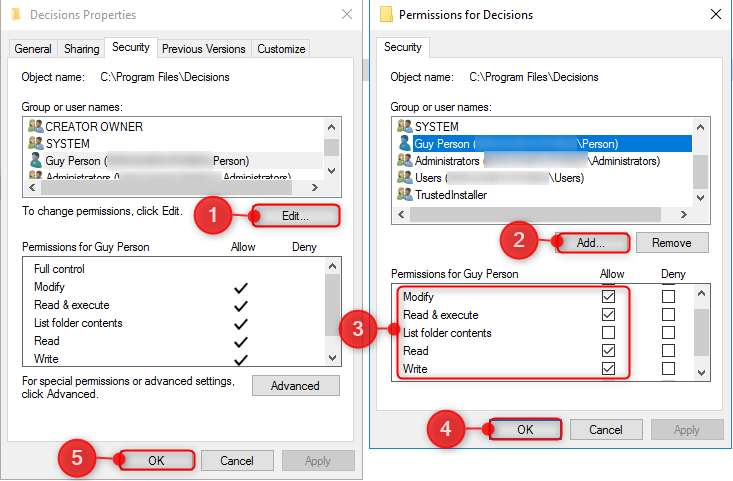
- Right-click the Decisions folder, select Properties, then select the Security tab.
- Select Edit > Add. Search for the standard account and then grant the necessary permissions. Select OK once done in both windows.
- If the FileStorage folder resides outside of the Decisions folder, repeat these steps for that folder.
- To confirm correct permissions, debug a Flow with the File Upload step, Look at its Input/Output Data. The Input/Output Data will be NULL when the permissions are not enabled correctly.
If values are shown, then the permissions are correct and the instance is completely set up.