Overview
This tutorial demonstrates how to send Composite Data Types via the POST method using Rest Service Integration.
Define the Rest Service
Use the example to create a Rest Service Integration with the POST method. Then, add a custom Rest Header to the Service Integration. Finally, create a simple Flow to test sending the Composite Data Type with the custom Rest Header and deserialize the returned Data.
- Create a REST Service
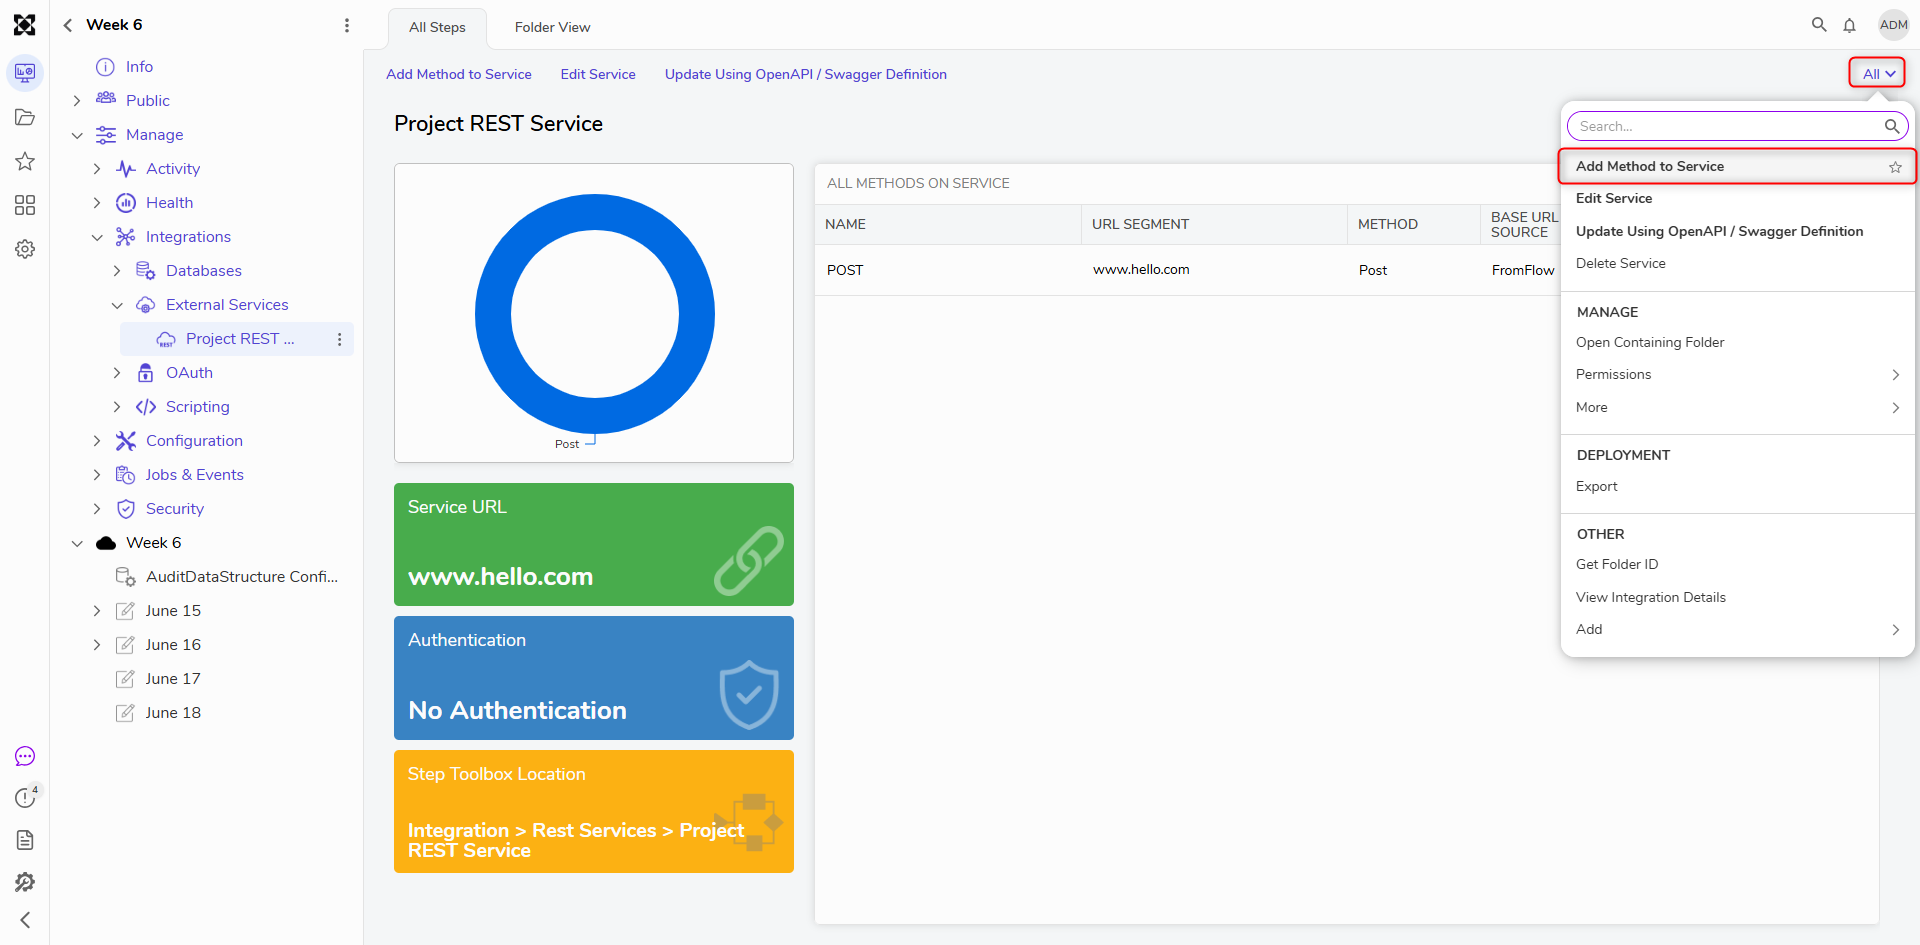
- From the newly created Rest Service Folder, navigate to All > Add Method to Service.
- In the resulting pop-up window, provide a Name, and define the URL .
- Define the HTTP Method as POST and Service Content-Type as JSON.
- Select Specify Below (Use {} for variables) from the Request Body Format dropdown. The Request Body is used to define the Composite Data Type between the two curly brackets. Define the Request Body as the following code snippet, then select OK.
{
"namedsession": "{sessionID}",
"datastring": "{stringinput}"
}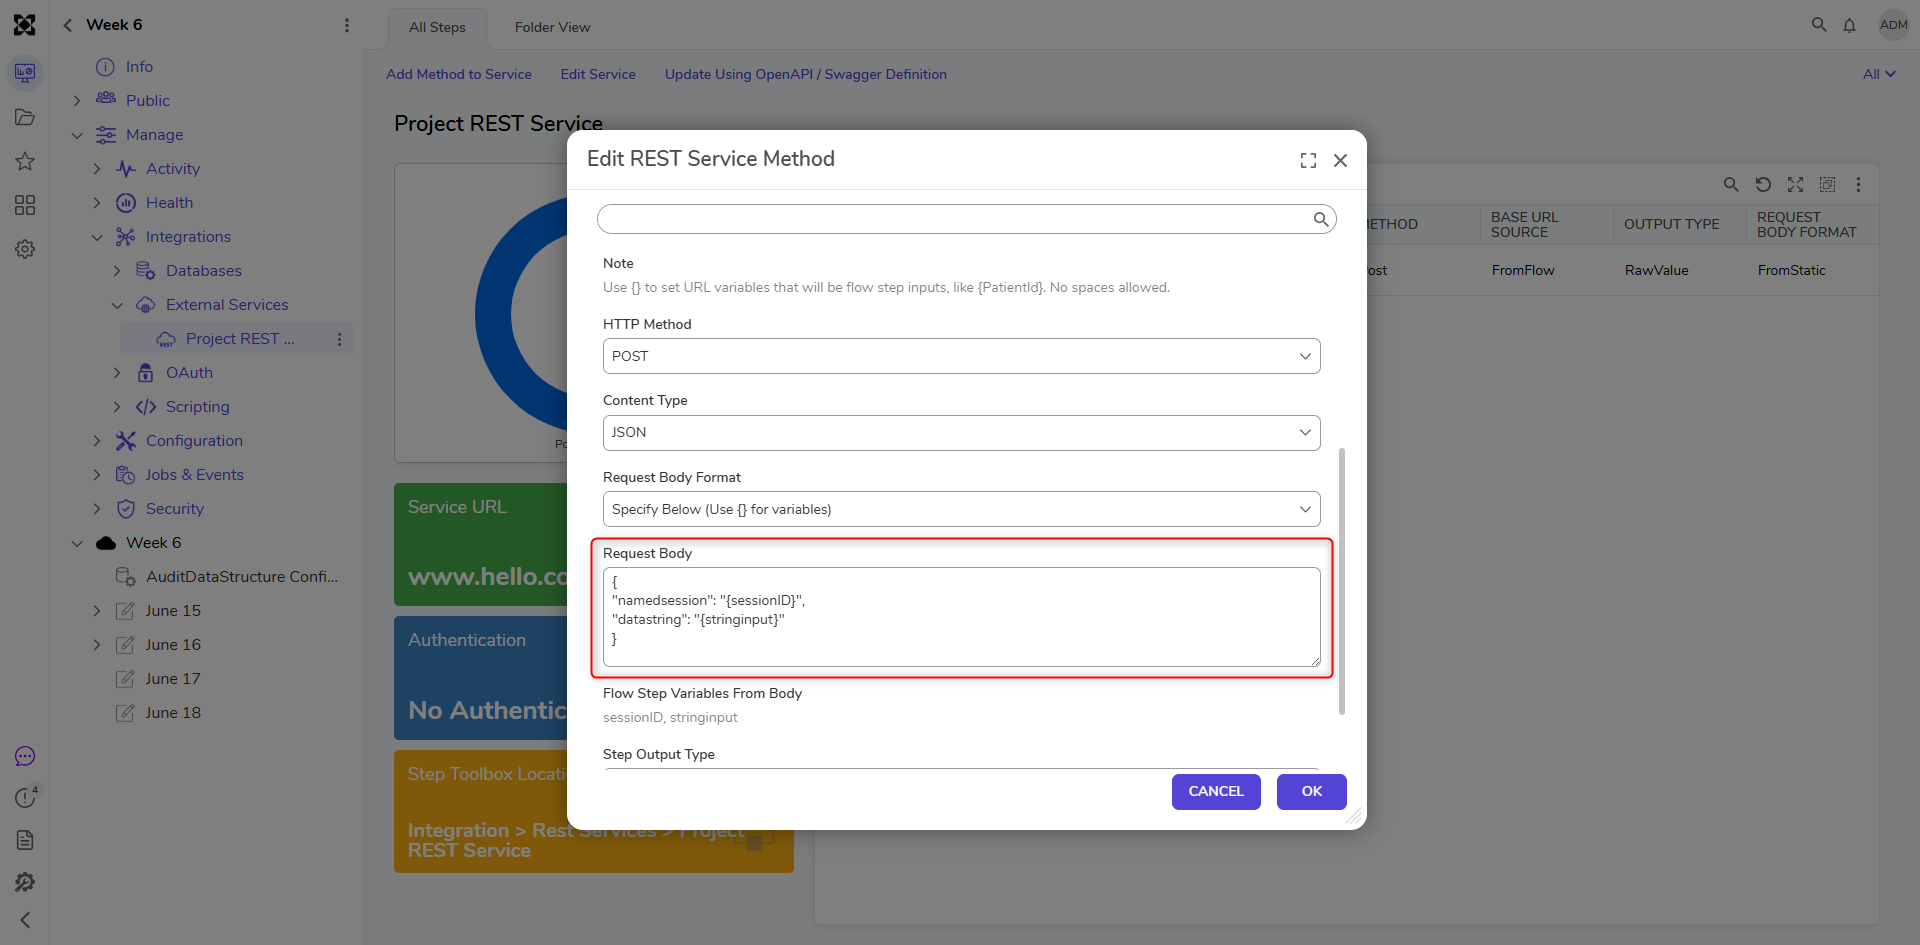
Design the Flow
- Navigate to a Designer Project and CREATE a new Flow.
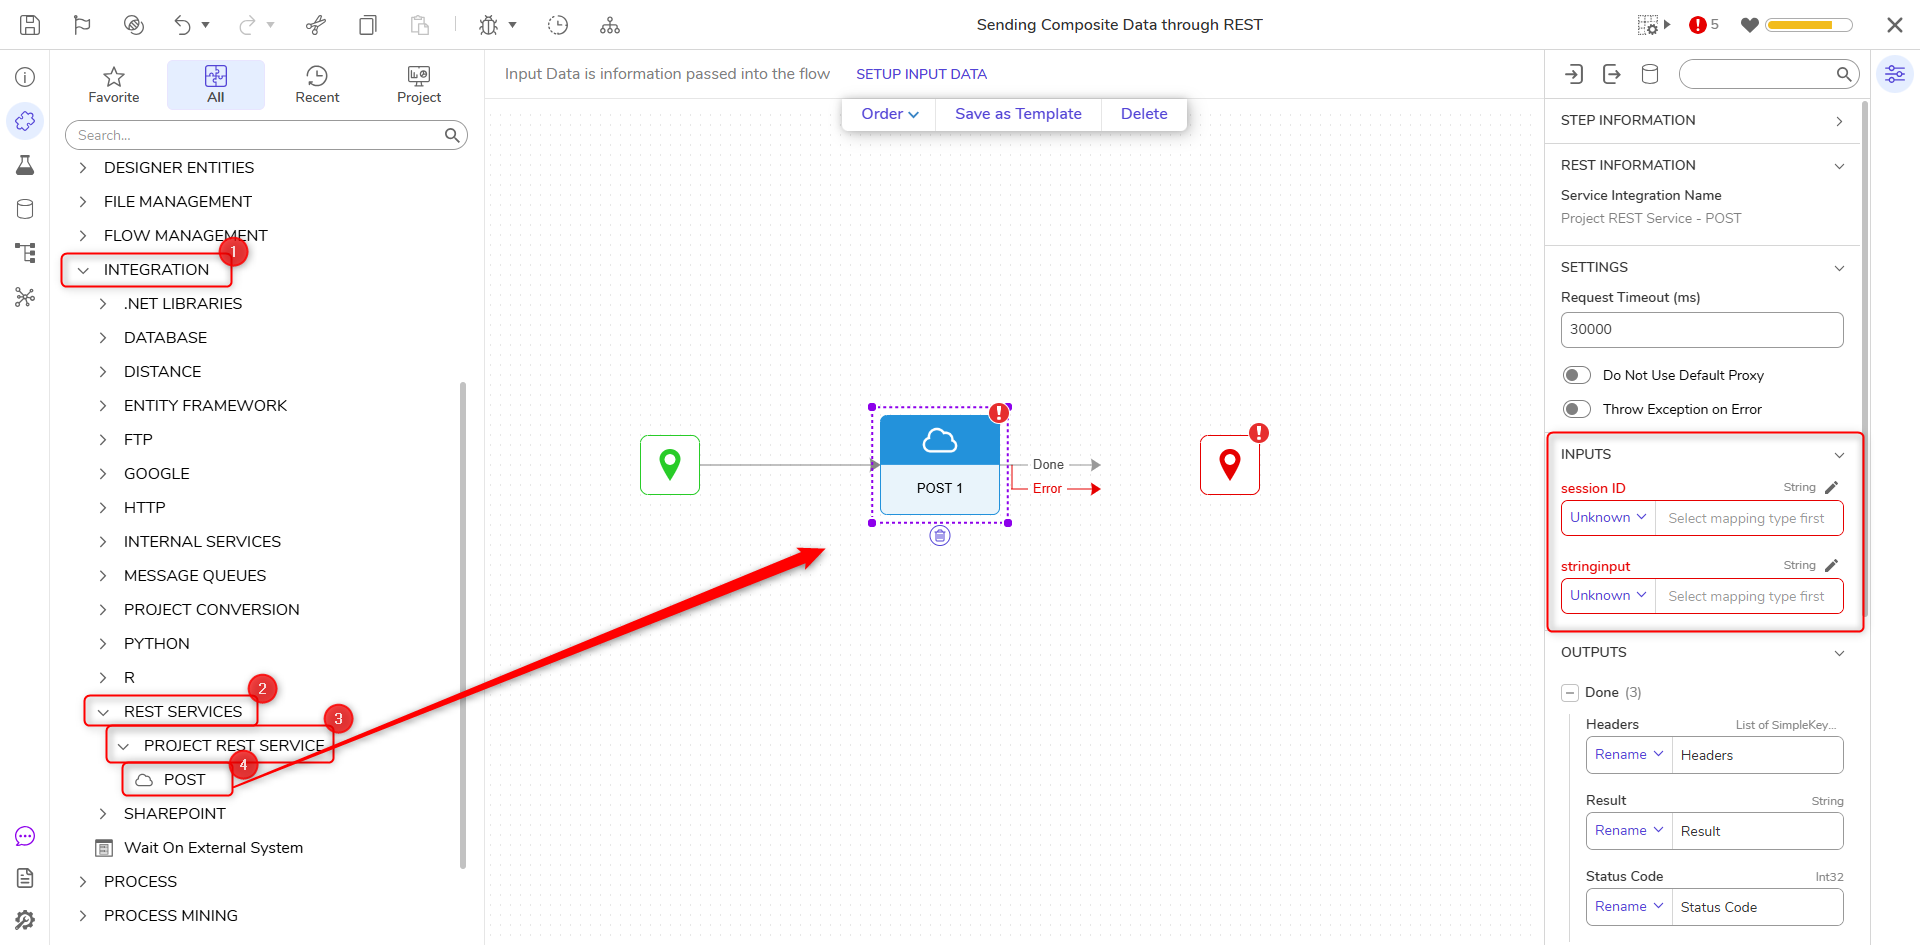
- In the Toolbox expand INTEGRATION > REST SERVICES > [NAME OF SERVICE].
- Drag and drop the Test step into the workspace.
- Navigate to the Properties panel and expand Inputs. Notice the two variables that were defined in the Request Body of the Method.
Other Request Body Formats
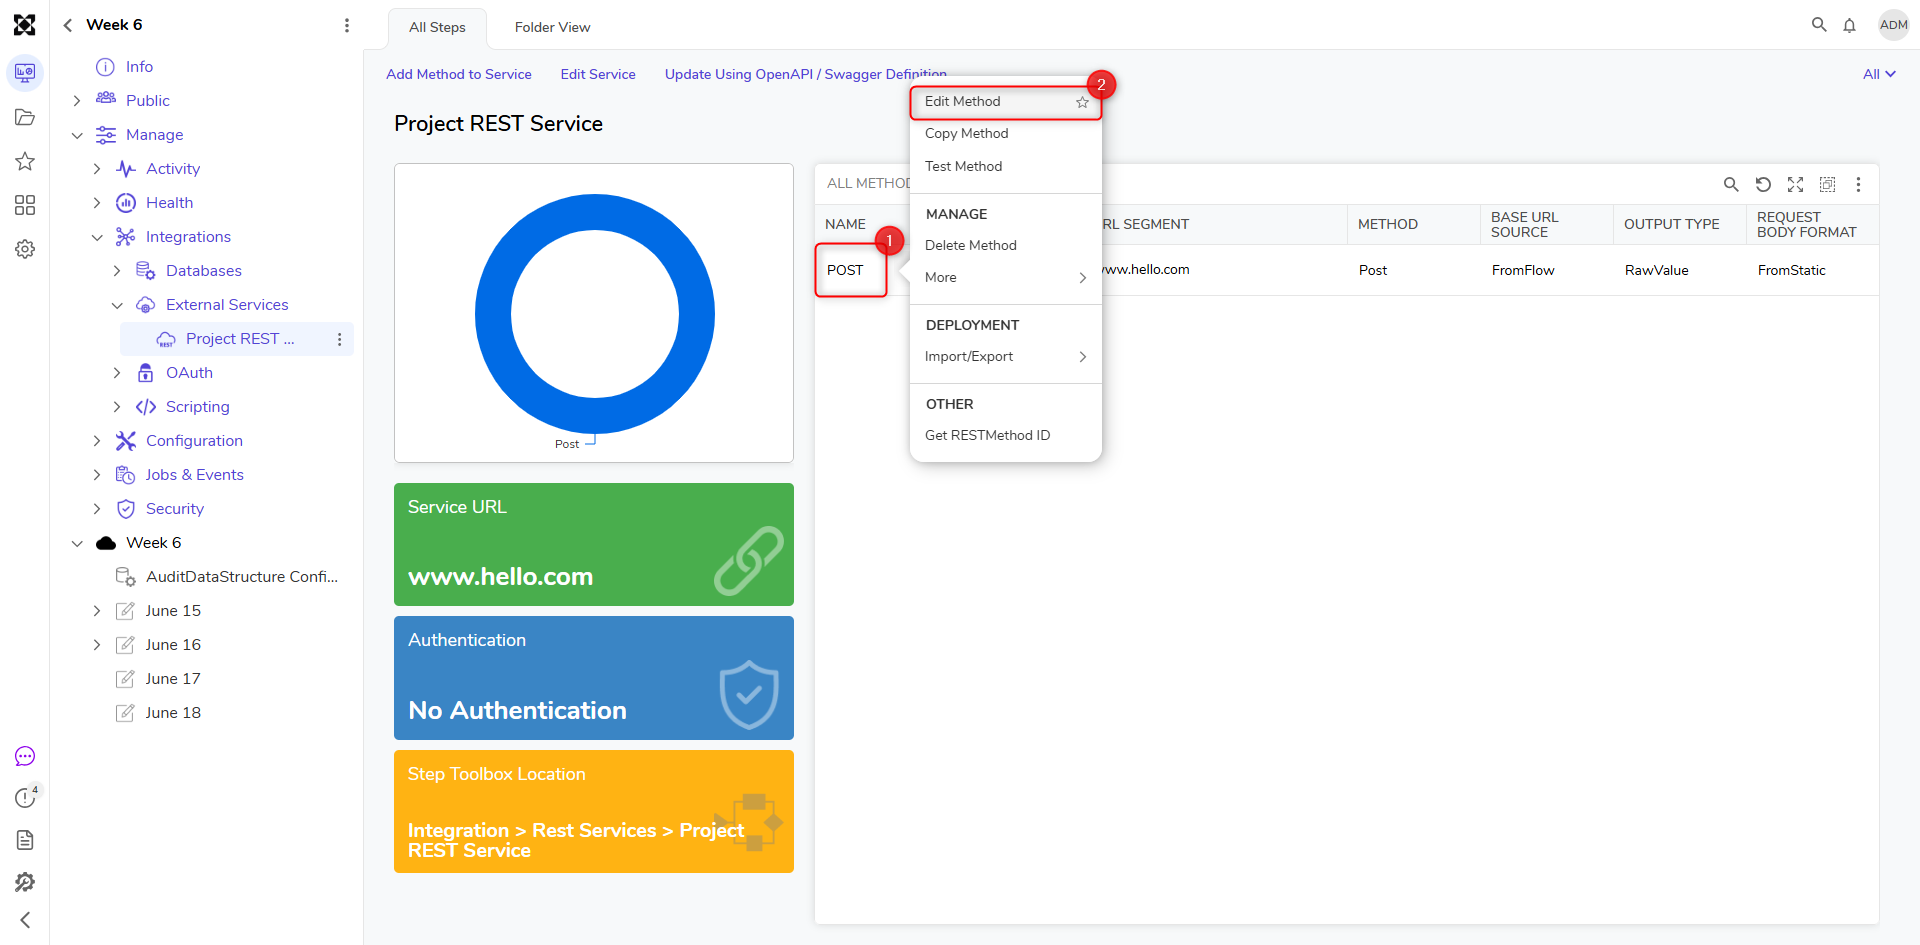
- Navigate to the previously created Rest Service Folder, System > Integrations > External Services. Next, select the Method, choose Edit Method in the action menu.
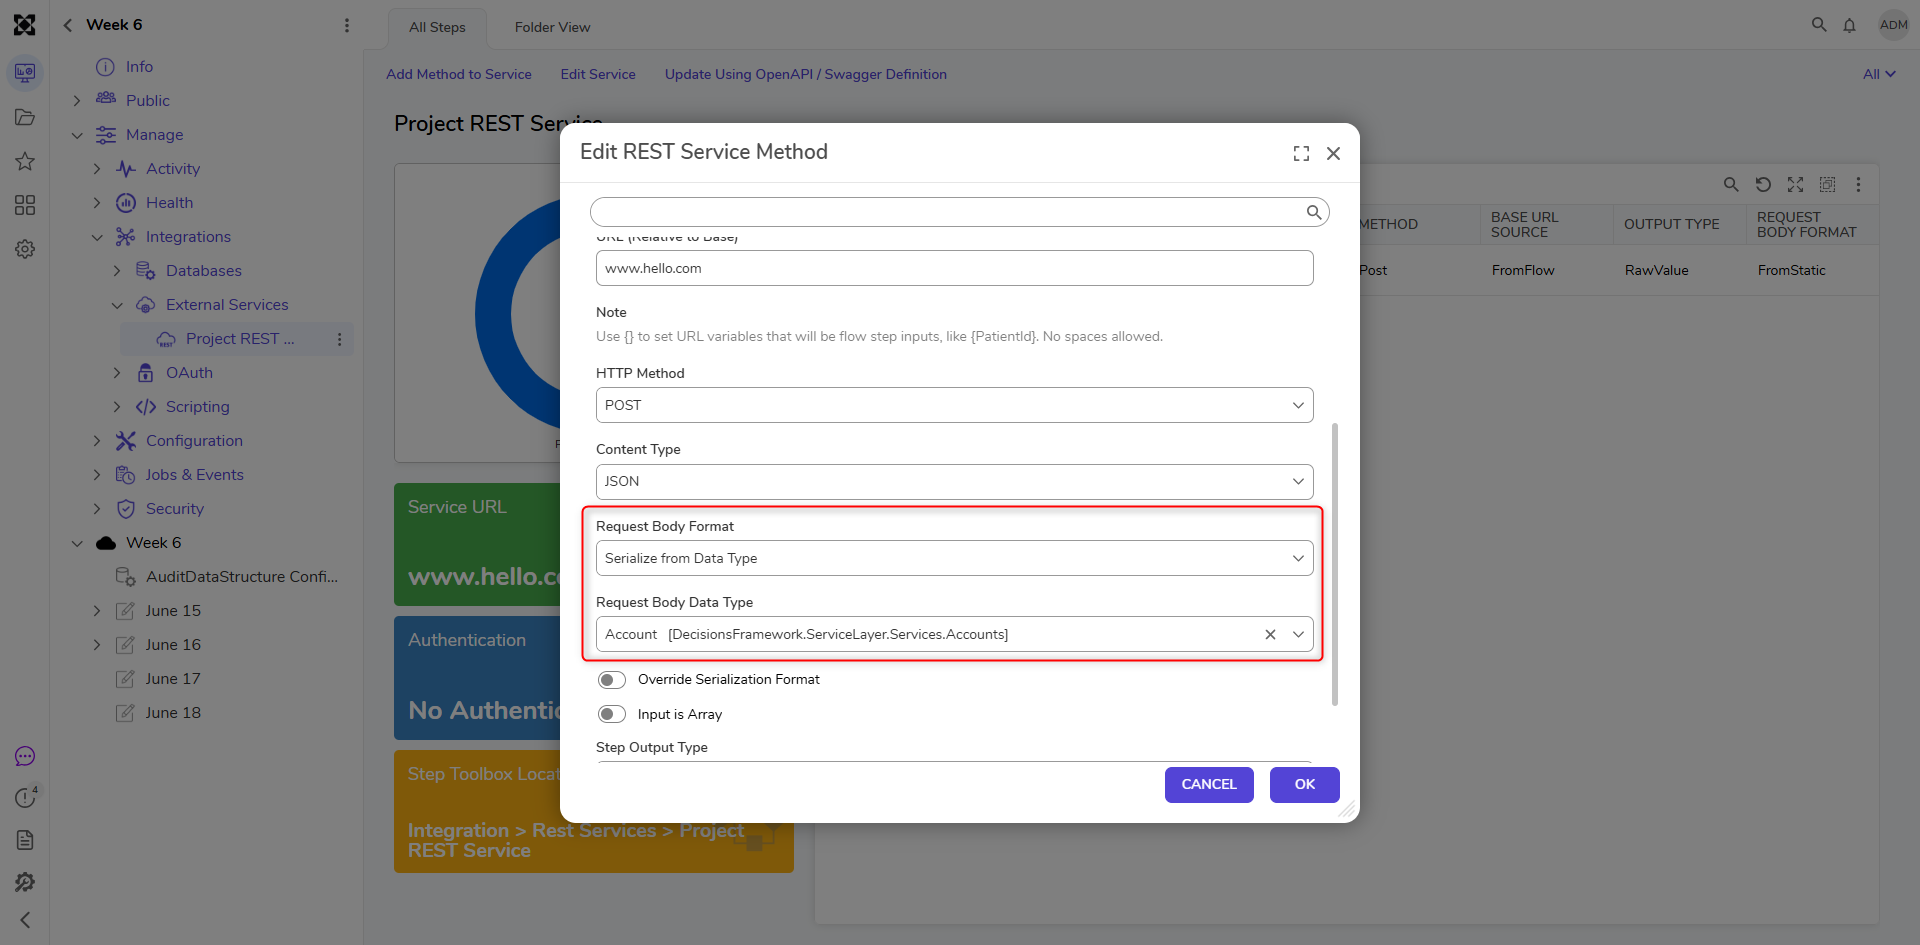
- In the REST Service Method dialog, change the Request Body Format to Serialize from Data Type.
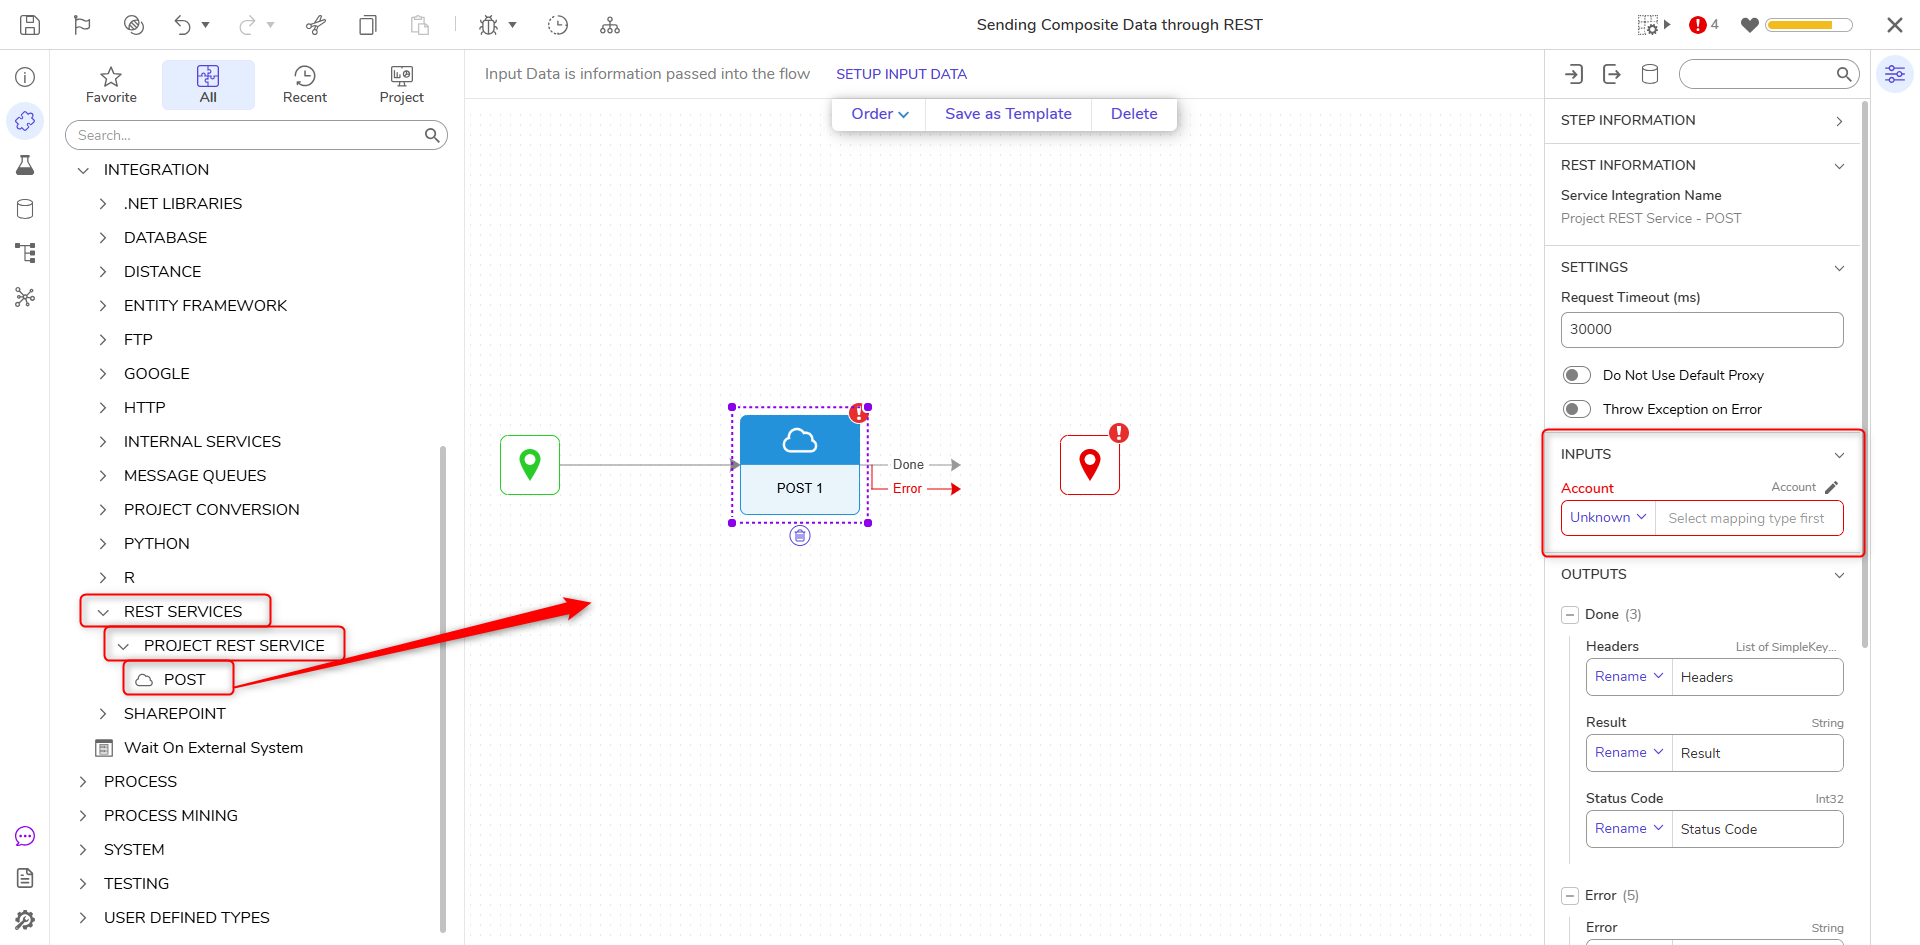
- Under Request Body Data Type, search for and select Account.
- Select OK.
- Navigate back to the previously created Flow.
- Select the same step used in the previous example and open the Properties panel. Notice that the Inputs changed to the Account data type.