Overview
The Software Development Kit (SDK) allows developers to customize, configure, and extend the Decisions platform with custom code to support features according to the business needs. For more information, refer to the Software Development Kit (SDK) Overview.
What changed from v8 to v9?
Parameters | Version 8 | Version 9 |
|---|---|---|
Adding/Removing SDK | Only users who had permission to access the file System were required to upload the .dll file to the "CoreServicesDlls" folder in the File System. Similarly, to remove the .dll, they had to move the .dll file from the "CoreServicesDlls" folder to the "Deleted" folder. | Users with Project permissions can now add or remove .dll files from the platform directly. |
Accessibility | The intended use of the platform is accessible globally. | Extensions added to a Project can only be used within that specific Project and not by another Project unless a dependency is created. |
Importing/Exporting | When exporting projects, the .dll file is not included and must be manually added to the appropriate location on the destination machine. | When exporting or importing a project, all uploaded .dll files are included. No manual intervention is required. |
Upgrading from v8 to v9?
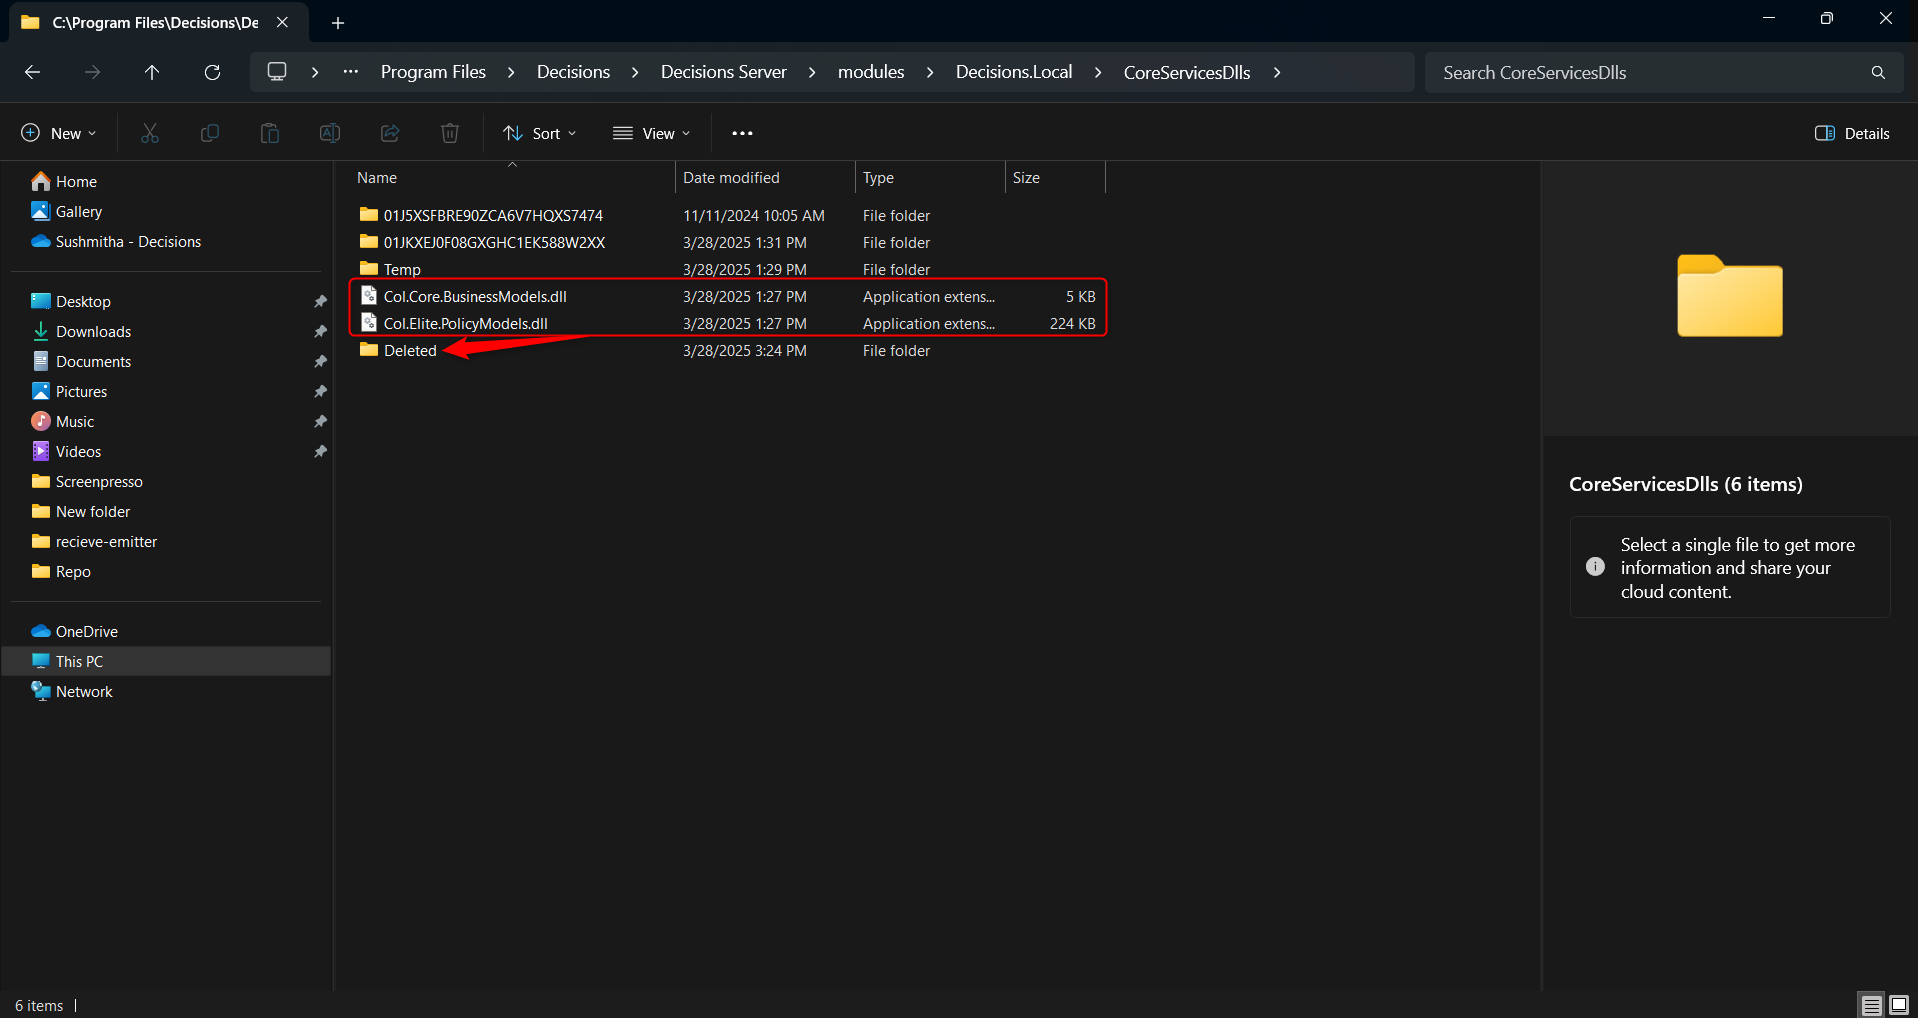
On upgrades from v8 to v9, the Project dependent on the SDK will be functional if the .dll file is present at C:\Program Files\Decisions\Decisions Server\modules\Decisions.Local\CoreServicesDlls.
Steps to perform after the upgrade
After the upgrade, it is necessary to upload the .dll file to their respective Project to maintain the Project's integrity. Failing to do so might cause issues when performing import/export or repository actions. Refer to the next section on uploading the .dll to the Project.
Upload the .dll file to the appropriate Project (refer to the next section).
Remove the same .dll file from
C:\Program Files\Decisions\Decisions Server\modules\Decisions.Local\CoreServicesDlls(the root CoreServicesDlls folder).Restart the Decisions service/application.
When the SDK is uploaded to a Project, the platform creates a subfolder under CoreServicesDlls named after the Project’s ID to store the .dll file. Leaving the same .dll at the CoreServicesDlls root level can cause conflicts when updating the Project-level SDK Extension.
Uploading an SDK Extension (.dll file)
Important Consideration
Uploading the same .dll file to multiple projects is not allowed. However, if you wish to use the same .dll file in multiple Projects, you can create a common Project and upload the .dll file to it. Then, you can add this common Project as a dependency to any other project where you need to use the SDK Extension.
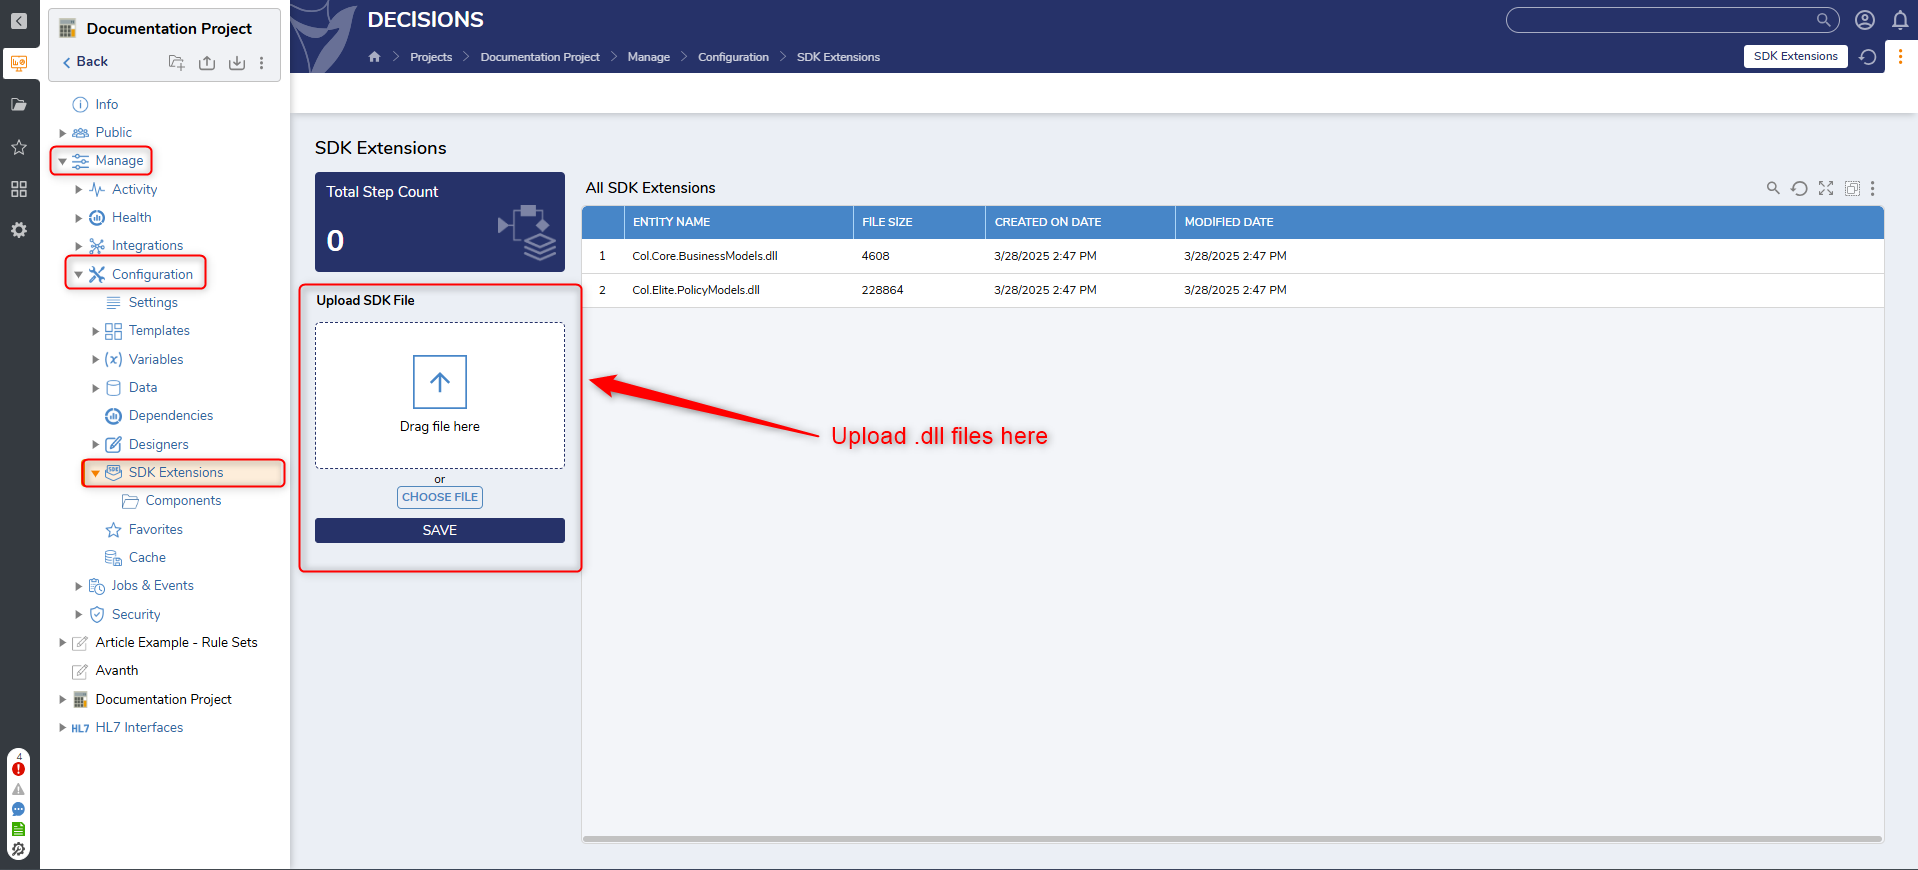
Navigate to the Project you want to add the SDK.
Expand the Manage > Configurations > SDK Extensions from the Project folder tree. The SDK Extensions dashboard opens.
This dashboard contains the Extension count, Step count, file upload area to upload an SDK, and a Report that shows all the SDK uploaded to the Project.
Users can upload the .dll file under the "Upload SDK Files" file upload area.
Note that only files with the .dll extension are supported.
Click on Save to add the extension.
Once the .dll is saved, it becomes accessible within the platform according to the intended design.
All SDK Extensions Report
The Report shows the names of all added extensions and their respective File Size, Created On Date and Modified Date.
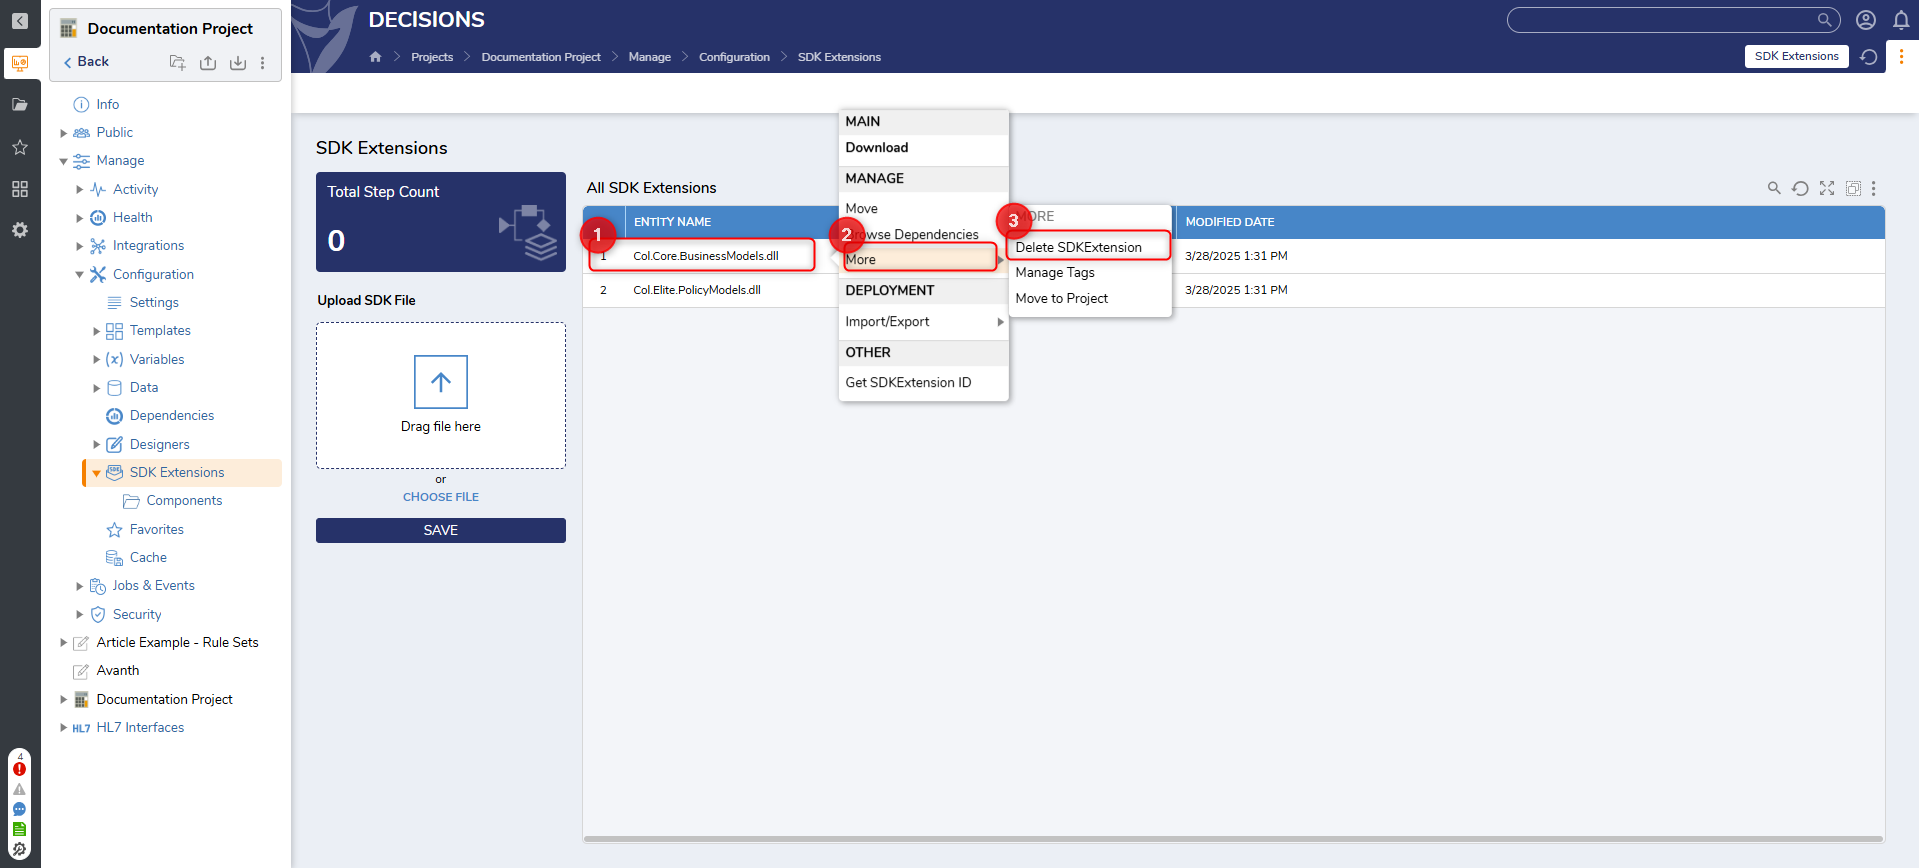
Removing an SDK Extension
Caution
Deleting the custom .dll file will remove all it's associated data and will impact all the dependent Projects.
From the All SDK Extensions Report, right-click on the respective extension you want to remove from the Project.
Click on More > Delete SDK Extension.
Click on "Yes”.
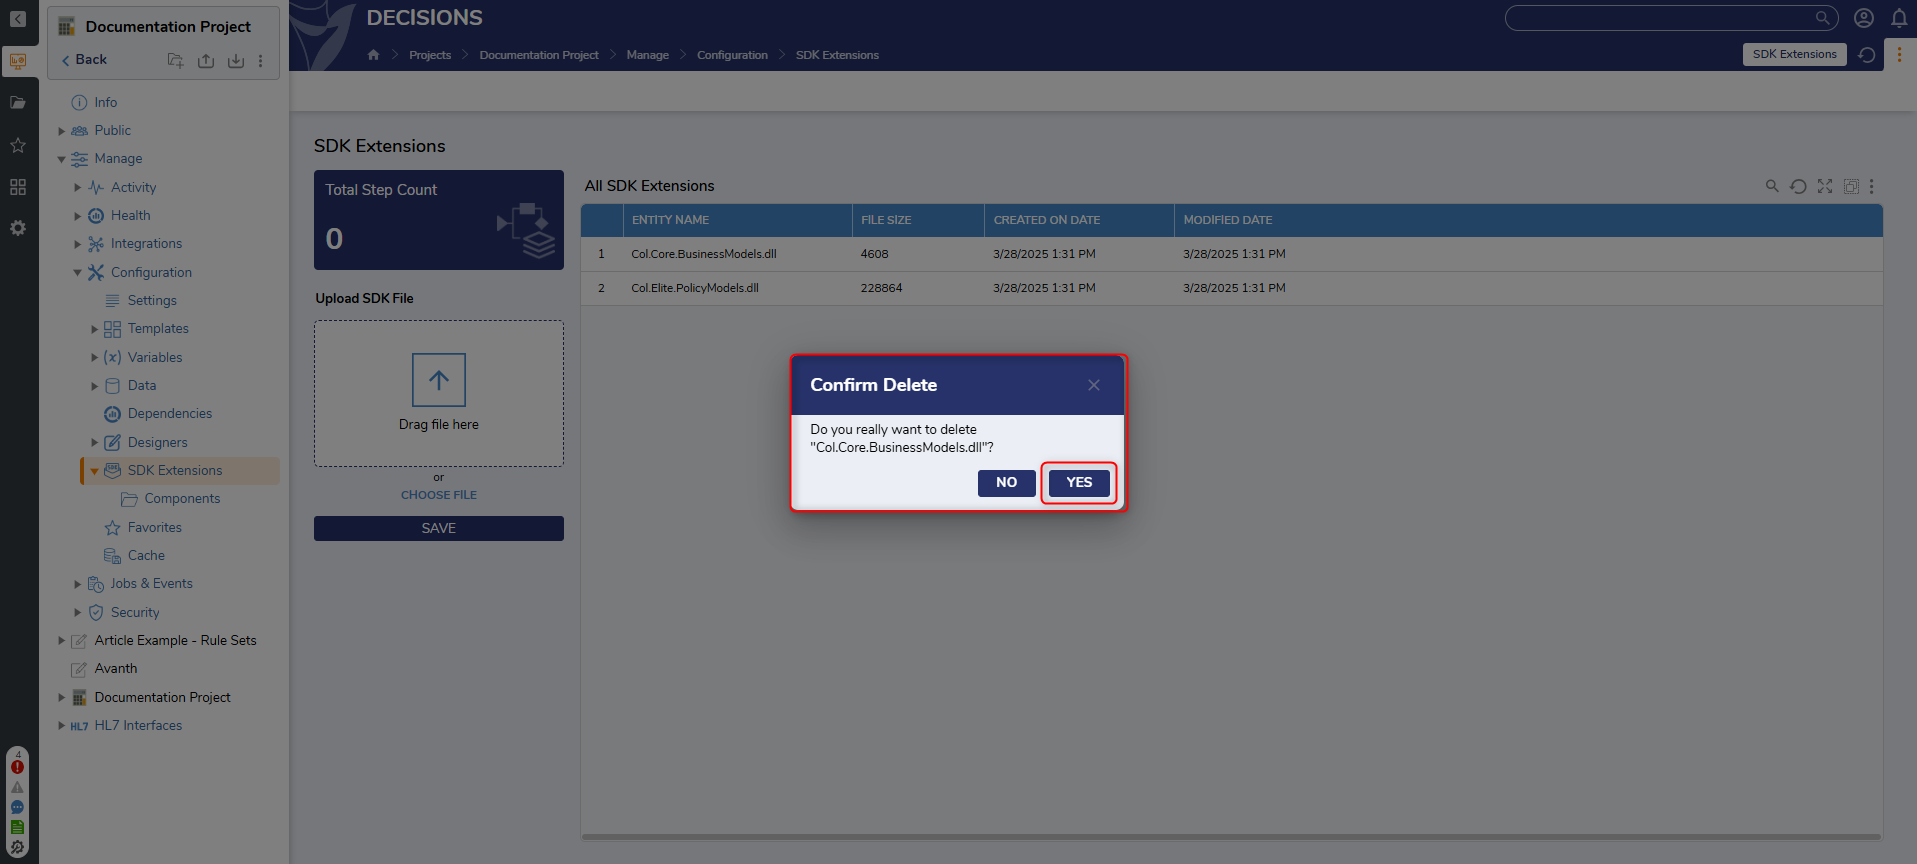
Move the .dll files from the CoreServicesDlls folder to the Deleted folder.
The .dll file will be removed from the Project.
Restart the application.
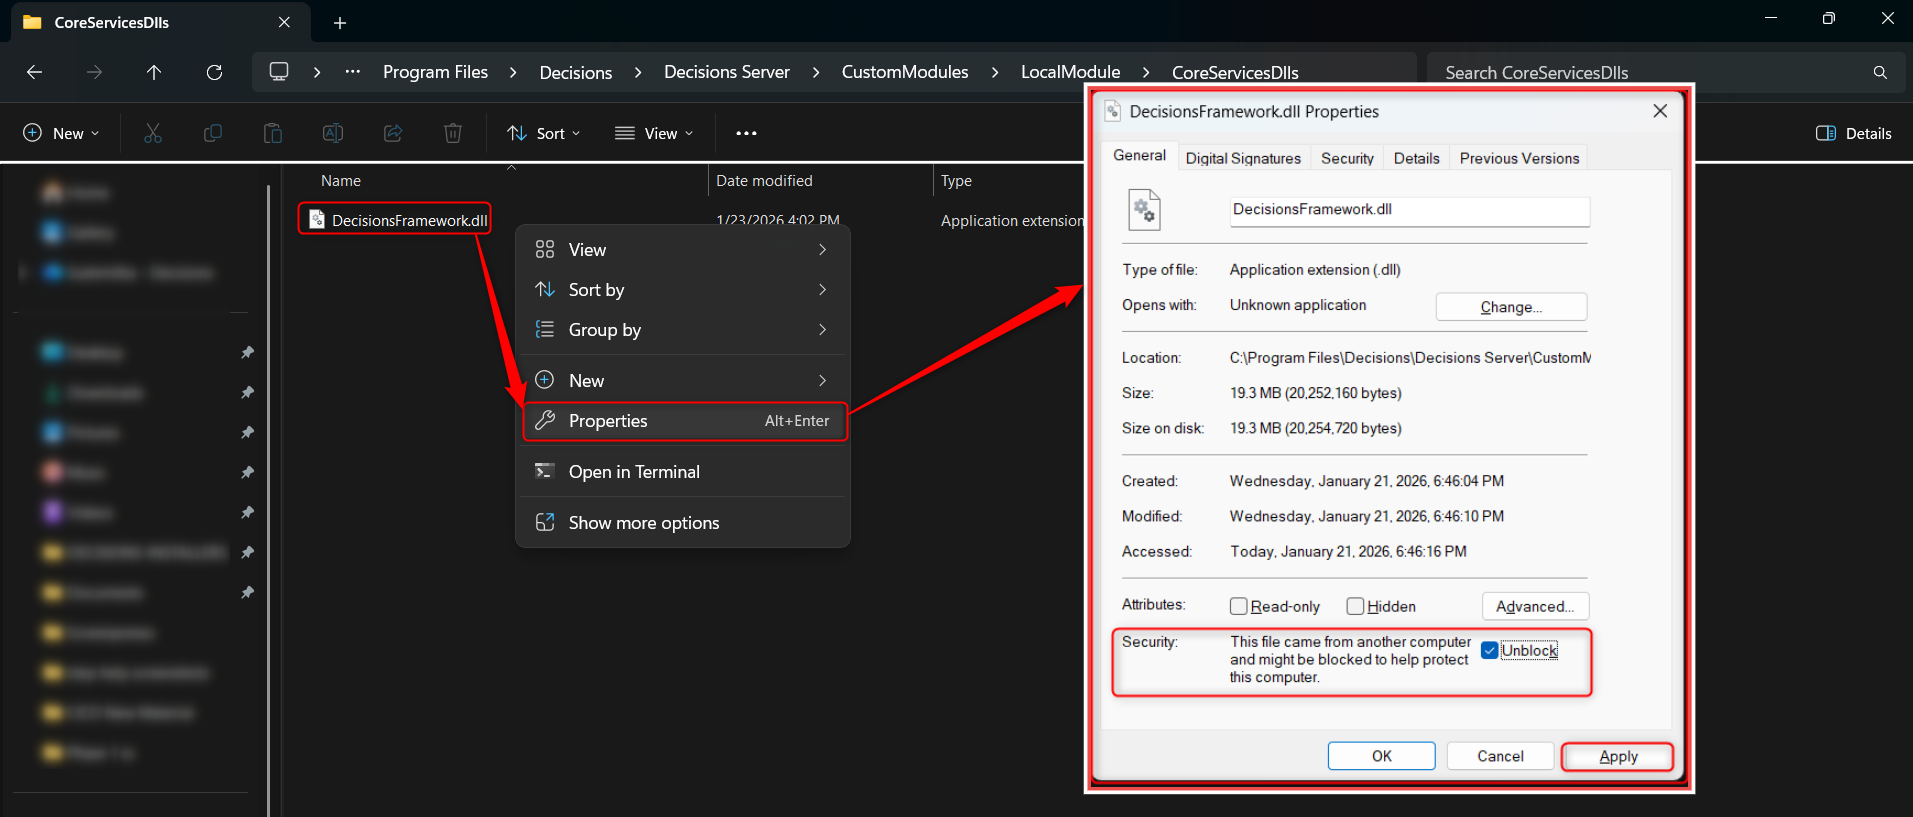
Troubleshooting .dll file
Ensure the .dll file is not blocked:
Right-click the .dll file and select Properties.
At the bottom of the Properties window, check for a security warning that reads:
This file came from another computer and might be blocked to help protect this computer.Click Unblock next to this warning and click Apply.
If the warning is not present, the .dll is not blocked.