Users cannot set up AD Sync simultaneously with Single Sign On (via SAML and OpenID Modules). Doing so will result in an error that requires users to reset their sign-on setup.
Overview
OpenID Connect (OIDC) is an open standard and decentralized authentication protocol. The OpenID module allows users to create accounts by selecting an OpenID identity provider and then use those accounts to sign on to any website that accepts OpenID authentication.
Version 9 Endpoints
- LoginURL - [baseporturl]:[port]/Account/Login
- LogoutURL - [baseporturl]:[port]/Logout
Prerequisites:
- Preexisting OpenID Account
- Access to an OpenID API
- Installation of the OpenID module (to learn how to install a module, see Installing Modules)
- Unlike most modules, the OpenID module is located with the identity provider modules under System > Security > Identity Providers.
- Add the OpenID Module as a project dependency.Note for Third-Party Systems and SubscriptionsCustomers are responsible for securing and maintaining accounts with third-party systems and subscriptions.
Basic Configuration
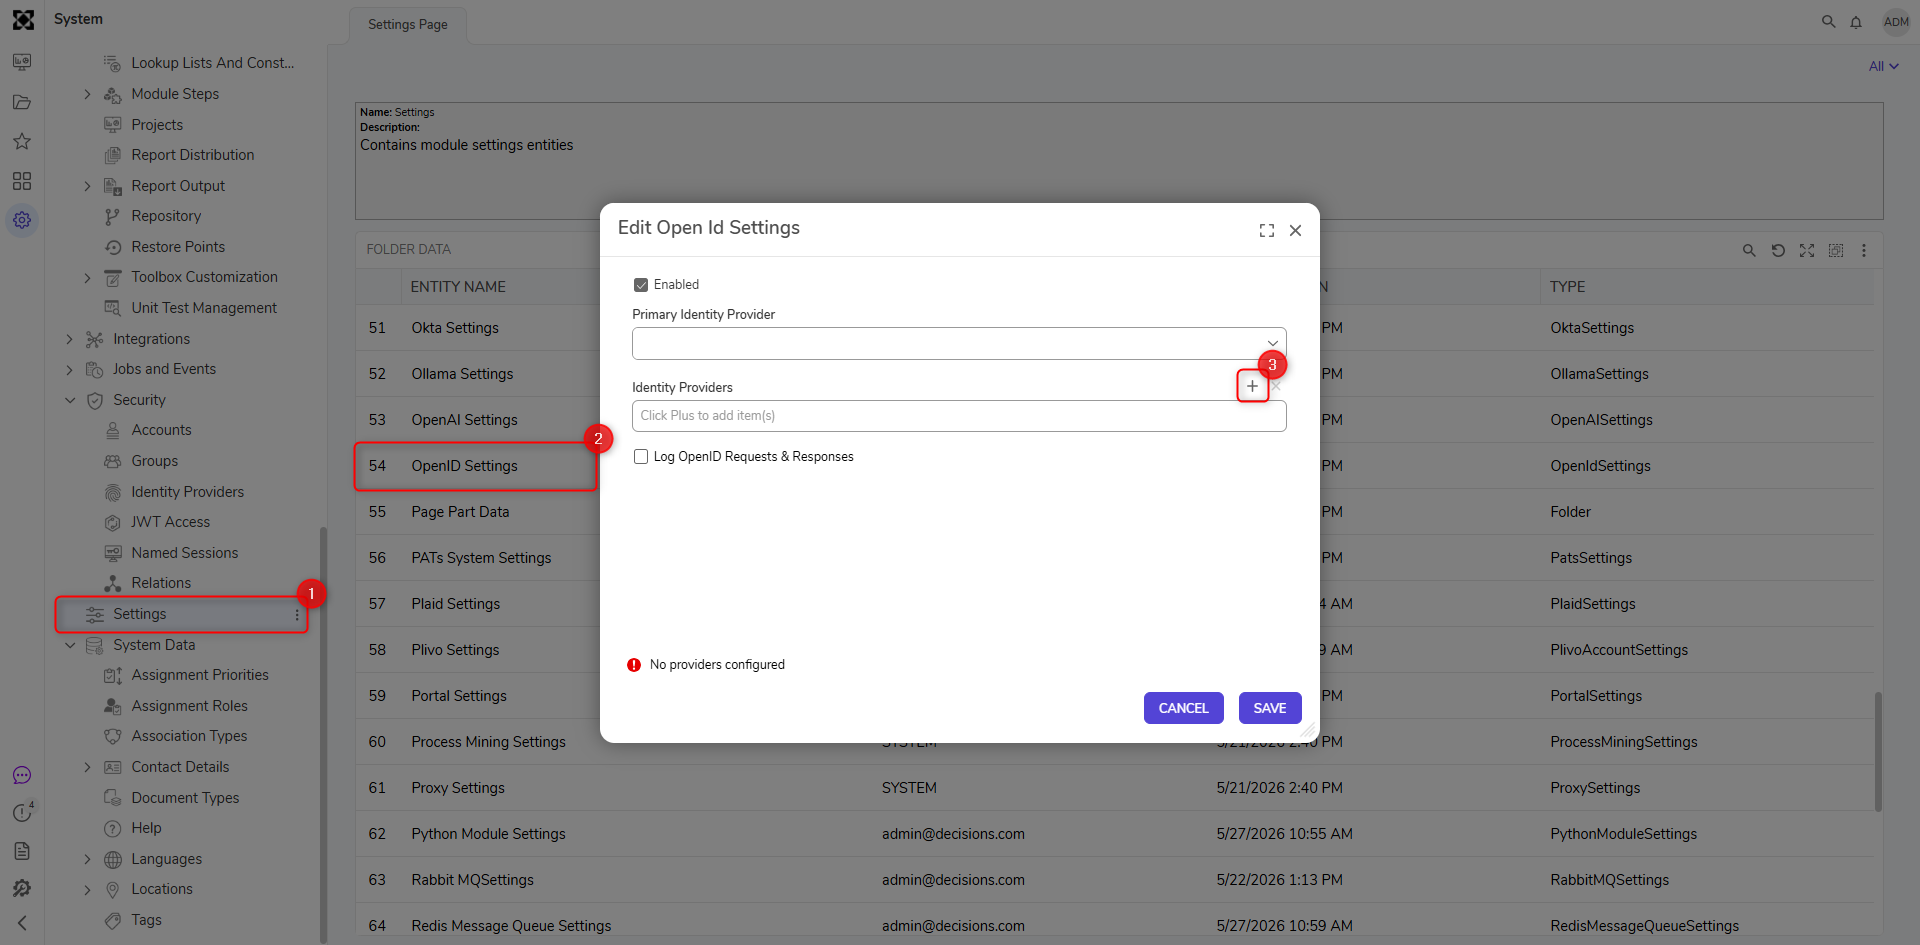
- Navigate to System > Settings and click OpenID Settings. Select the Enabled checkbox on the Edit Open Id Settings window and click ADD under Identity Providers.
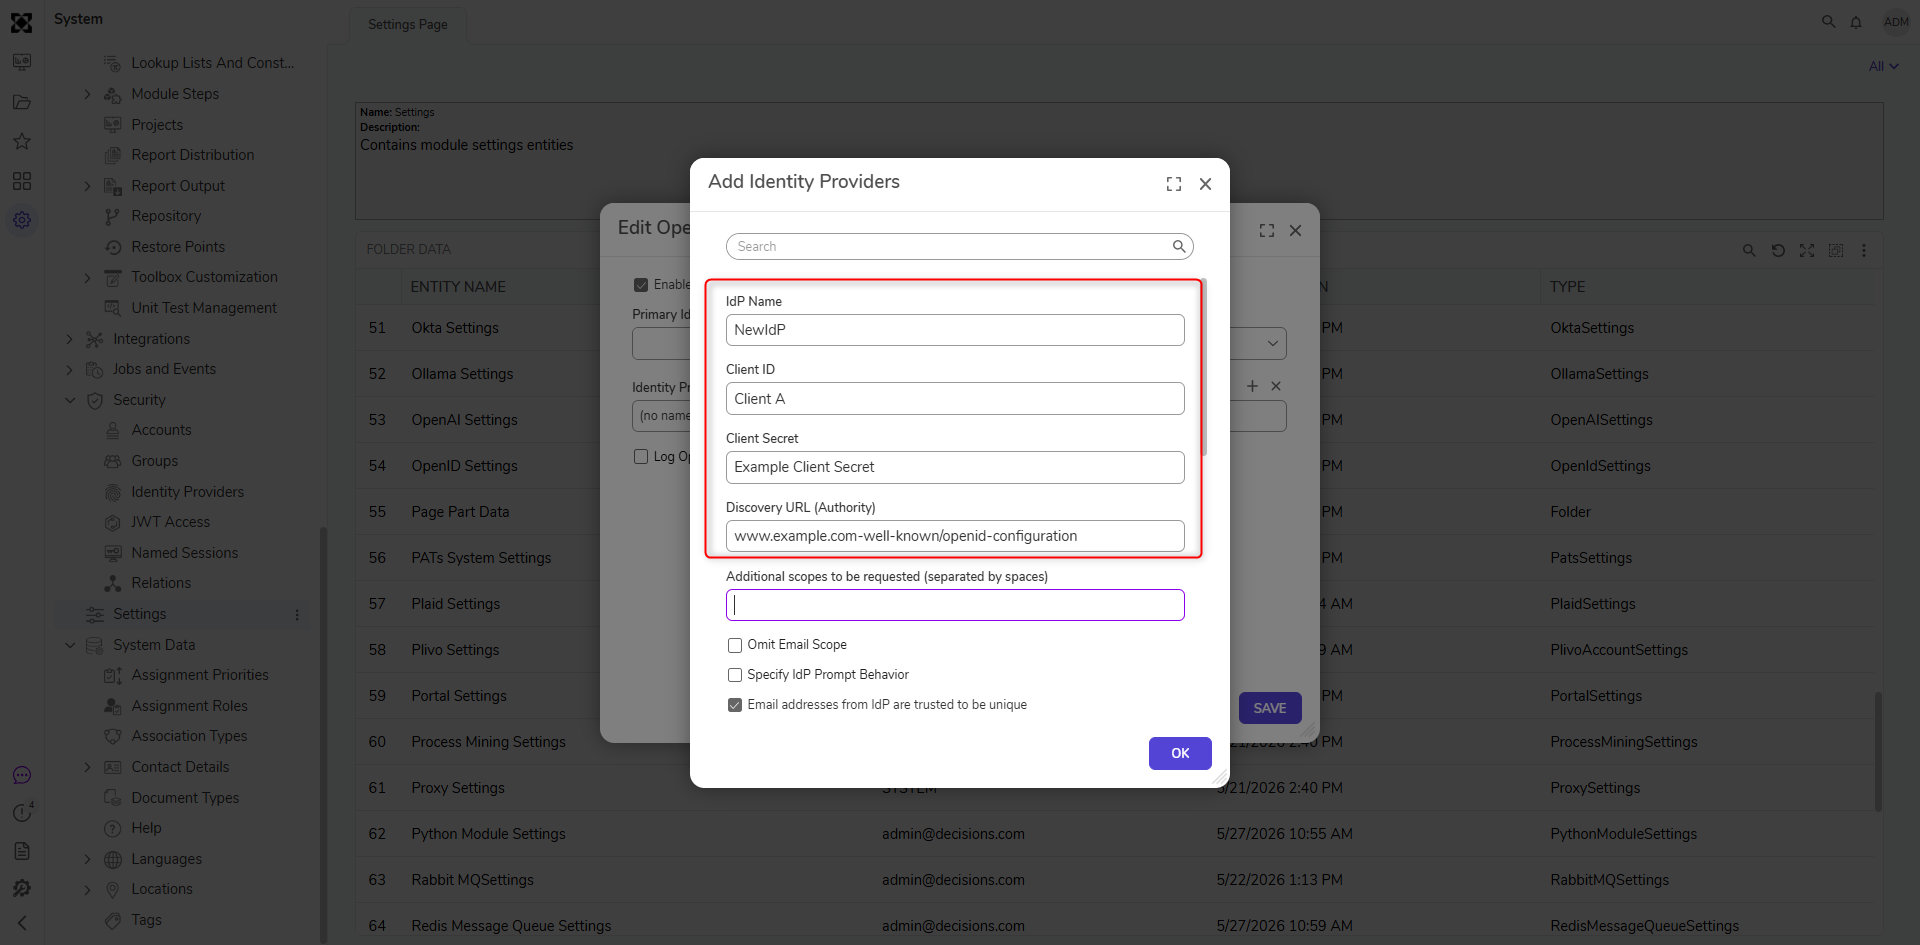
- Enter an appropriate name in the IdP Name field. The Client ID, Client Secret, and Discovery URL (Authority) fields can be obtained from an Identity Provider. The Discovery URL (Authority) usually ends with ".well-known/openid-configuration". After configuring all the appropriate fields, click OK.Be sure the information being inputted is correct. Many Identity Providers have an allowed list of redirect URIs. It may be necessary to add "http://decisions/Login" to this list. The required information may change between different Identity Providers.
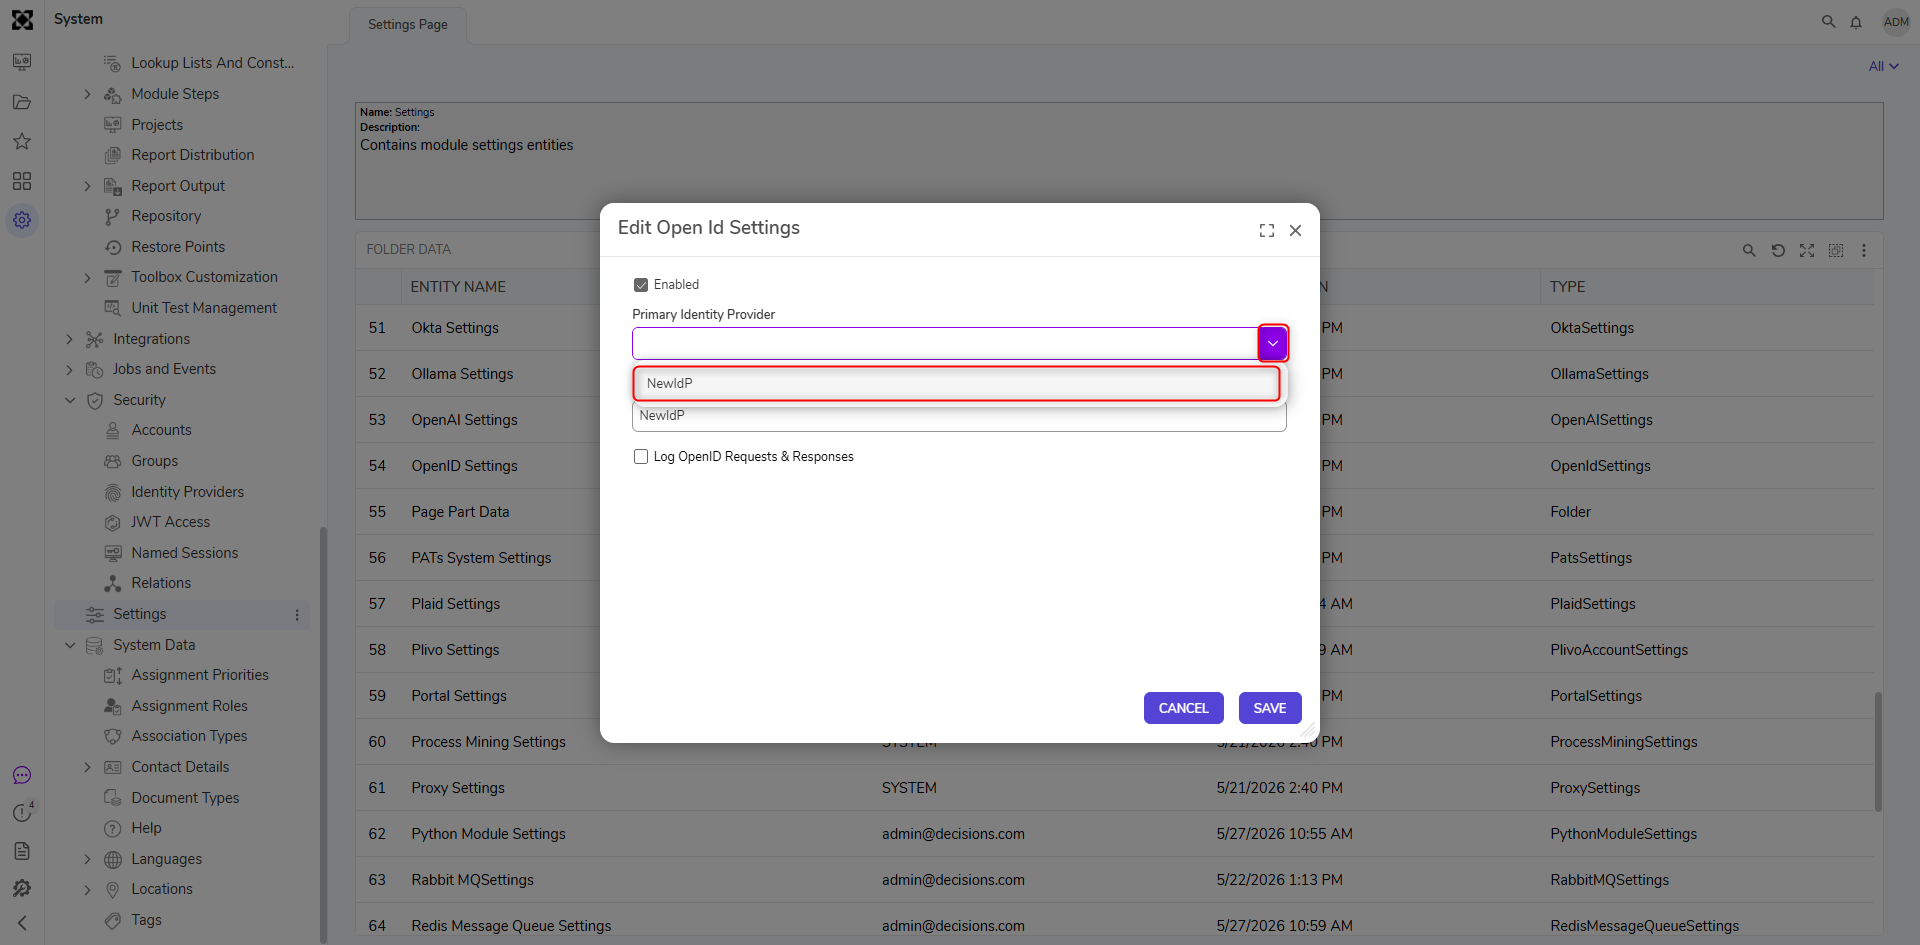
- Click the dropdown list under Primary Identity Provider and select the Identity Provider created. Click SAVE.When the Log OpenID Requests & Responses setting is enabled, requests and responses will be located at C:/Program Files/Decisions/Decisions Server/Logs/OpenID.
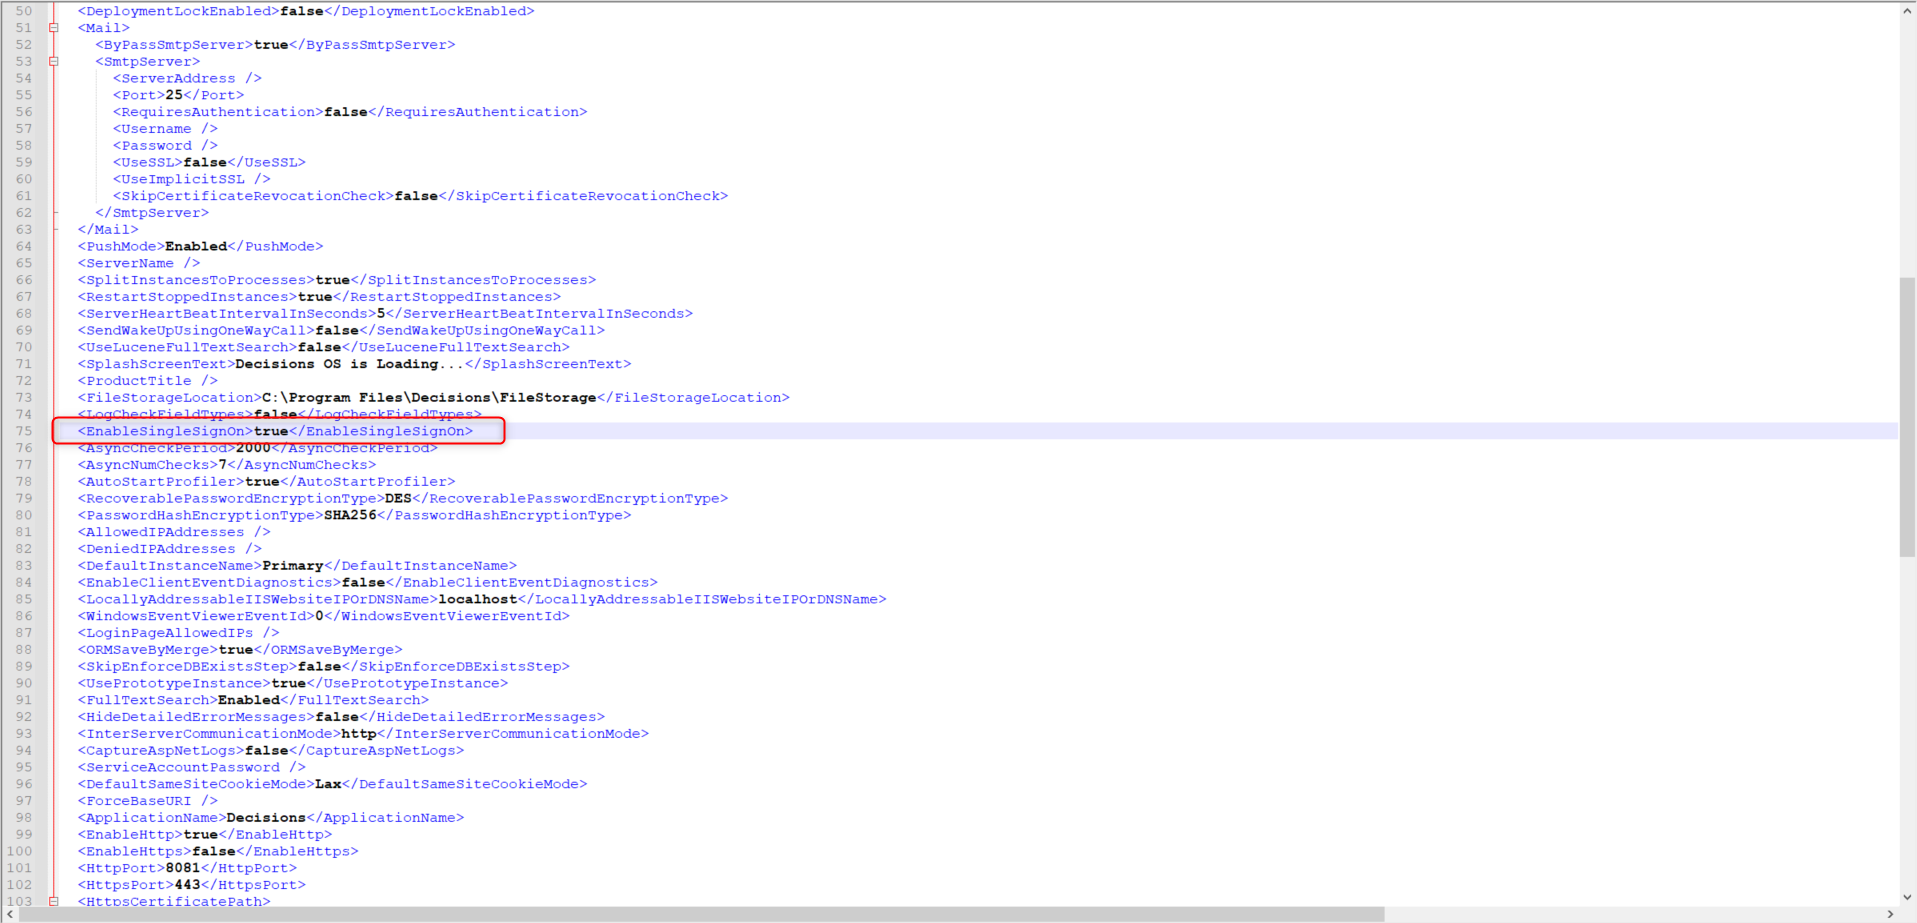
- In the File Explorer, navigate to C:\Program Files\Decisions\Decisions Server and open Settings.xml.
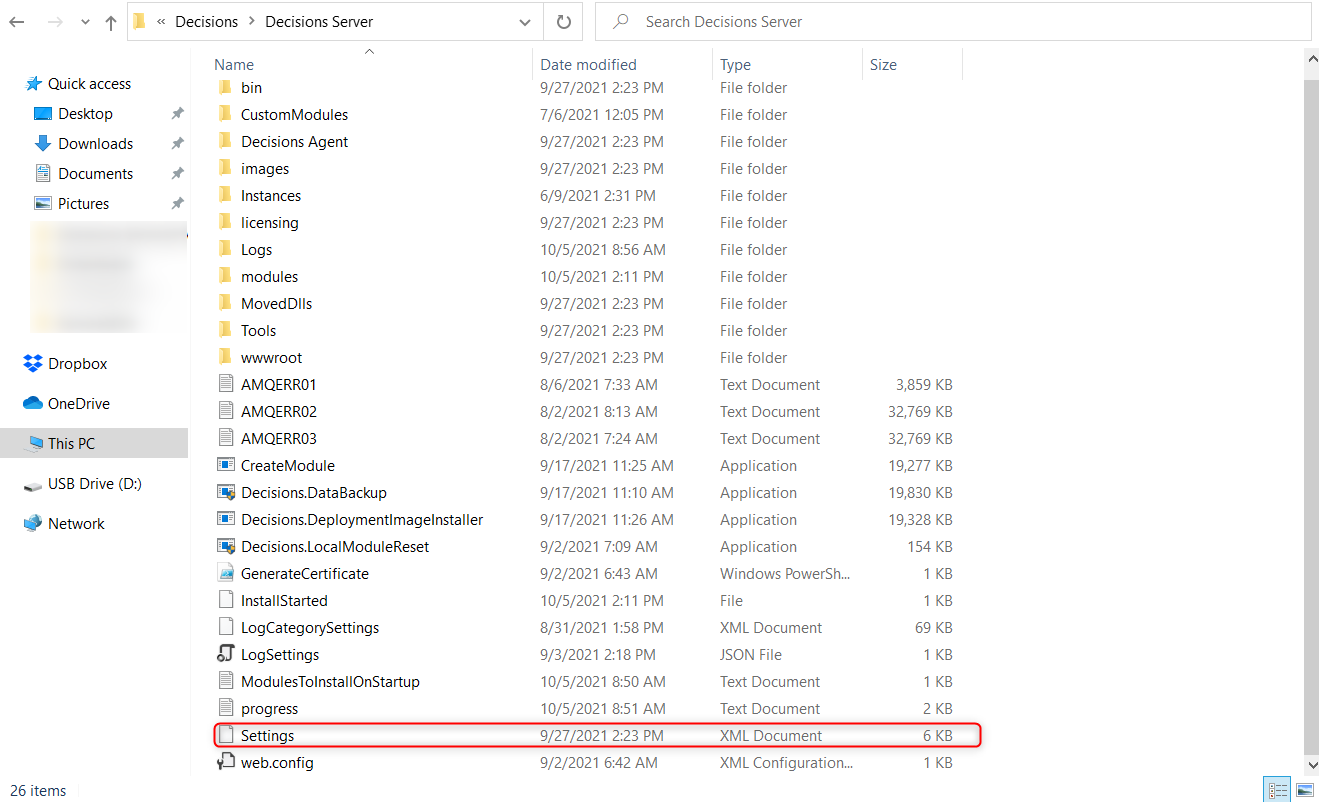
- Locate <EnableSingleSignOn> and set the value to true.
- Restart the Decisions Service service or IIS App Pool. If there is an active session, it might be logged in with a non-OpenID account. Log out or start a new session to be redirected to the identity provider. Once the identity provider has accepted the credentials, it will redirect to Decisions to log in with the OpenID account.
Login URL Parameter
This parameter is an authentication and authorization protocol built on top of OAuth 2.0. Users can specify which OpenID Provider to log in with by using the Login?OpenIDProvider=idofOpenIDProvider URL parameter.

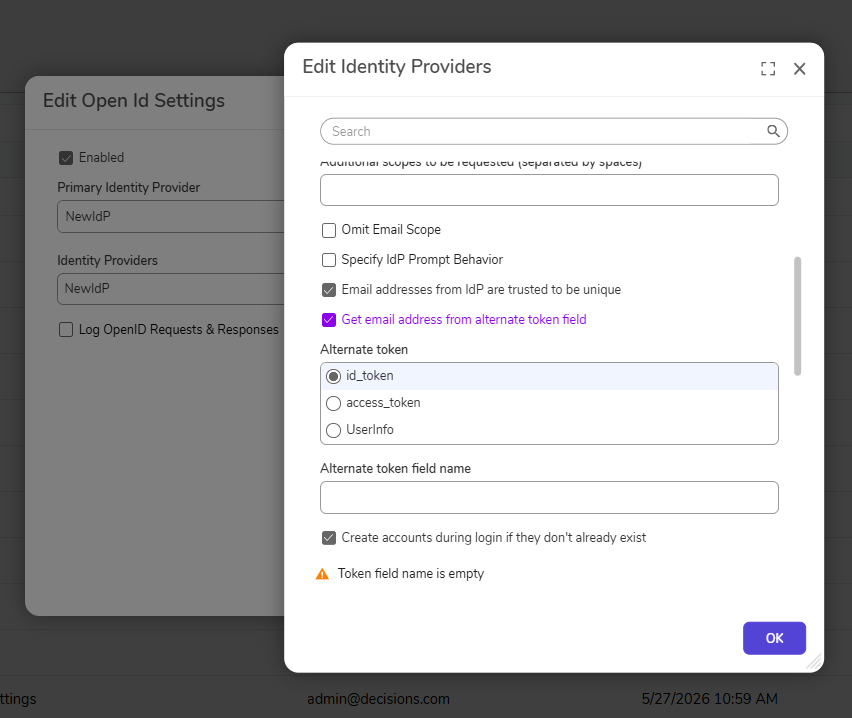
Alternate Token Fields
Email addresses can be acquired from different fields in the OpenID Token. Two options available in all versions are id_token and access_token. Starting in v9.5, users also have the option of the UserInfo field. Alternate token fields can be accessed when setting up or editing an Identity Provider, and then enabling the box "Get email address from alternate token field". The list of possible fields will appear.
Email Scope
Users have a property for the IdP settings that allows the email scope to be omitted. In certain use cases where the IdP is blocking the sending of email because of the email scope, this option can be used to allow email to be sent.
Generally, it is recommended to ignore unrecognized scopes.
Feature Changes
| Description | Version | Release | Developer Task |
|---|---|---|---|
| Added Omit Email Scope property | 9.4 | October 2024 | [DT-041279] |
| Added the option of getting the email address from the alternate token field Userinfo. | 9.5 | November 2024 | [DT-042684] |
| OpenID Login Flow is now visible on Pick entity dialog while configuring login flows for identity providers. | 9.6 | January 2025 | [DT-043179] |